If tight hips and a stiff lower back sound all too common, then allow us to introduce you to this six-move yoga flow that’s specifically designed to boost your spine mobility and ease hip stiffness.
Tight hips can be caused by several reasons, but spending too much time sitting — at your desk or on the couch — is one of the main culprits. That’s because the action of sitting puts your hip flexors into a compressed position, causing them to shorten in length and tighten up and the tightness can extend to your lower back.
But that’s where rolling out a yoga mat and setting aside 20 minutes a day to stretch comes into its own. Yoga incorporates gentle stretching movements and emphasizes breath control and mindfulness all of which can help ease any tightness and tension felt in your body.
To help you mobilize your hips and increase your range of motion in your lower back, we asked Ladder personal trainer and certified yoga teacher Sasha Hanway to compile a short yoga flow.
How to do this six-move yoga flow
There’s a mix of static (non-moving) and dynamic (moving) holds included in this six-move workout and Hanway has designed this short yoga routine as a flow, meaning you’ll be able to transition from one move to the next with ease.
That said, if you’re short on time, you could pick a handful of these moves and complete as many of the stretches as and when time allows — like during a quick screen break or as a cool down from your full-body workout.
The six-move routine shouldn’t take longer than 20 minutes and features many of the best yoga stretches for beginners. Hanway recommends repeating just one set of this yoga flow sequence, while focusing on your form, engaging your core, and remembering to breathe throughout.
1. Reverse tabletop hold
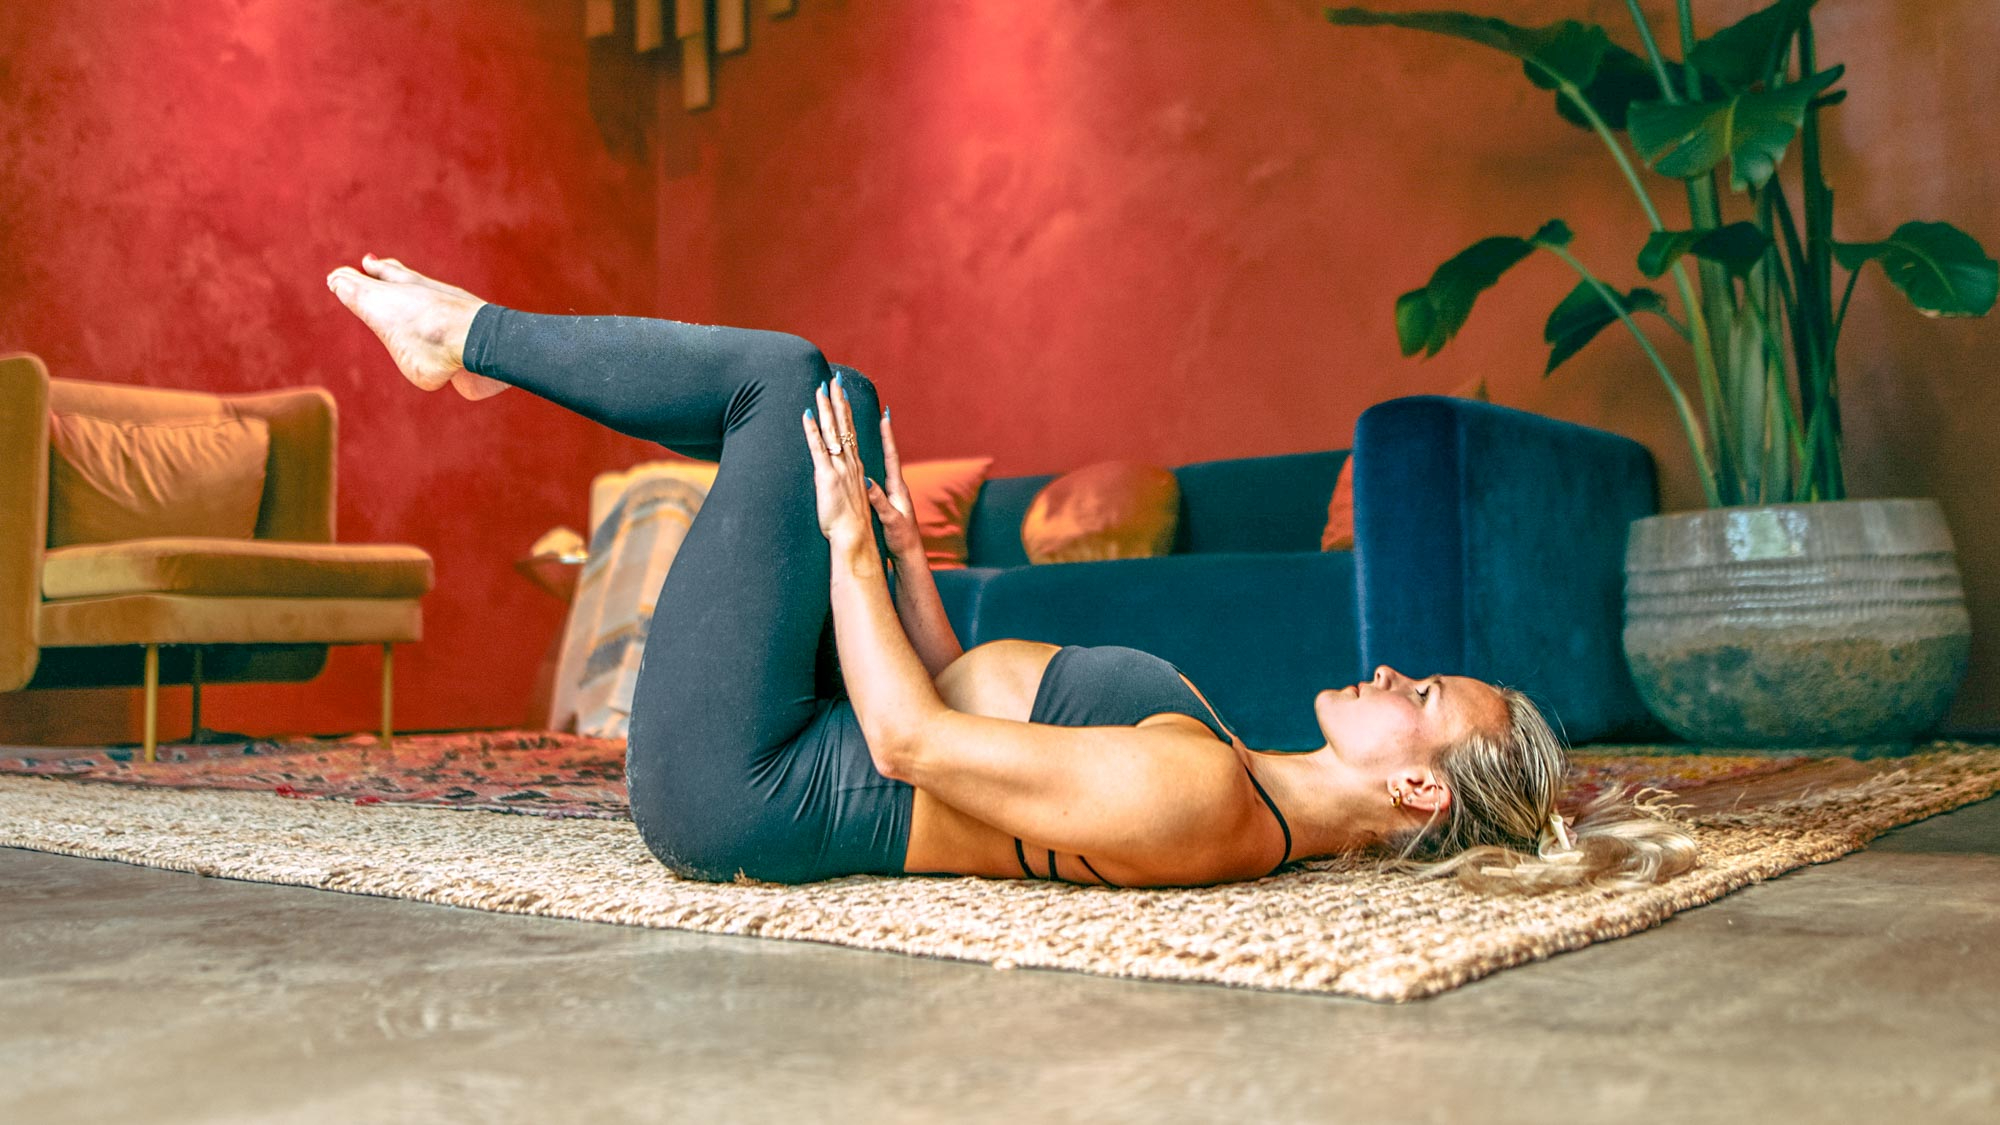
In yoga, the tabletop position is a starting point for several exercises. For example, you can do the cat/cow from this position, a tiger pose, a downward dog, or a plank. However, in this instance, you’ll be completing a reverse tabletop, so you’ll be on your back instead of holding your weight on your hands and knees.
- Lay on your back and stack your knees over your hips, bringing your shins parallel to the floor.
- Ensure that your knees are perfectly aligned over the hips, and place your palms on the tops of your thighs.
- Actively drive your thighs in towards your palms as you press palms into thighs.
- Pull your belly button to your spine, and use your exhalations to actively draw your bottom ribs down, gluing your lower back to the floor.
- Hold for 30 seconds and repeat 3 times.
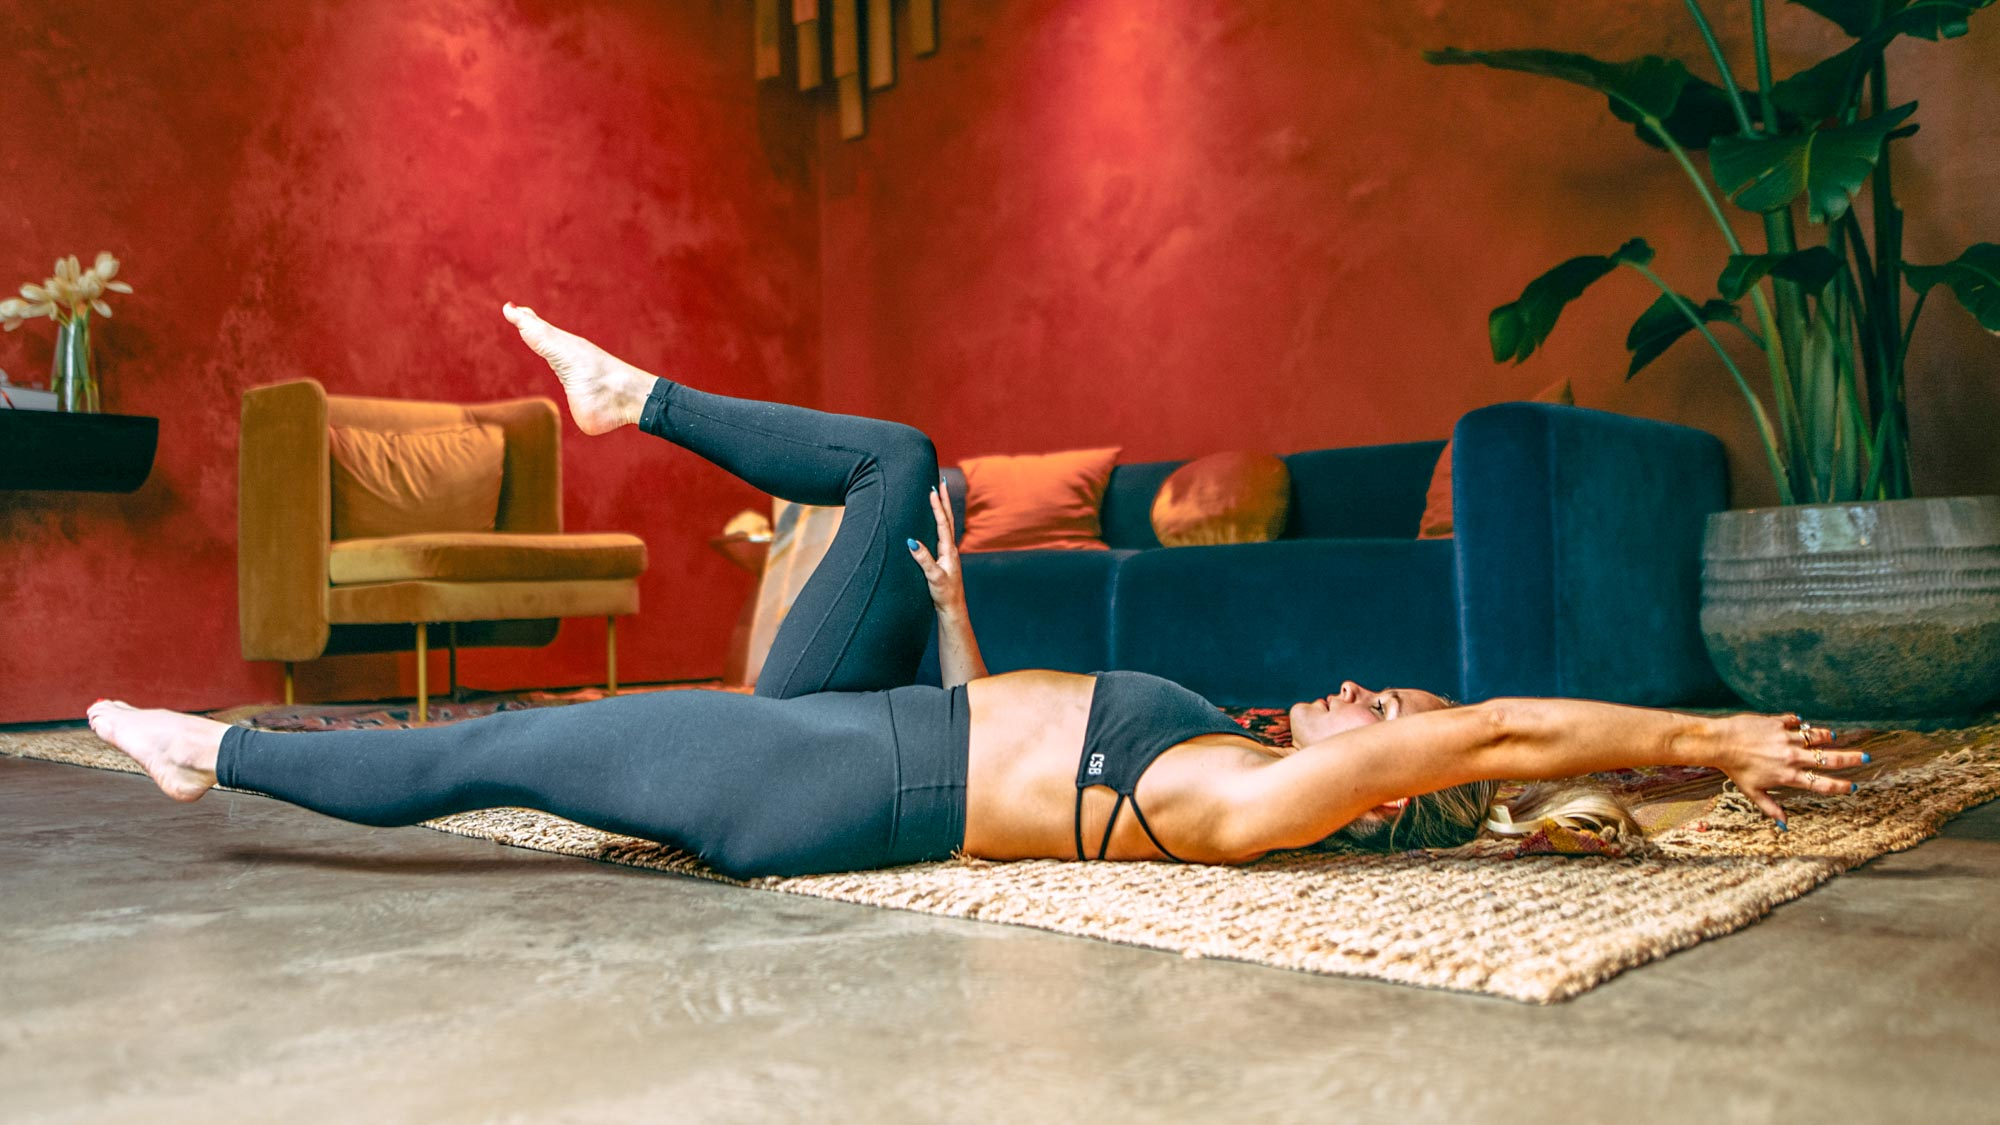
2. Unilateral deadbugs
The dead bug is hailed as one of the top abdominal exercises for targeting your transverse abdominis — the deepest core muscles you own. But this stabilization exercise is to be done unilaterally, so will see you move just one side of your body at a time to really perfect any imbalances while stabilizing your spine.
- In a reverse tabletop position, actively press your left hand into your left thigh (knee stacked over ankle still).
- On your next inhale, extend the right arm and right leg long until they’re just above the floor.
- Use a slow exhale to gradually bring your right arm and leg back to the starting position. On the exhale, focus on activating through your low core, envisioning knitting your ribs together.
- Repeat 10 times on each side.
3. Eagle arm folds
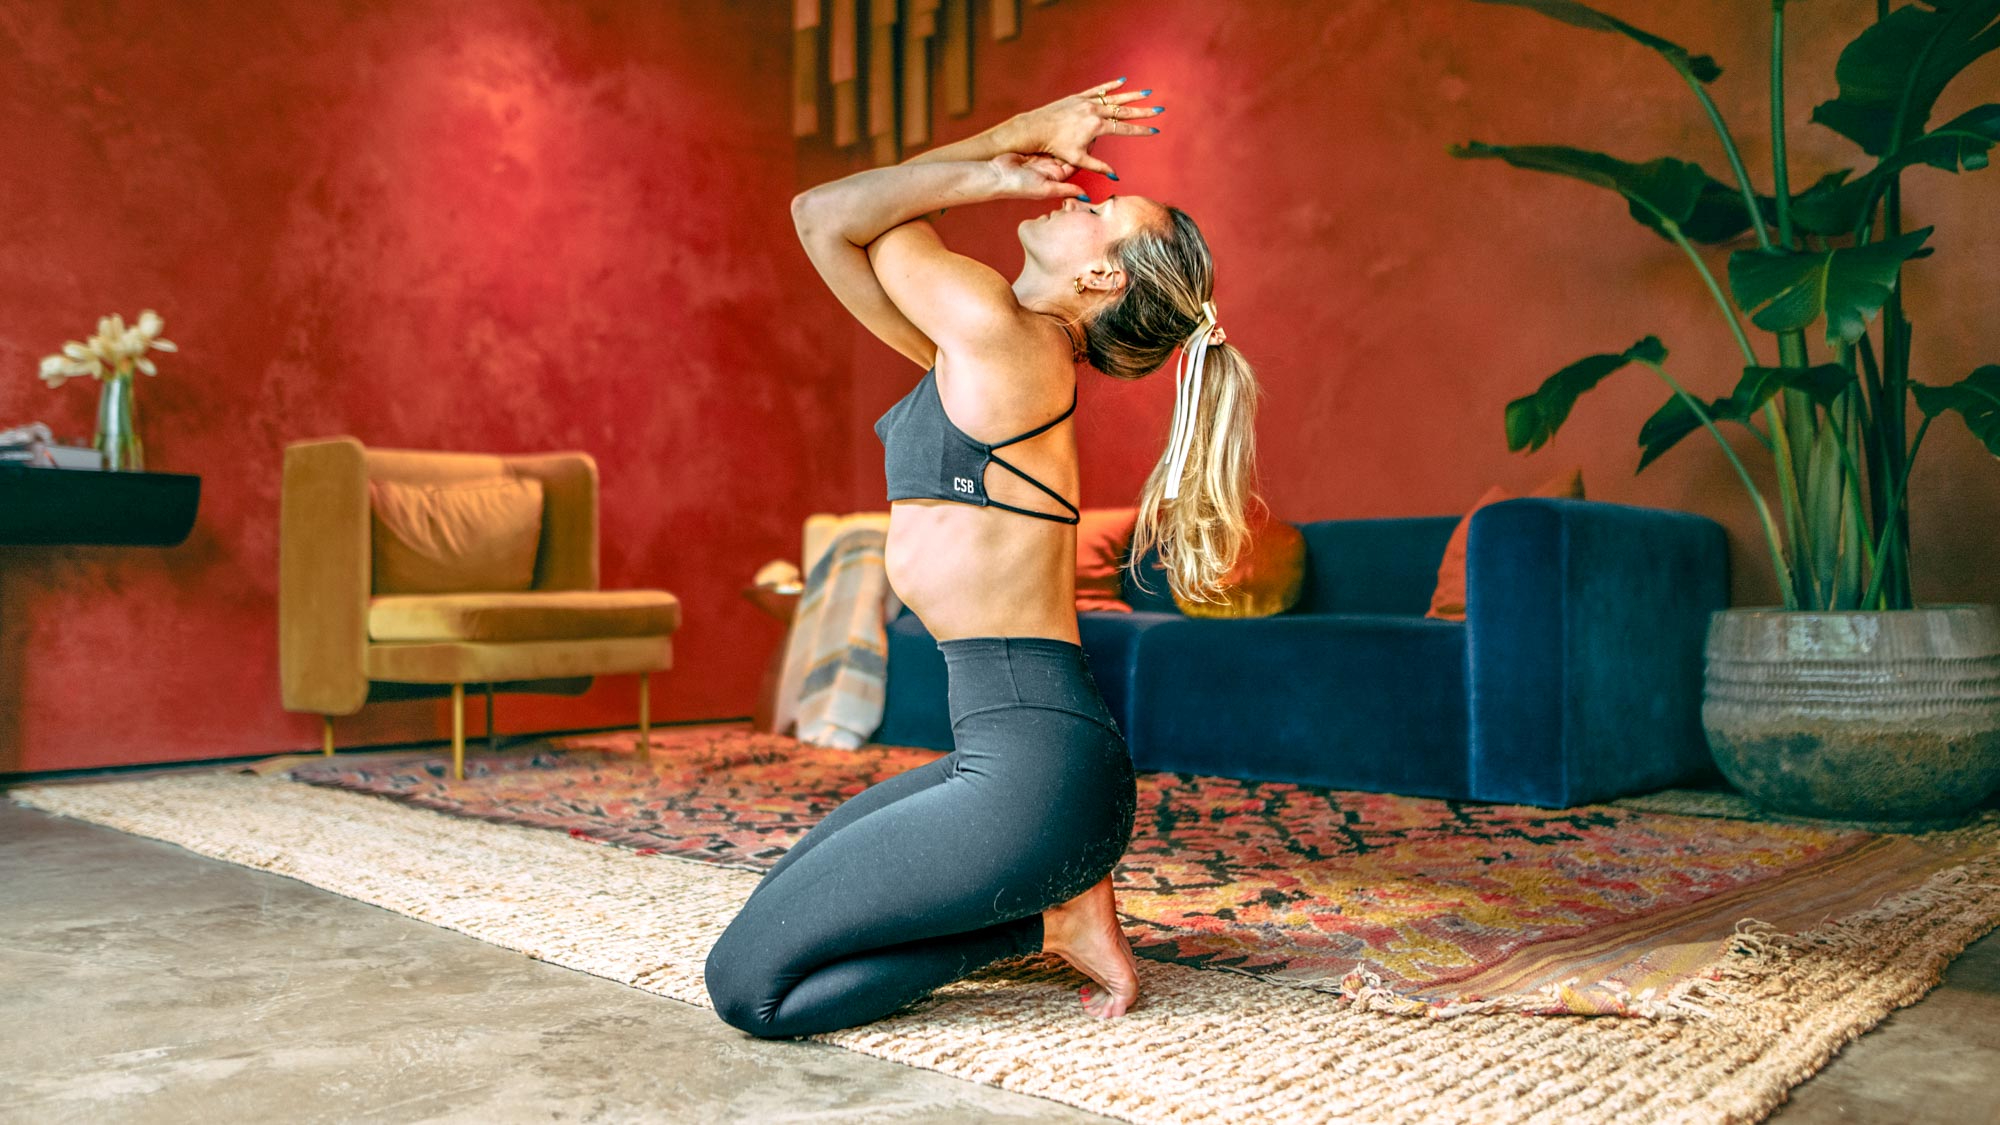
According to Hanway, “This move helps to release and open through the thoracic spine”.
- Come into a seated position on your knees. Wrap the right arm under the left, grabbing the opposite shoulders, like you’re hugging yourself, or go for the full eagle wrap pressing the palms together.
- On your inhale, start to shift your gaze skyward, finding a small upper back bend, and shifting the elbows up.
- On the exhale, fold forward, tuck your chin, and draw your belly button to your spine.
- Repeat three times on each side.
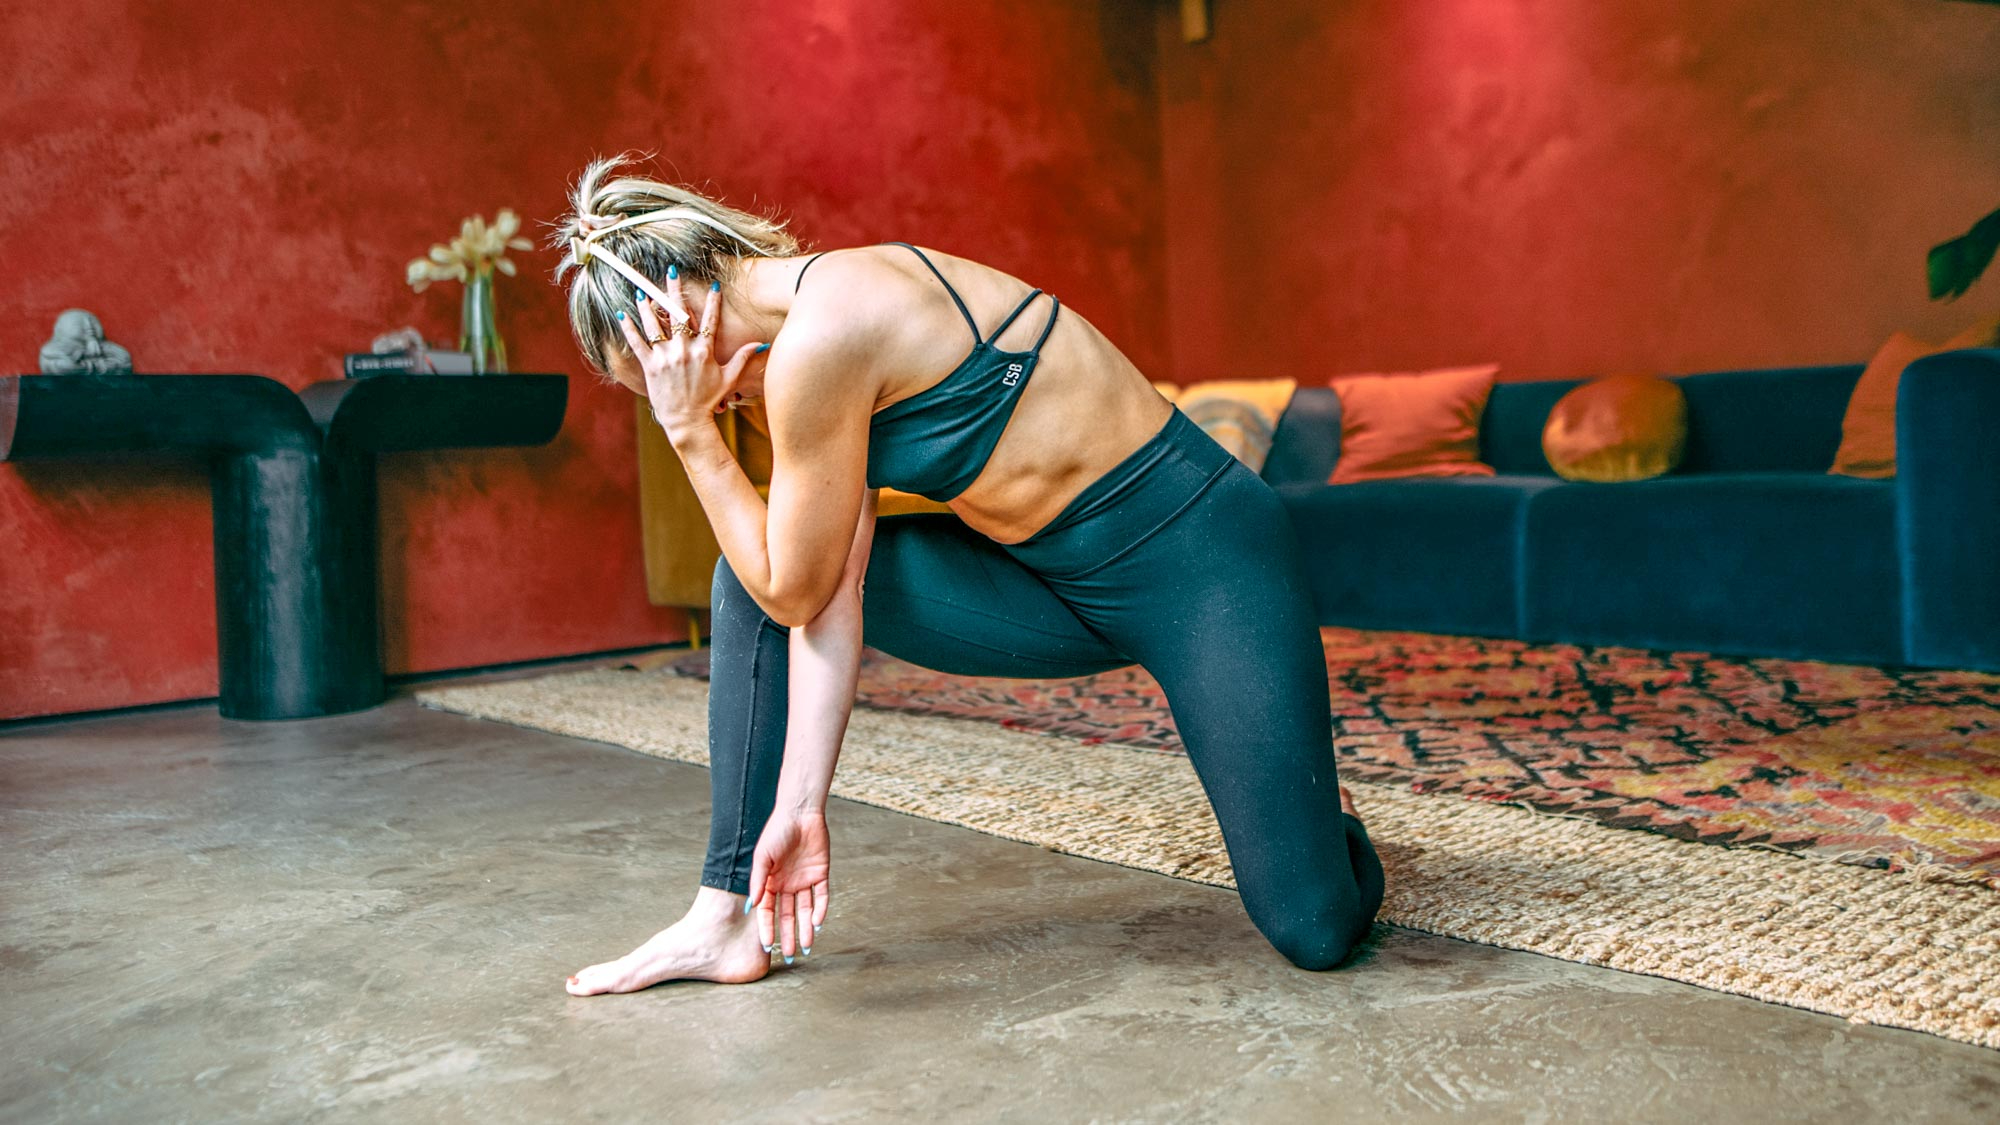
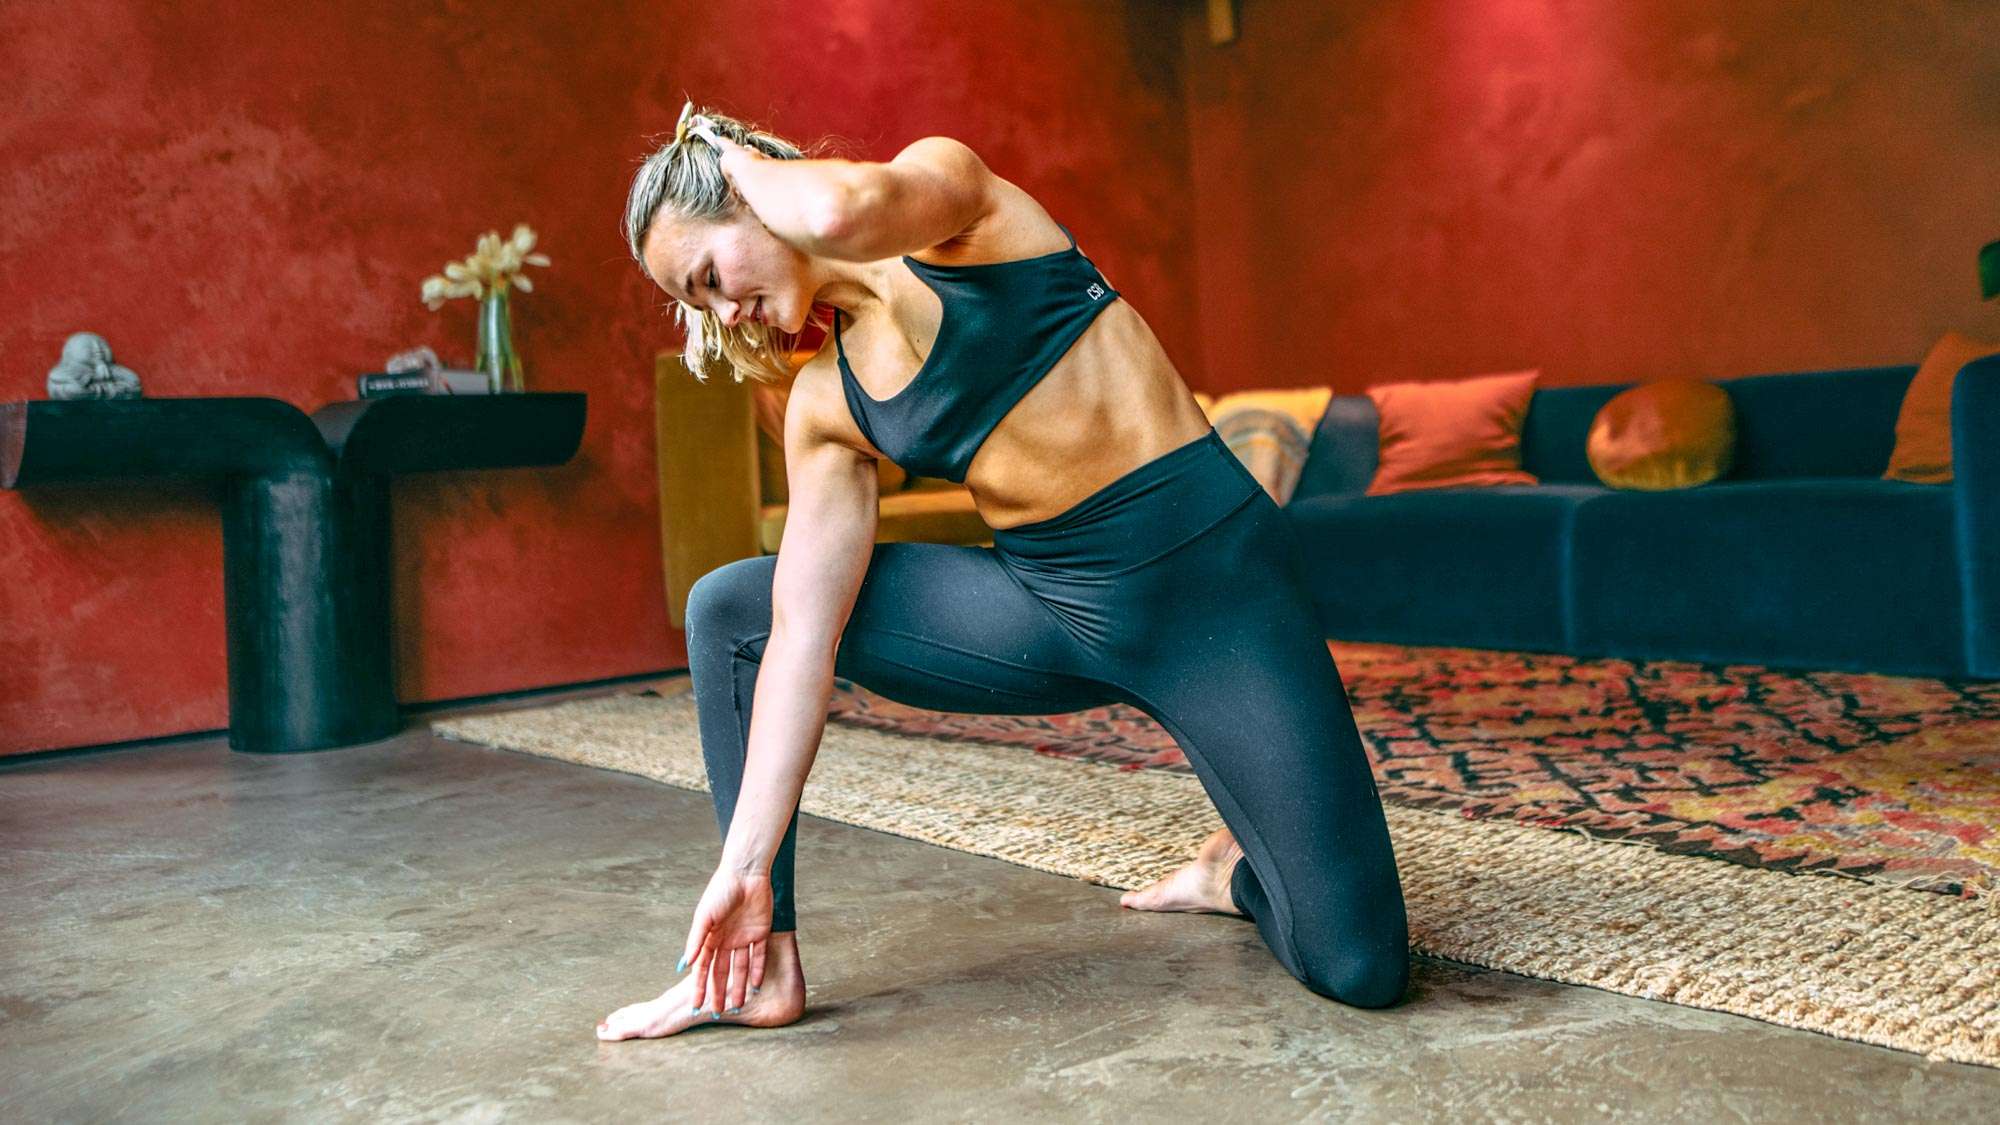
4. Low Warrior II rocks

Along with reducing stress and tension in your body, the low Warrior pose is said to boost your physical strength and flexibility in your shoulders and back.
- Rise to stand on your knees and step your right foot forward.
- Bring your left shin parallel for stability. Pull your hands to the heart center and start to bend into the right knee, pressing it forward keeping the right heel glued to the ground.
- When it reaches the end range of motion, use the strength of the hamstring to draw your hips back to stack over your left knee.
- Repeat five times on each side.
5. Low Warrior II thoracic series
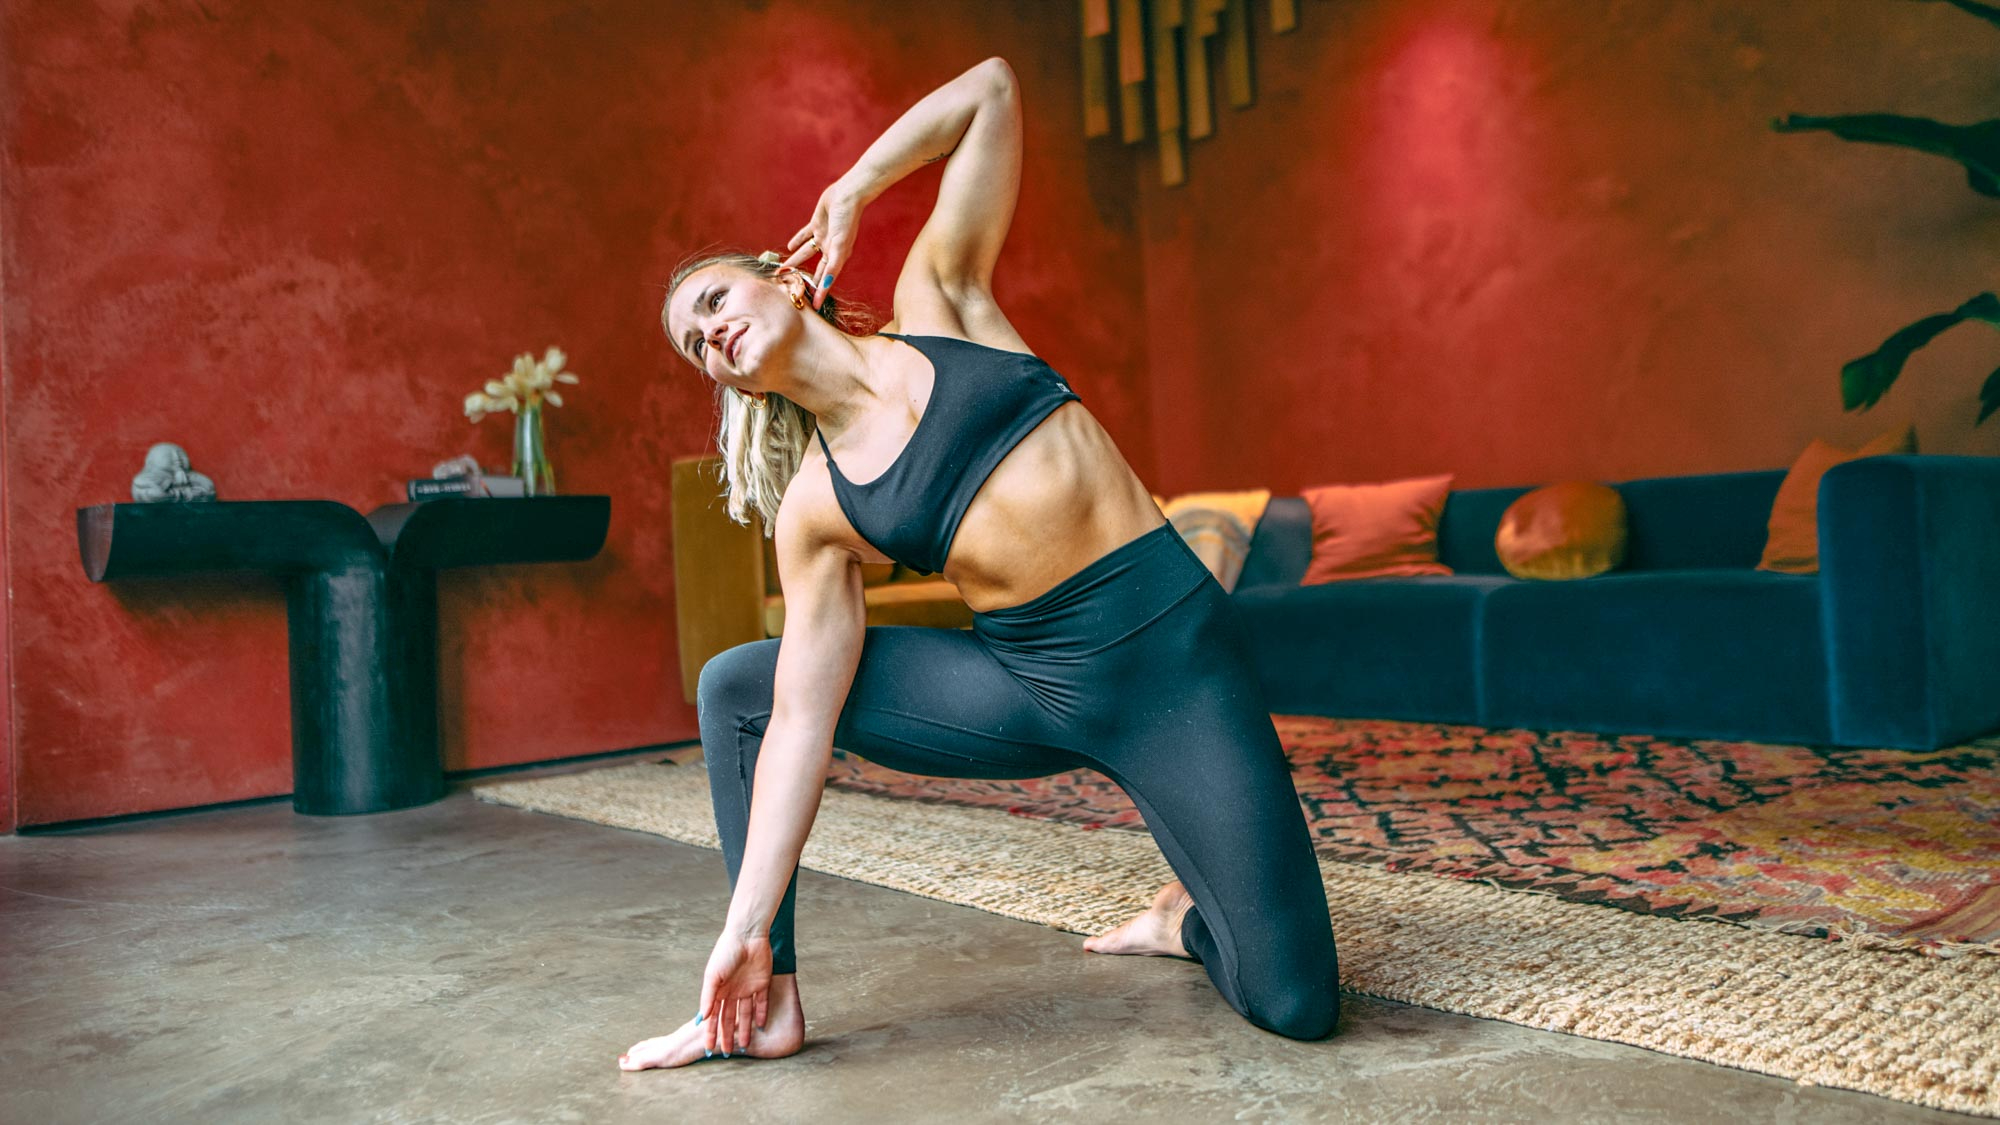
As its name suggests, this low warrior variation will hit the middle section of your spine — also known as your thoracic spine. But it will also target your hips.
- Keeping your low Warrior II stance, draw your right triceps to the inside of your right thigh, and bring the left fingertips behind the head.
- Spread through the collarbones and activate through the back of the shoulders, drawing the shoulder blades together.
- Inhale as you expand, exhale drawing your left elbow to tap your right arm.
- Repeat five times on each side.
6. Puppy pose
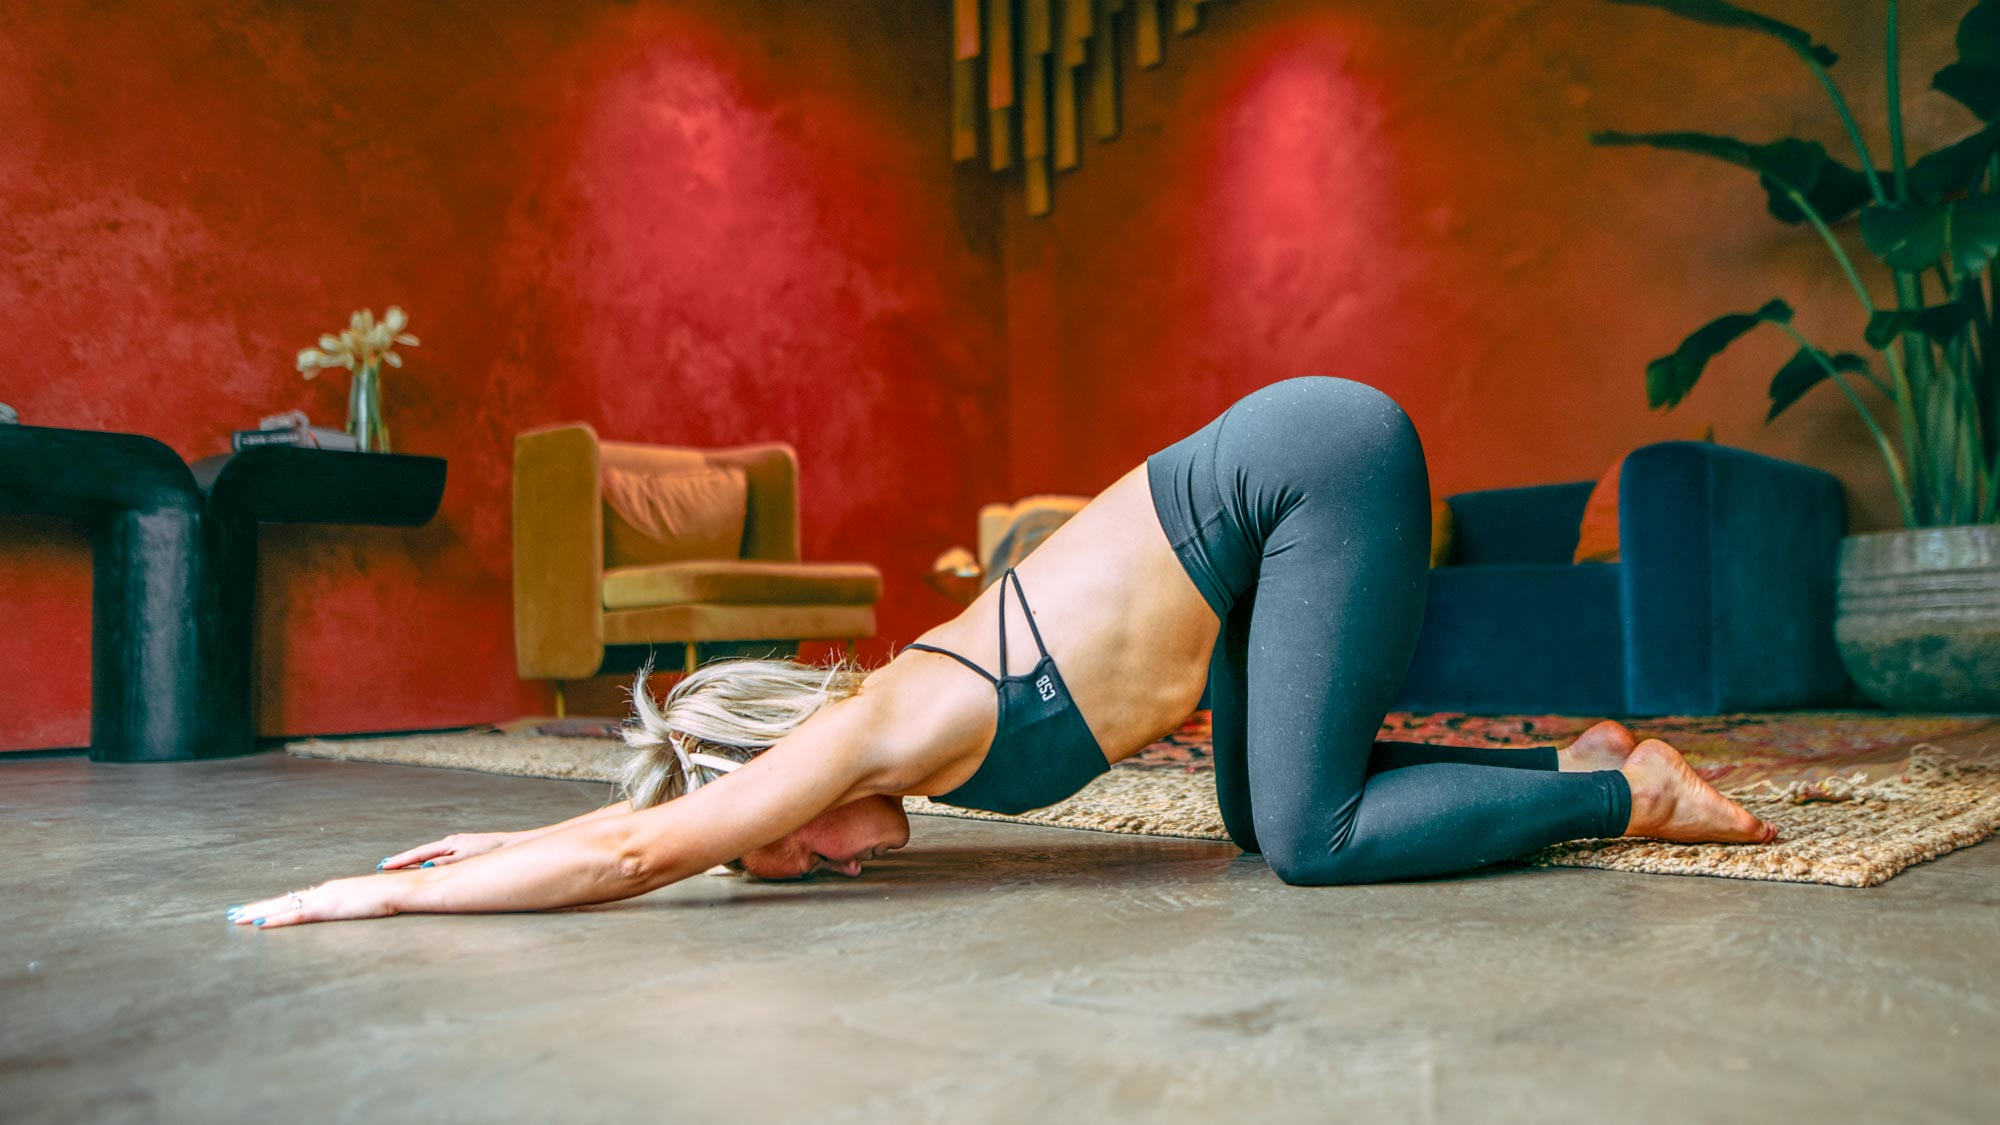
As one of our writers recently found when they practiced the puppy pose for three minutes a day, this much-loved stretch is known as a true ‘heart opener’, as the main purpose of this pose is to work into the spine, shoulders, upper back and abs, releasing tension as you go.
- On all fours, stack your hips over your knees and walk your fingertips forward to rest your forehead on the mat.
- Keep your arms engaged as you stretch your hands in front of you and relax your chest toward the ground.
- Hold for 5-10 breaths.