Learning how to resize a canvas in Photoshop is an important step in your journey to becoming a photo editor. You can start with a certain size canvas and then suddenly realize you need more space. Similarly, if you've imported an image and want to add space around it, for a background or for transparency, you'll need to resize the canvas first.
While Photoshop is one of the best photo editing software applications around, there's no doubt that it comes with a steep learning curve. So while resizing a canvas is super easy, it's totally understandable that you might not know how to do it.
Believe me, if you're just getting into Photoshop, remember that all us other Photoshop users were in the same boat once. And that's why this guide exists.
So, without further ado, here's how to resize a canvas in Photoshop.
Note: Resizing a canvas is not the same as resizing an image. The canvas is what your image goes on. So you're effectively resizing the background. If you want to learn how to change the dimensions or resolution of an actual image, read our guide on how to resize an image in Photoshop.
How to resize an image in Photoshop
- Press Opt + Cmd + C (Mac) or Ctrl + Alt + C (Win)
- Or Click Image > Canvas Size
- Enter new canvas dimensions
- Click OK
Read on to see full illustrated instructions for each step.
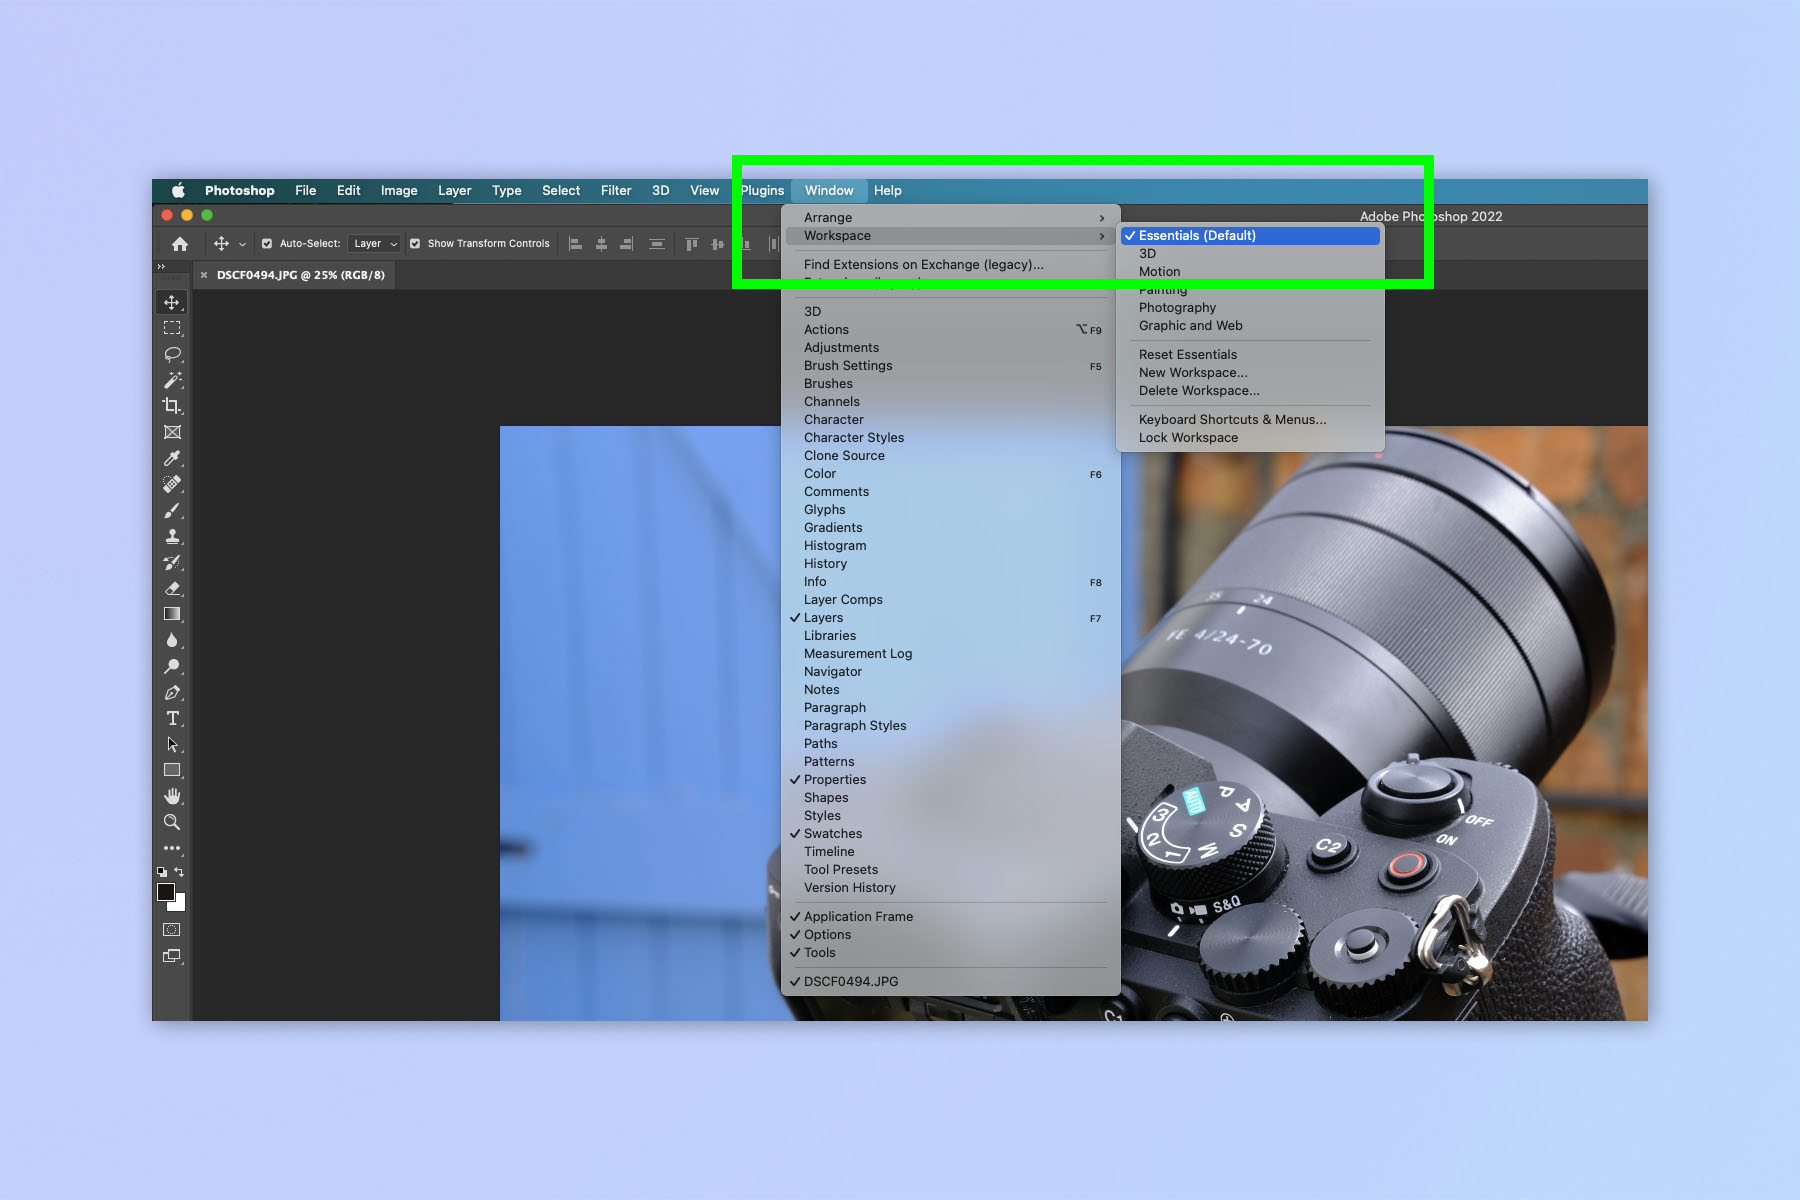
Before we start, let's ensure we're all working in the same workspace, so the instructions below line up with what you see on the screen. Click Window in the top toolbar, then select Workspace > Essentials.
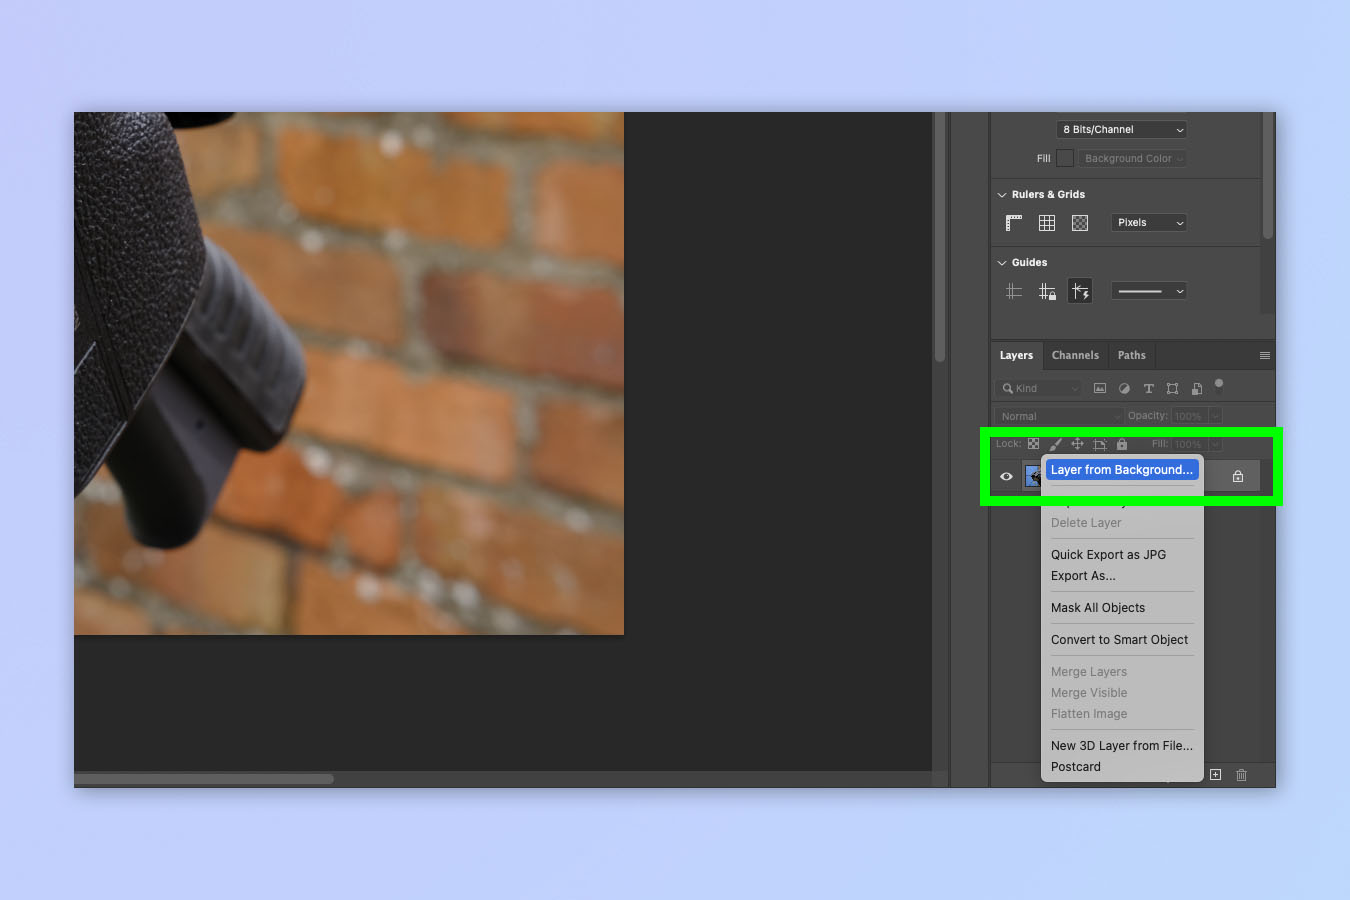
Something important to remember is that if you're changing a canvas around an already imported image file and you want the new background canvas to be transparent, make sure to convert it to a layer before starting. If your image is showing as "Background" your extended canvas will be a color. Converting to a layer means your extended canvas will be transparent, and you can then change it to a color later on by following our guide on how to add a background in Photoshop.
Right click the image layer on the right hand side and select Layer from Background. When a pop up appears, name your layer and click OK.
With the housekeeping out of the way, let's get on with the show!
1. Press Opt + Cmd + C (Mac) or Ctrl + Alt + C (Win)
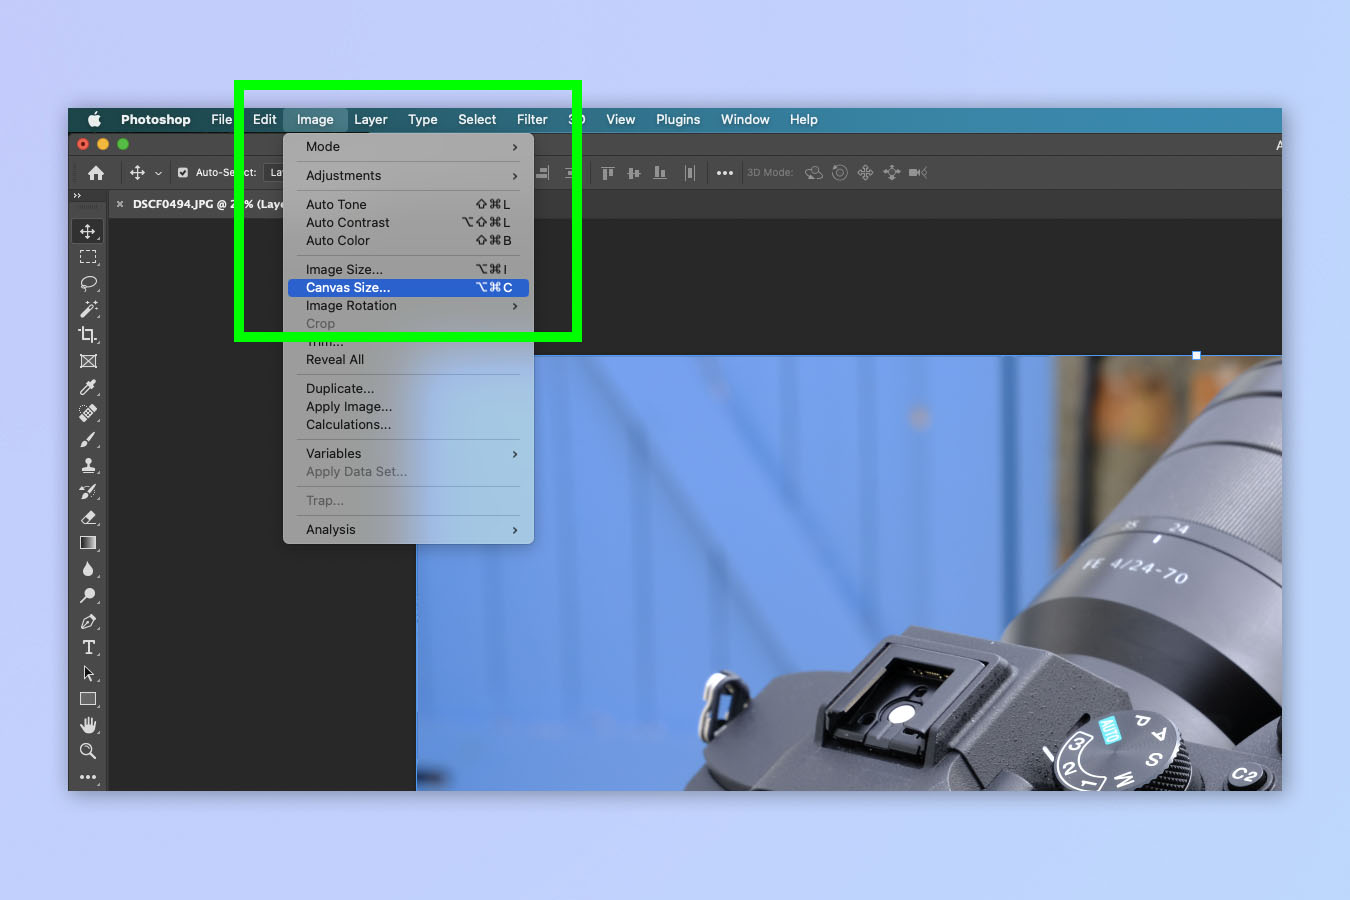
With an image or canvas open in Photoshop, press Opt + Cmd + C (Mac) or Ctrl + Alt + C (Win).
Alternatively, click Image in the top toolbar, then click Canvas Size.
2. Adjust total dimensions
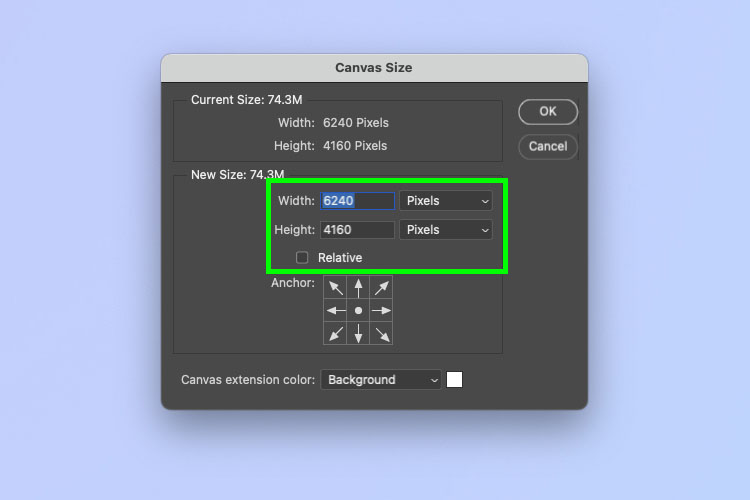
There are two ways to change the canvas size. The first way is to change the total dimensions of the canvas. This is the best option if you have a specific size of canvas in mind.
To do this, leave Relative unchecked. Now click the dropdown on the right and select the measurement by which you want your canvas to be sized. We've chosen pixels, but you could choose inches or centimeters etc.
Next, enter a width and a height in your chosen measurement. If your new width and height is smaller than your current canvas, your canvas will essentially be cropped (or clipped). A warning will appear telling you this after step 5.
3. Adjust Relative dimensions
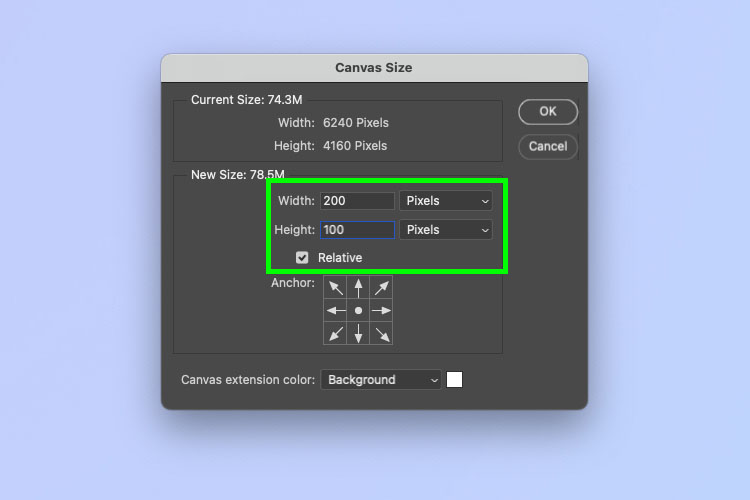
Alternatively, you can change the size of your canvas by simply adding or subtracting a set amount of your chosen measurement. For example, to add 200 pixels to the width and 100 to the height.
To change your canvas this way, click the Relative check box, then select a measurement from the dropdown by which you want your new canvas size to be measured.
Now, enter the amount you want to increase or decrease your canvas sizer by in the width and height boxes. To crop (or clip) the canvas, meaning to make it smaller, enter a minus number by typing a hyphen before it. A warning that you will clip the canvas will appear after step 5.
4. Choose where the new dimensions are anchored
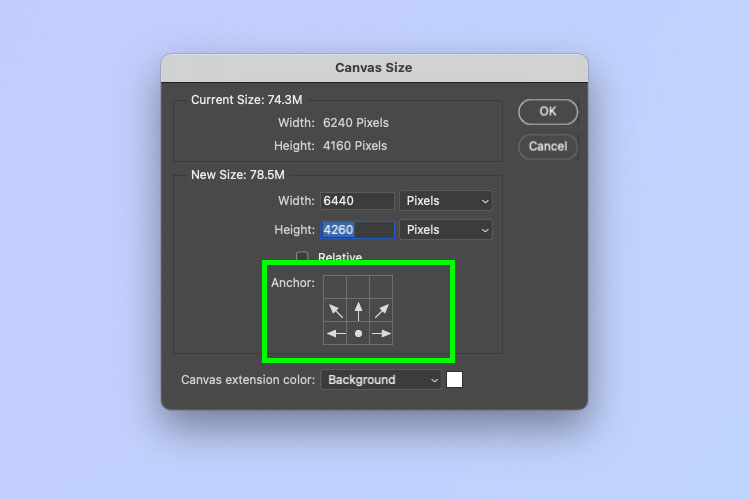
The previous two steps used a central anchor. That means that any extra dimensions added, regardless of whether they were specified in total or relative dimensions, will have been applied evenly on all sides. So, for example, if you added 200 pixels to width, 100 pixels would be added left and right. 100 extra pixels in height would add 50 pixels above and below.
You can change the anchor point if you want all pixels to go to certain sides.
Click a box on the 9-box square and all of your pixels will be added in the space remaining. In the image above, all of the new height pixels will be added in the top row of empty squares. However, because I haven't anchored to a single side, all of the width pixels will still be split evenly.
Have a play around with this to get a feel of how it works, and if you don't like it, simply press Ctrl + Z (Windows) or Cmd + Z (macOS) to undo.
5. Click OK
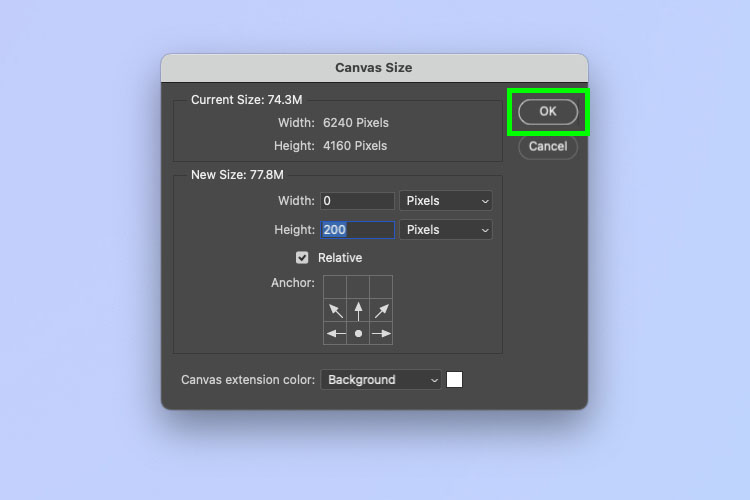
When you're happy, simply click OK.
Pretty easy, right? Now you know how to change a canvas size, you can add specific borders to your images, or you can simply have more room to add in extra elements! We can show you more ways to use Photoshop in out other tutorials. Next, check out how to add a border in Photoshop, how to add a drop shadow in Photoshop, how to remove a background in Photoshop and how to create a GIF in Photoshop.


