Looking to enhance your projects with unique typography? Something as simple as your font choice has the potential to take your work to a whole new level, and while Windows computers are already stocked with a large selection of classic fonts, there’s nothing like a personal touch to your projects to make them stand out. A unique font choice can achieve that.
That’s why we’ve crafted this guide to teach you how to install fonts on Windows computers. We’ll take you through the process step-by-step, covering every intricacy of the process, from downloading fonts to integrating them into your system. We’ll also equip you with some handy advice on where to source your fonts. If you’re not sure where to start looking for fresh fonts, check out our free font recommendations, and for those in the industry, our list of the best professional fonts.
Read on if you’re ready to expand your creative possibilities and create a whole new font library personalised to your exact needs. And if you’re a Mac user, we’ve got you covered too with our guide on how to download fonts on Mac!
01. Download the font from your chosen font provider
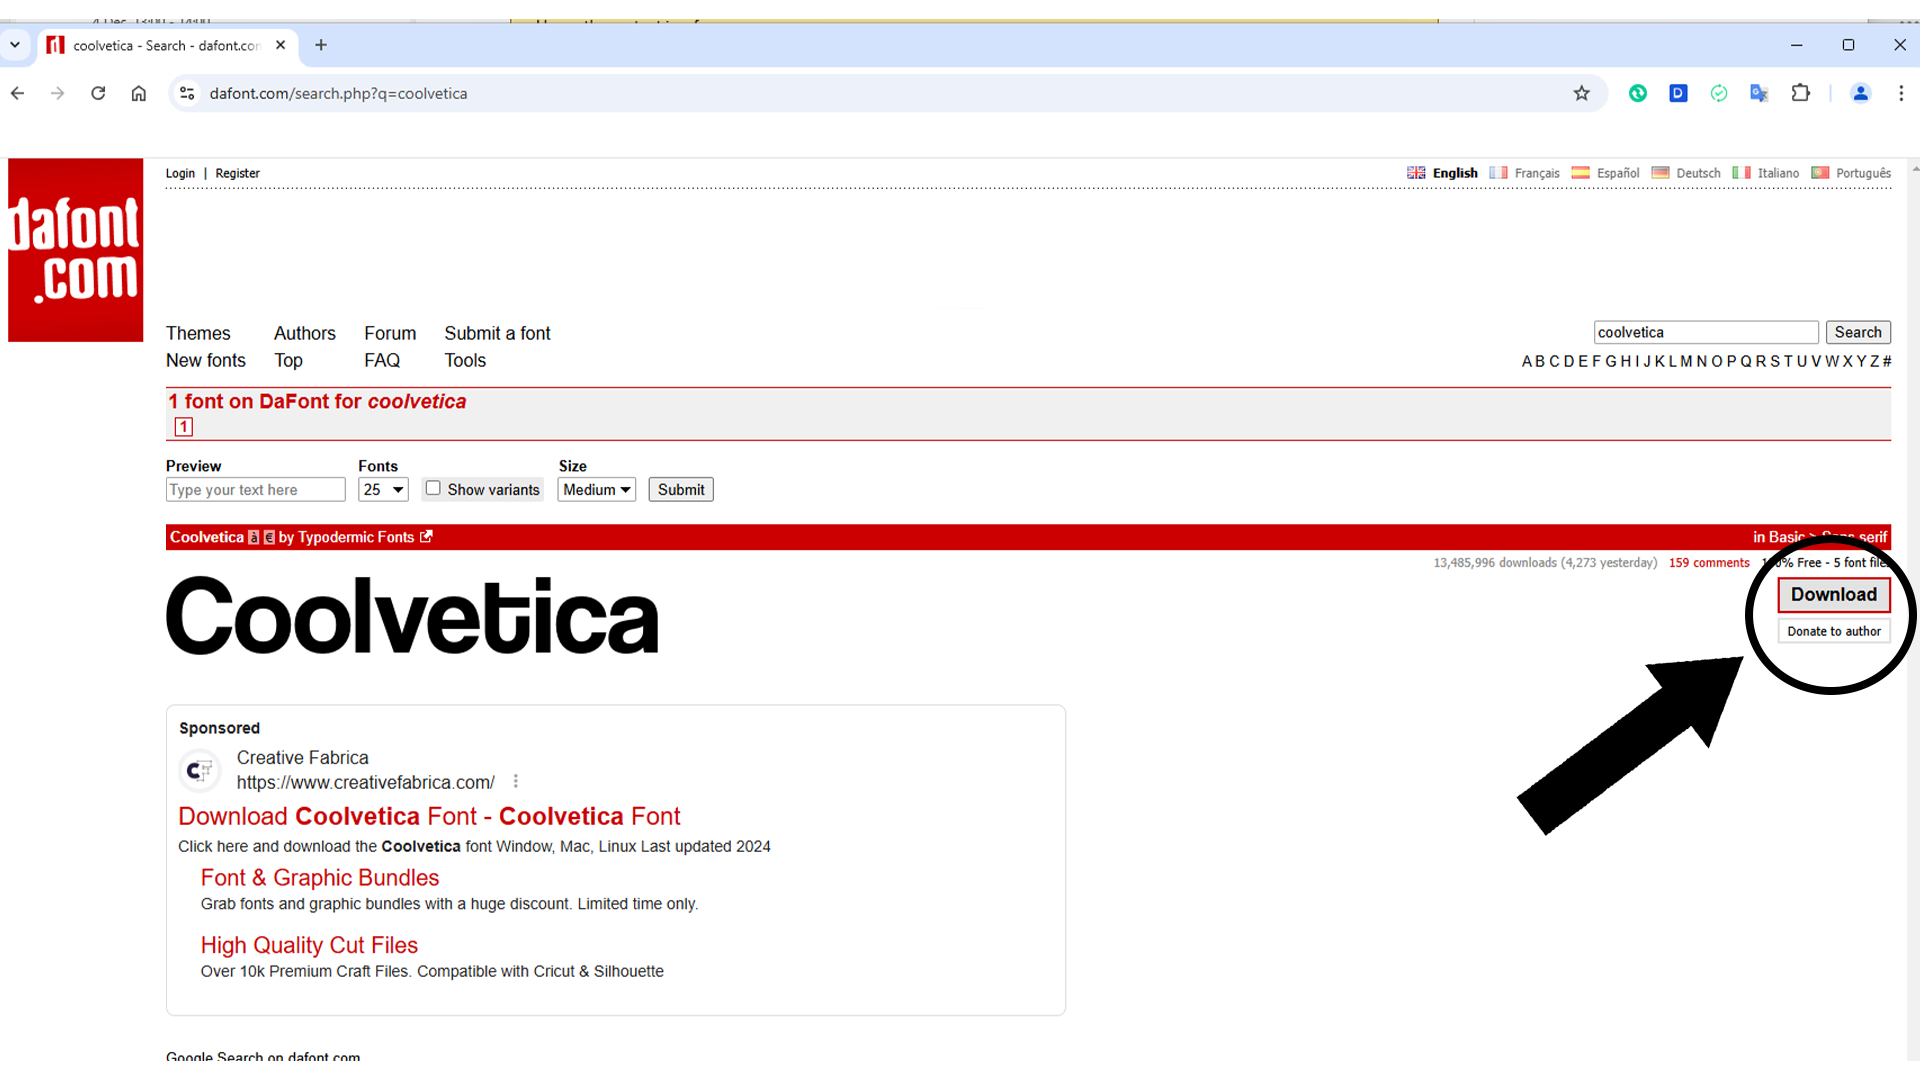
When browsing for a font, Adobe Fonts, DaFont, Creative Market and MyFonts offer the best range of typefaces for beginners and professionals. Adobe Fonts is included with Adobe subscriptions and offers a large variety of professionally crafted fonts, all available for professional use. MyFonts and Creative Market are both font marketplaces where you can buy any font you need to add to your collection, and all are highly endorsed typefaces. DaFont offers over 40,000 free fonts with varied usages, where you can find famous, professional fonts as well as outrageous unnecessary typefaces that can still be quite fun. Once you have bought your font or identified the font you want to download, there will be a Download button clearly identifiable on the page.
02. Open the download
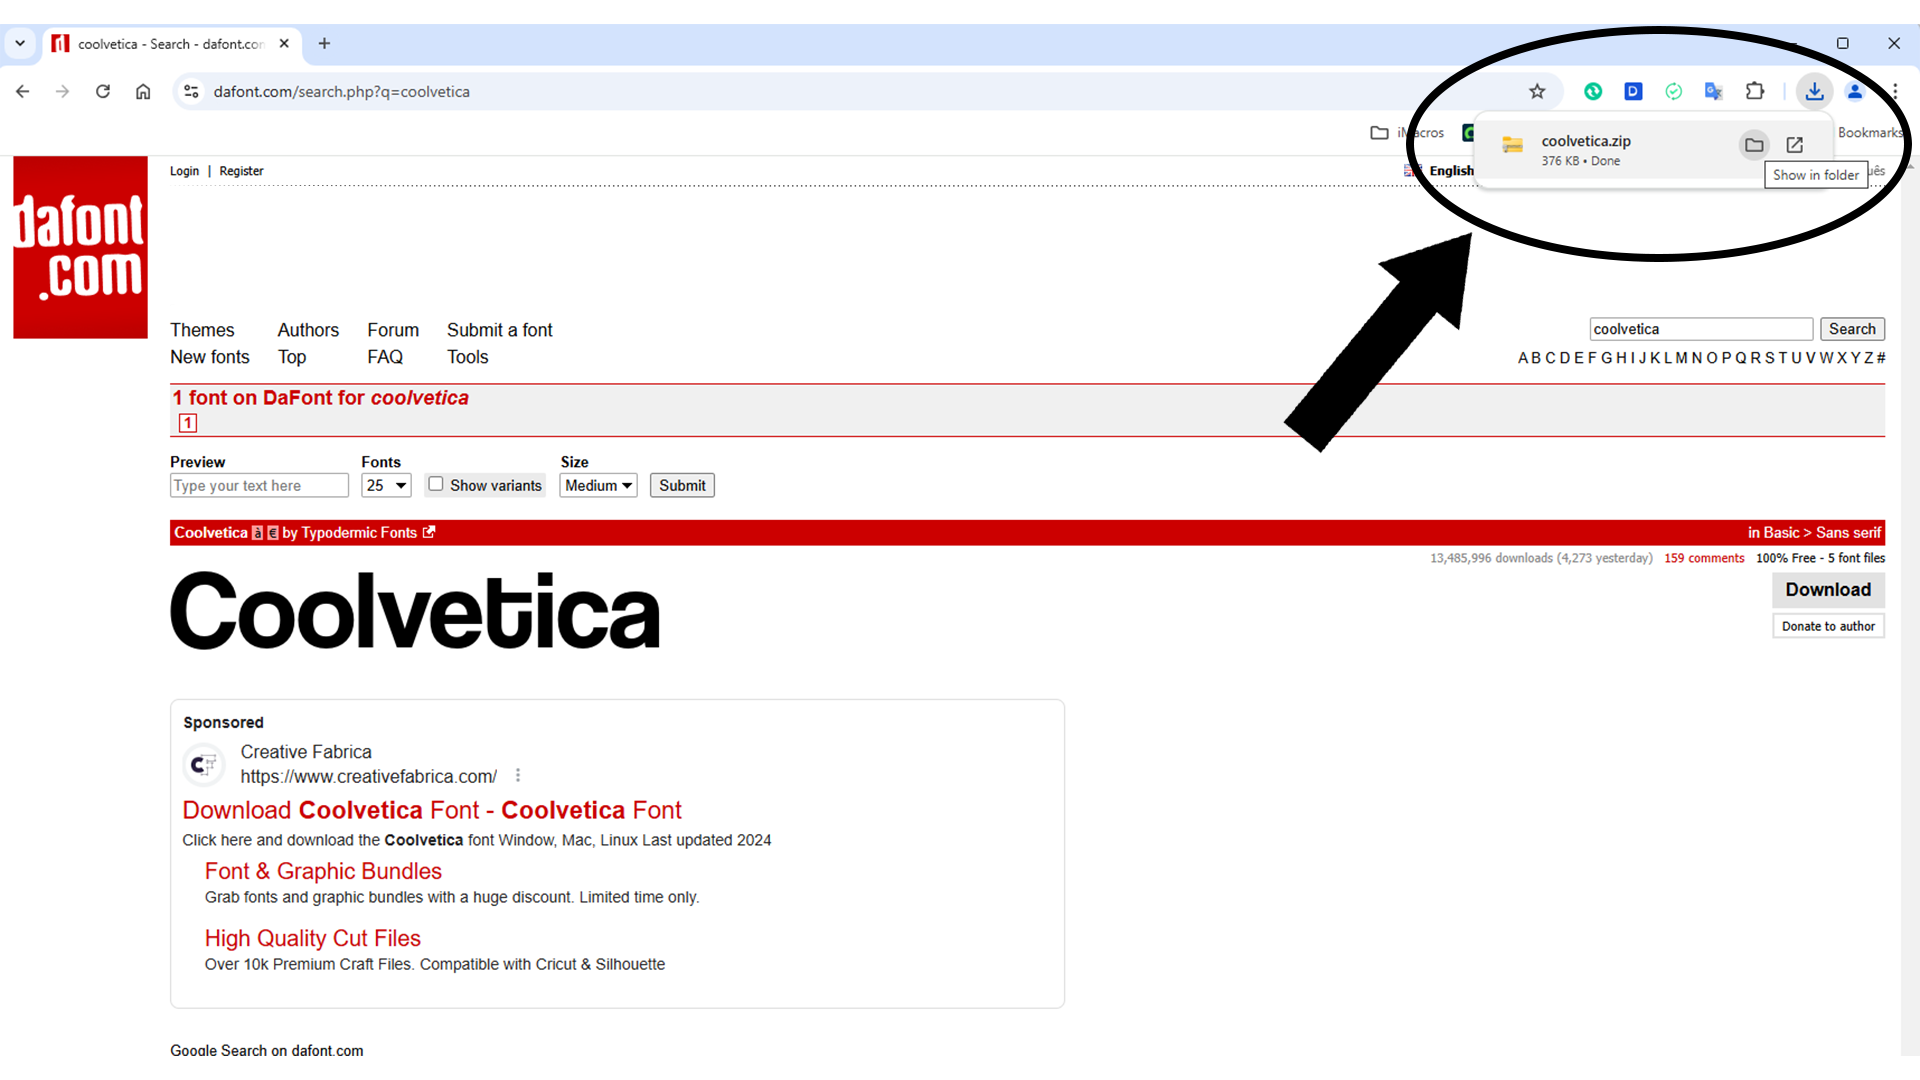
The font will appear in the Downloads icon in the top right-hand side of your browser tab. If it has not already popped up, open the Downloads icon, where you will see a folder titled after your font with a .zip extension. Double click on this folder to open it.
03. Extract the zip
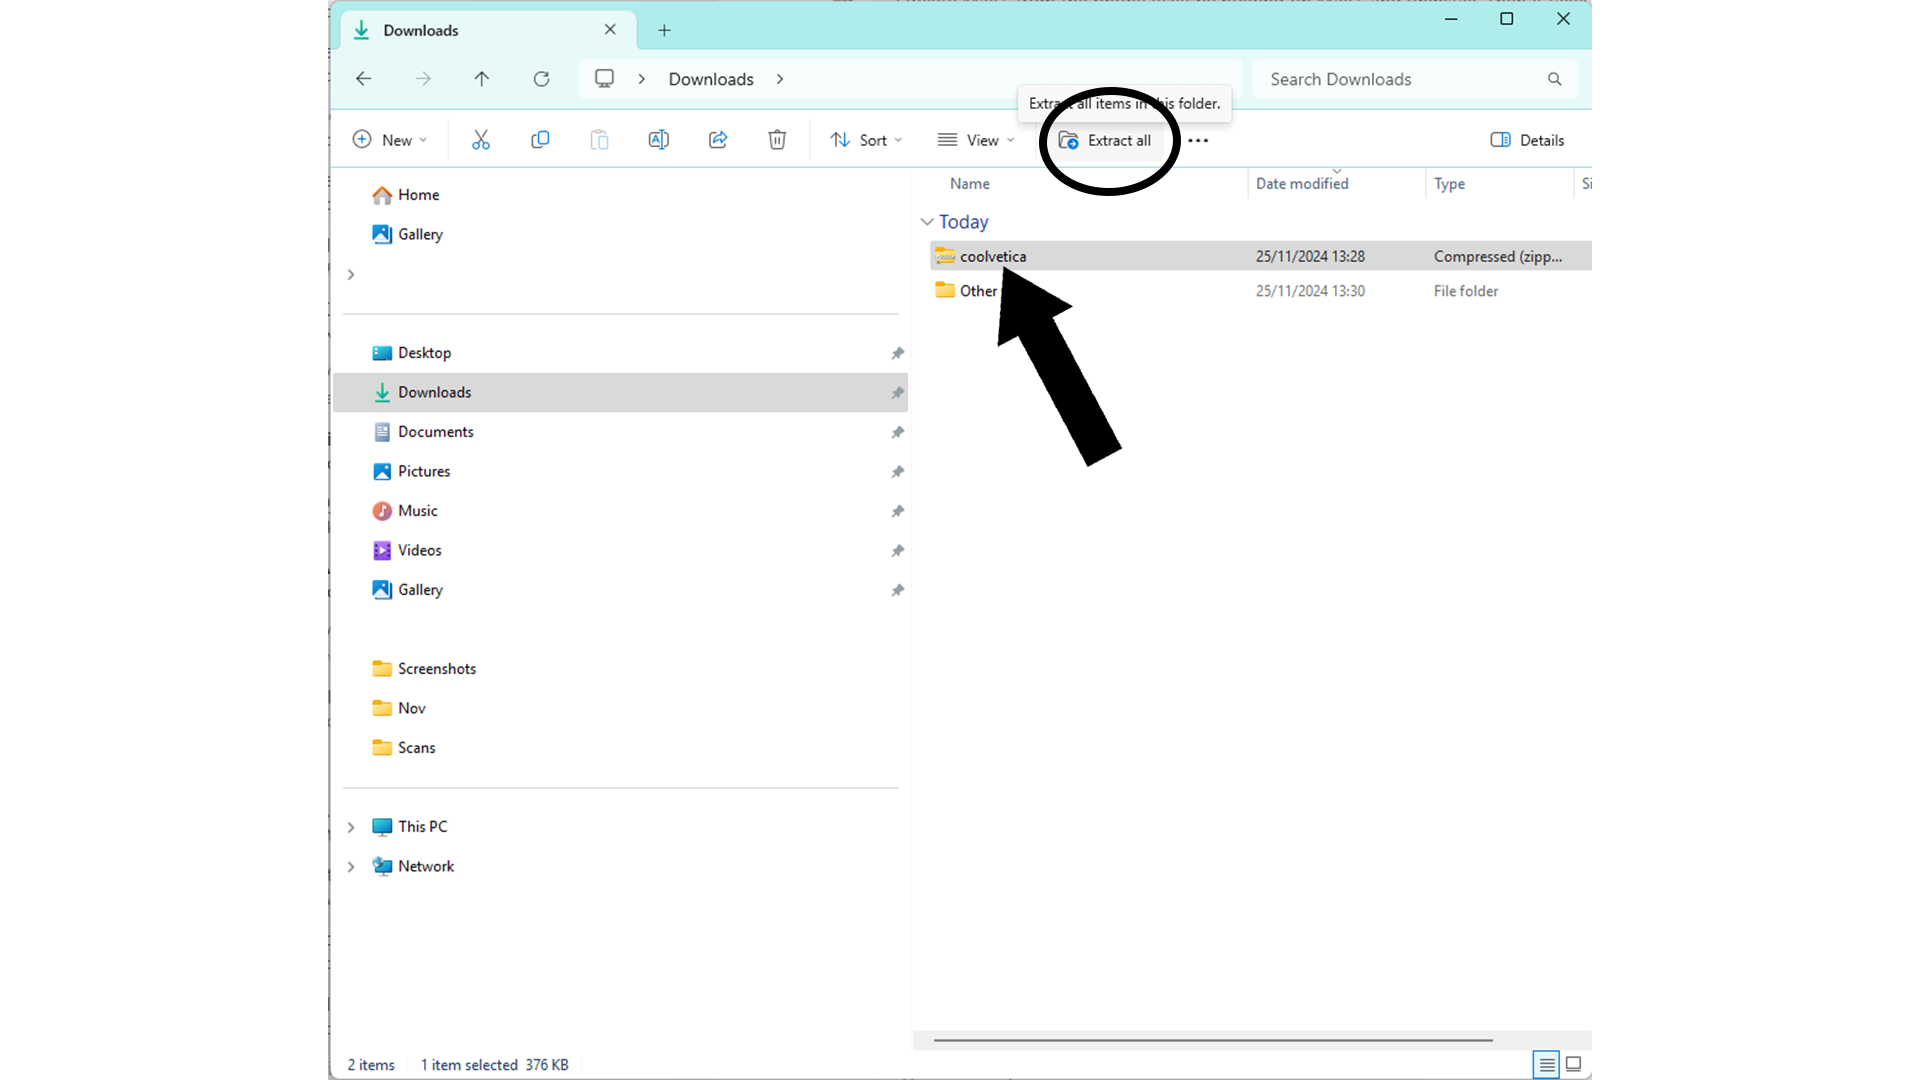
The folder will now be opened in File Explorer. Click on it once to select it if it is not already selected. In the top bar of File Explorer in the same window, there will be a button called Extract All. Click on this to expand and open the zip file. This will open up a file containing one or more .otf files and a .txt file. The .otf files contain the font, and if there are several this means that the font has different weights and variations to install. The .txt file contains licensing information about the font. This is important to read to make sure you use the font according to the correct permissions.
04. Open Font Settings
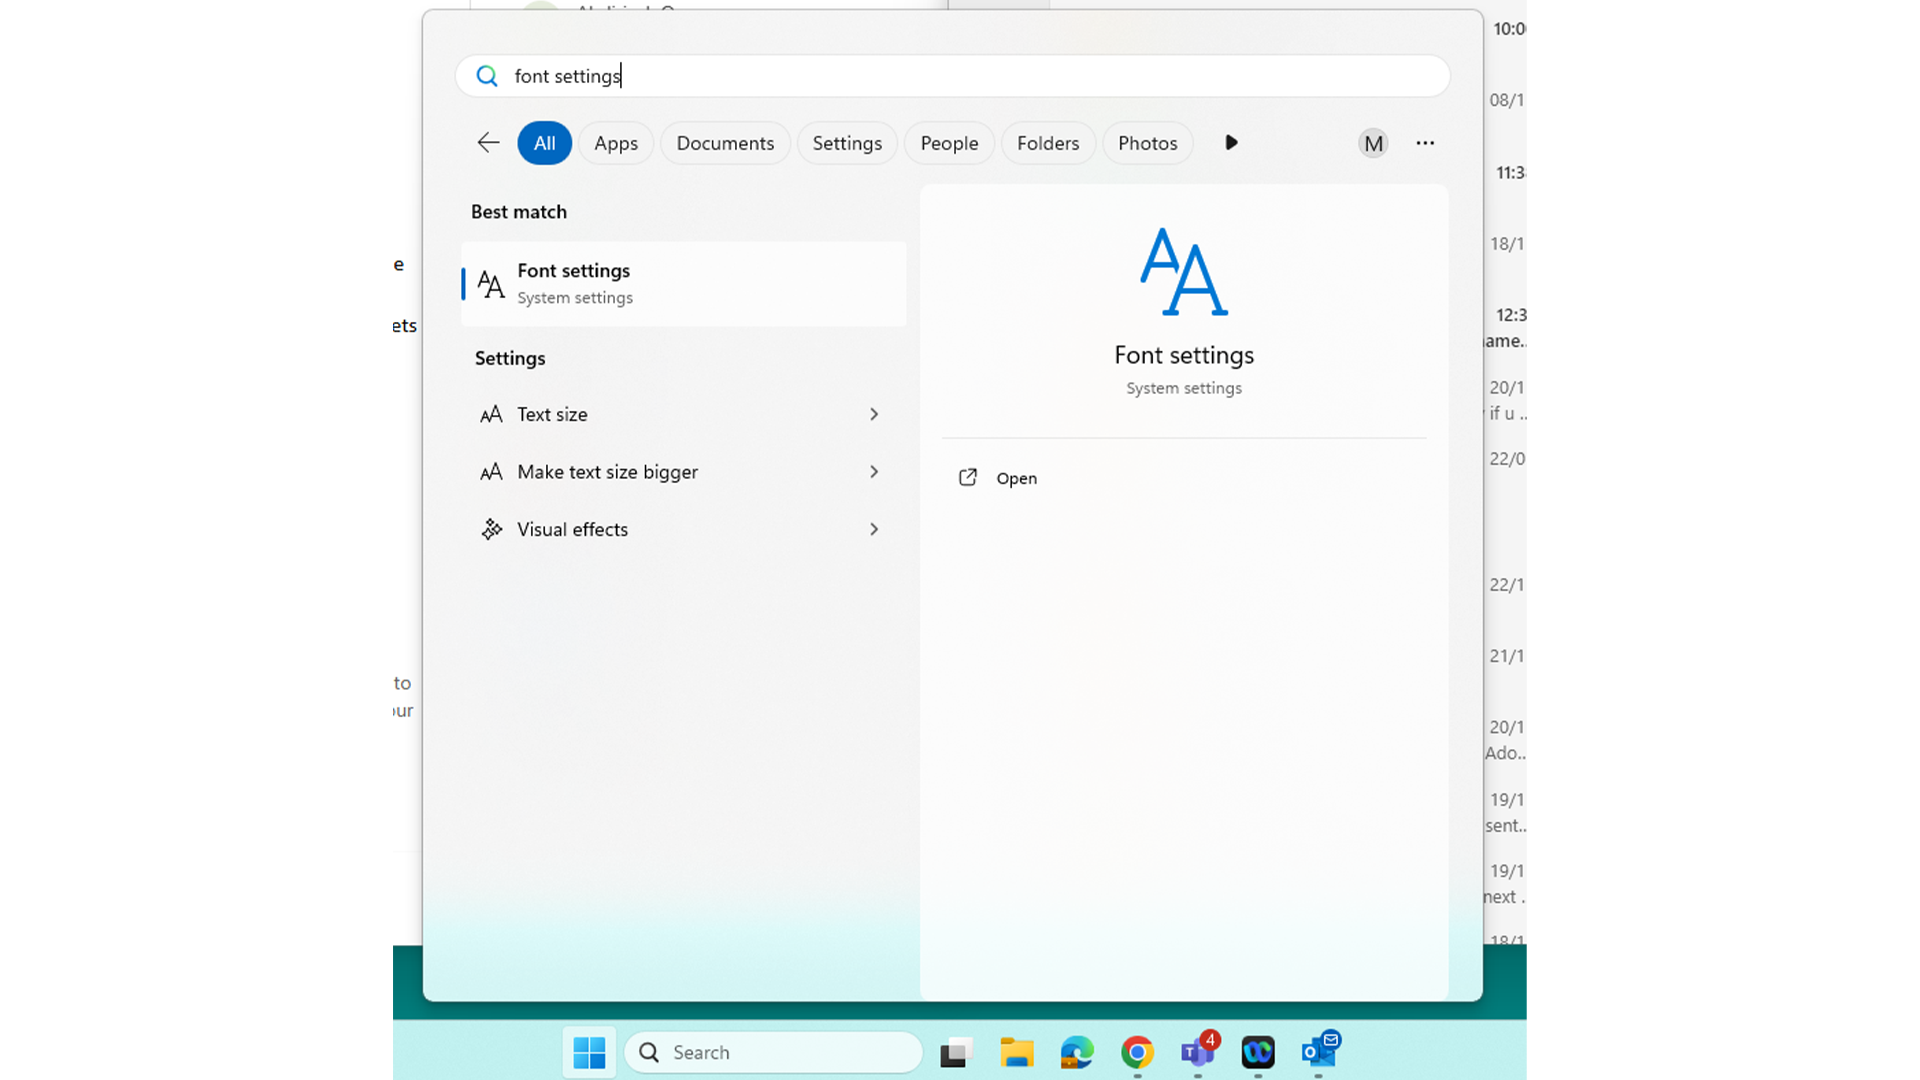
In your computer's Windows search bar, search for Font Settings to open the Font Settings app. This is the app on your computer that stores all your fonts, as well as where you can search for an already existing font or install a new one. Make sure this app is open.
05. Drag and drop
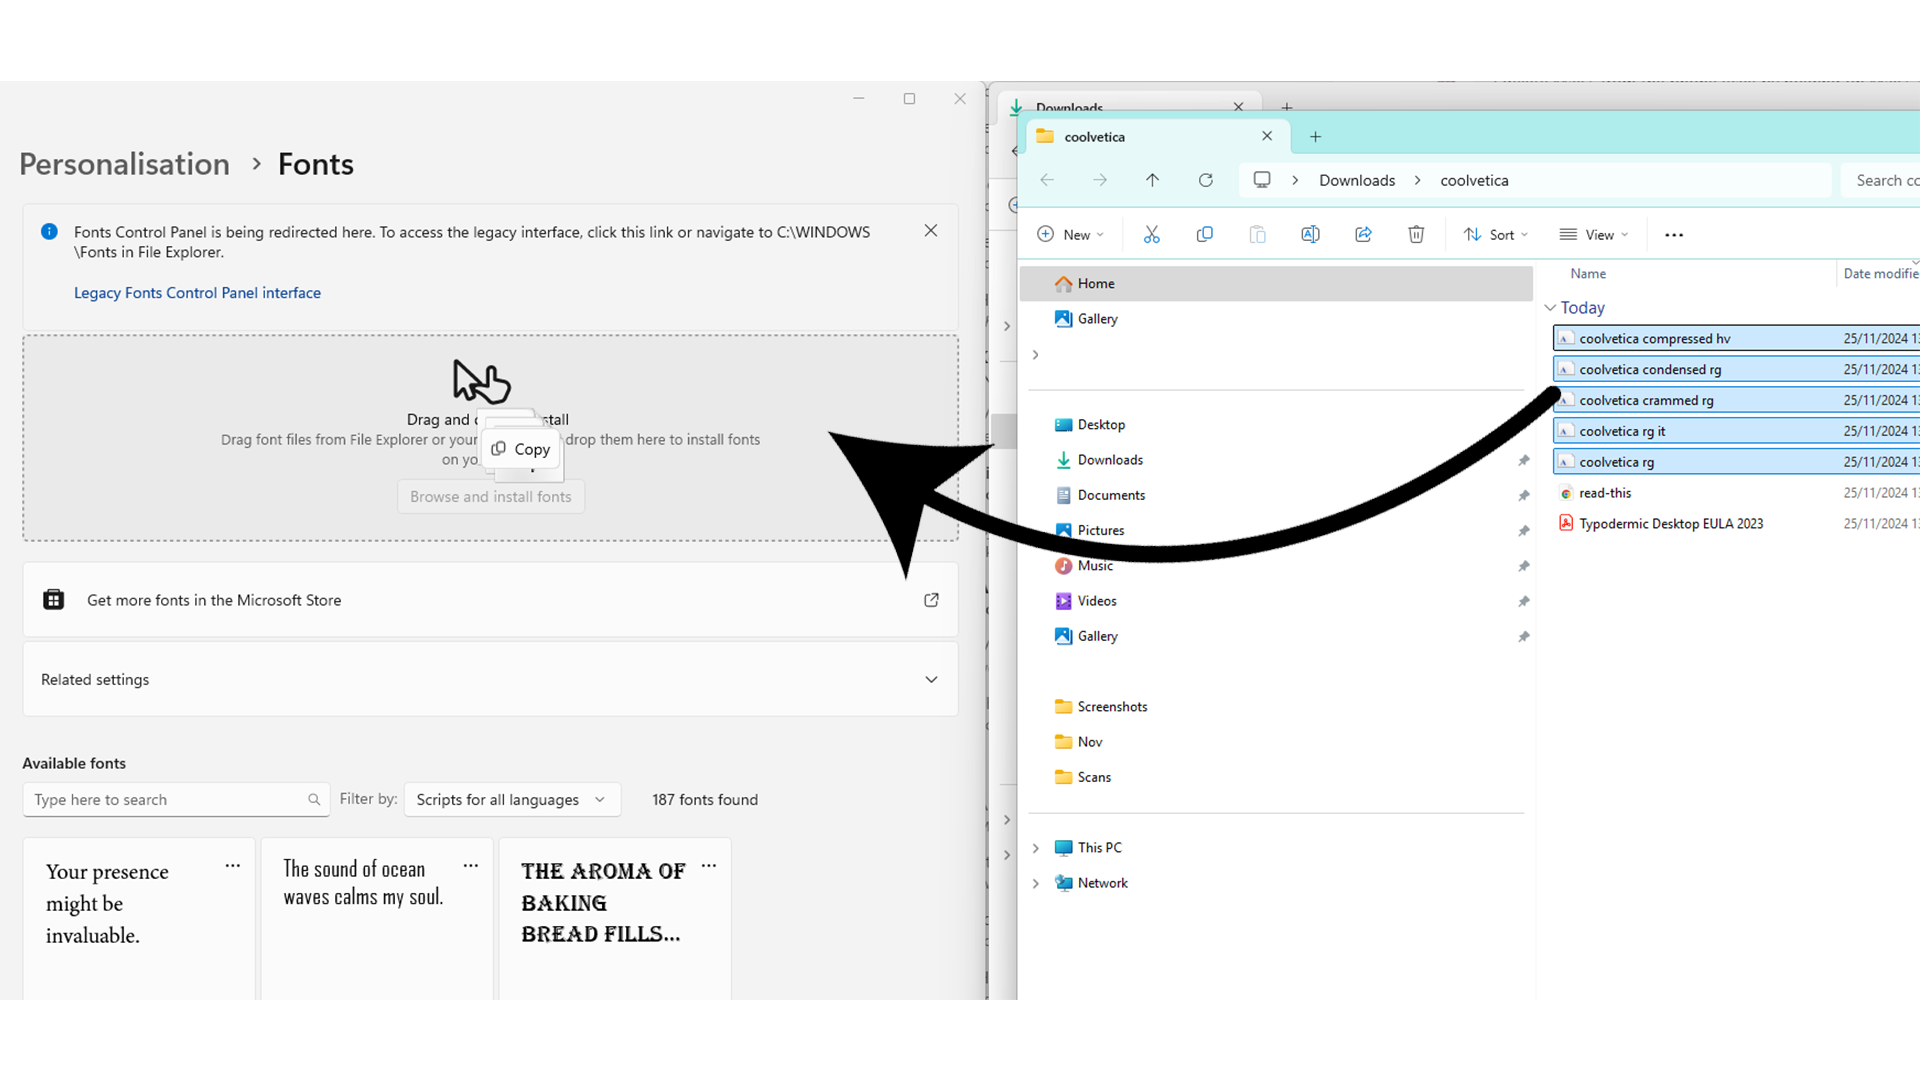
Hold down ctrl and click on each .otf file to select all of them if there are multiple. If there is only one, you do not need to hold down ctrl; instead you just need to click on the file as normal. Drag your .otf files(/s) across into Font Settings where there is a section labelled Drag and Drop to Install. This should install your font and all its variations into your computer’s fonts app.
06. Check the font is installed
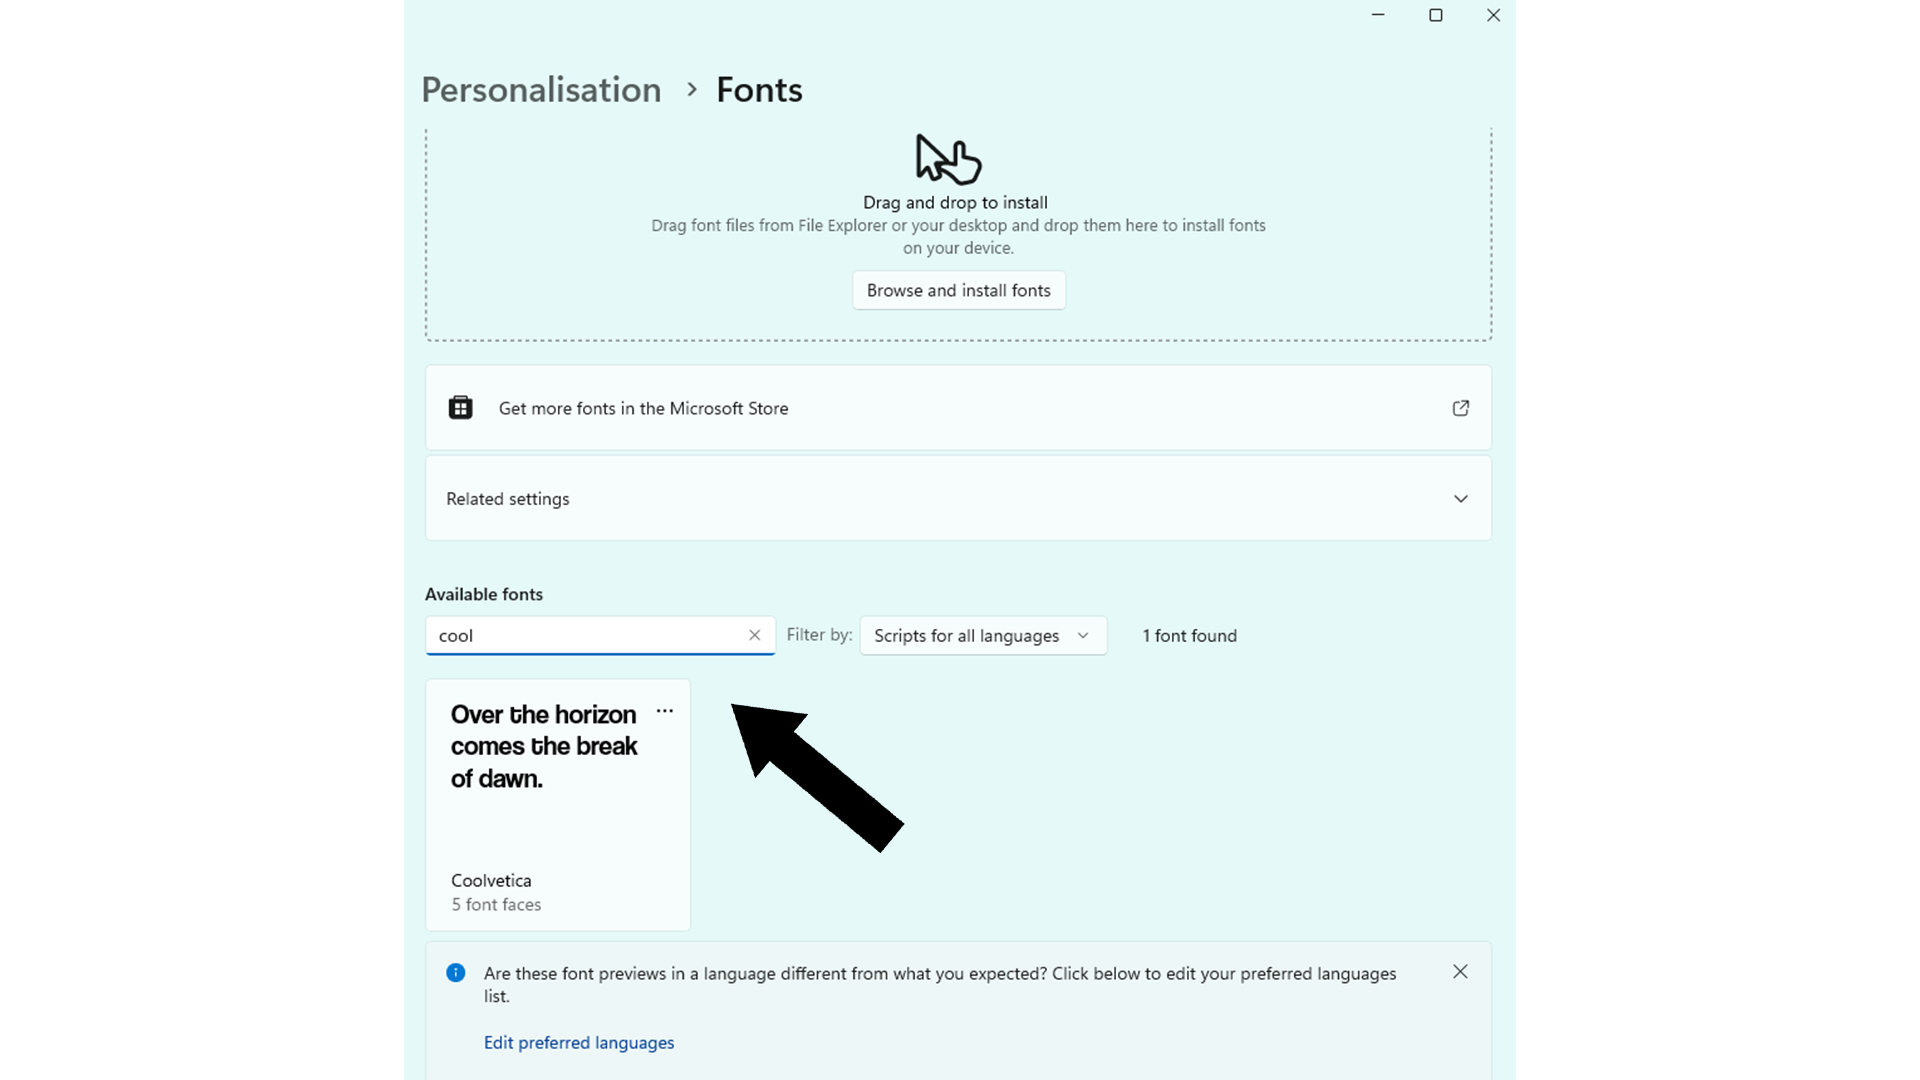
Now we need to check that the font is installed. In Font Settings, search for the name of the font and check that it comes up. If it doesn’t, then try the process again.
07. Check the license
Now is the time to read that .txt file we mentioned earlier on. It's important not to overlook it so that you can ensure the font is licensed to be used in the places you intend to use it. Double click on the .txt file to open it and double check the license.
07. Make the most of your new font freedom!
If your new font appears in Font Settings, it has been successfully installed and is fully ready for use across your whole computer. Congratulations! Now you can enjoy the luxury of your own fully customisable font library.


