Watch video: King of the castle
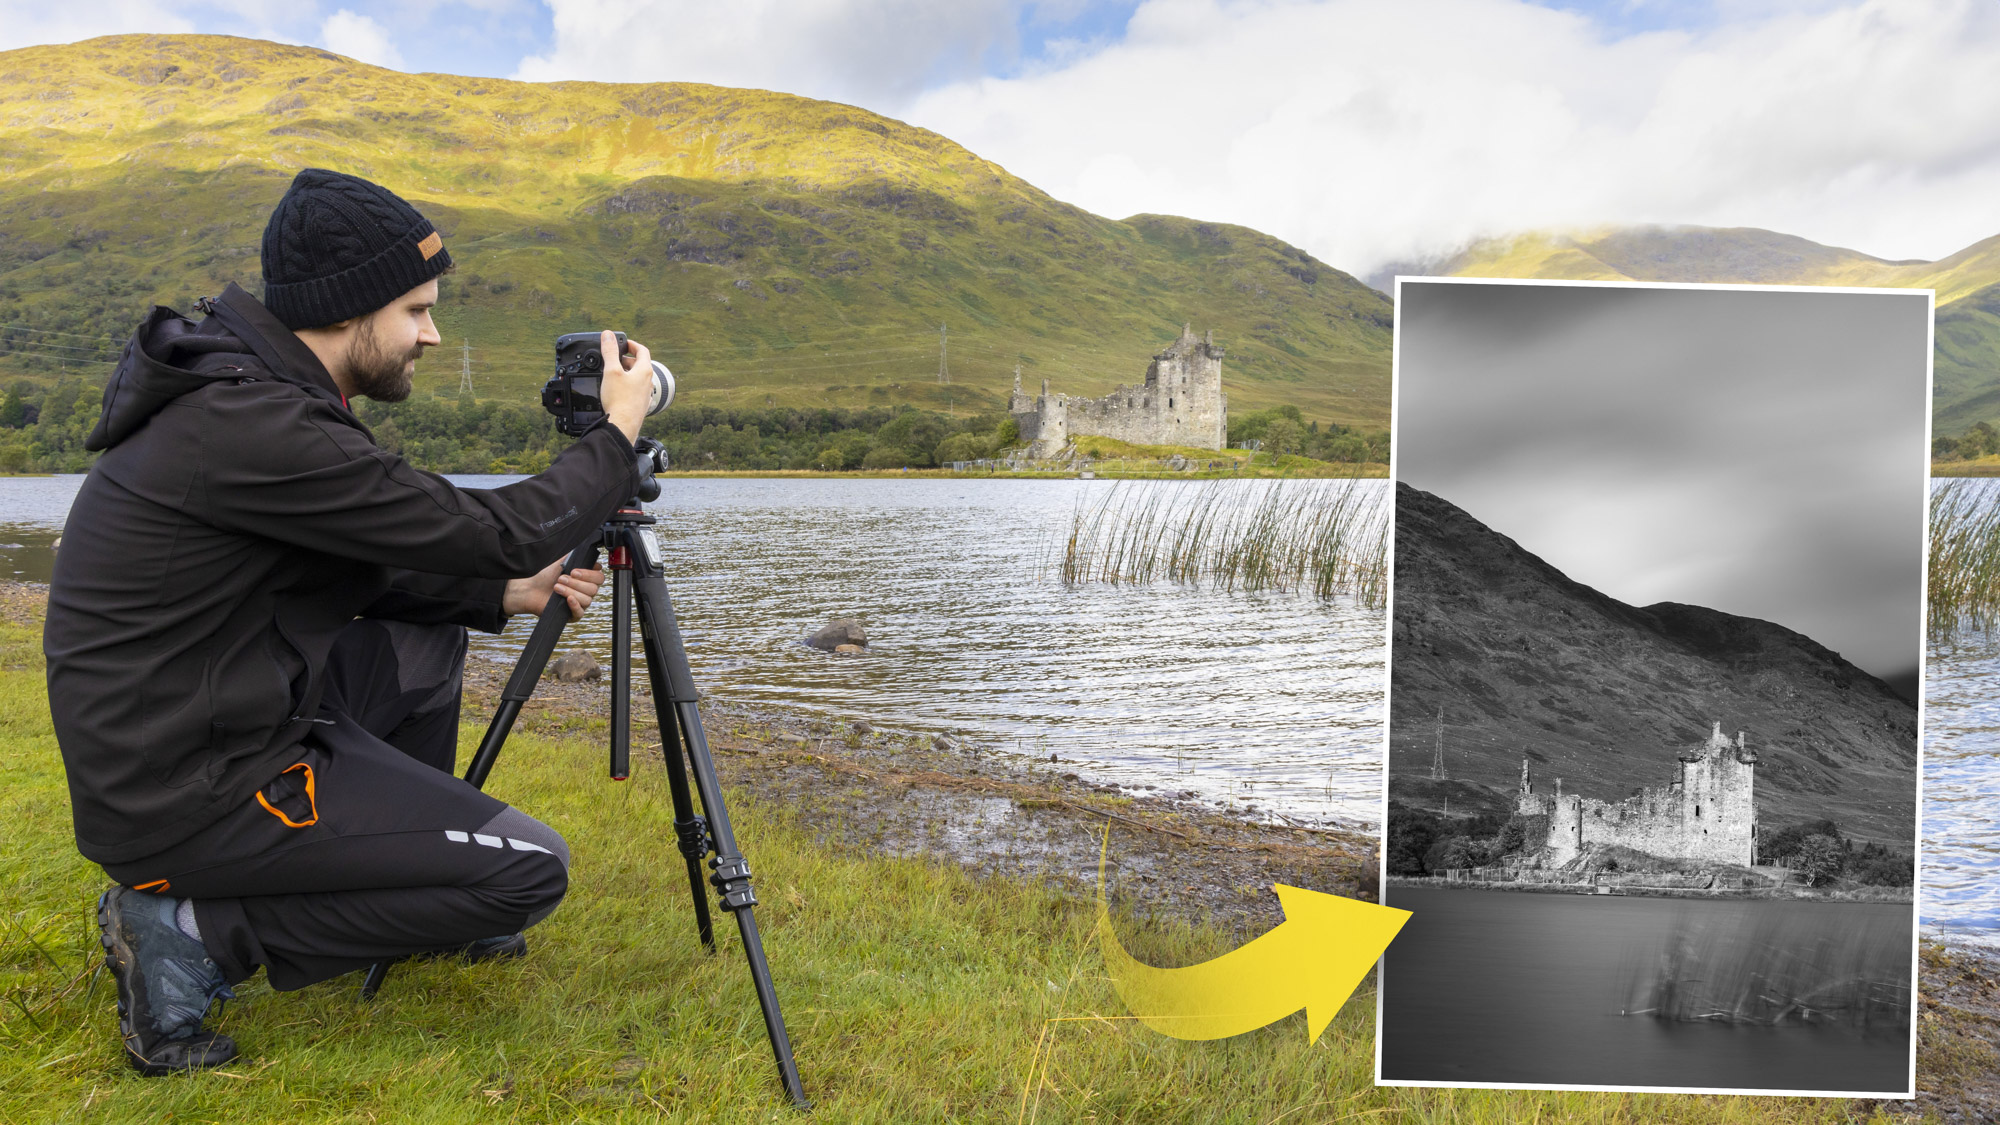
The United Kingdom is full of top landmarks from lighthouses to trees and historic listed buildings to castles. On a recent trip up to Scotland, I couldn’t help myself but stop for a few photos at the iconic Kilchurn Castle on the scenic and blissful Loch Awe.
If your landscapes are failing to have the impact you’d like, it might be worth including an iconic landmark such as a castle in your scene to anchor it and to demand the viewer’s attention. In this project I’ll run through some of the essential gear you’ll need to take great landscape shots, as well as some of my favourite tips for photographing outdoor scenes.
You’ll learn how to improve your composition, slow down your shutter speed with an ND filter and wait for the perfect lighting, as well as correcting wonky lines of straight buildings in your shots. Get stuck in and watch the accompanying video to see how to capture the perfect image...
1. Get set up
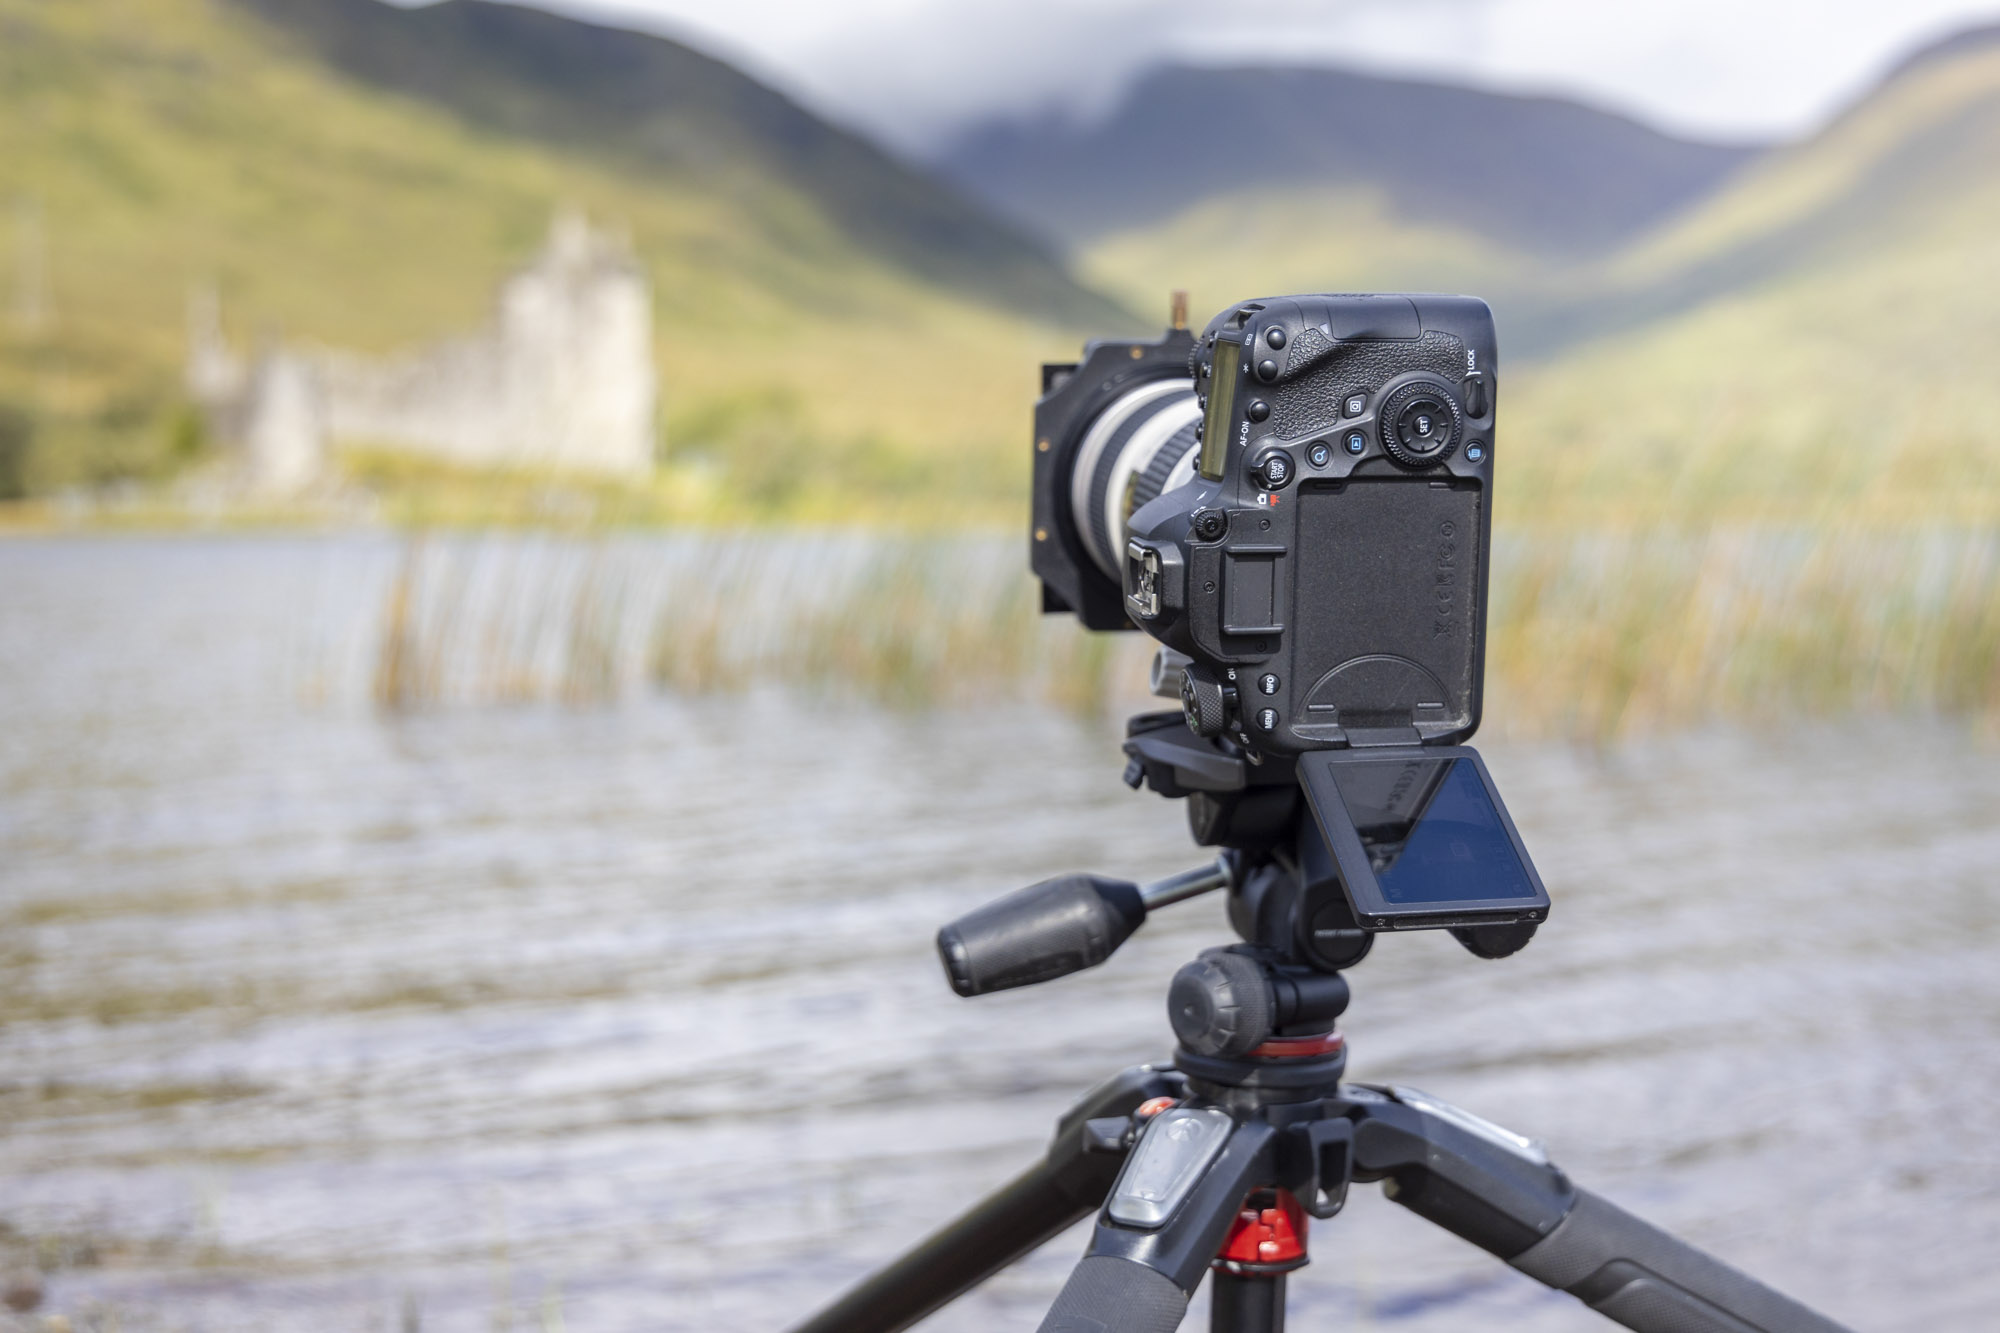
When shooting a landscape you often have plenty of time to spare as you sit and wait for the perfect light to materialize (more on that in the next step). This means you can really take your time to set up on a tripod and perfect your composition. A locked-off sturdy tripod removes any vibrations from handheld shooting so you can get sharper shots.
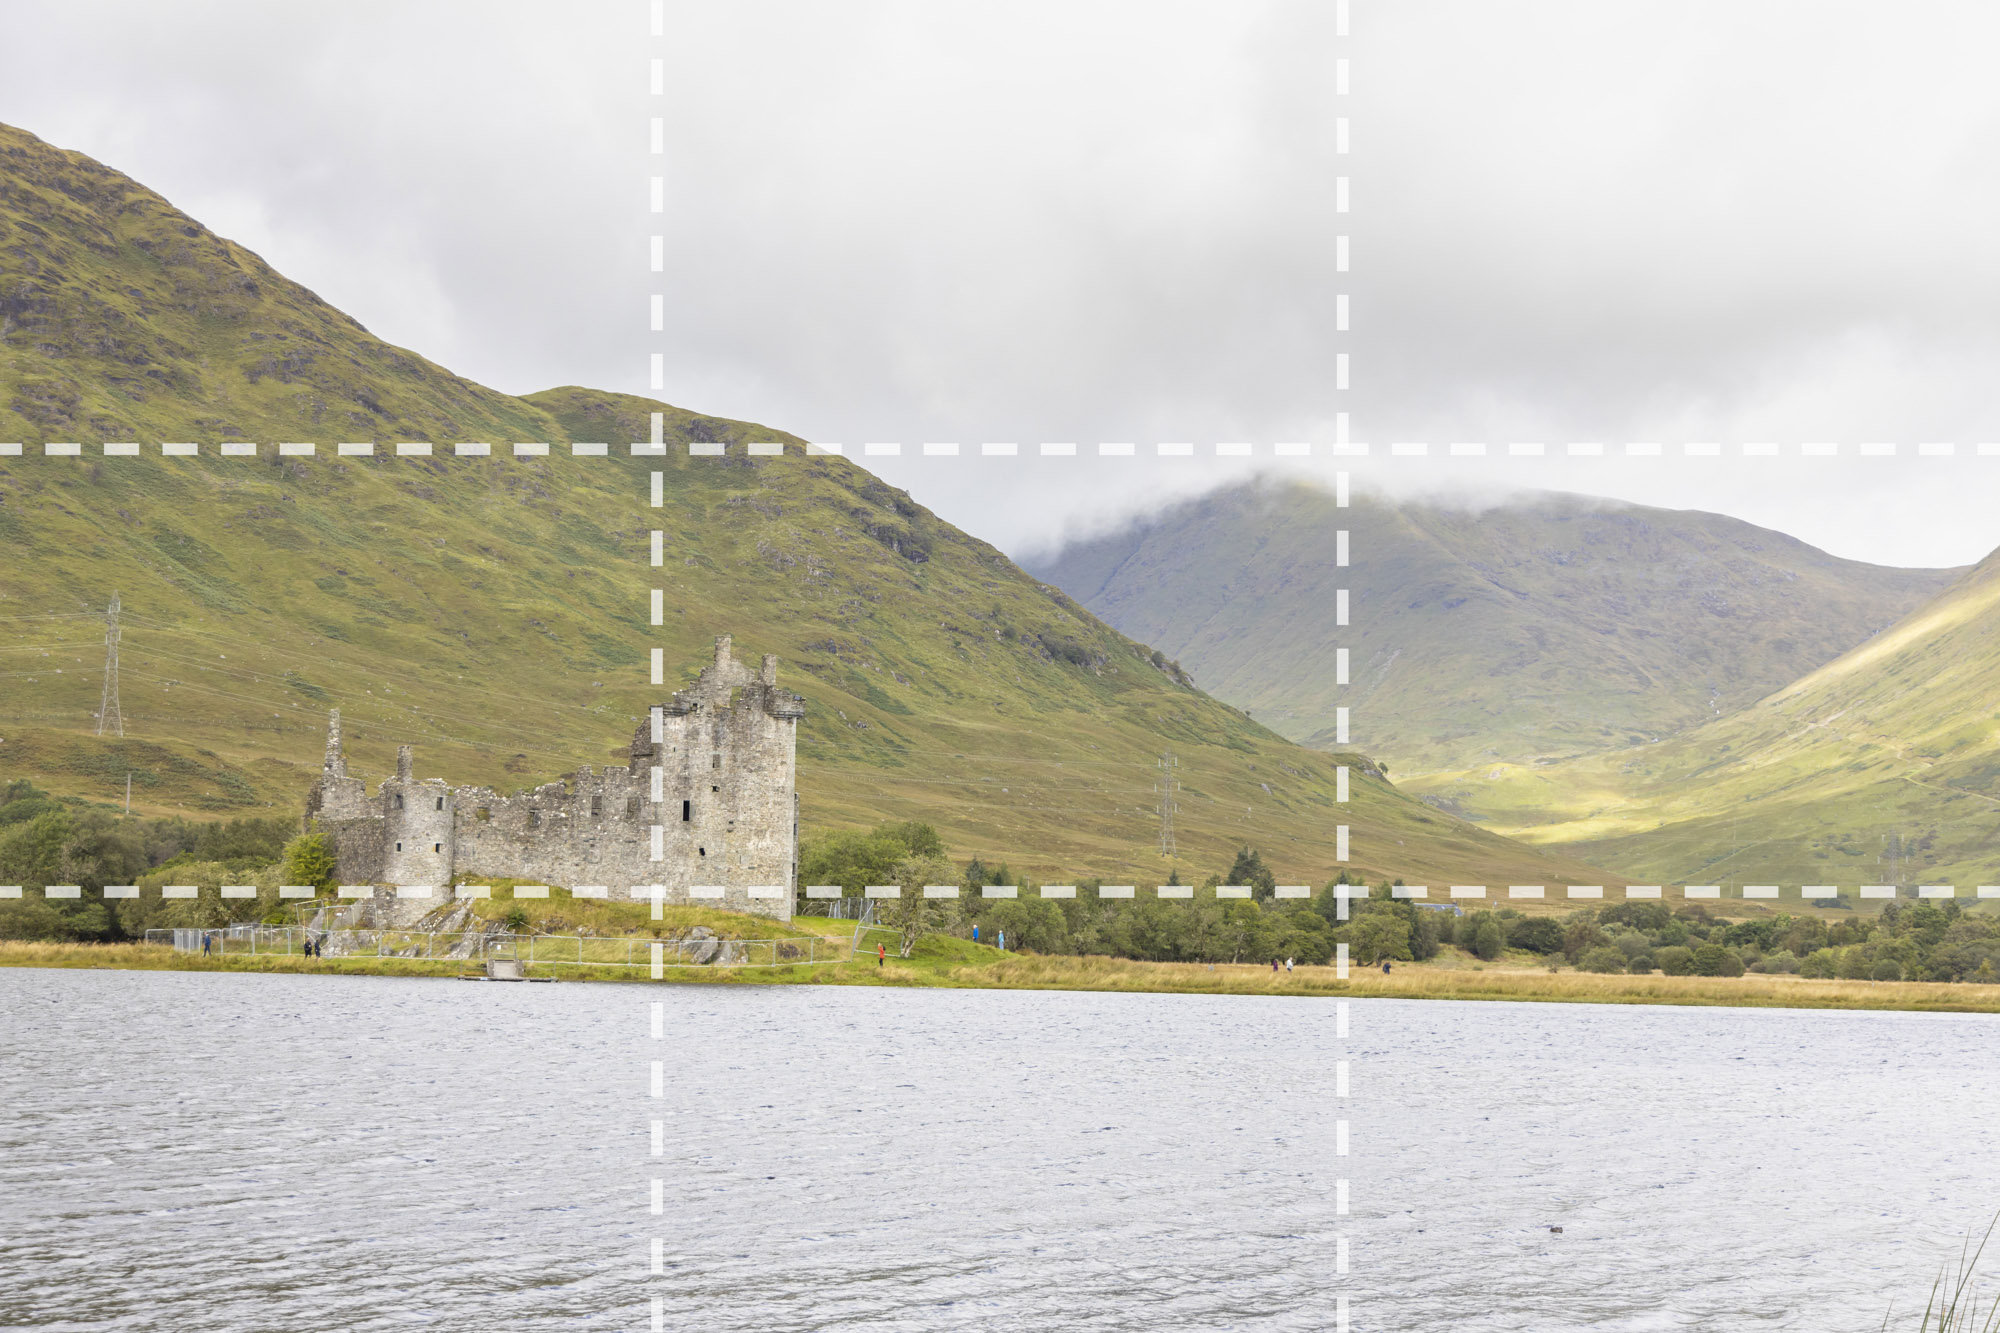
Go into Live View and compose your shot, making sure the horizon is perfectly level. The rule of thirds is a classic trick you can use when composing to enhance your landscape scenes as it helps offset your focal point so it isn’t in the middle of the frame. You can also enable the 3x3 Grid Overlay on many Canon EOS cameras to see the rule-of-thirds grid in Live View.
2. Be patient
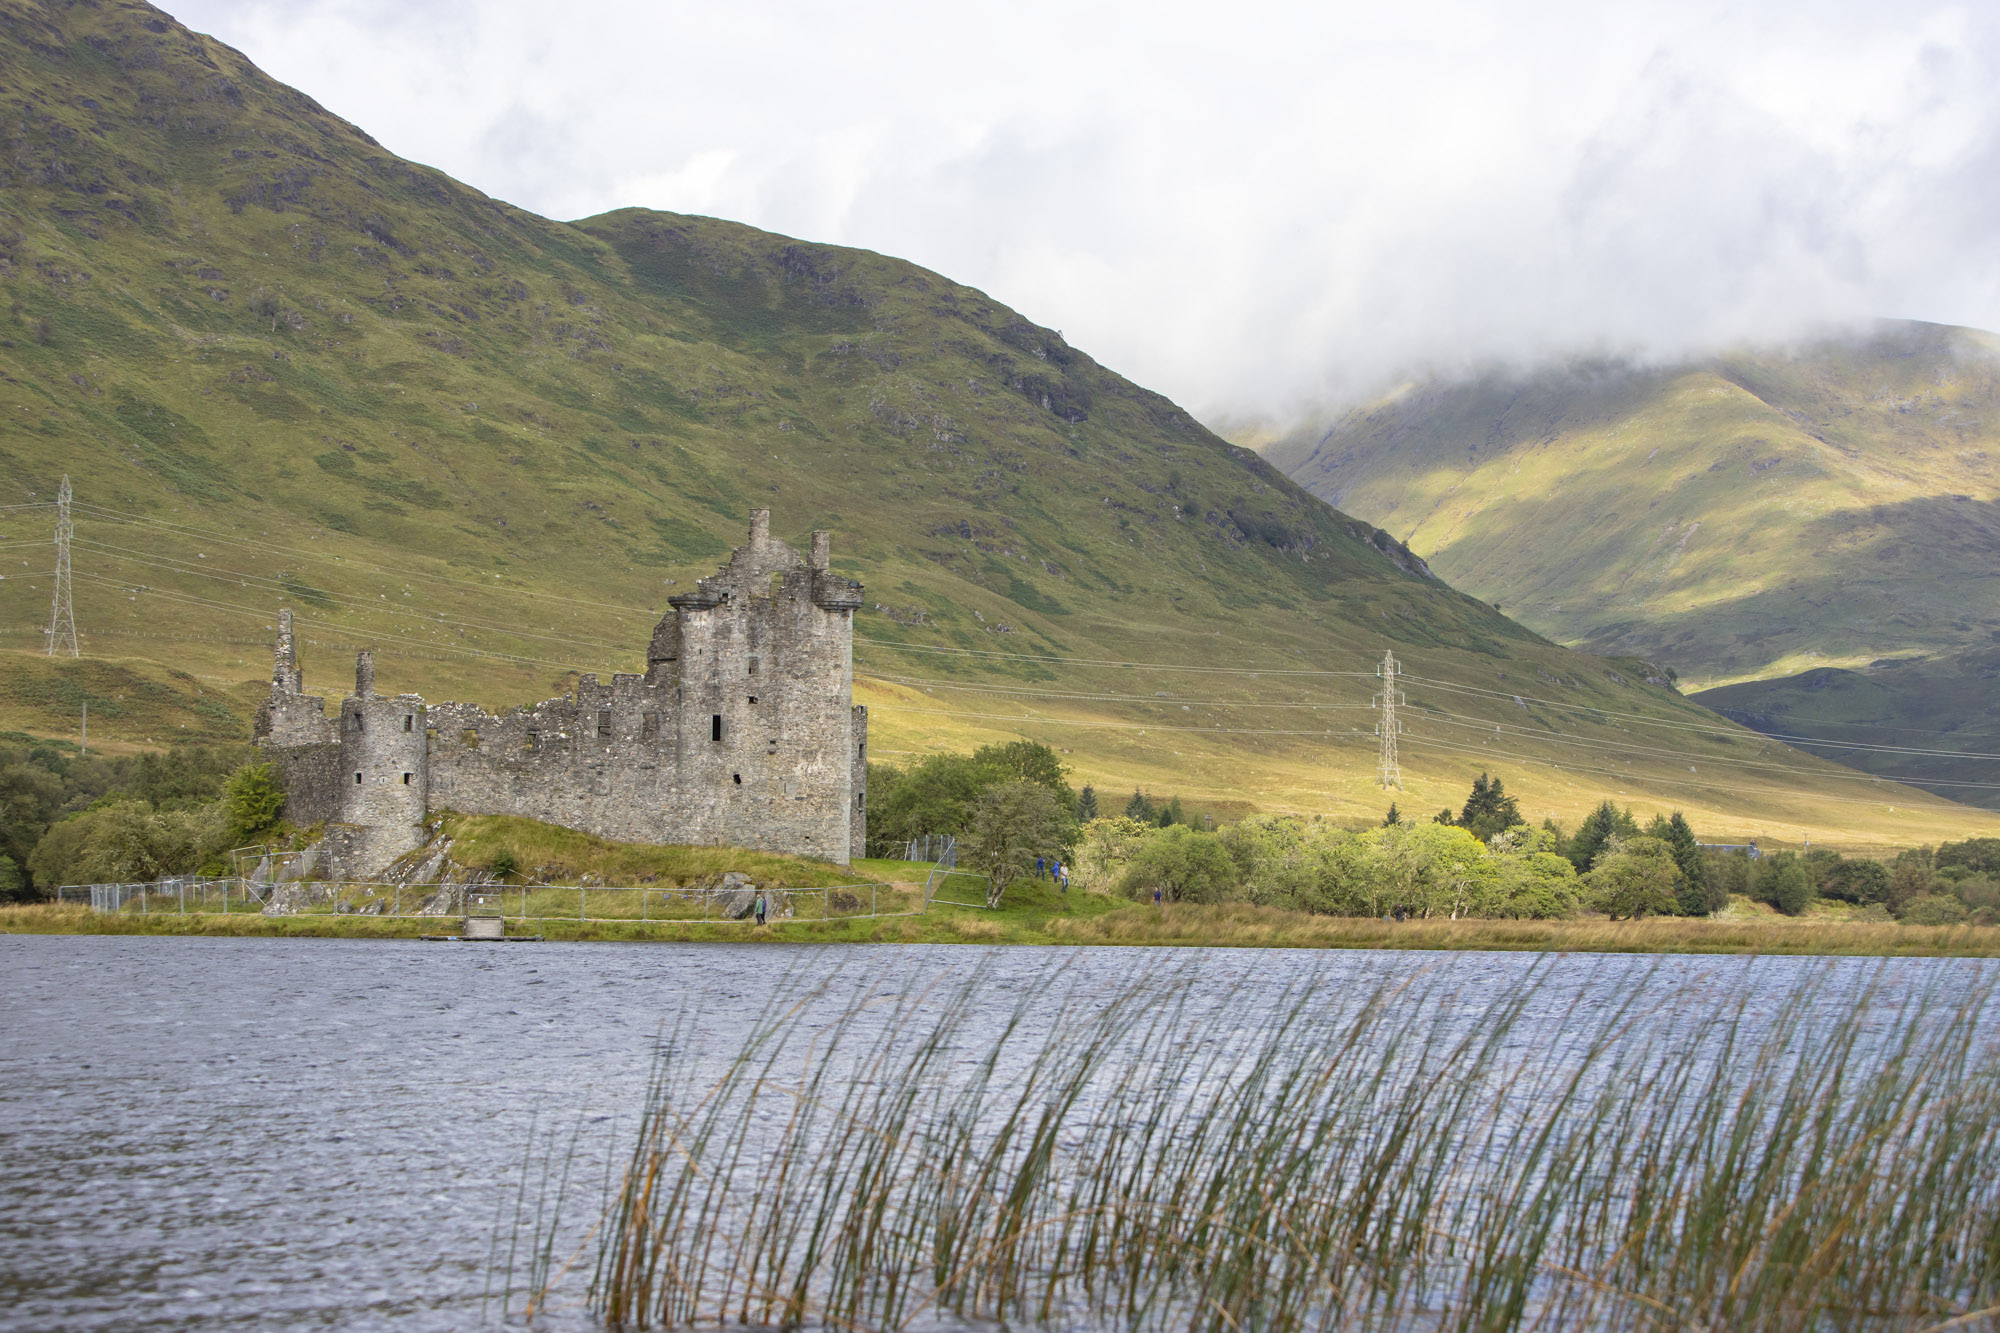
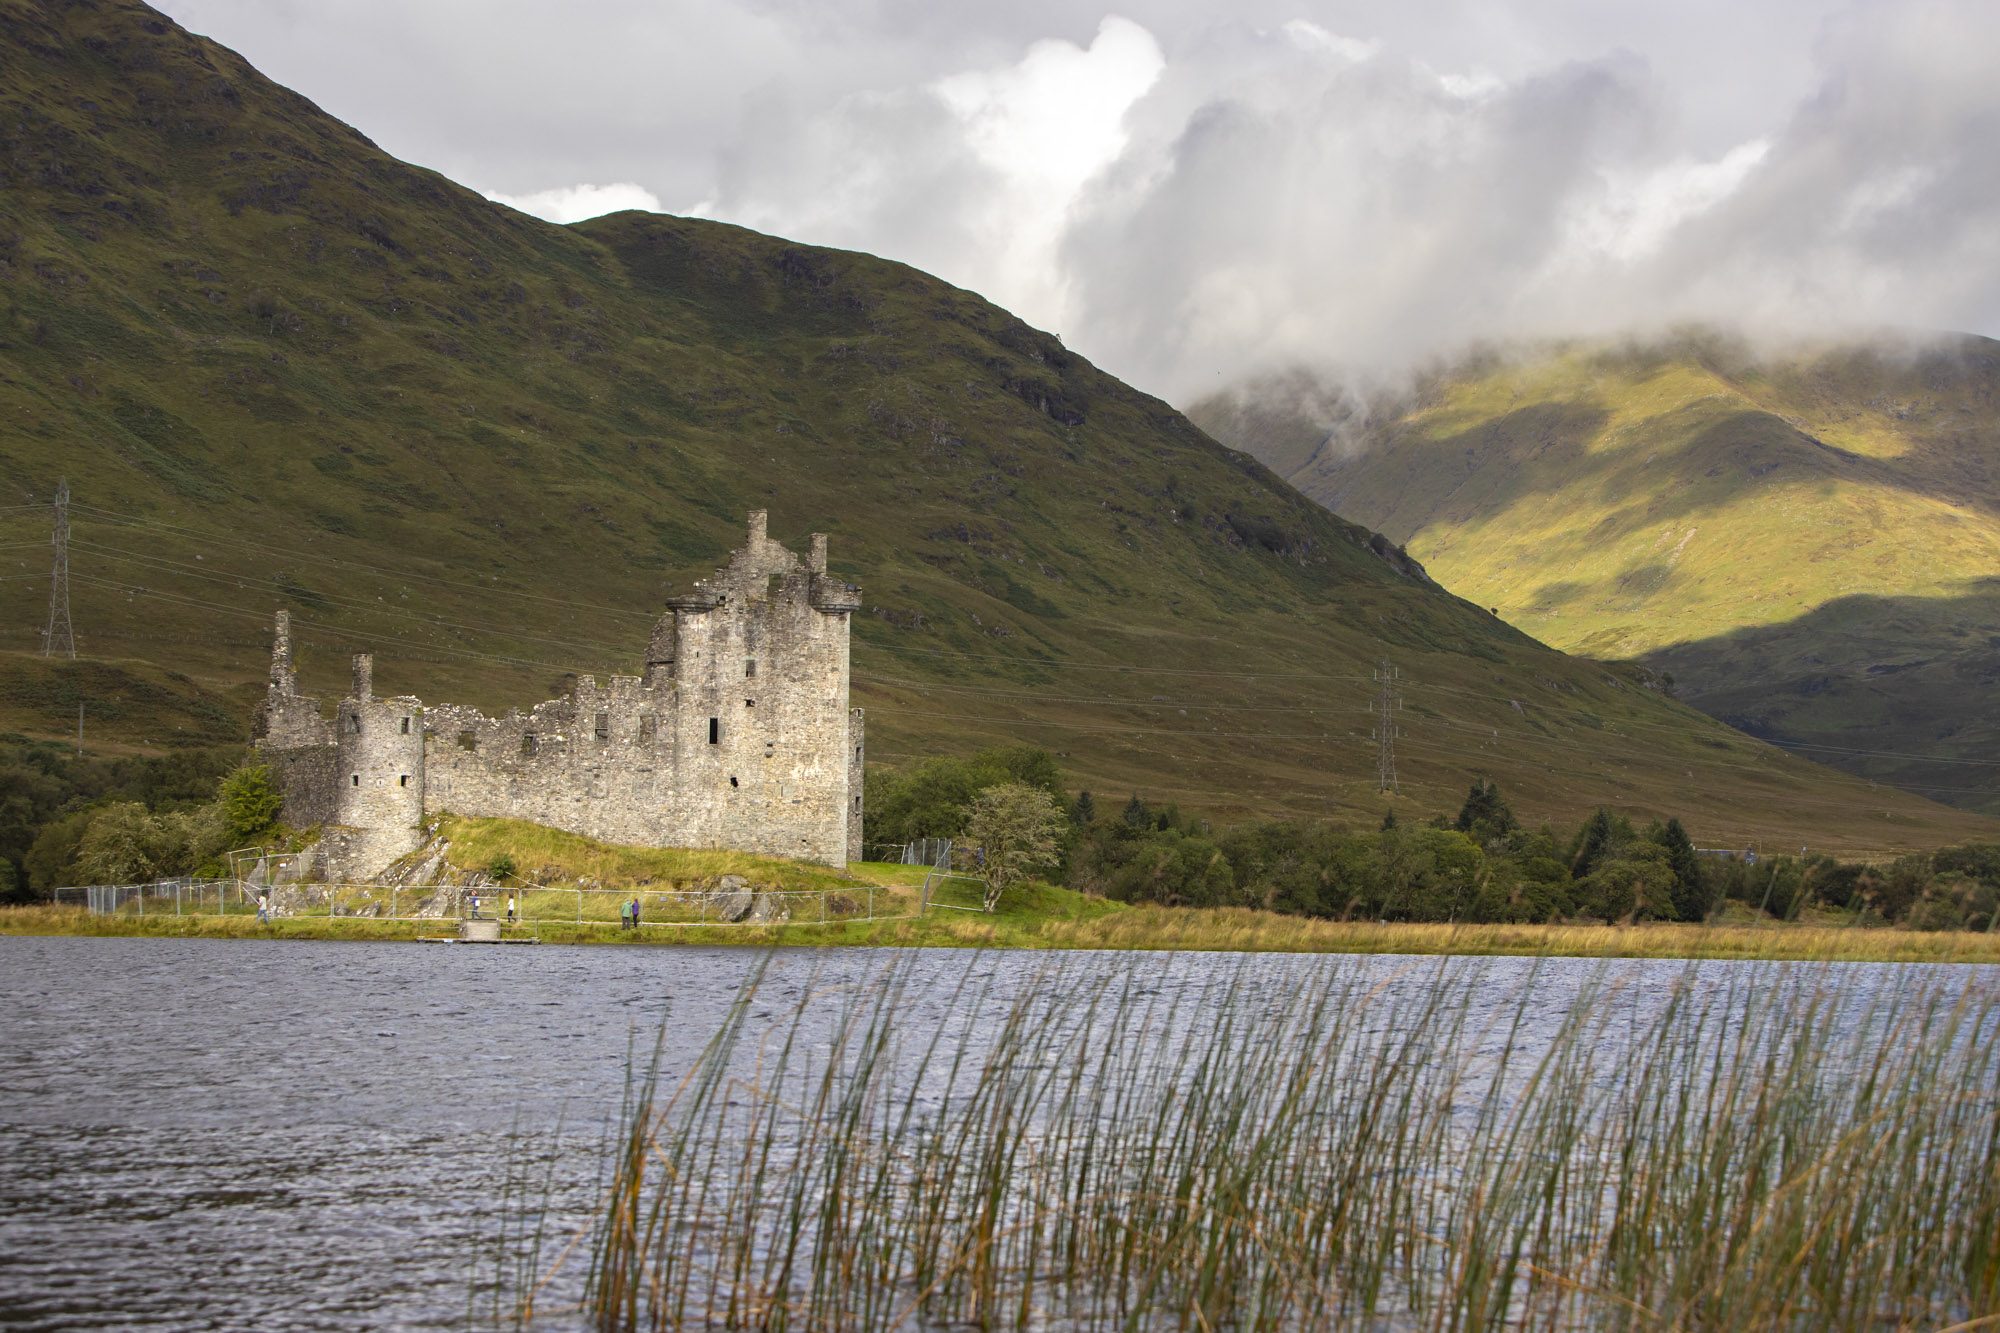
Light can change quickly when shooting landscapes, especially on overcast days when the sun can suddenly break through cloud cover and bring your scene to life. While taking our shots of Kilchurn Castle, the light changed dramatically within a matter of minutes, so it always pays to be attentive and ready to take the shot.
A small opening appeared in the clouds and seemingly spot-lit our castle, leaving the hills behind in shadow which looks much more striking than the flat light we had before. The quality of light will also change throughout the day, when the sun is overhead in the middle it can look harsh and unflattering, while at sunrise or sunset you have the blue and golden hours which are generally much more photogenic.
3. Use long exposures
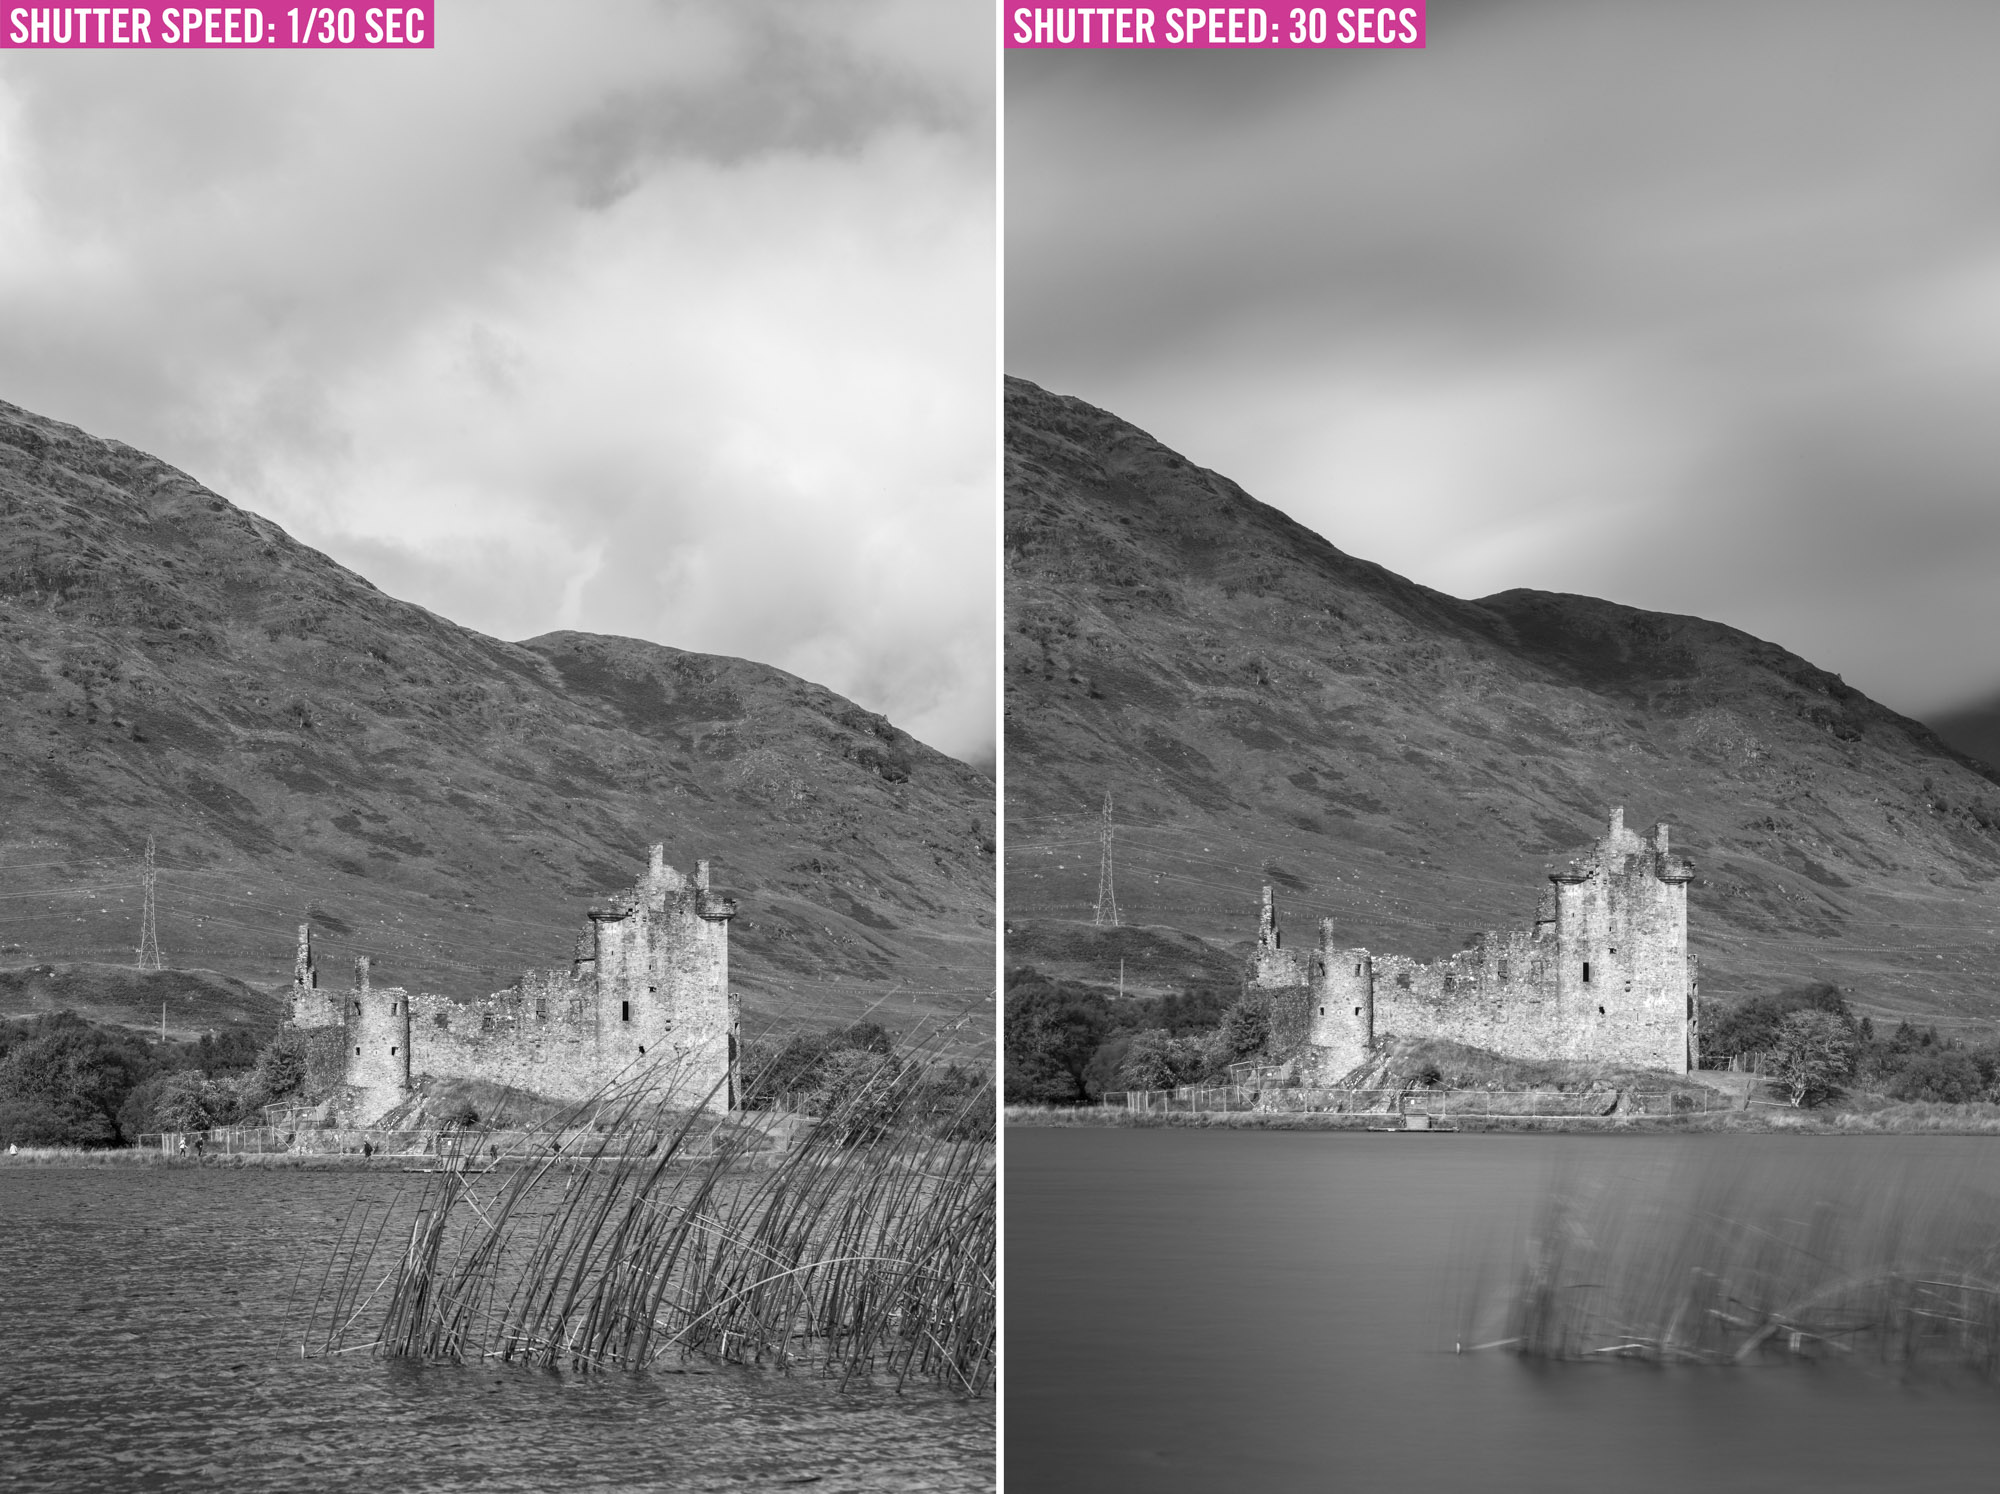
A great way to change up your landscape shots so they look more professional is to experiment with your shutter speed. Shutter speed is a core variable on the exposure triangle, alongside aperture and ISO sensitivity. The light levels in daylight are usually too bright to achieve a long exposure, even on cloudy days.
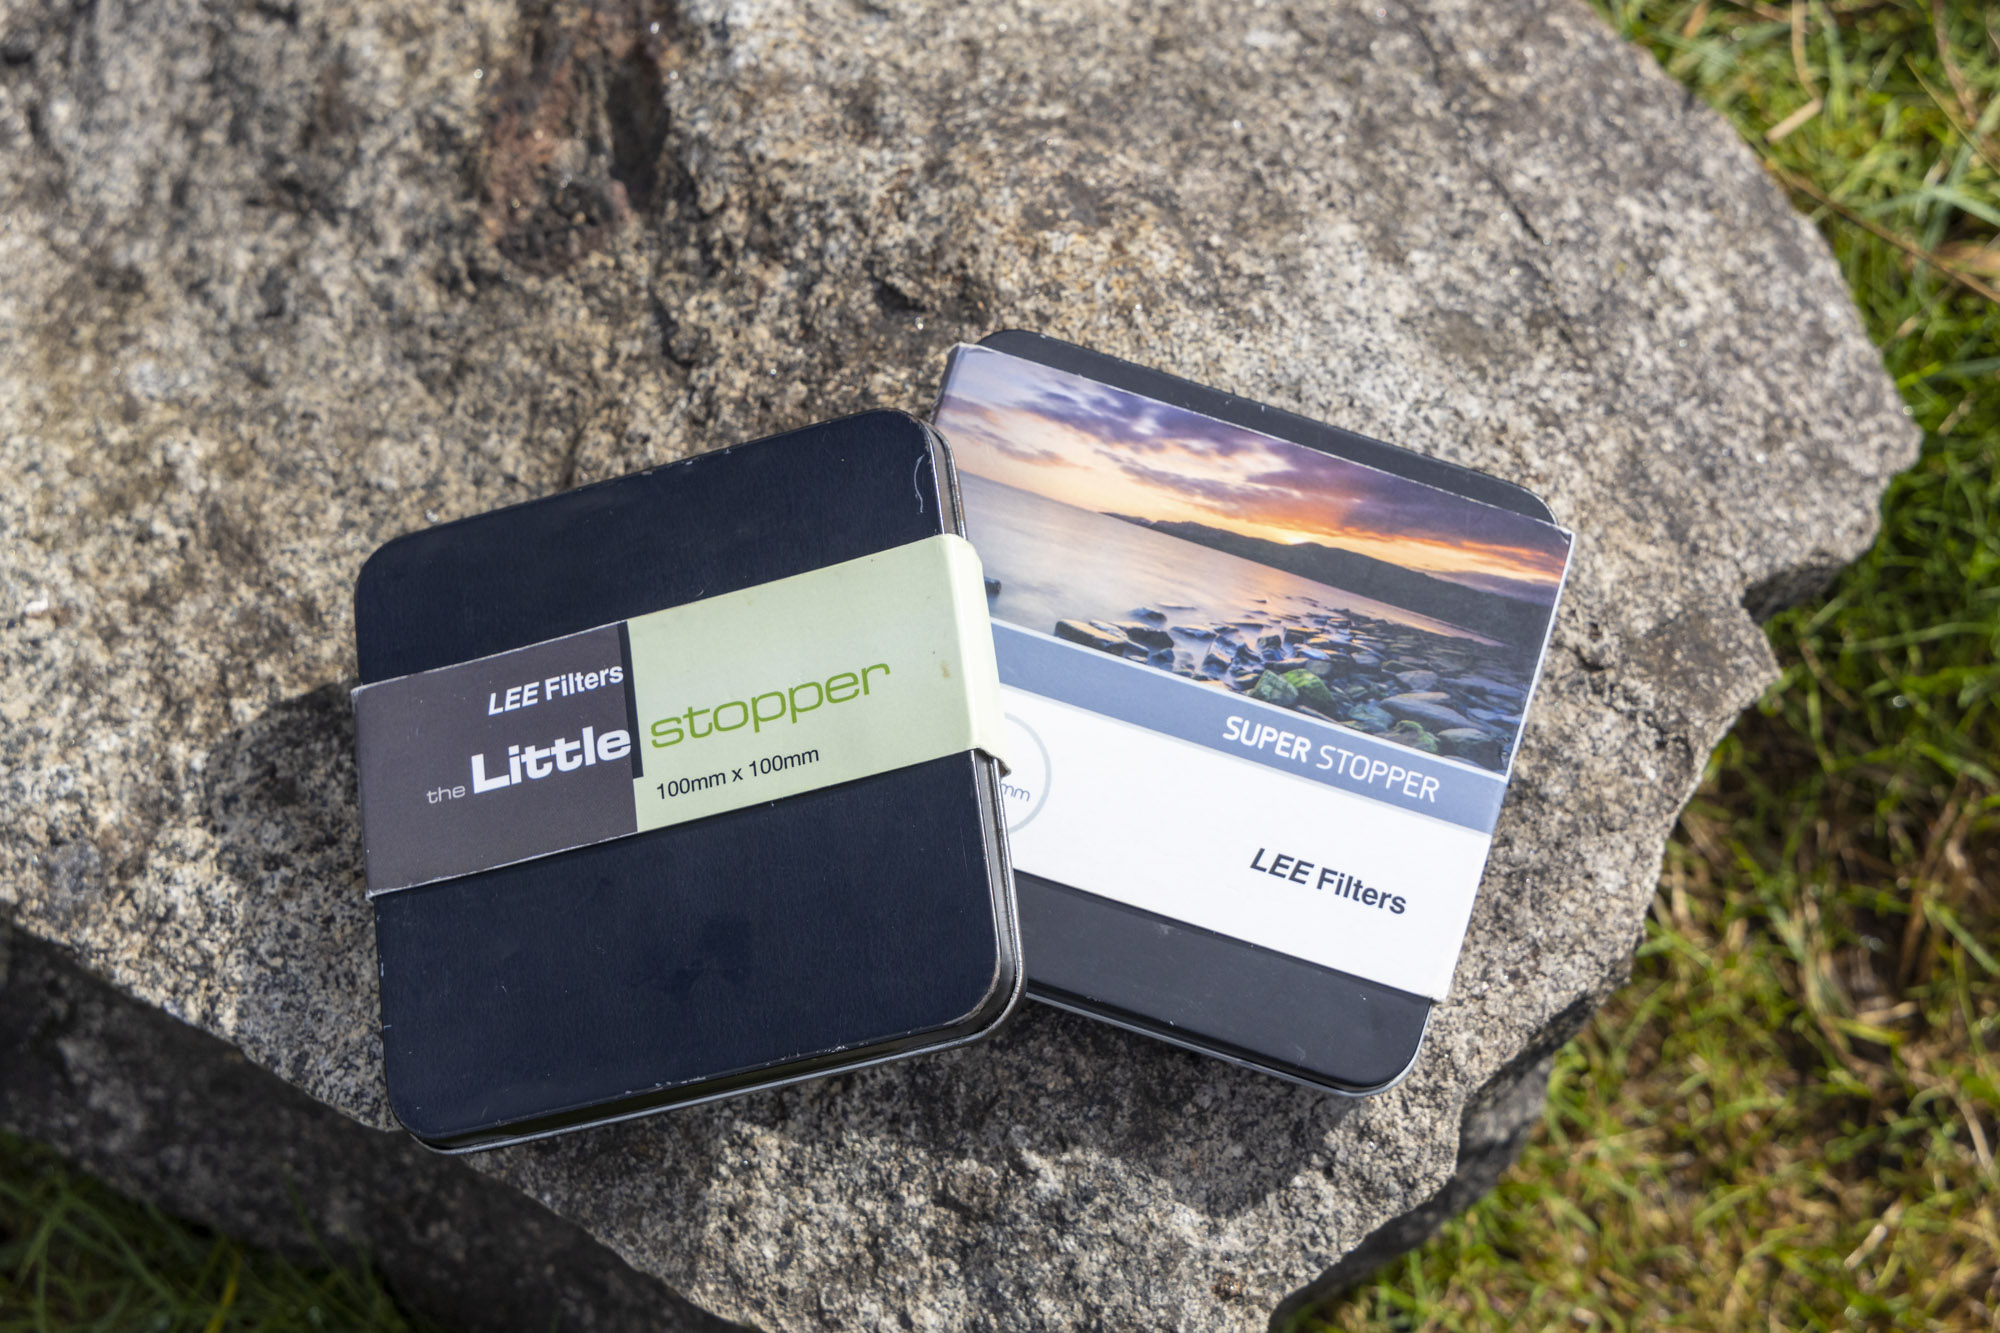
So it can be worth investing in a Neutral Density (ND) filter which attaches to your lens and blocks out some of the light, a bit like sunglasses, and allows you to lengthen the exposure. In the examples, you can see that a regular shutter speed of 1/30 sec has frozen the clouds and ripples in the water, while slowing it down with a 10-stop ND to 30 secs has added an ethereal blur.
4. Watch horizontal and vertical lines
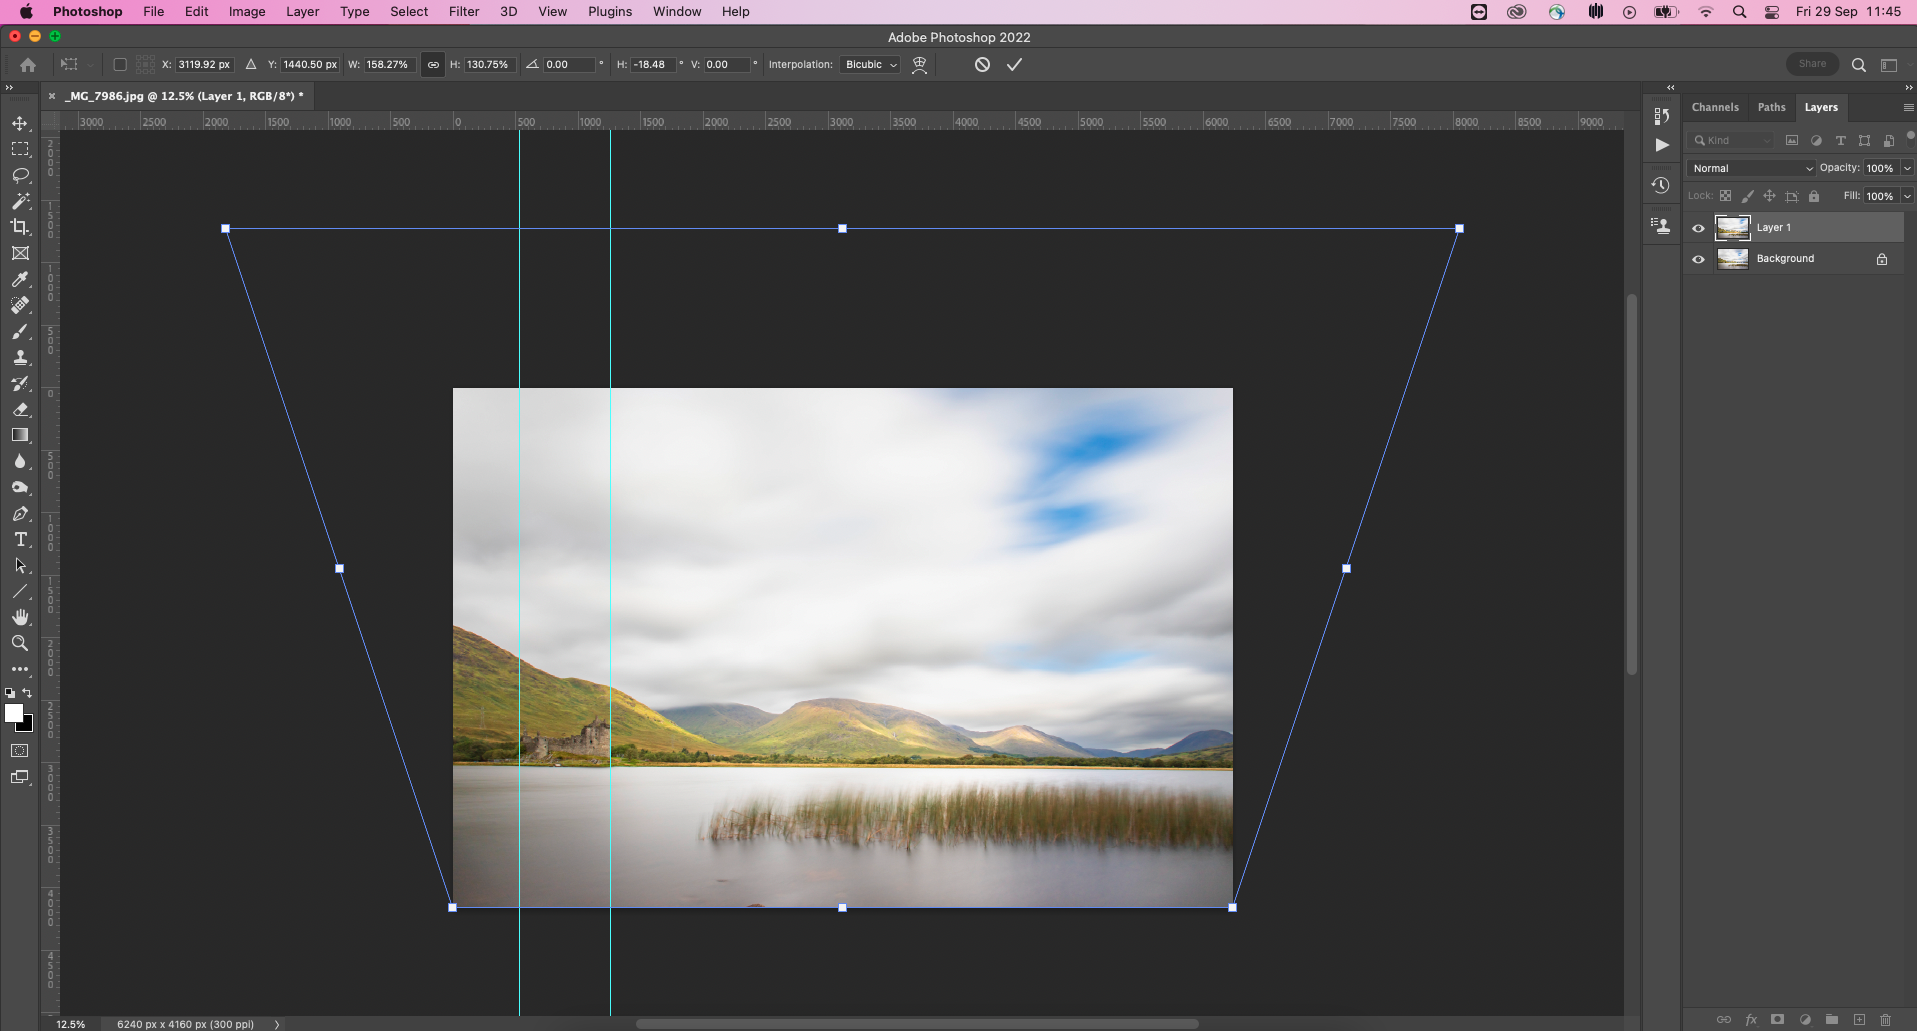
Converging verticals are when straight lines of buildings appear to lean inwards. This is most apparent when shooting with a wide-angle lens and positioning a building off-centre, or shooting from a low perspective.
To fix this, open your image in Photoshop and press Ctrl/Cmd+J to duplicate your image, then hit Ctrl/Cmd+T to go into Free Transform mode. Hold Ctrl/Cmd+Shift+Alt and pull one of the top corner handles of the bounding box out until the verticals are straight. You’ll then see the image looks a bit squished, so hold the Shift key and drag the top middle handle upwards to stretch it up.
If you're serious about scenery, take a look at the best cameras for landscape photography along with the best lenses for landscapes.