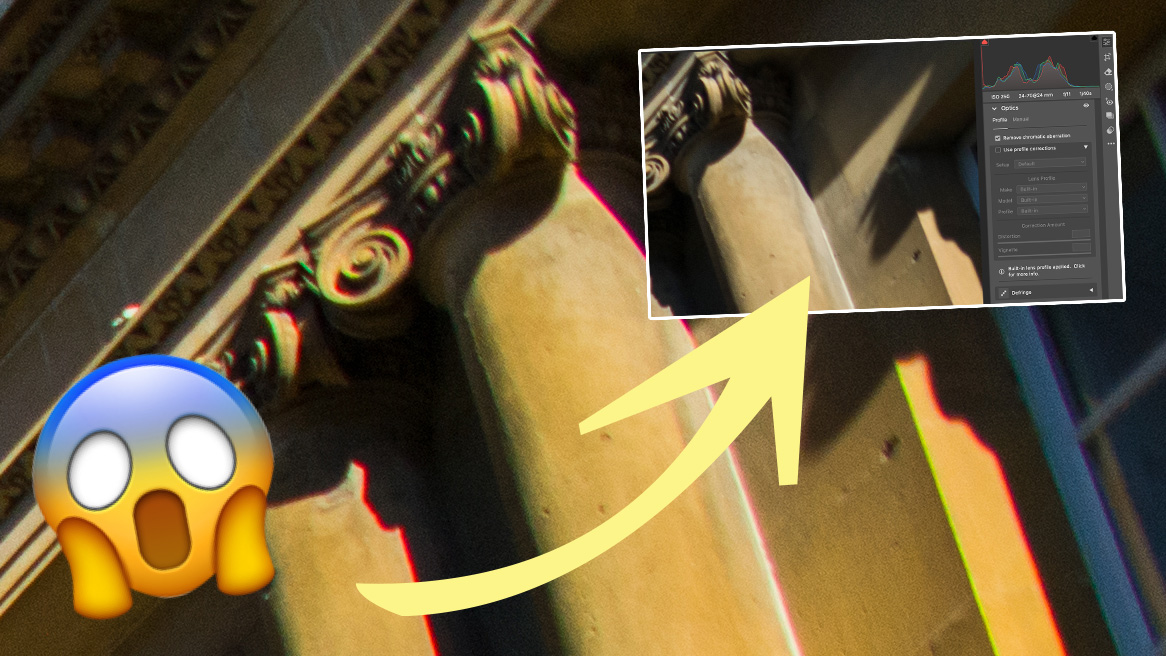
Ever noticed rainbow-colored halos around the edges of objects in your photographs? This is known as chromatic aberration or color fringing. Typically, it’s only visible if you look really hard or zoom into an image, but in some cases it can be quite prominent.
Thankfully, modern lenses are extremely good at avoiding optical anomalies and distortions like chromatic aberration, so it’s far less prevalent than it used to be. In addition, the best photo editing software has gotten mighty good at removing it from photographs in one quick, via clever AI.
Still, chromatic aberration is definitely something to be aware of. Here's everything you need to know…
Why does chromatic aberration happen?

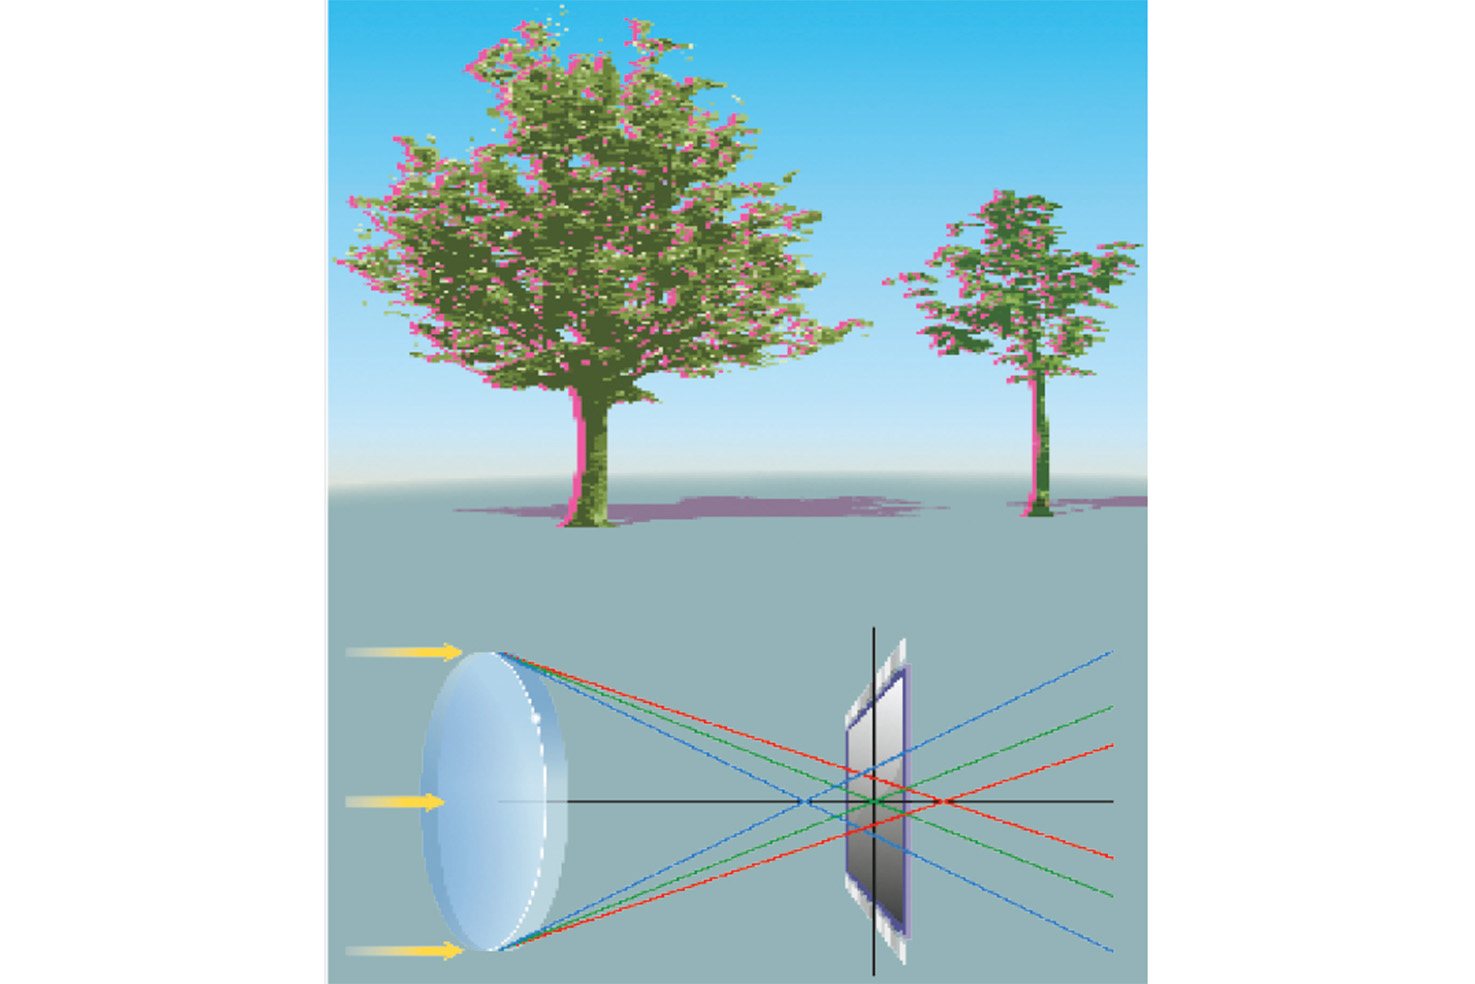
Chromatic aberration (also known as color fringing) occurs when different wavelengths of light are refracted at different angles as they pass through a lens element. This prevents the wavelengths from arriving at the same focal plane as the camera’s sensor, and since different wavelengths represent different colors, this results in the lurid fringes we’d all rather avoid.
This effect is amplified at both wider apertures and the longest or widest focal lengths of a zoom lens. Lens manufacturers work hard to avoid chromatic aberration and other distortions by using various mixes of lens elements and specialist lens elements, such as the best Nikon lenses' Super ED and Short-wavelength Refractive glass. Back in 2012 the, then, best Canon cameras, the Canon EOS-1D X and Canon EOS 5D Mark III debuted tech that could remove chromatic aberration in-camera.
But all lenses are susceptible to at least some chromatic aberration, even if it’s barely visible.
When is chromatic aberration most likely to happen?
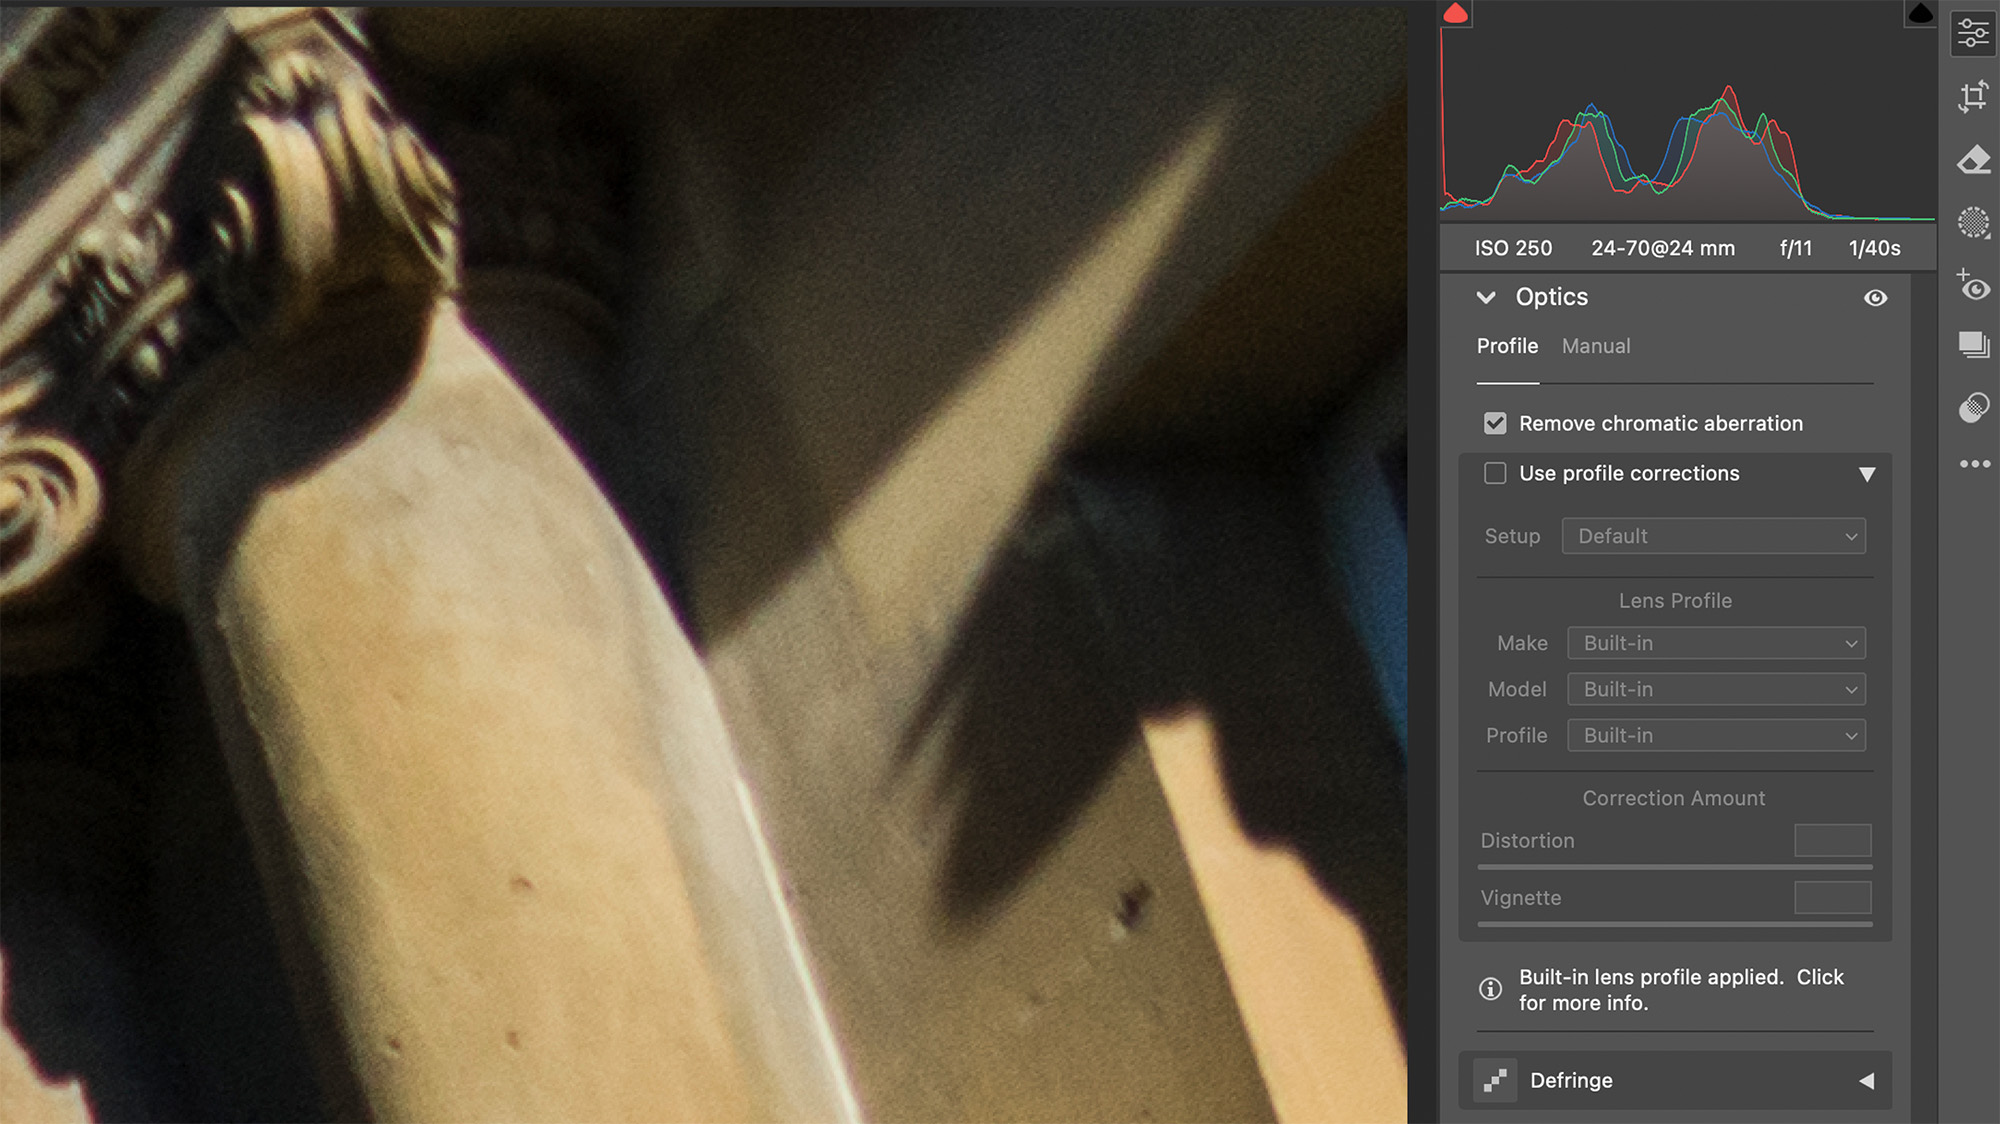
You’re most likely to encounter noticeable color fringing when shooting in high-contrast lighting conditions, but that’s not to suggest you should avoid these situations. Modern editing software has made chromatic aberration easy to remove in post-production. For example, you can remove chromatic aberration using Adobe Photoshop’s Lens Correction filter, but the quickest way to banish fringing is to check the Remove Chromatic Aberration checkbox in either Camera Raw's Optics panel or Lightroom Classic’s Lens Corrections panels. Photoshop comes into its own if you want to selectively edit your shot or remove stubborn examples of color fringing via layer masks.
Ultimately, chromatic aberration is nothing to worry about. You’re more likely to encounter it when using older lenses, but editing software has gotten so good at removing it, that it’s essentially breathed new life into some vintage lenses. I have an old Nikon AF-n 28-85mm f/3.5-4.5, which is as sharp as a tack but suffers from extreme chromatic aberration and the ability to quickly remove color fringing has put it back into rotation over the past few years.
It can be easy to overlook chromatic aberration when you’re editing multiple shots, particularly if it isn’t too obvious, so it’s worth getting into the habit of zooming into areas of high contrast and checking for it. I tend to check Remove Chromatic Aberration while working in Adobe CC as a matter of course. While subtle color fringing might go unnoticed on Instagram or your website, it will be much more noticeable should you decide to produce a large, high-quality print.
How can you fix chromatic aberration?

Most modern photo editing software allows you to correct a variety of lens distortions in one click. For example, both Adobe Camera Raw and Lightroom feature similar Optics and Lens Correction panels, respectively. The Remove Chromatic Aberration checkbox does a good job of automatically removing color fringing, while the Defringe sliders in the Manual tab allow you to refine the effects further.
You might also like...
Looking to upgrade your photo editing abilities even more? Discover how I perfect colors the easy way with HSL sliders in Affinity Photo.
And learn how to use Photoshop's High Pass Filter to selectively sharpen your photos like a pro.


