If you’ve been hearing never-ending chatter about moving to Linux – some of it from me – you may be wondering why. Part of it is that Linux, and its open-source software just keeps getting better. But the other part is that many of us are moving away from vendors that are increasingly harder to work with. Apple, Adobe and Microsoft are all suffering the same unforced error: Greed.
In this article I'll be running through some of the reasons to download Ubuntu Studio, an open source content creation studio that runs on Linux, then installing it on three different machines to show how easy it can be. I'll finish with a quick tutorial to allow you to do it yourself. For other software advice see our best photo editing software guide, and my recent review of open source photo editor Gimp 3.0.
How Apple, Adobe and Microsoft are failing you
Linux is a great platform. But it isn’t that much better than OS X or Windows was in their prime, which many will agree was some years back.
Go back 10-15 years: Apple Macs used to be expandable, as most other computers still are. But now memory and even hard drives have been made impractical to upgrade. Mac Pro towers used to be somewhat affordable. Now they start at $7,000US and hit almost $13,000 with all standard options. And that’s for an M2 without a monitor!
Adobe promised its subscription model would benefit their customers. There’s no denying that never became true, and yet their monthly fees still keep going up, up, up. Currently Creative Cloud costs $720US/year. And that’s every year, until you retire.
Linux has a built in software store, except all the software is free and open source.
Microsoft, after many good years, has been flailing. There are advertisements in Windows, they added Recall that many call spyware. They have also taken a page from Apple’s playbook and disqualified millions of perfectly good computers from upgrading to their latest OS.
If you run an older Intel Mac then you know support has already stopped. M1 Mac support is due to end in the near future. And Windows 10 support will be winding down in 2025. Are you eager to toss your perfectly functioning computer and buy a new one?
Maybe you’re fine with all that, eh? But if not, Linux may be calling.
Linux is Calling
By comparison, Linux and open-source software just keep getting sweeter: Installation has gotten easy. Similar to installing either Mac or Windows.
Most versions of Linux have a built in software store for downloading and automatically installing a huge range of software. Just like the Mac and Windows stores, except all the software is free and open source.
If you are terminal-phobic, no worries. Command-line is largely a thing of the past. It’s far faster and more efficient than the other systems, so your computer, even an older one, may feel even faster than when it was new! Every version of Linux is free and easy to download. No more googling for “How to find a free version of (Windows/Mac OS)”.
Why you should choose Ubuntu
In the world of Linux a “distro”, which is just short for a “distribution”, simply refers to a “version” or “flavor” of Linux. Those new to Linux find all the different distros intimidating. But really, it’s hugely liberating! Some Linux distros include Arch, Debian, POP OS, and Fedora.
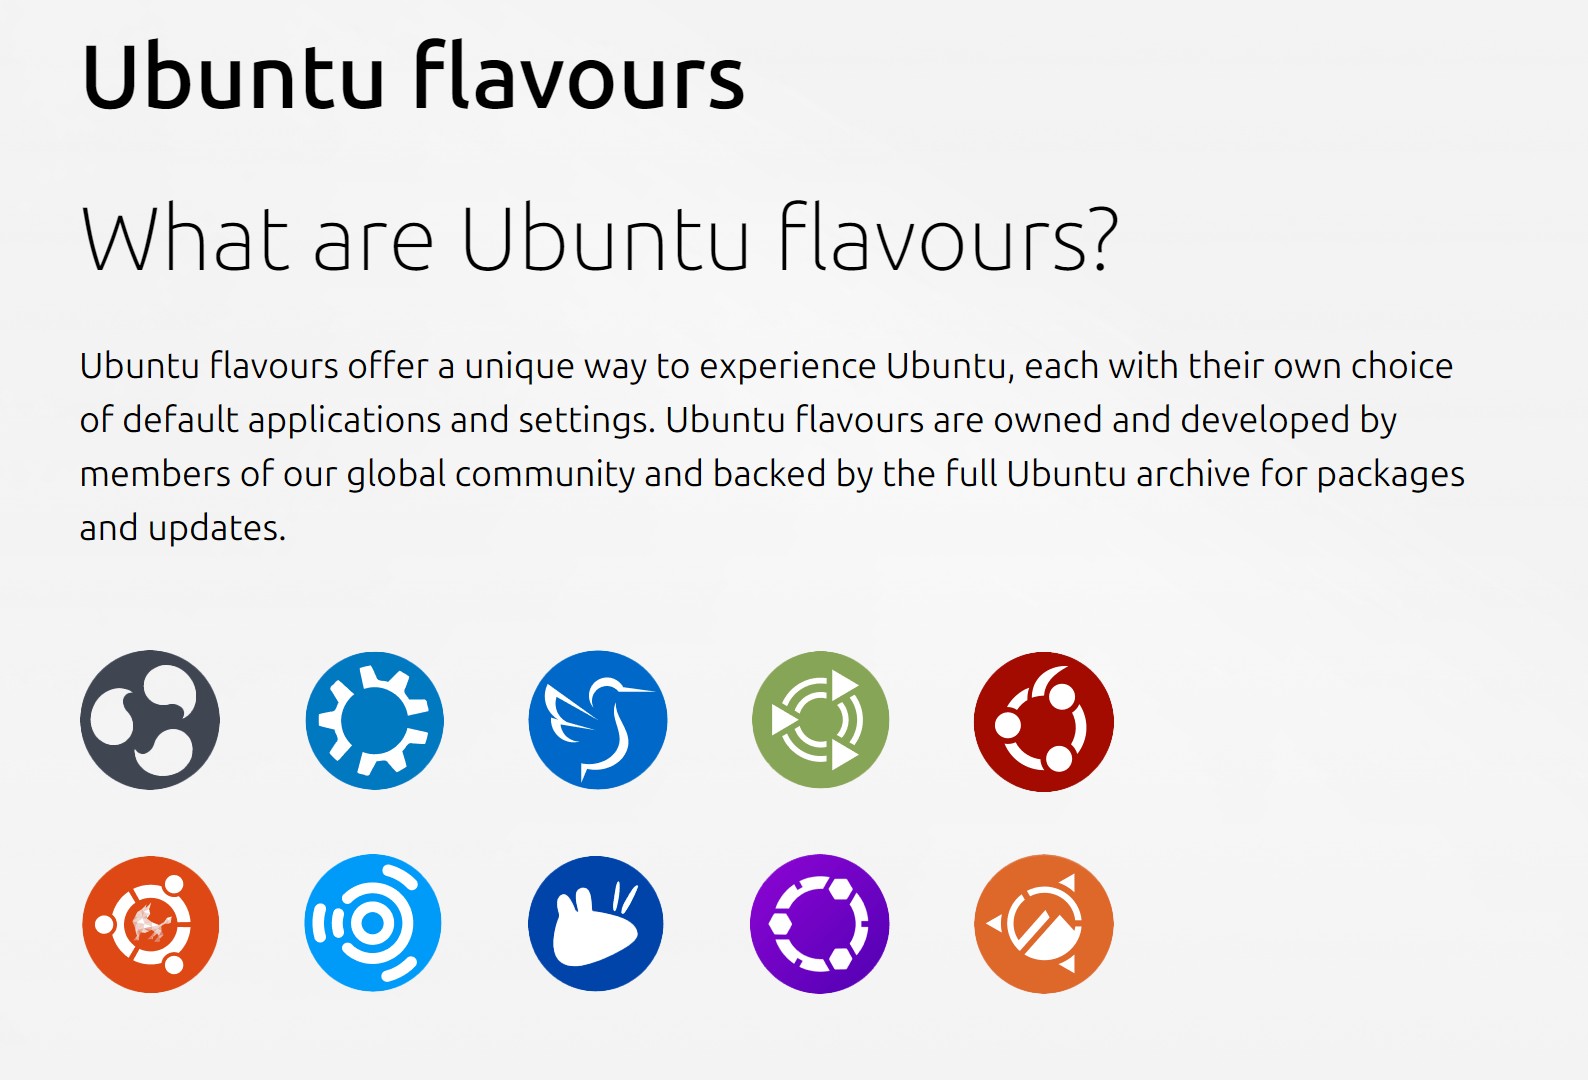
But probably the most popular distro for years has been one called “Ubuntu”, which is an ancient African word meaning “humanity to others”. Cool, huh? Ubuntu even has a number of official sub-distros, each with its own special strength. For example, both Lubuntu and Xubuntu are lightweight operating systems designed to run well on older computers. Edubuntu is a distro designed for use in education.
An Ubuntu for Us
There is also another flavor of Ubuntu called “Ubuntu Studio” (ubuntustudio.org), a distro made just for creatives! When you install Ubuntu Studio it will not only install the OS and the basic office software, but it will also install a tremendous suite of content creation tools. Yes, alternatives to the entire Adobe suite. Programs that run, more or less, like our favorite Adobe apps such as Photoshop, InDesign, and Illustrator. Plus pro-level apps for 3D, audio and photography.
Most of these applications are full-featured and totally capable of professional use and quality. They also read and write their files in the same industry-standard formats. So exchanging files with Adobe based co-workers is mostly a no brainer.
Installing Ubuntu Studio on 3 machines
As mentioned, installing Linux has gotten super-easy. So easy in fact, that I thought we should install Ubuntu Studio on three different systems, each that makes use of Linux in different ways:
10-year old Samsung Laptop: My old Samsung Ultra 14” from 2014. A great computer for years, but it got slow when I upgraded it from Win 8 to 10. Switching to Linux did the trick! Plus it’s nice to have a laptop with the classic I/O ports like USB-A, HDMI and even an Ethernet connection.
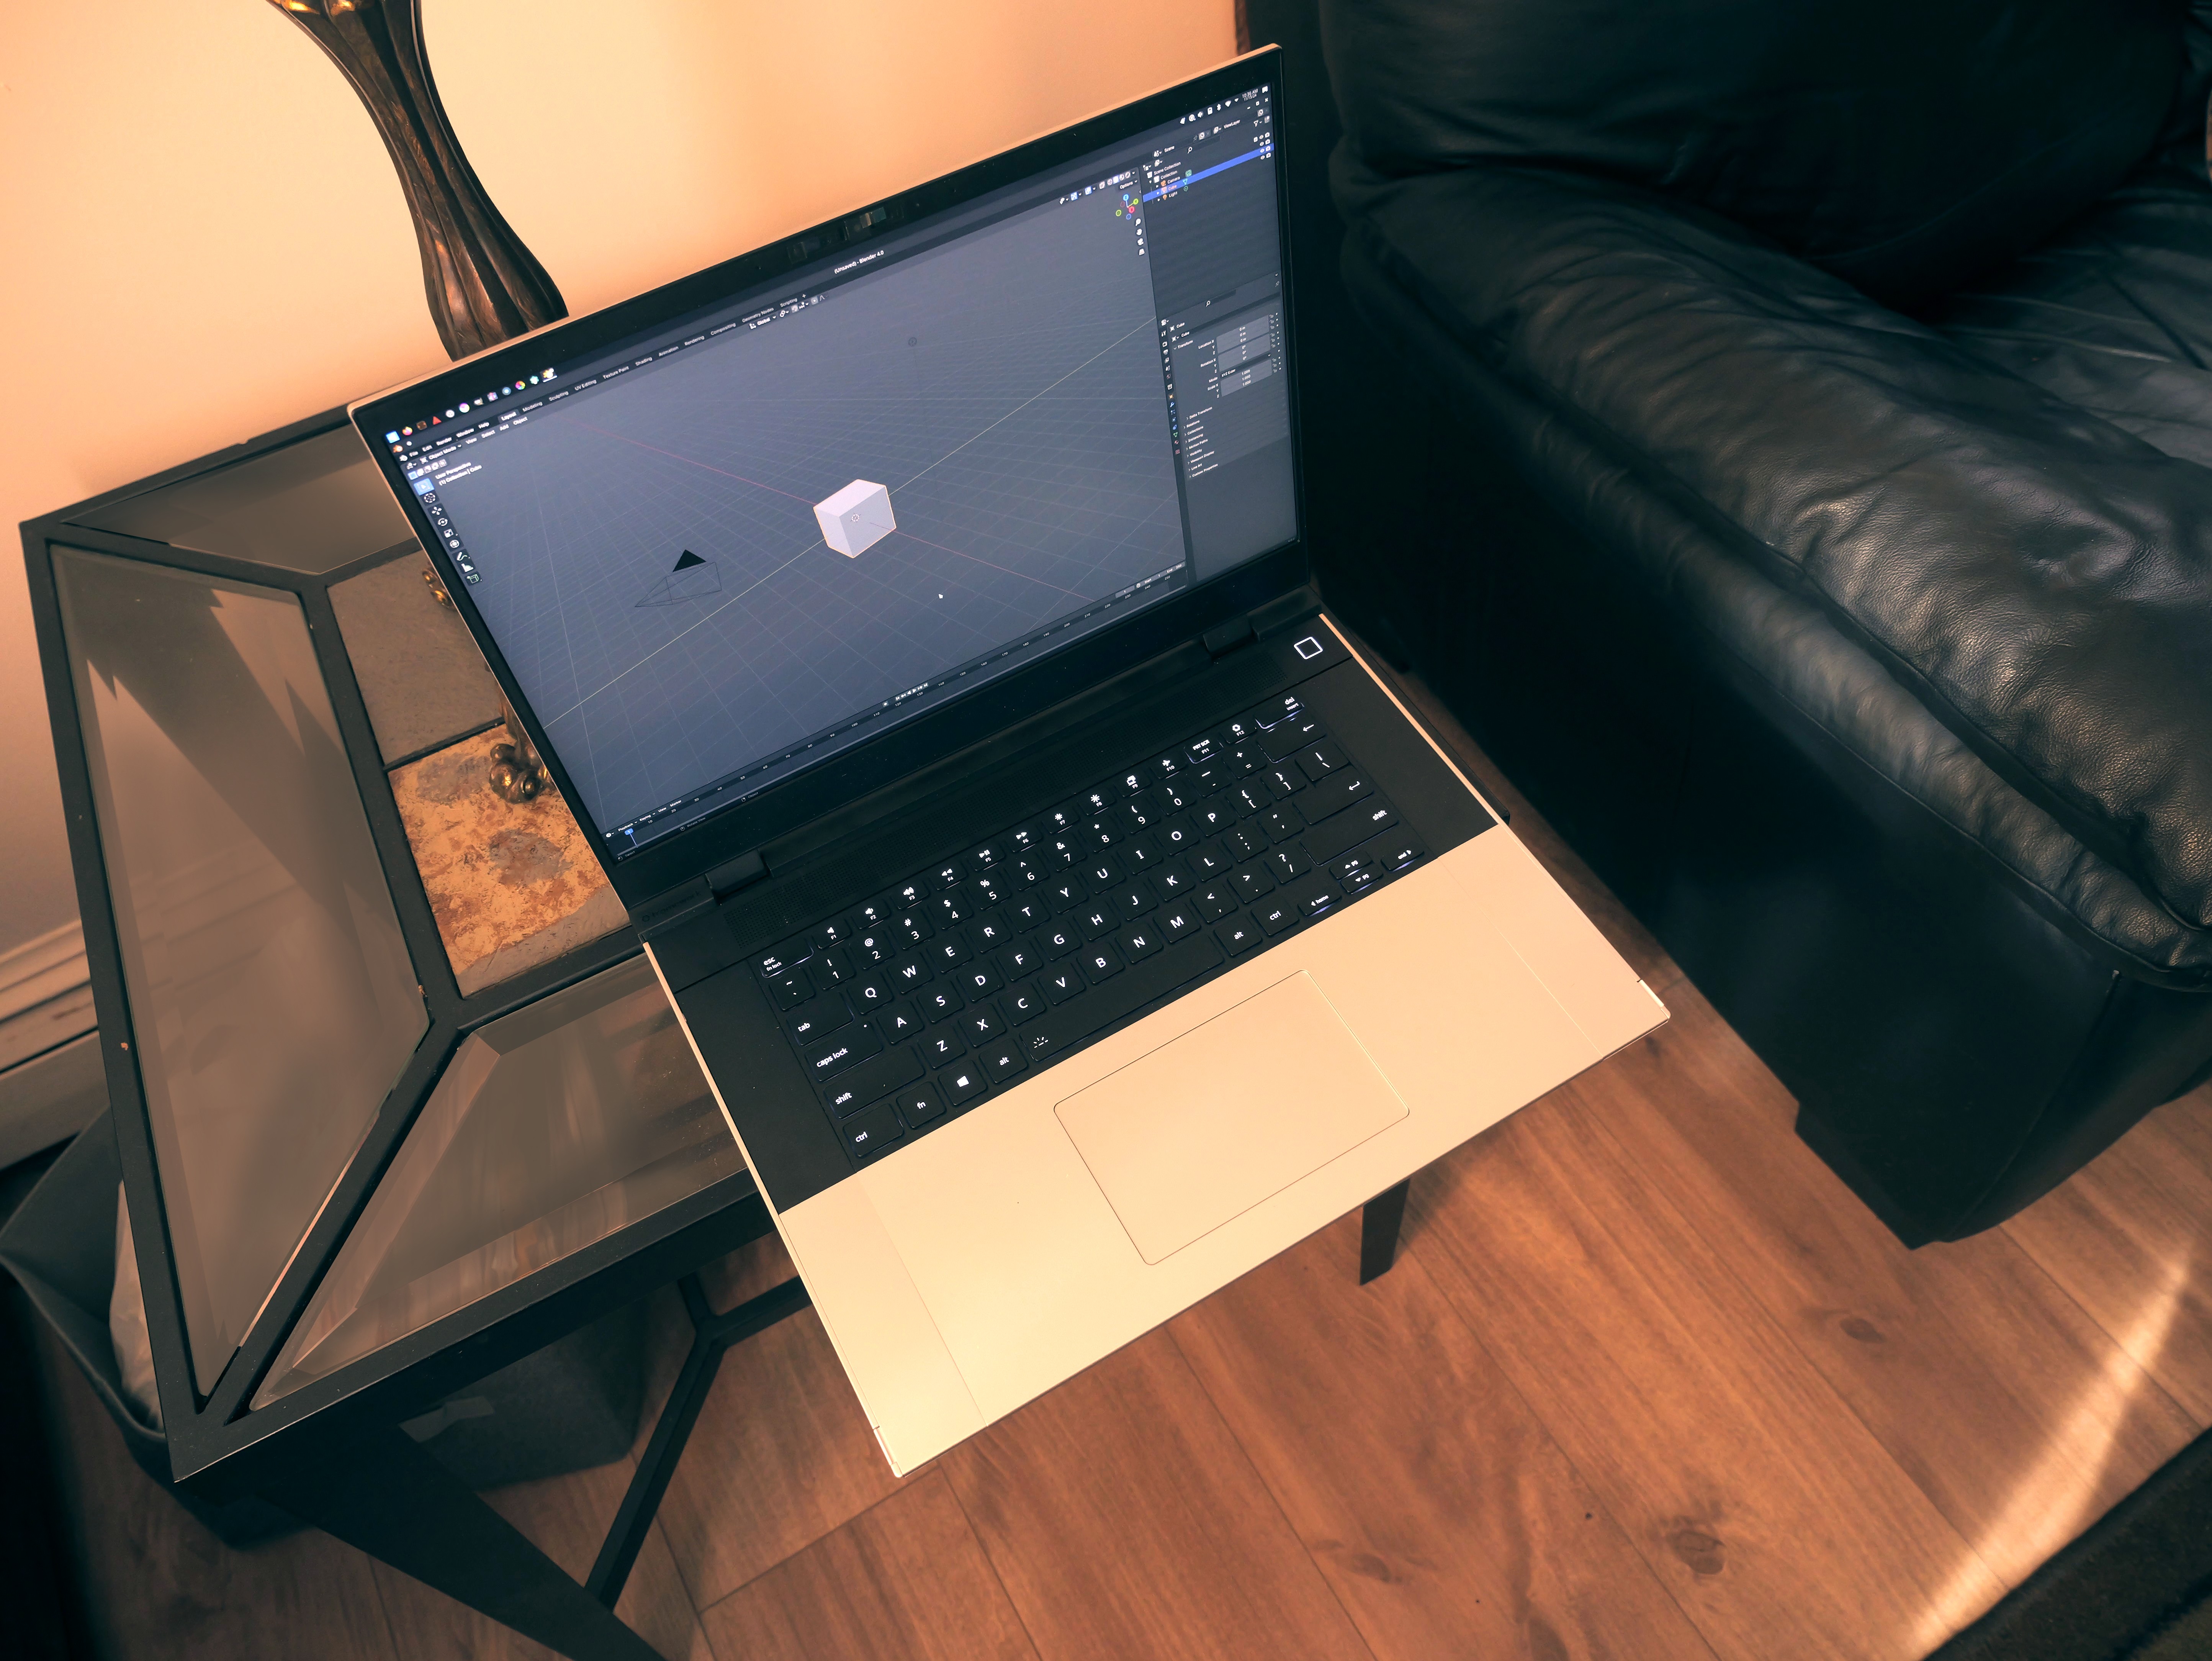
Framework Laptop Workstation: Look for our other articles on Framework computer’s 16” workstation (including when I built my own laptop). With a large screen and good discreet GPU, it feels like a missing link between a laptop and desktop. Ubuntu Studio apps fly on this!
Modern Dell Notebook: Here is yet another way to incorporate Linux. Dell’s super-sweet 13” XPS notebook came with Windows 11 installed. This runs too well to toss, even if I prefer Linux. So this unit will get a super-cool dual boot install. Always a hit at parties!
Macs: We will not be installing on a Mac here. But know that Linux distros should install fine on the older Intel Macs. And new ARM versions of Linux are up and running on M-chip Macs.
How to download Ubuntu Studio
01. Grab a copy of Ubuntu Studio
(Approx. time: 10 minutes)
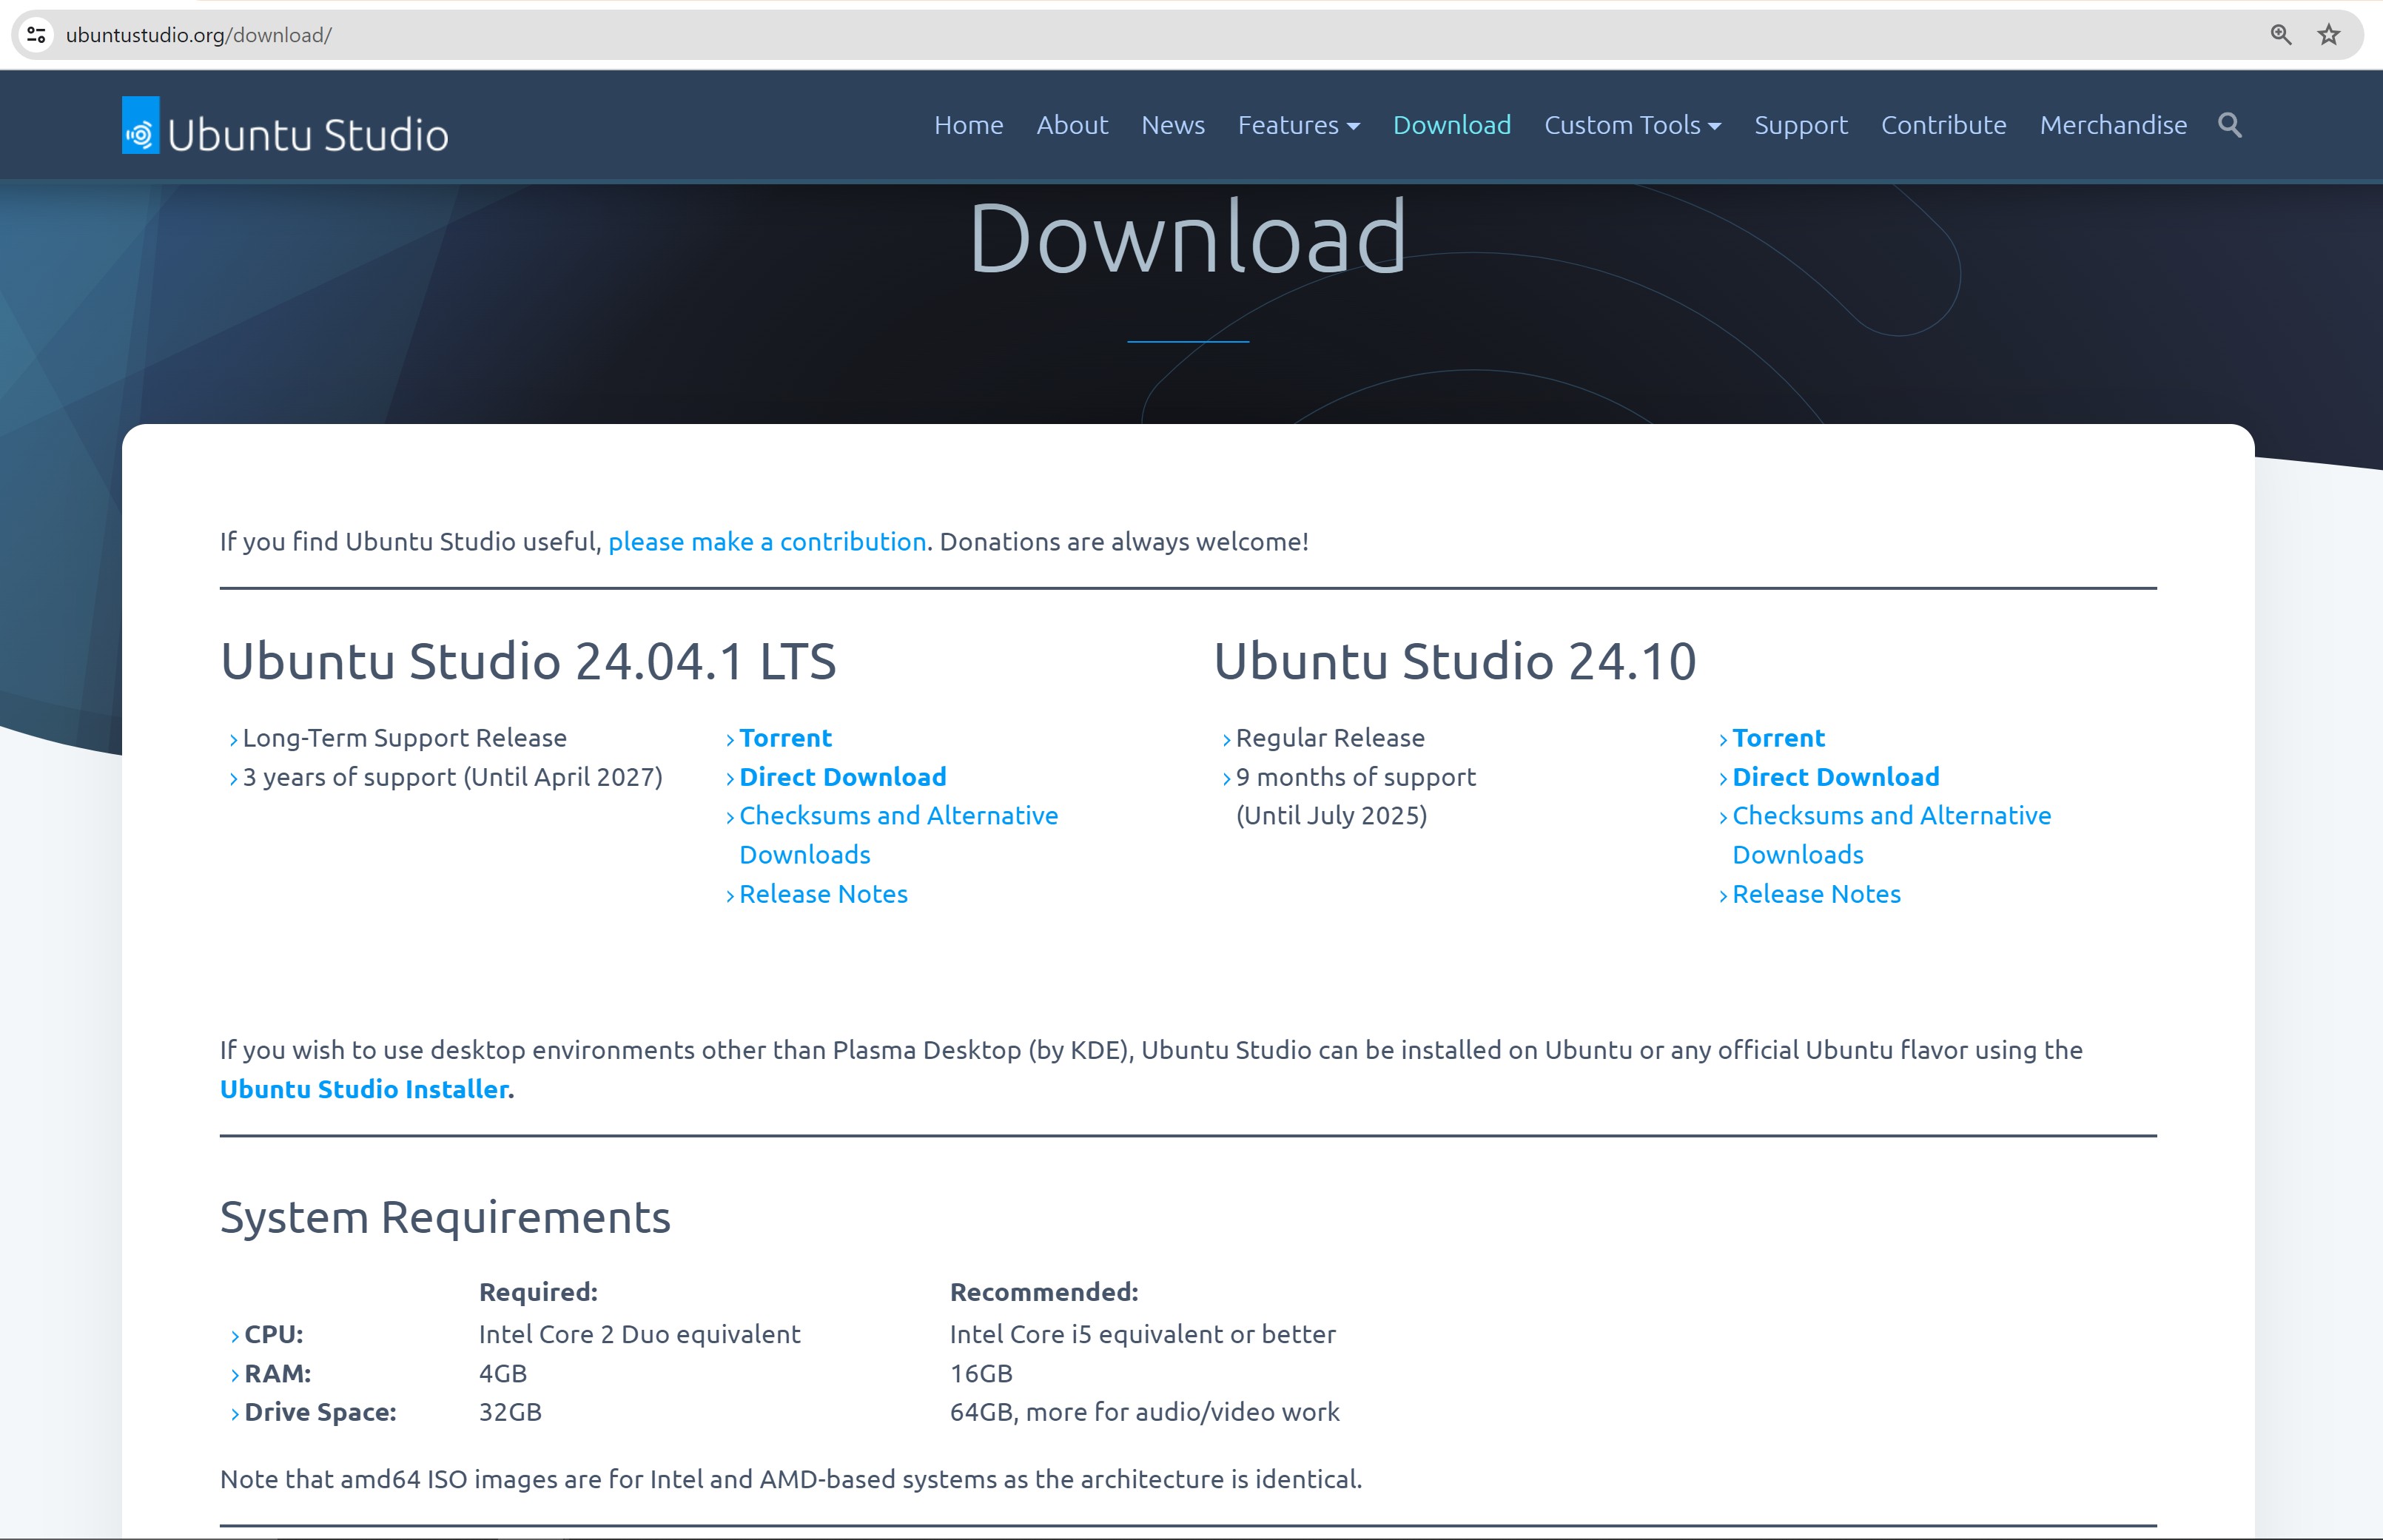
Surf over to: https://ubuntustudio.org/download/
Note the modest “System Requirements”.
Most distros offer two current versions. One is the latest and greatest stable version. The other is called an “LTS”, for Long Term Support and is supported for years.
Download the ISO to your computer.
02. Download subtype

(Approx. time: 8 minutes)
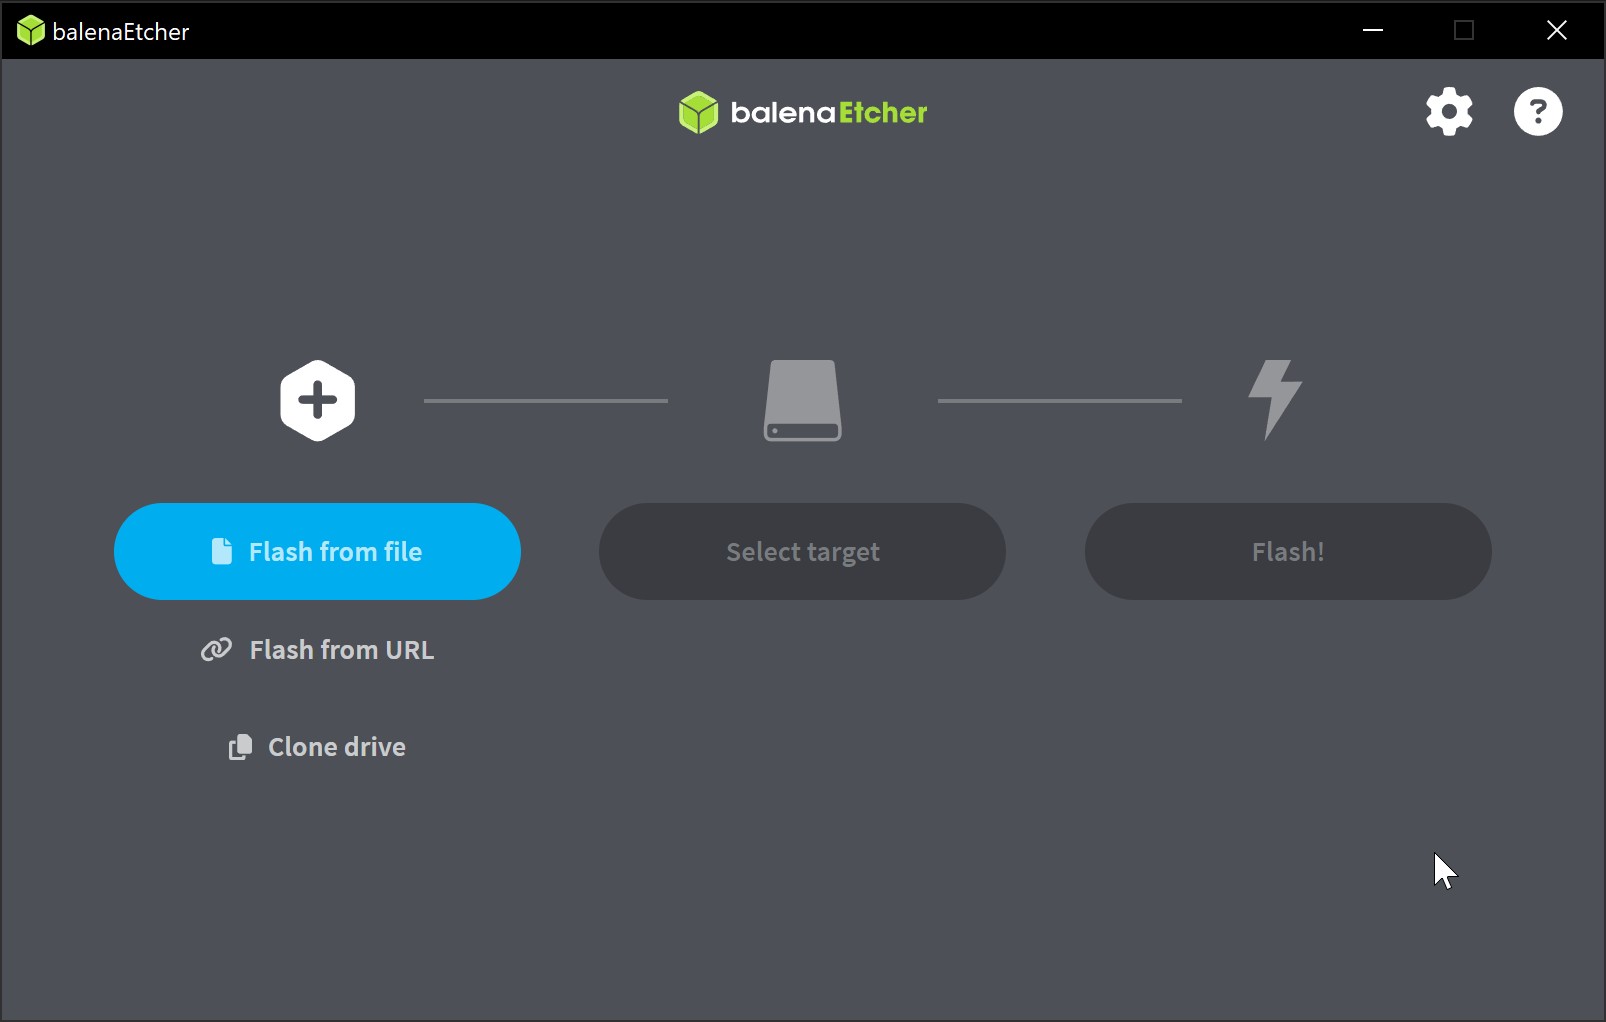
Etcher is a small utility to write an ISO to an external disk. Download it from Etcher's website.
It’s interface is very simple:
Choose the SOURCE: Load Ubuntu’s ISO file we downloaded.
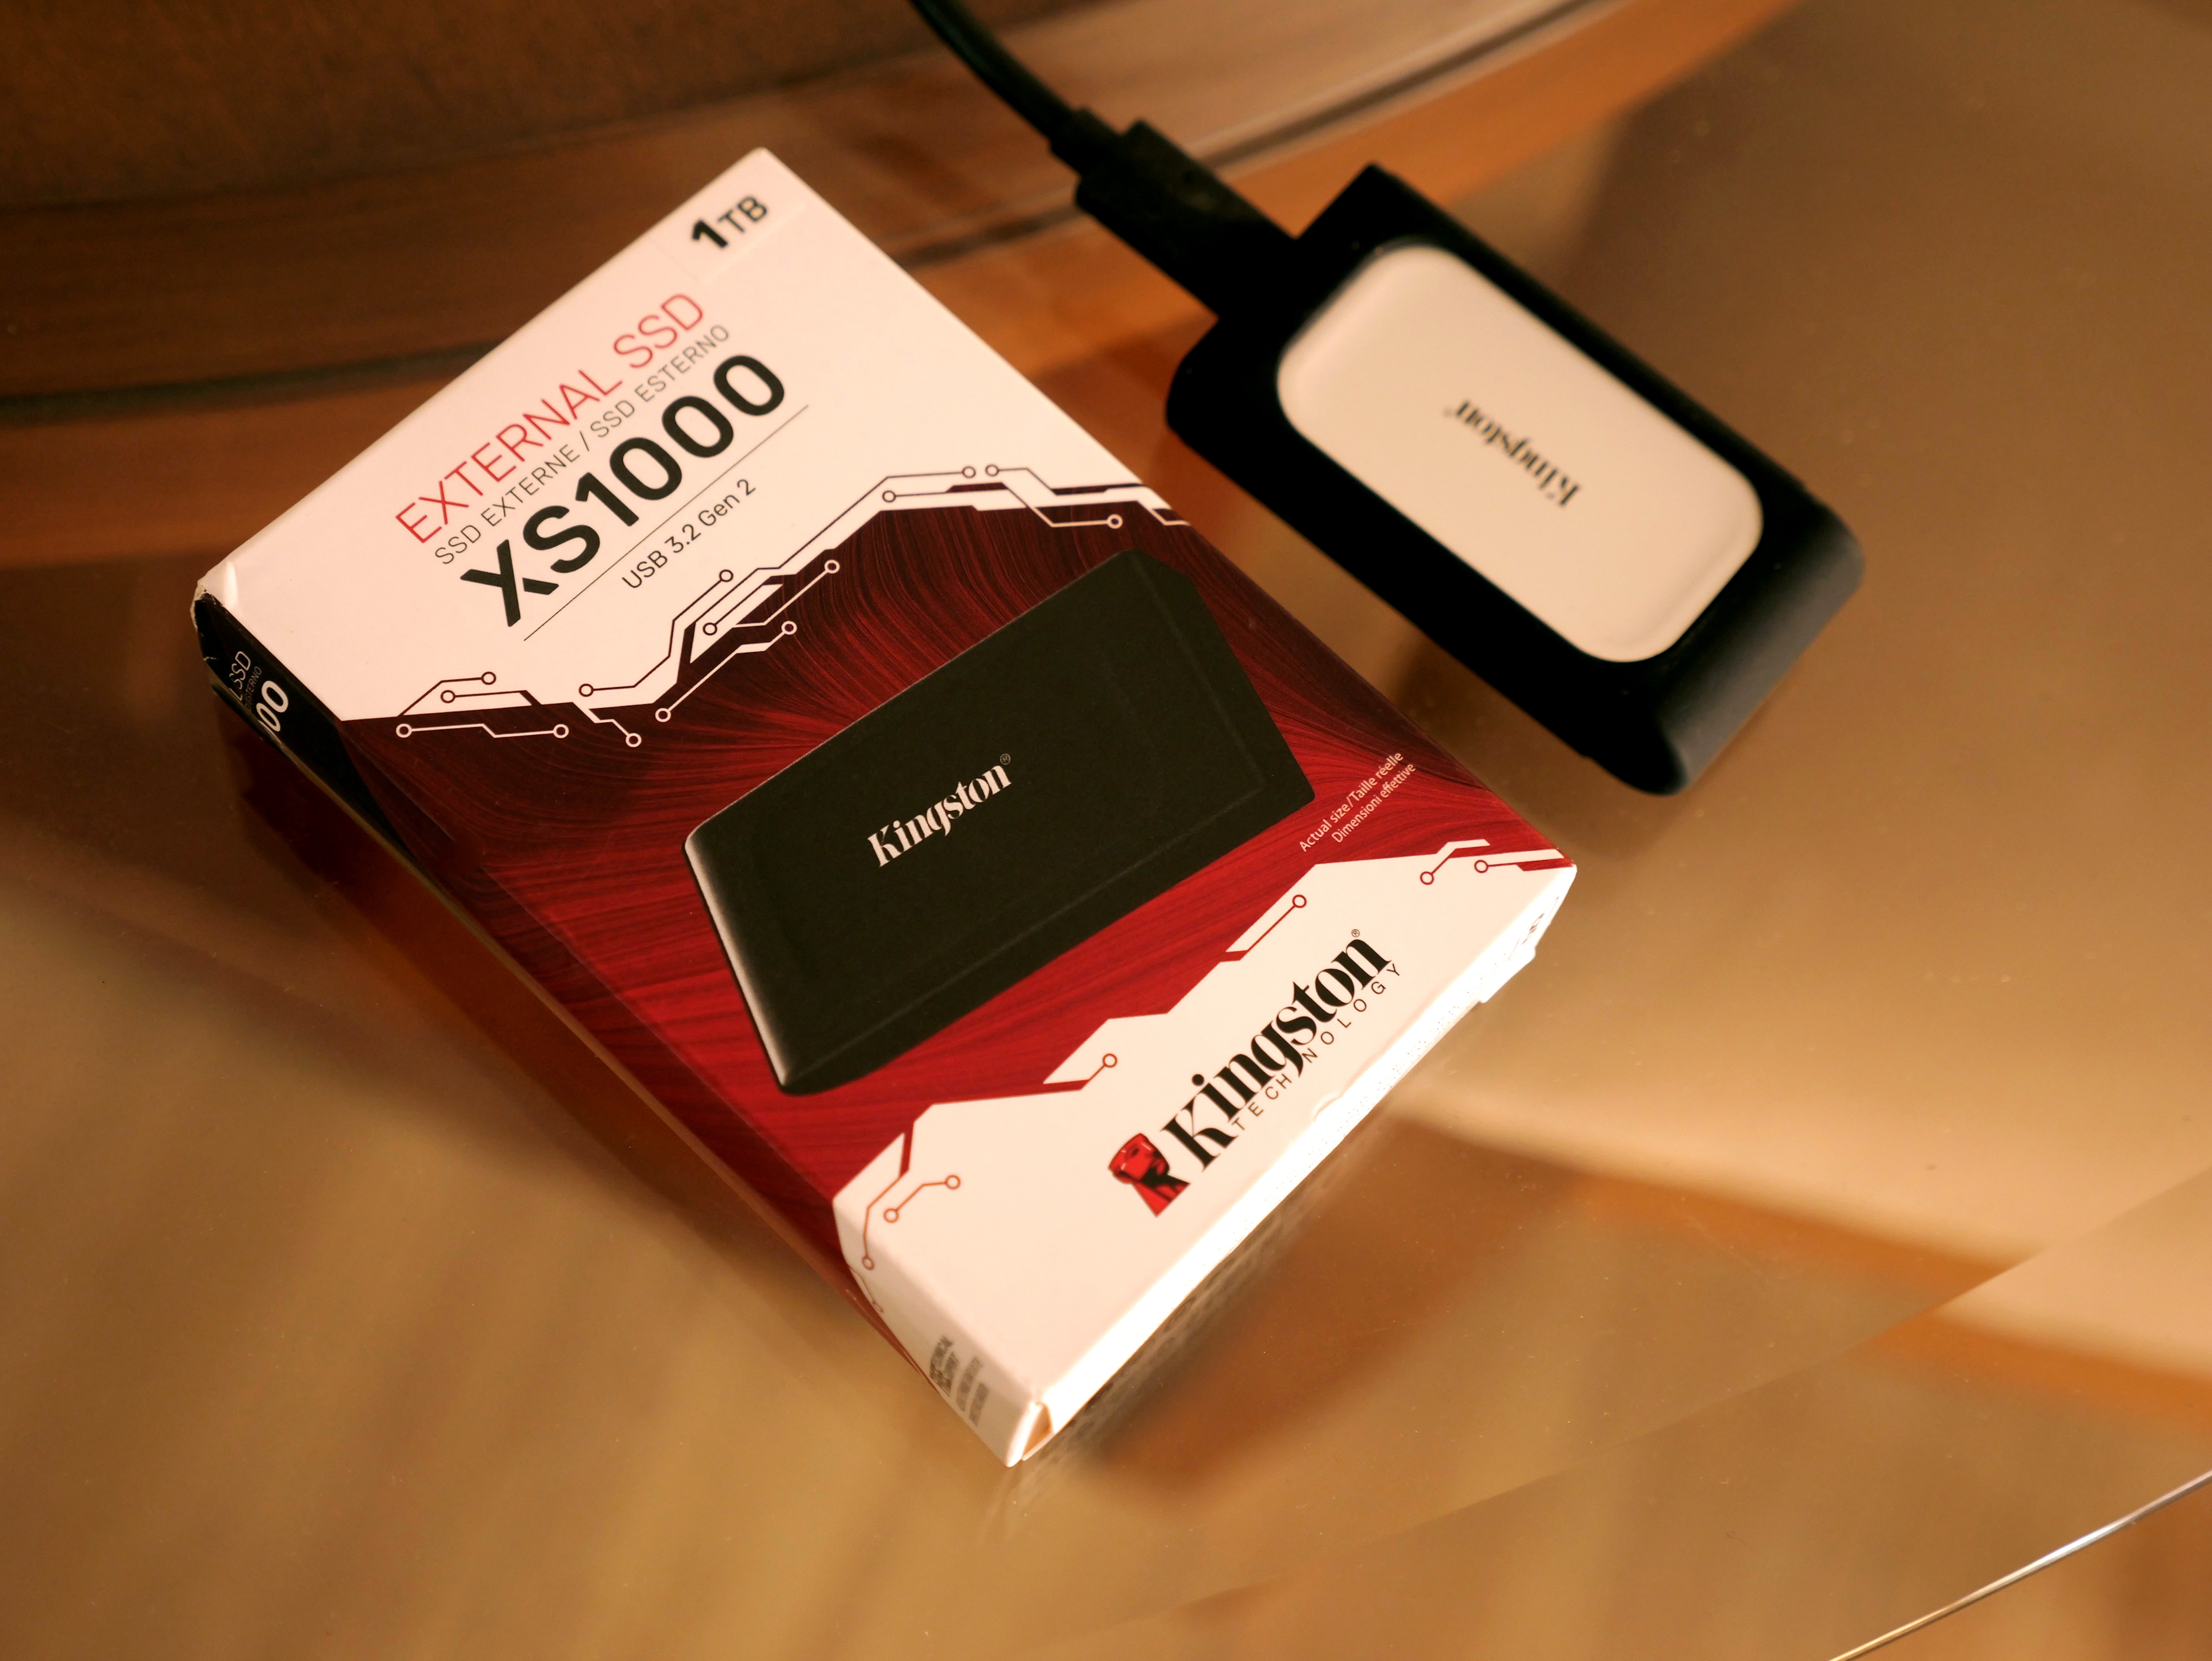
Choose the destination drive. Any external USB drive with at least 8GB will work. I tend to like Kingston Technology’s (kingston.com) super-affordable XS1000 with one TB of fast storage.
Then “Flash” it, and safely eject the USB drive.
03. Set BIOS Boot
(Approx. time: 5 minutes)
The BIOS is where the computer’s hardware “preferences” are kept. We just need to set the computer to boot from an external drive.
Plug in your newly created USB installer drive before we start.
Accessing the BIOS is a bit cloak & dagger: Start the computer and immediately start tapping its BIOS ACCESS KEY, like one or two times per second, until the BIOS opens. If Windows starts to launch, reboot and try again.
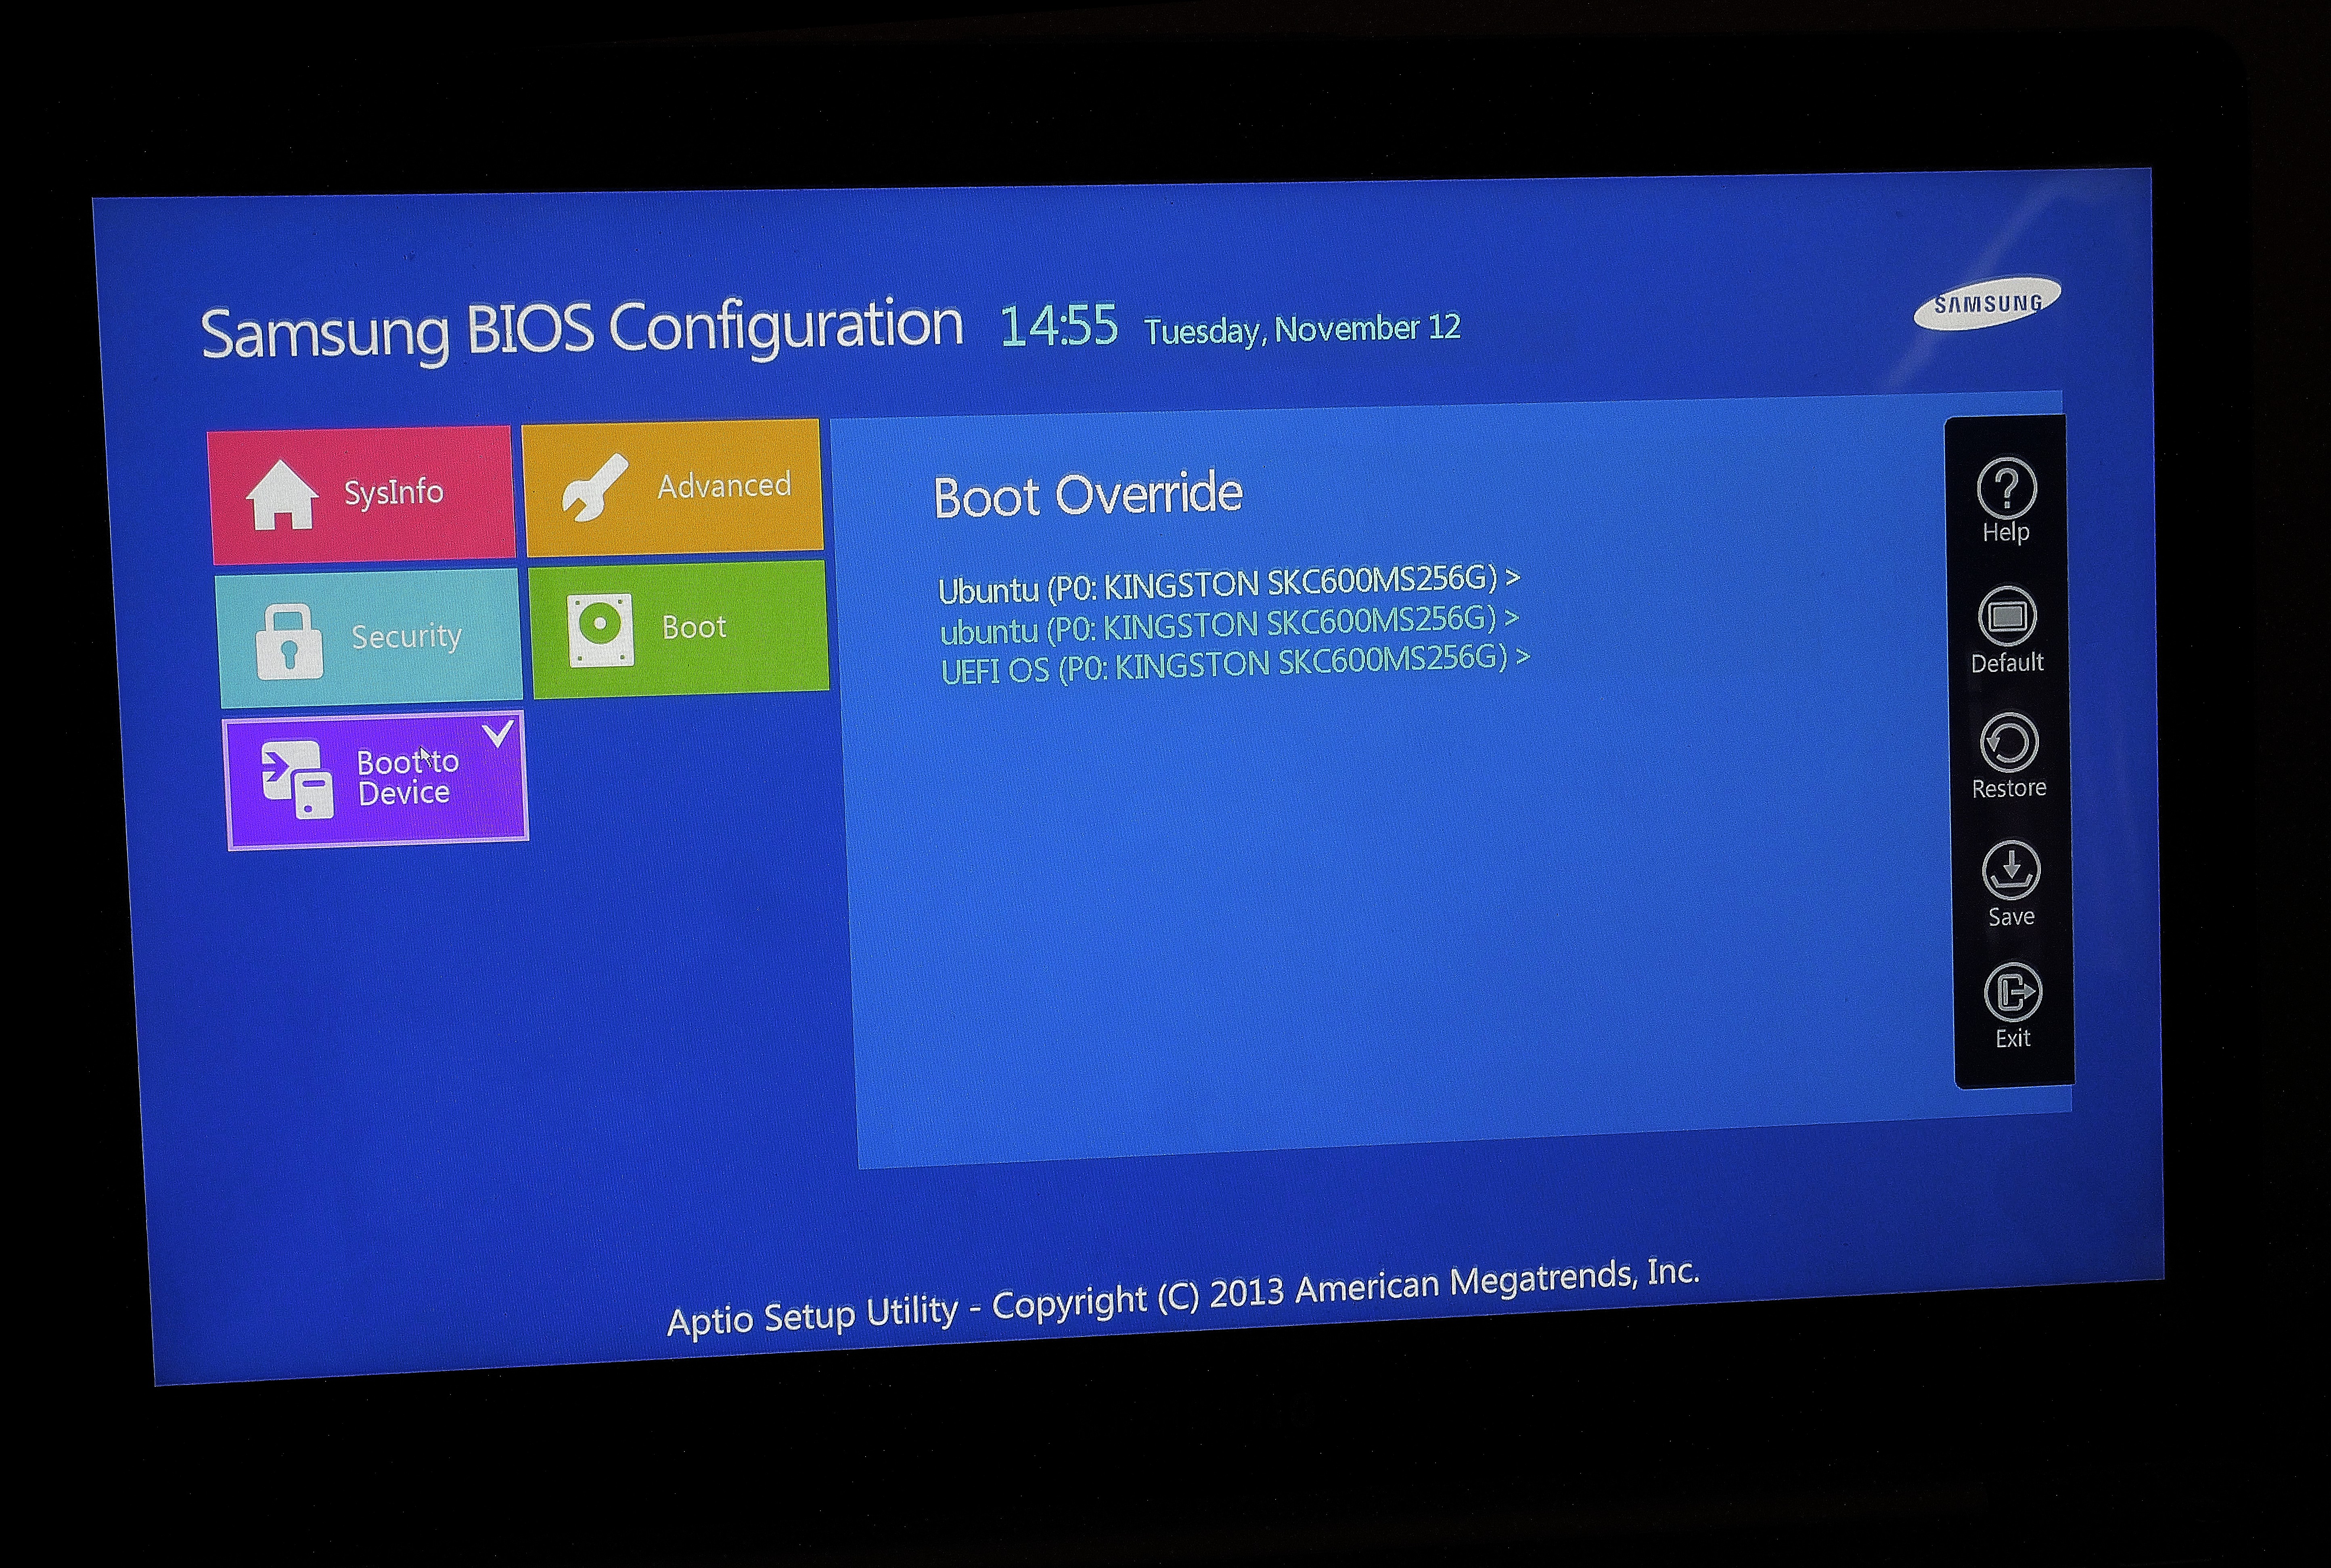
Different manufacturers use different BIOS access keys, check your manual. But it’s usually either F2, DELETE or the F12 key.
Once inside the BIOS, look for the BOOT OPTIONS and set it to boot from the external drive.
Save and exit the BIOS. It should reboot into the Ubuntu Studio disc.
(Approx. time: 10 minutes.)
Most of the following applies to all three laptop installs, with two minor differences: The Framework without any OS knew to boot externally, so you can skip the BIOS. And the Dell XPS will have a couple of alternative steps.
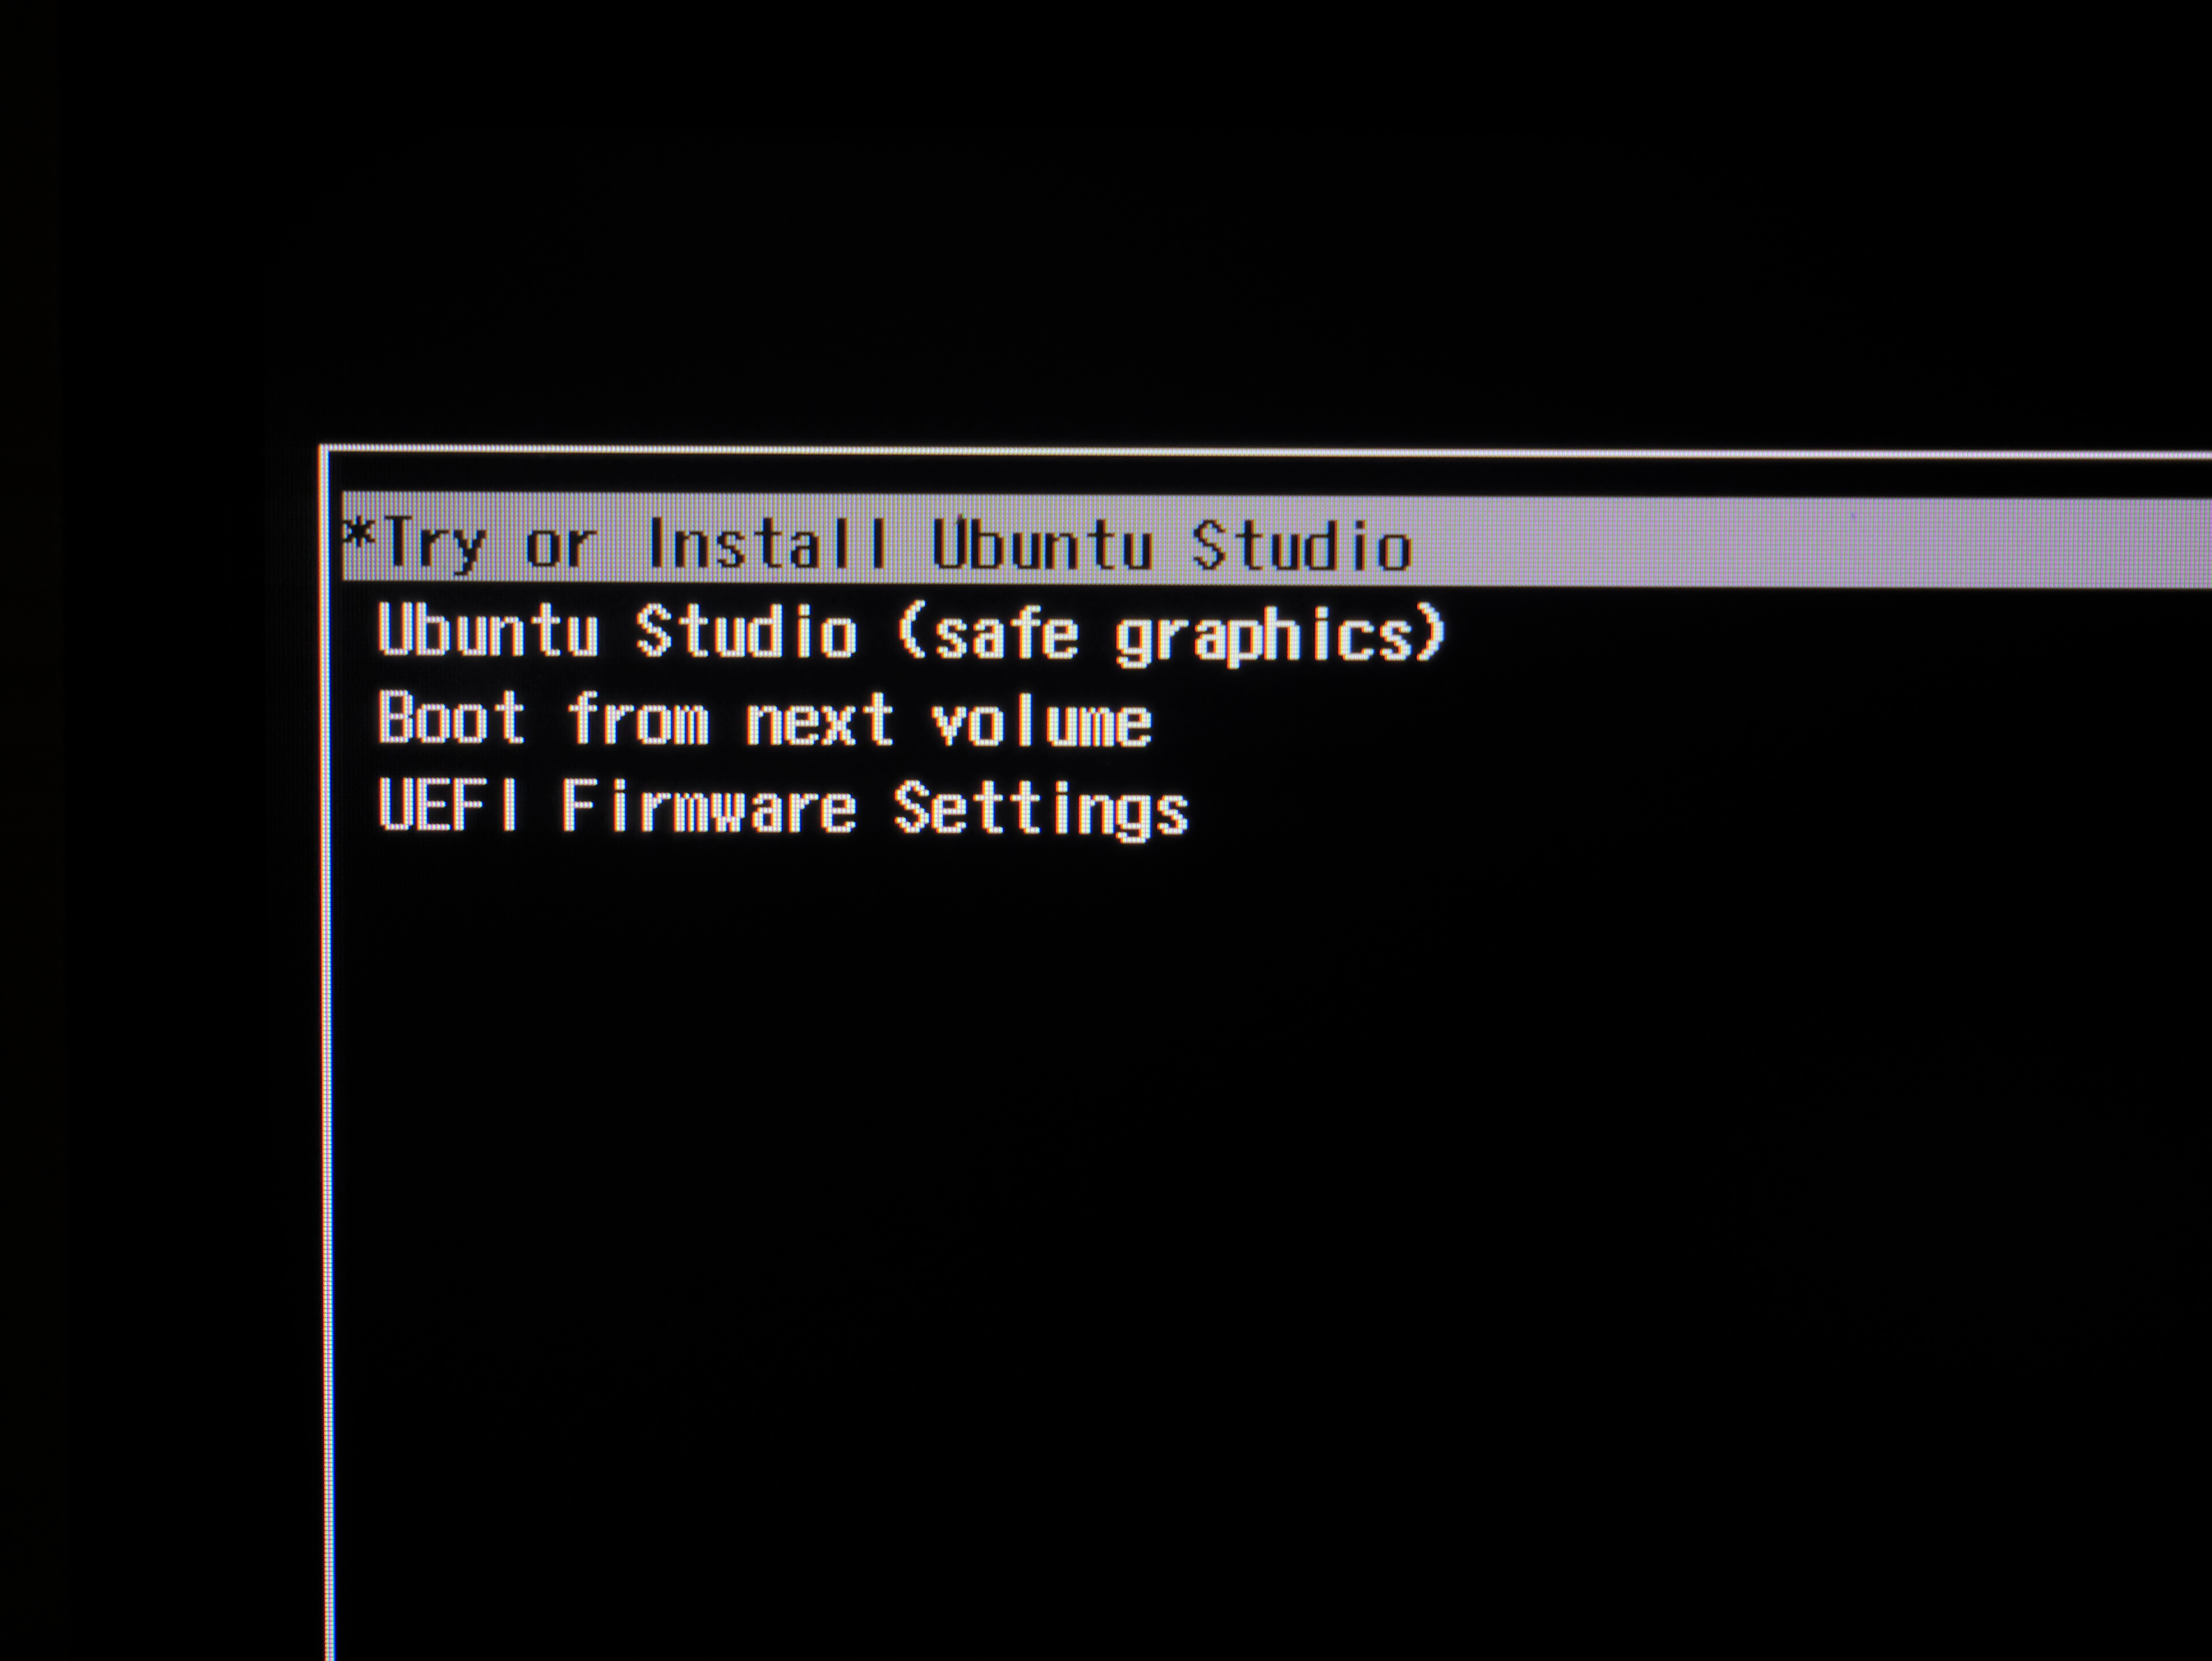
GRUB: When booting from the external USB drive you will first see the “GRUB” window that lists some additional booting options. We want to just go with the default, “Try or install Ubuntu Studio”, which should start by itself after 30 seconds, or simply hit RETURN.
The installer will run and it will look much like installing any application or OS. It will ask you a few set-up questions like preferred language, keyboard type, global location. So I’ll just hit on the more nuanced steps.
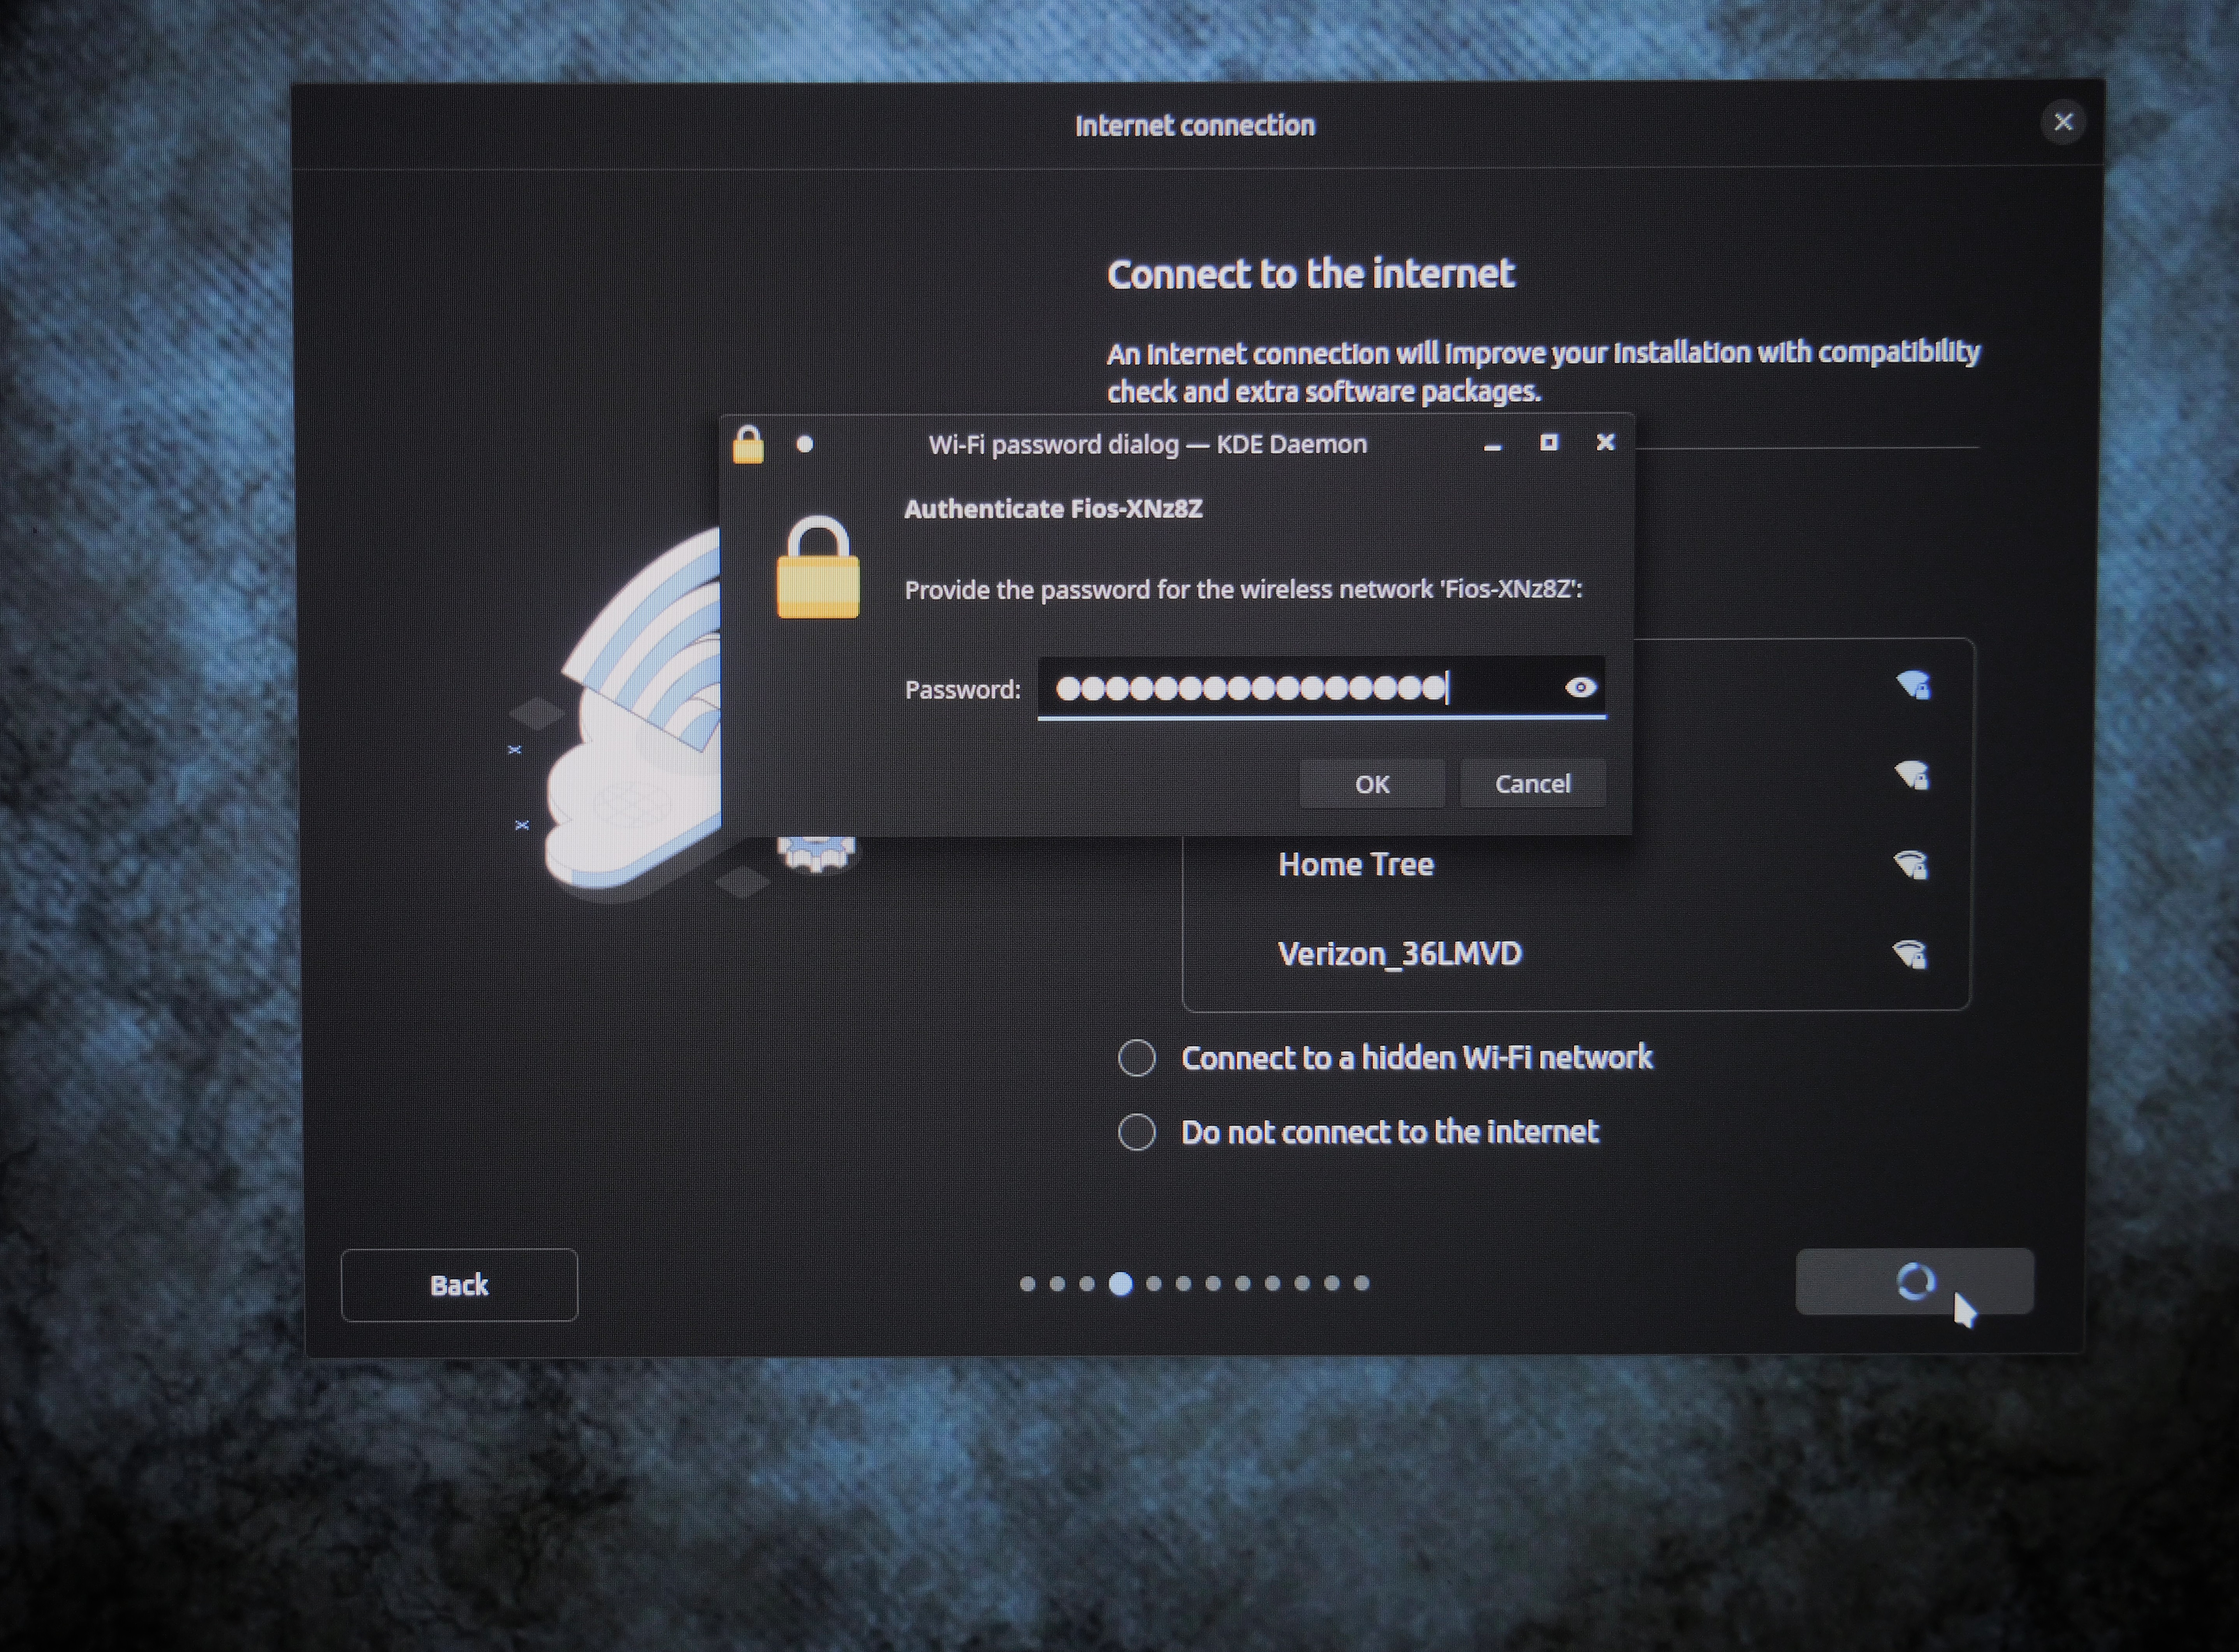
Internet: The 4th installer page will ask if you wish to connect to internet, or you can wait until later. My advice, CONNECT NOW. Some SW, particularly graphics card drivers, install much easier this way.
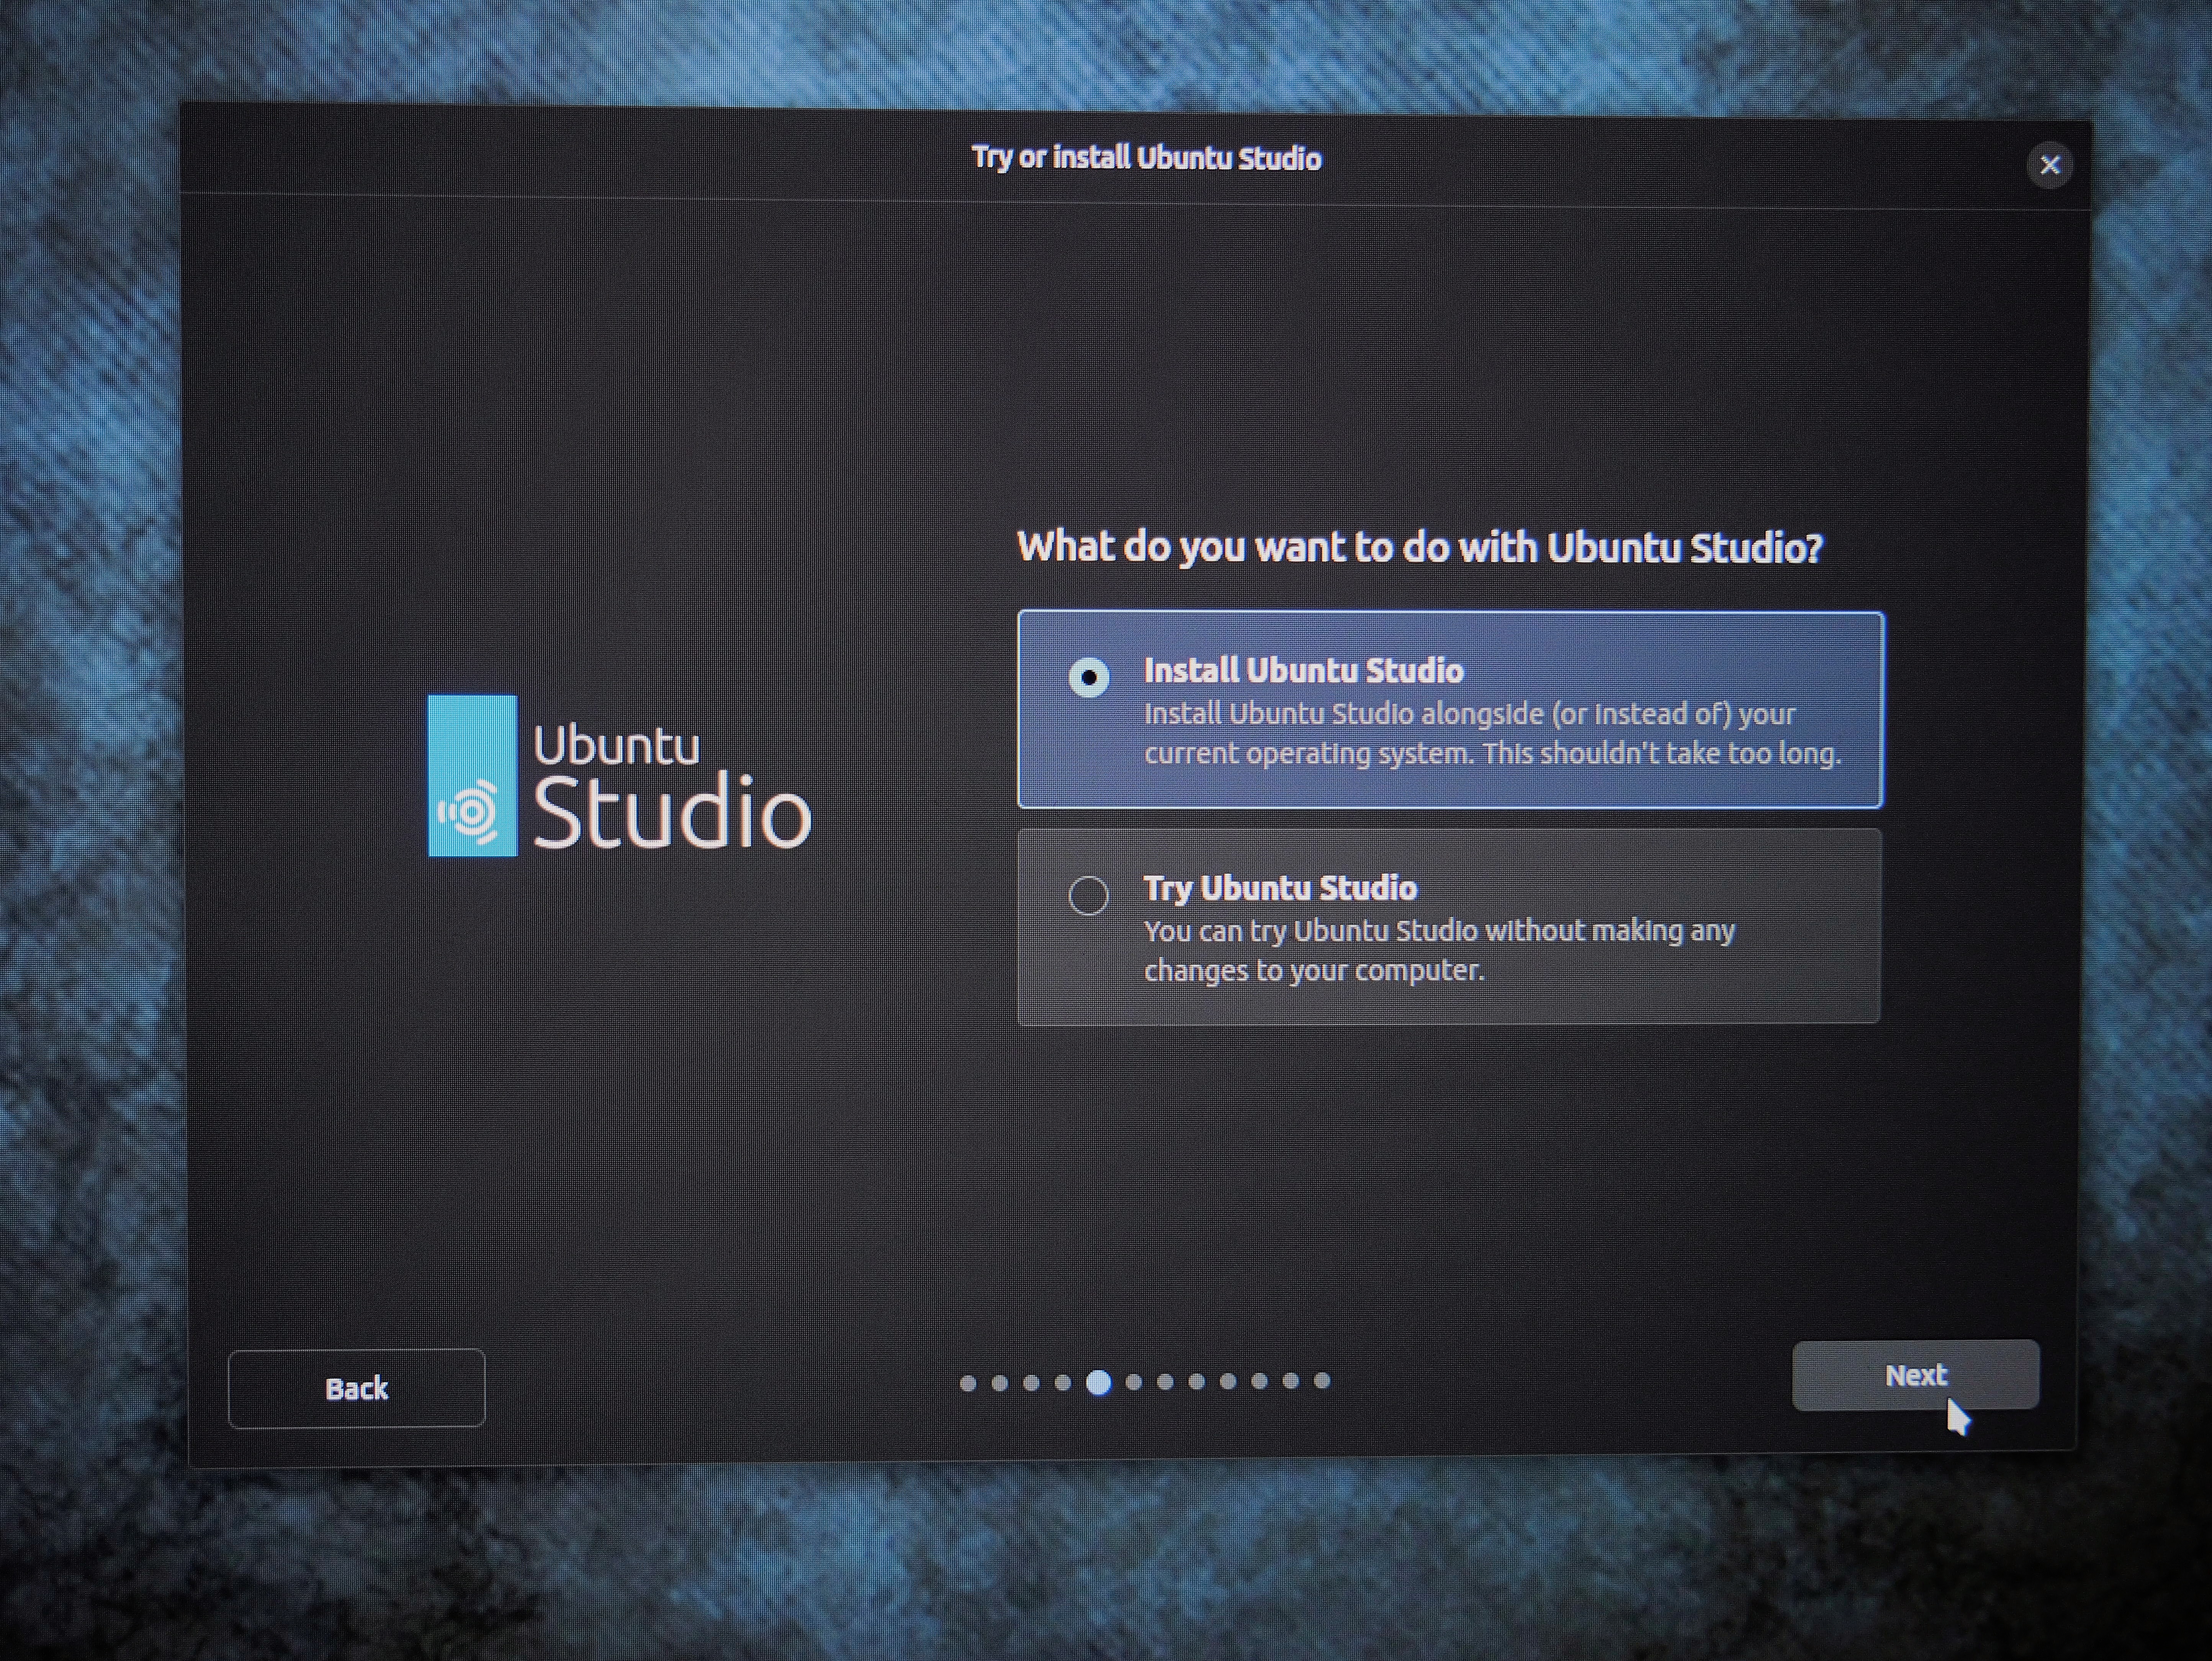
Install or Test: The 5th step in the installer asks if you wish to go ahead with the installation, or run the new operating system from the external drive, so you can "try before you buy". Keep in mind it will run slower and perhaps be less stable than an actual install.
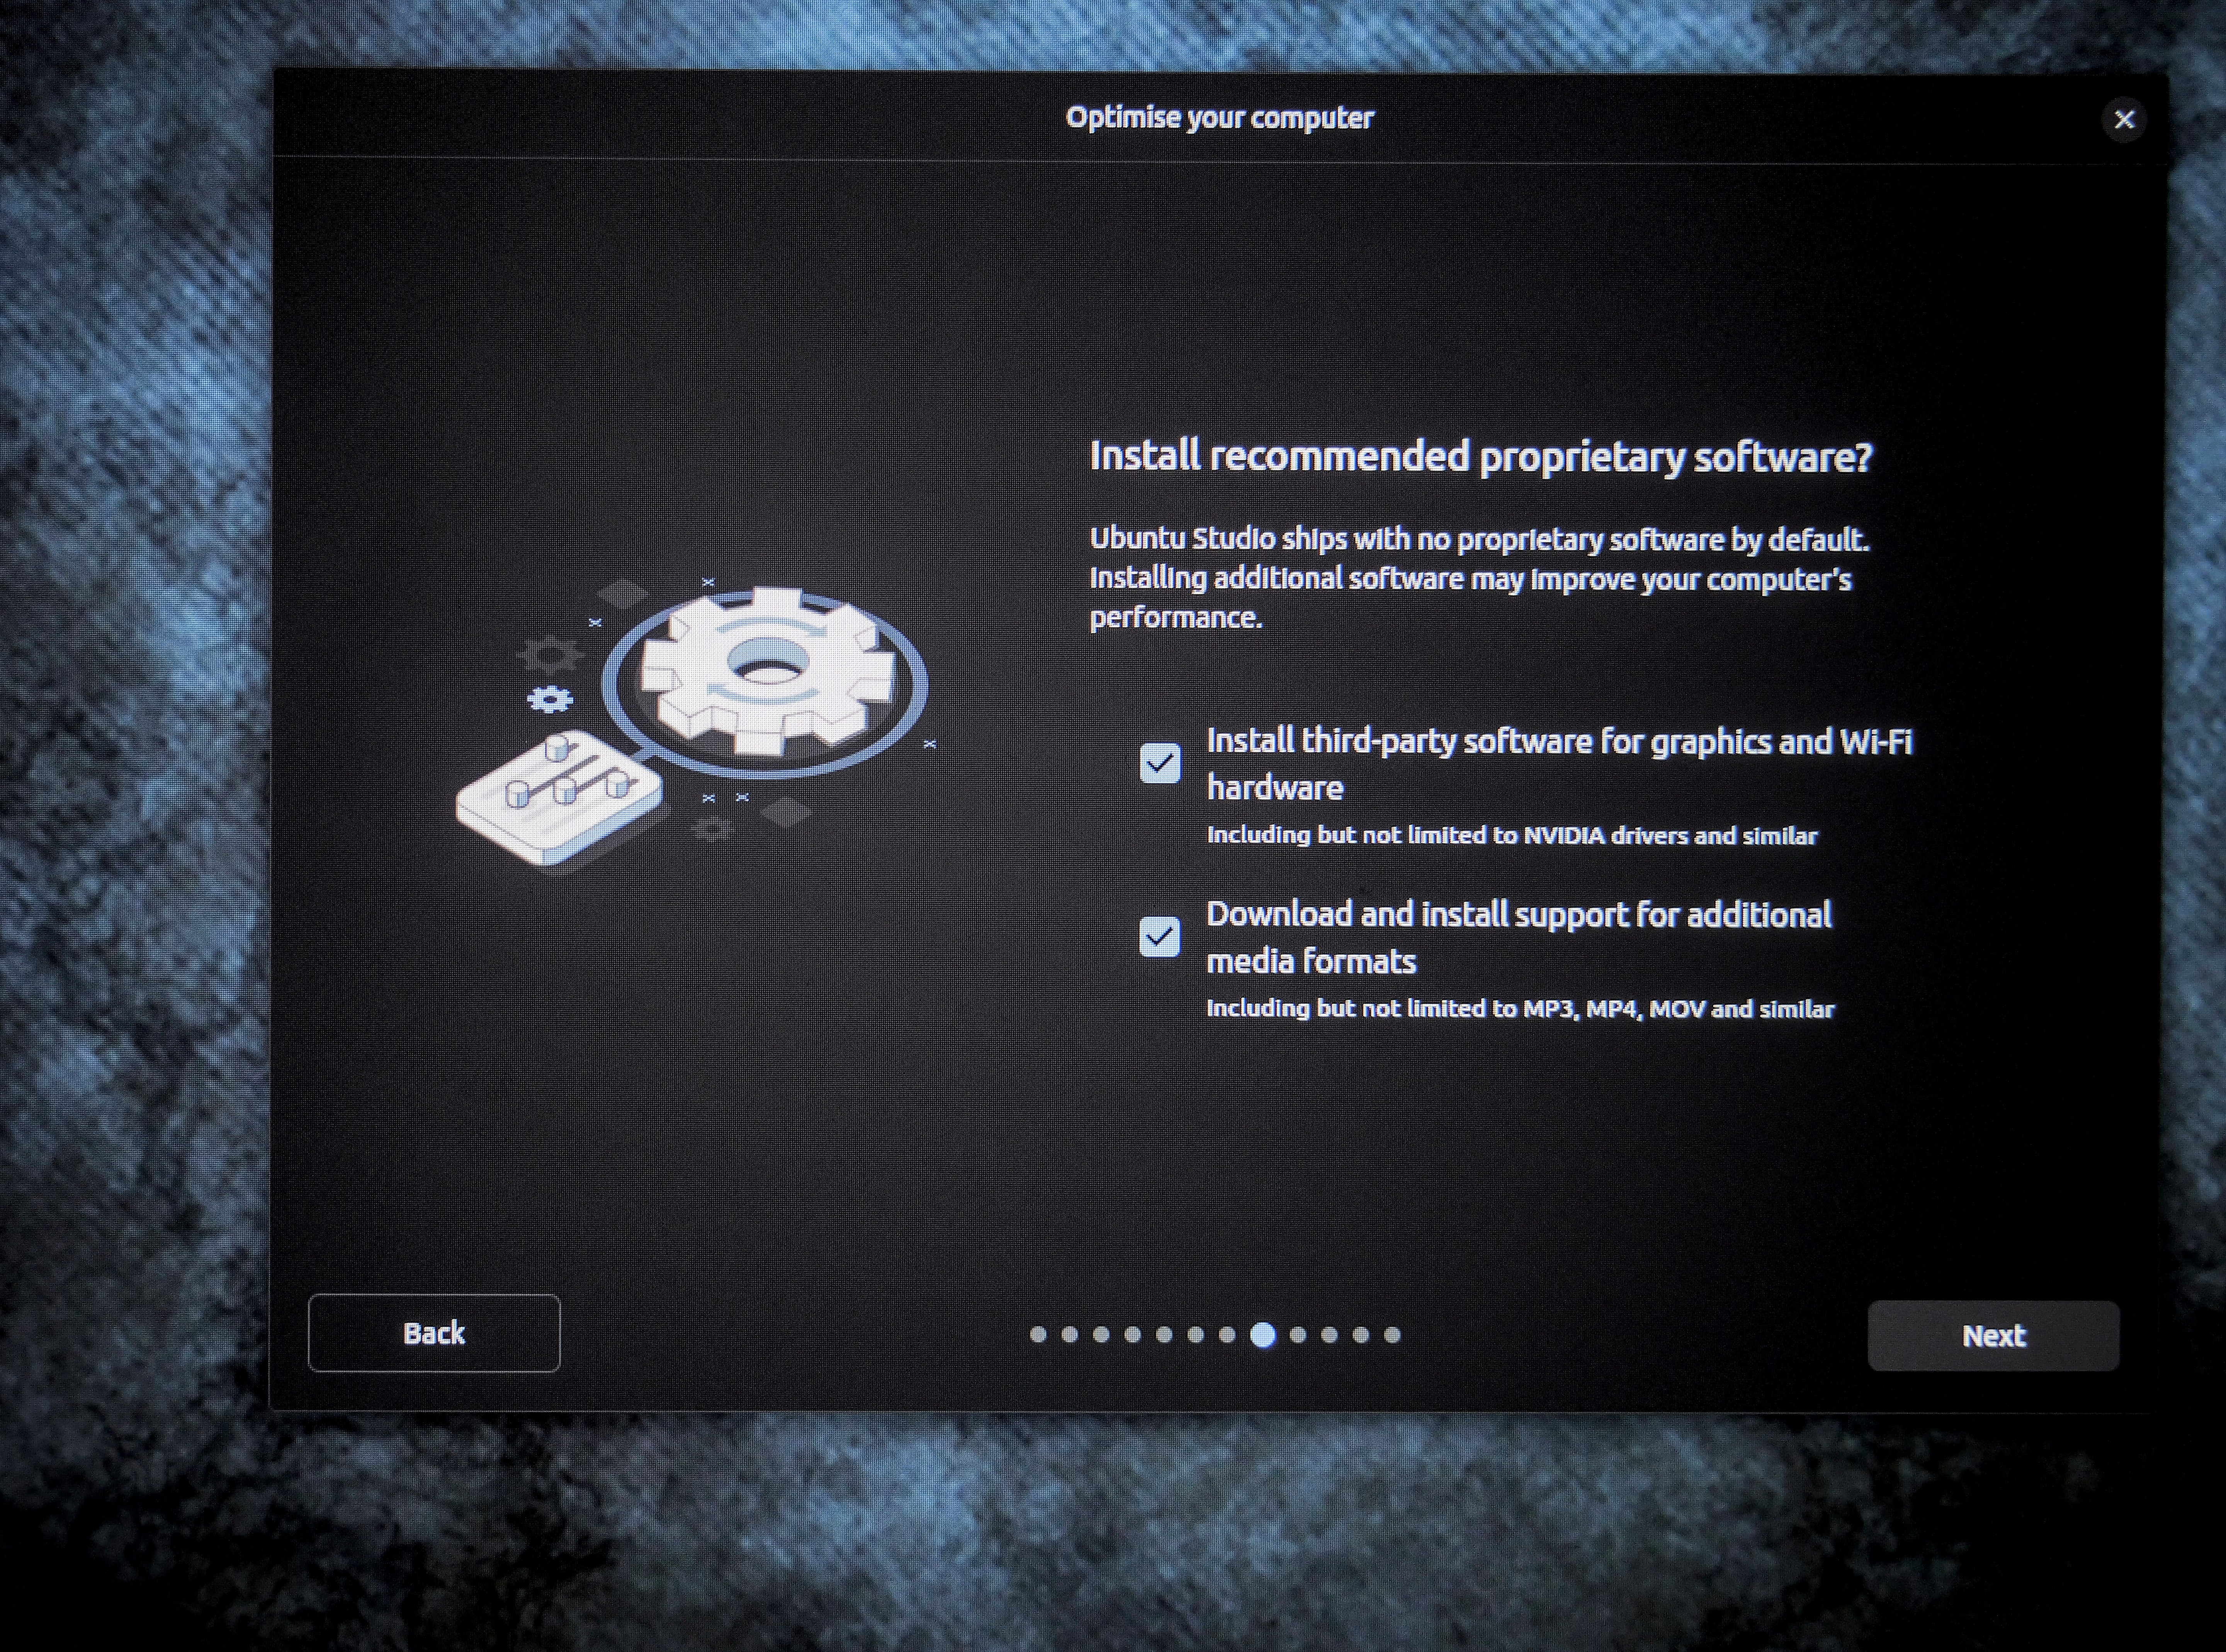
Third-Party SW: The 8th installer page asks if you wish to optimize your computer by allowing third party software. You want this as it might include graphics drivers.
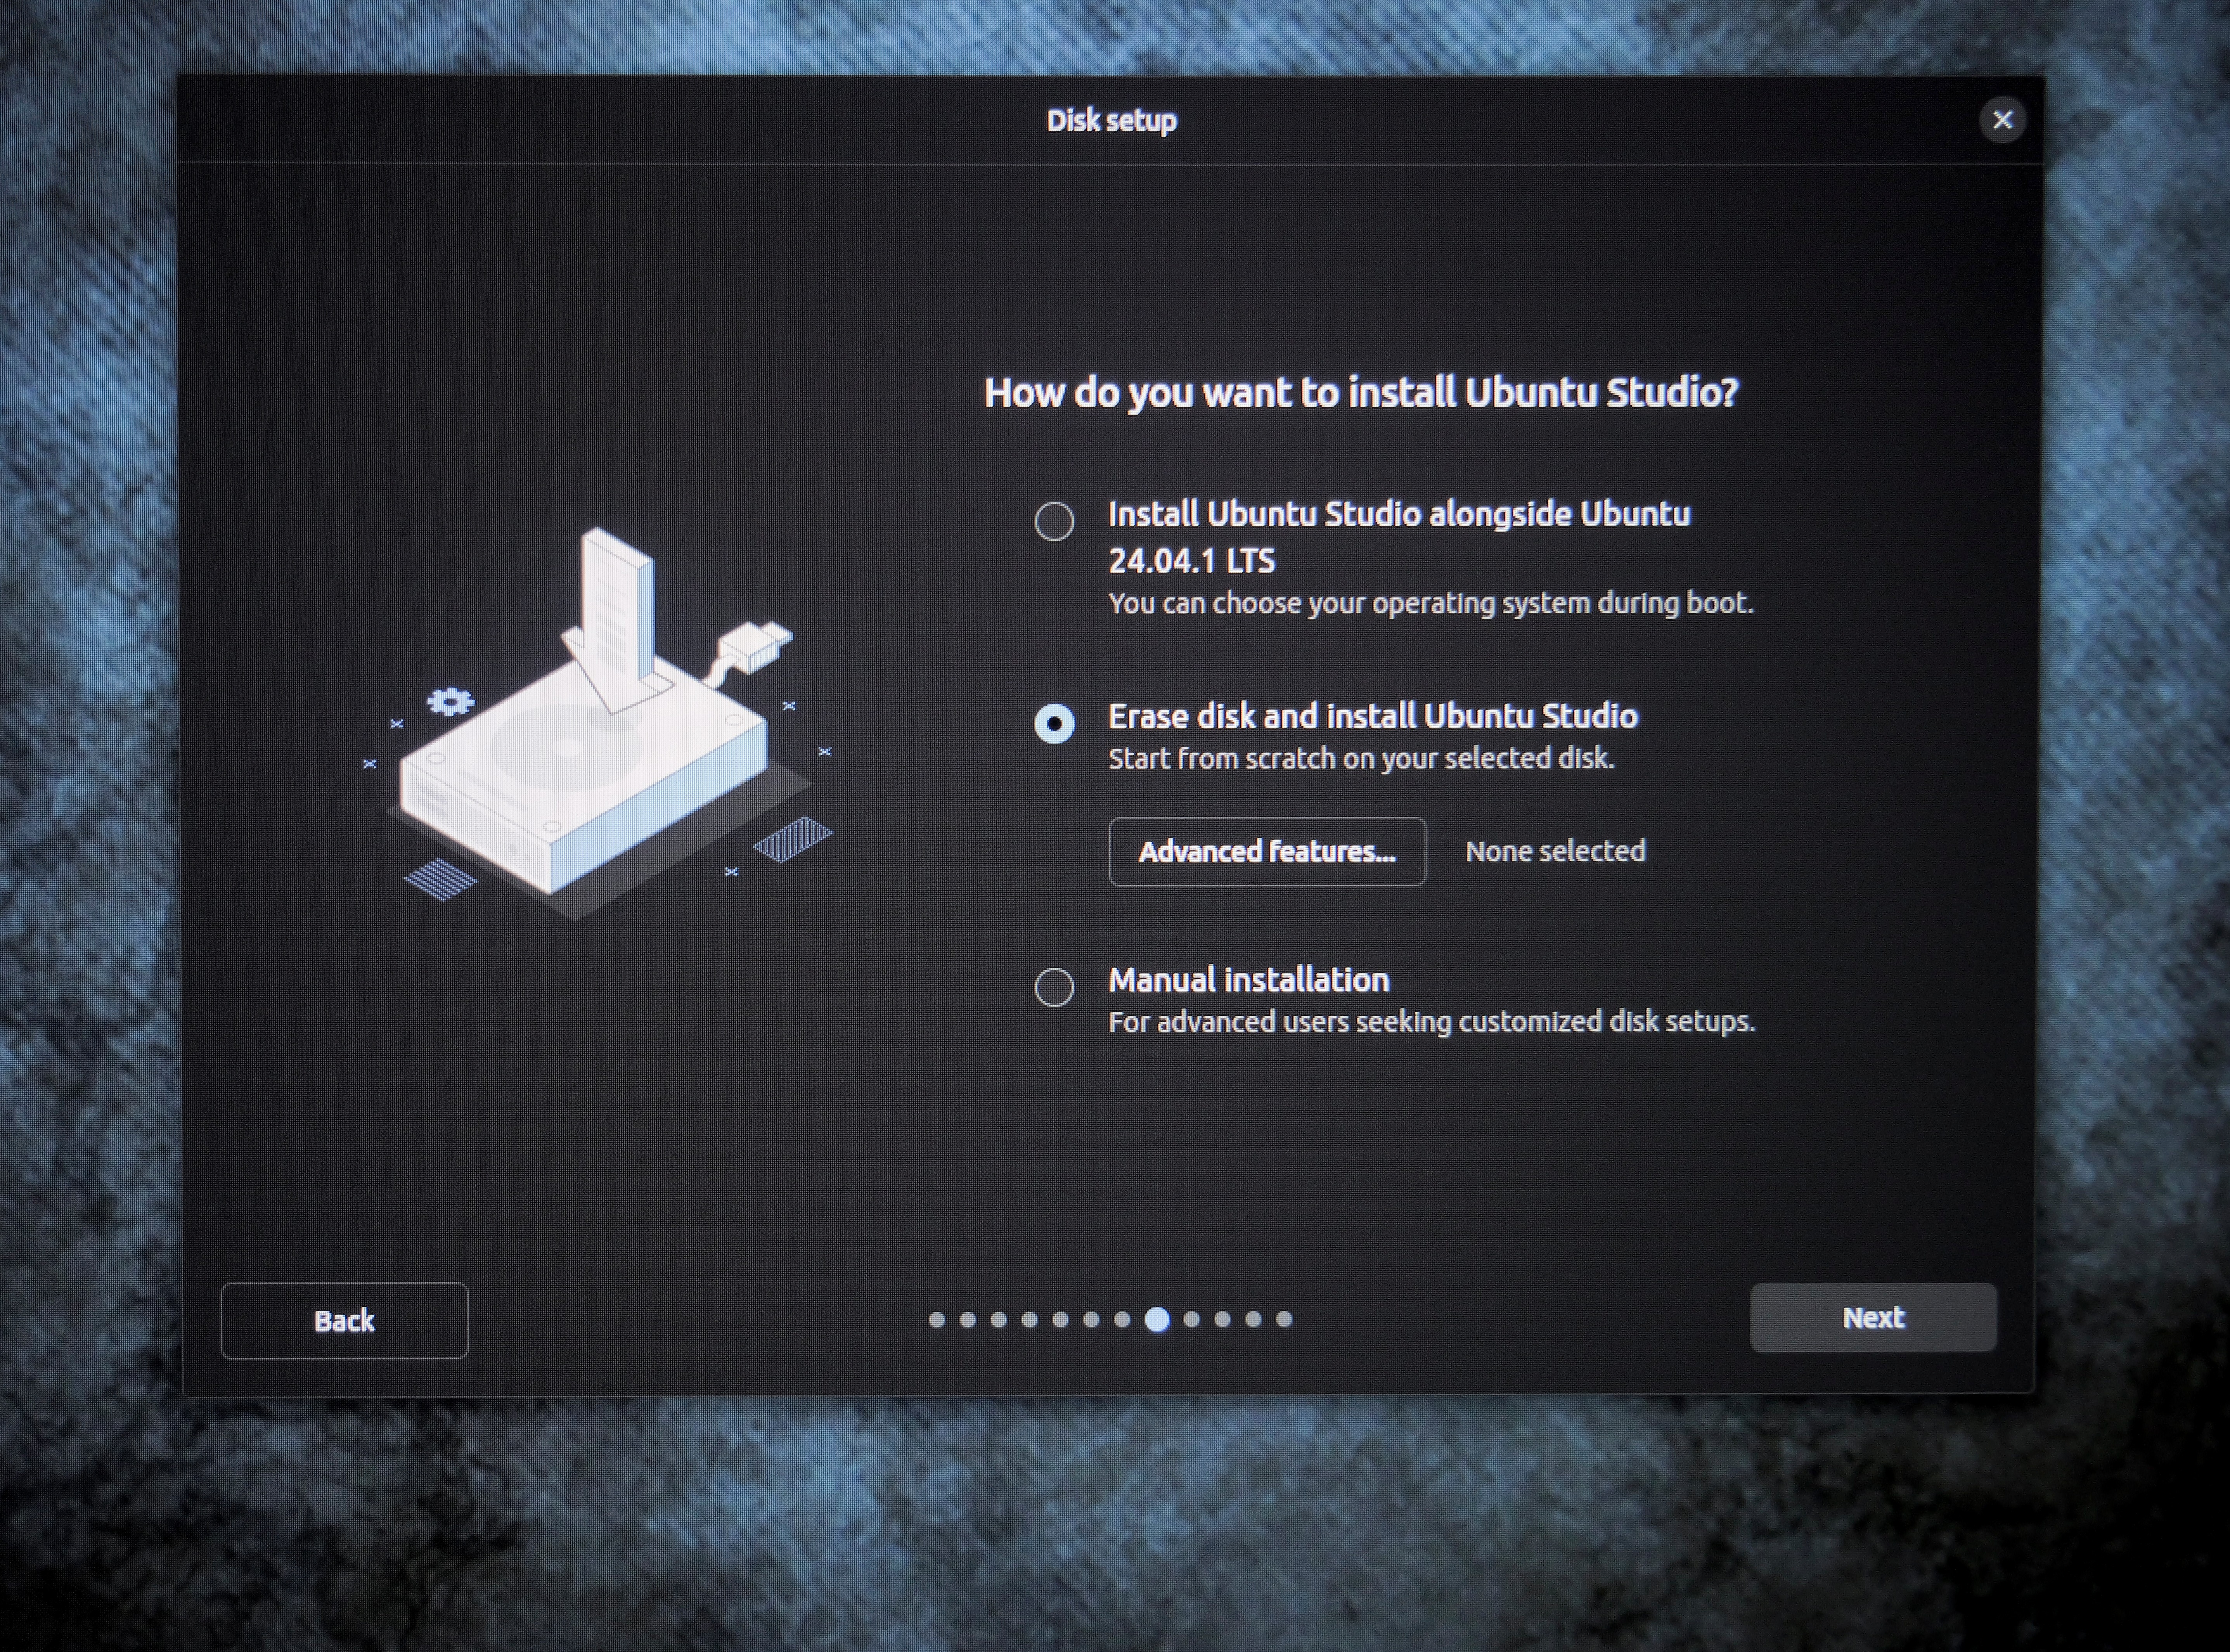
Disk Set-Up: This step allows you to choose how Ubuntu gets installed. In most cases you will simply wish to overwrite Windows and have Ubuntu Studio as your new OS.
WARNING: Make sure to back up, as everything on the Windows partition will be erased. (NOTE: We will handle this step differently with the Dell laptop, later in this article.)
Create Account: Unlike with Windows/Mac, creating an account on Ubuntu just means s "local" one on your computer. Things like name and password. This step creates no cloud/network account, nor sends any data out.
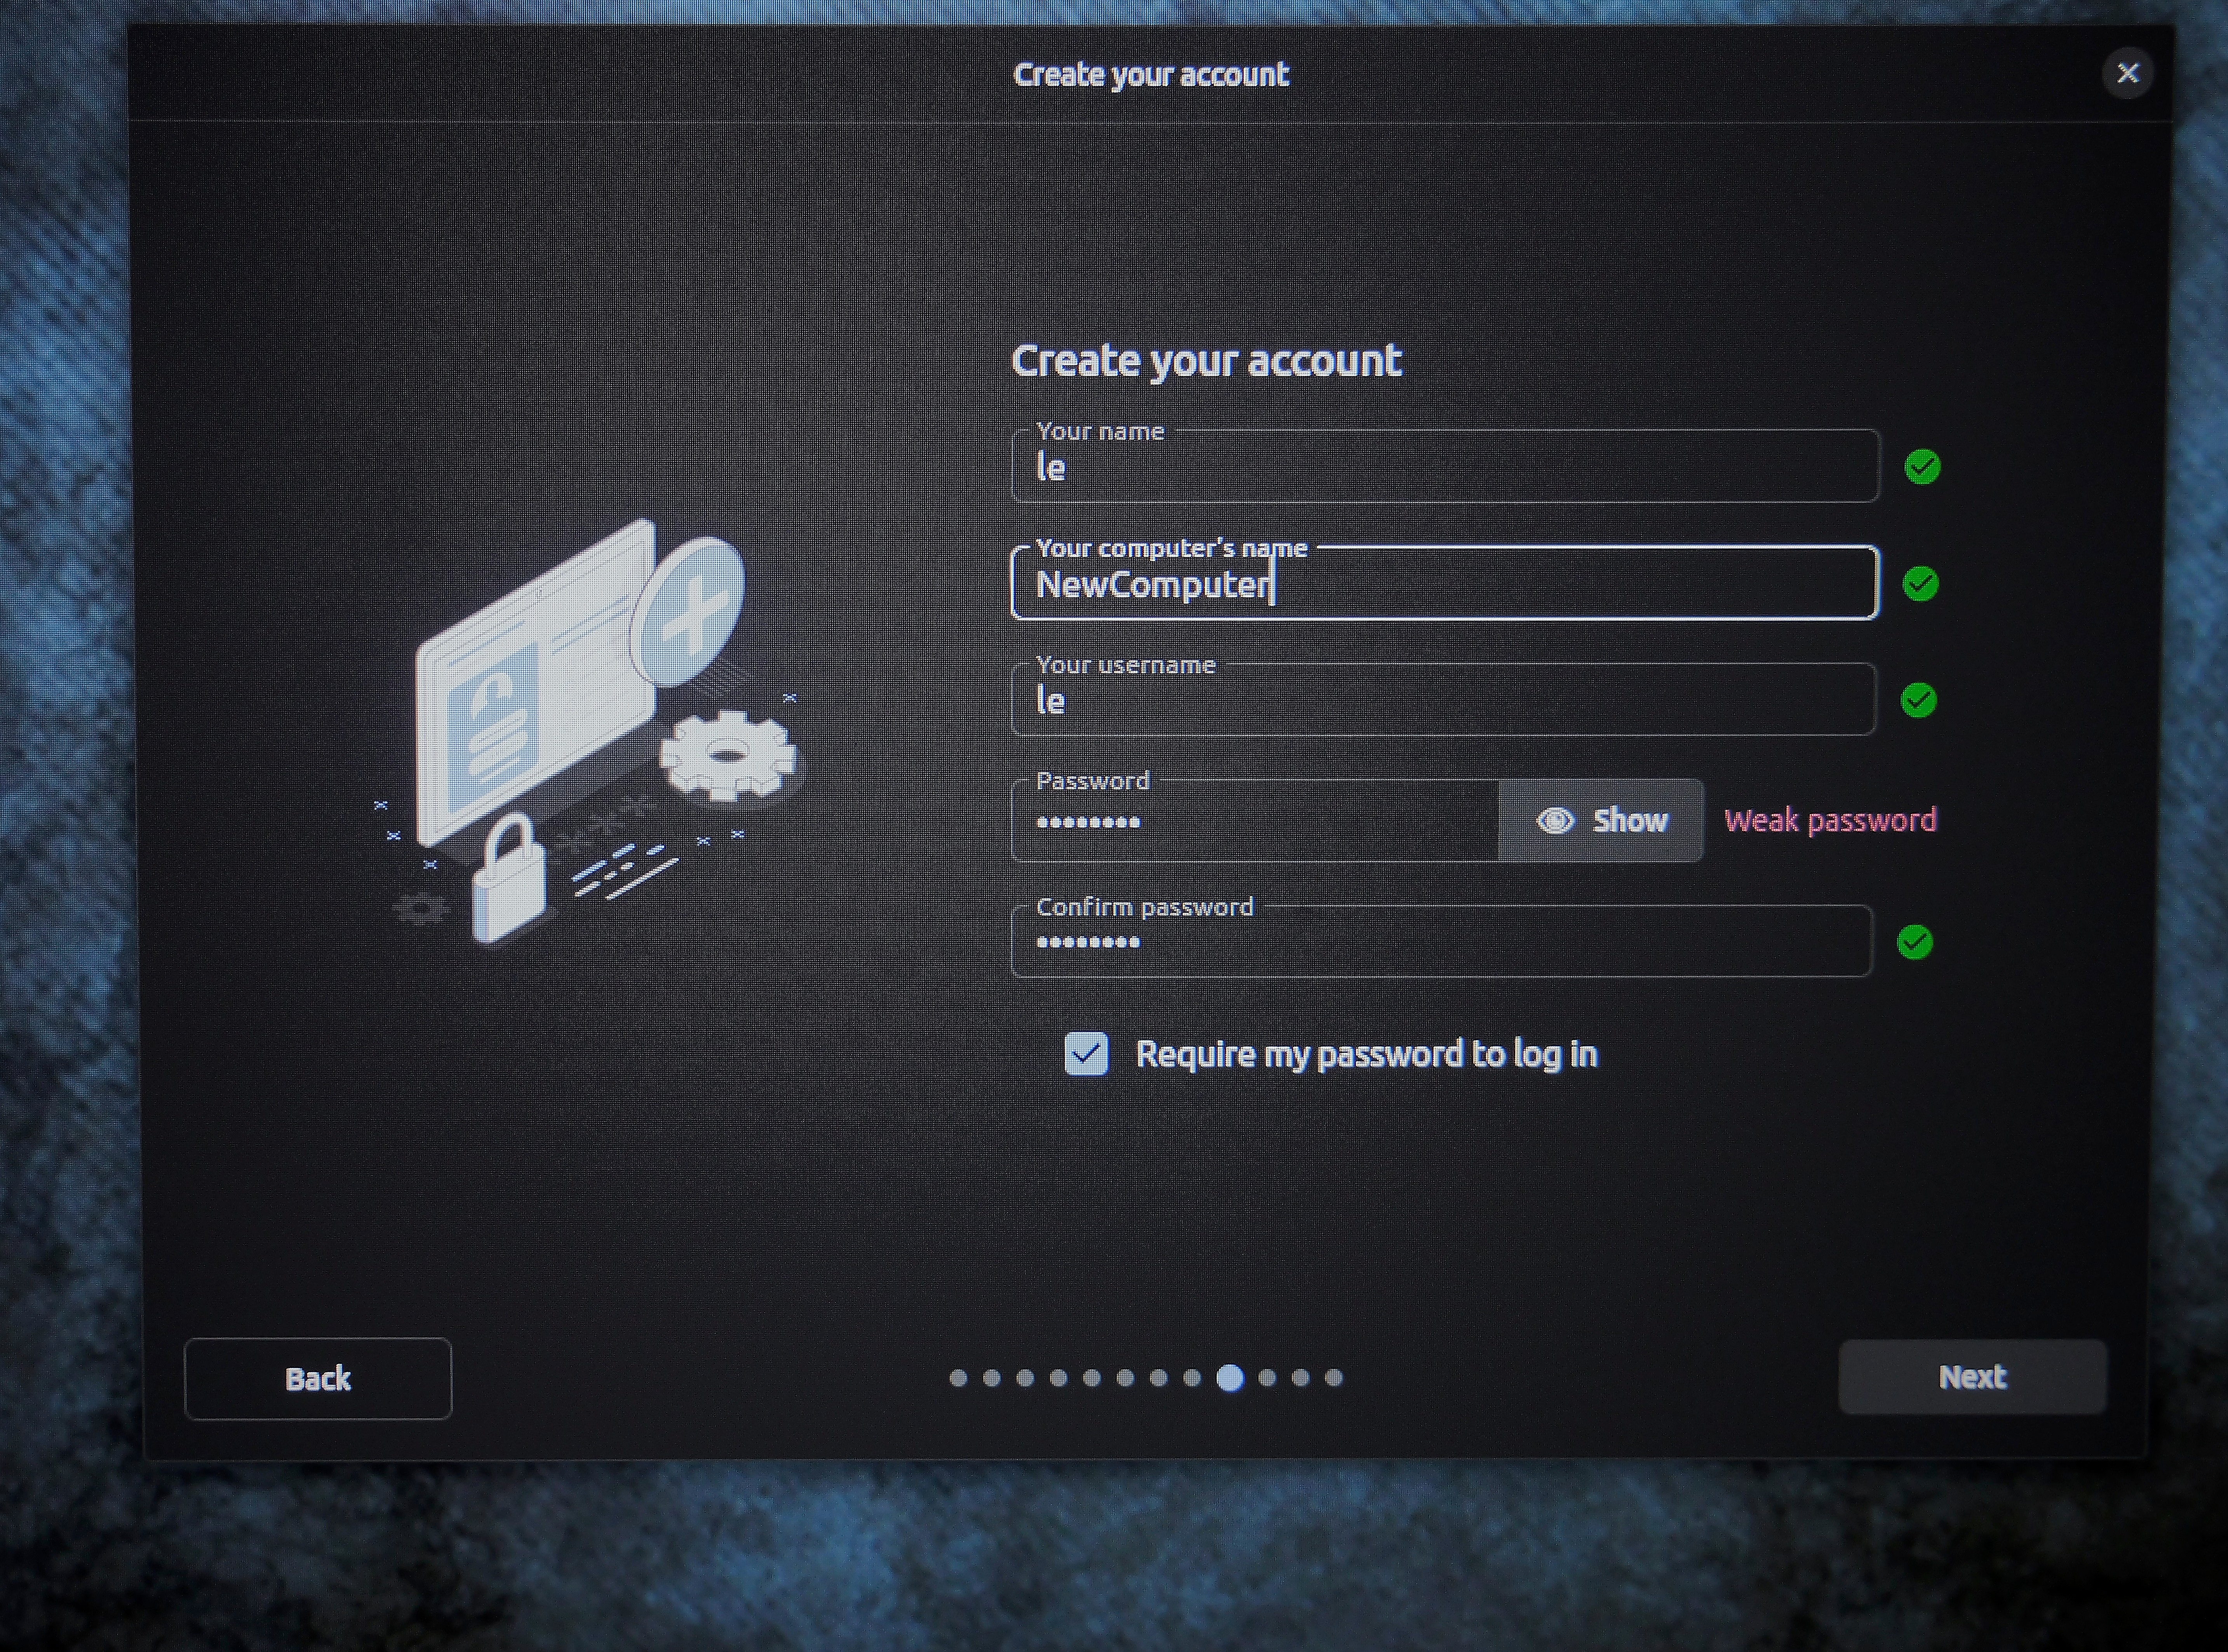
FINISH: The last few steps ask you to confirm a few settings, and then click the INSTALL button. A few minutes later you will find yourself in your new Ubuntu Studio interface. The whole process should take well under an hour!
BONUS INSTRUCTIONS: Setting Up a Dual-Boot
As mentioned, that Dell XPS with Windows 11 already installed is just a bit too sweet to completely write over. Instead we can keep Win 11 and merely add Ubuntu alongside. Yes, on the same drive. This is called setting up a “Dual Booting” computer.
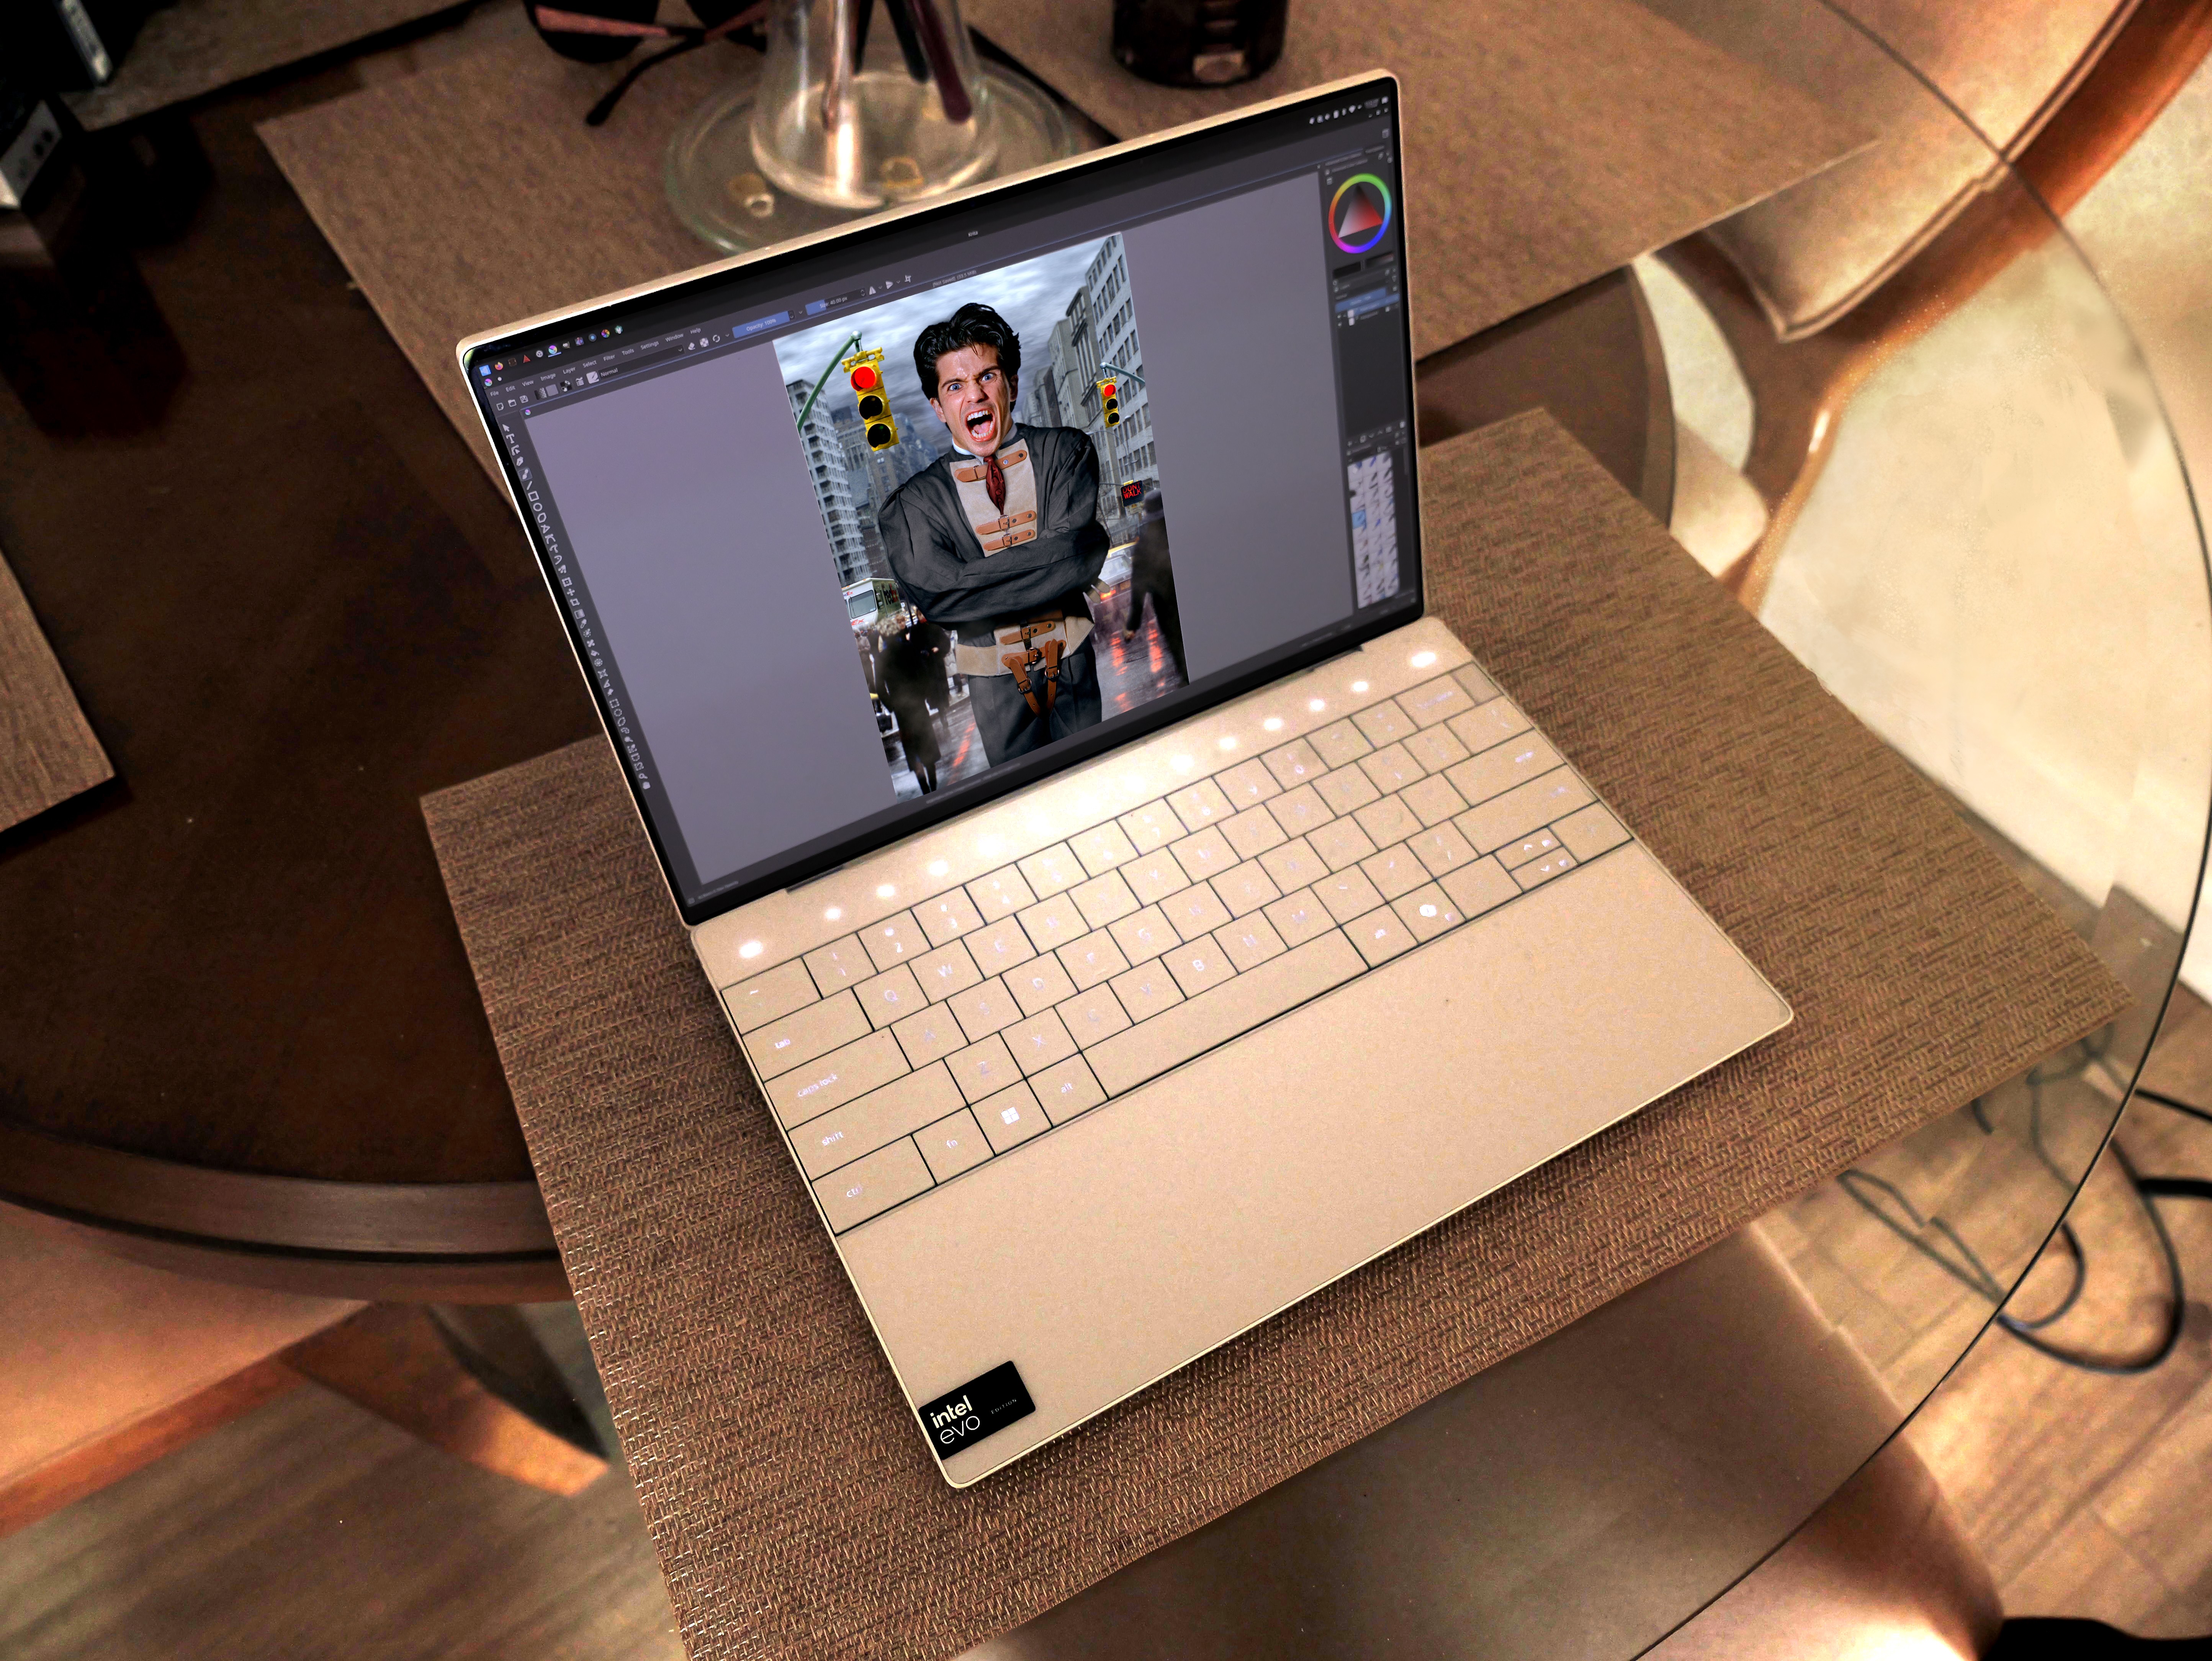
Setting up a dual-boot system used to require jumping through a few hoops. But the new Linux installers make it much easier now.
Before you start though, you will need to disable something called “BitLocker” in Windows. This is done in Windows Settings. It will then decrypt anything already encrypted. When done, reboot into the installer.
All of the steps are the same as we saw above, with one change:
In the Disk Set-Up window we will choose to “install Ubuntu alongside Windows” on the same drive. But they still need different PARTITIONS, which are like slices of the hard drive pie.
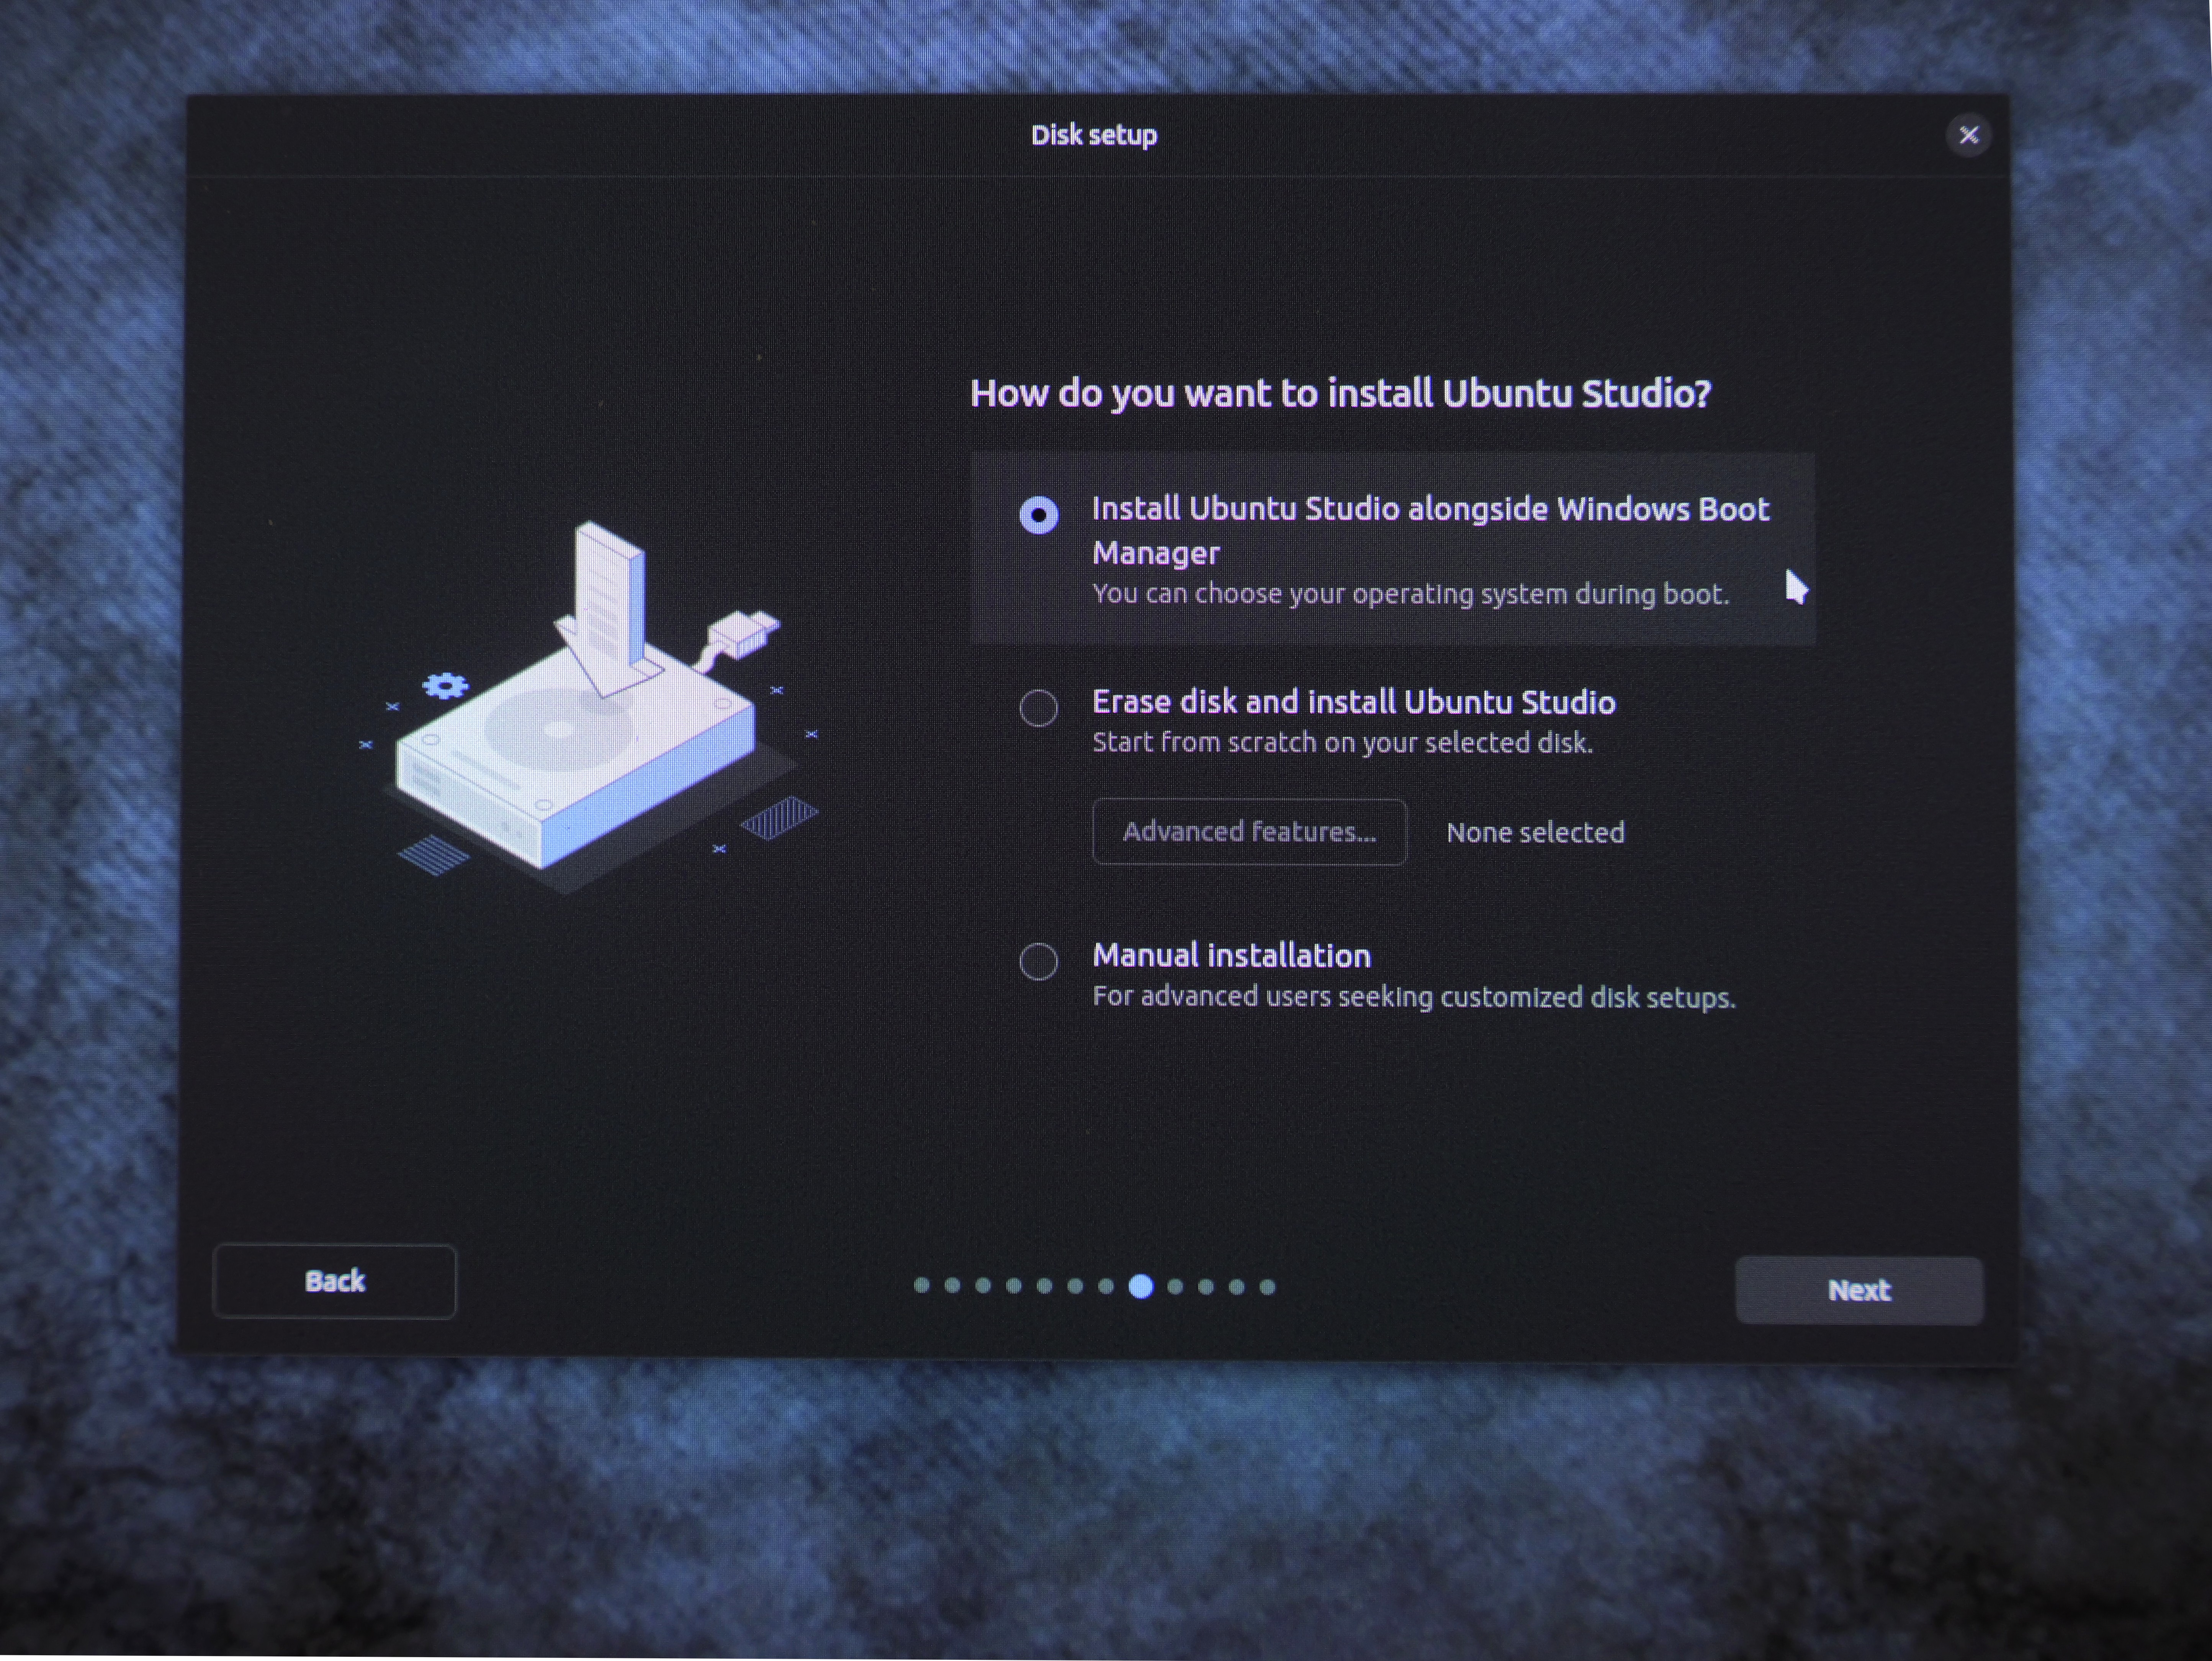
Click NEXT and you will be brought to a page where you can set the various partition sizes.
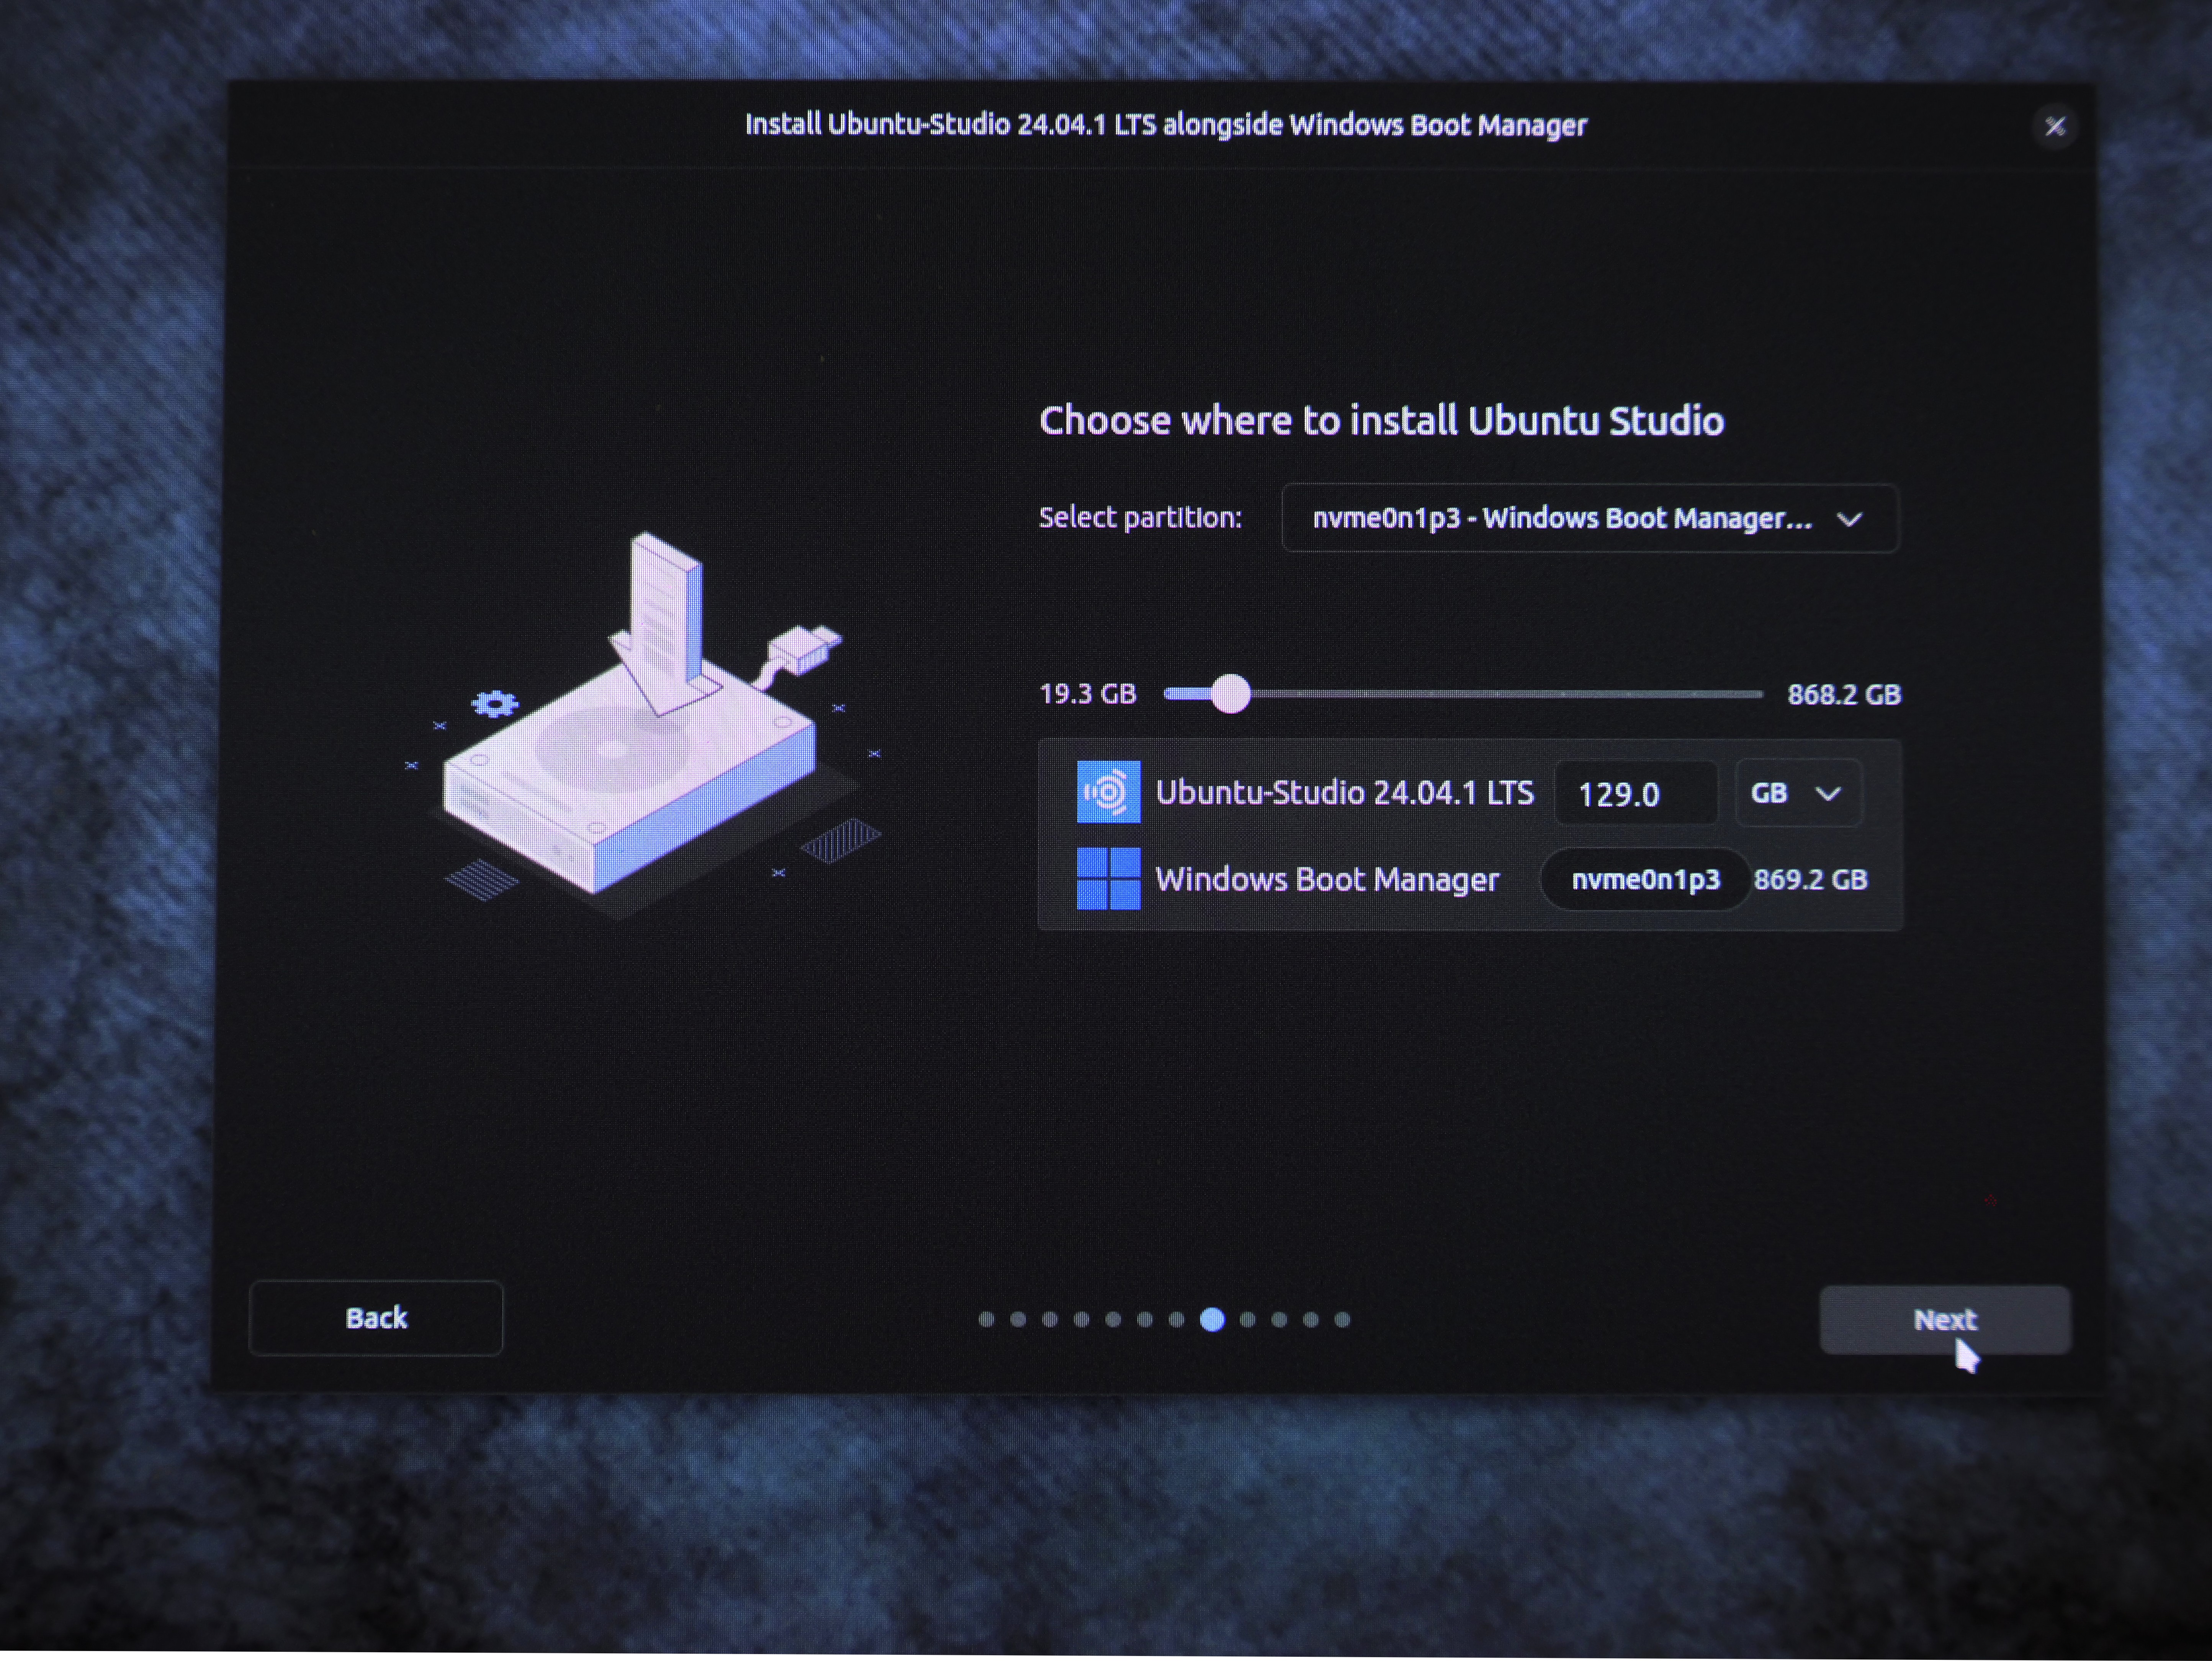
Make sure to be using the “C” drive, which will likely be the largest. You do NOT want to use the “Recovery” or other smaller partitions. Divide the hard drive for Windows and Linux.
Again, click on NEXT and the installer will continue, as above. When done, you will have a very cool dual-boot computer!
Final Thoughts
Compatibility
Some years ago Linux would run better on some hardware than others. This is only sort of true today because more manufacturers make sure their products work on Linux. But it’s also credit to Linux developers who keep making it more seamless. This is a good reason to test-drive Linux before installing, it’s like kicking the tires.
A New Creativity
Let me leave you with this to think about. I remember my early days on computers. Everything was new and so exciting! For me, and many other creatives, moving to Linux and the open tools provided on Ubuntu Studio has brought back that excitement.
Yes, it has also brought back the frustrations of learning new tools. There is hair-pulling, I won’t lie. But then you stumble upon something that GIMP can do that you always wished PS could, and a smile starts to form on your face. And that early excitement of exploration returns. And it’s wonderful.
For more advice, see our guide to the best laptops for graphic design, and the best laptops for photo editing.


