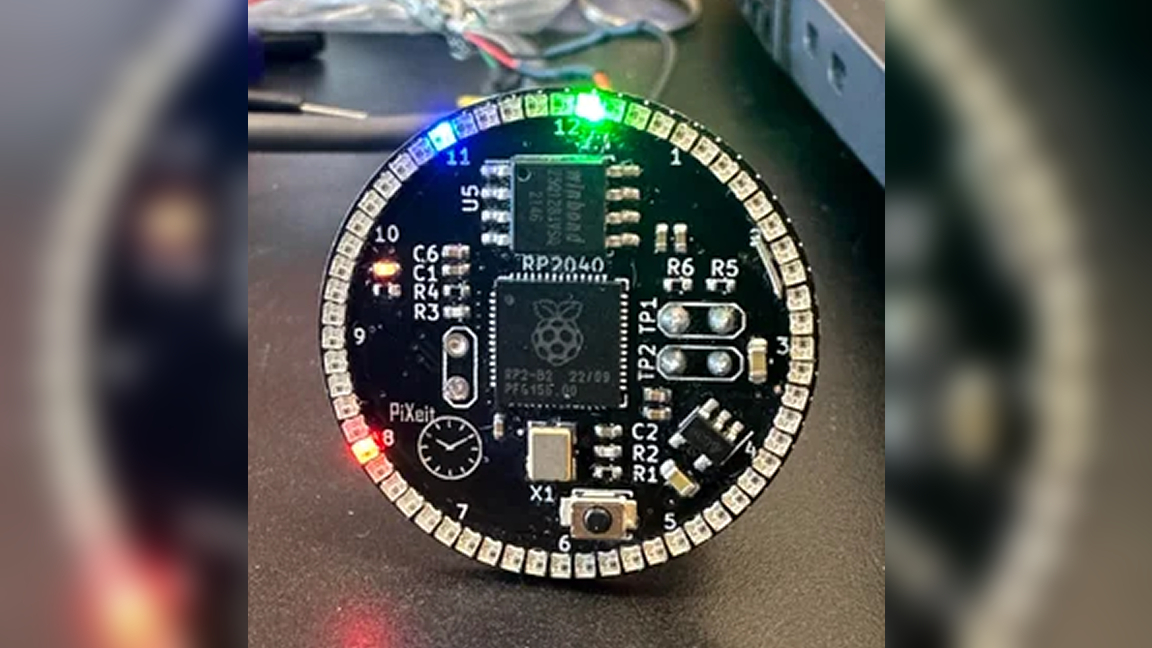
Makers never cease to amaze us when it comes to the cool Raspberry Pi-powered wearables they create. Today we've got an awesome wristwatch PCB created by maker and developer Kim Paulsson that features a Raspberry Pi RP2040 microprocessor as used in the Raspberry Pi Pico. Instead of using hands to point to the hour and minute, Paulsson is using a ring of RGB LEDs.
According to Paulsson, the project was created as a learning endeavor. It consists of a circular PCB spanning 28.5mm across, intended to work as a face for a wristwatch. It uses a battery which makes it portable and in the future will make it wearable. Surrounding the circumference is a string of RGB LEDs.
The LEDs display the time by using colors to indicate the hour, minute and second of the current time. Because this is just a PCB and not a finished unit, the LEDs are exposed which makes them appear a bit brighter than preferred. However, this can be fixed by adding a diffusing layer, something which could be 3D printed using the best 3D printer.
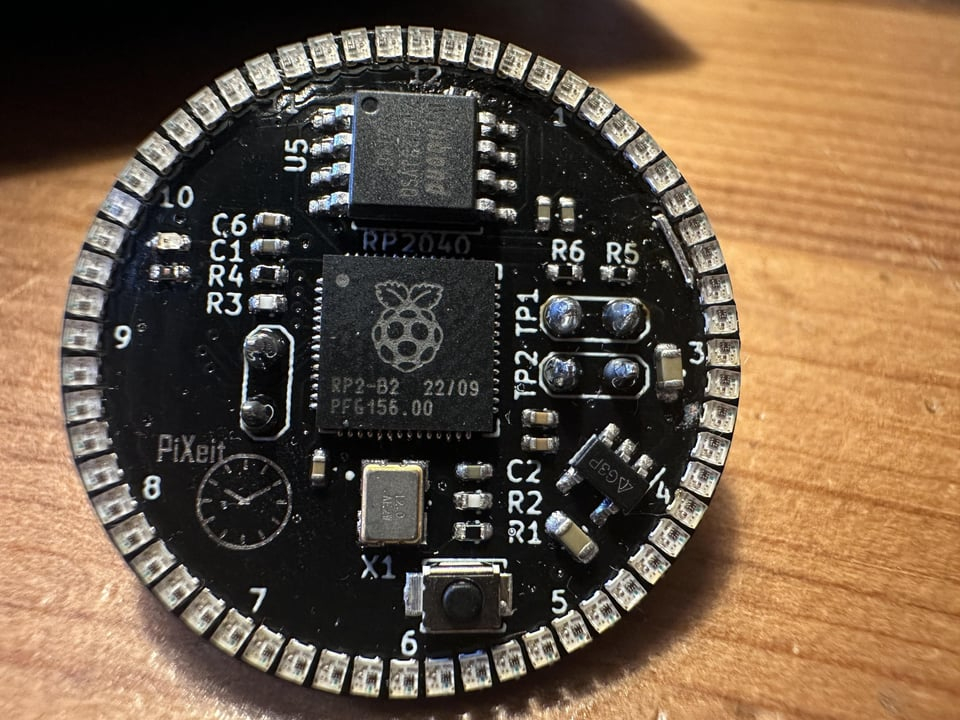
The PCB was designed in KiCad by Paulsson just for this project. The board is matte black, and uses surface mounted components, including the RP2040 which serves as the main processor. Because the RP2040 doesn't have any onboard storage, there is a Winbond 25Q1281VSQ 8Mb for flash storage. There are 60 LEDs surrounding the PCB, one used to represent each second of every minute as well as for the hour and minute lights. We're not use what protocol these LEDs are using. It is most likely WS2812 "NeoPixels" or APA102 "DotStar" as they only require power, ground and a data connection.
So far, the RP2040 wristwatch PCB works without a hitch as demonstrated by the video shared to YouTube by Paulsson. According to Paulsson, the goal from here is to optimize the battery and work on a way to house the hardware. In the meantime, the hardest part of the project is out of the way and we get to appreciate the glowing end results.
If you want to get a closer look at this Raspberry Pi project, check out the original thread shared to Reddit. You can also follow Kim Paulsson for more cool creations as well as any future updates to this one.