Nothing screams modulation like a good old LFO. This most basic of synthesizer components has been responsible for some exceptionally iconic sounds in the history of production. Due to the design of mid-’80s Roland synths, LFO could be manually triggered using the iconic white LFO button, which was located immediately next to the pitch wheel.
This gave rise to the use of heavily modulated LFO, on bright-sounding saw pads, becoming something of a trademark. This infiltrated modern production too; just listen to the synth stabs on Uptown Funk, if you need evidence. But they can also be used more sparingly, to provide a degree of undulation to the pitch of a patch, as is commonplace with artists like Aphex Twin.
But what of the rise of the wobble bass? This is a sound that captured the production psyche within the dubstep genre, through its use by artists such as Skrillex. Recognisable by its compressed, brightly garish sound, we’ll create something slightly more subdued to place in our own track.
The process of applying LFO to a filter is the same, whether you want to crank the modulation or keep things more under control, so this tutorial should serve you well for a number of production scenarios.
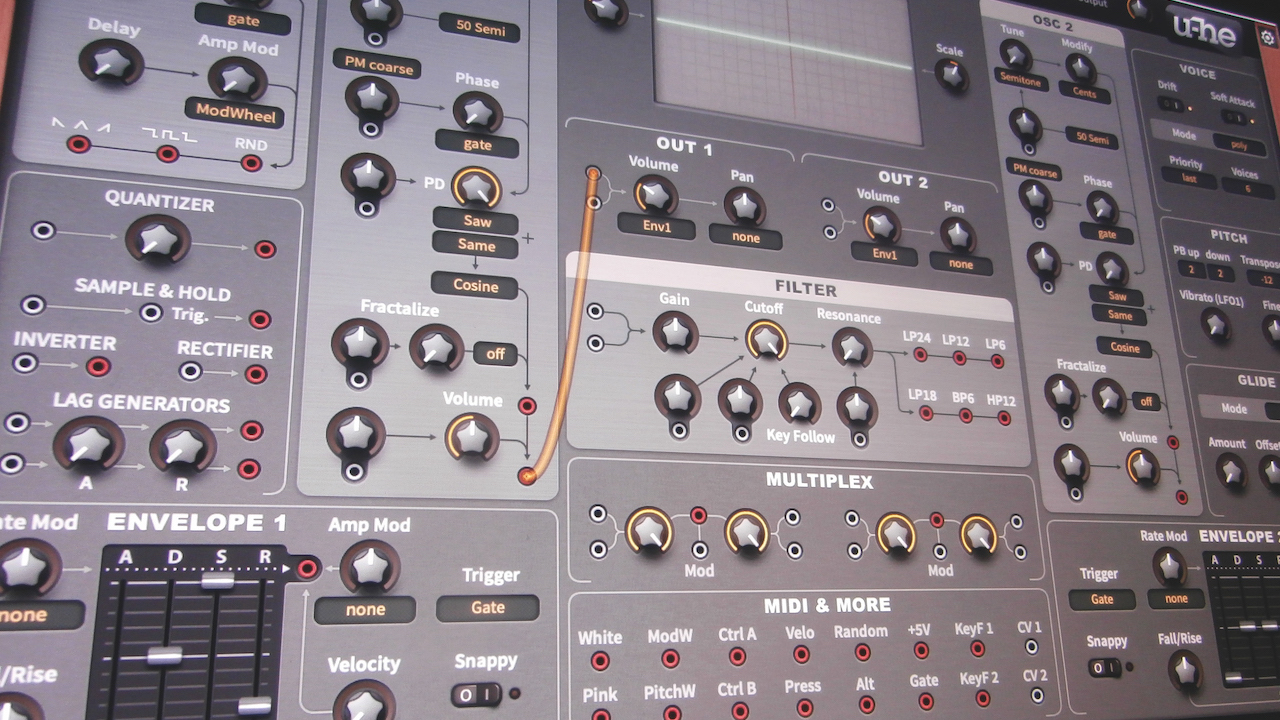
For this tutorial, we're using BazilleCM, a synth plugin that comes free with every issue of our sister magazine Computer Music, along with a bundle of other plugins called the CM Plugin Suite. Let's turn up the wobble factor!
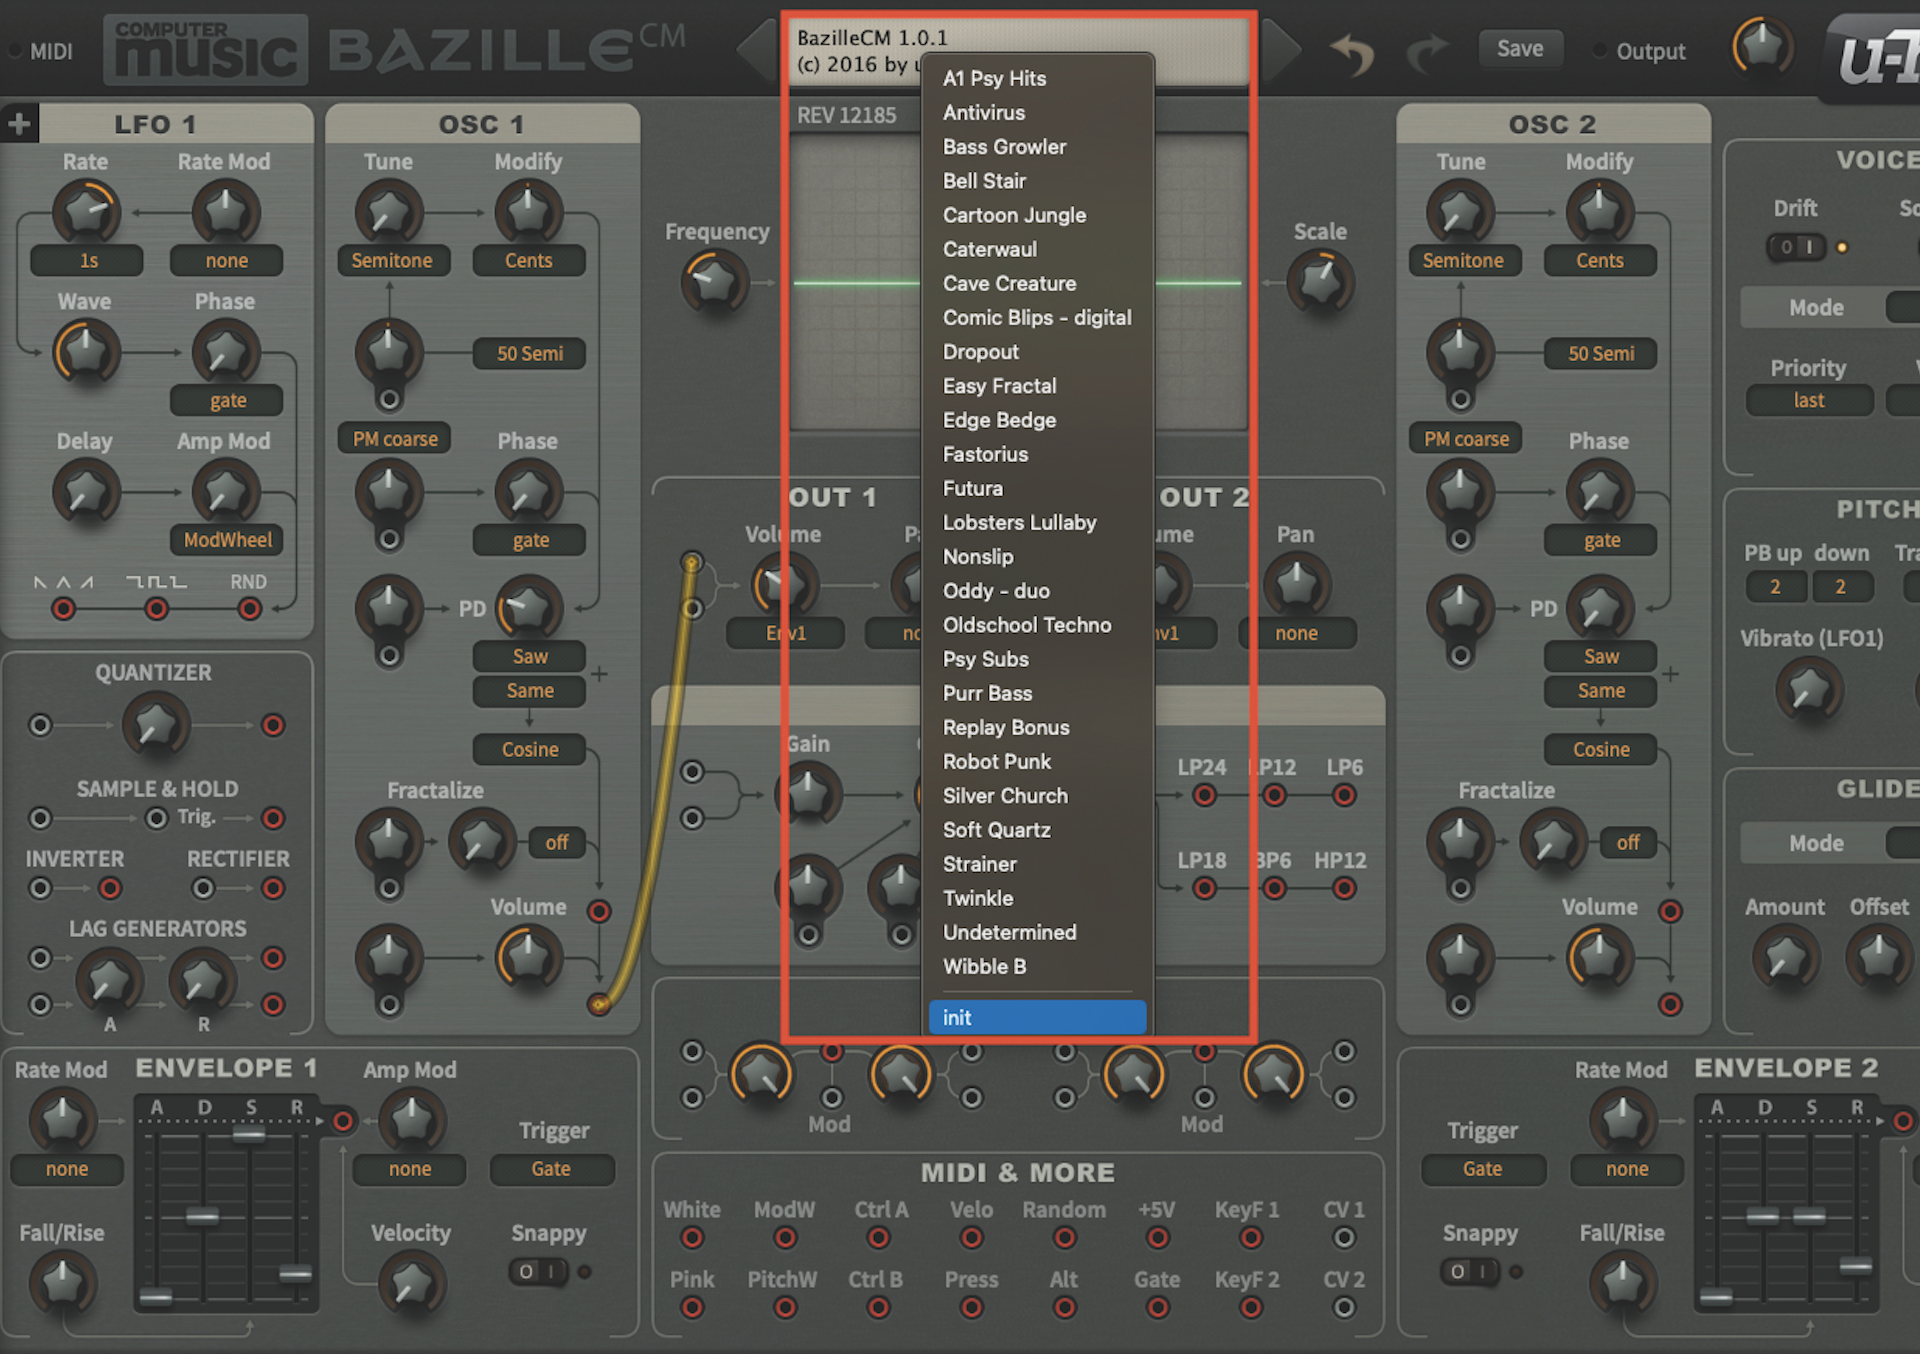
Let’s start things off by initialising a patch in BazilleCM. Open up your DAW and load up the plugin. Once the plugin window is open, move to the central display at the top of the window, click to reveal the drop-down menu, and select ‘init’ from the bottom. This will initialise the patch.
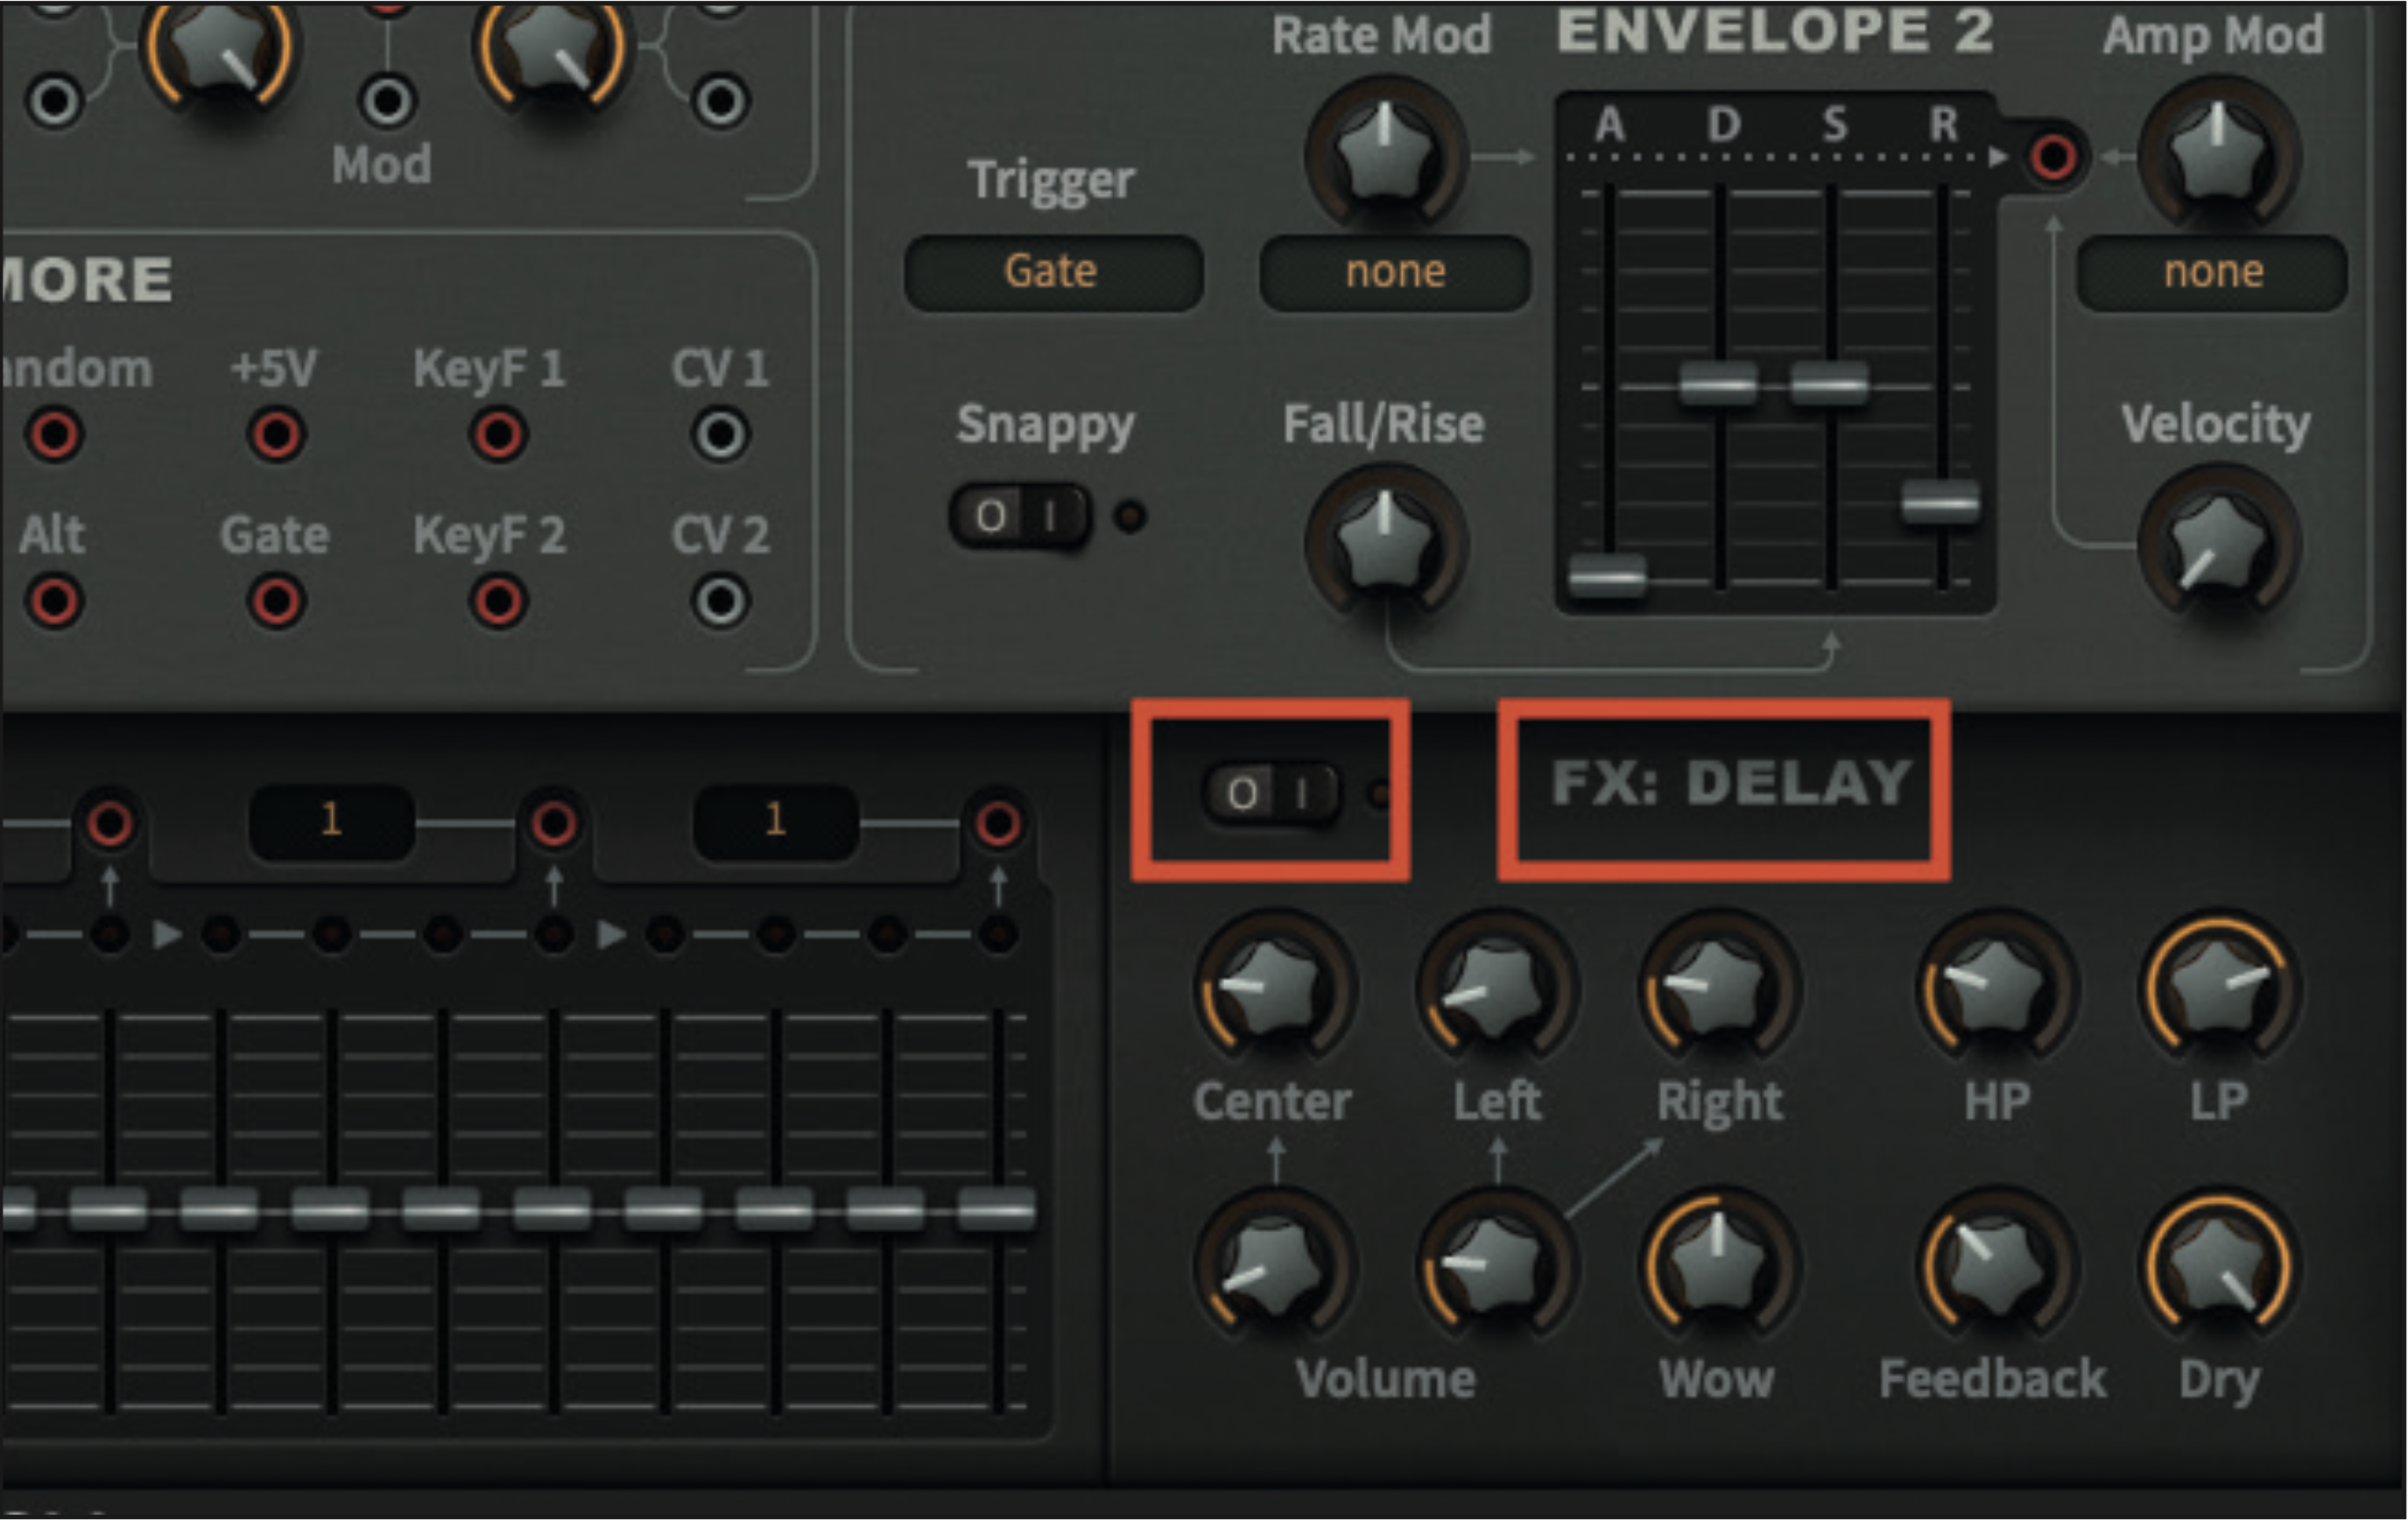
As part of the initialisation, you’ll also hear the FX Delay active in the signal. To make our adjustments clearer at this stage, go to the Delay section (bottom-right) and move the switch to the ‘off’ position. You can always switch it on again later, if so desired.
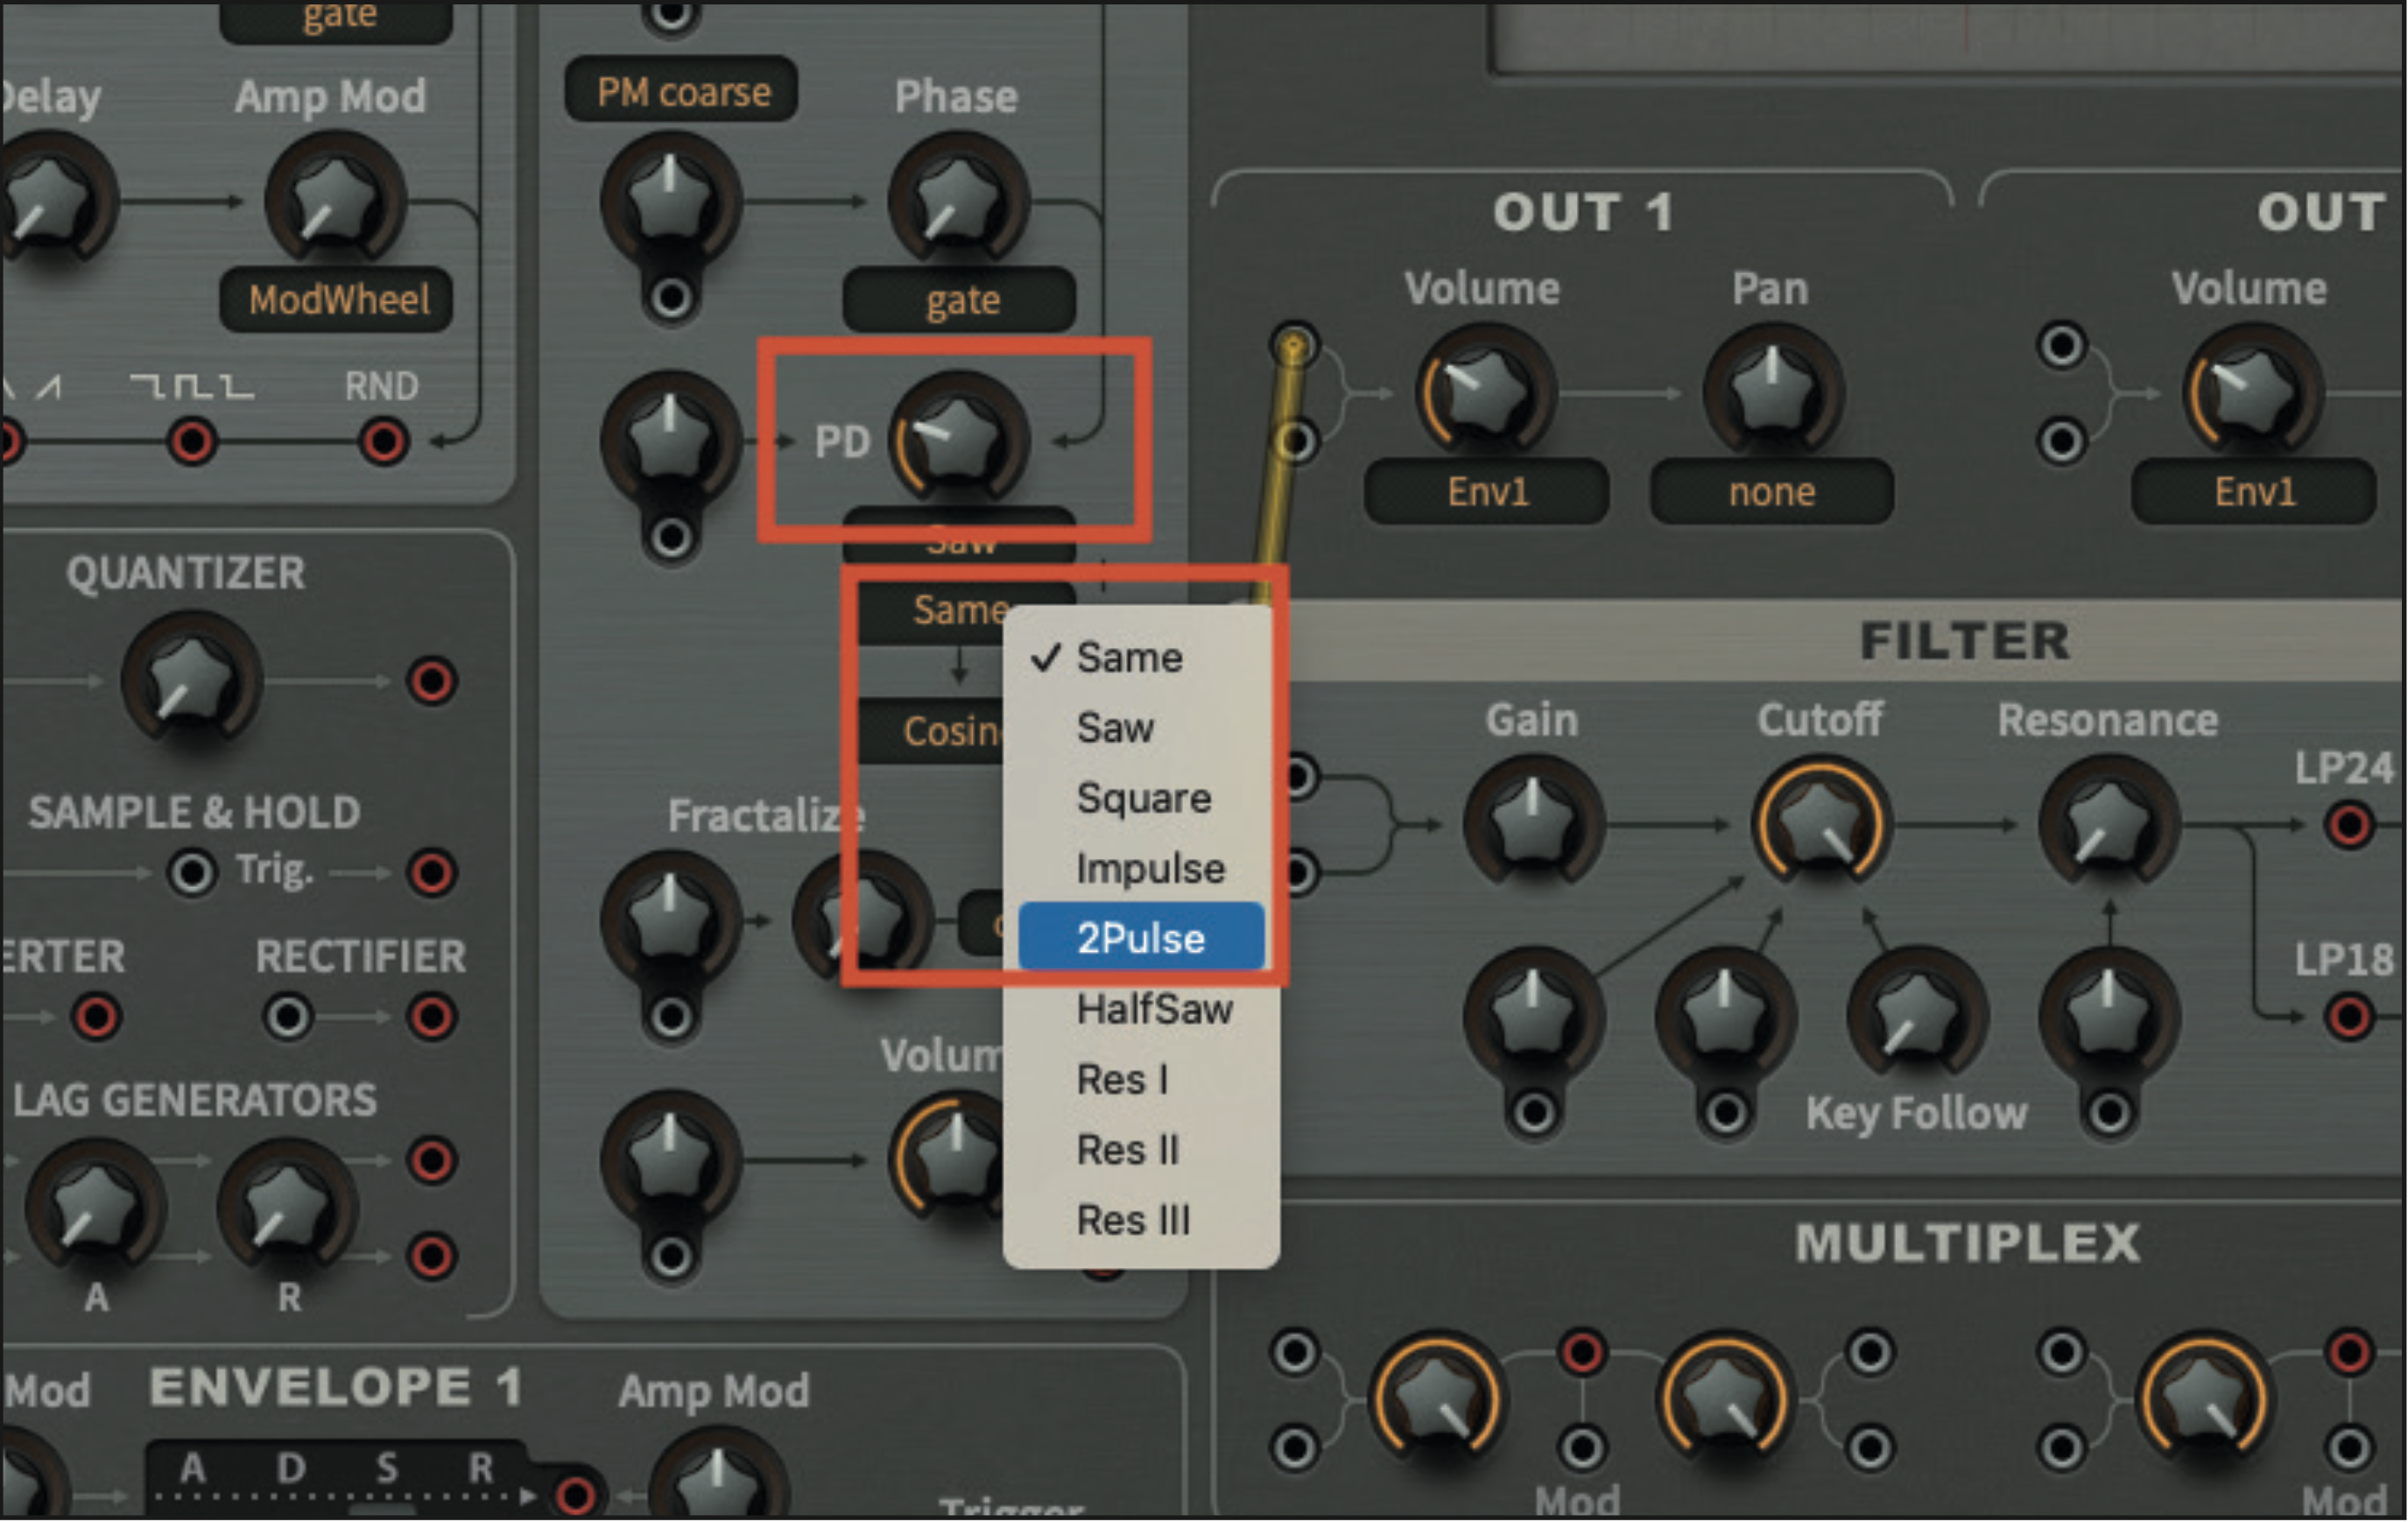
We’ll begin with Osc 1. To create our starting tone, adjust the PD pot to a value of 25; don’t forget to keep an eye on the display at the top of the plugin window, for an accurate numerical value. We will also want to change the secondary waveform from the drop-down menu, to 2Pulse.
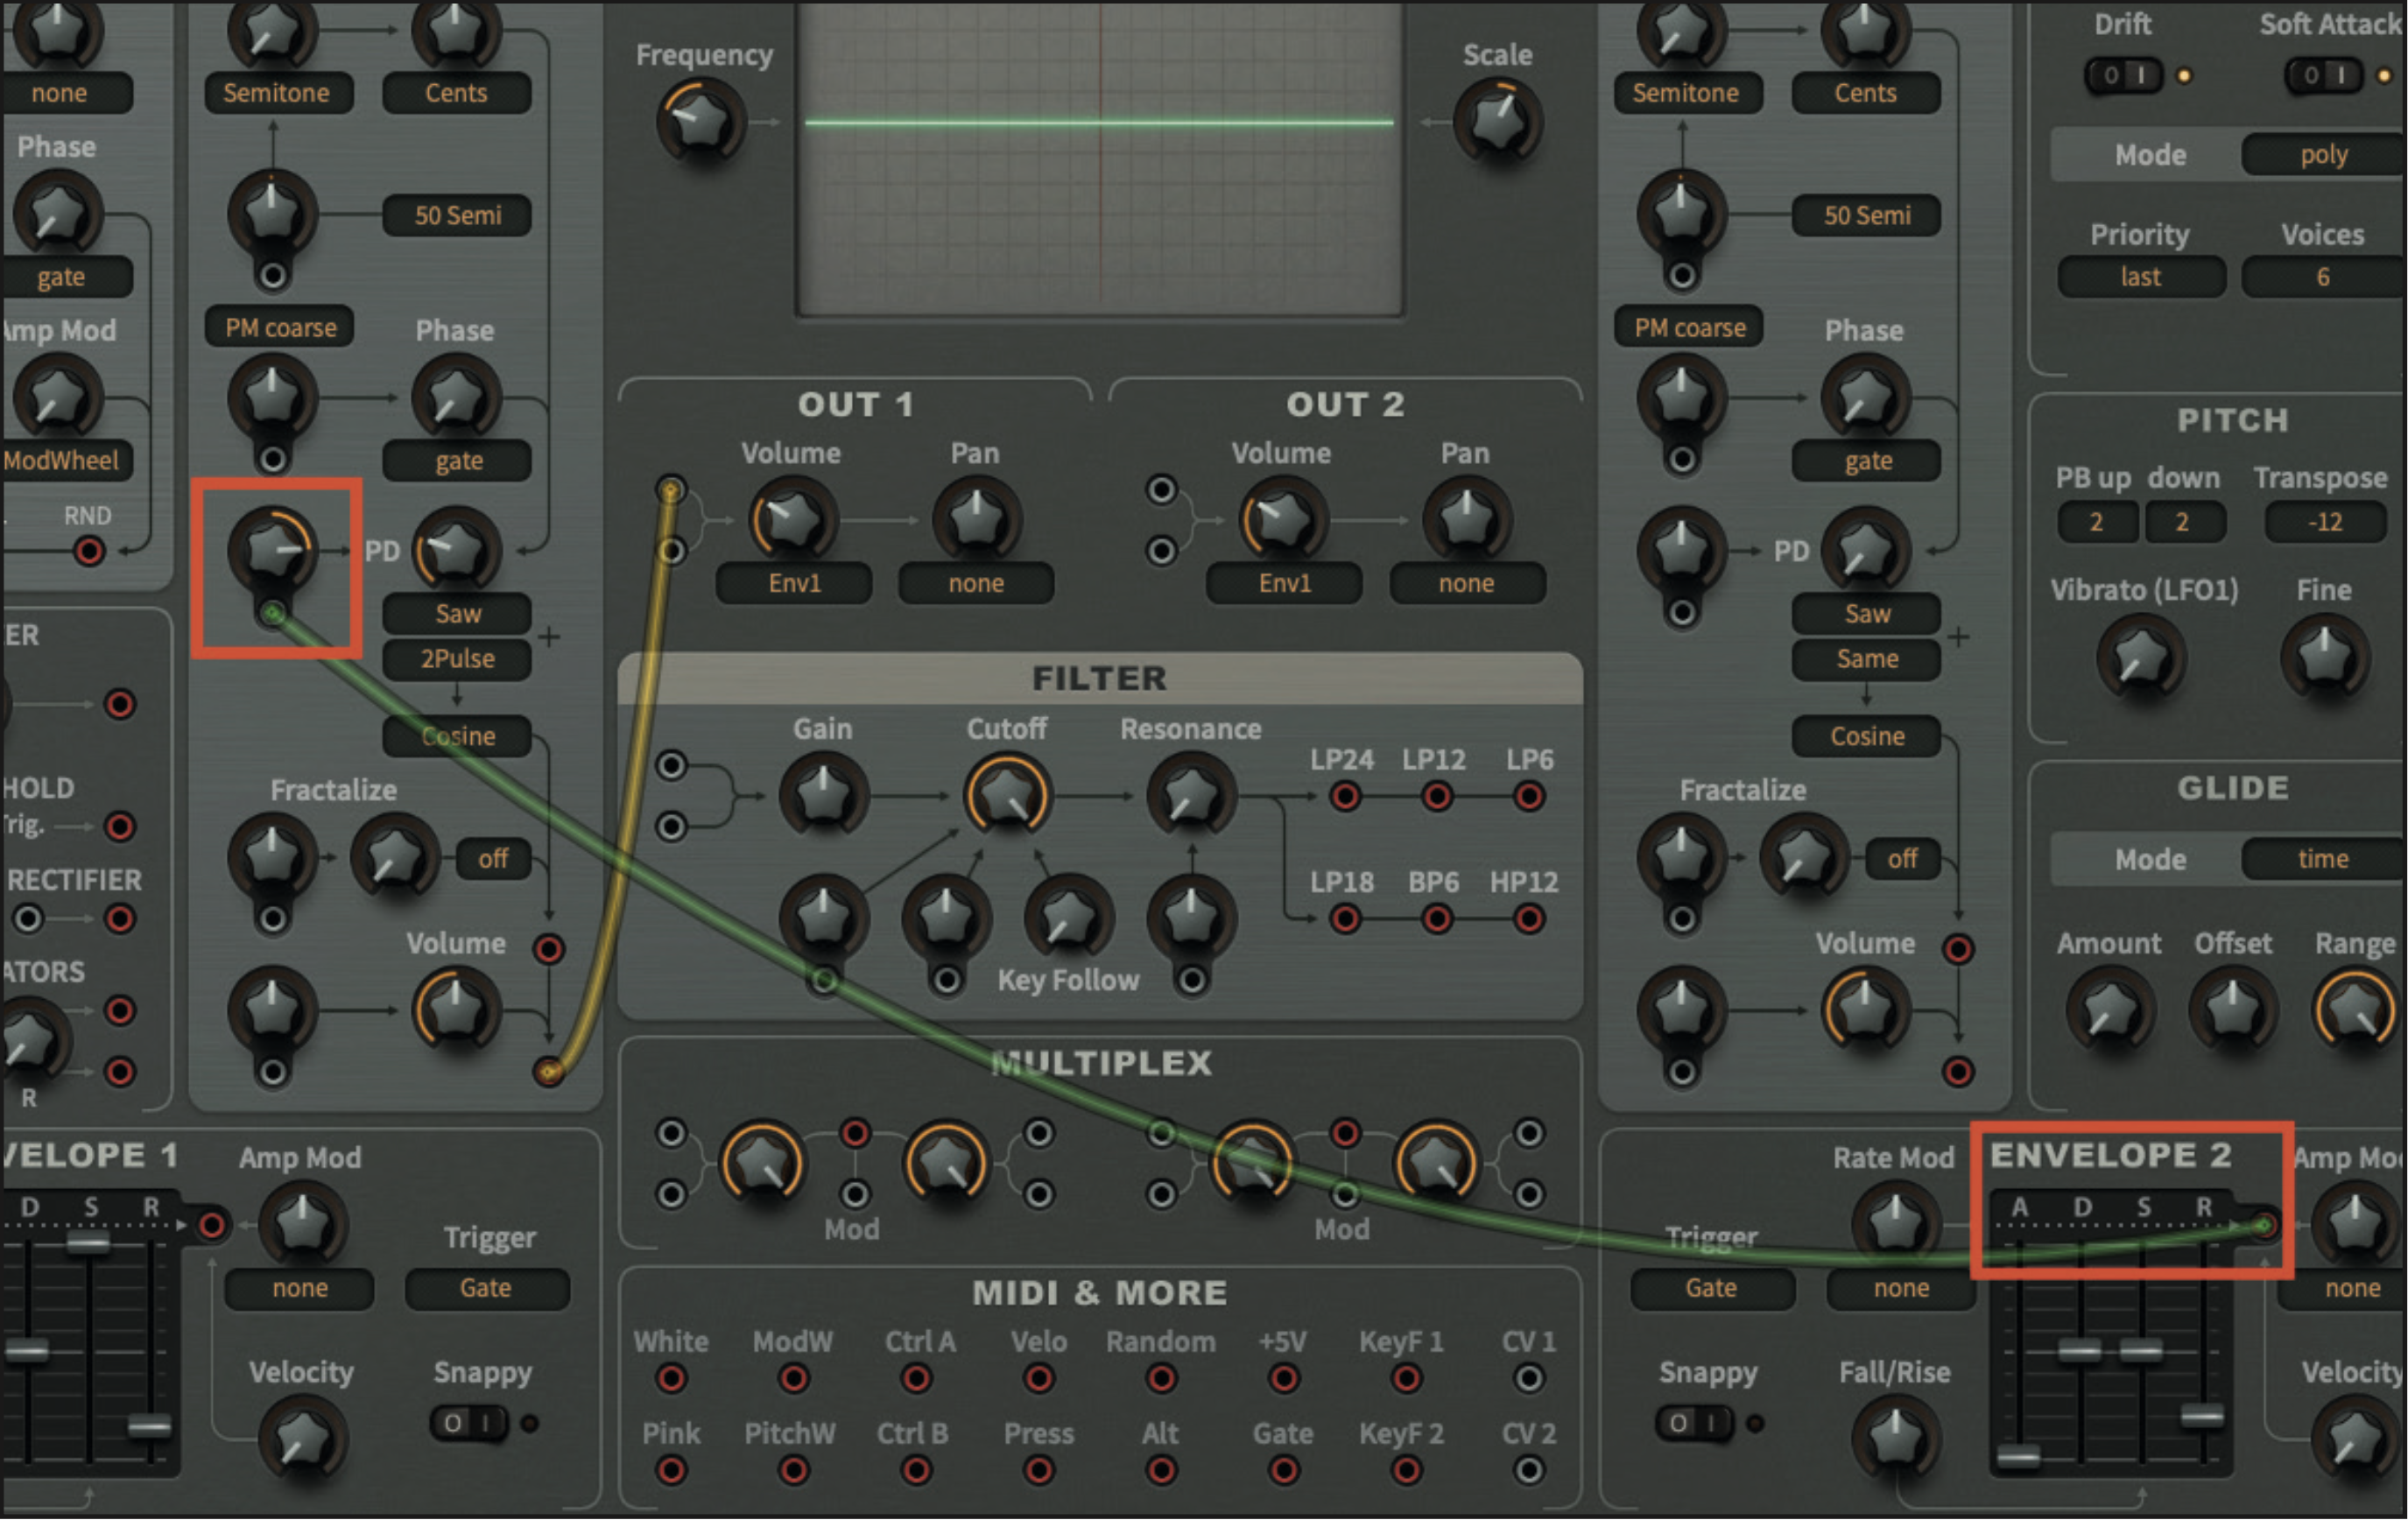
We want to create a sound which feels digital in make-up, which we can do by applying envelope modulation in the direction of phase distortion. Patch the output from Envelope 2 to the PD modulation pot of Osc 1. Once connected, set the value of the pot to 62.
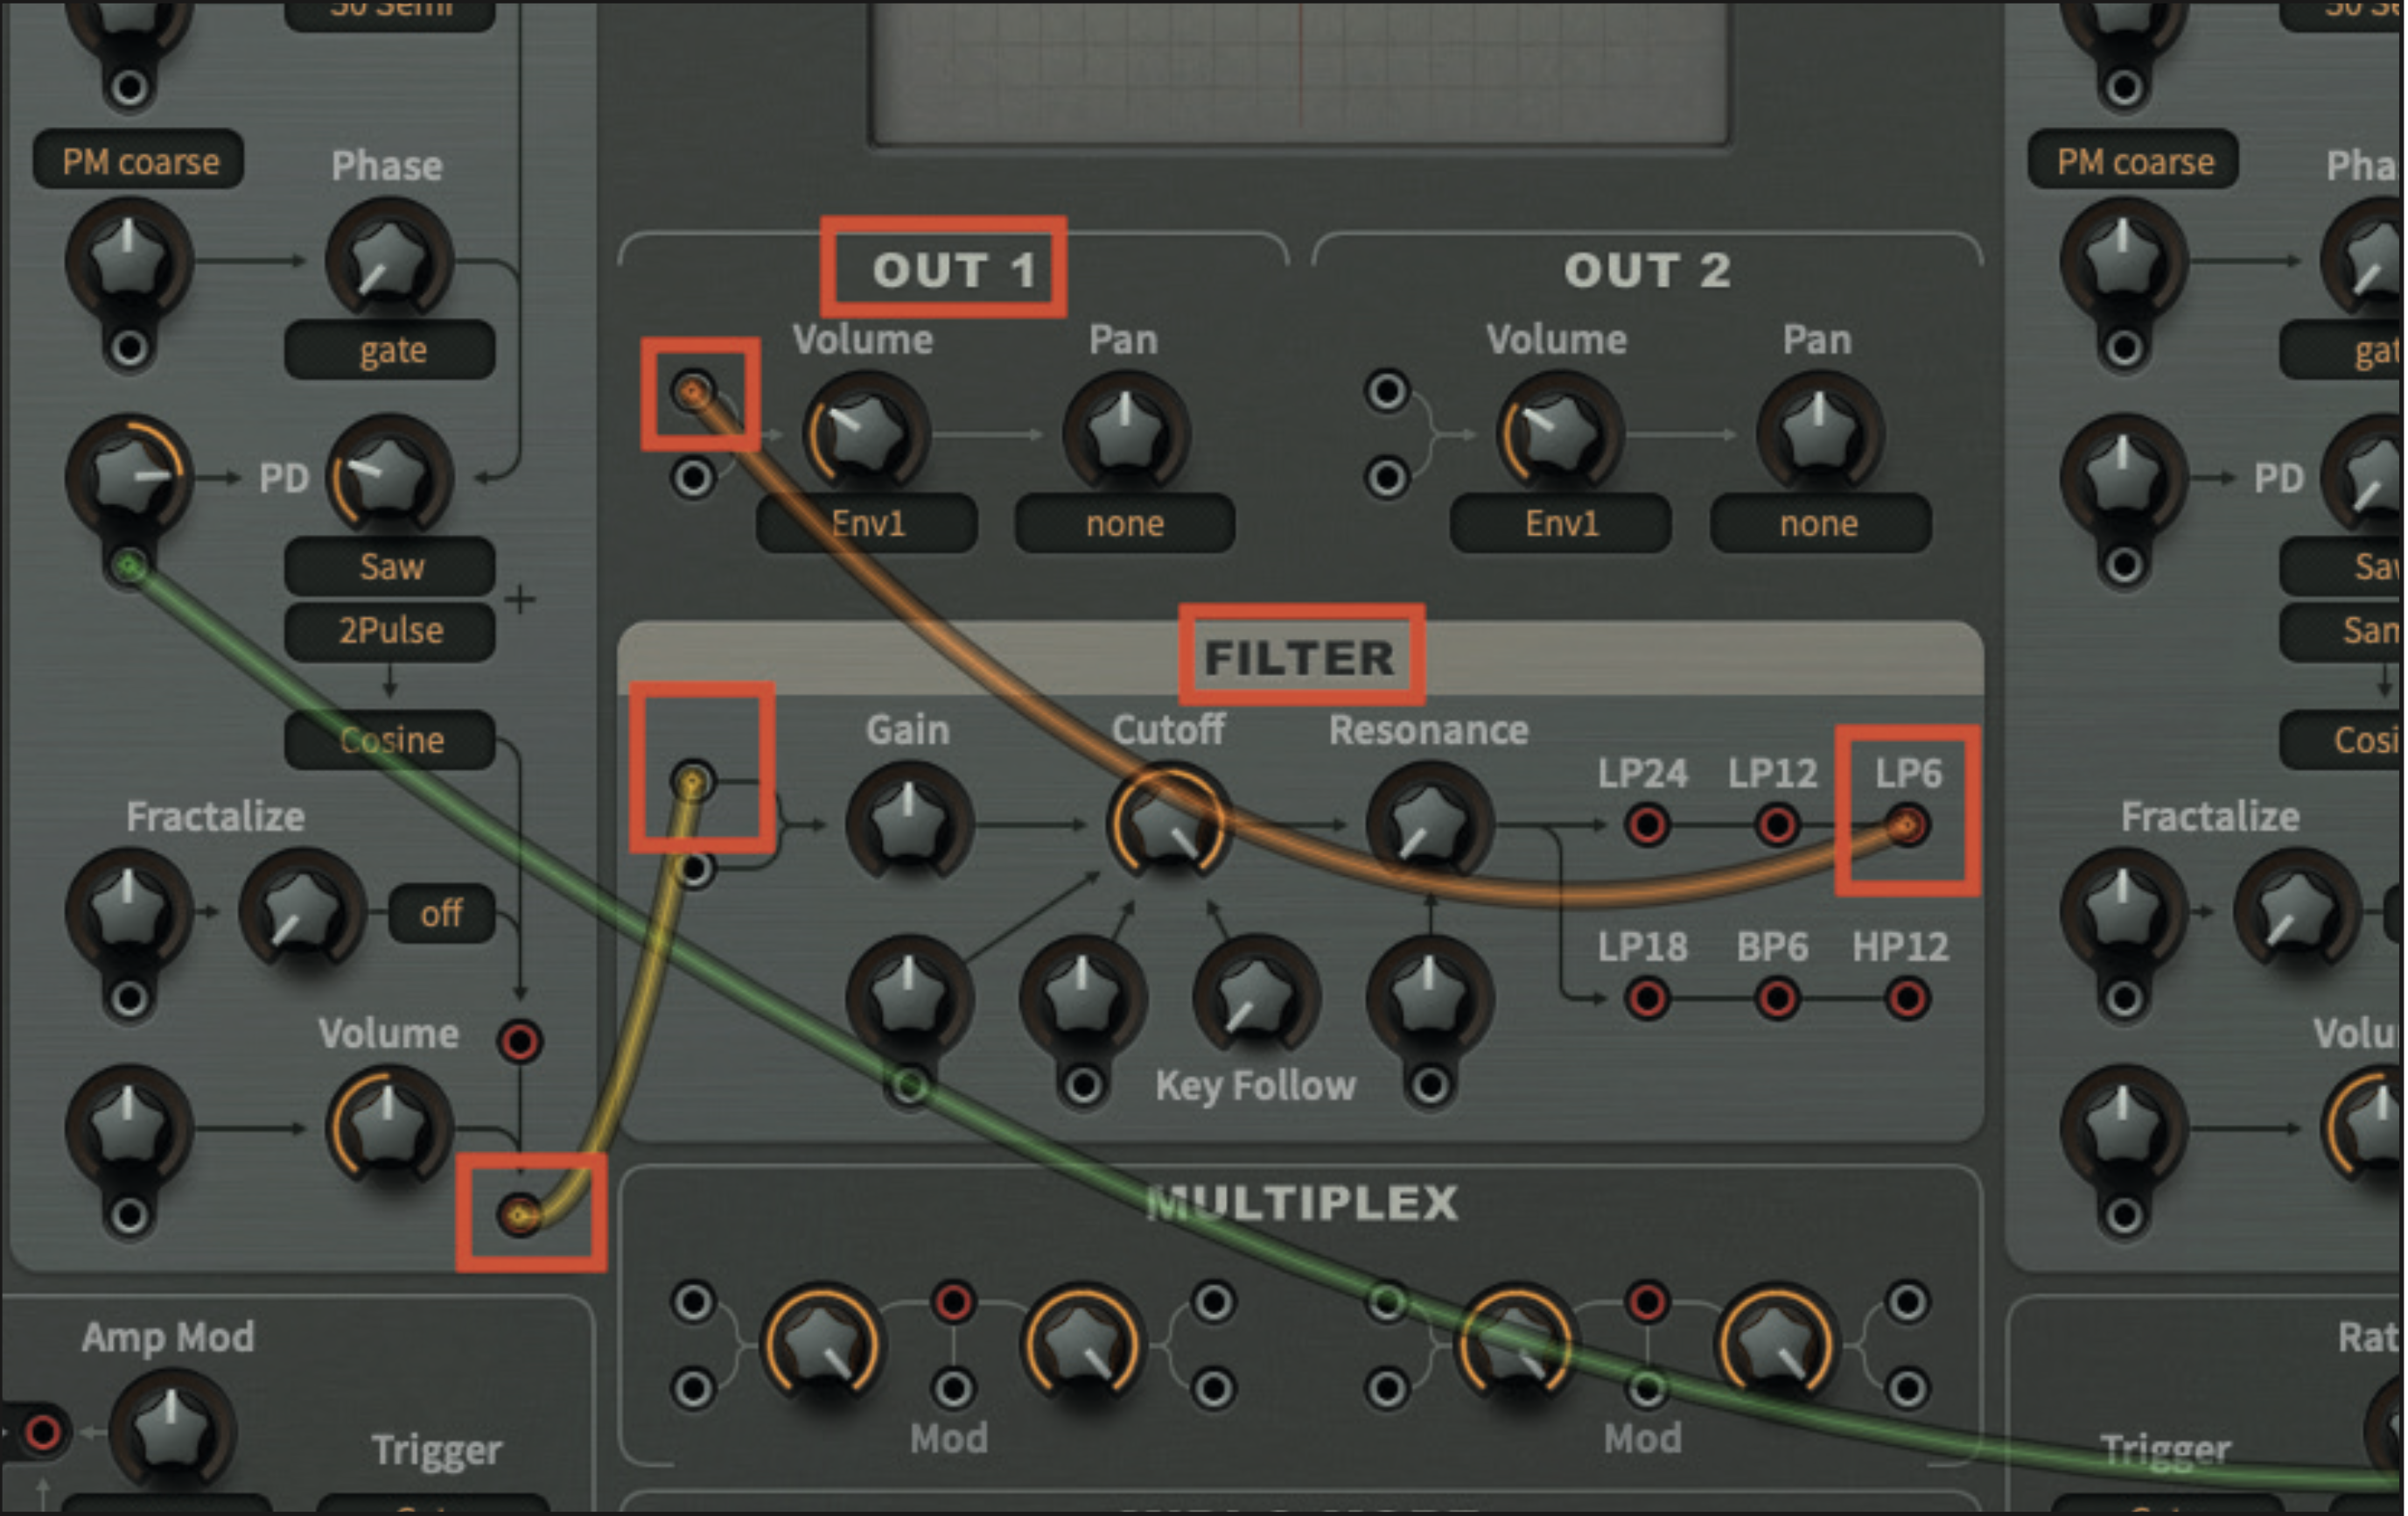
Currently Osc 1 is not outputting via the filter, so we need to place this in line. Disconnect the cable which is currently connected to Out 1, and reconnect it to the input of the filter section. Then, take the output from LP6 on the filter, and reconnect it to Out 1.
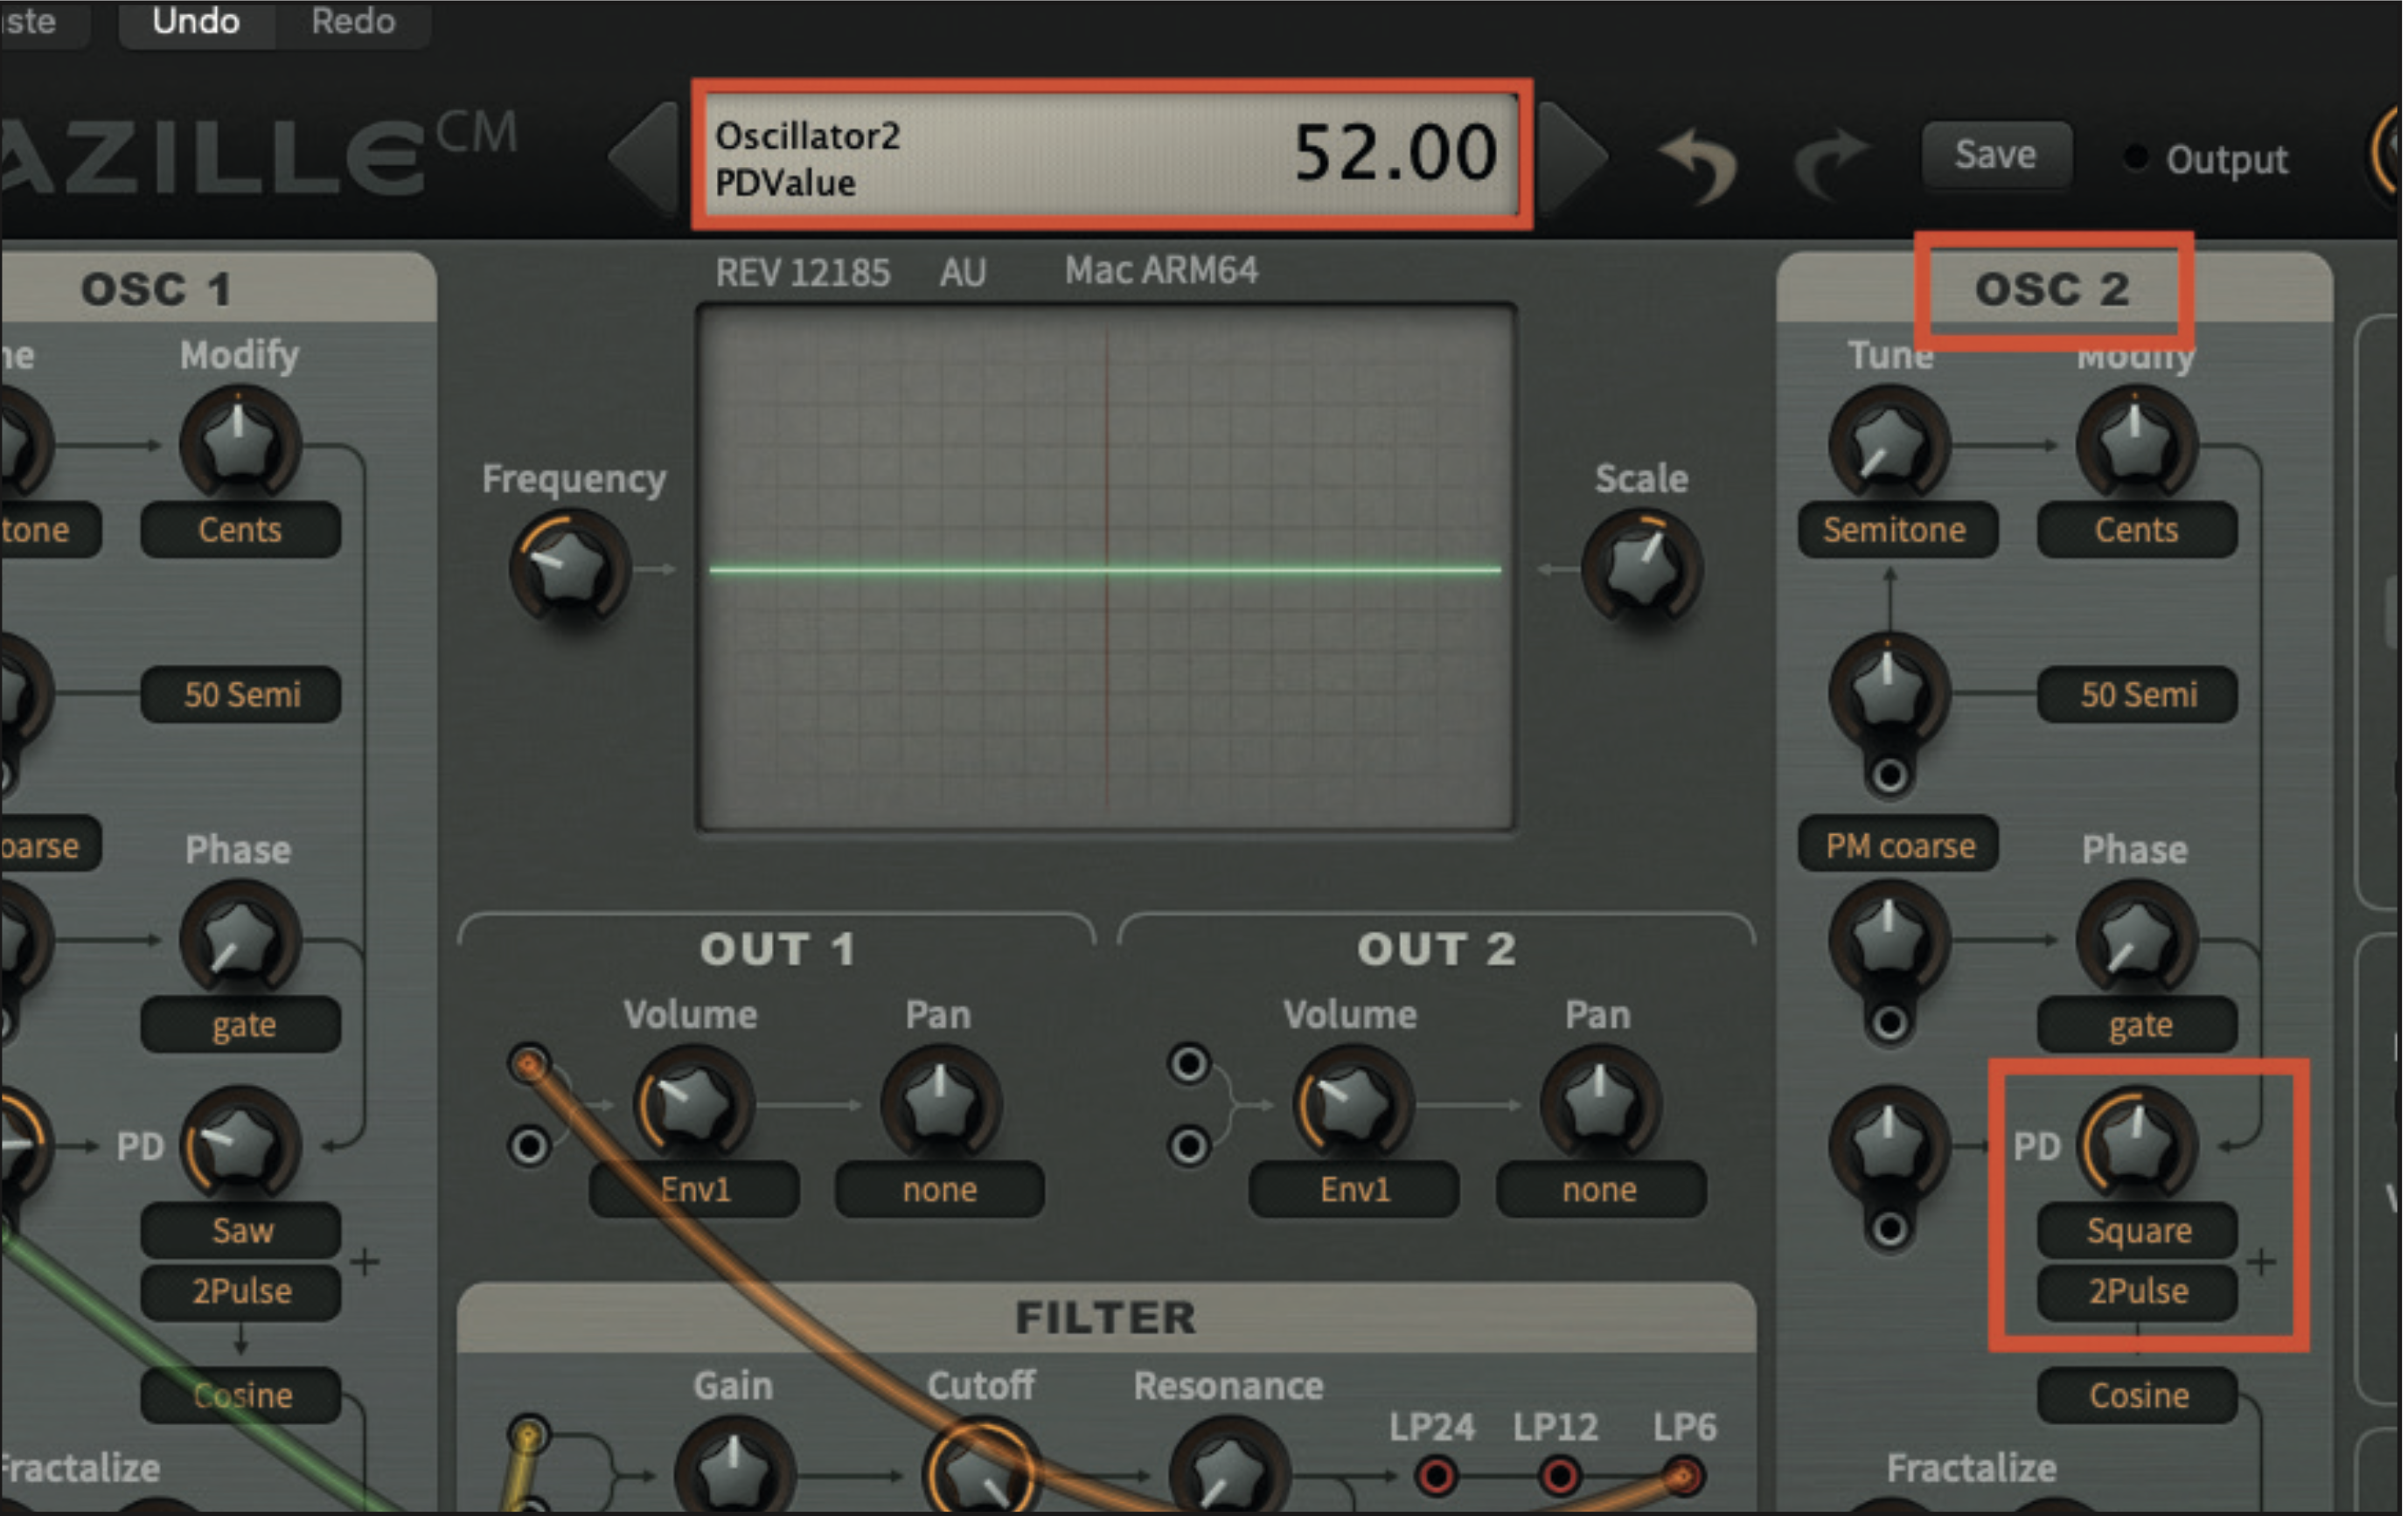
Moving across to Osc 2, adjust the PD pot to a value of 52. We also want to mix up the source tone by setting the primary waveform to a square, and the secondary waveform to 2Pulse. We will shortly blend this with the primary oscillator, adding a further digital-sounding element to the mix.
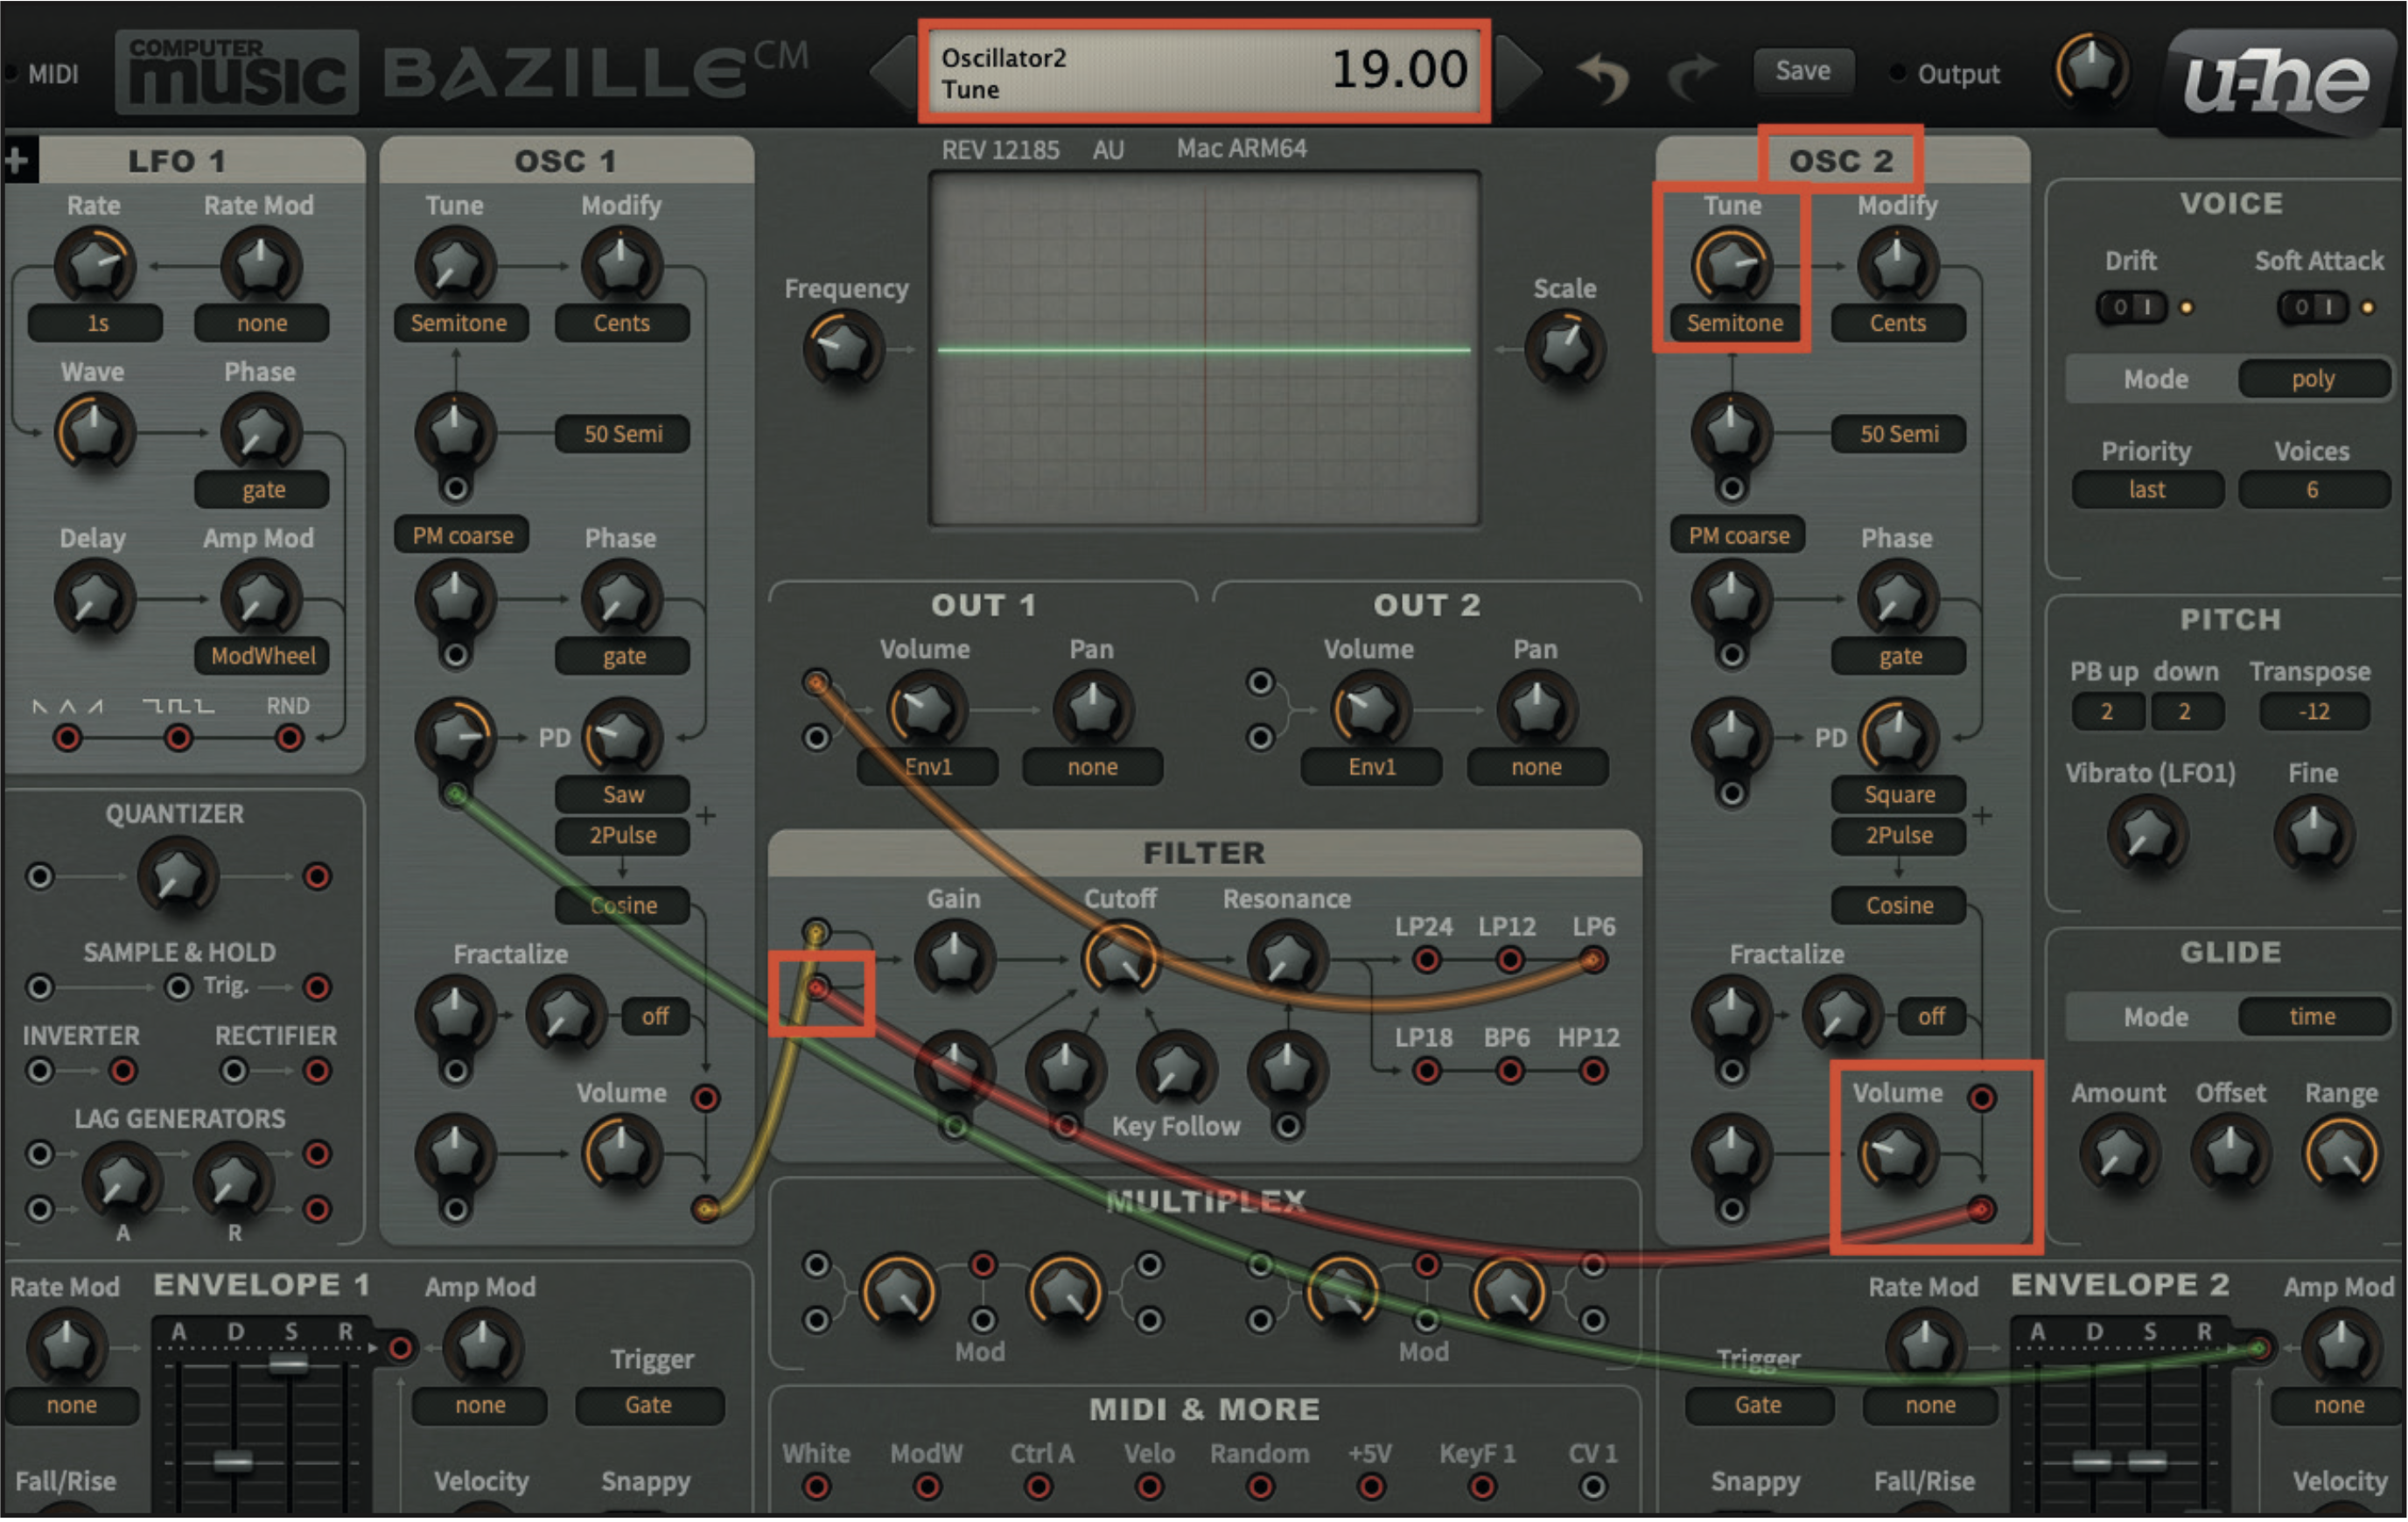
We are going to use Osc 2 to create a harmonic overtone, an octave and a fifth above our primary oscillator. Adjust the tuning pot to a value of 19 semitones. We also want to reduce the Volume pot to a value of 25, while also patching Osc 2 into the secondary input of the filter section.
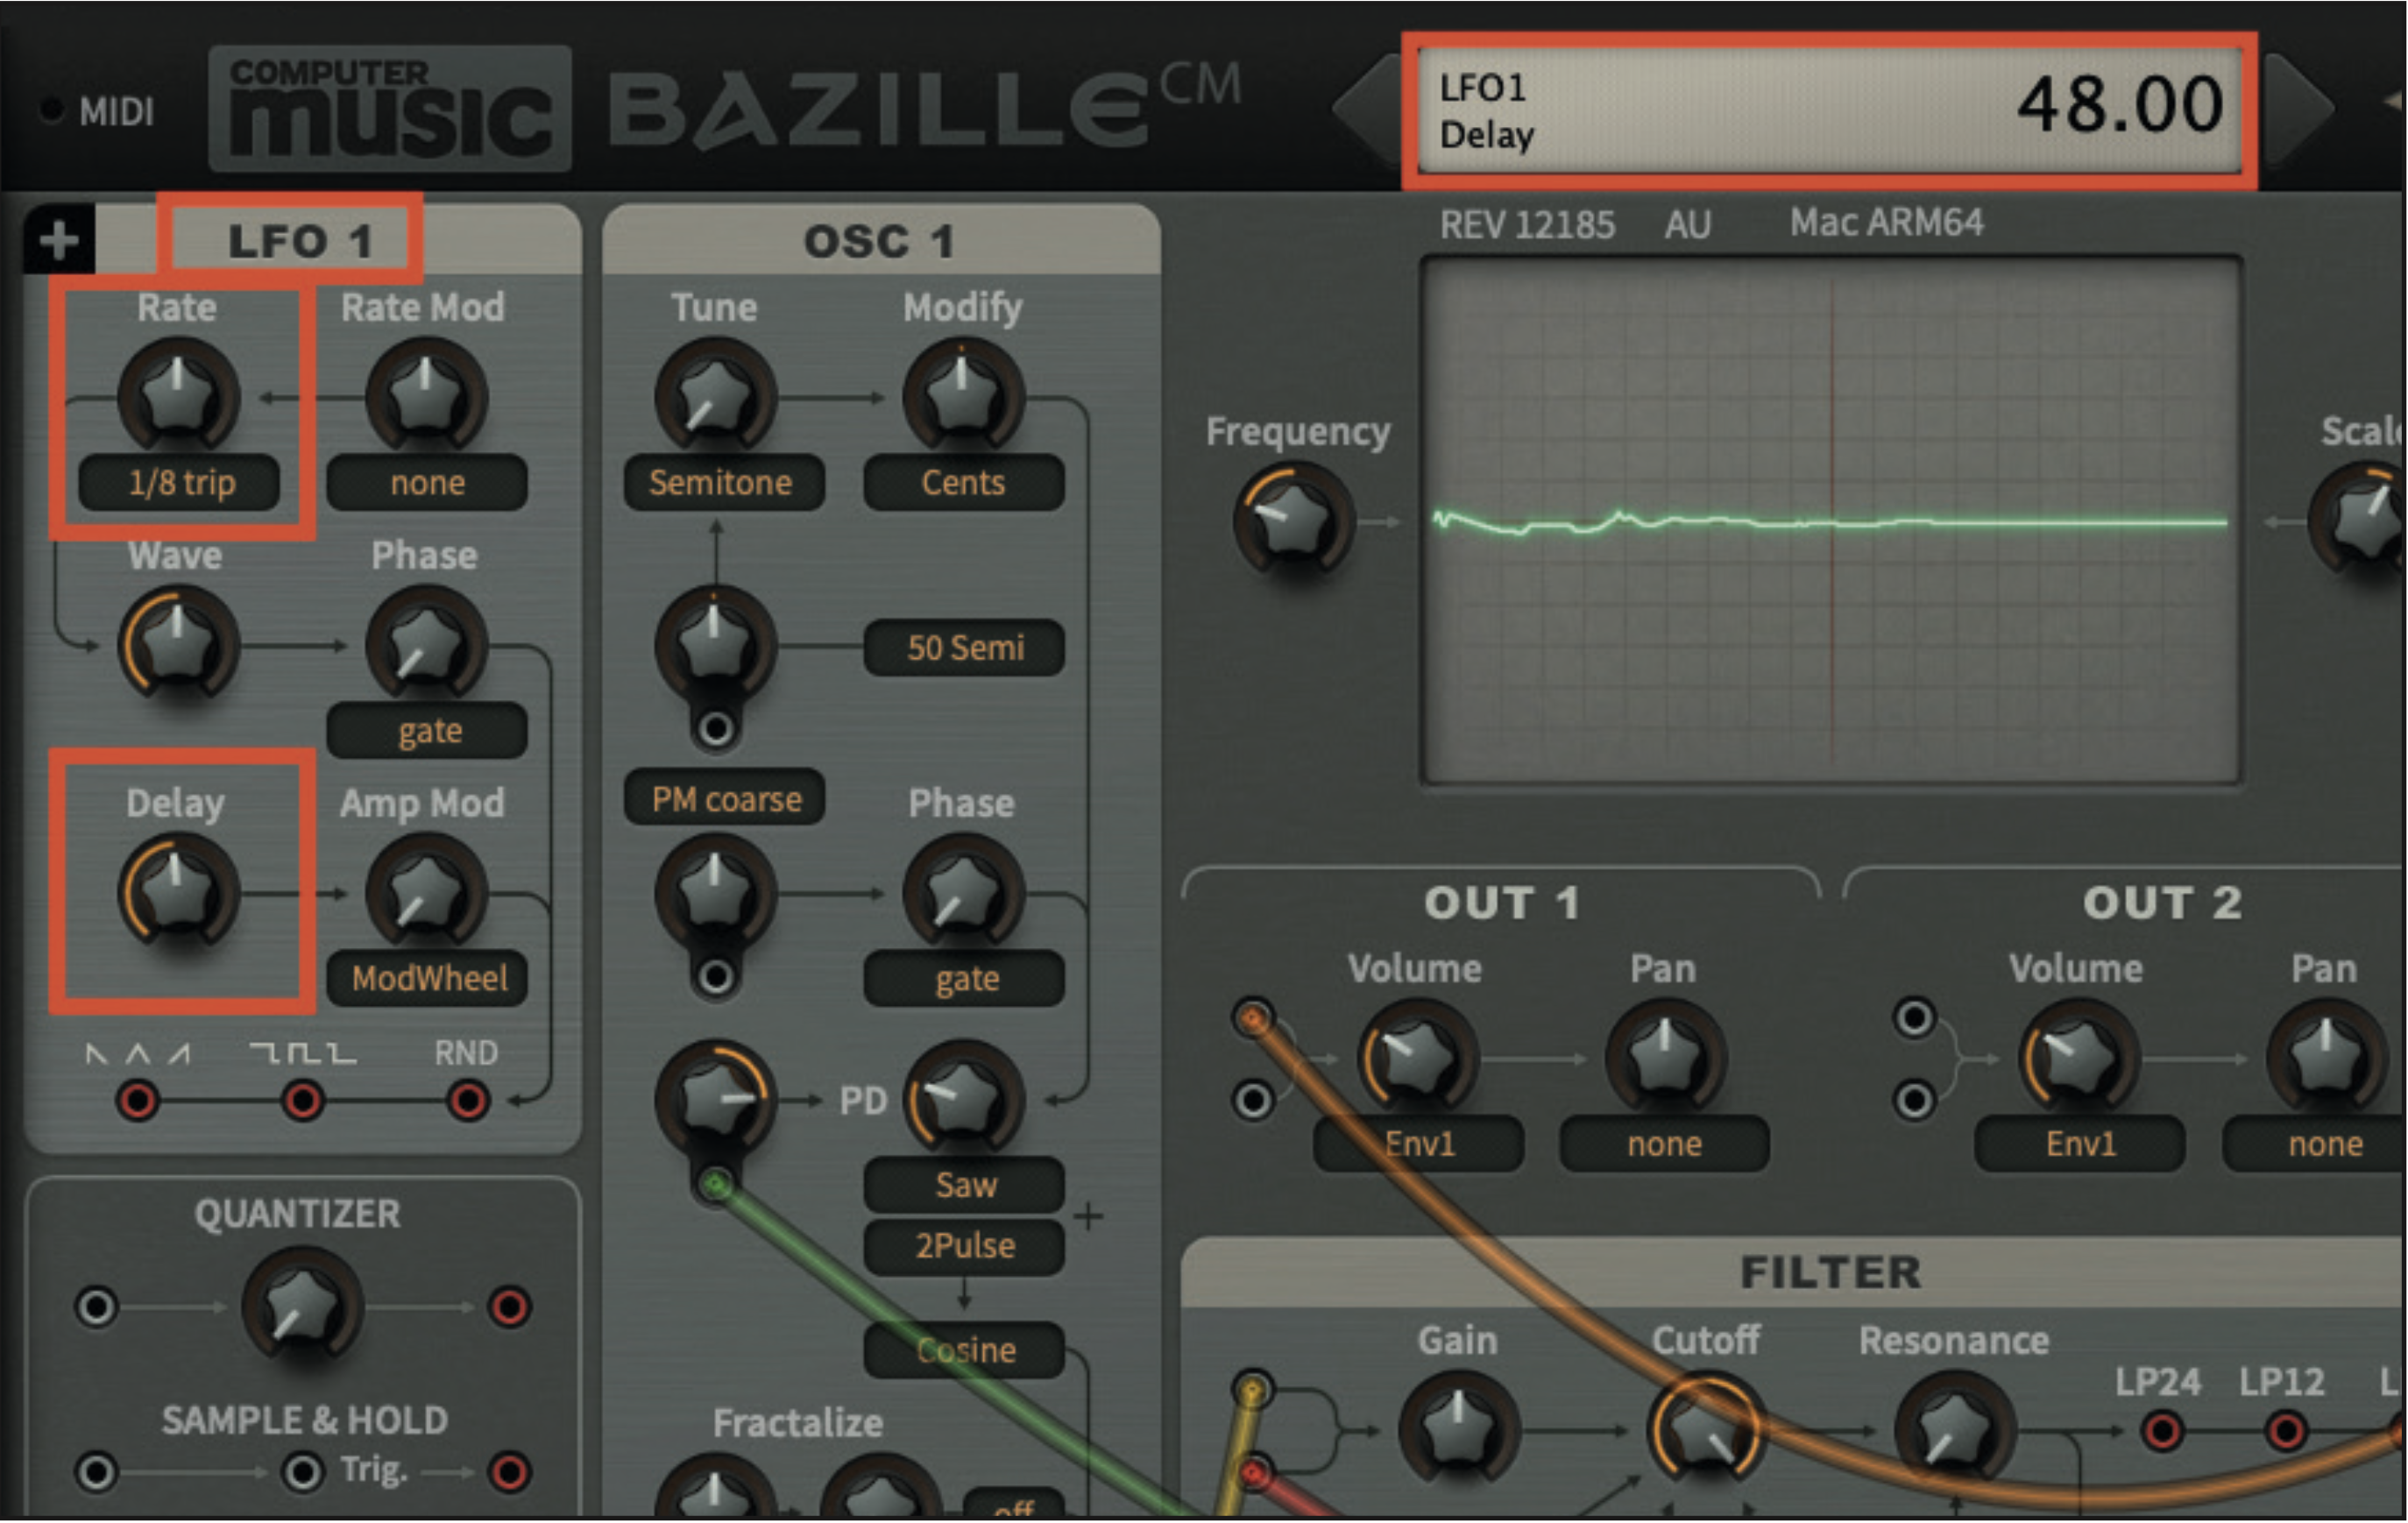
Next we move to the LFO 1 section, which is going to provide a wobble. Below the Rate pot, select 1/8 trip from the drop-down menu. Once selected, centre the rate pot to the 12 o’clock position. Now, adjust the Delay pot by setting it to a value of 48. This will delay the onset of the LFO, providing the classic dubstep sound.
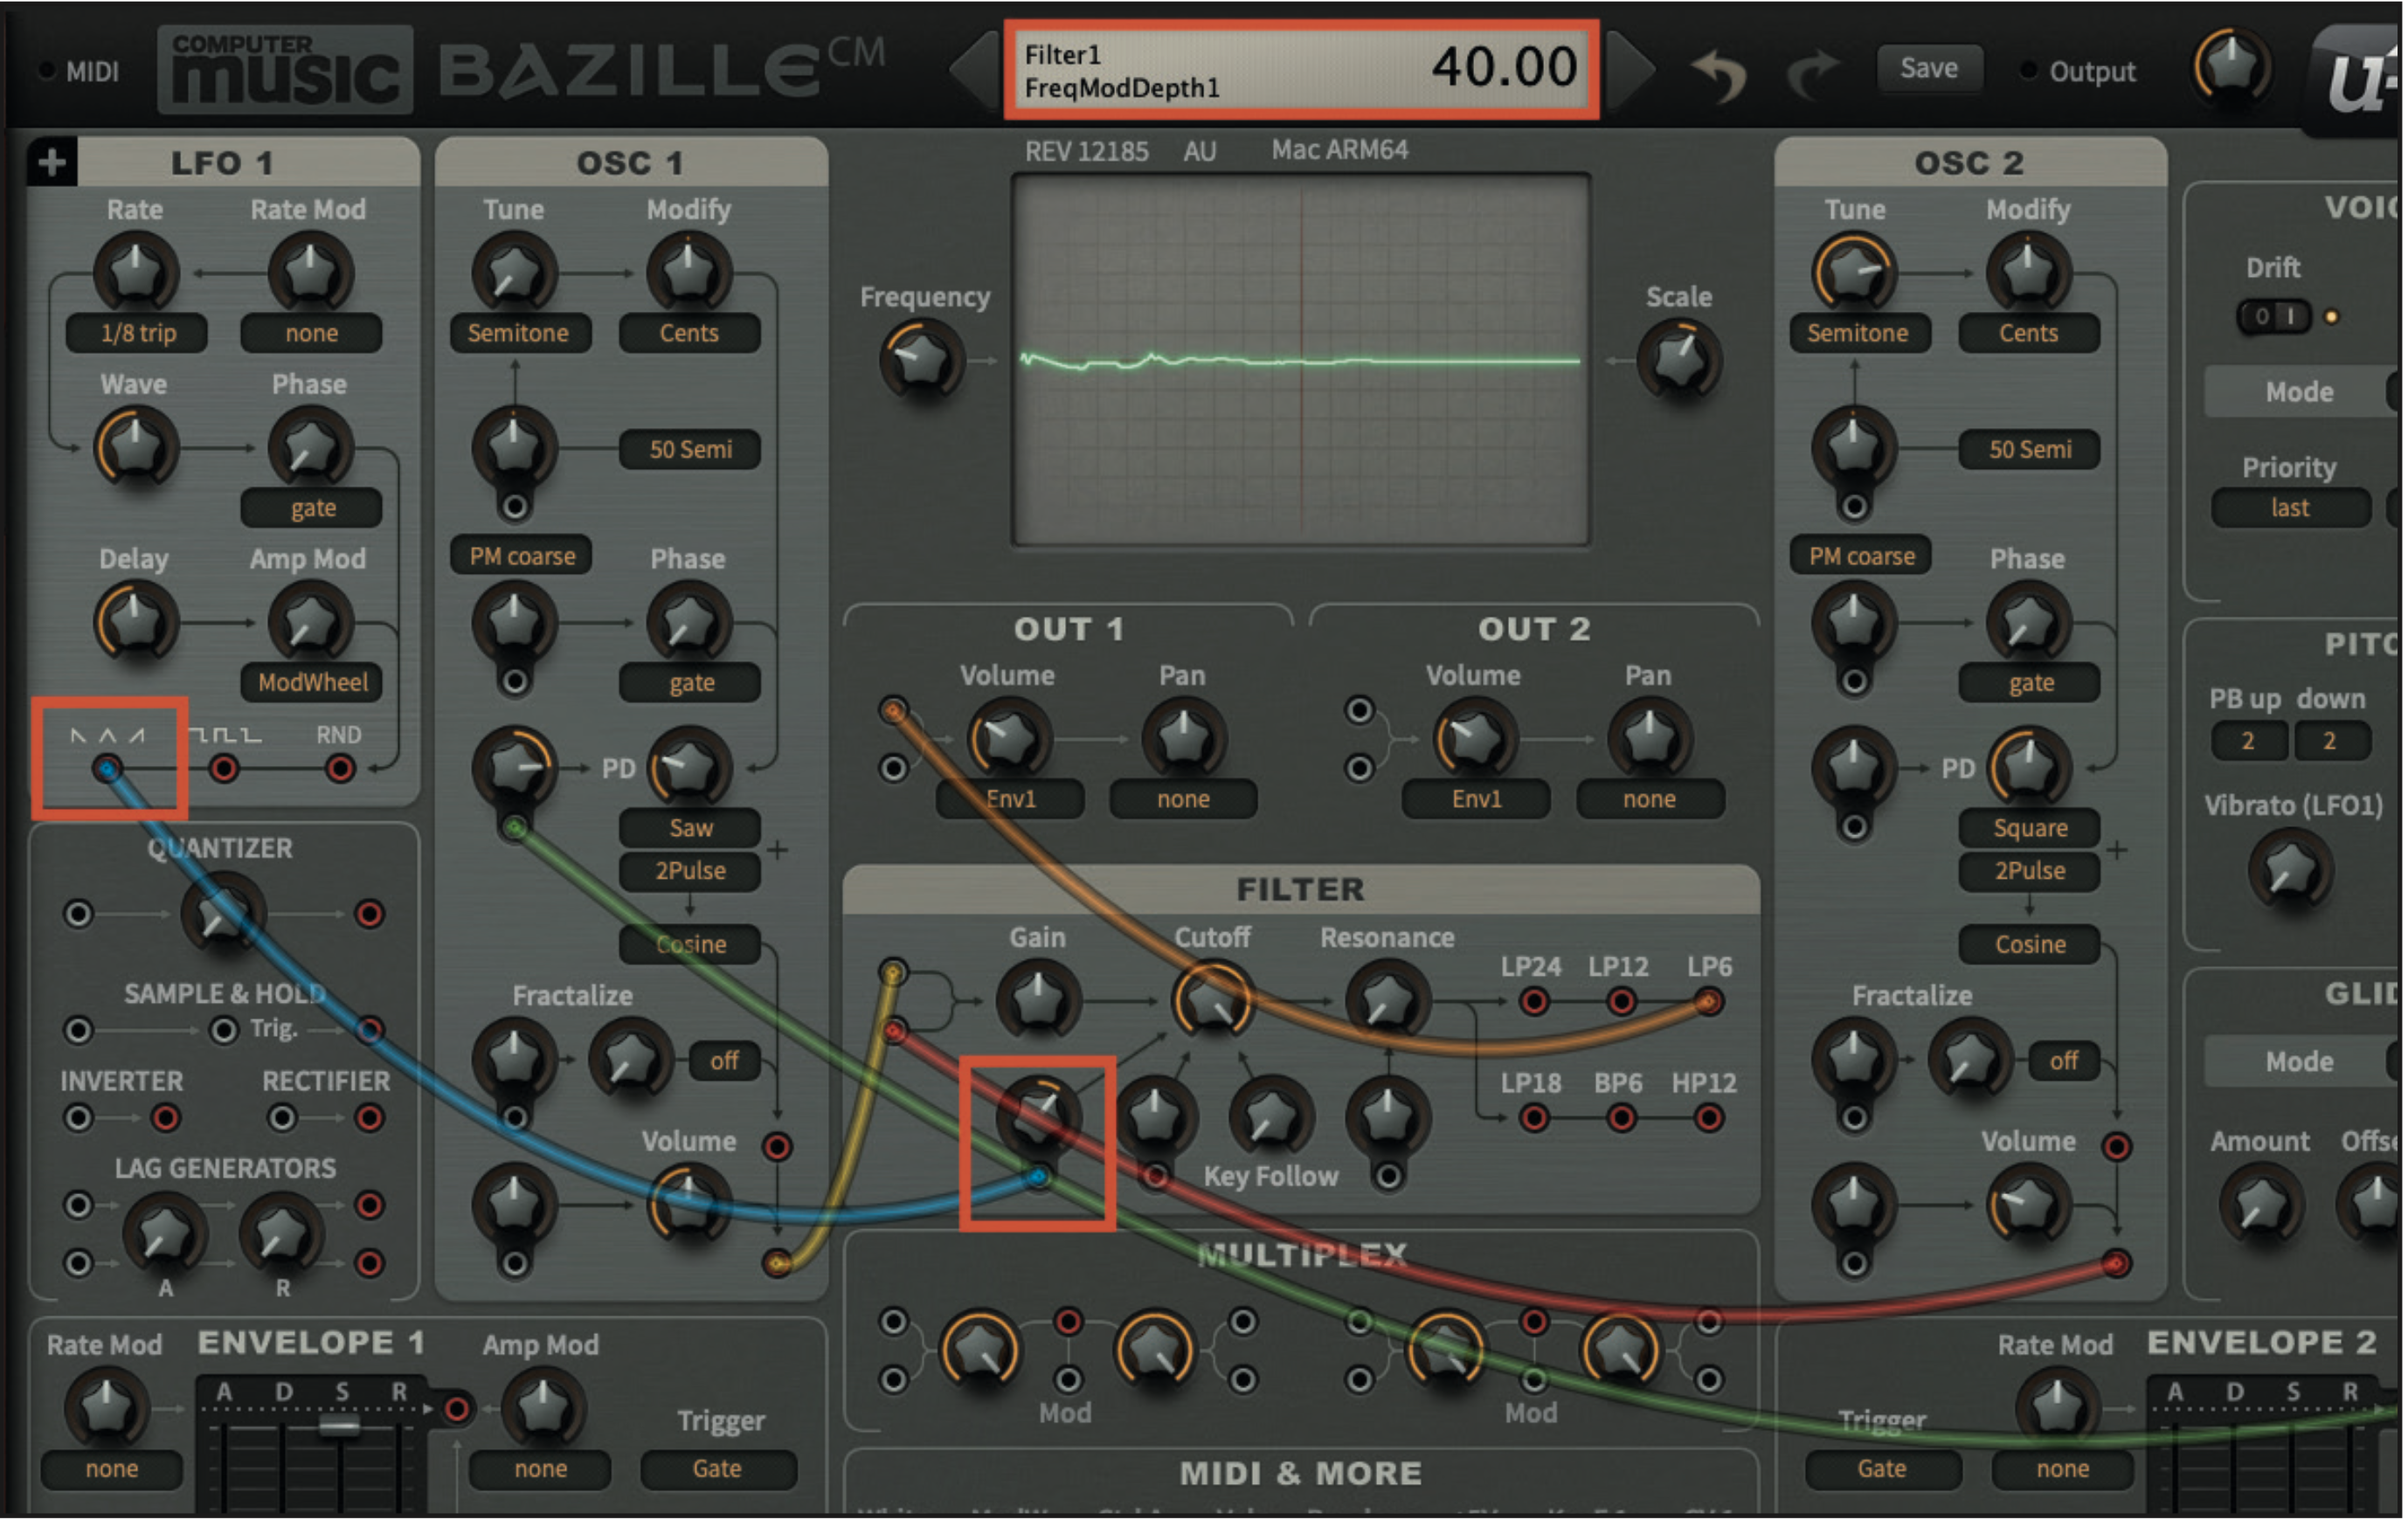
Selecting the LFO waveform requires a patch cable from the appropriate output. We are going to use a triangle wave, to supply our modulation. Drag a virtual patch cable, from the triangle wave output to the first filter cutoff modulation pot. Once connected, adjust the modulation pot to a value of 40.
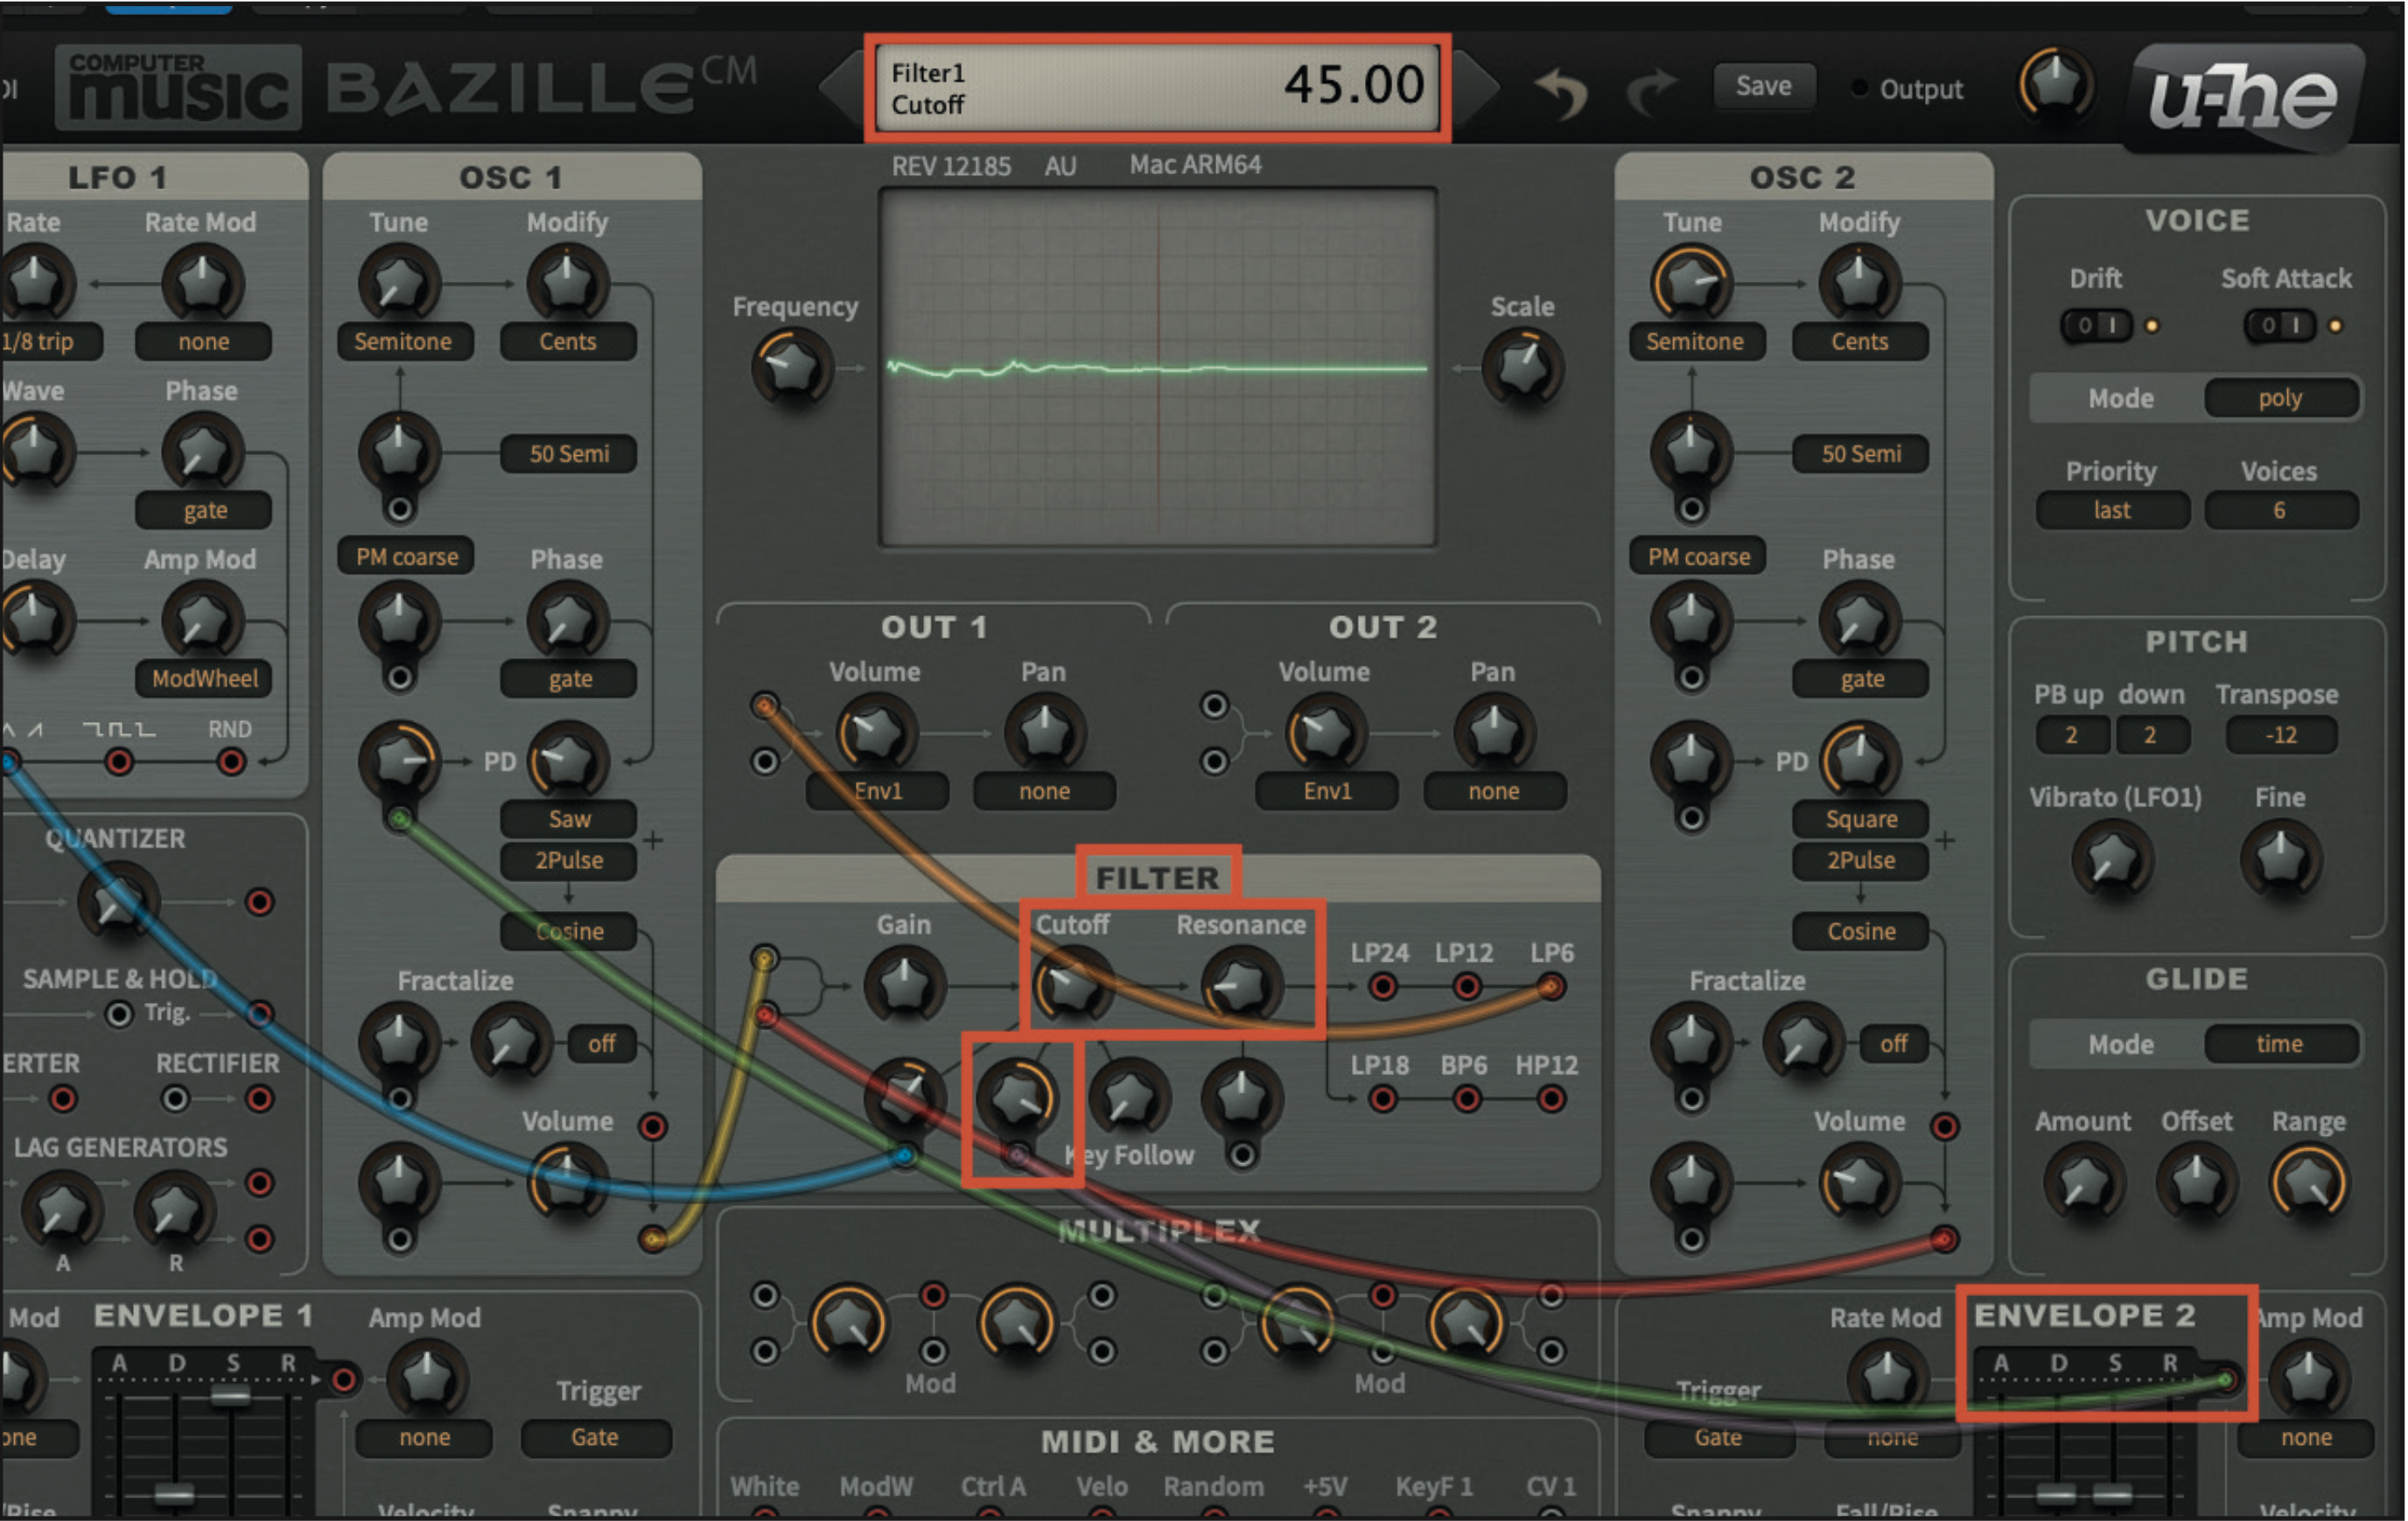
Head back to Env 2, and drag a second patch cable from the output to the second filter cutoff modulation pot, before setting the pot to a value of 130. We can also now adjust the overall filter settings; set the Cutoff pot to a value of 45, and the Resonance pot to a value of 17.
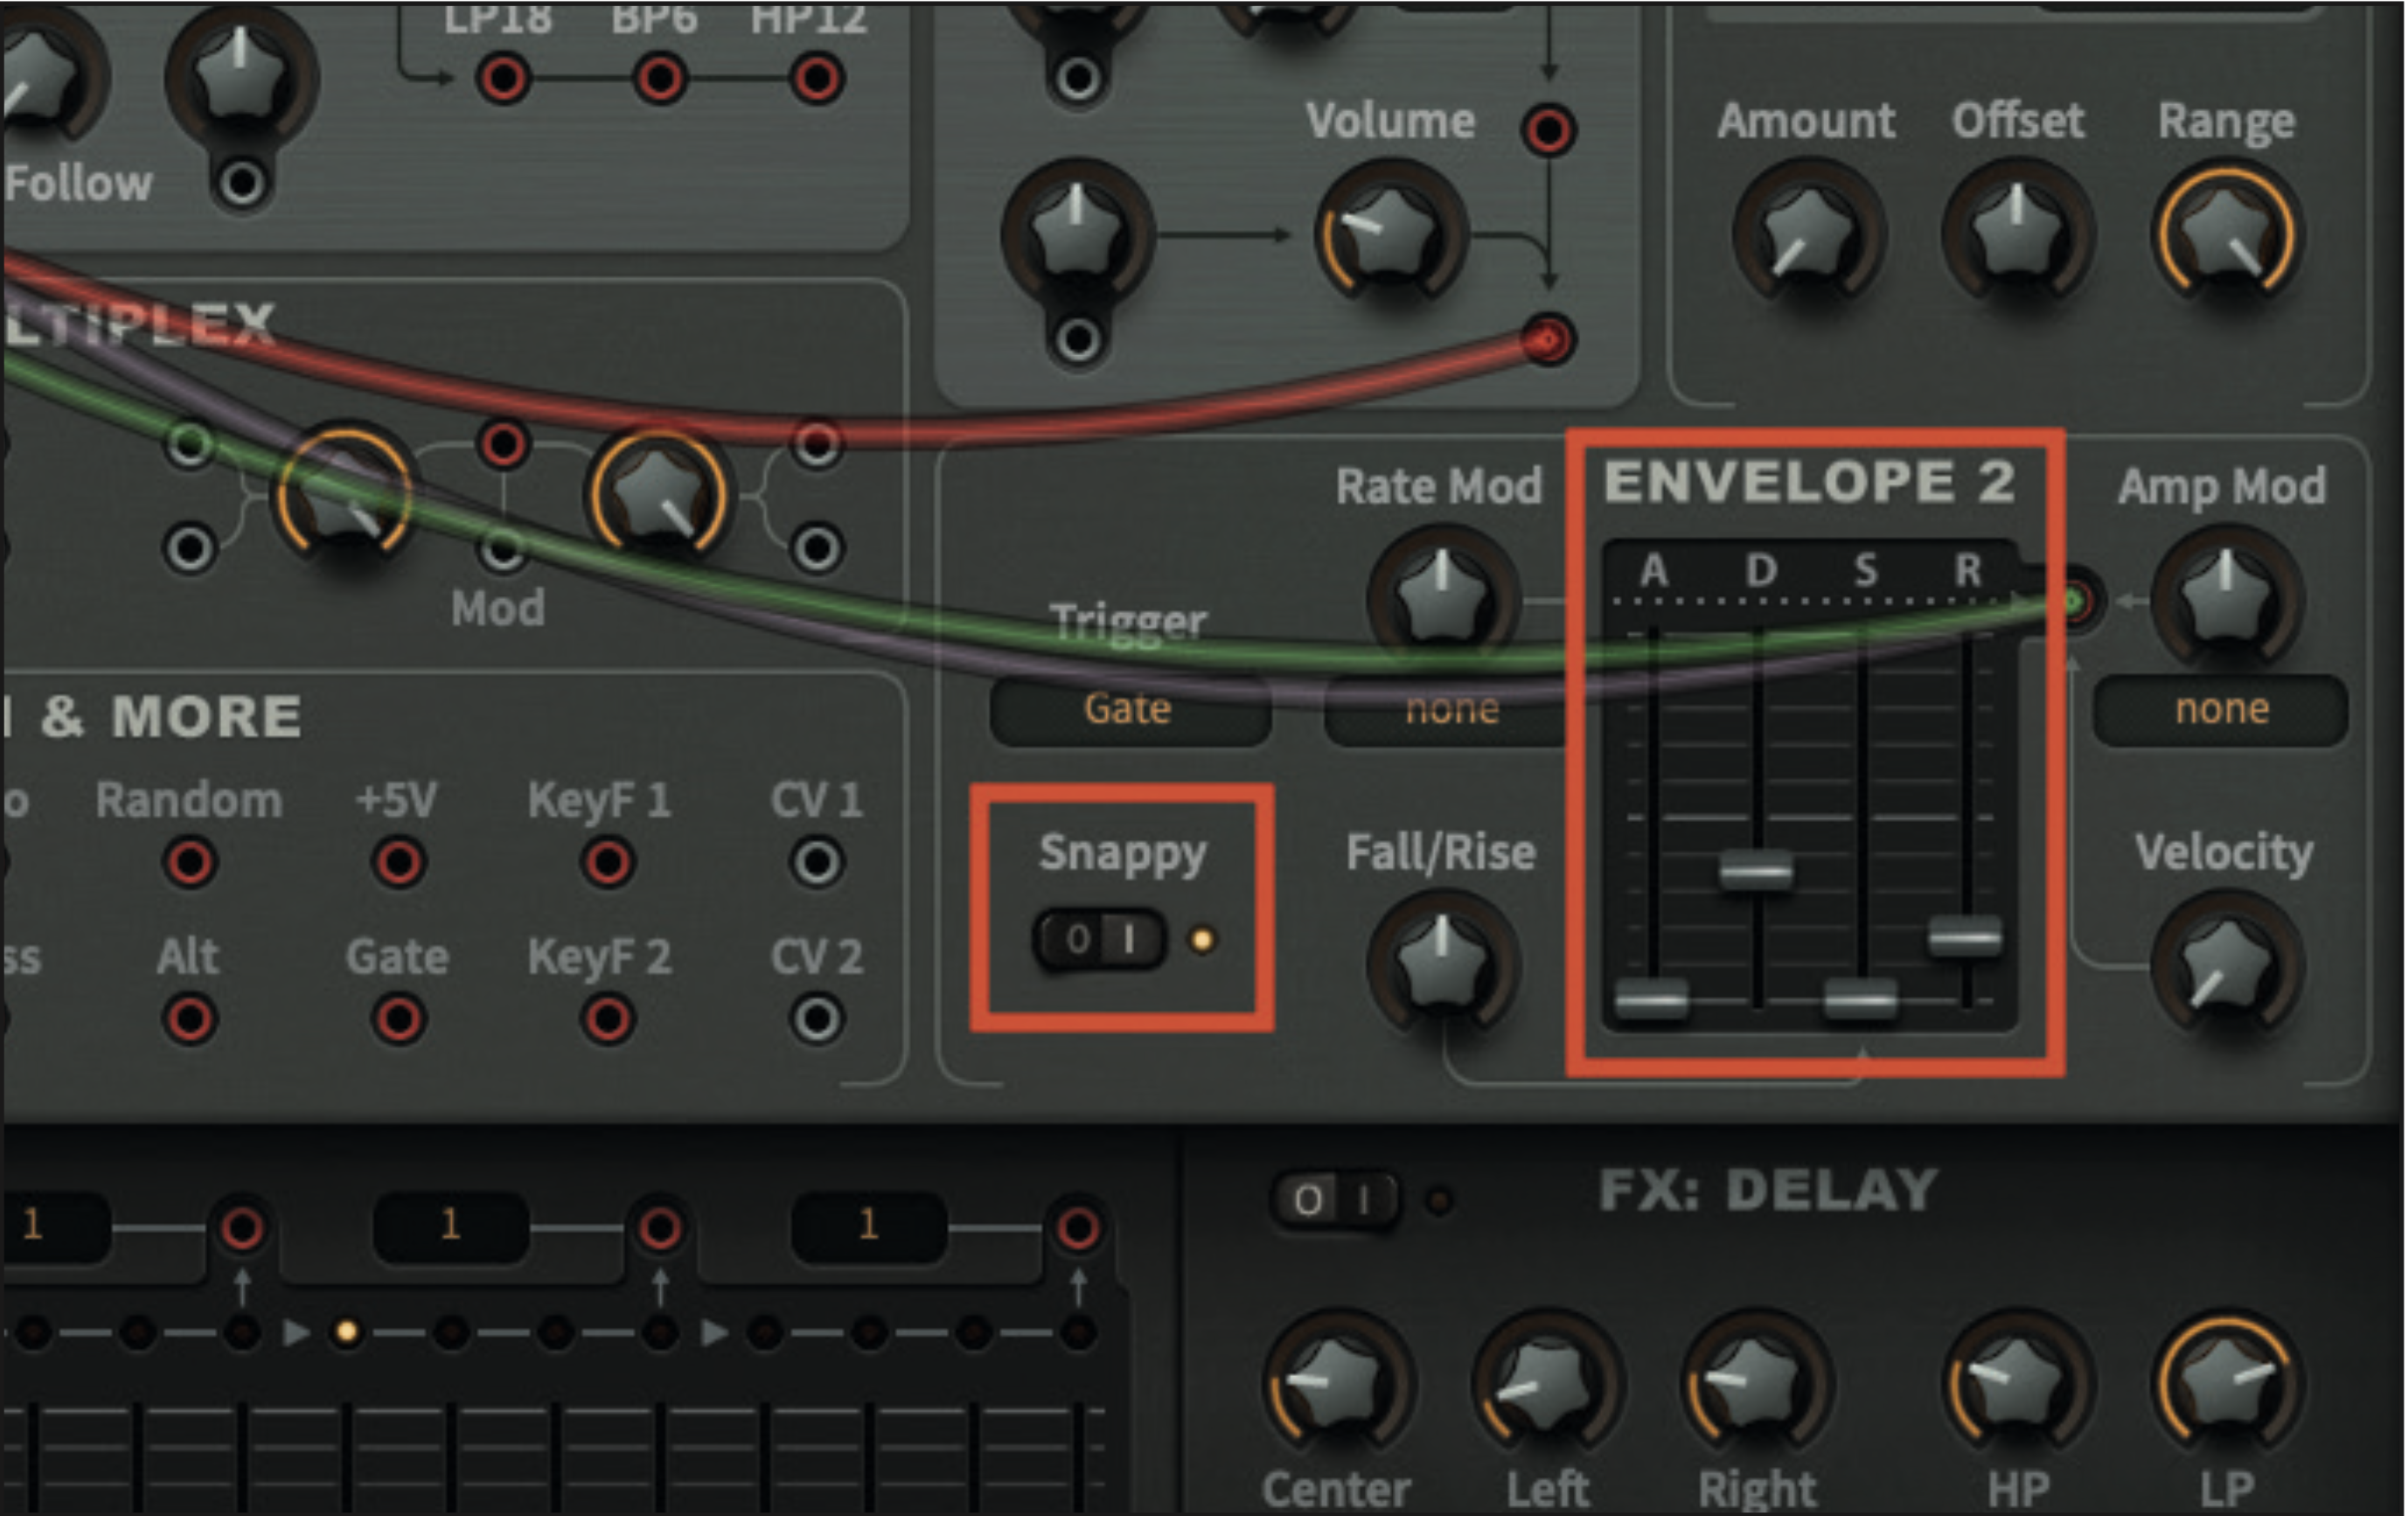
Staying within the Env 2 section, flick the switch labelled Snappy to the On position, which will increase the speed of the envelope phases. We can now adjust the envelope faders to suit; try setting Attack to 0, Delay to 34, Sustain to 0 and finally Release to 17.
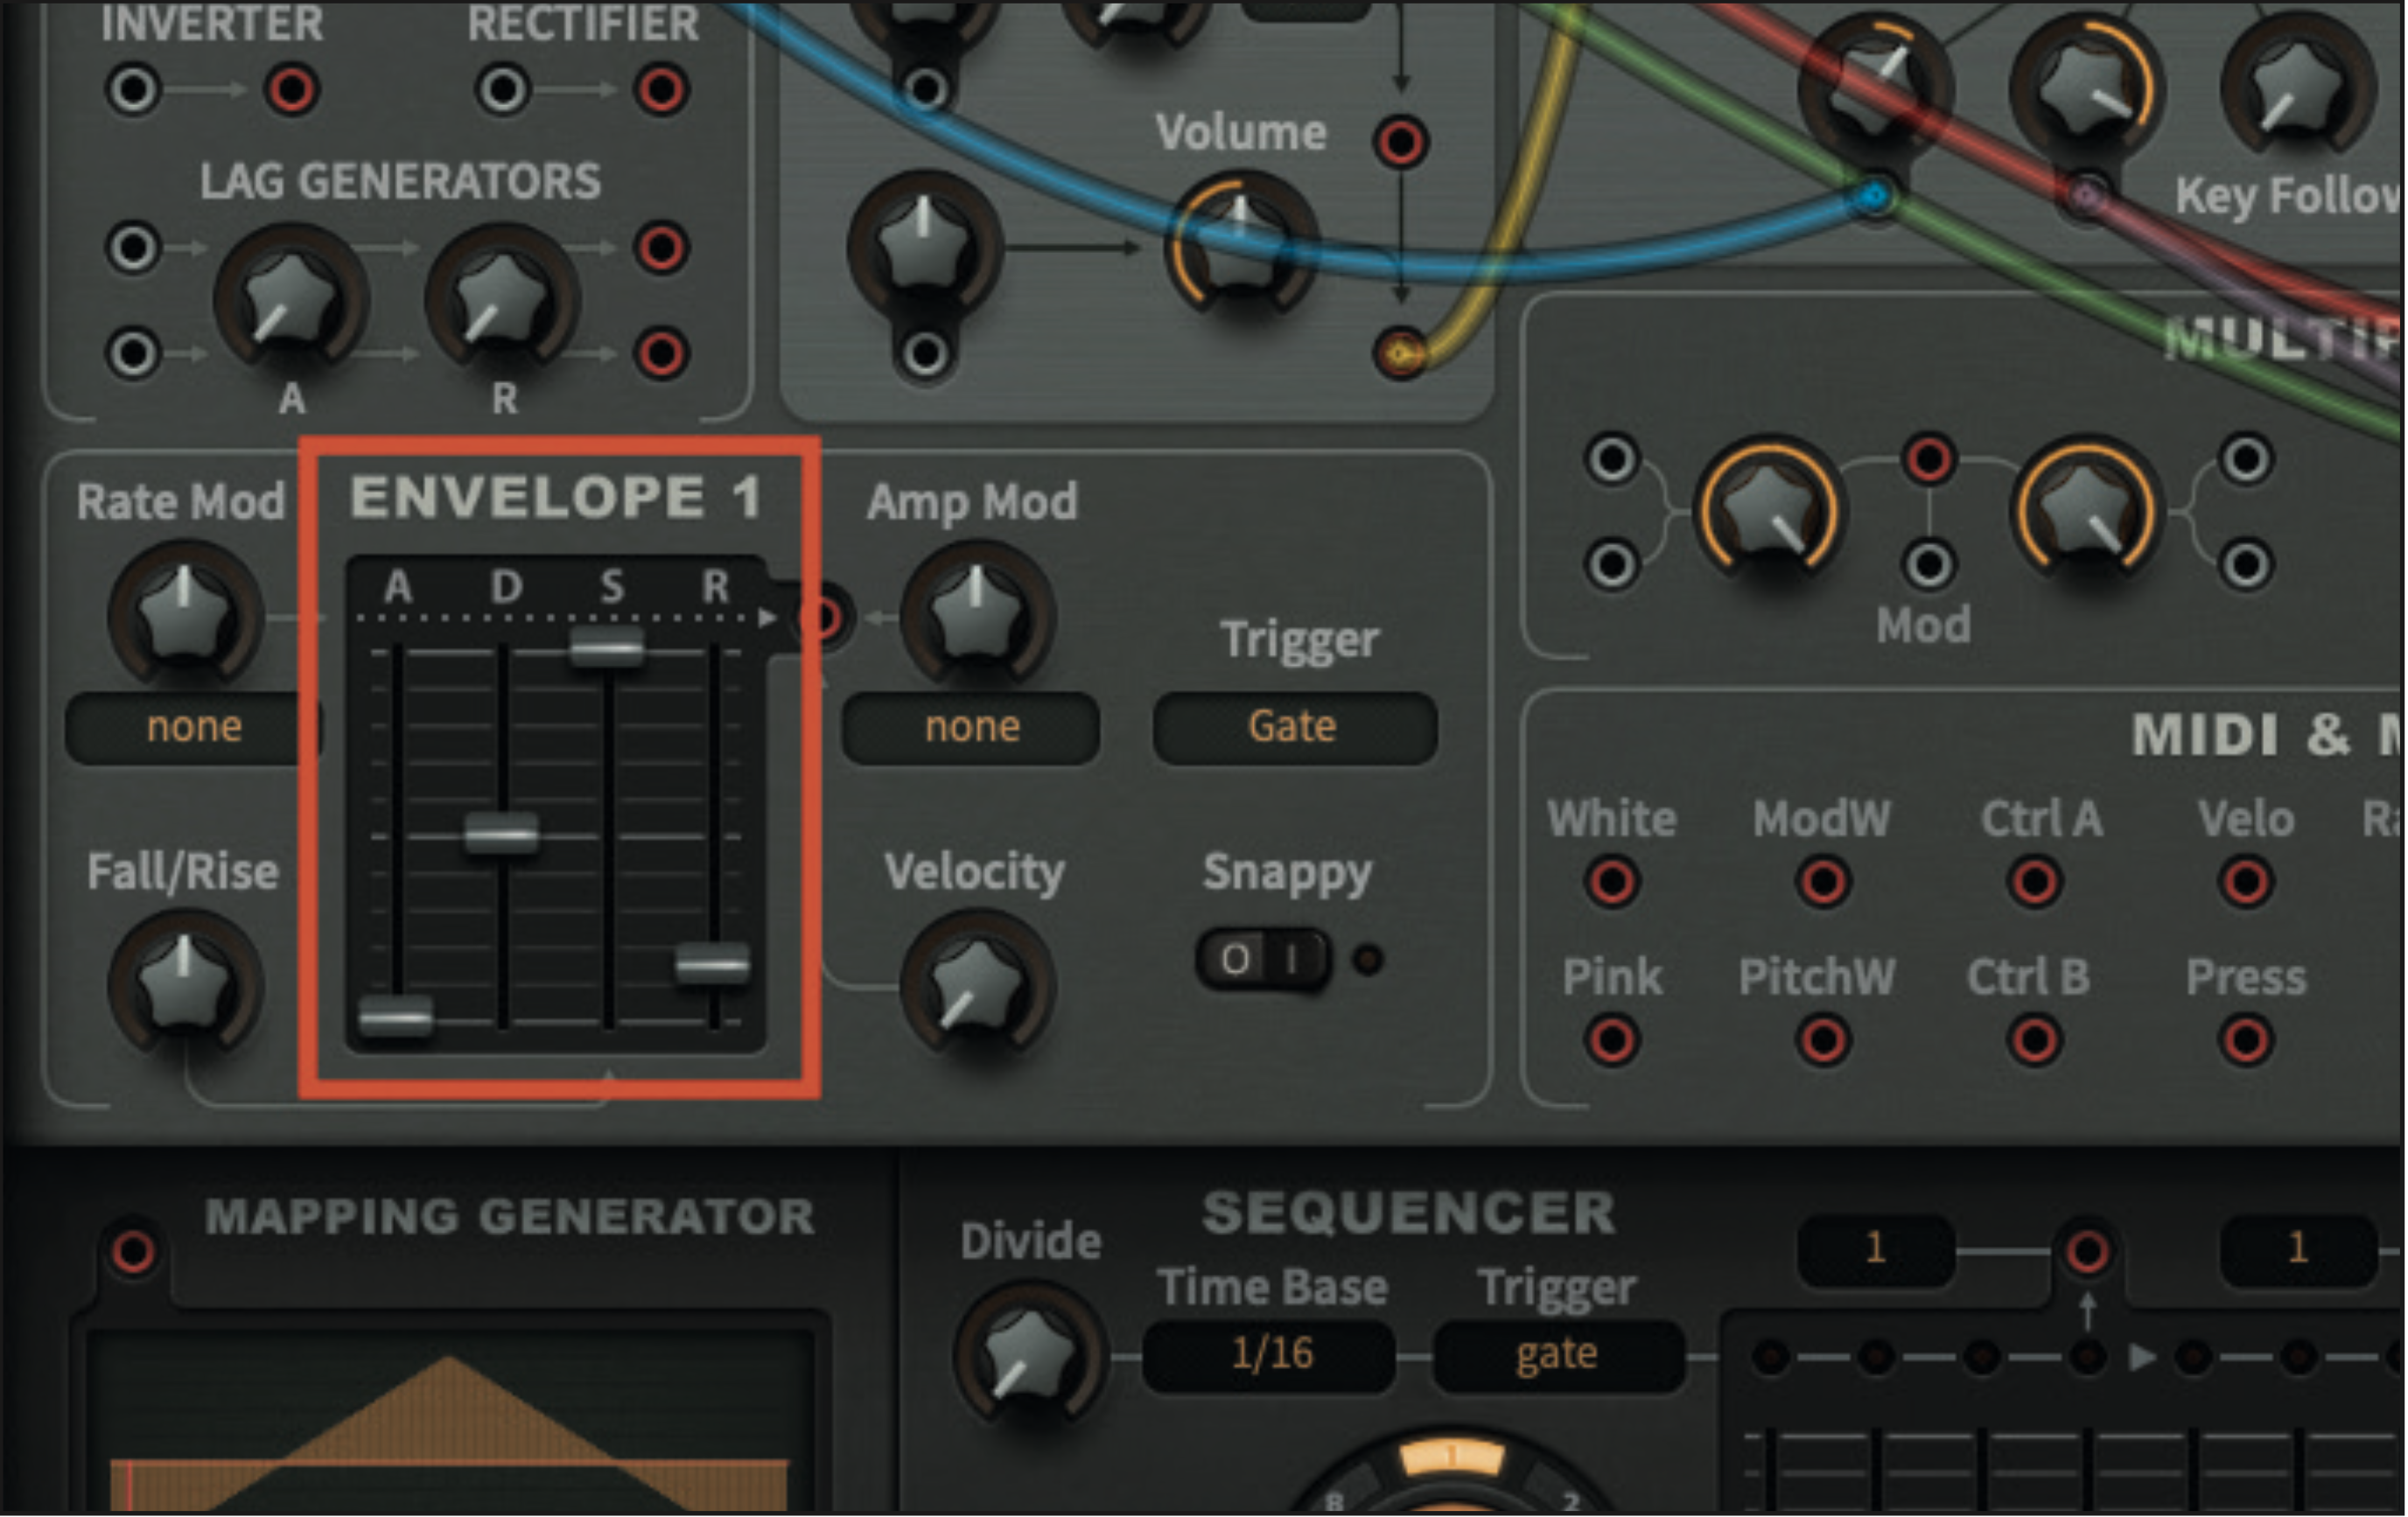
Finally, you may prefer to adjust the ADSR settings of Env 1. We’ve purposely left them at default positions, as we feel that the generated sustain suits our purpose. You can certainly experiment with decay and sustain elements to create a snappier sound. Env 1 is already modulating output volume, so no need for a patch cable.
Pro tip: compress to impress
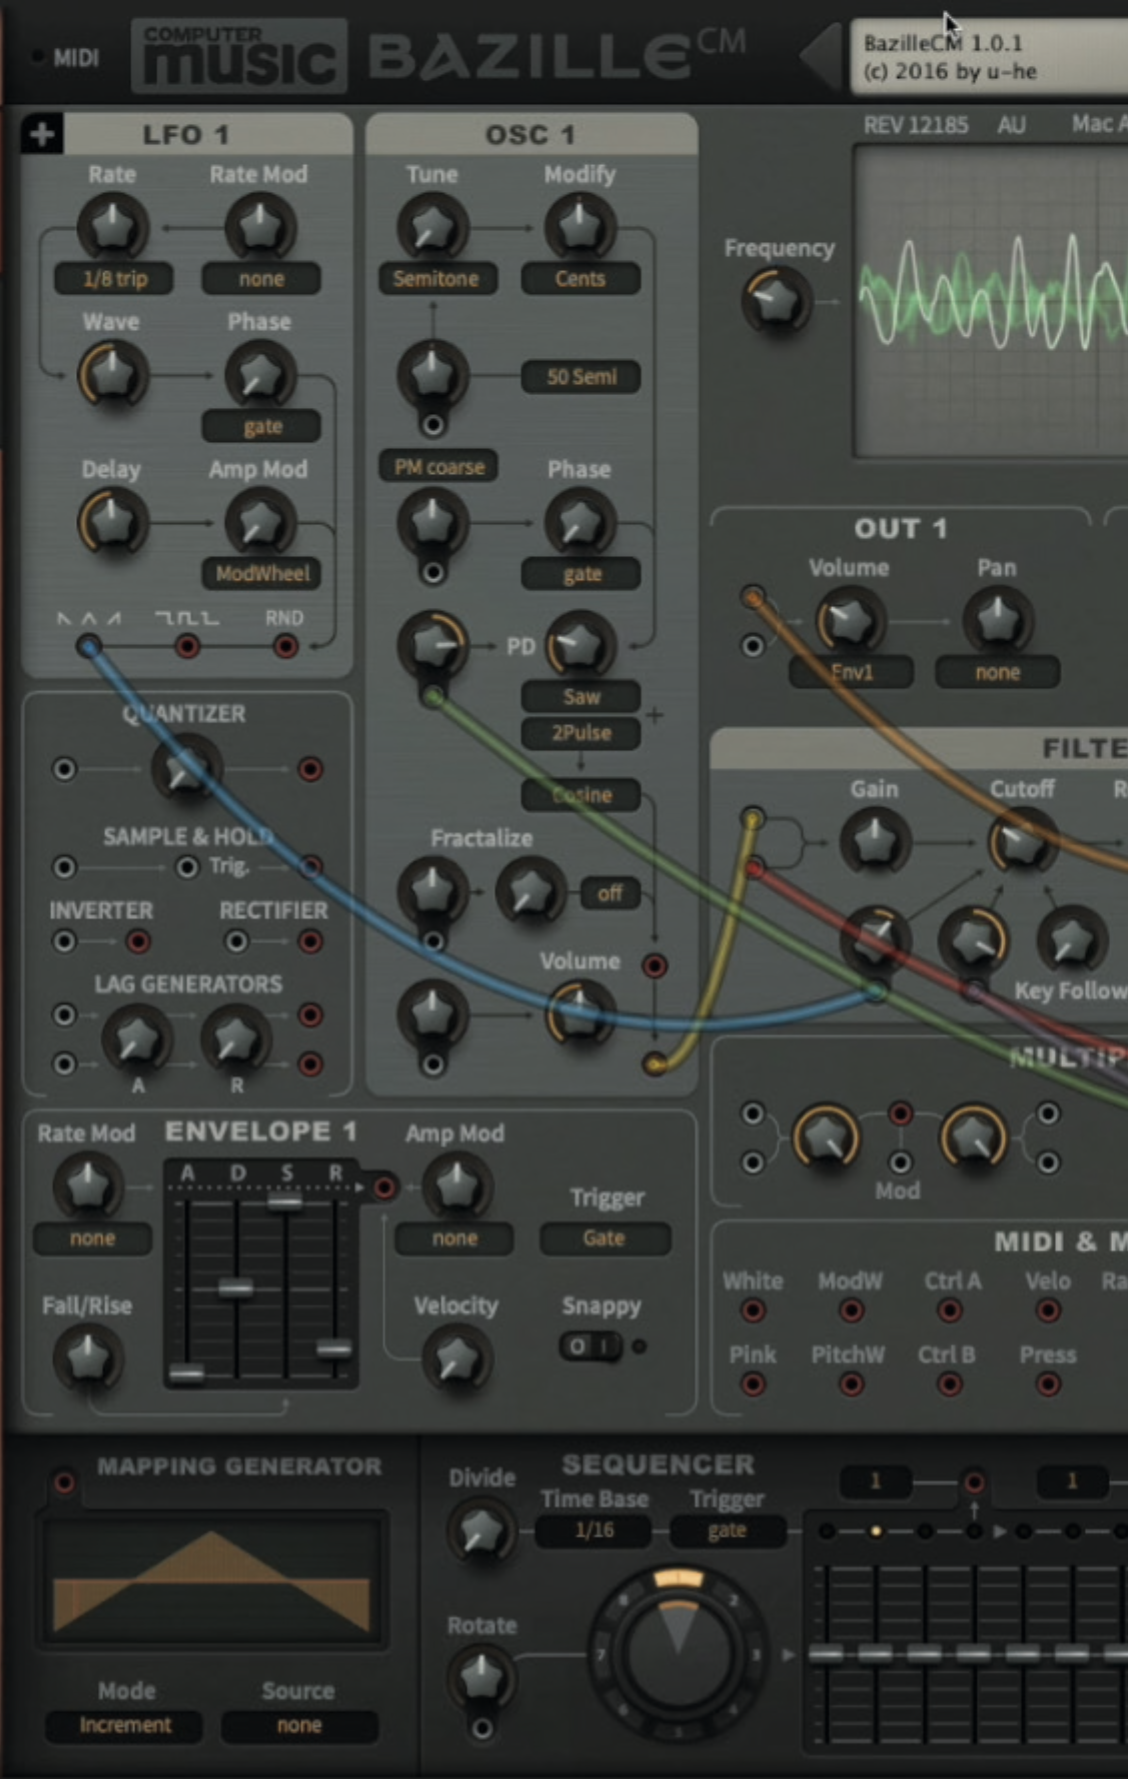
One of the trademark traits of the dubstep wobble bass sound is its unapologetic sharpness of tone, which suggests a very digital waveform upfront. In our example, we’ve created a halfway house between a harsh sound and something that could be regarded as softer and possibly more analogue.
To create a harsher tone, try experimenting with the Phase Distortion (PD) elements of the oscillator to induce a more metallic feel. You may also want to consider raising the cutoff pot amount in the filter section, to increase brightness.
Regardless of where you might direct your production, there are two other elements, which should be regarded as indispensable for this form of sound. Firstly, applying overdrive or distortion to the synth plugin will undoubtedly benefit the overall sound.
Try using a distortion plugin that sounds bright; despite the sense of analogue that we often consider part of distortion, the brightness will have the opposite effect in the mix, producing a sharper tone. You should also heavily compress this sound, with many dubstep examples being very high in the mix of a track. As with all great sounds, experiment with settings and use your ears, rather than your eyes.
Recommended listening
1. Objekt - Cactus
Wobble bass provides the complete backbone for this track, alongside beats. You can hear varying modulation amounts, as the track progresses
2. La Roux – Colourless Colour
In a far more subdued example, this wobble bass creeps in from the outset of the song


