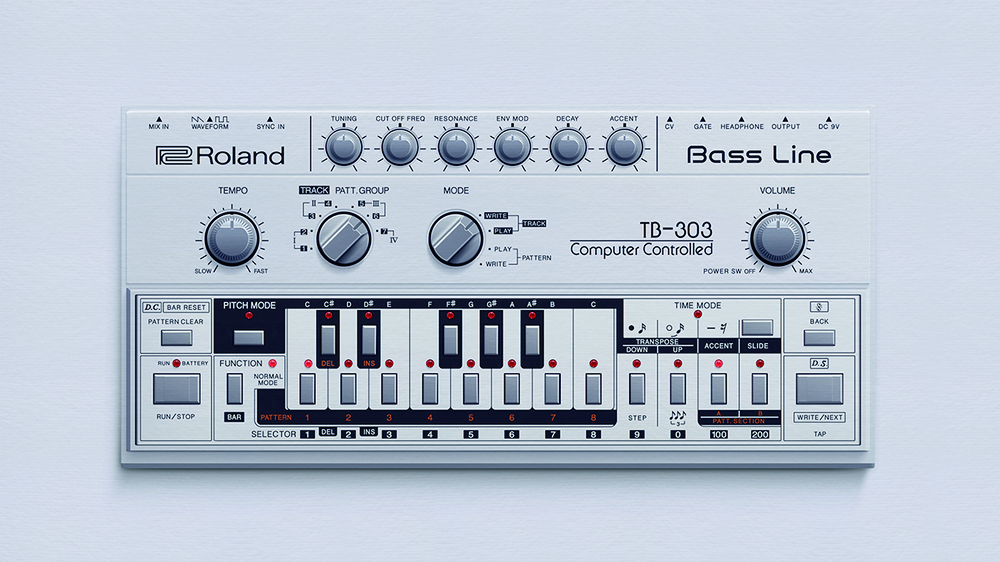
At this point, there’s little more that needs to be said about the influence and importance of Roland’s pintsized TB-303.
Anybody with even a passing interest in dance music production likely knows the story. Released in 1981, the 303 was an unsuccessful attempt at creating a realistic replacement for a live bass guitarist, designed to provide backing for bands and live musicians.
It was a commercial failure, yet cheap second-hand units made it into the hands of adventurous early dance musicians such as Detroit trio Phuture, who used its simple, single oscillator sound engine and notorious raspy filter to create the legendary resonant bass sounds that defined acid house and techno.
However, while many of us are familiar with the 303’s sound, due to escalating second-hand prices, until recently few modern producers have had the opportunity to get hands-on with anything resembling a genuine TB-303.
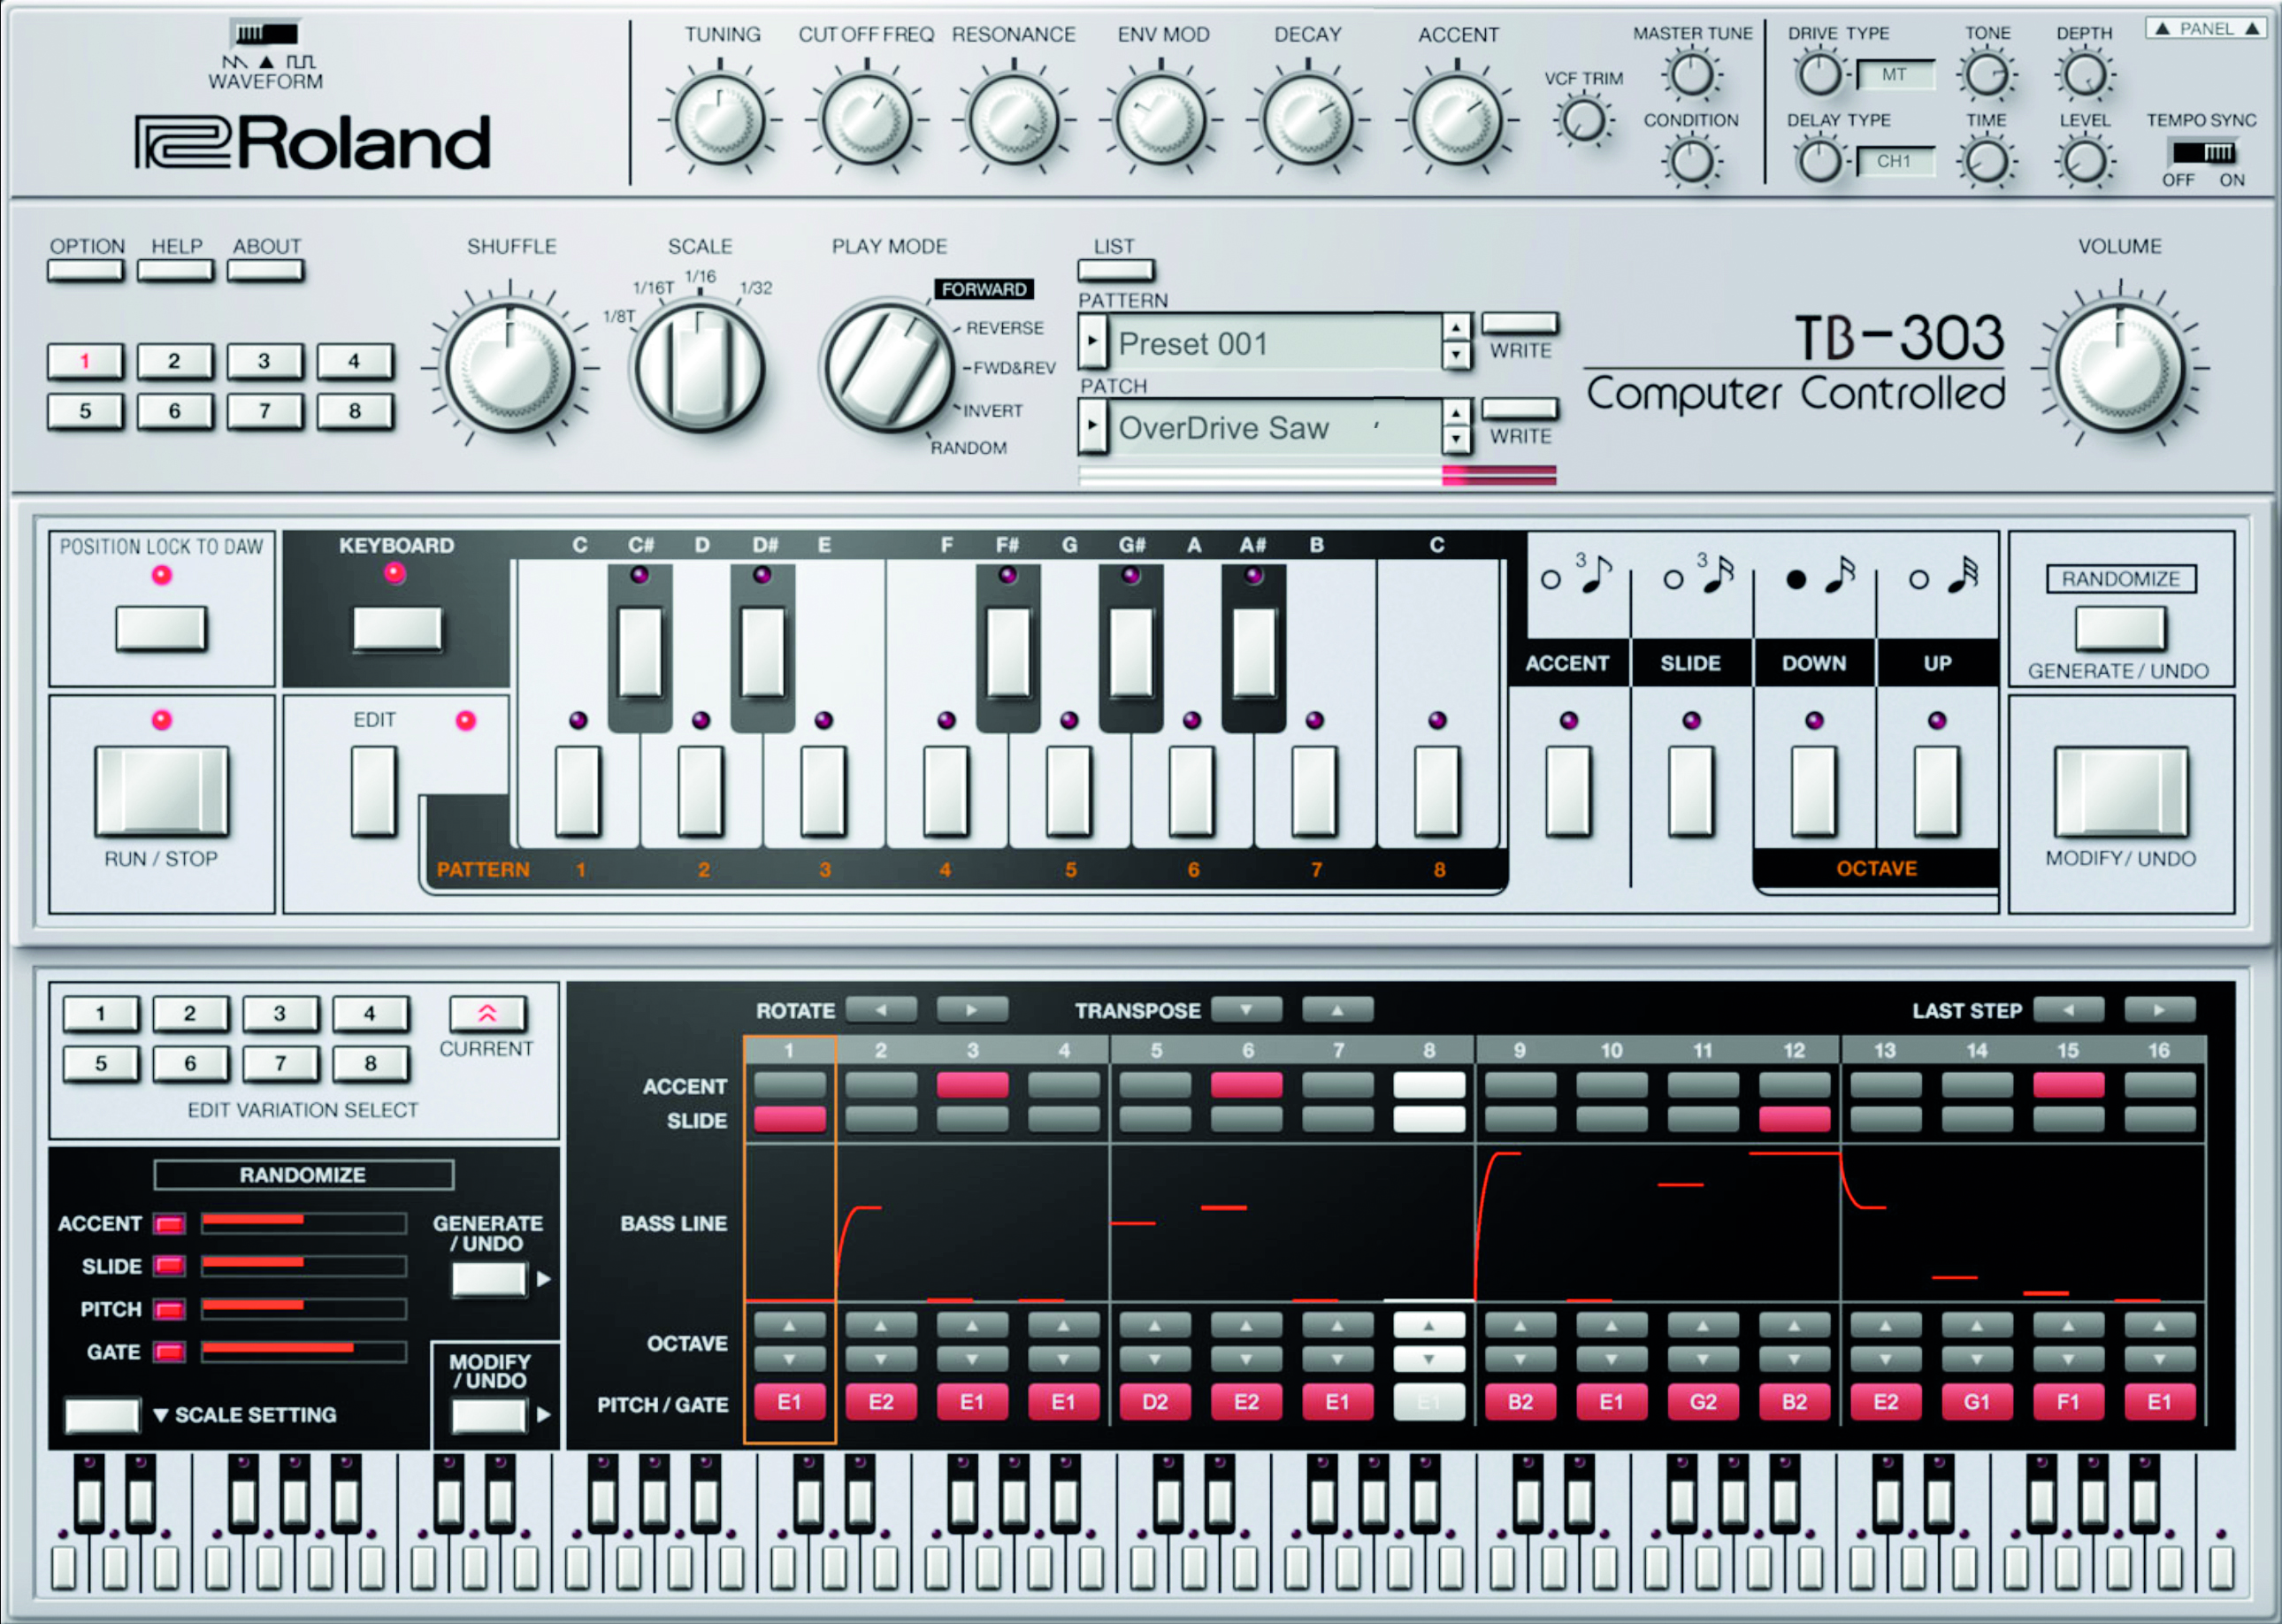
Roland TB-303 vs. software emulations: can you tell the difference?
That’s changed somewhat in recent times; while there have been plenty of 303 clones on the market for years, Roland’s authentic-looking TB-03 Boutique and Behringer’s bargain priced TD-3 have recently brought the classic 303 workflow into the mass market. Additionally, for in-the-box producers, Roland’s Cloud software offers an on-the-money digital recreation.
As much as it’s a deservedly iconic instrument, the TB-303 is also incredibly esoteric; despite its relatively simple synth engine, the process of sequencing and editing patterns is surprisingly long-winded and very much not intuitive. For those picking up a faithful recreation, having not spent time with the original, it can come as quite a shock to the system.
With that in mind, let’s take a look at how to get started and program some classic acid and techno-style patterns.
For the sake of this tutorial, we’re focusing on Behringer’s TD-3 hardware and Roland’s TB-303 plugin, both of which are widely available and stick fairly close to the workflow of the original hardware. Unless stated otherwise, everything discussed is based on the functionality of an original 303, and should be transferable to any faithful emulation, clone or – if you can get your hands on one – an original unit.
Understanding the 303 sequencer
The most unique aspect of the 303 sequencer is the fact that pitches (notes) and sequencer steps are input separately – meaning that creating a pattern involves first inputting a sequence of notes, then a separate sequence of steps, ties and rests. There’s actually a third step involved too, if you really want to get the most out of the sequencer, which is to then assign slides, octave jumps and accents. Let’s go through these one at a time to break down how it works.
The first thing we need to do is select a pattern we want to edit. The original 303, along with faithful hardware recreations like Behringer’s TD-3, make use of a system of Patterns and Tracks. Here, Patterns are the basic sequences, which can each be up to 16 steps in length, while Tracks are longer arrangements created by chaining several Patterns together.
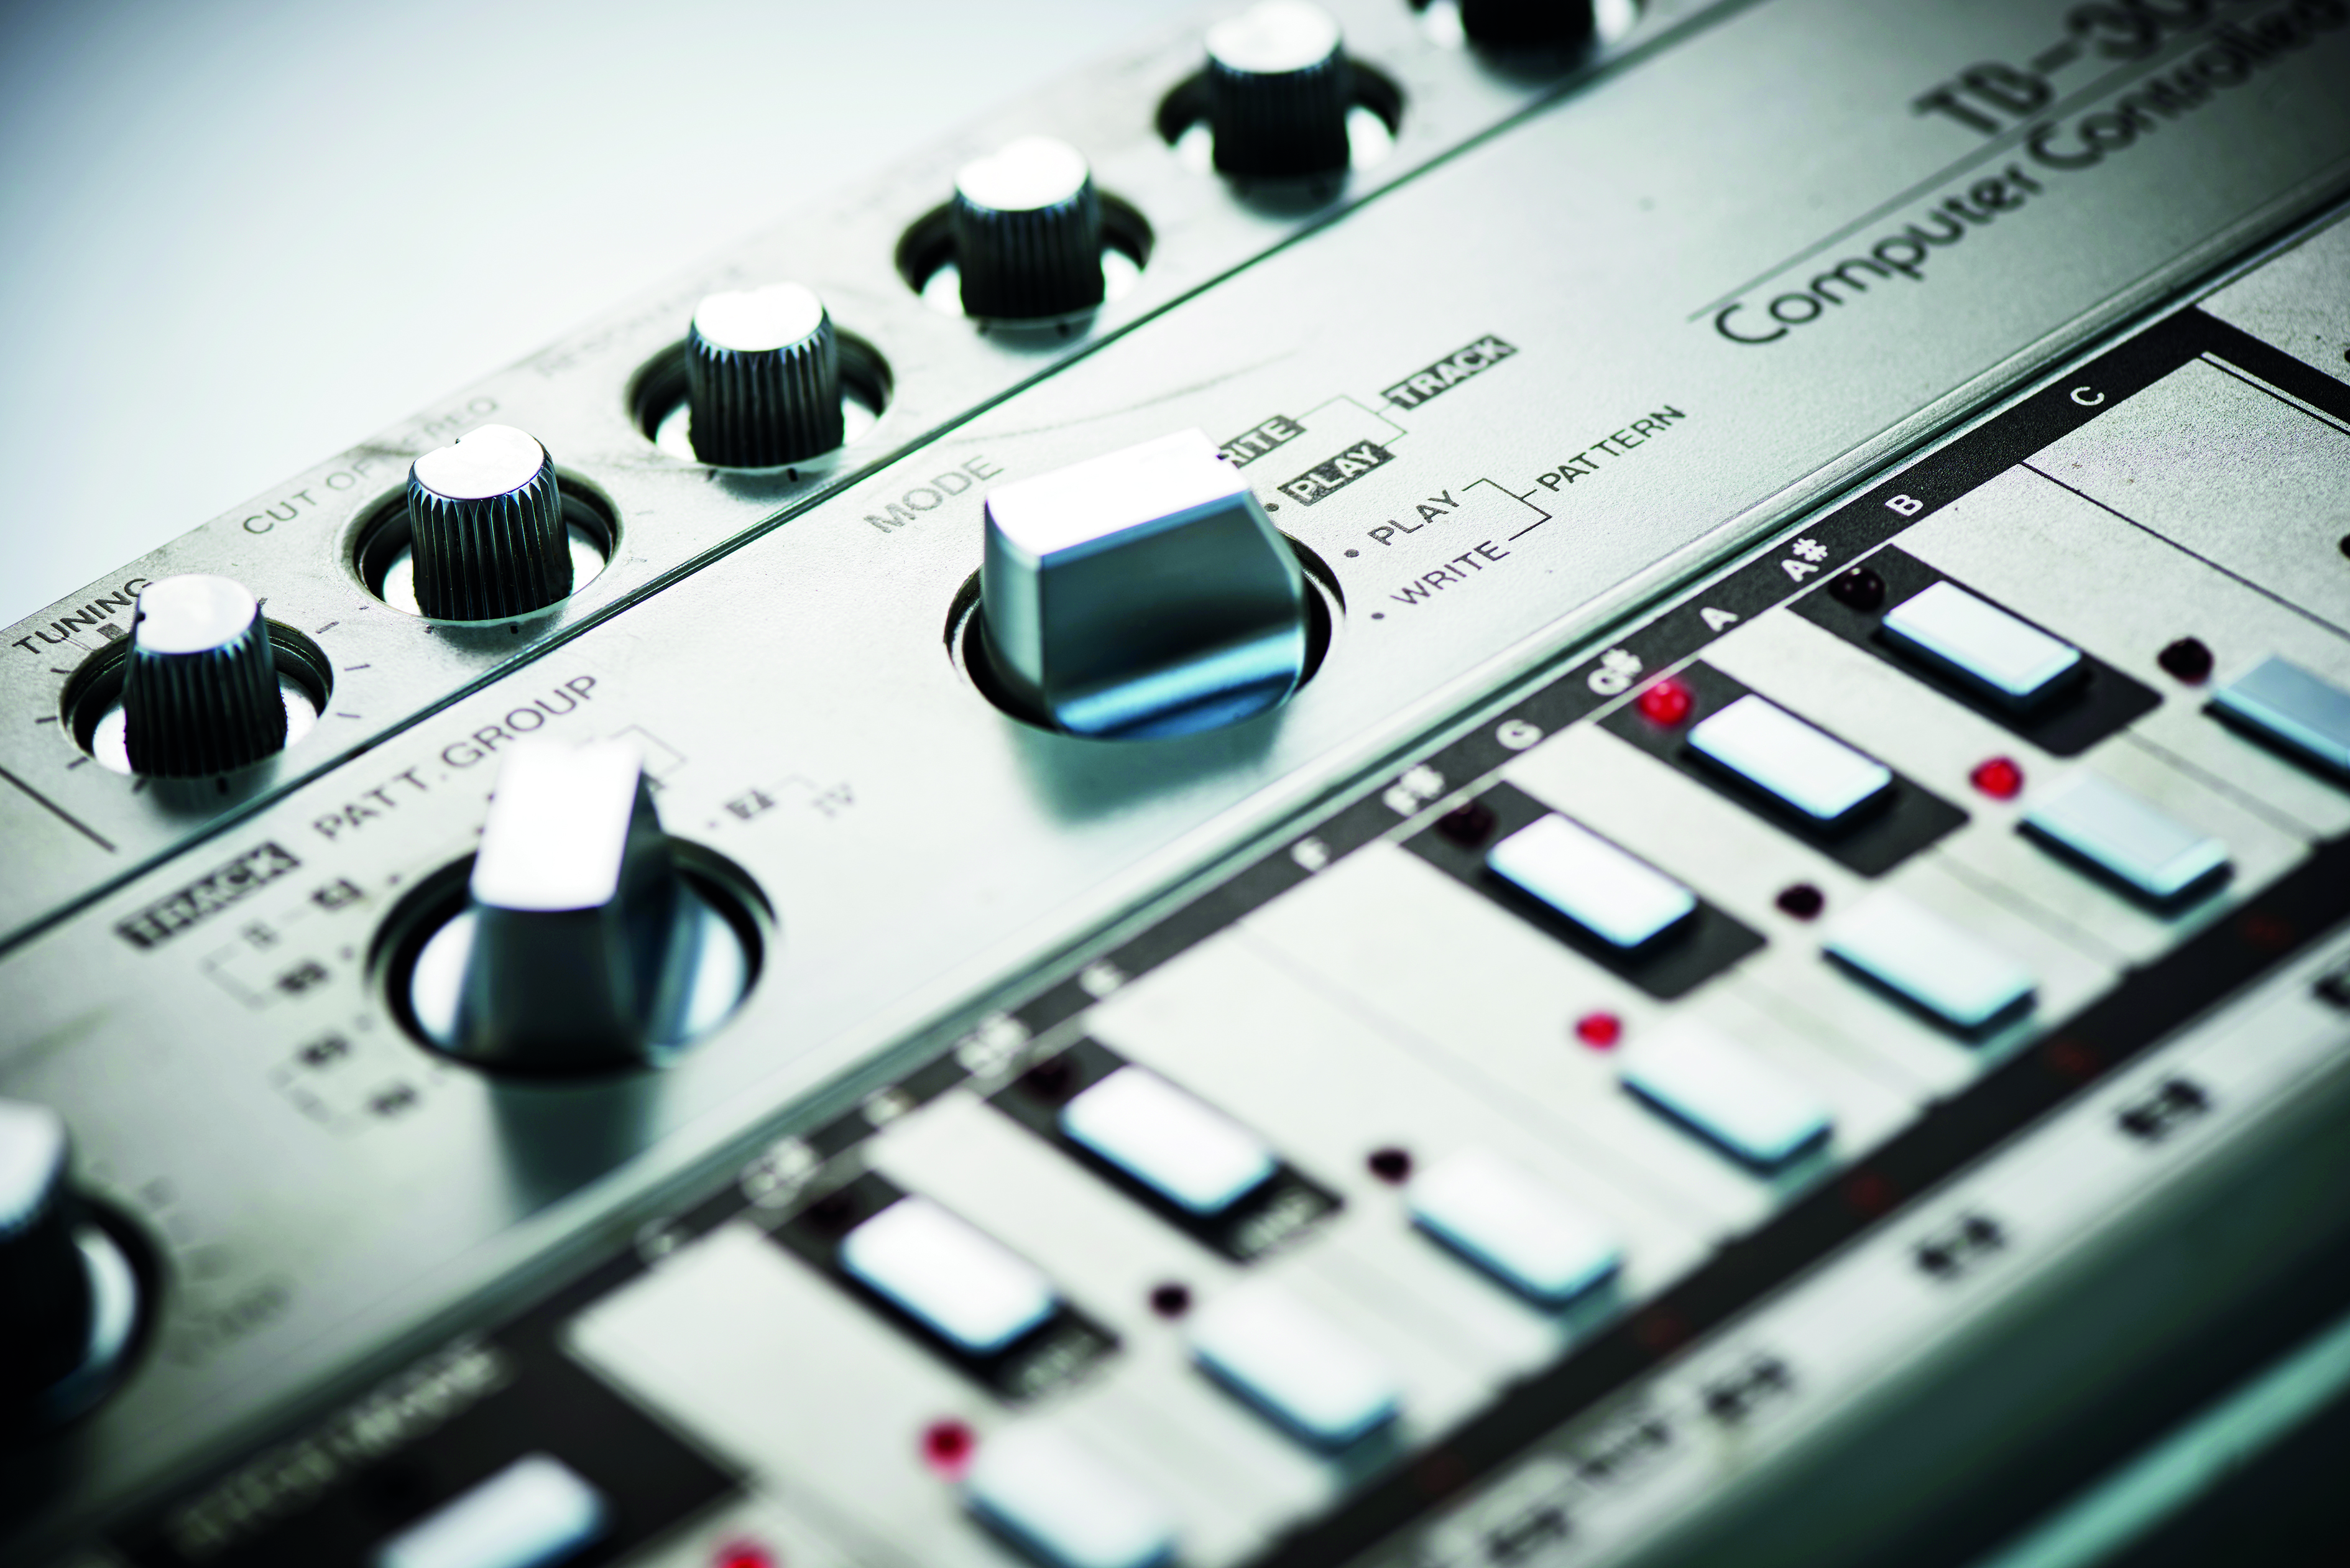
Patterns are stored in four Pattern Groups, which can be selected using the Track/Pattern Group dial. Pattern Groups are marked by the Roman numerals, while the numbers indicate Track selection. Each Pattern Group hosts eight Patterns, selected using the numbered sequence buttons, each of which has A and B variations.
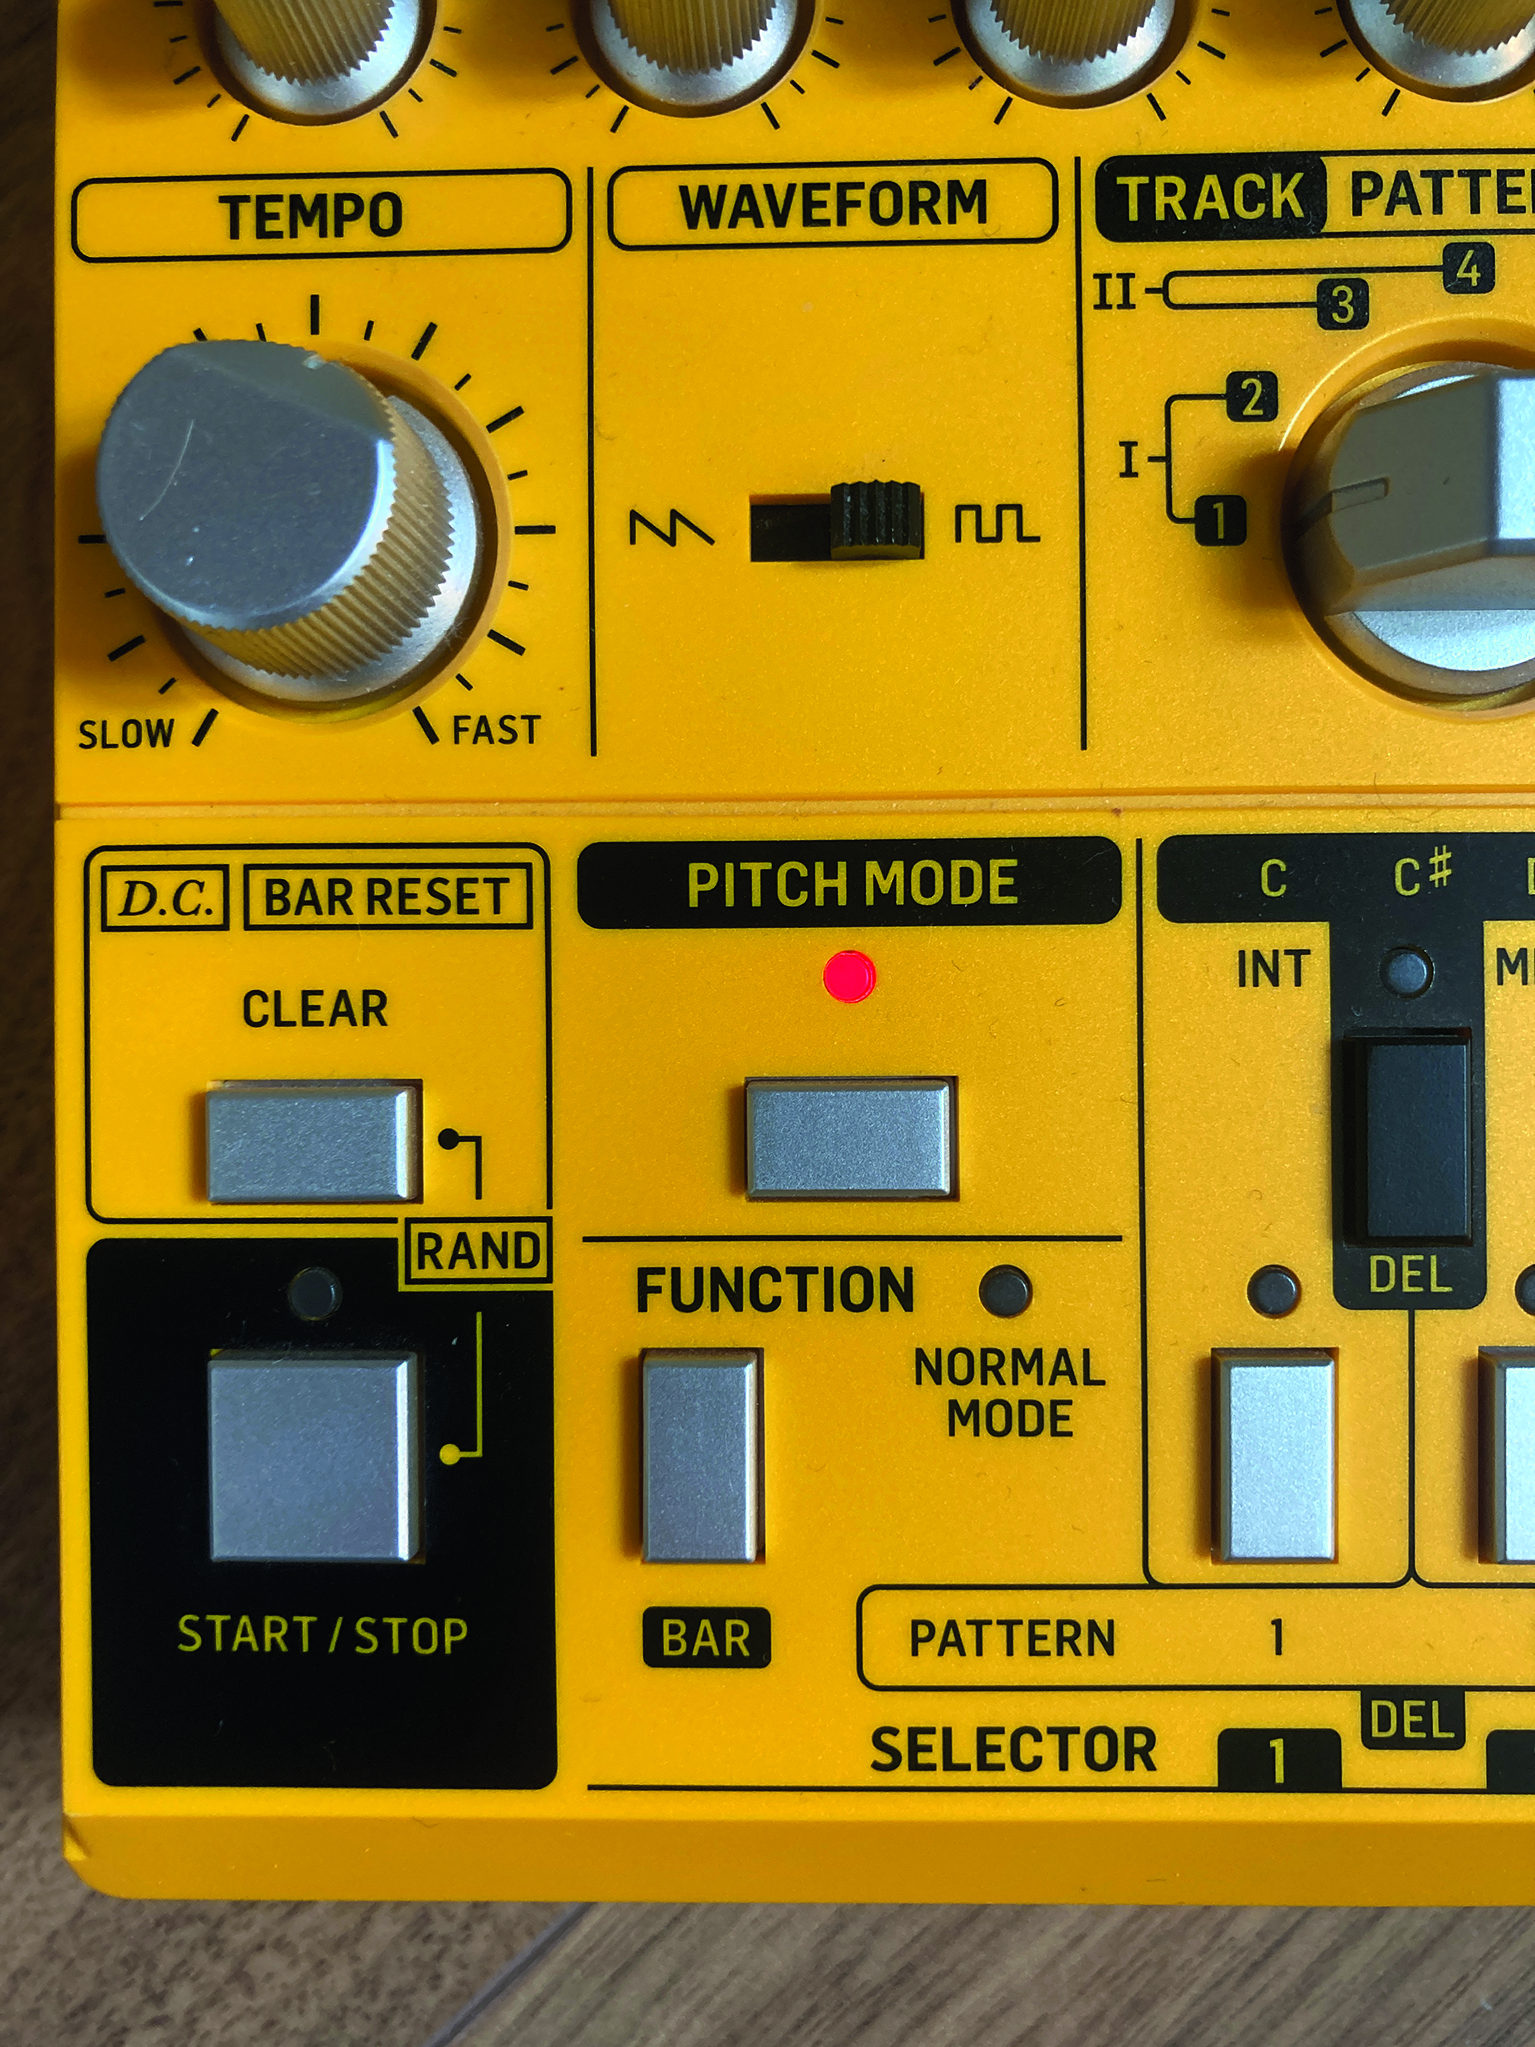
The simplest place to start is Pattern 1 in the first Pattern Group. Select this by turning the Track/Pattern Group Dial to the far left and pressing Step 1, the LED above the step will flash to indicate the selection. We now need to turn the Mode dial all the way to the right, to Pattern > Write, in order to edit the pattern. (See Fig. 1 below)
First step is to clear the Pattern of any existing sequence – we can do this by pressing Clear and the selected Pattern button (step 1, in this case).
Creating a classic acid pattern
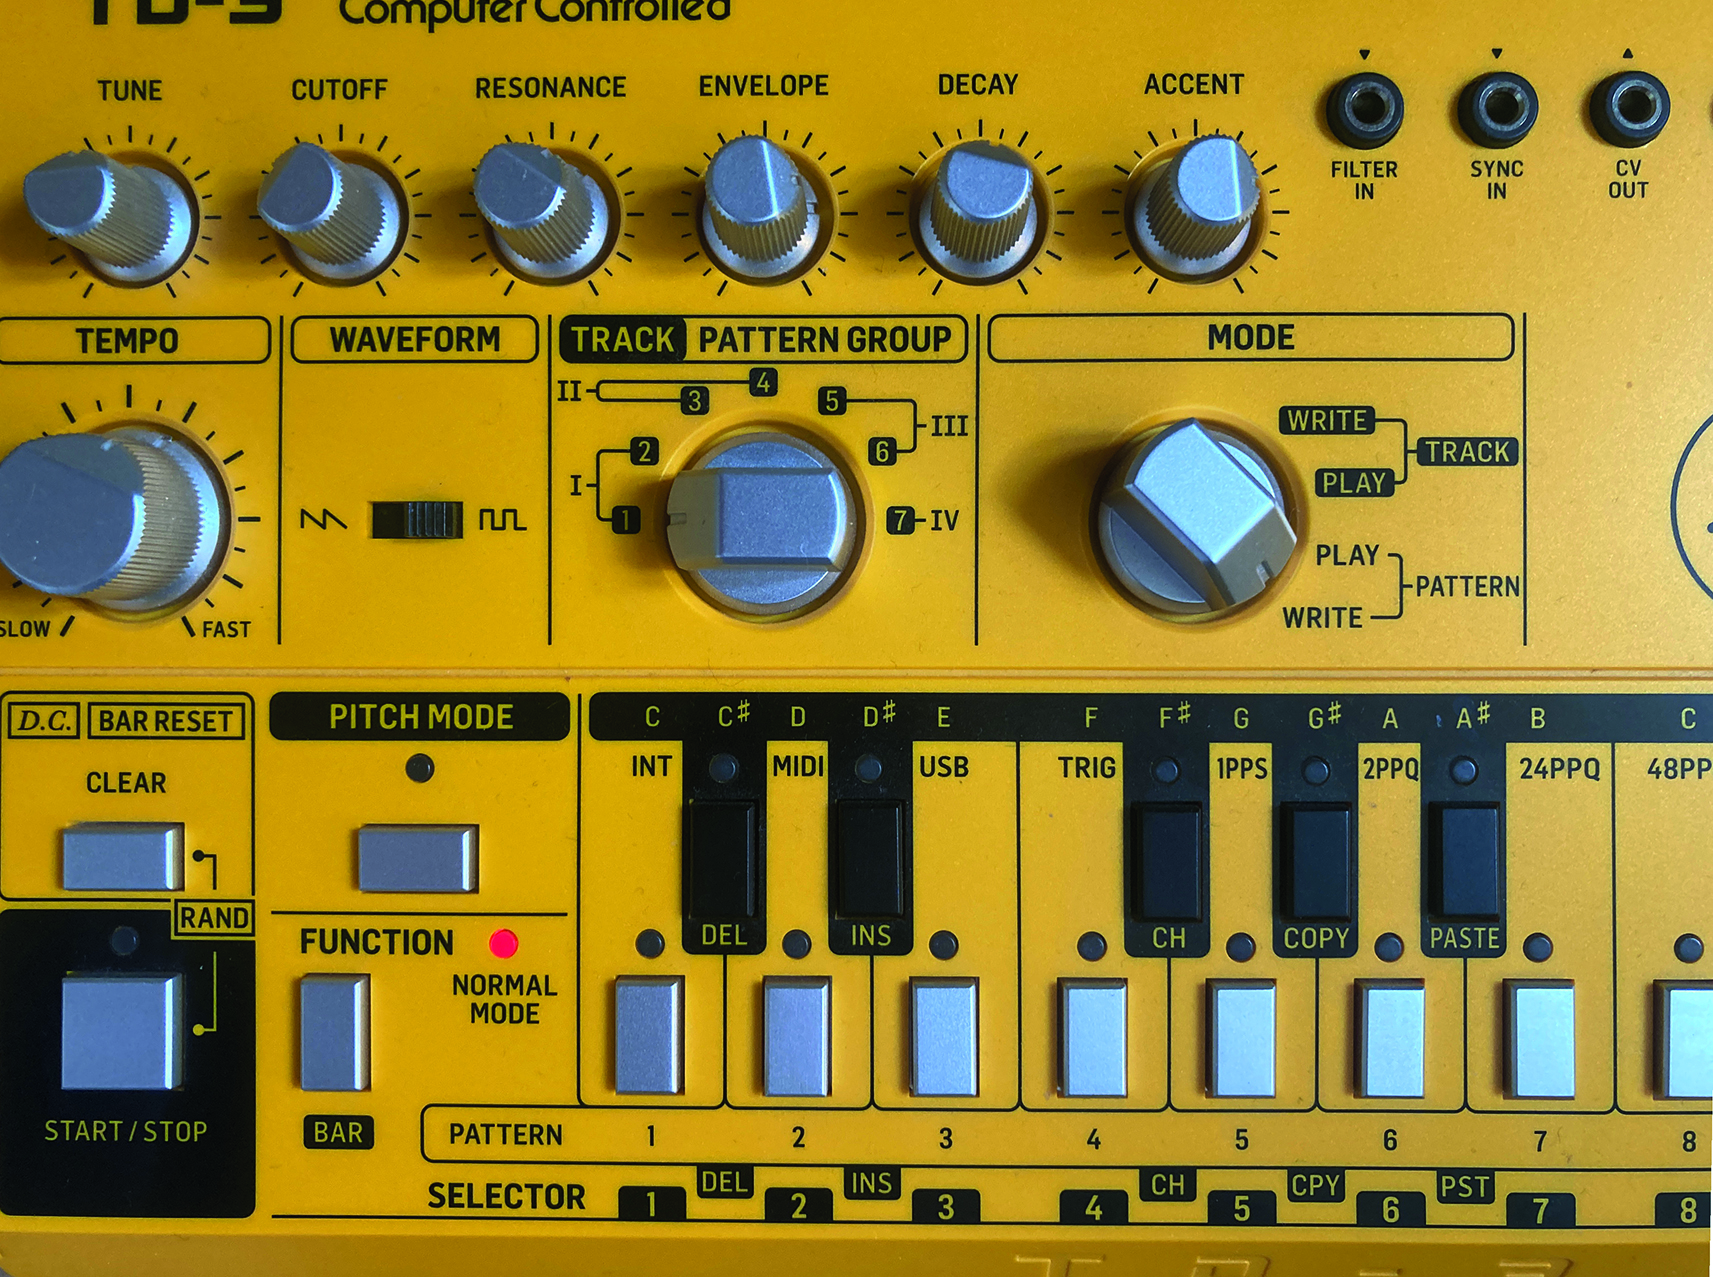
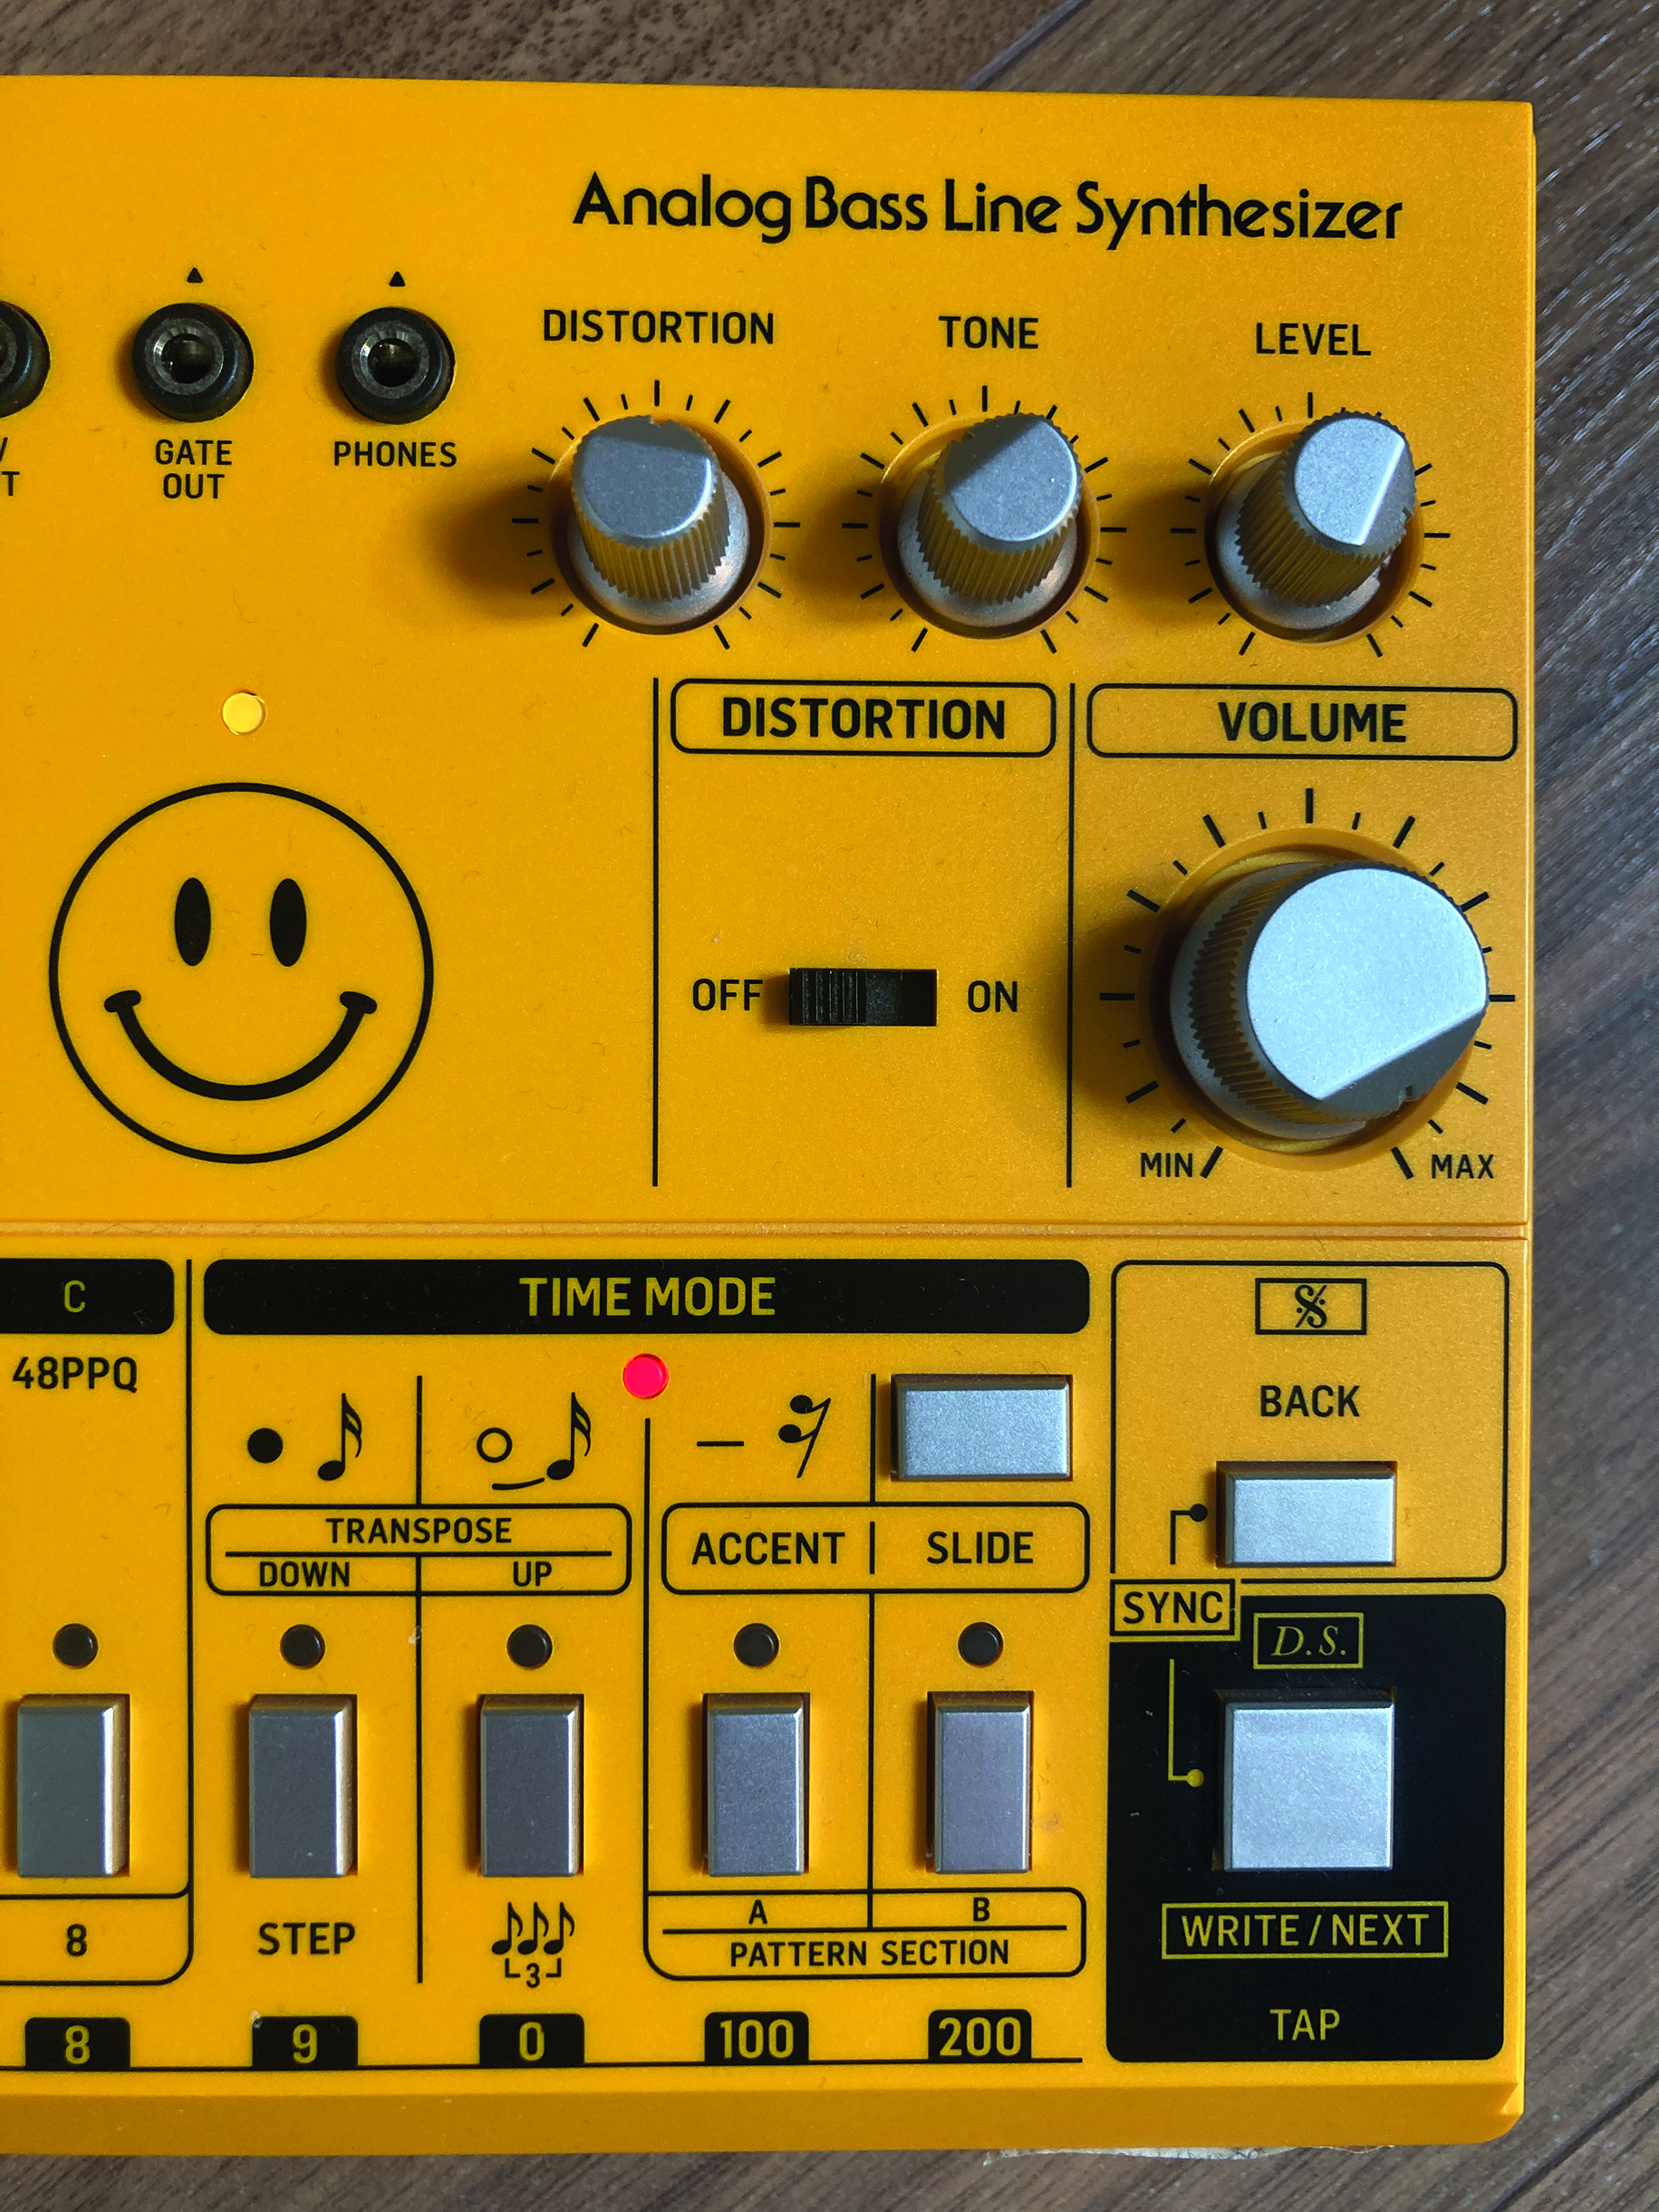
Our sequence starts by inputting a series of notes. We need to do this in Pitch Mode. This is selected by pressing the Pitch Mode button, the LED above which will light up to show that it’s active. (See Fig. 2)
With Pitch Mode active, simply play a series of notes using the button keyboard. This will create a melodic sequence. There’s no need to worry about timing or velocity, the only thing being recorded is the sequence of notes themselves. Start with the root note of your track/scale then add pitches as you see fit.
It’s possible to input notes one octave above or below the main pattern by holding either the Down or Up buttons to the right of the keyboard as you input a note. However, it’s possible – and arguably more desirable – to add and edit these later on.
Once you’ve input a series of notes, press Function to exit Pitch Mode. Alternatively, to redo the pattern, press Pitch Mode again to go back to the start.
Now try pressing the Run/Stop button (or Start/Stop as it’s labelled on the TD-3). Note that nothing happens – that is because, although we’ve input a sequence of notes, until we input timings, the 303 doesn’t register this as a sequence.
Pro tip
303 Patterns are 16 steps in length by default. However, it’s possible to set a different length by holding down Function and pressing Step a number of times to correspond to the desired length (ie, press step eight times to set an eight-step sequence). Having a 12-step pattern cycling over a 4/4 kick drum is a classic acid techno trick!
Timing time
The next step in creating our Pattern is to enter Time Mode. This is done by pressing the Time Mode button to the right of the interface; the LED will light up to let us know it’s active.
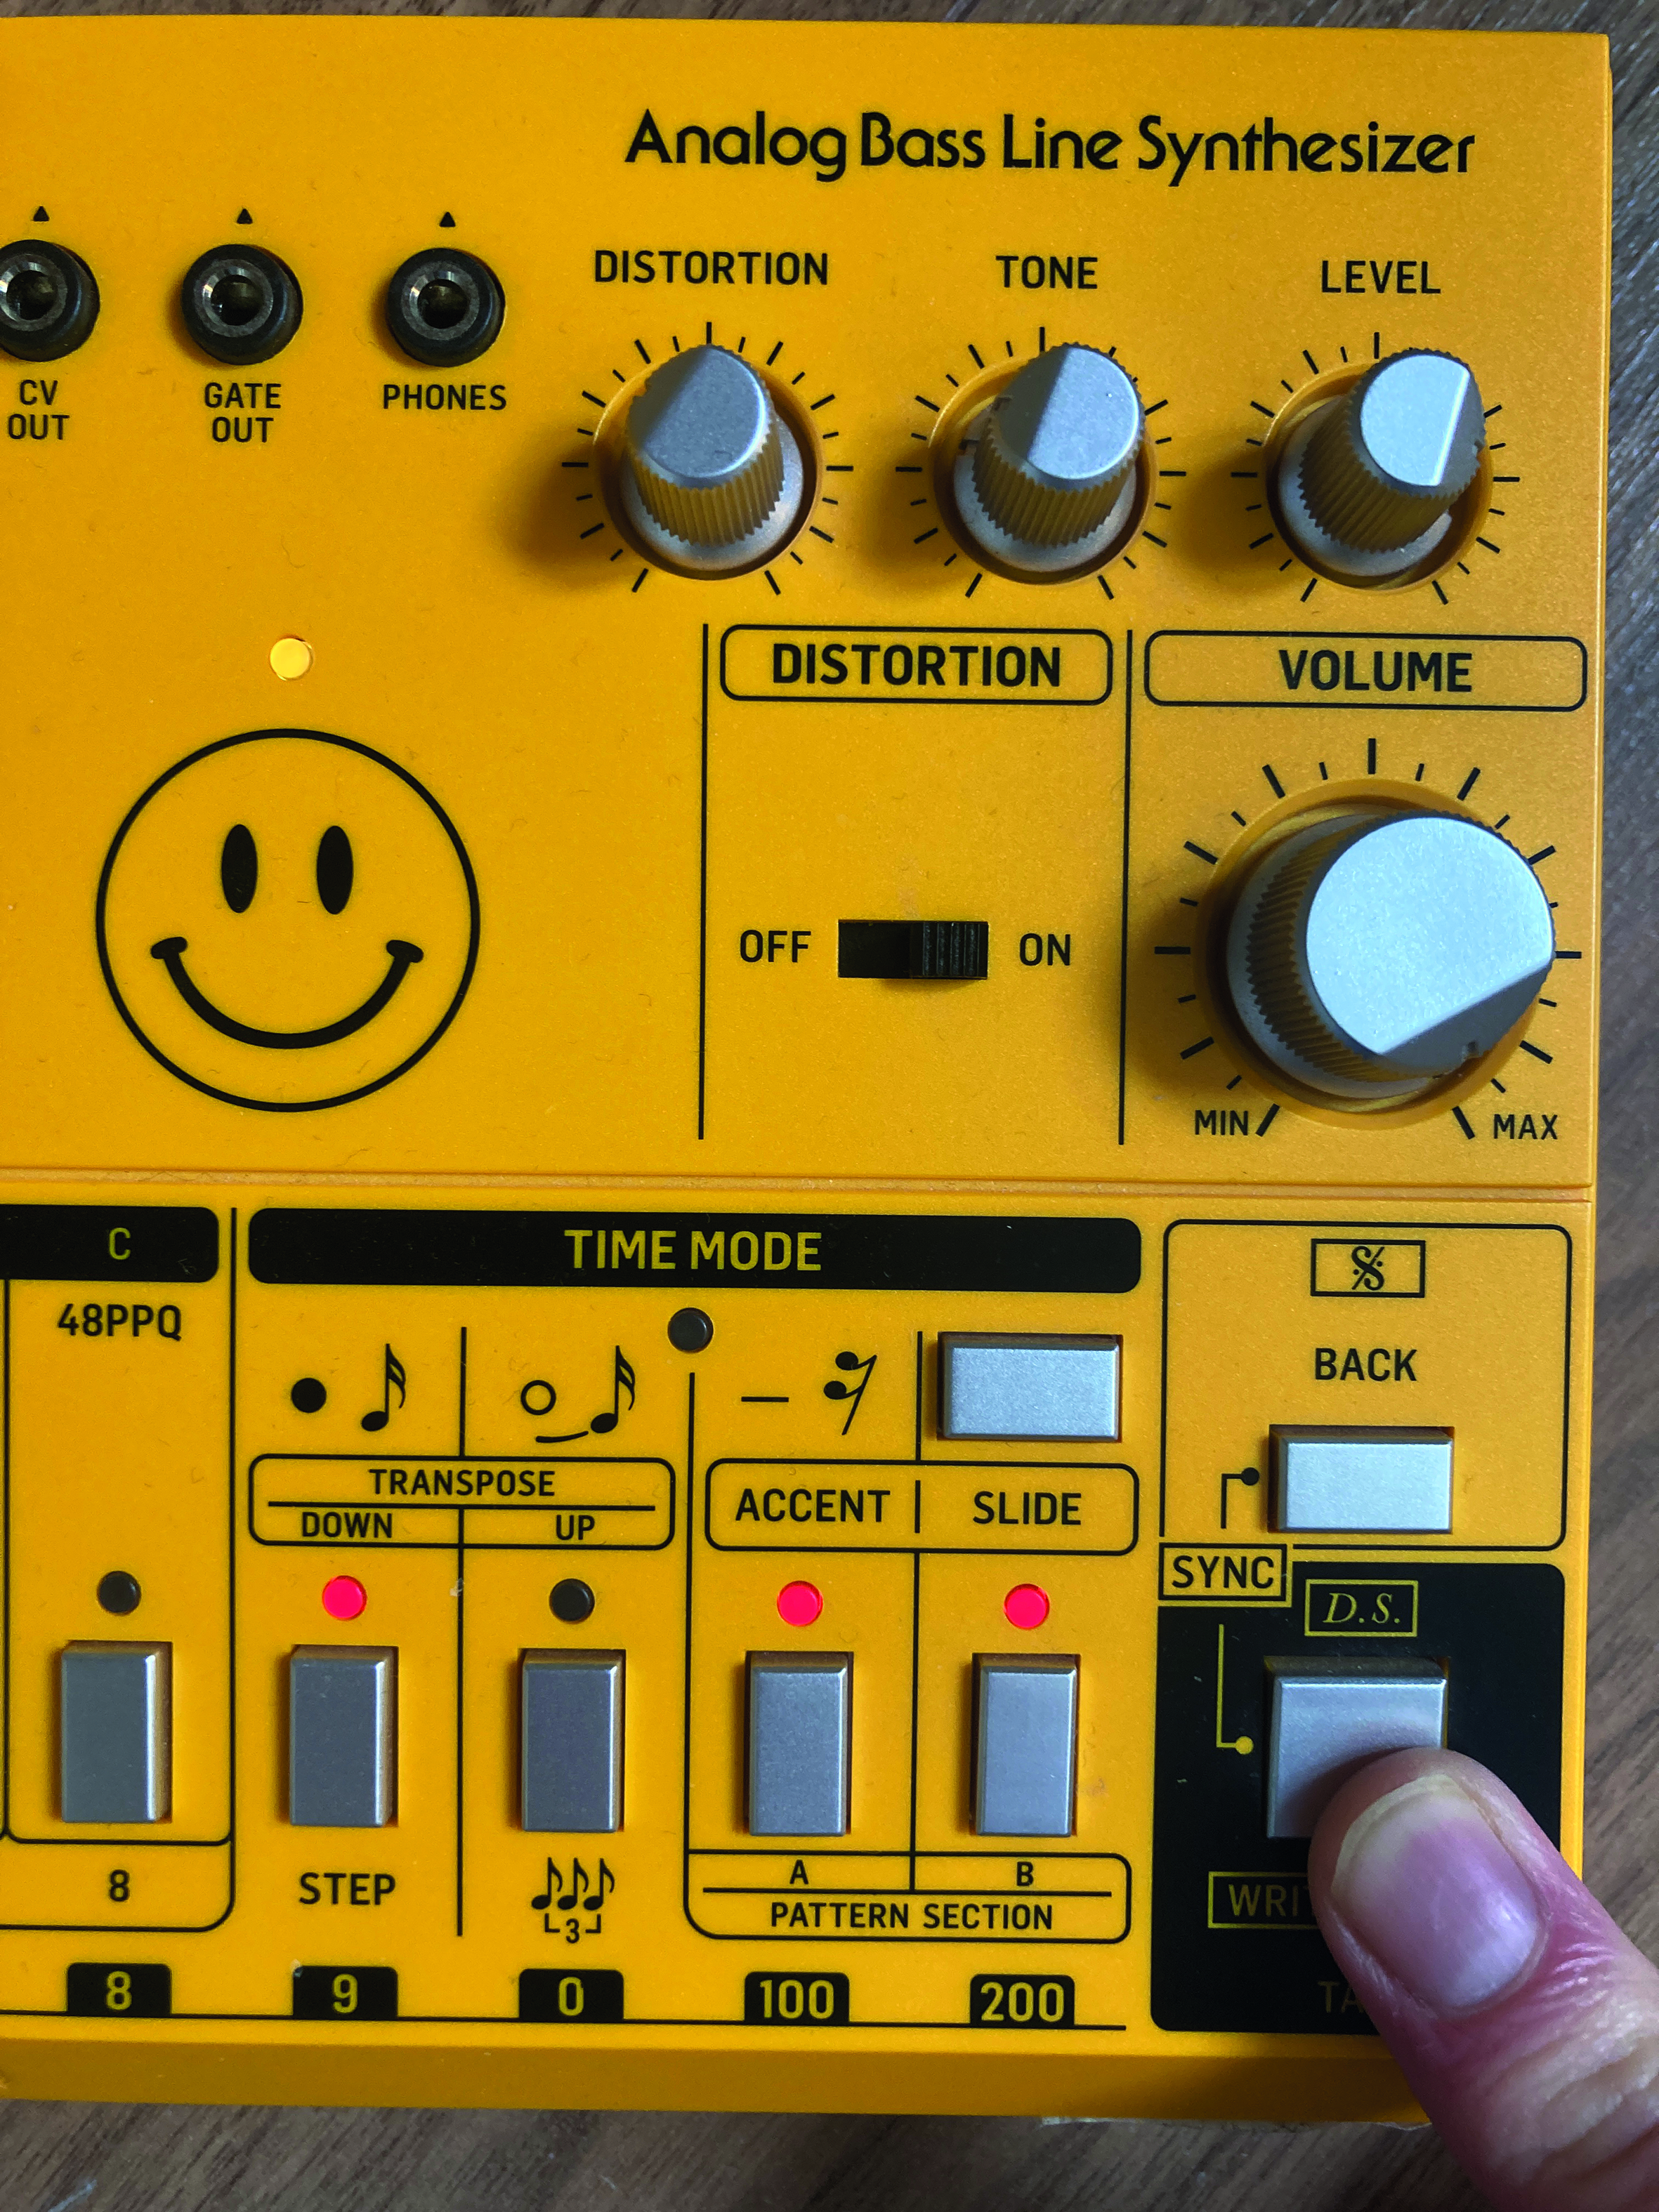
In Time Mode we can create a series of notes, ties and rests. These are input using the three buttons labelled with the corresponding musical notation. Running from left to right the first button (also labelled Transpose Down) inputs a note, the next (Transpose Up) inputs a tie, and the third (labelled Accent) inputs a rest. (See Fig. 3)
We create our sequence by adding a combination of these until we’ve reached the set number of steps for our Pattern (at which point the Time Mode LED will go out, indicating we’ve created a full Pattern). A Note step will play the next pitch in the sequence we’ve already input, a tie will extend the current note across the length of the next step, and a rest will input a step of silence.
It’s worth considering how the 303’s Pitch and Timing sequences interact. If you input a pitch sequence of 16 notes, these don’t necessarily correspond to 16 steps in a pattern, as the sequencer only moves onto a new pitch with each Note trigger. If you input a rest, rather than silencing or skipping over the corresponding pitch, the sequencer will wait until the next note to move on.
For example, if you have a pitch sequence of C, D, E, F combined with a timing sequence of Note, Note, Rest, Note, this will result in a pattern of C, D, _, E, not C, D, _, F. The same goes for ties. The same pitch sequence with a timing input of Note, Tie, Tie, Note, would result in a sequence of C-C-C, D.
Alternative method: it’s also possible to perform the timing of a sequence ‘live’. To do so, hold Function and press Run/Stop (aka Start/Stop). Now press Clear – you’ll hear a metronome. With this running you can tap the Write/Next button to create a pattern. A quick tap will input a note trigger and holding the button will add a tie.
Accents, slides and octave jumps
The ability to add variations to sequencer Patterns via accents and slides is where the 303 sequencer comes to life. Accents add emphasis to notes by increasing the volume and filter envelope depth, controlled by the Accent dial along the top of the unit.
Activating a slide for a note causes a bendy portamento effect as the note’s pitch slides into the next one. Slides work particularly well combined with octave jumps – activate slide on a note, then shift the following note either up or
down an octave to create the overt ‘bends’ that are a distinctive feature of acid basslines.
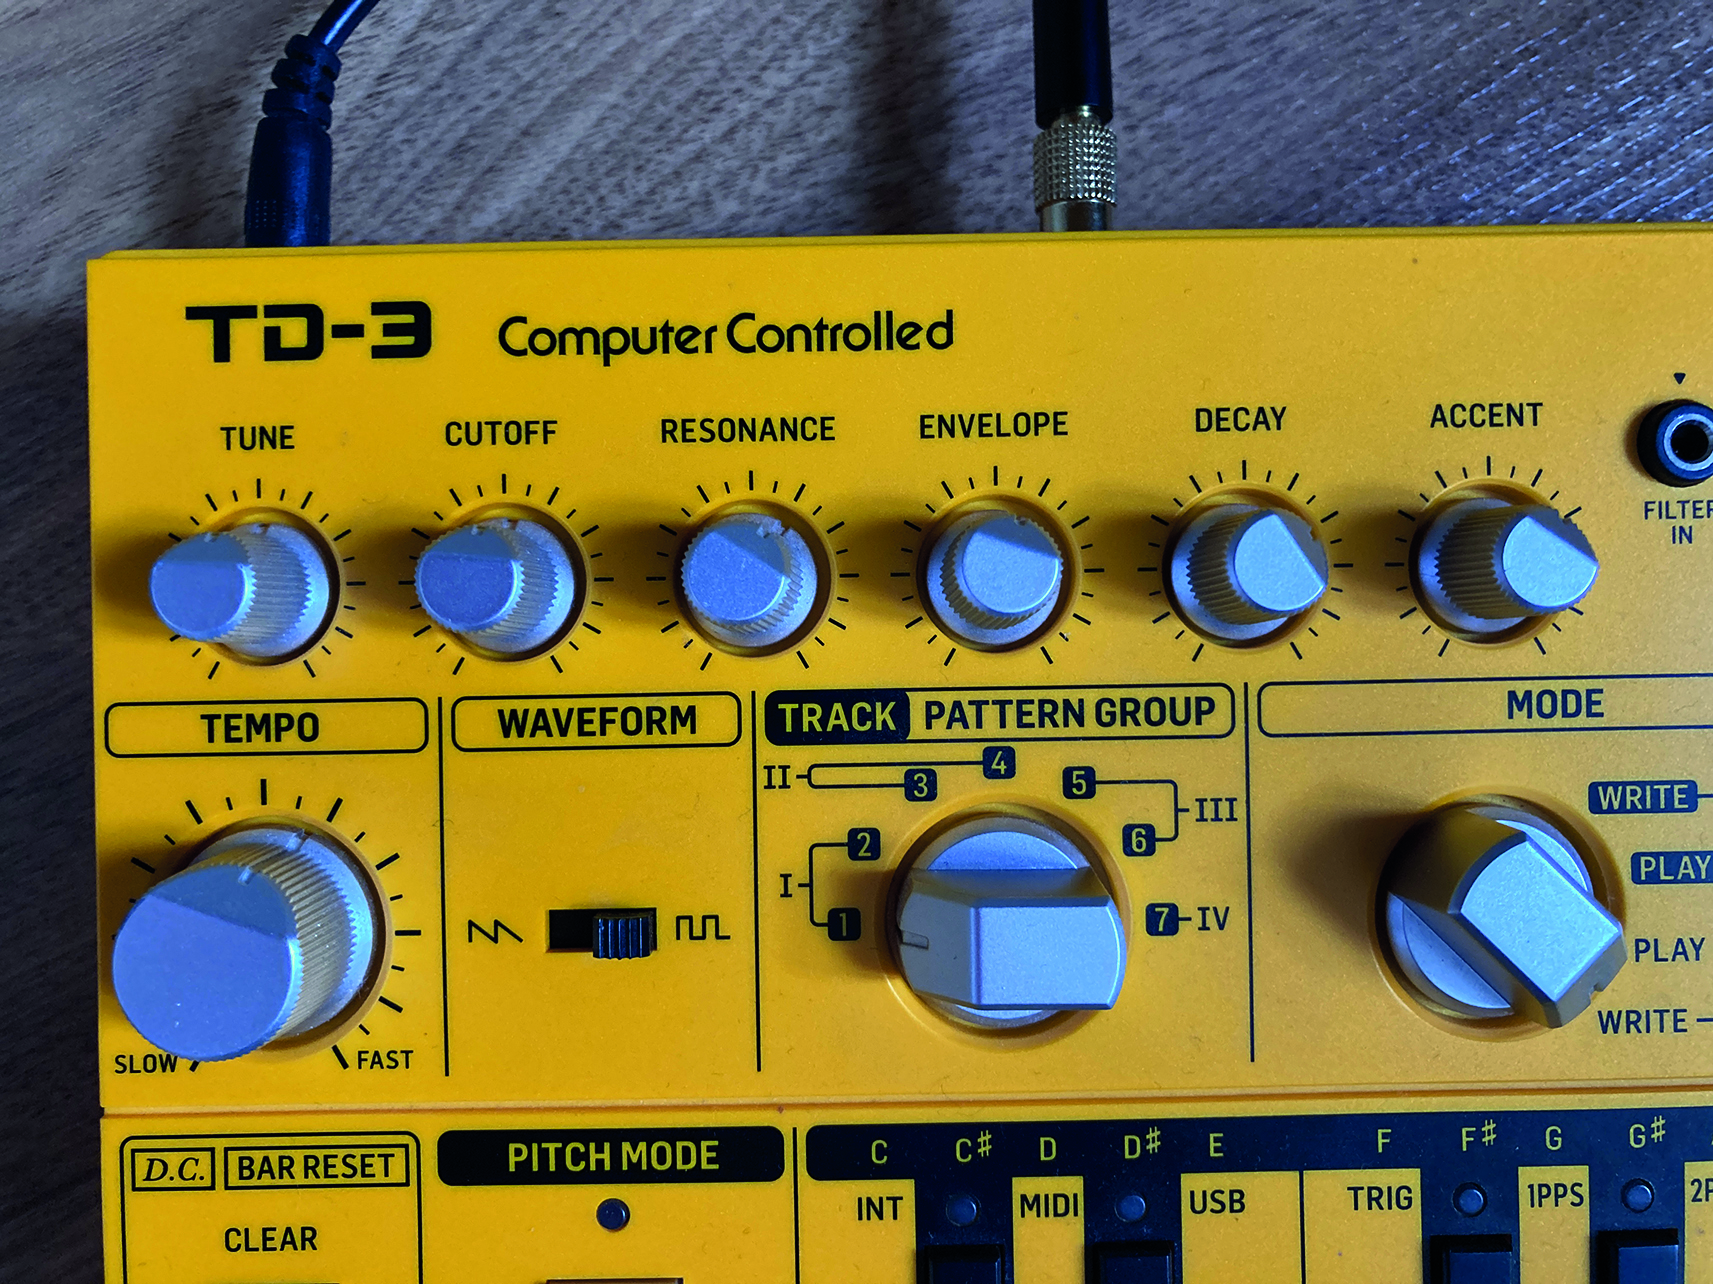
Accents, slides and octave shifts can be edited by returning to Pitch Mode (you’ll need to have the sequencer mode stopped and Pattern > Write mode active). Here, hold down the Write/Next button to hear the first pitch in your sequence. With Write/Next held down you can active accent, slide, transpose up or transpose down. (See Fig. 4) Alternatively, press a new keyboard note to change the assigned pitch.
Press and hold Write/Next again to move to the next step in your sequence, or Back (above) to move to the previous step.
Sequencing tips
It can be slightly mind melting trying to keep track of pitch inputs, timings, accents and slides. As such, approaching the 303 with a precise pattern in mind can be hard work. Don’t be afraid to embrace spontaneity – pick a music key to work in but try adding pitches or timing triggers at random. Scatter accents, slides and octave shifts around at will.
Many of the greatest acid basslines in history were likely created through this sort of fun experimentation. If it doesn’t work, just rip it up and start again [ahem].
Don’t overdo it with ties, slides and octave jumps – a simple, repetitive pattern livened up with one or two flourishes often works better than something complex and all over the place. When using live timing input, try slowing the tempo right down to give yourself time to create a more precise rhythm.
Adjusting the synth
After the complexity of the 303’s sequencer, getting your head around the synth itself is refreshingly straightforward. (See Fig. 5) This is a single oscillator synth, switchable between basic saw and square wave sounds. A saw tone is harmonically richer and slightly harsher sounding, whereas the square has a hollow quality. Aside from the wave selector (on the rear panel of the original, but up front for most remakes) the only oscillator control is a tuning dial.
The most significant element of the 303’s sonic character comes from its filter. This is a 18dB diode ladder filter, distinctive because of its capability to create squelchy resonance without pushing into self-oscillation (ie, creating a pitched tone itself).
There are two simple, snappy envelope generators on board, routed to the amp and filter. The amp envelope is essentially fixed, while we get a pair of basic controls for the filter envelope that alter the decay and depth of modulation (Envelope).
The behaviour of this filter envelope and its modulation controls are key to what creates the 303 ‘magic’. Yes, filter resonance is a big part of it – for a classic acid sound have this control around two-thirds clockwise at least – but bouncy, slightly stepped filter modulation is a major element of the acid bassline sound.
For best results, roll down the filter cutoff to its lowest point and tweak the Envelope and Decay controls to shape the sound to your liking.
It’s worth acknowledging a third control that interacts with the filter envelope – Accent. We don’t have space to go in depth into what happens to accented notes from the 303 sequencer, but in overly simplified terms, it triggers a ‘boost’ to both the amp and filter cutoff driven by the filter envelope.
Not only does this change the dynamic shape and harmonic content of these accented notes, but – at least in the case of the original 303 – it creates interesting ‘ramping’ effects when multiple Accents are chained on after another.
Take it further
303 basslines are rarely heard without some kind of effect treatment. Distortion is the classic choice – the way the resonant sound interacts with some analogue-style overdrive is wonderful.
Behringer’s RD-8 smartly comes with distortion built in. For other situations, guitar pedals work wonders (a Tube Screamer is our personal choice). In the box, pedal or amp emulations, or anything that replicates analogue distortion circuits can work well.
Aside from distortion, delay is a tried and tested pairing (again, guitar stompboxes are great), and a small touch of reverb can go a long way to bringing the sound to life.
Roland Cloud TB-303 - going beyond the hardware
Roland’s software 303 clone, the Roland TB-303 Software Bass Line, adds several modern features that expand on the classic hardware workflow. But what can they do?
Randomised sequences
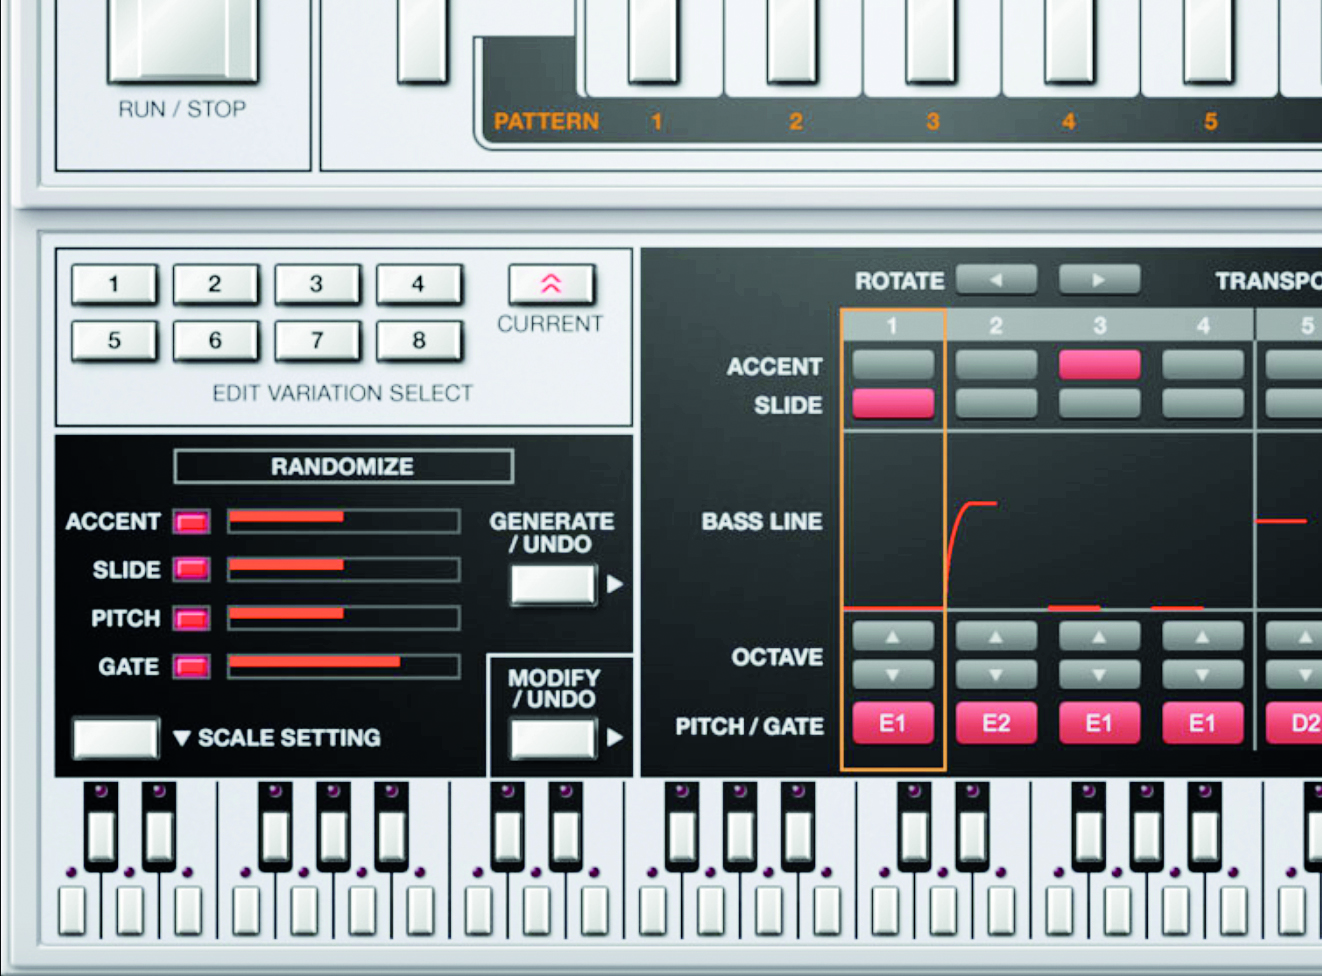
The software 303 can be expanded to reveal a far more flexible – and easier to program – take on the sequencer. A key improvement is the ability to randomise slides, accents, pitch and gate, which can be great for creating oddball, unexpected acid lines.
2. Playback modes
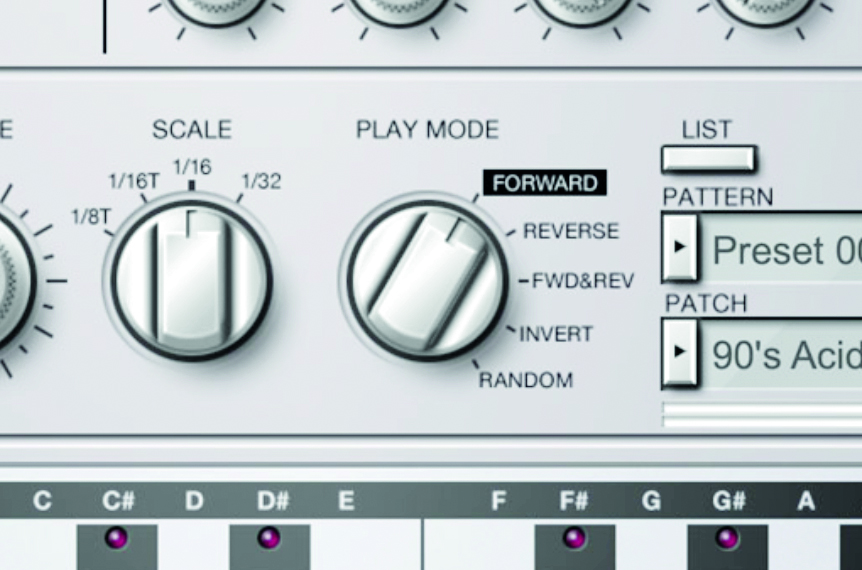
The original 303 sequencer only operates in a simple left-to-right direction. The software version can do more, such as run backwards, in a random order, or bounce back and forth. Switching these up with automation is a cool way to mix
up patterns.
3. Secret panel
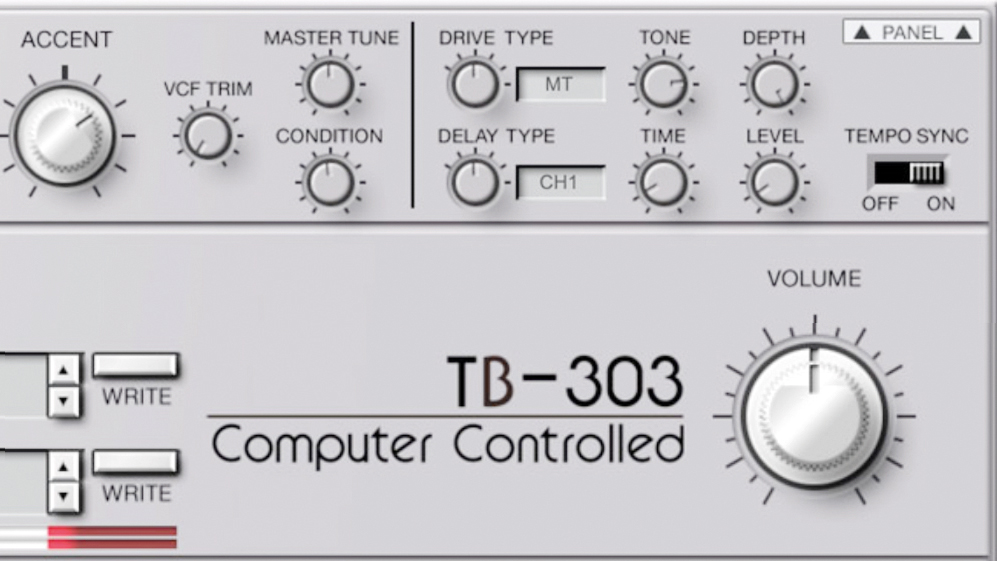
The software 303 features a few ‘hidden’ parameters that can help shape the sound of the emulation, including a VCF trim, for altering filter response, Vintage Condition parameter for ‘ageing’ the sound, and onboard distortion and delay.


