Your iPhone can measure the light in the scene and work out what it thinks is the best exposure, but it won’t always get it right. This is true for every camera, from smartphones to professional cameras, and there are two reasons for this:
-
Your camera can’t distinguish between the amount of light and objects that are naturally dark or light.
It adjusts the exposure for both, trying to make them a neutral brightness. Often it works fine, but if your subject is naturally a dark tone, it’s going to come out too light and if it’s naturally light, it’s likely to be underexposed.
-
Your camera doesn’t know what you want the lighting to look like so it has to guess.
Often it guesses right, but sometimes it doesn’t. If you’ve got a spotlit singer on a dark stage, for example, your iPhone might think it needs to increase the exposure to brighten up the stage, and your performer will just be a blob of light.
So sometimes you need to take over, and this is how it’s done using nothing more than the standard Camera app. Sure, experts will already know this, but lots of iPhone users might not – or they might have forgotten how to do it or how easy it is.
How to adjust the focus and exposure on your iPhone
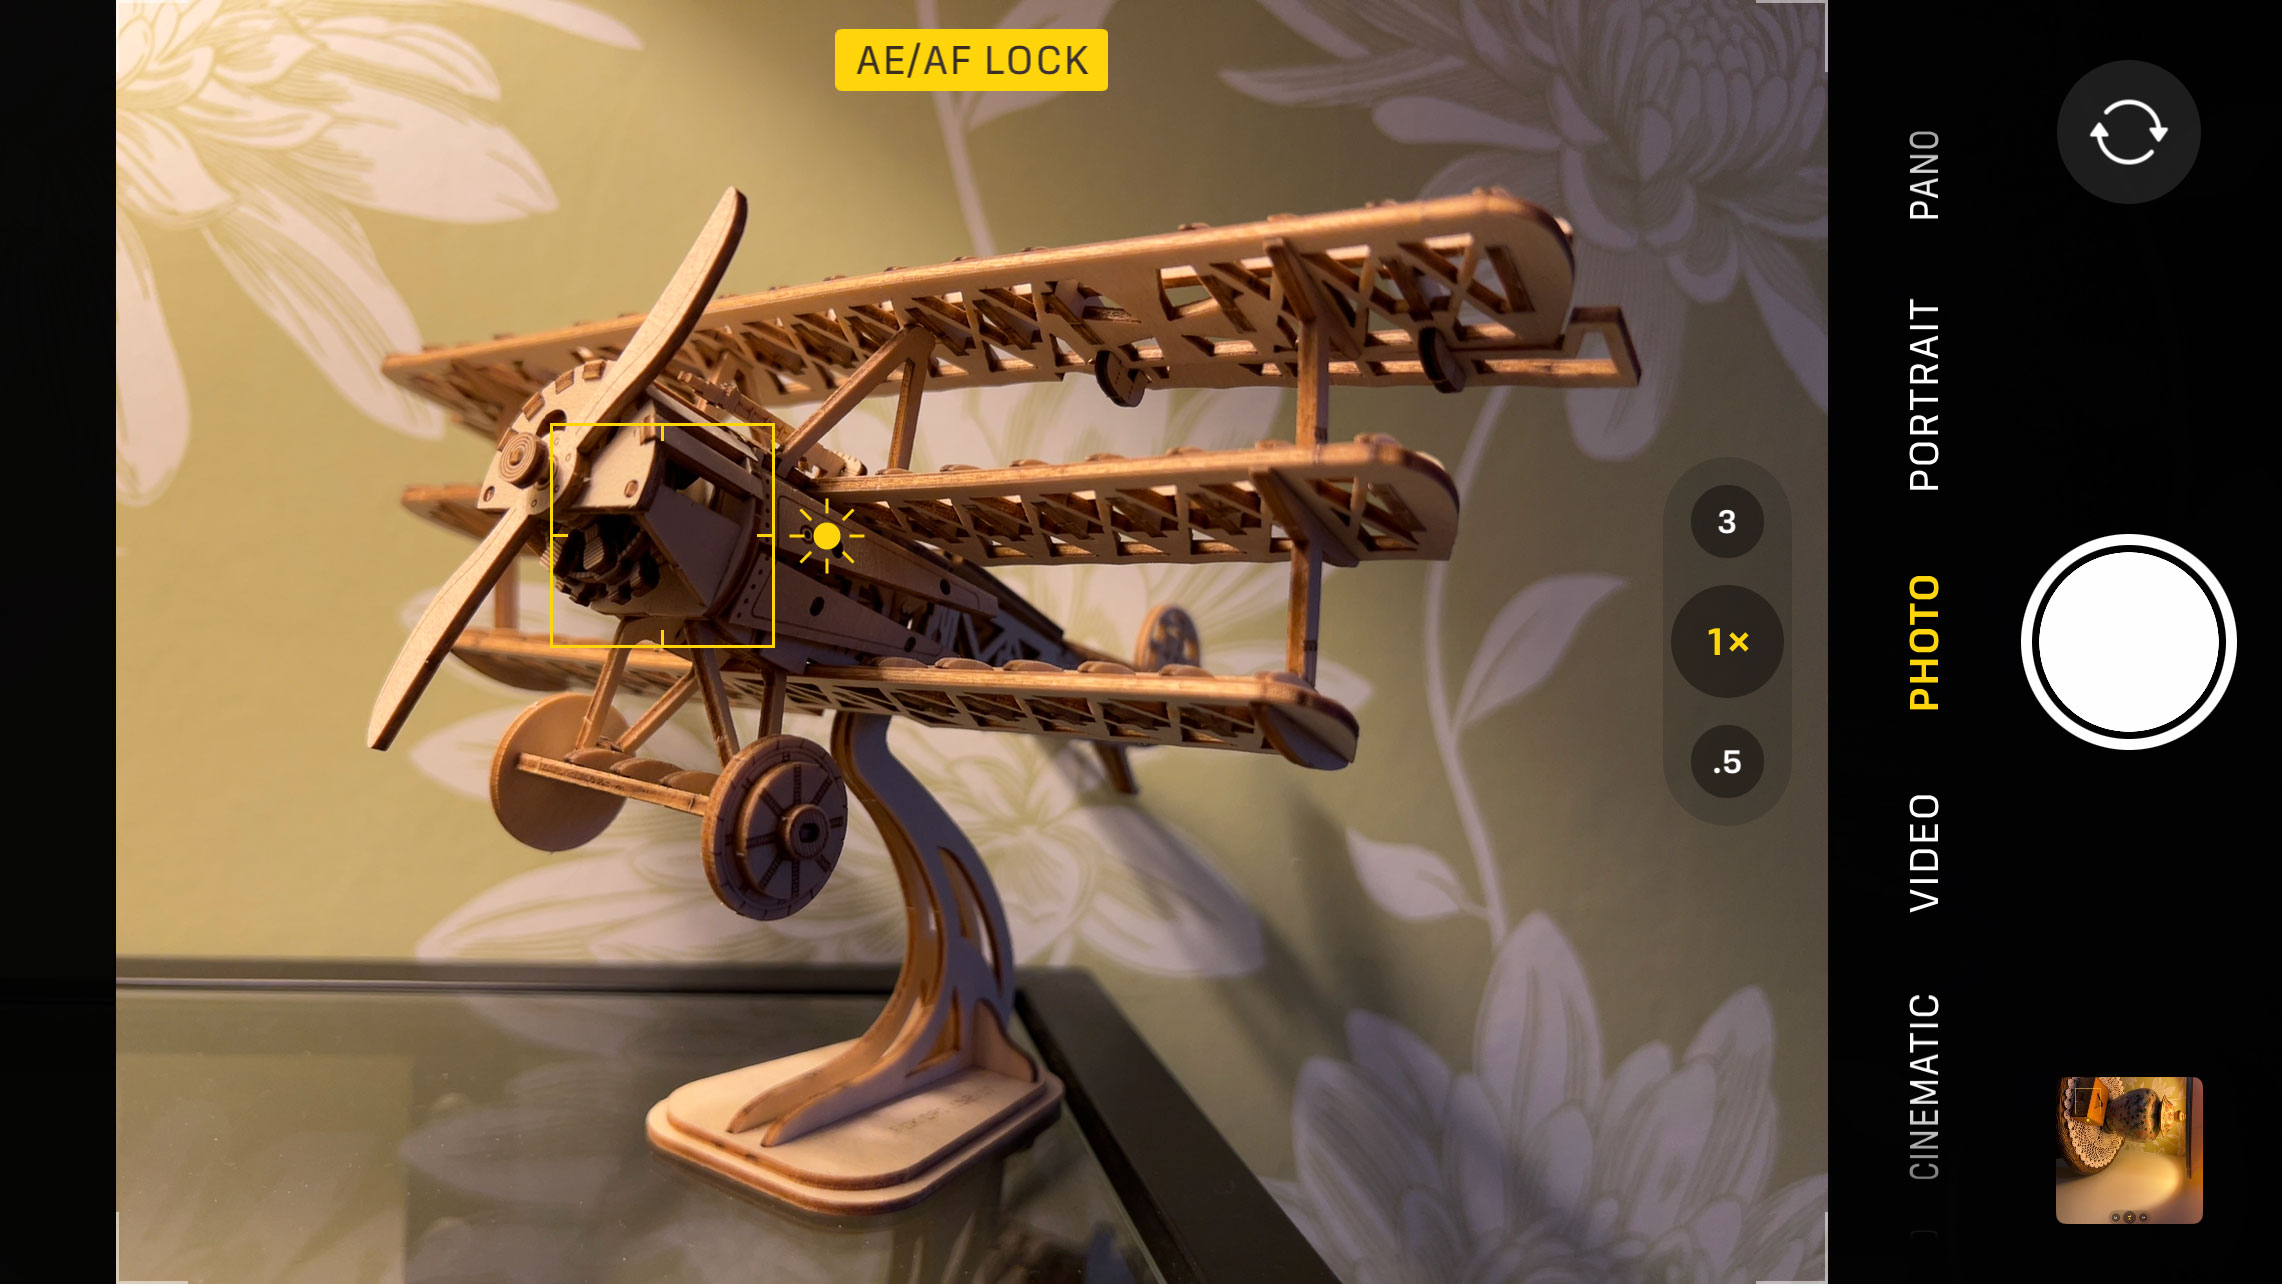
So first, decide on your main subject and tap on it. You’ll see a yellow box where you’ve tapped – and this also sets the focus on that object, by the way, which is useful. Already the phone is adjusting the exposure to suit the subject or area you’ve chosen.
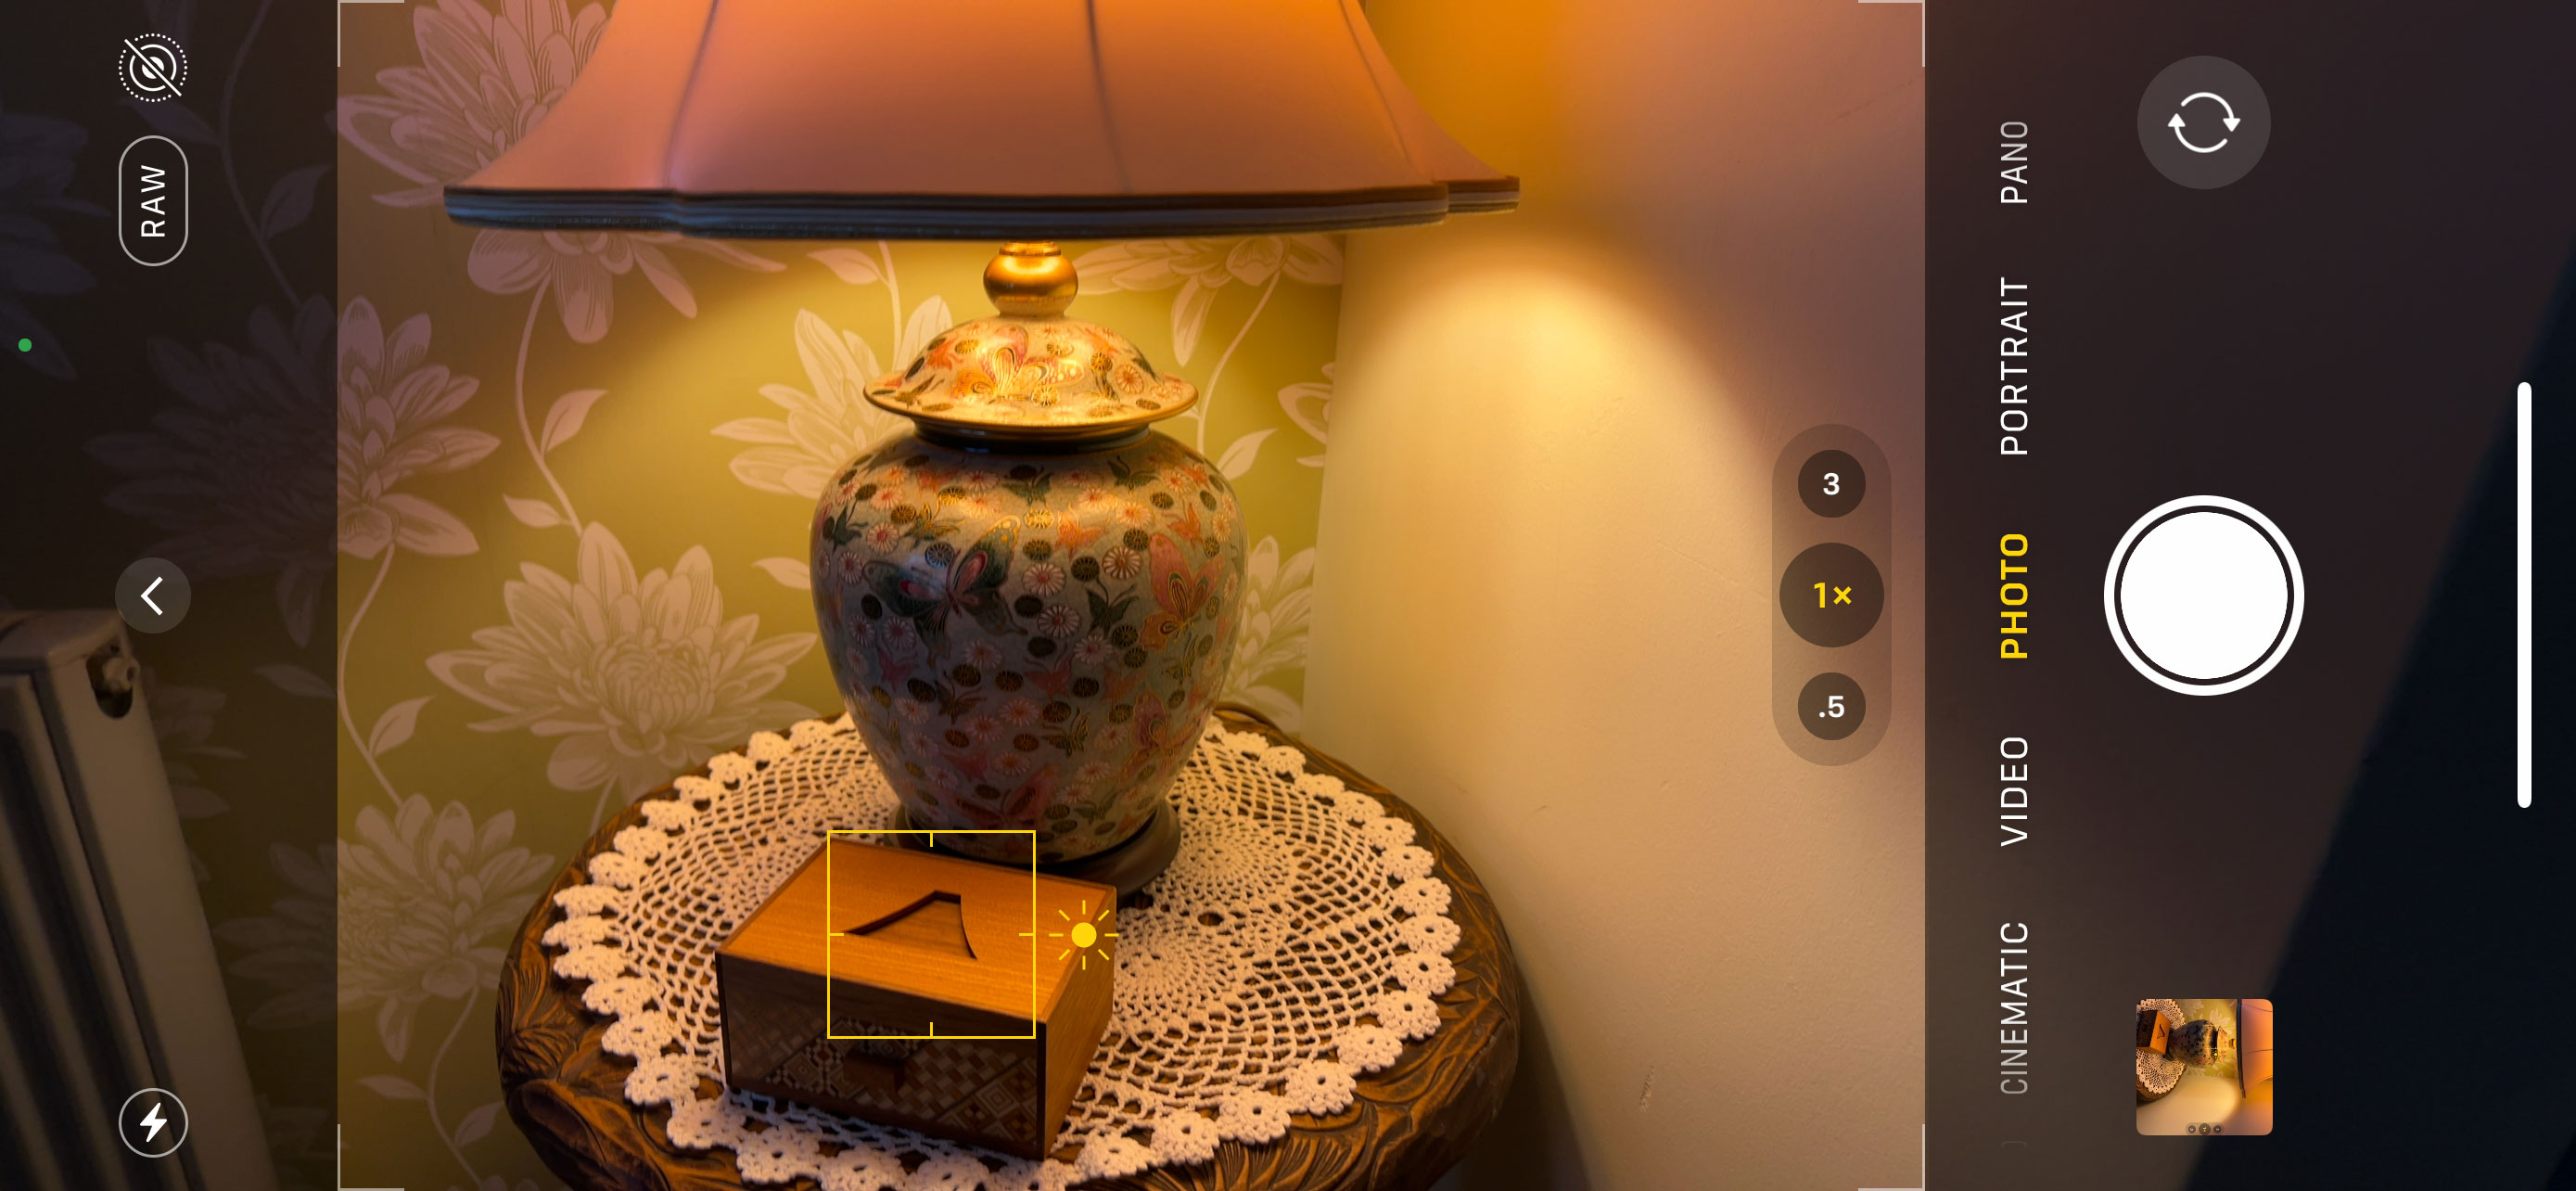
Next to the box you’ll see a brightness slider – you drag this up to manually increase the exposure and down to reduce it. When it looks right, tap the shutter button as usual. Yes, it’s that easy. As soon as you’ve taken a picture the Camera app goes back to its fully automatic mode.
How to lock focus and exposure on your iPhone
So the simple tap-and-adjust technique described above is fine for single shots, but what if you want to take a whole series with a fixed focus and exposure? For example, you might have set up a still life shot with carefully controlled lighting that isn’t going to change.
That’s easy too. Instead of just tapping once on your subject, tap and hold. After a second or so you’ll see a yellow AE/AF Lock sign appear. You can still adjust the exposure as before, but this time both the focus and the exposure will now be fixed for all the shots you take.
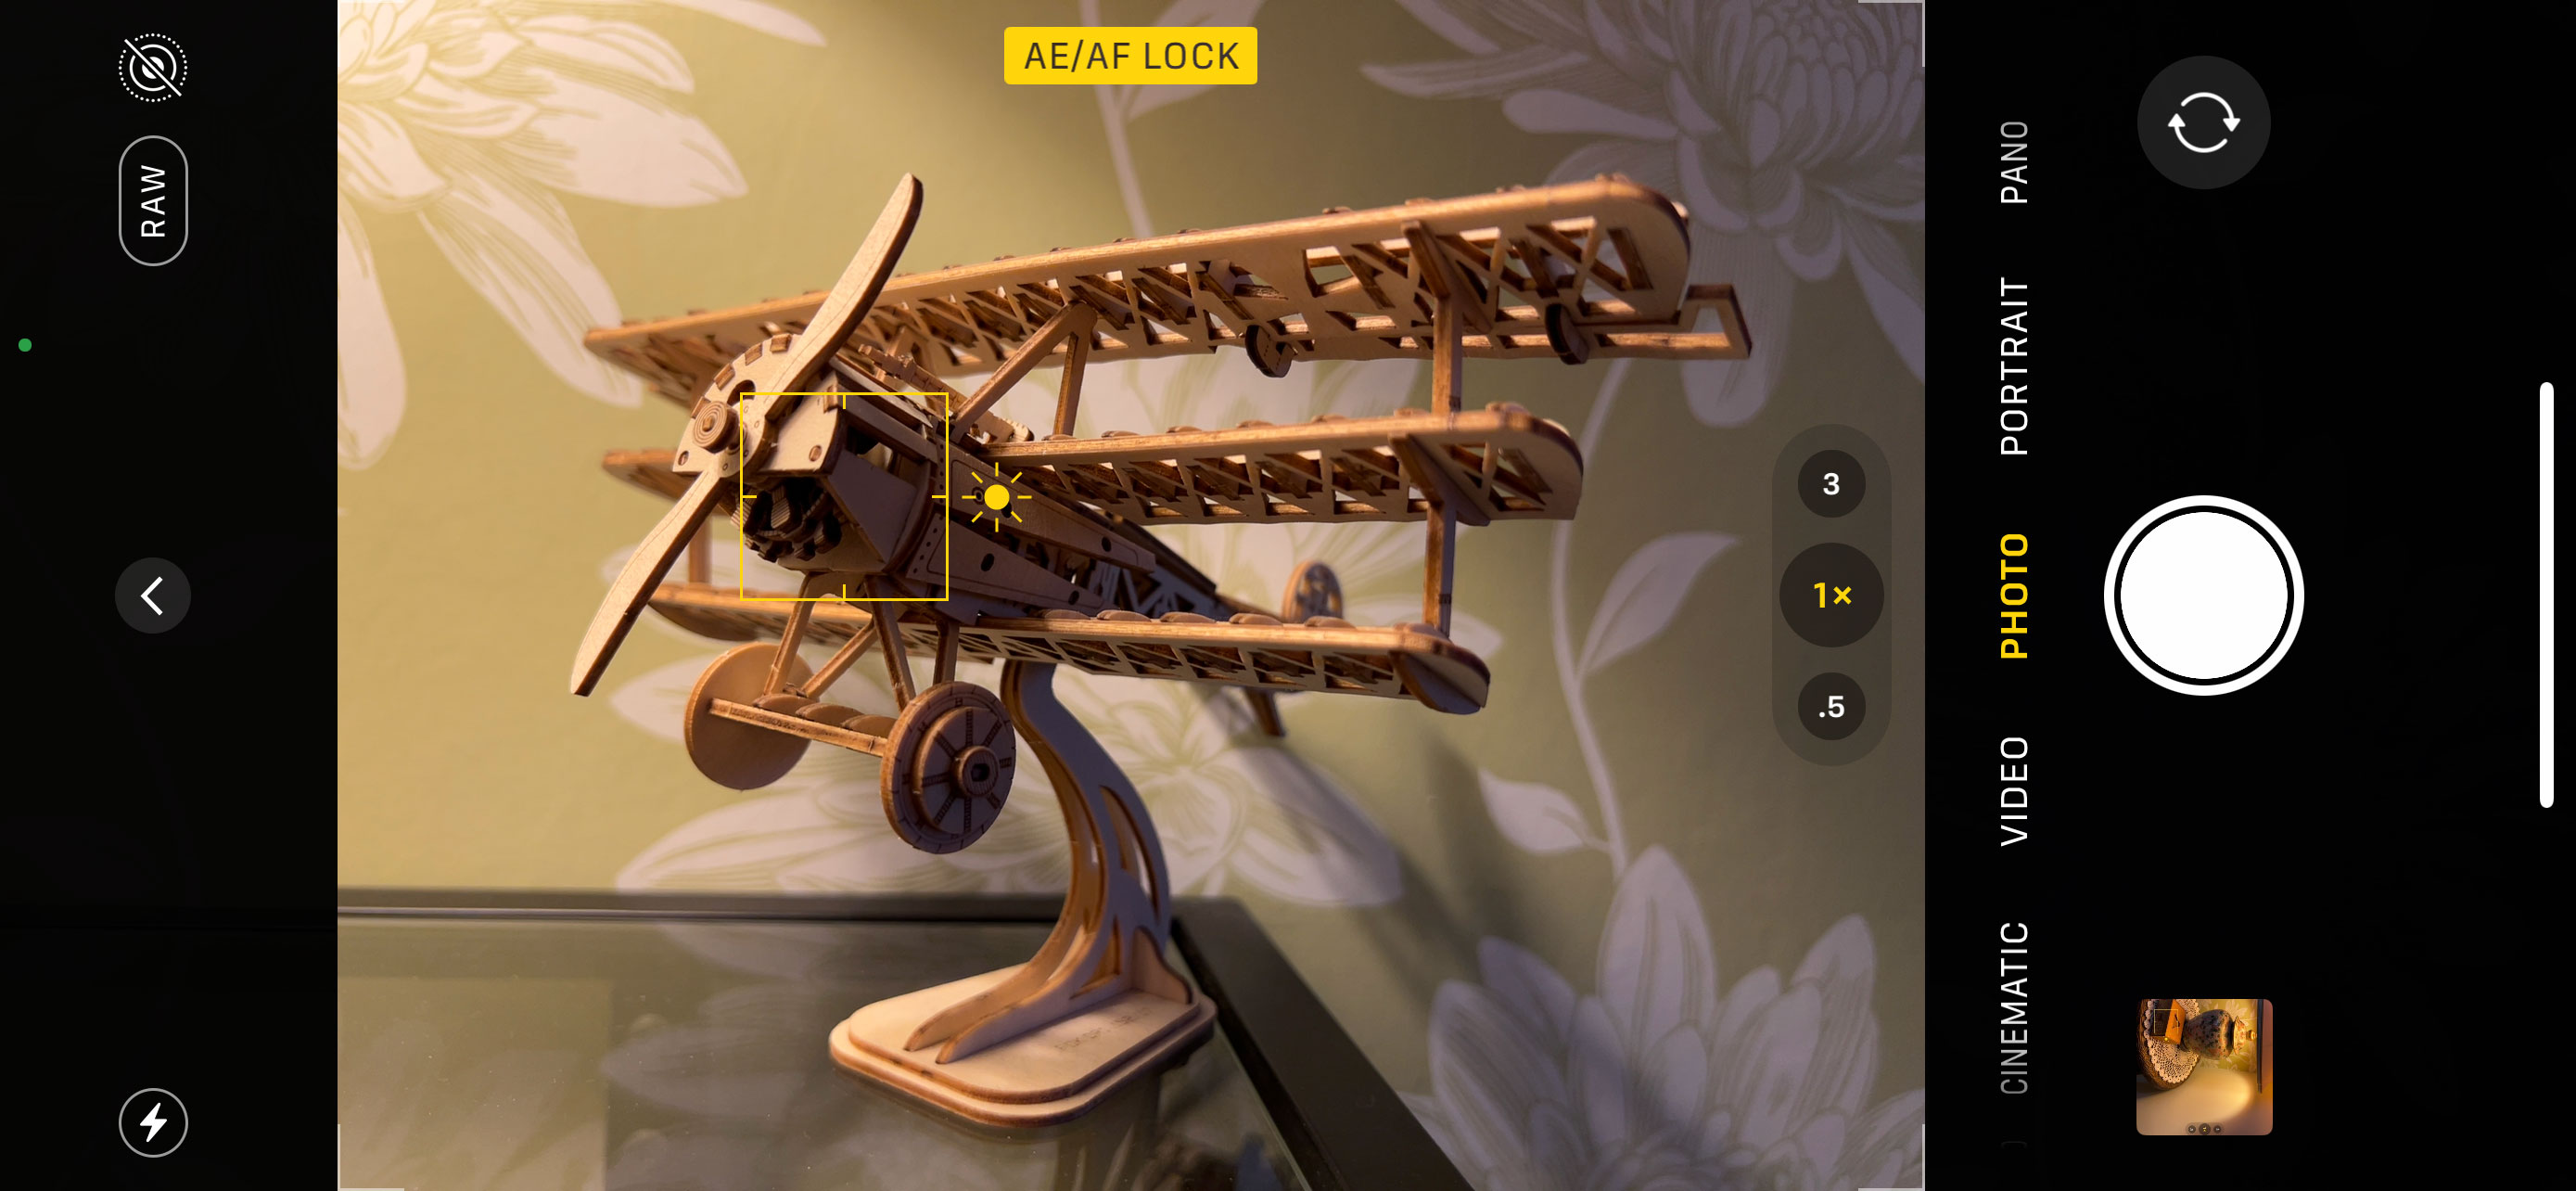
To get out of the AE/AF lock mode, just tap anywhere else on the screen to go back to the regular focus/exposure control, and to get back to fully automatic operation, just wait a few seconds for the focus/exposure square to go away.
Using the iPhone’s exposure compensation and AE/AF lock controls takes a couple of seconds, but it’s well worth it for tricky subjects or scenes that just look too bright or too dark.