Adopting an aerodynamic riding position is one of the easiest (and cheapest) ways of going faster on the bike. But if you try to mimic the pros by going straight into the lowest tuck you think you can contort yourself into, you’re likely going to end up reducing the power you can put out. Favouring only aerodynamics or only power will see you going slower than a more balanced approach.
But there are ways through which we can improve our power output whilst in an aerodynamic riding position. We spoke to strength and conditioning coach Chris Peden of Combined Athletic Performance to find out more.
“Having poor hip and thoracic (mid spine) mobility could hinder the positions that you are trying to get into on your bike, so it is important to keep on top of these areas when off the bike to give ourselves the best chance of moving freely,” Peden explains.
“Mobility work will help with enabling you to get into a better riding position, while a combined strength training programme which helps strengthen your posterior chain will allow you to maintain those positions and optimally transfer your power through the pedals.”
Incorporating a series of mobility exercises into your cycling training plan doesn’t have to take long, Peden has put together a mobility routine that should take no more than 10 minutes to complete each day. Following this series of movements will help with improving both comfort and power output in an aerodynamic position, so that you can hold this position for longer, and ultimately go faster
“This mobility routine is a great start for many individuals and can be incorporated into your daily routine to help with how you feel both on and off the bike,” he says. “Follow the routine from top to bottom and repeat two to three times.”
1. 8 Point Plank
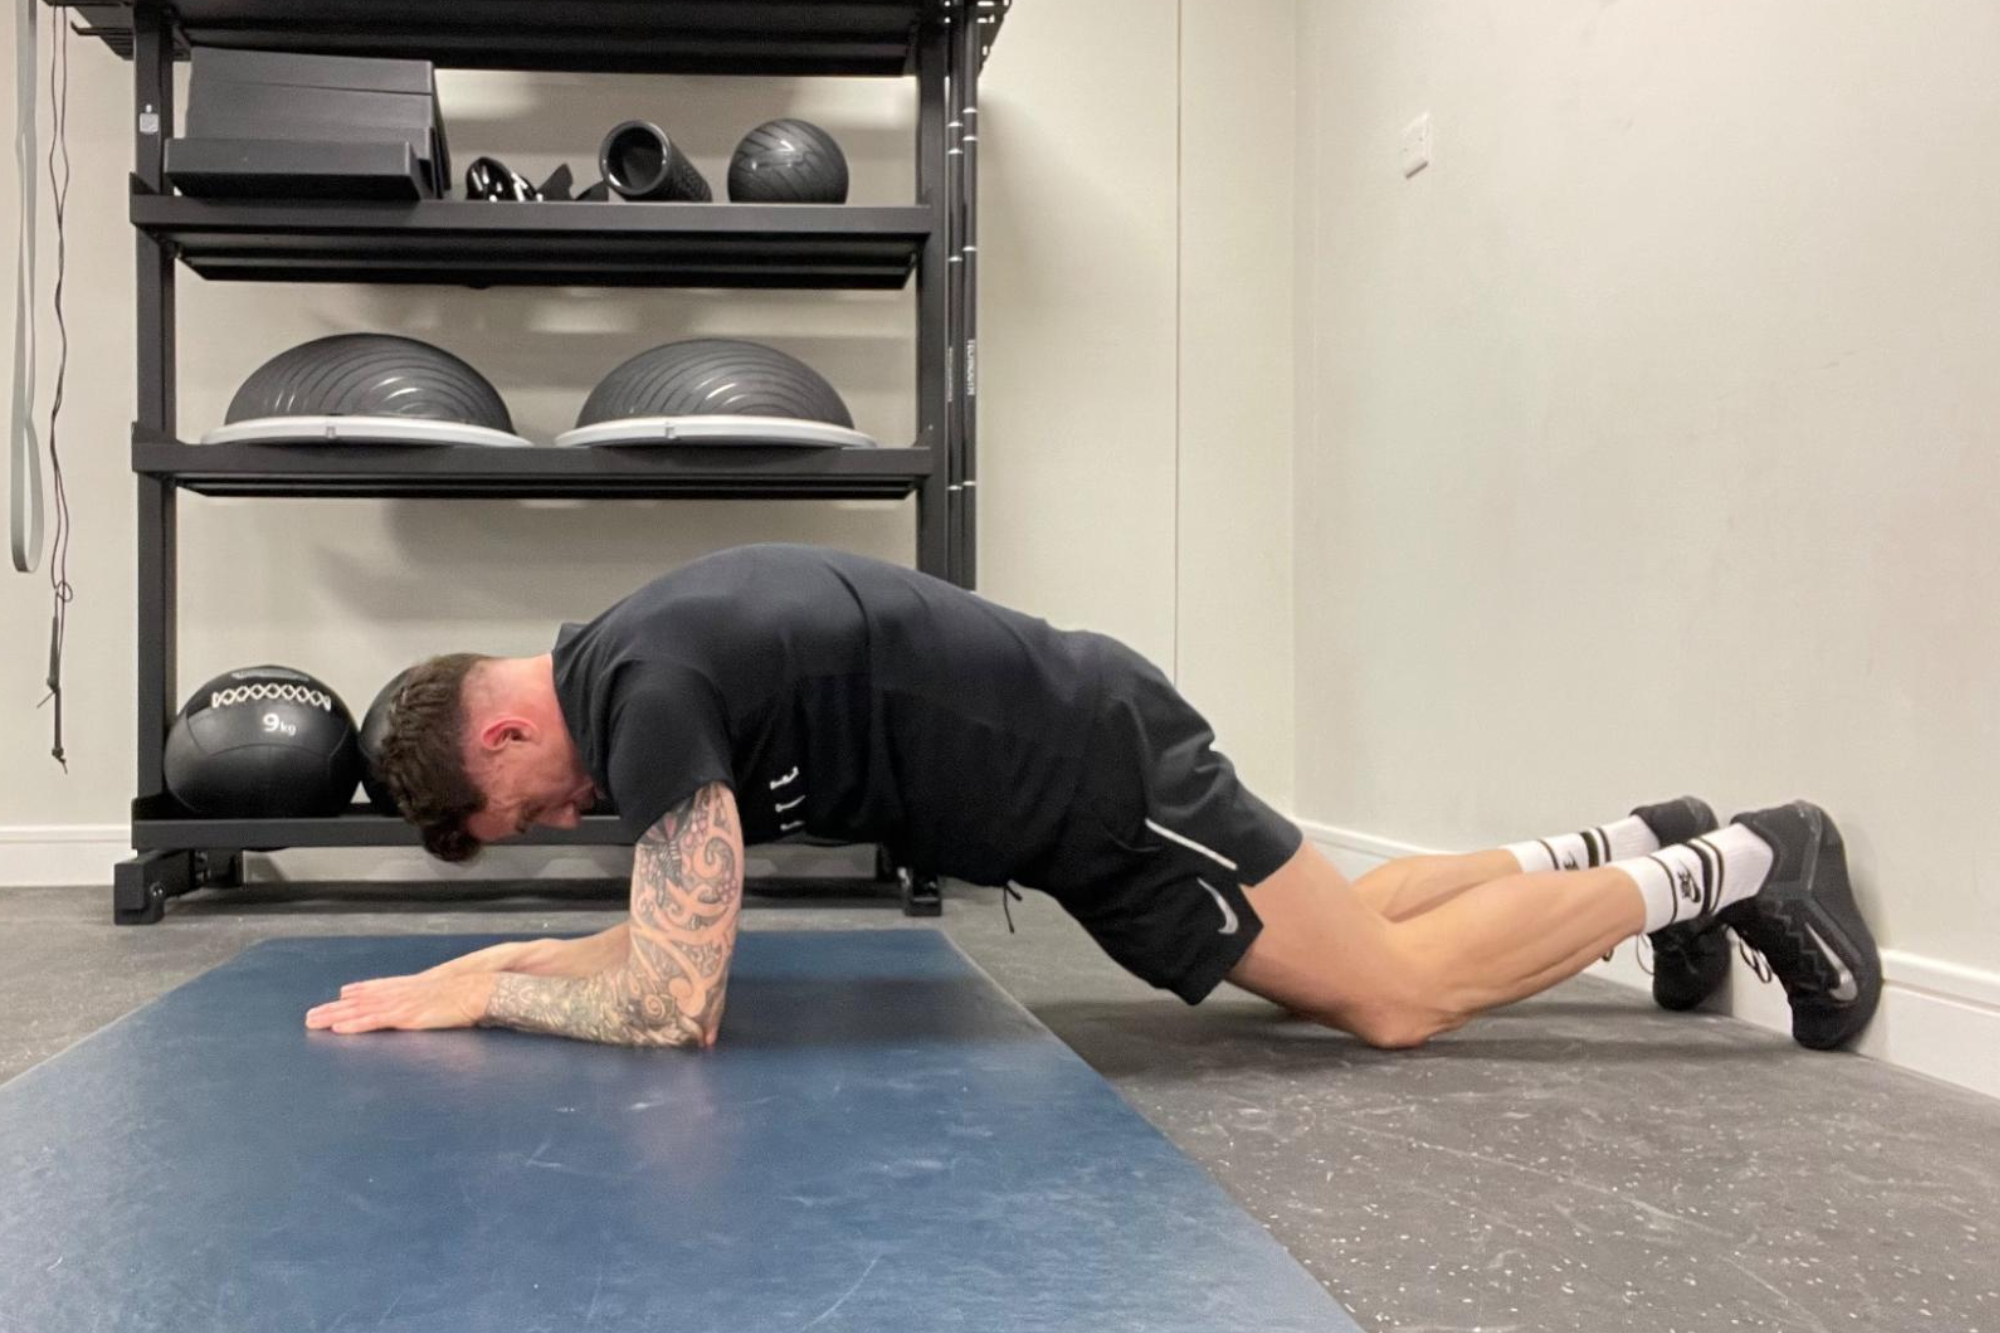
- Place your feet against a wall and adopt a plank position
- Then drop your knees to the floor, tuck your pelvis under and push your forearms into the floor so that your upper back raises to the ceiling
- From here, take a large controlled and deep breath through your nose and try to get your lungs to inflate so that your rib cage expands at the front, side and rear
- Then exhale out of your mouth and try to feel your rib cage wrap around your body and your core contract, all whilst continuing to push through the floor with your forearms with the aim of expanding your upper back even further
- Repeat and do 5-10 breaths total
2. Wall Assisted Hip Airplane
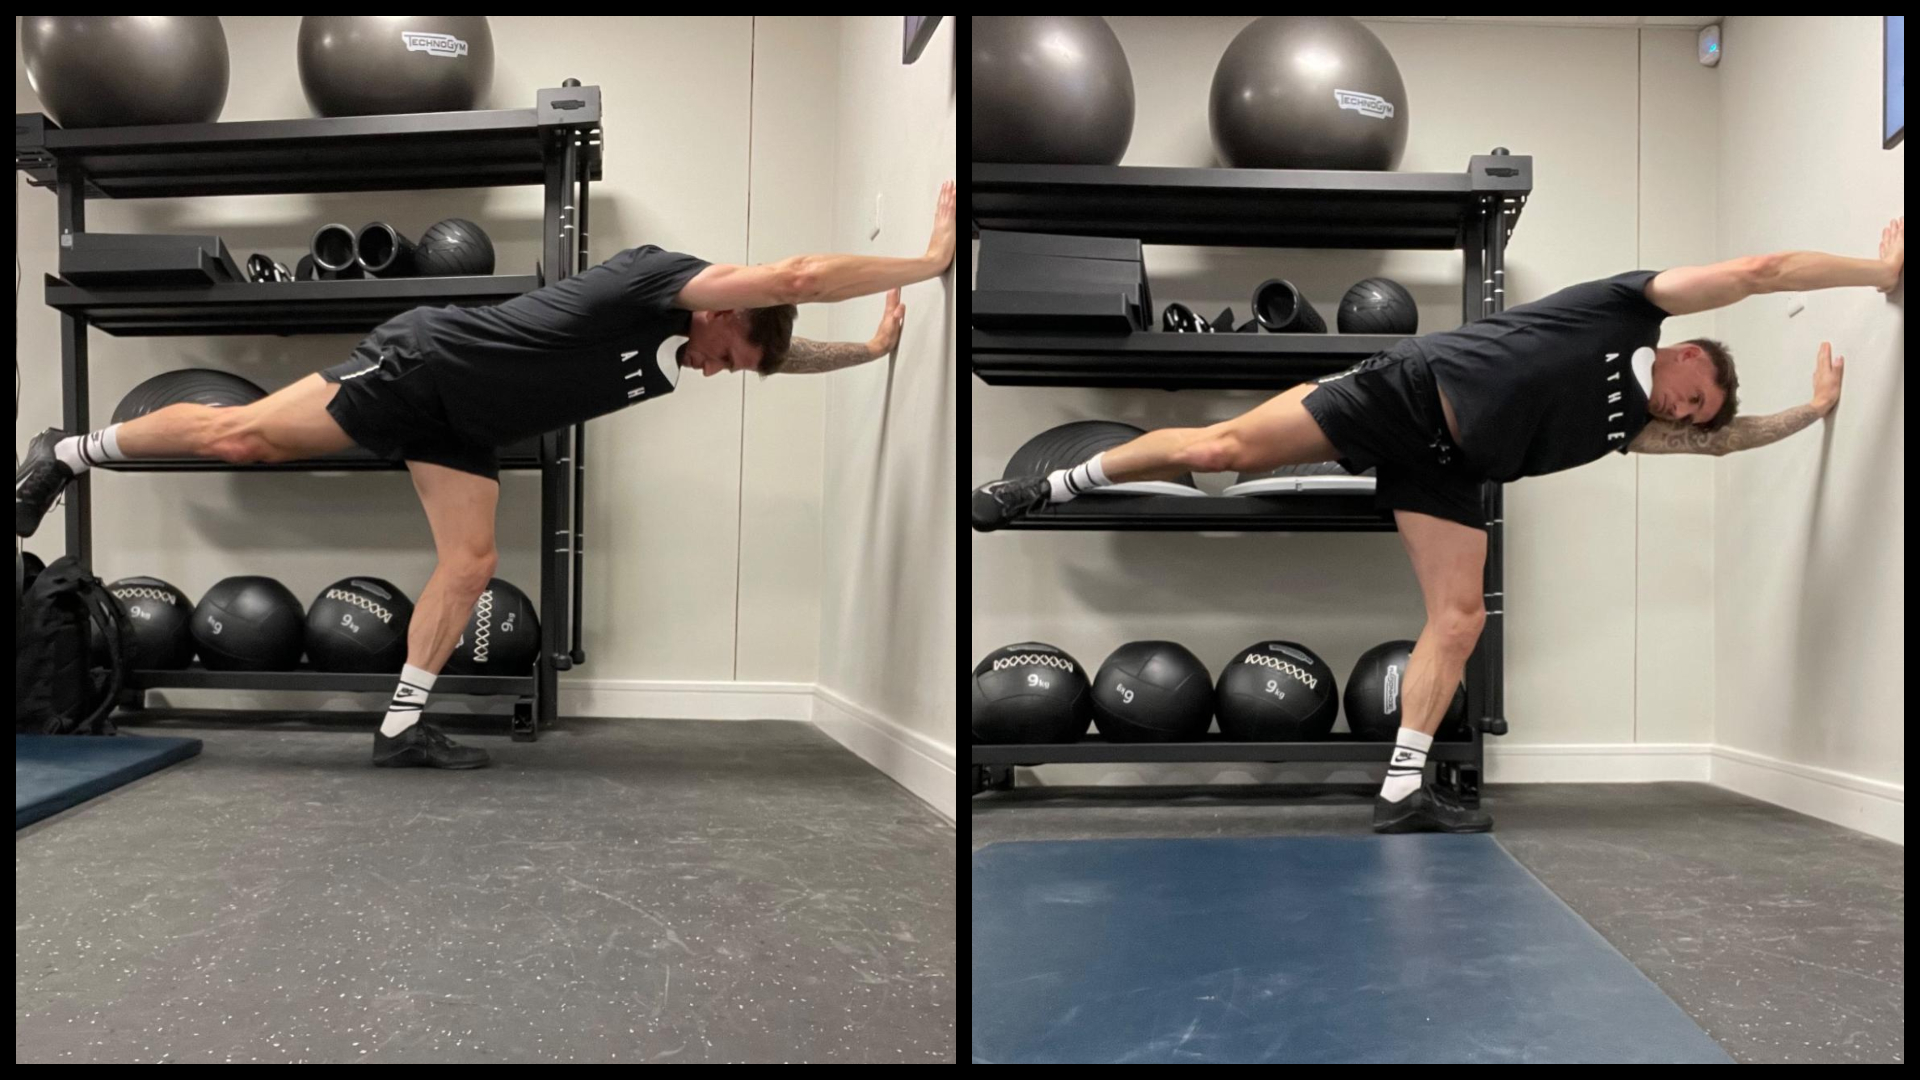
- Single leg RDL (Romanian Deadlift) and hinge forward so that you can place your hands against a wall for support
- With your hips starting in a neutral position, dip your hips down to inwardly rotate your pelvis before externally rotating as far as your body will allow to get your pelvis rotating on the head of your femur
- Use your hands on the wall to help guide the rotation of how your body moves and keep repeating through this full range for 10-20 reps
- Repeat on the opposite leg
3. 90/90 Knee Rolls

- Lie on your back and place your feet against a wall so that you are in the 90/90 position and then place a foam roller between your thighs
- From here, push your feet against the wall and pull your feet down without them moving so that your glutes and hamstrings activate
- Tuck your pelvis under to raise your bottom off the floor by roughly an inch or two whilst ensuring your lower back remains firmly against the floor
- From here, slowly and under control, start to roll the foam roller between your legs by using your inner thighs to pull one knee down whilst the other goes up
- Repeat on the other side so that your pelvis starts to move up and down on the left and right side
- Make sure your feet stay in position and that there is no rocking of the body
- Repeat for a total of 20 reps
4. Scapula Push Ups

- Adopt a tall plank position with your hands placed underneath you just wider than shoulder width with your body creating one long line between your shoulders down to your feet. Keep your core tight to ensure your hips don’t sag.
- From here, keep your arms straight but allow your body to lower slightly so that your shoulder blades squeeze together before pushing hard through the floor to return back to the starting position with the aim of trying to get your shoulder blades to pull apart at the top.
- Repeat for a total of 10-20 reps