Interested in film stills photography, but don’t have access to detailed movie sets, ultra-realistic props and an army of actors? Toy photography might be a suitable way to scratch your movie-making itch – it’s a great way to create and shoot otherwise unattainable, cinematic sci-fi and fantasy-themed worlds from the comfort of your own home.
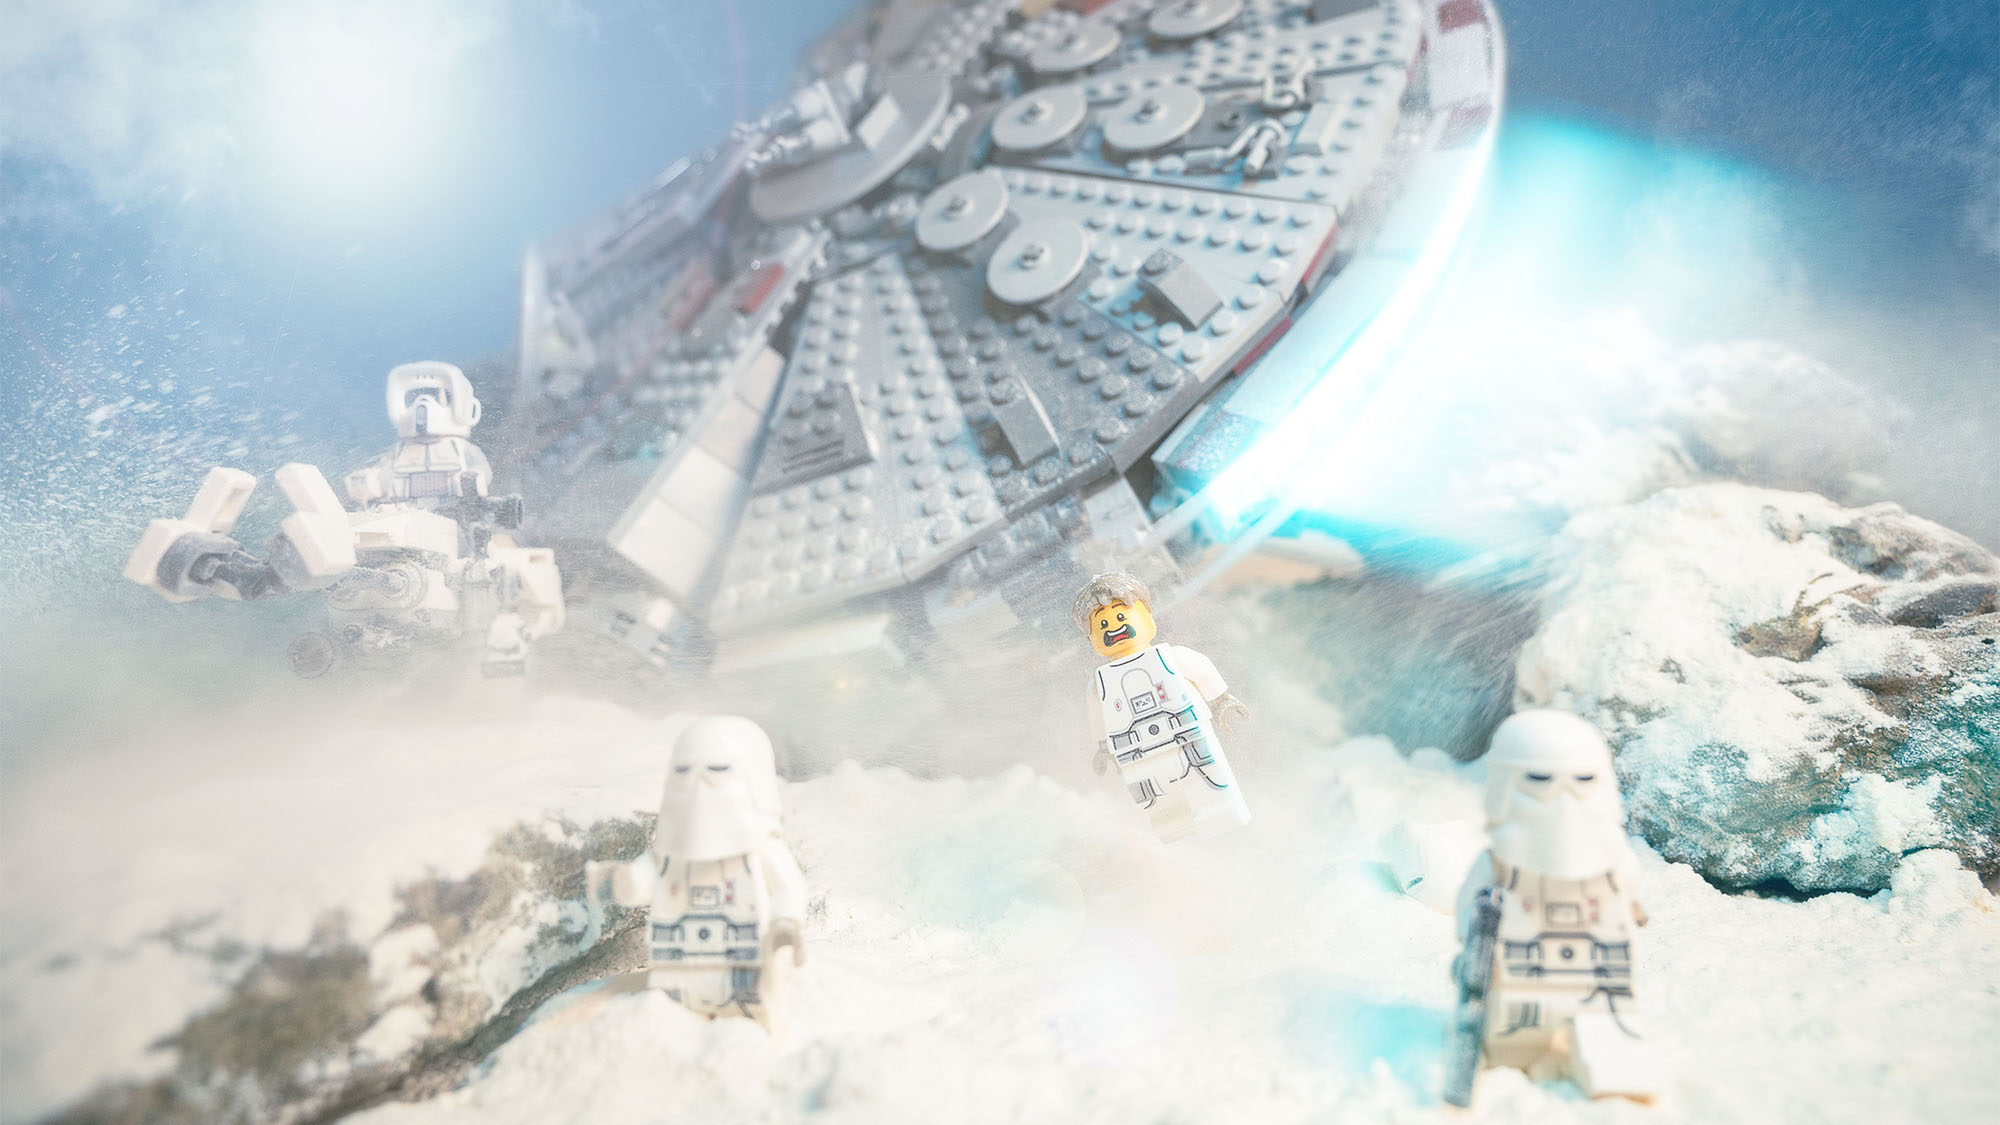
Our space blizzard scene – inspired by The Empire Strikes Back’s infamous Battle of Hoth – might look like a fairly involved process, but it was created using a few Lego models, rocks found in the back yard, a bag of flour and Adobe Photoshop CC. You don’t need to be a master model maker to create a convincing scene, since you only have to worry about what the camera sees.
• Here's how to create a jump to lightspeed effect in Photoshop
Add a few in-camera special effects – including a specialist Adaptalux light – a shallow depth of field and a couple of editing tricks, and you can disguise anything rough around the edges. Just make sure you use a weatherproof camera, an old camera or a rain cover for protection, because it’s going to get messy…
01 Keep it constant
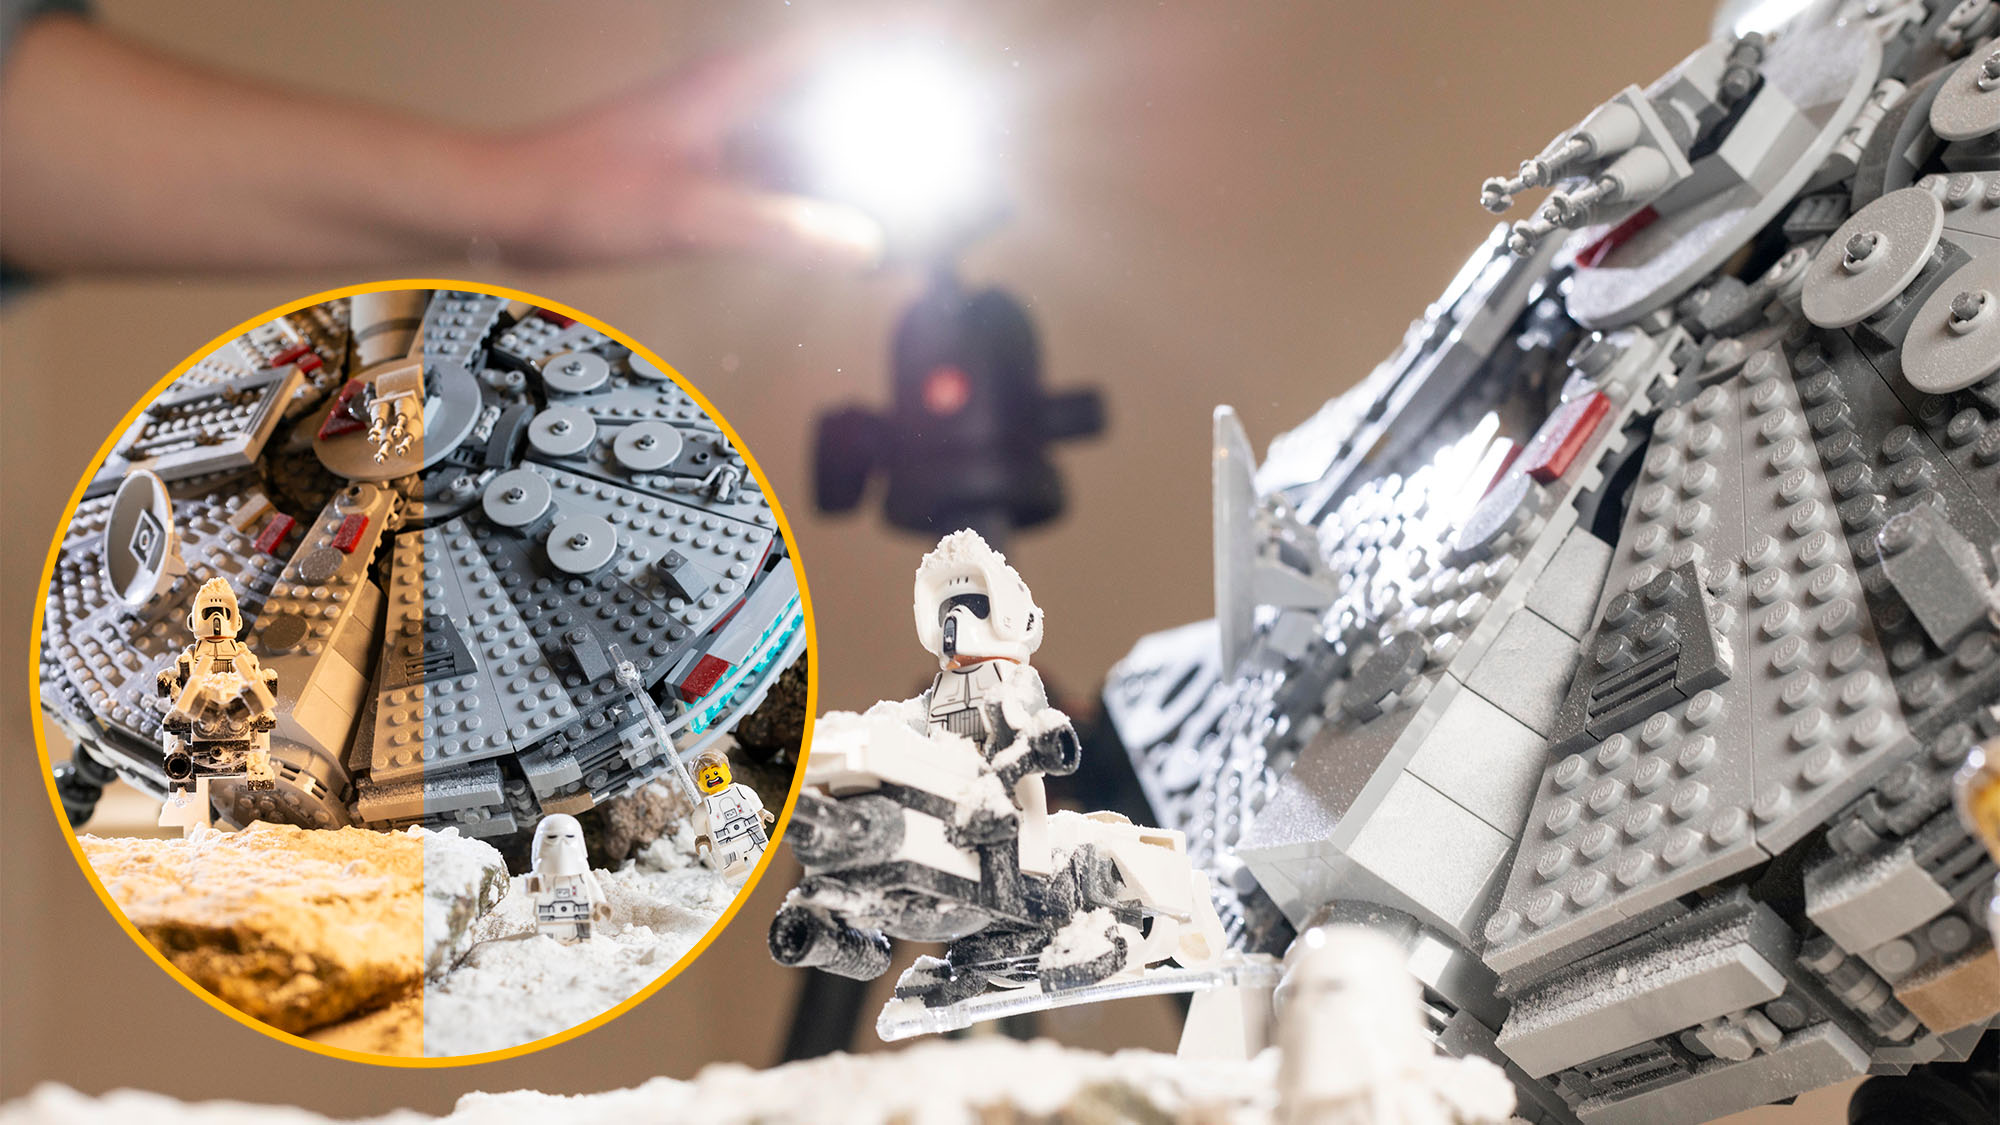
Flash can often prove too powerful when shooting close-ups, so we recommend using continuous lighting. We directed an LED panel onto our diorama from the right. This created defined, cinematic shadows, so we opted not to fill them by placing another panel on the left. A second light (a Lume Cube) was placed behind the scene – without encroaching into the frame – to create a soft backlight that would mimic the sun. Many LED lights enable you to alter the color temperature. We set our panel to 5600K, to roughly represent daylight.
02 Cover your camera!
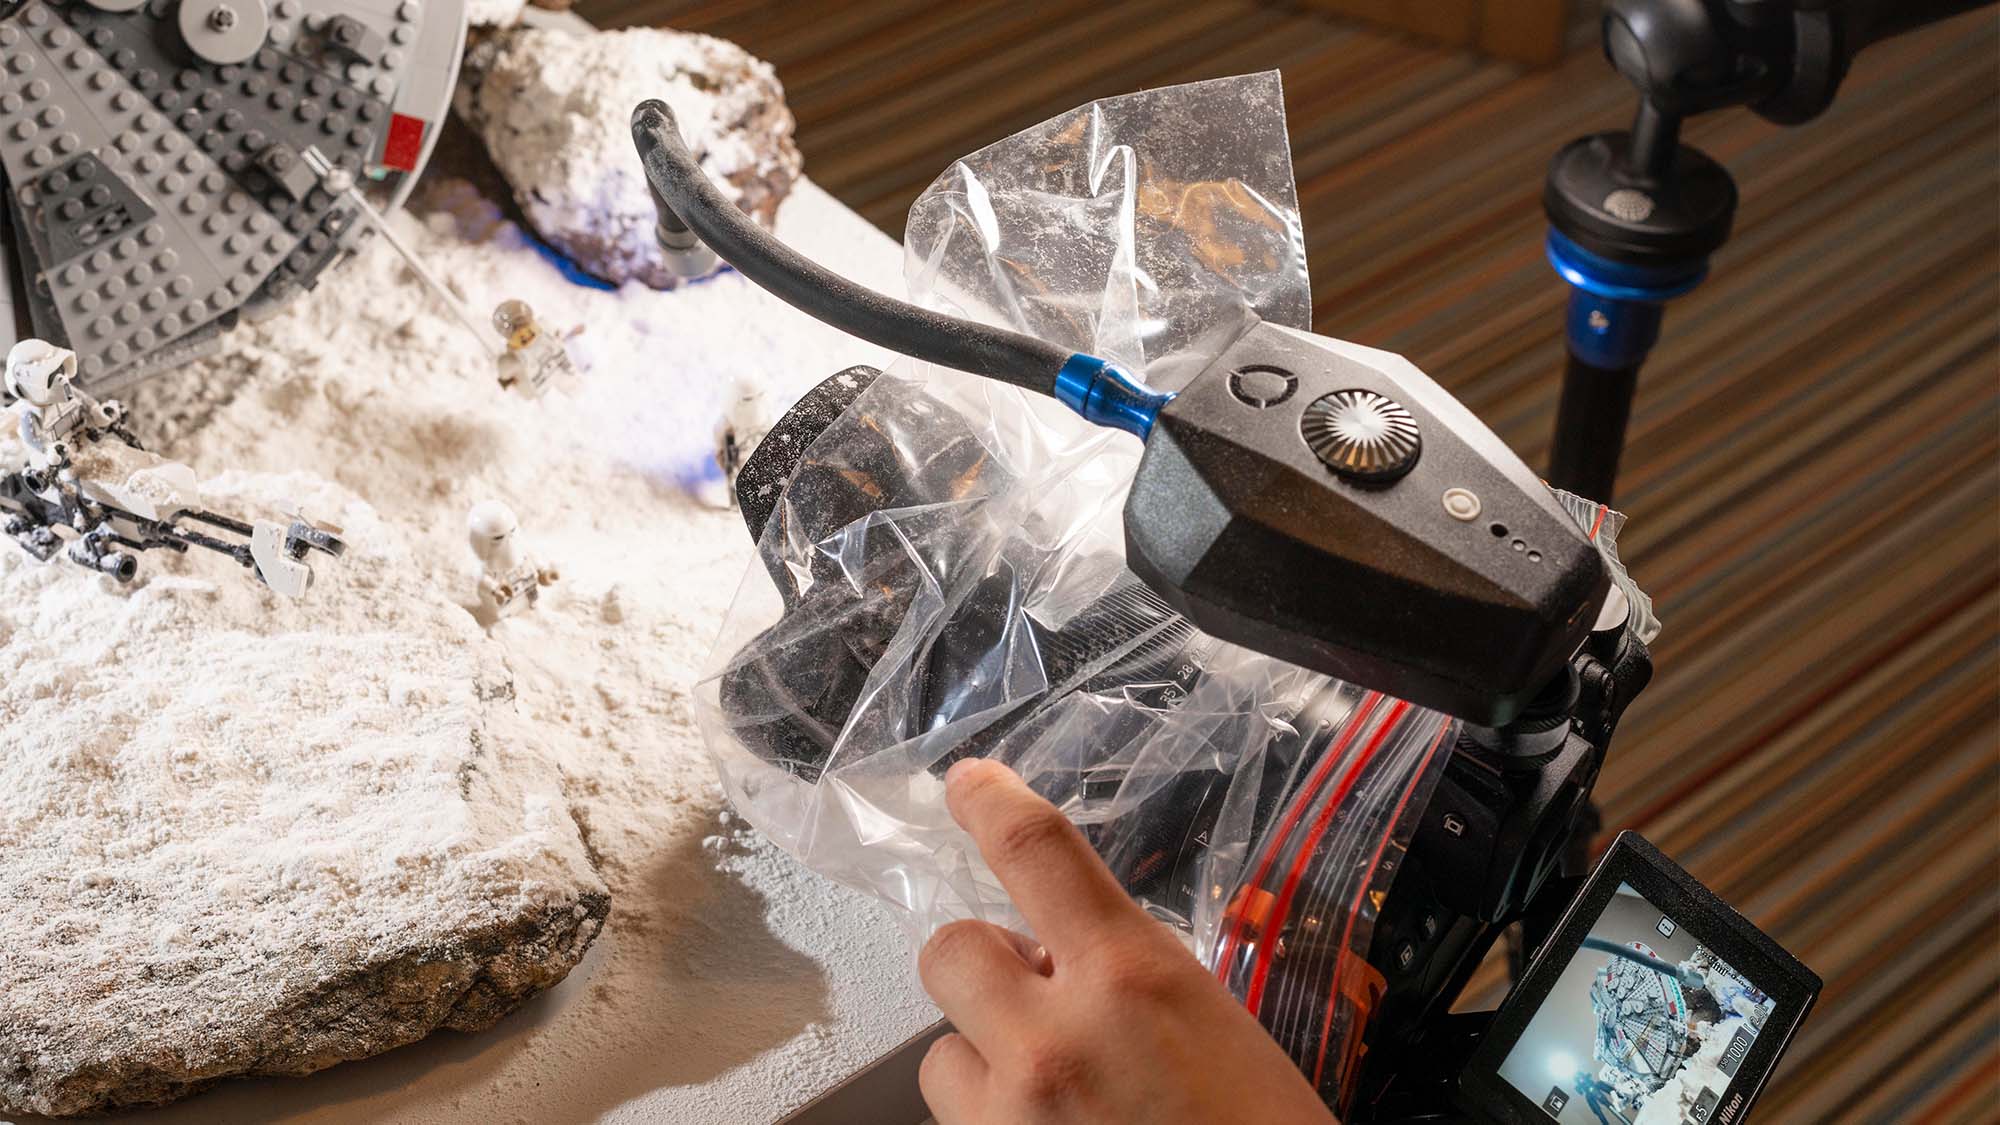
Even if your camera is weather-sealed, we wouldn’t recommend knowingly exposing it to sand, grit or anything else with small particles that could potentially work its way into the body, unless you absolutely have to. Our scene involved using flour as snow, which gets everywhere, whether you protect your camera or not, so we used a makeshift camera and lens cover (using a freezer bag) to protect our setup from the bulk of the cooking ingredient. If you’re lucky enough to have an old camera or lenses, this would be the ideal time to use them.
03 Camera settings
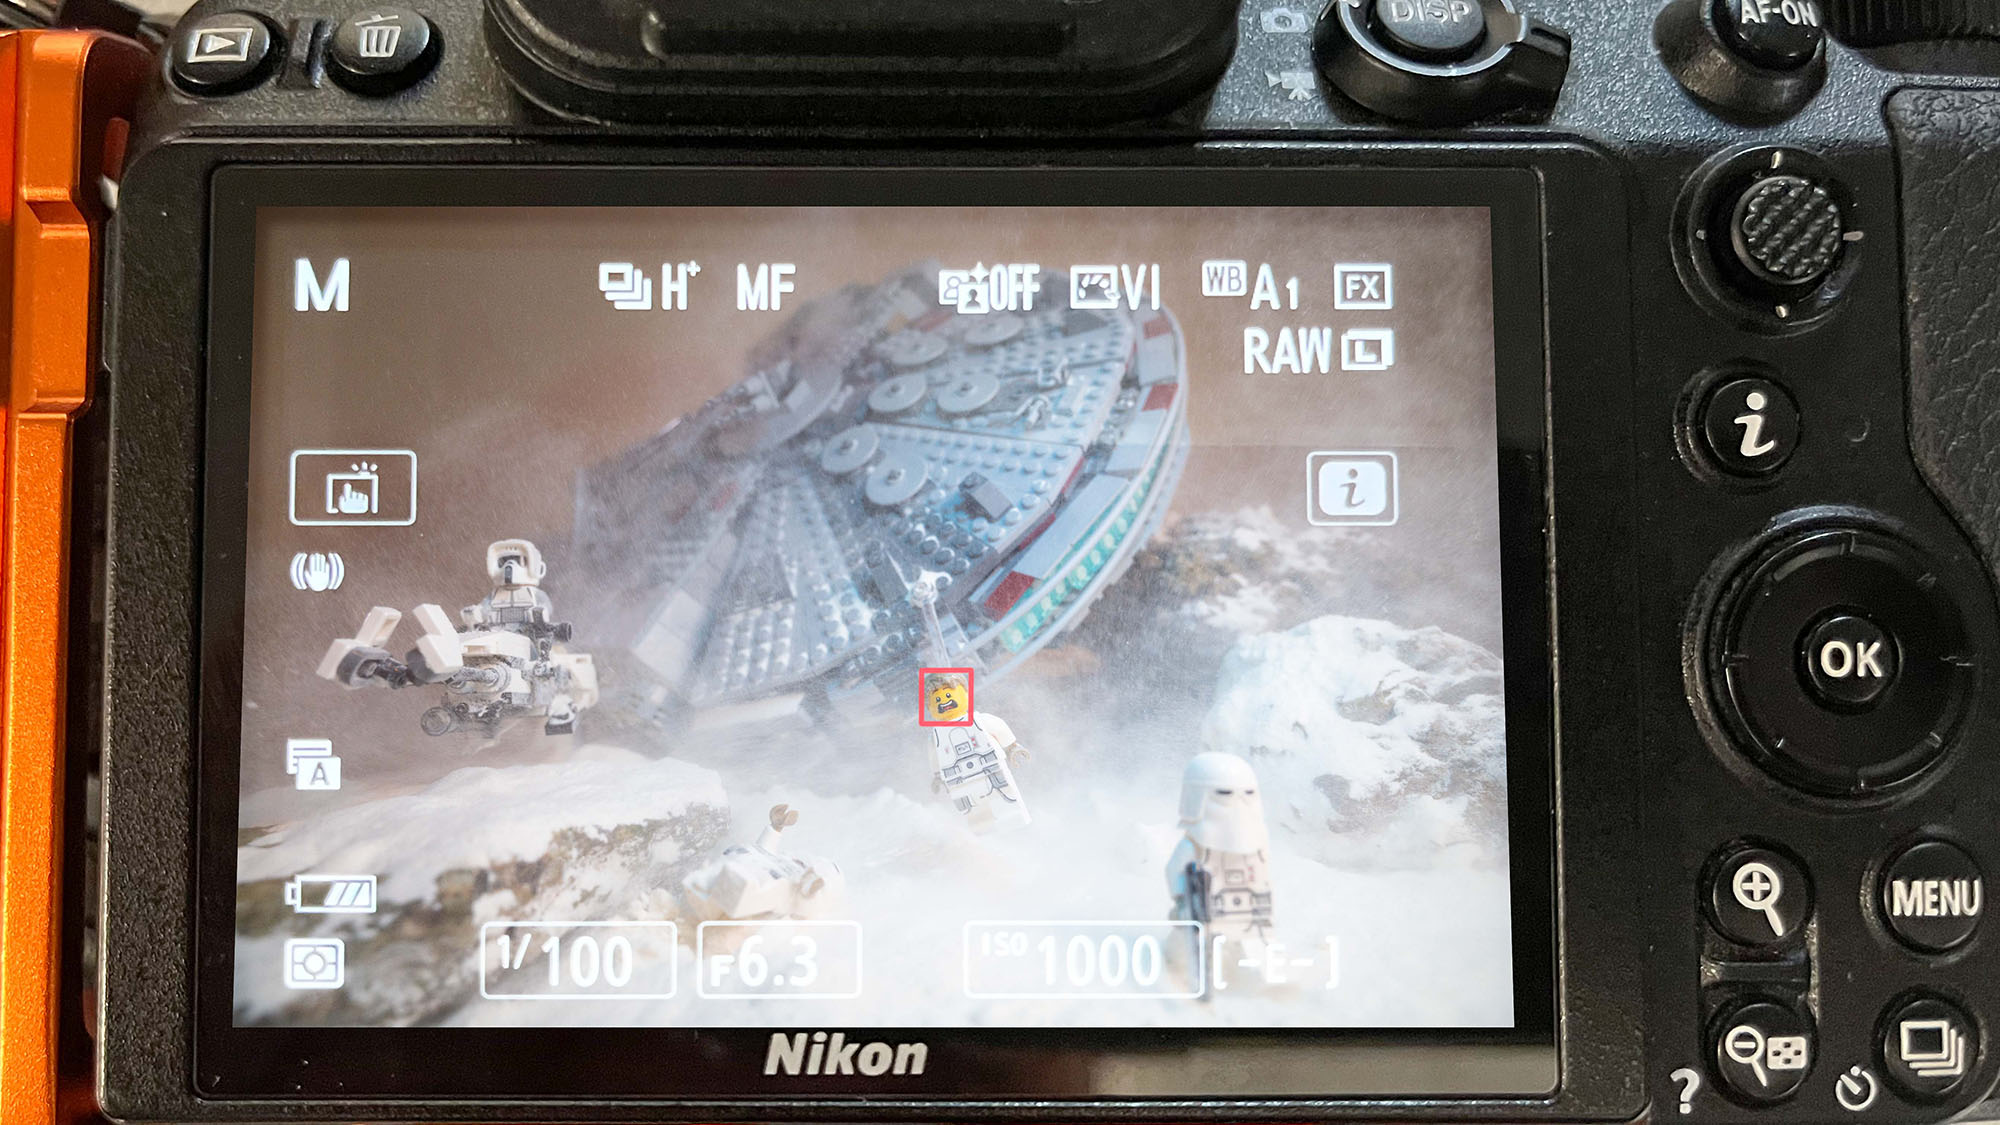
We used an aperture of f/6.3 to provide a shallow depth of field that would effectively hide any inconsistencies within the scenery, and a shutter speed of both 1/100 sec and 1/400 sec. This enabled us to blur the flying flour and freeze it still before blending multiple images together in Photoshop using layer masks. However, if you’re not confident using layer masks, you can also use multiple air blowers (you’ll need an assistant to fire the shutter or operate a blower) to capture a similar effect in-camera.
04 Flour power
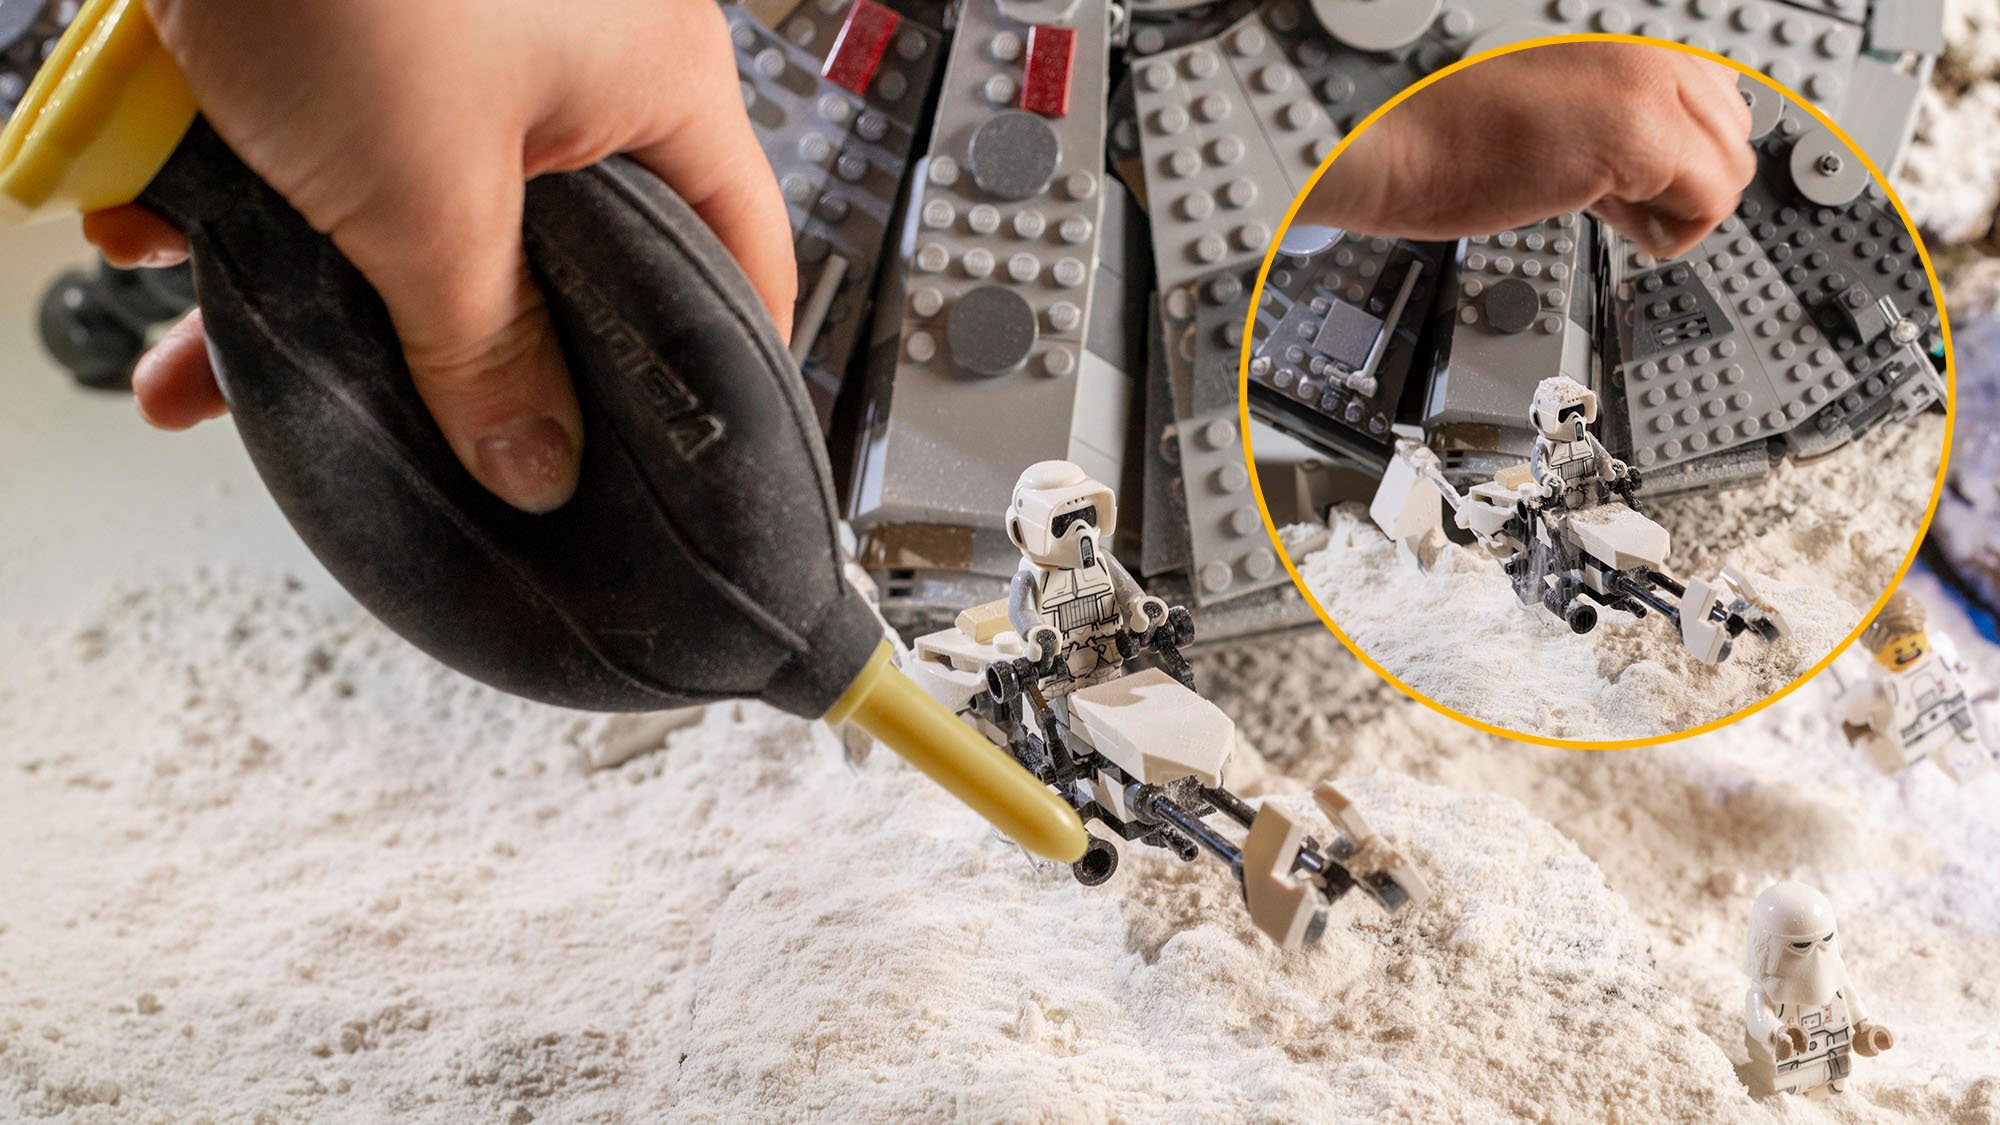
Set burst mode to continuous high and use a remote shutter release (if you have one) to fire the shutter. Fire off a burst of shots while sprinkling flour to create snowfall, or use an air blower to fire particles across the frame. We directed our flour explosions away from the Lego Millennium Falcon, so it looked like the thrusters were creating the plumes. We focused on the screaming figurine using manual focus but, if you use AF, switch to manual focus before shooting to prevent refocusing or hunting.
05 Add a little flare
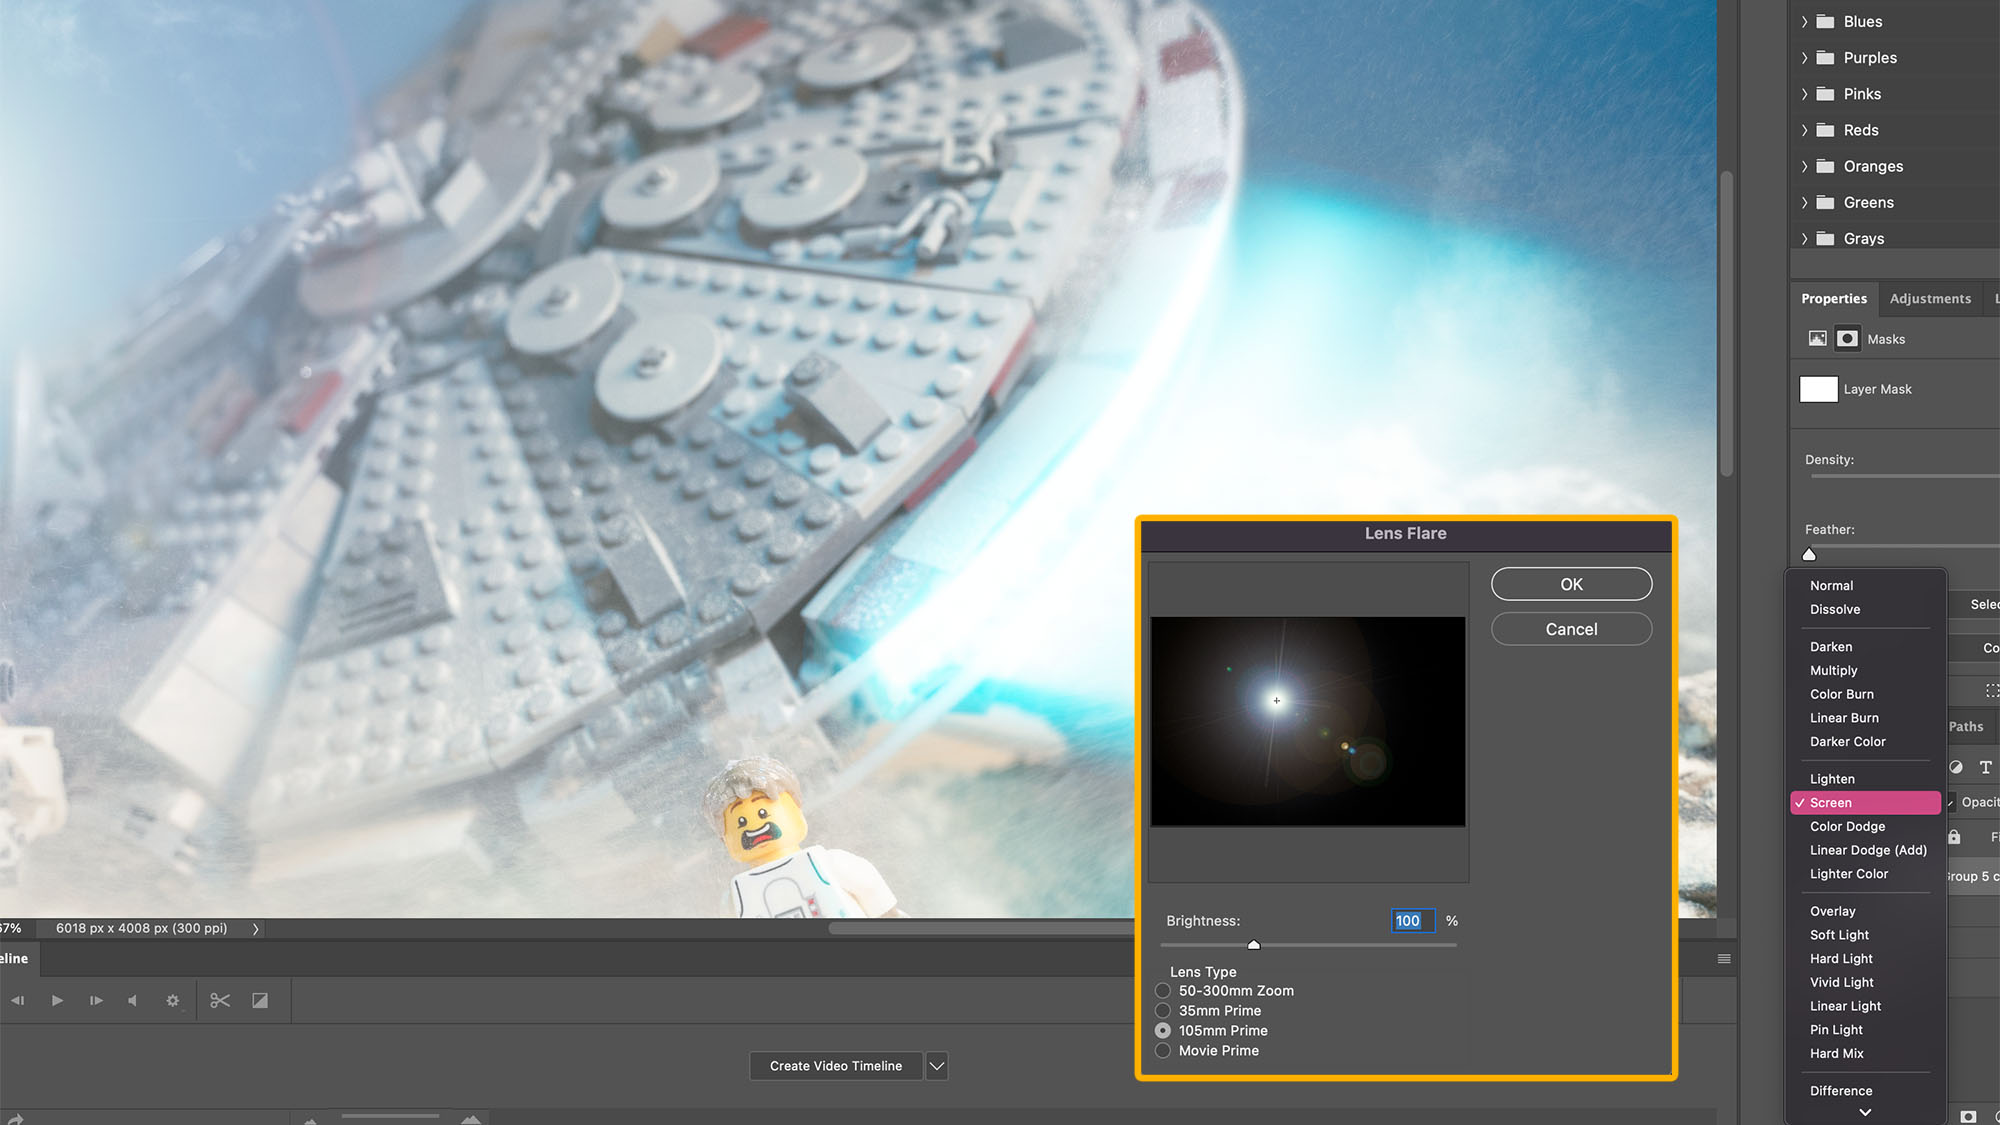
The lens flare and glow from the ship’s thrusters were created in Photoshop CC. The latter uses a similar technique to our Lightsaber tutorial, with motion blur added via Filter > Blur > Motion Blur. The flare is created by going to Filter > Render > Lens Flare and selecting '105mm Prime'. In both instances, you need to create the effects on a black layer before changing the blend mode to Screen.
What's the Adaptalux Studio?
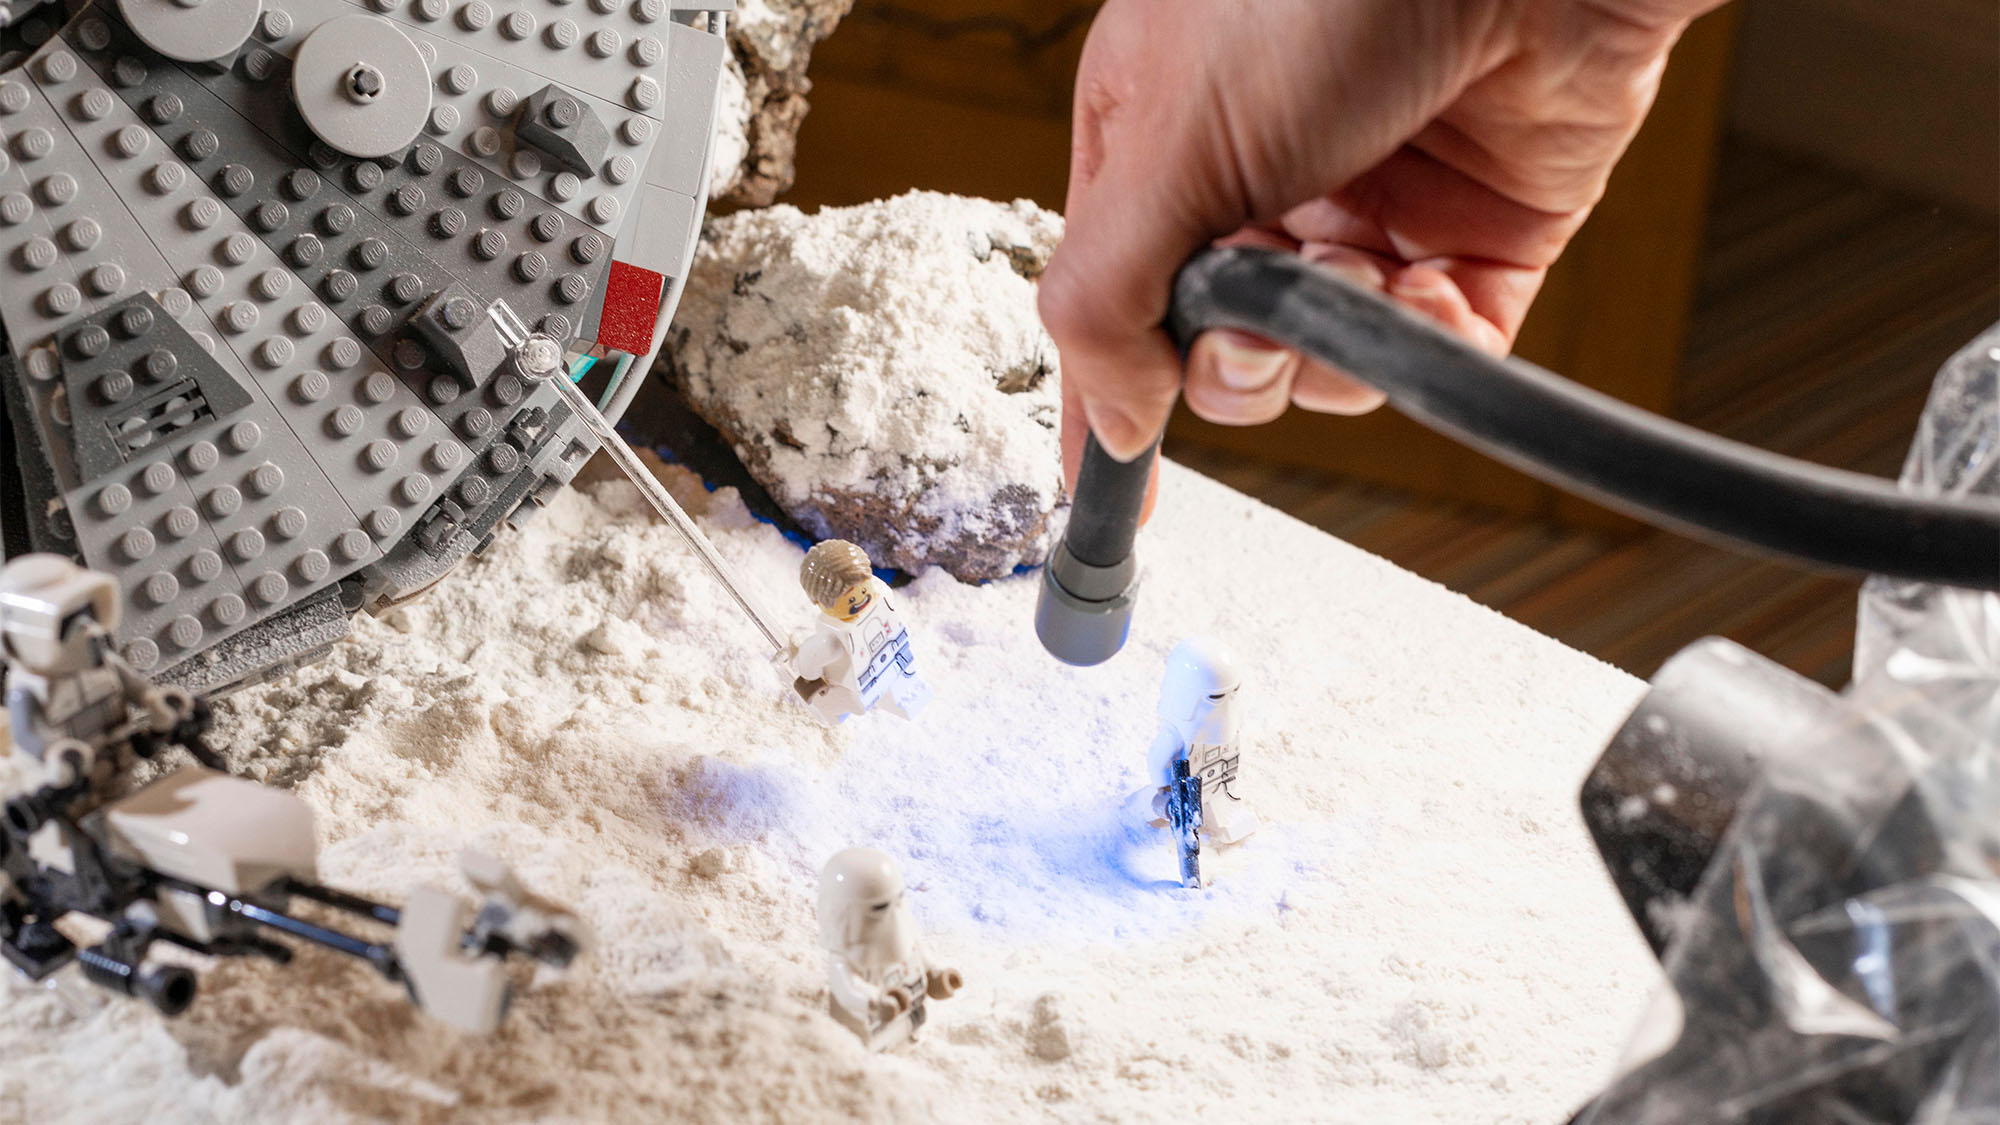
Although the blue blast from the spaceship’s thrusters was added in post, we used blue LED lighting to create the cool glow that it would emit in-camera. You could do this by simply attaching a blue gel to an LED light. However, we had access to a specialist piece of equipment called the Adaptalux Studio. This modular LED lighting system can house up to six Lighting Arms, of which various colours are available. Each arm is flexible, so you can set them in a variety of positions. We attached the Control Pod to a hot shoe mount via its 1/4-inch thread and then onto our camera's hot shoe. The blue Lighting Arm was then angled over the scene accordingly.
How to get Adobe Photoshop CC
Adobe offers three subscription-based Photography Plans, which you can click on below. We recommend either the regular Photography Plan, or the Photography Plan (1TB), which costs more but comes with 1TB of online storage.
For this tutorial and for anyone who likes to work on a single main computer, we recommend the regular Creative Cloud Photography Plan. This is the cheapest way to get started AND it comes with Lightroom and Lightroom Classic too.
Read more:
Make your own Lightsaber in Photoshop
Top techniques for photographing action figures
Bring your toys to life with forced perspective photography
