With the 50% price increase in the monthly Creative Cloud Photography Plan, while the annual option remains the same cost as before, some photographers are reconsidering their photo editing options. Since many photographers only use Lightroom with little to no need for Photoshop, free Raw processing software such as RawTherapee offers similar functionality to Lightroom without the expense of a subscription. It almost sounds too good to be true.
The software offers a huge amount of control over image processing including localized adjustment tools, but the adjustments are complex due to the sheer number of controls available. It's not often I find myself saying this, if ever, but the complexity of the software in part comes from possibly having too many controls. That's not to say it's unusable because there are aspects of the software that in some ways make editing easier, but the user workflow undoubtedly takes some getting used to.
RawTherapee is a great Raw processing software solution if you use the free photo editing software GIMP since it works as a Raw plugin; GIMP doesn’t offer Raw support natively. Plus, if you use Affinity Photo 2, which does offer Raw Processing, the Develop Persona doesn’t offer an image browser and the controls available are minimal in comparison to RawTherapee. The Develop Persona is, however, much easier to use and results can’t be faulted.
Considering RawTherapee is free and the controls and tools that are on offer, it could be one of the best photo editing software programs available based on these points alone. It's certainly not as slick as commercial software, but it can produce great image quality if you're willing to spend a few hours getting to grips with how it works.
RawTherapee: Minimum System Requirements
RawTherapee: Price
RawTherapee is completely free open-source cross-platform Raw processing software available for Linux, macOS and Windows. You can download the latest version for each platform from the official Rawtherapee website.
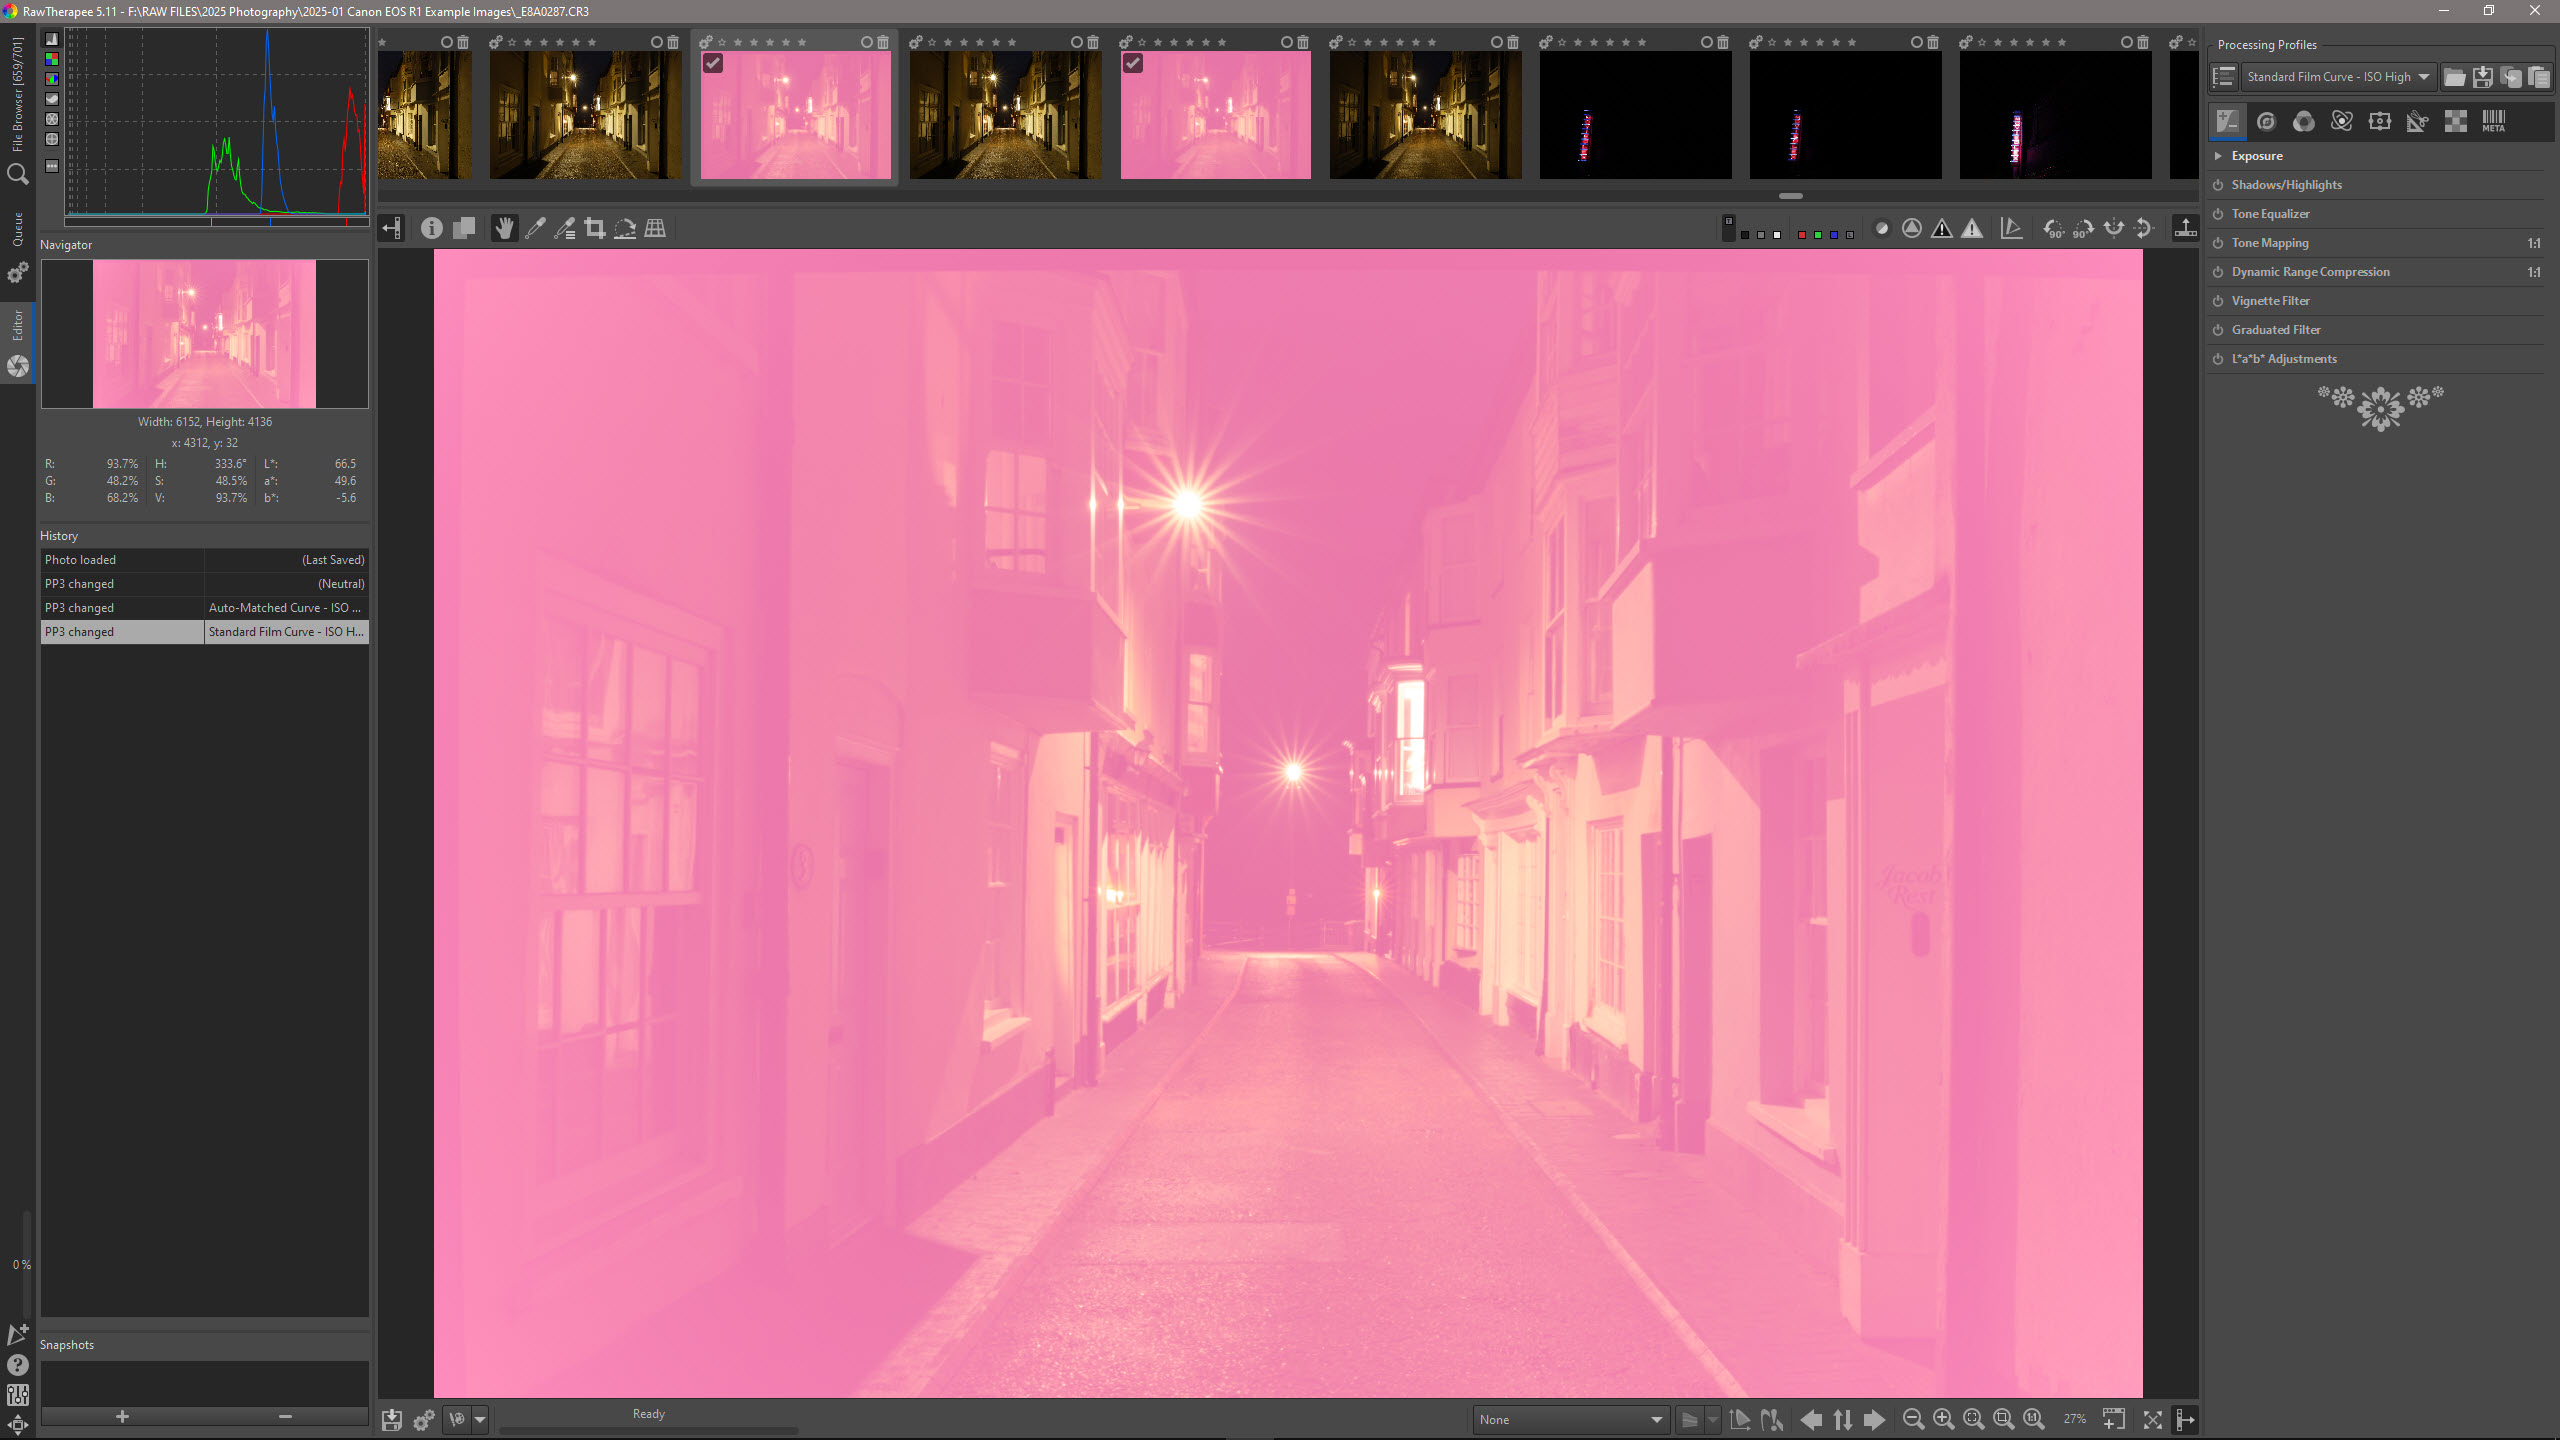
The software is available in over 15 languages and is compatible with a wide range of Raw files, although during testing version 5.11 wasn't compatible with Canon EOS R1 Raw files. This version was released in August 2024, so the next release may offer support.
RawTherapee certainly isn’t as fast or as intuitive as Adobe Lightroom plus, it's more complicated to use. But let's not forget that it's free and the controls on offer are extensive. The source code is also available to download so you can adjust the software if you know how to code.
RawTherapee: Design & Interface
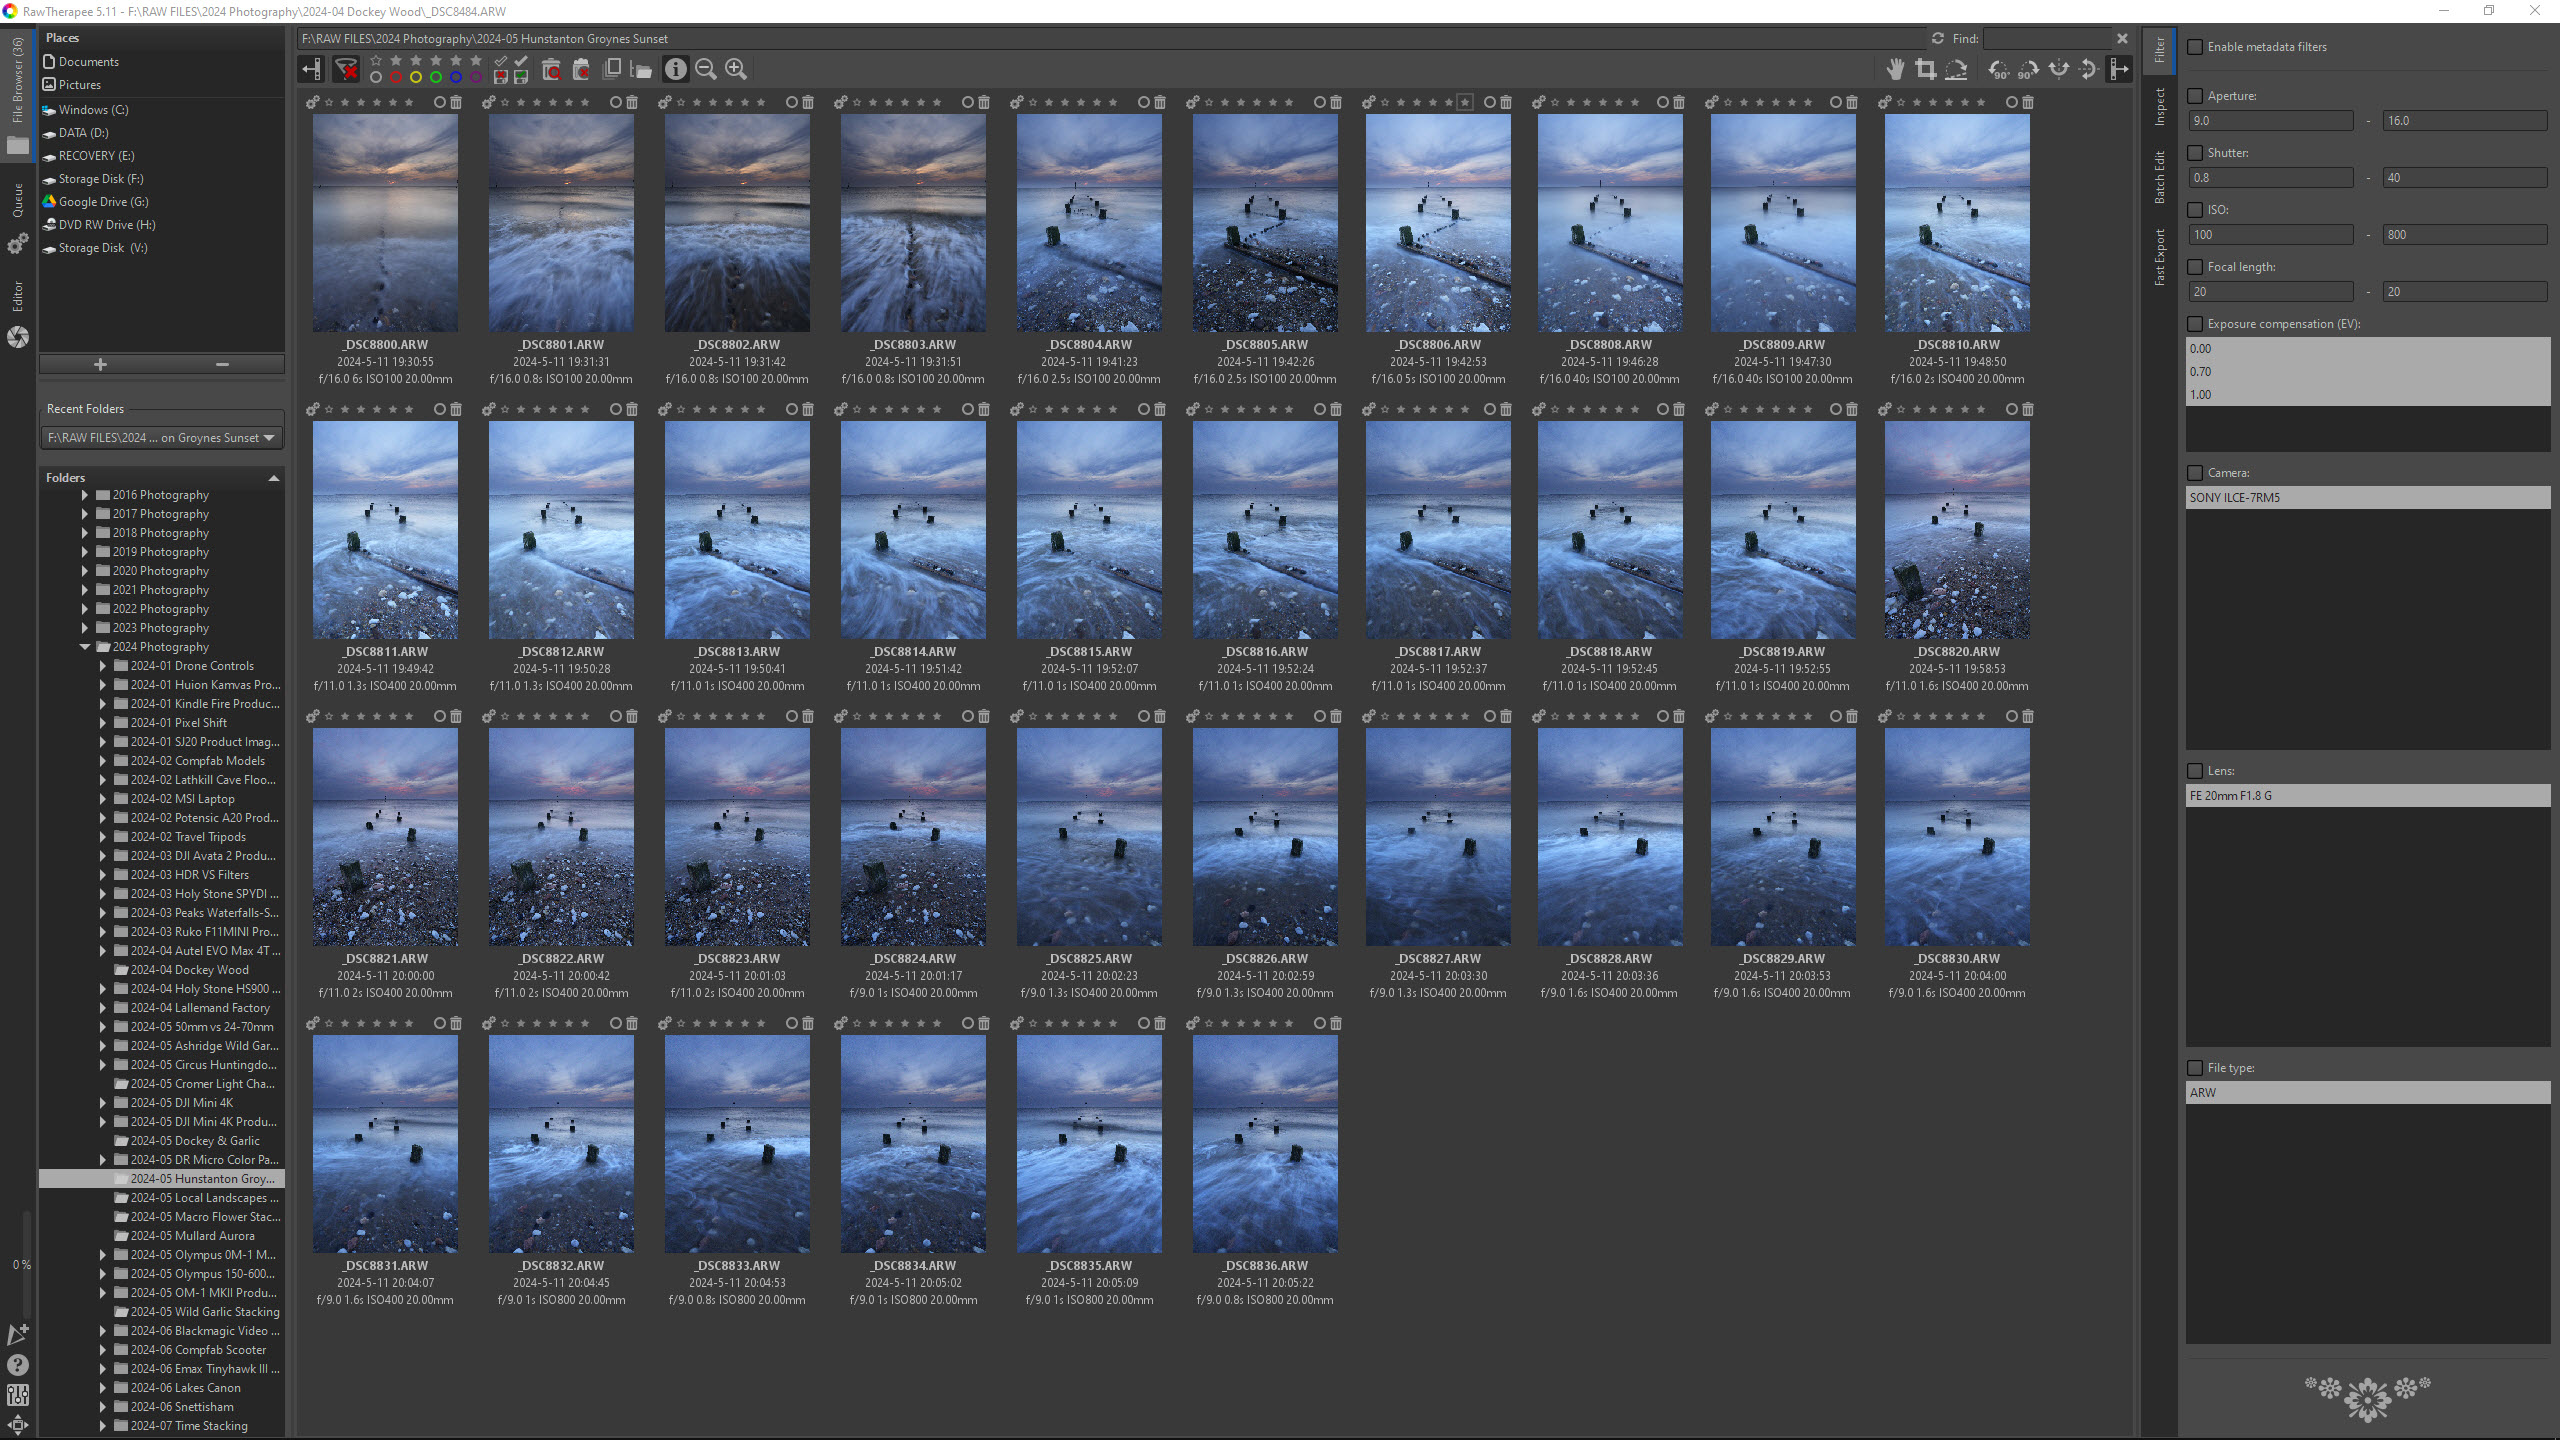
The RawTherapee interface is essentially split into three sections: Editor, Queue, and File Browser. When you open the software, you're taken to the File Browser where using the file tree on the left, you can navigate to the desired folder of images and view thumbnail images. These can be zoomed in and out to change their size, star-rated, color-labeled, deleted and rotated – what you'd expect. It's certainly not as slick as Lightroom's catalog but it works without any major issues.
When you open a new folder, loading images into the File Browser isn’t at all fast so you'll need a degree of patience. Especially for folders containing larger numbers of images. Then, once ready to edit you can double-click a Raw file, which takes a few seconds to open in the Editor. If you're looking for instantaneous loading you certainly won’t find it here.
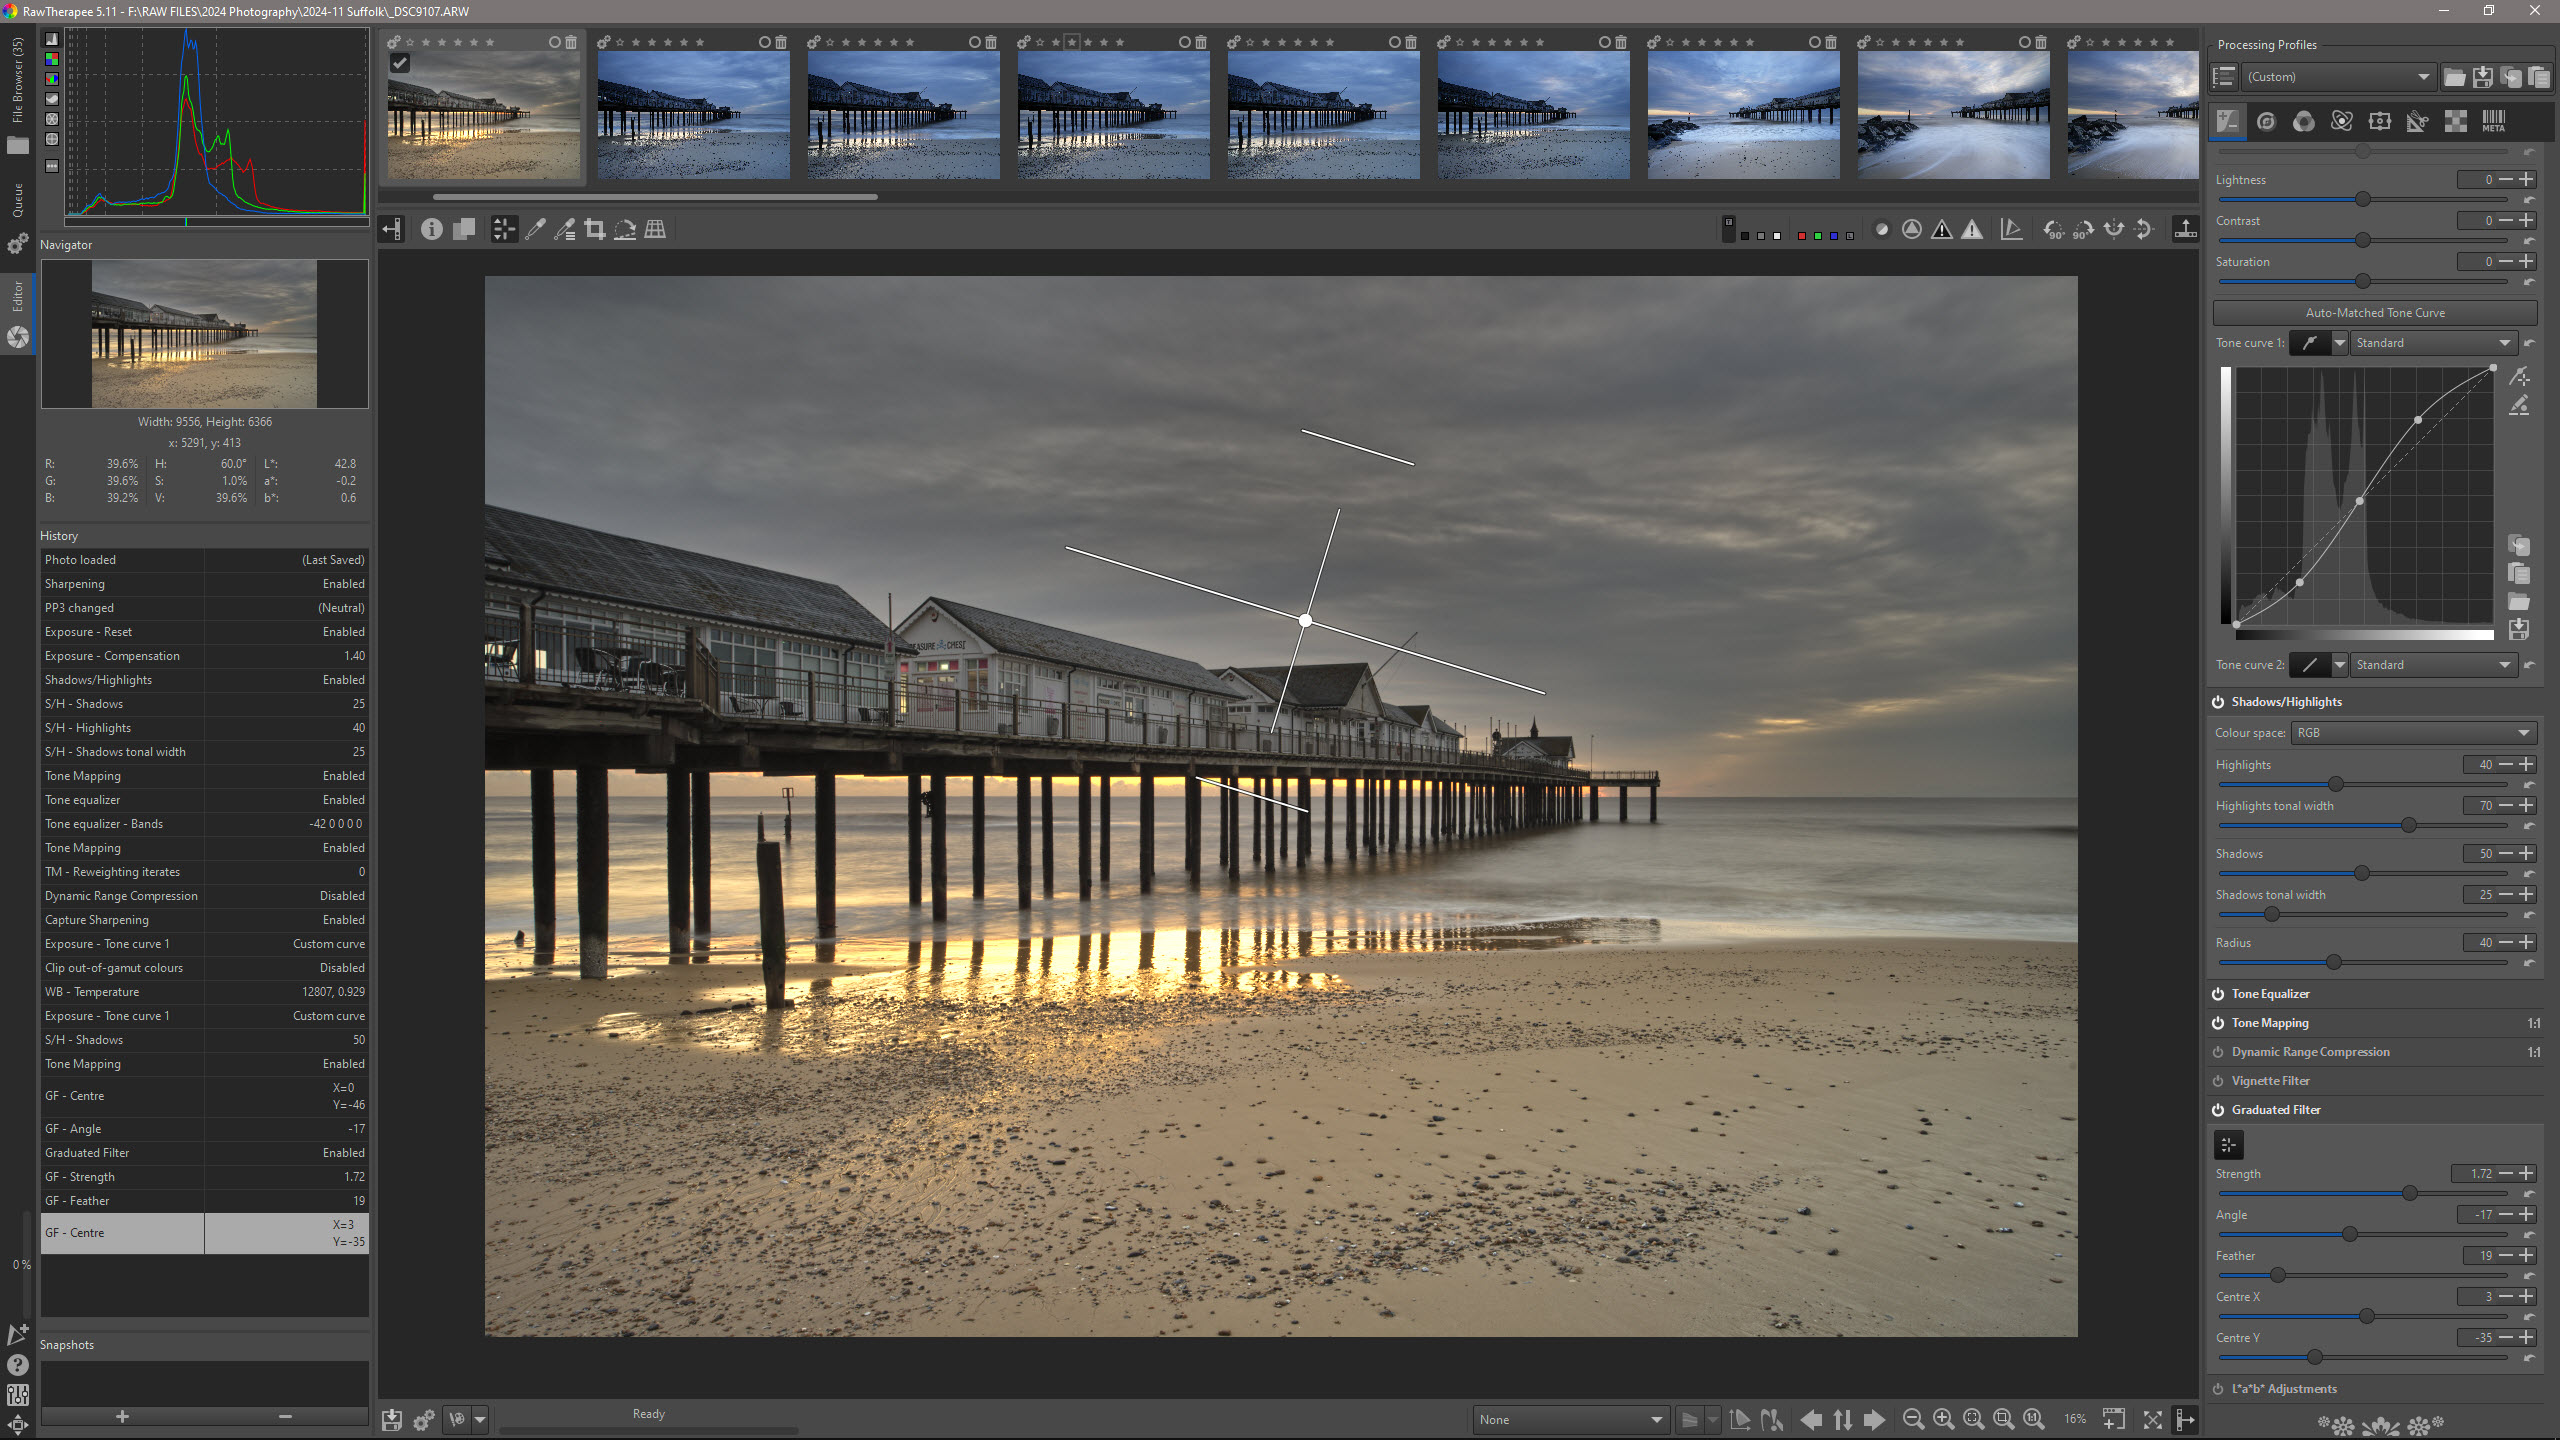
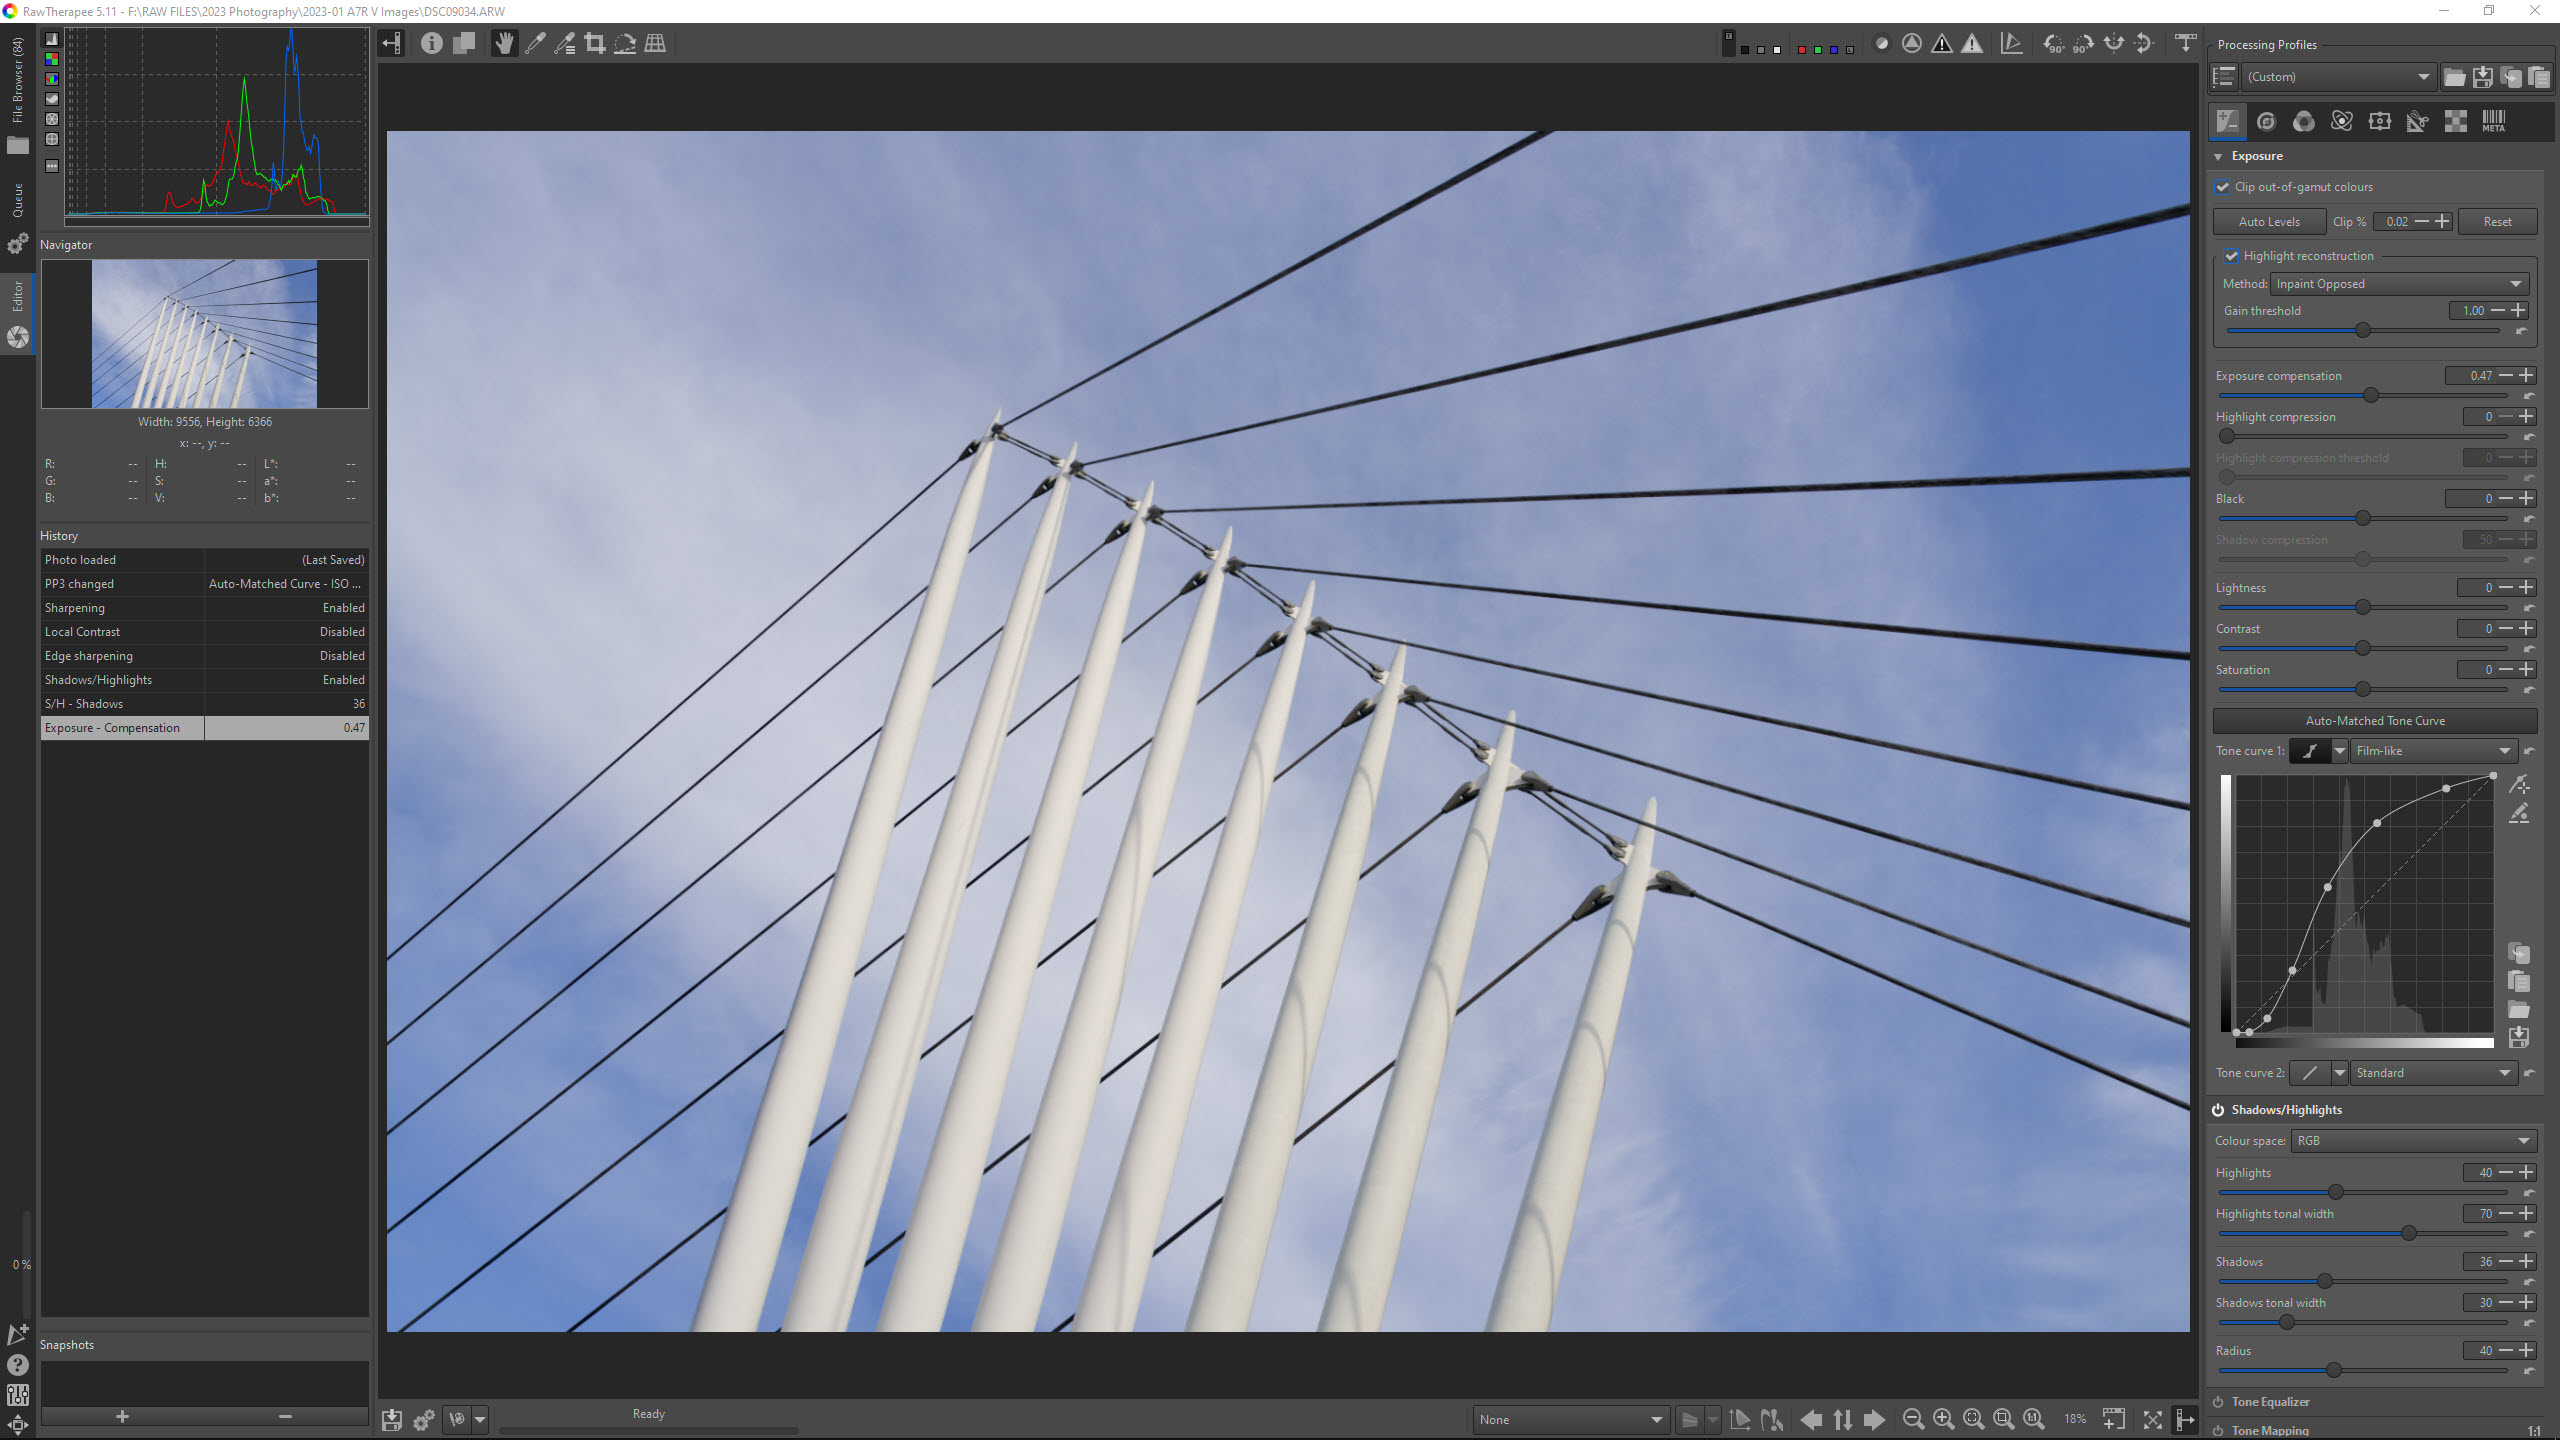
The Editor section of the software is generally laid out how you'd expect with a histogram in the top left of the interface, which can also be changed to other types of scopes including vectorscopes, so you can work with what suits you best. Below this is the Navigator with detailed image information provided for the position of the mouse pointer over the image, a main image window, a filmstrip showing thumbnails along the top, adjustments on the right and various tools above and below the image window.
We'll go into more detail about the editing controls in the next section, but one thing that RawTherapee does when a new photo is loaded into the Editor is to apply a Processing Profile that aims to automatically process the Raw photo the way it would have been processed in-camera as a JPEG. This shows up as (Last Saved) but there are other Processing Profiles you can choose from. This provides a starting point for further editing or can be an end in itself if you're happy with the result.
In my experience of using the software, the Processing Profile never gave me a result I was happy with so further processing was always required. It was often a good starting point, but certainly not a final edit. For beginners, it may be useful because you can shoot in Raw and achieve a similar automatic result to in-camera JPEGs with Raw files available for manual processing as your editing skills increase.
There's also a Neutral Processing Profile that's aimed at use with JPEGs, TIFFs and PNG files where no processing is automatically applied. This can also be used as a starting point for Raw Processing where the image is left completely unprocessed and ready for fully manual adjustments. For more advanced photographers, you can create your own Processing Profiles to maintain a consistent look in your photos by using a personalized starting point for further adjustments. This is essentially the same as applying import adjustments in Lightroom.
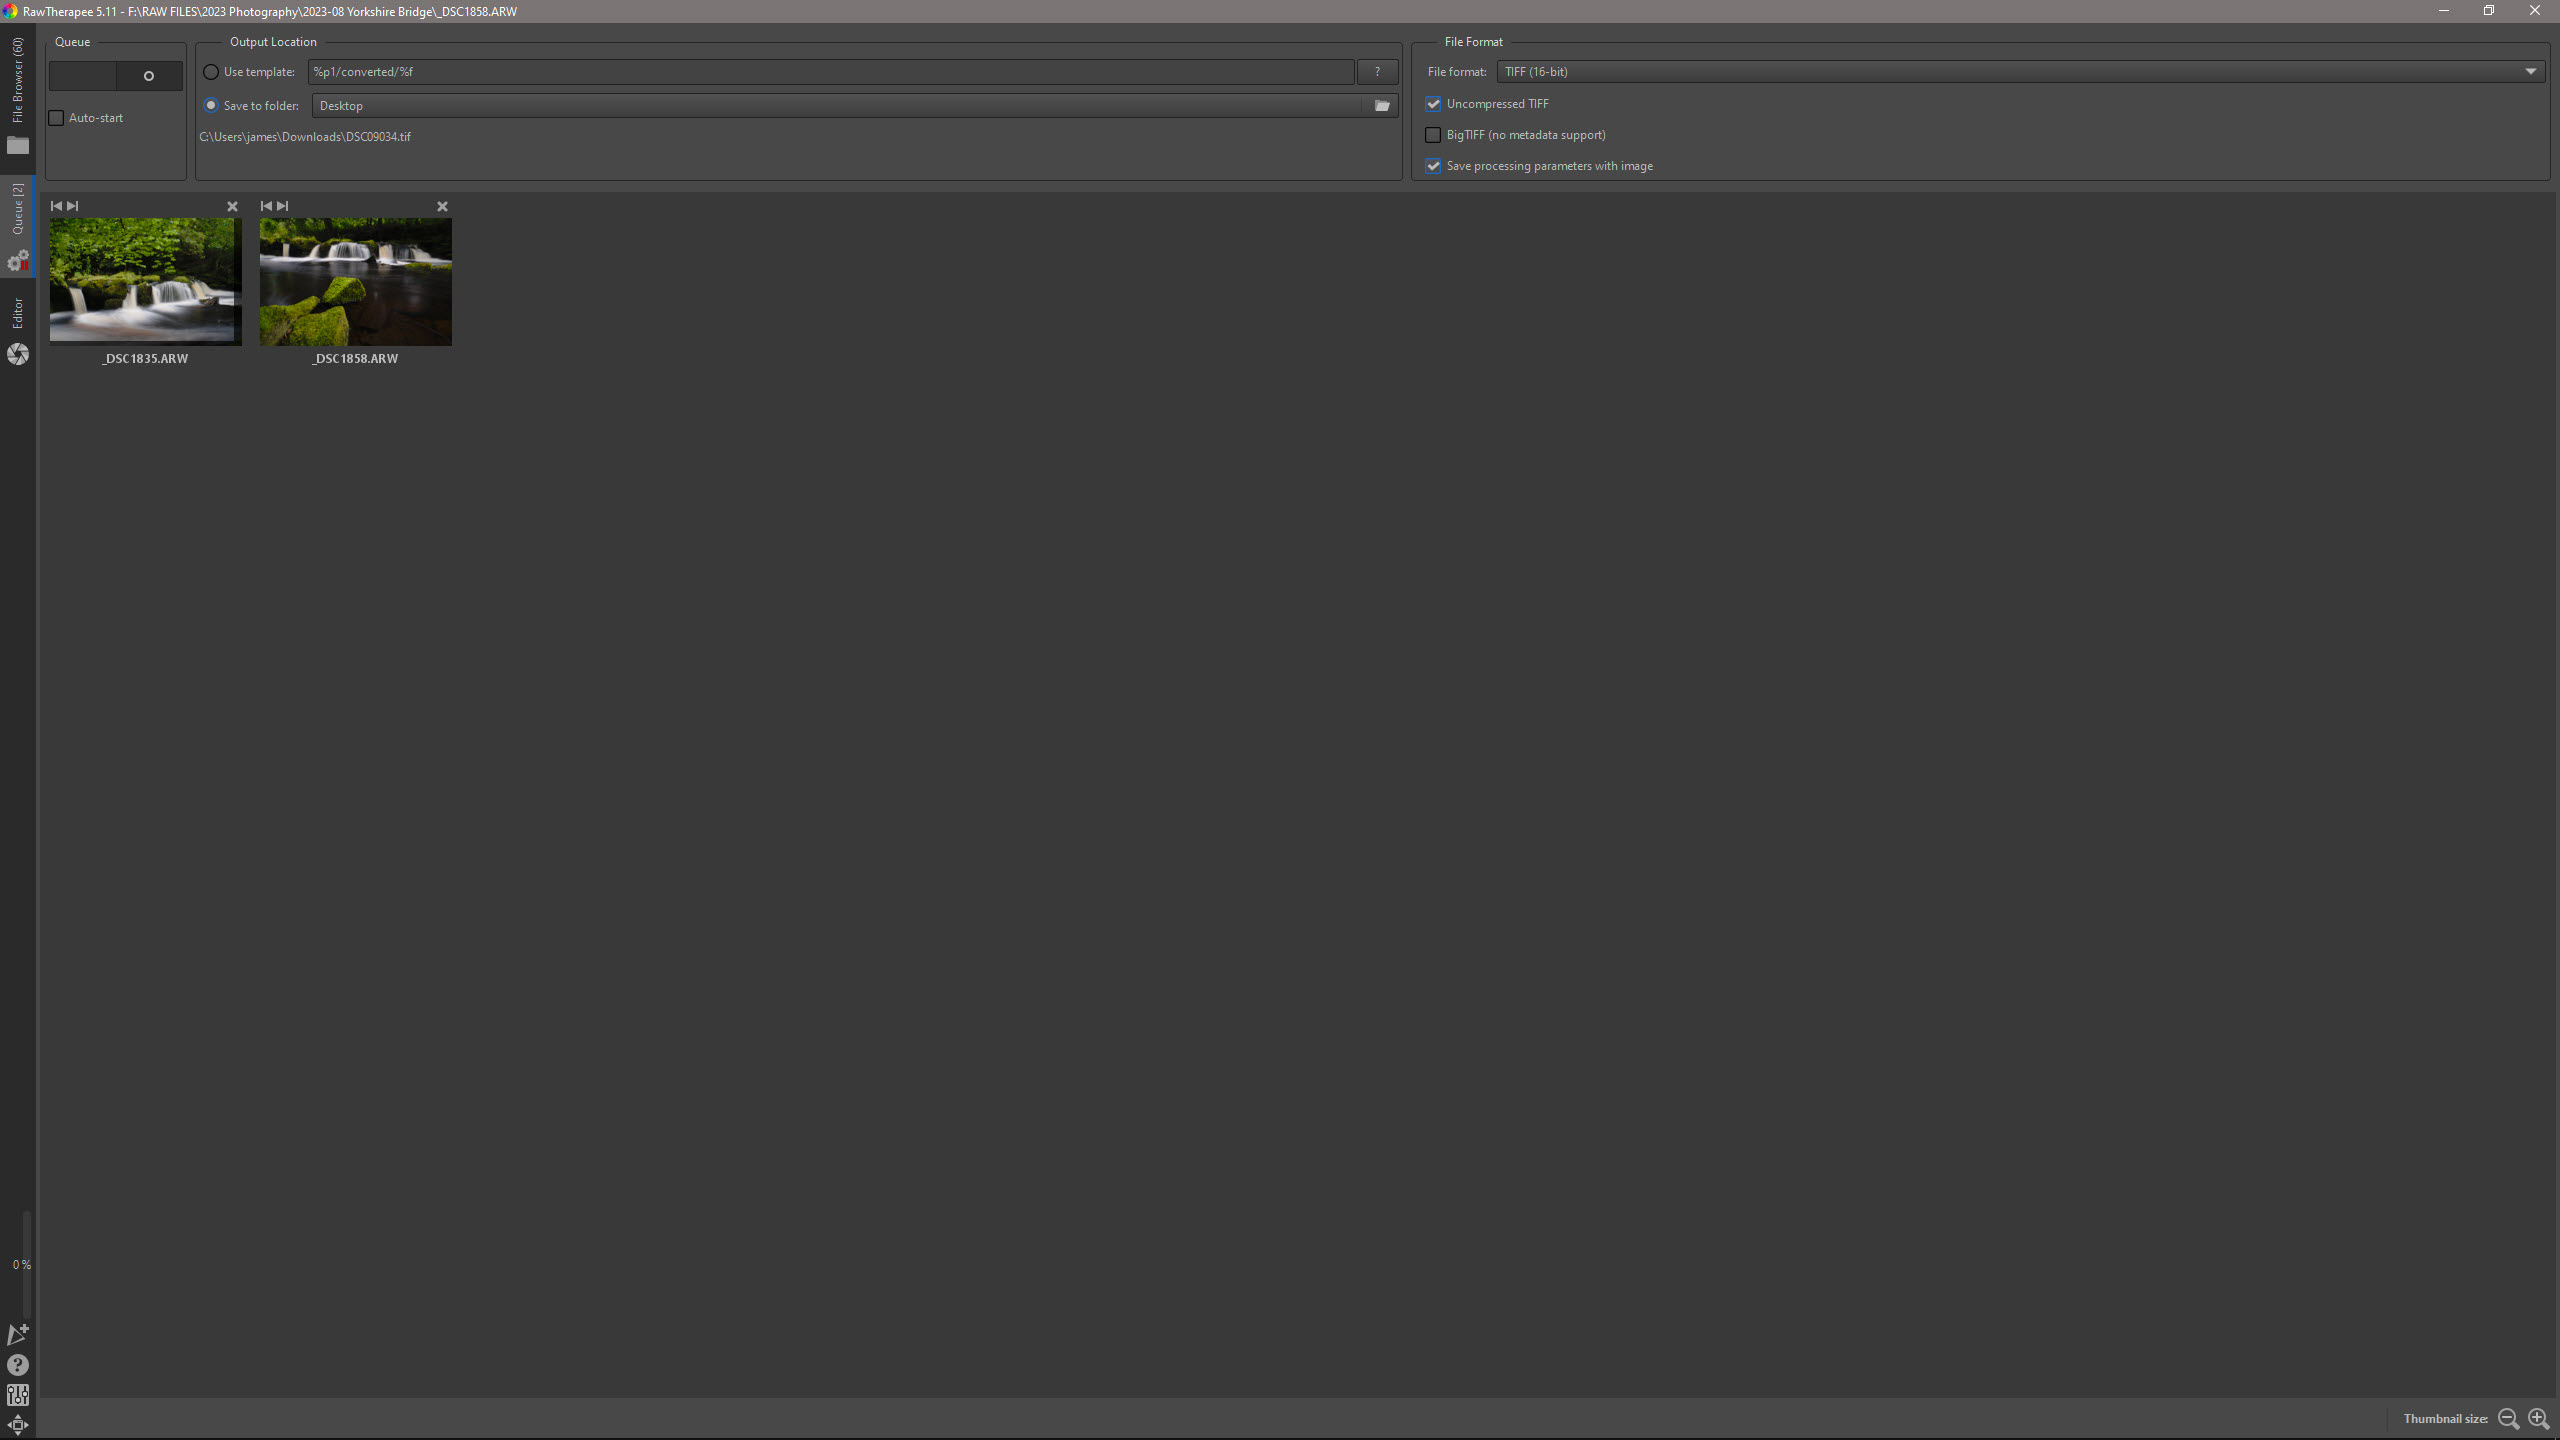
Once an image has been processed, you can right-mouse-click on the active thumbnail on the filmstrip and select Put to queue, by clicking on the cogs icon below the main image window or using a keyboard shortcut. You can wait until several photos are in the Queue section of the software before exporting to the desired file format (JPEG, TIFF or PNG) or export individually. Alternatively, you can click the save icon – the floppy disk – for individual image exports.
RawTherapee: Performance
Just like other Raw processing software, adjustments made to photos are non-destructive so the underlying image file is left untouched. RawTherapee supports most Raw file types, although as previously mentioned Canon EOS R1 Raw files were unsupported at the time of testing. Other supported file formats include HDR DNGs, JPEGs, TIFFs and PNGs.
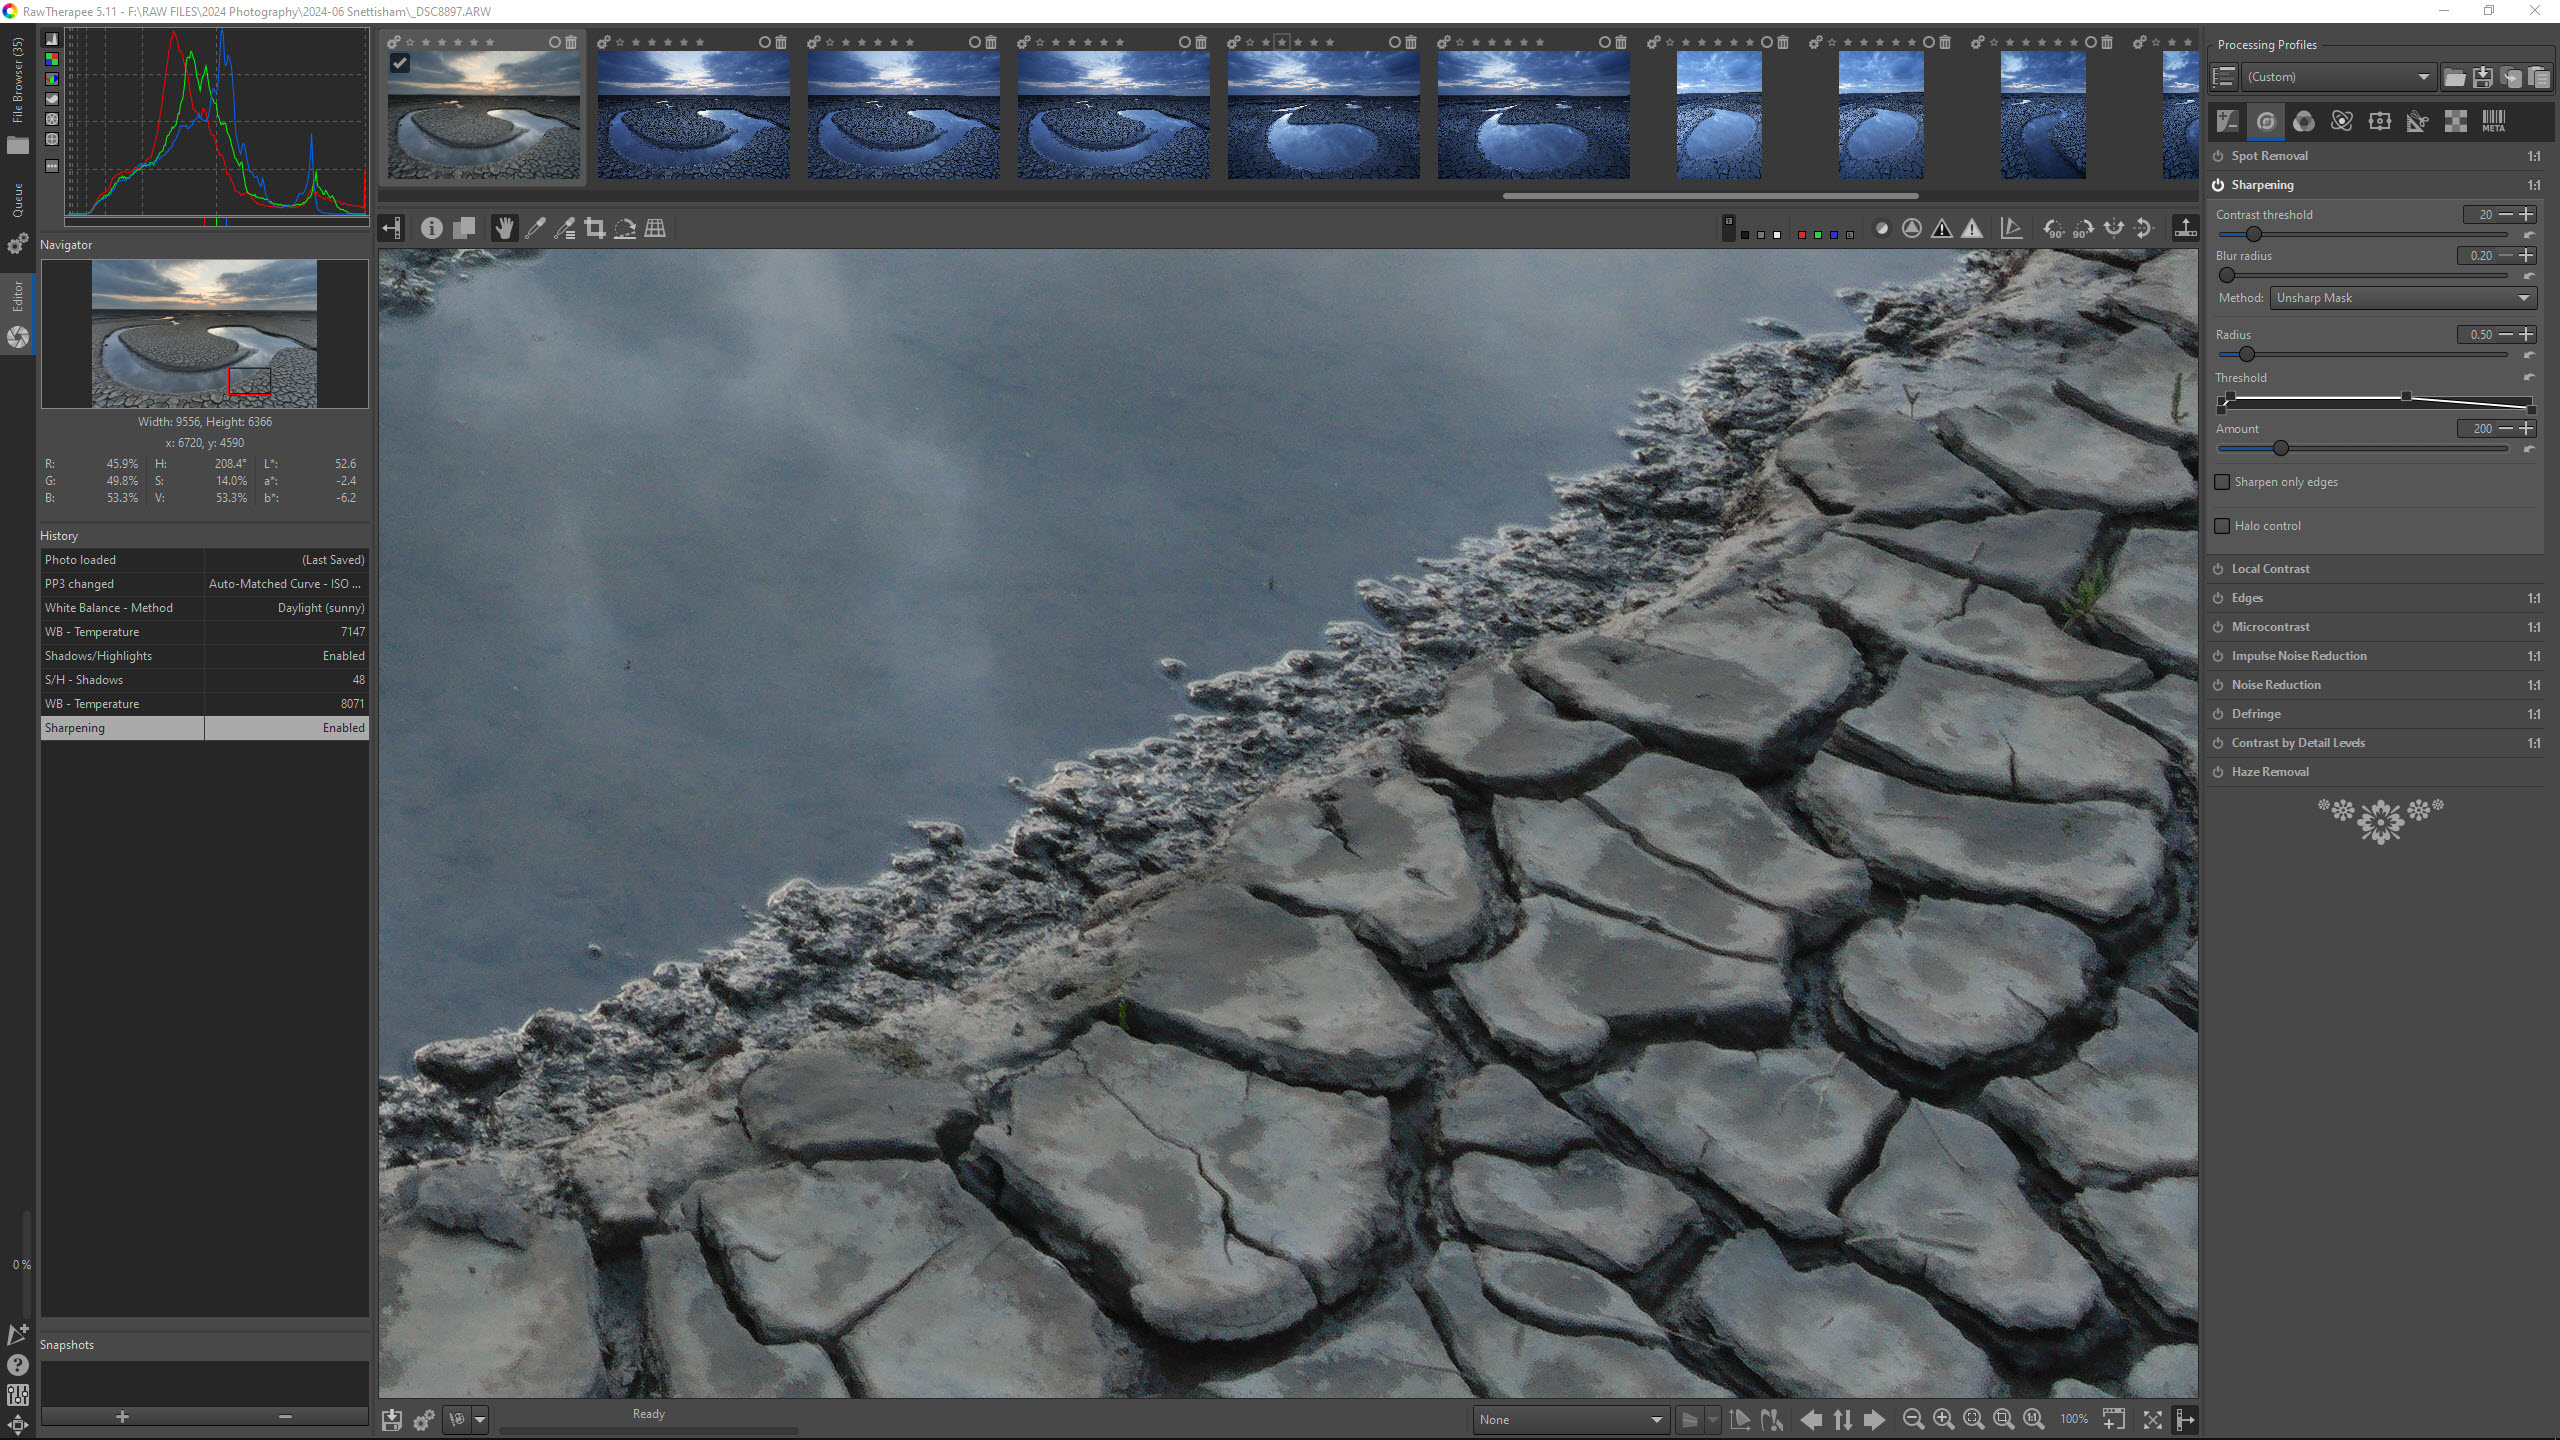
RawTherapee features a 32-bit (floating point) processing engine and demosaicing algorithms. This sounds pretty fancy, but while the image quality possible with the software is great, it's still not quite at the level of Adobe Camera Raw and Lightroom. For example, I could see more luminance noise in a shot processed with RawTherapee than in the same photo processed with Lightroom. This was visible in the blue sky of a photo taken at ISO 100.
RawTherapee can, however, merge pixel shift Raw files with automatic ghost masking, dark frame subtraction (often used in astrophotography) and offers flat field correction and hot pixel correction. These specific features weren’t tested because the focus was on standard processing tasks that the majority of users would typically undertake.
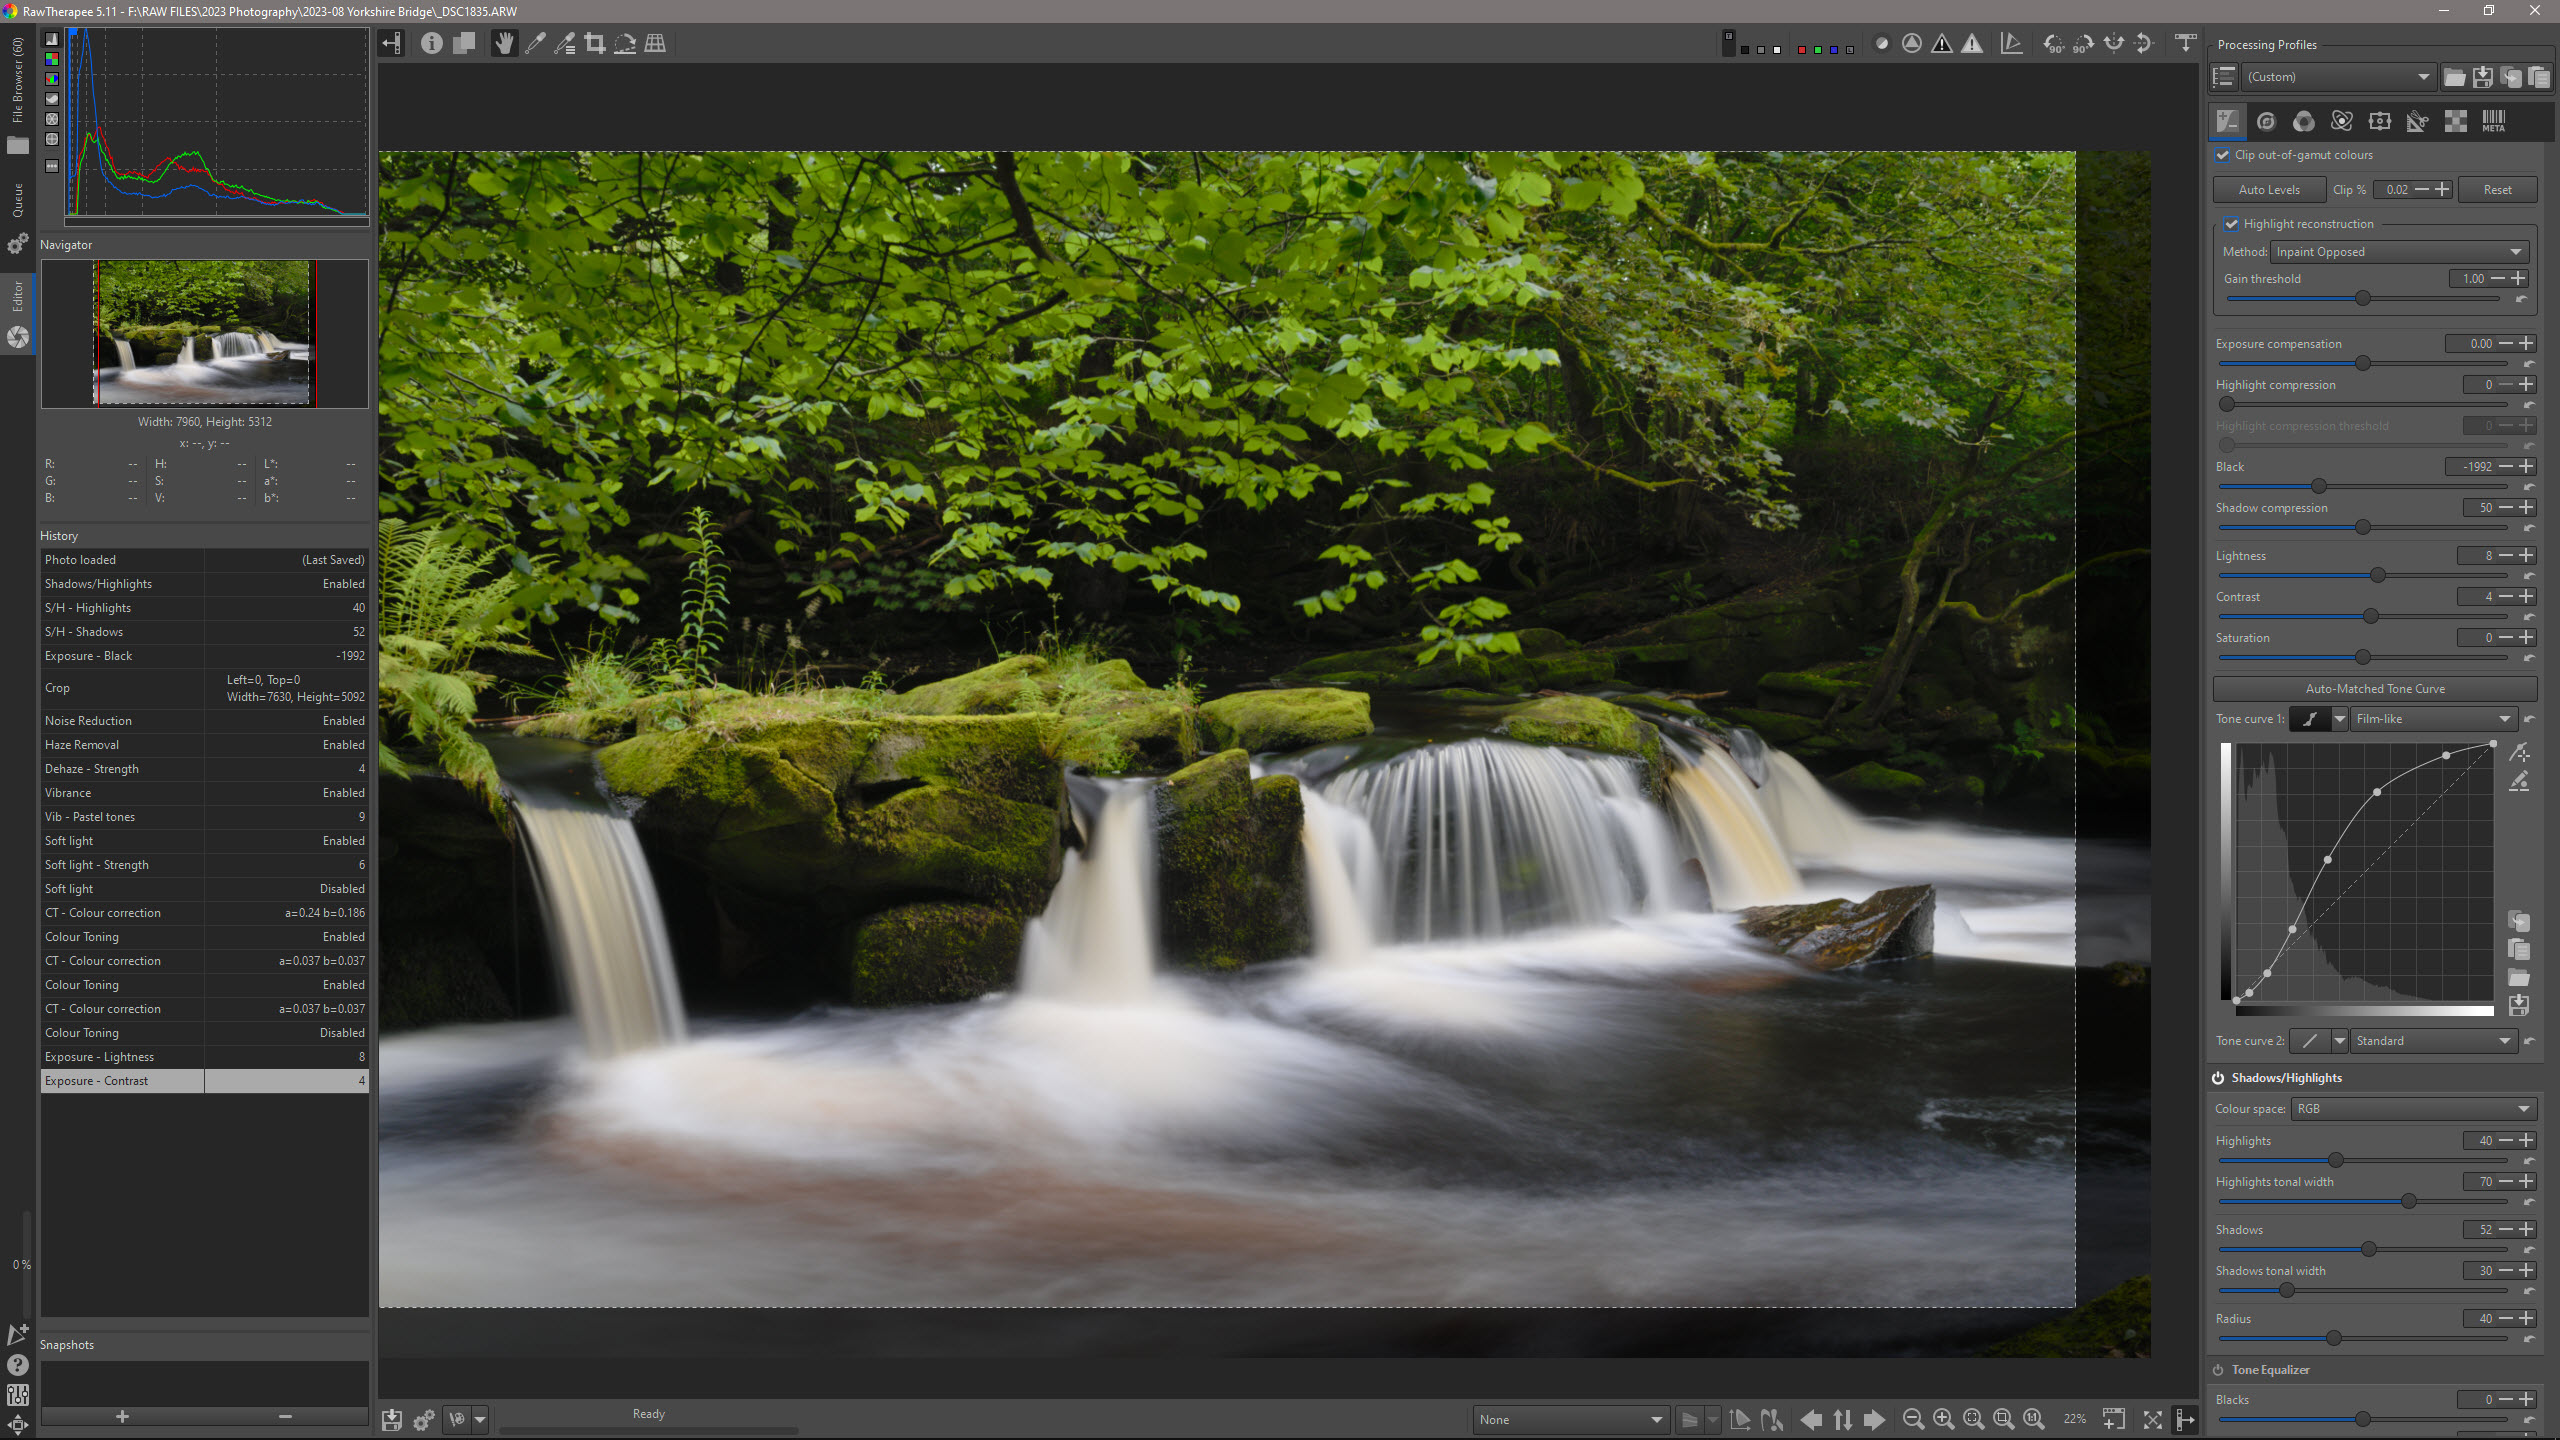
The adjustment controls available are extensive, and the level of control available is impressive, but there is so much control there may be too much. If you're unsure of anything you can avoid the controls you don’t understand or need. The controls are split into tabs/palettes and consist of Exposure, Detail, Colour, Advanced, Selective Editing, Transform, Raw and Metadata. Any controls with 1:1 next to the name require you to be zoomed into 100% / 1:1 to be able to clearly see the result.
Other features include localised adjustments including a Graduated Filter, Spot Removal and lens corrections to name but a few. Everything you need and much more is available. The main issues with RawTherapee are the speed at which images load, the slight lag between moving sliders before the effect is visible and the quirky workflows and processes that spring up. For the latter, it's not a huge issue but you do have to get used to the way RawTherapee works, particularly if you're used to other Raw processing software.
RawTherapee: Verdict
I found RawTherapee took quite a lot of getting used to in terms of the workflow and sheer number of adjustments available. Some are great and provide much more control than Lightroom, although I can't help but think that the software is overcomplicated in some areas. Some controls are also scattered around in what doesn’t always feel like a logical way.
It can’t be forgotten that this is free software, so despite the performance issues and the quirks of RawTherapee, you're getting a lot of control. The quality of results isn't quite at the level of Adobe Camera Raw and Lightroom, but it's not too far off and RawTherapee is hugely impressive considering its free software.