The subject’s face is always likely to be the most heavily scrutinised area of the image by anyone viewing your photos. And the person’s eyes are generally the first place the audience looks. That means, as retouchers, we must ensure that the eyes leave an impression.
As studio photographers, we learn early on that catch lights in the subject’s eyes are a good thing and that they add a sense of life and energy to a portrait. However, with large light sources, such as a softbox or umbrella, lighting the fine details of the eye can be difficult. For this reason, applying some localised brightening and special effects can be really beneficial to help enhance the fine structure of the eye, which is where the person’s character is most visible.
Similarly, teeth can make or break a shot. A portrait without a smile can look uncomfortable, but teeth are commonly an area many models feel self-conscious about. Even healthy teeth can show staining, but with some subtle and targeted colour adjustments, we can produce an even and fresh look.

Editing steps
Introduce local colour and brightness adjustments for portraits that glow
1. Reduce the yellows
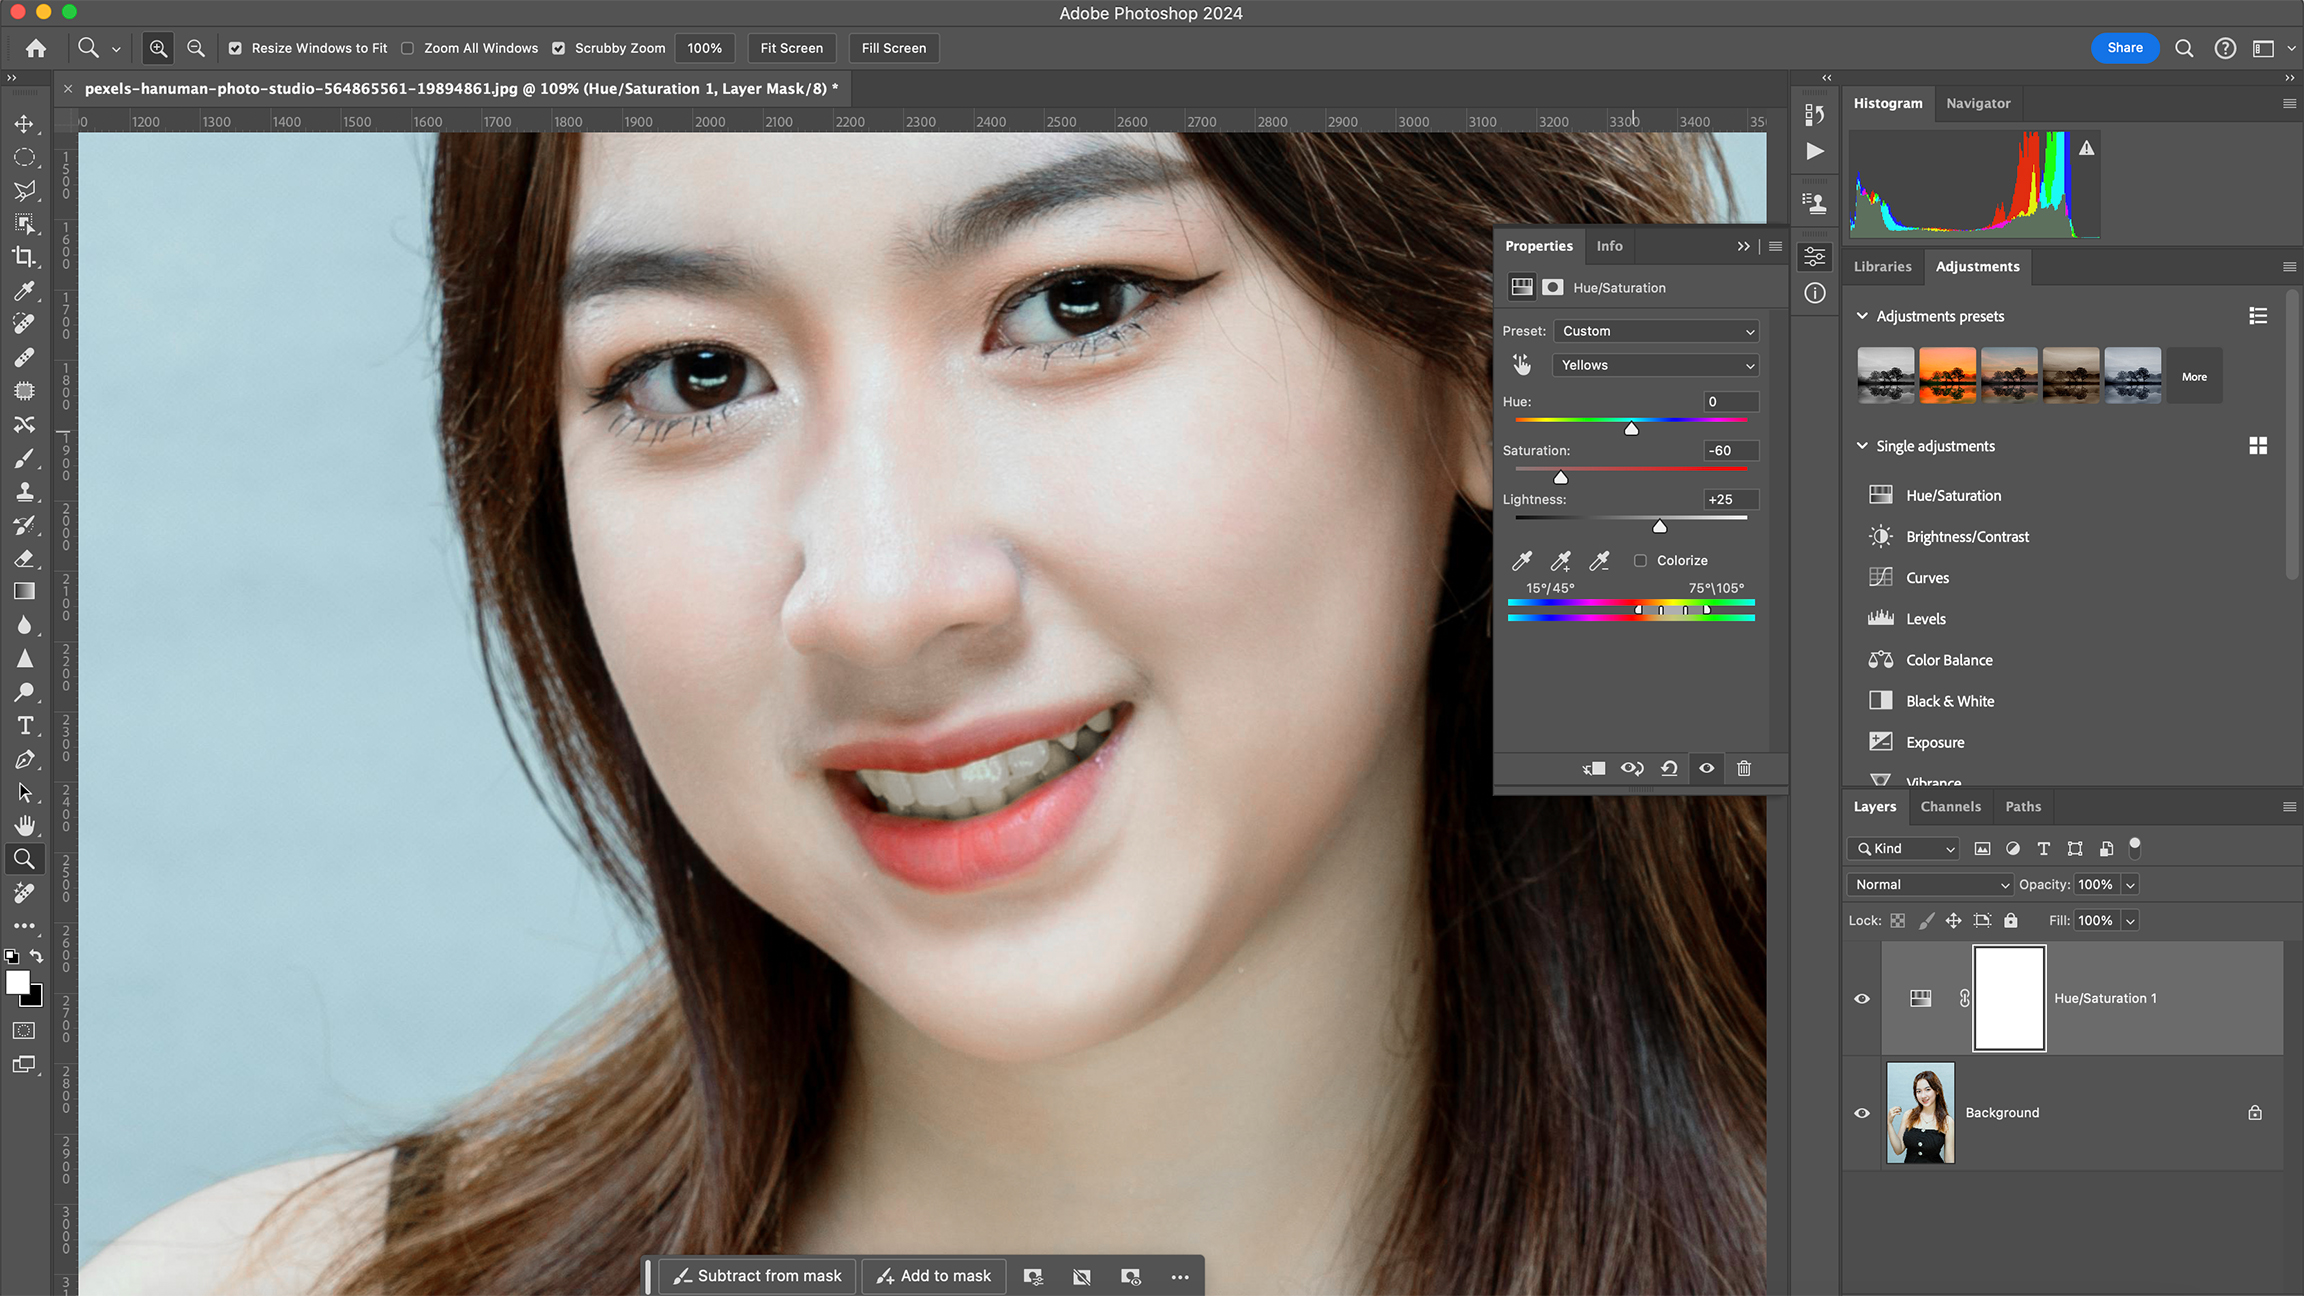
There is a slight yellow cast to the model’s teeth. To address this, add a Hue/Saturation Adjustment layer, select Yellow and reduce the Saturation. Move the Lightness slider to the right to brighten areas containing yellow.
2. Mask teeth
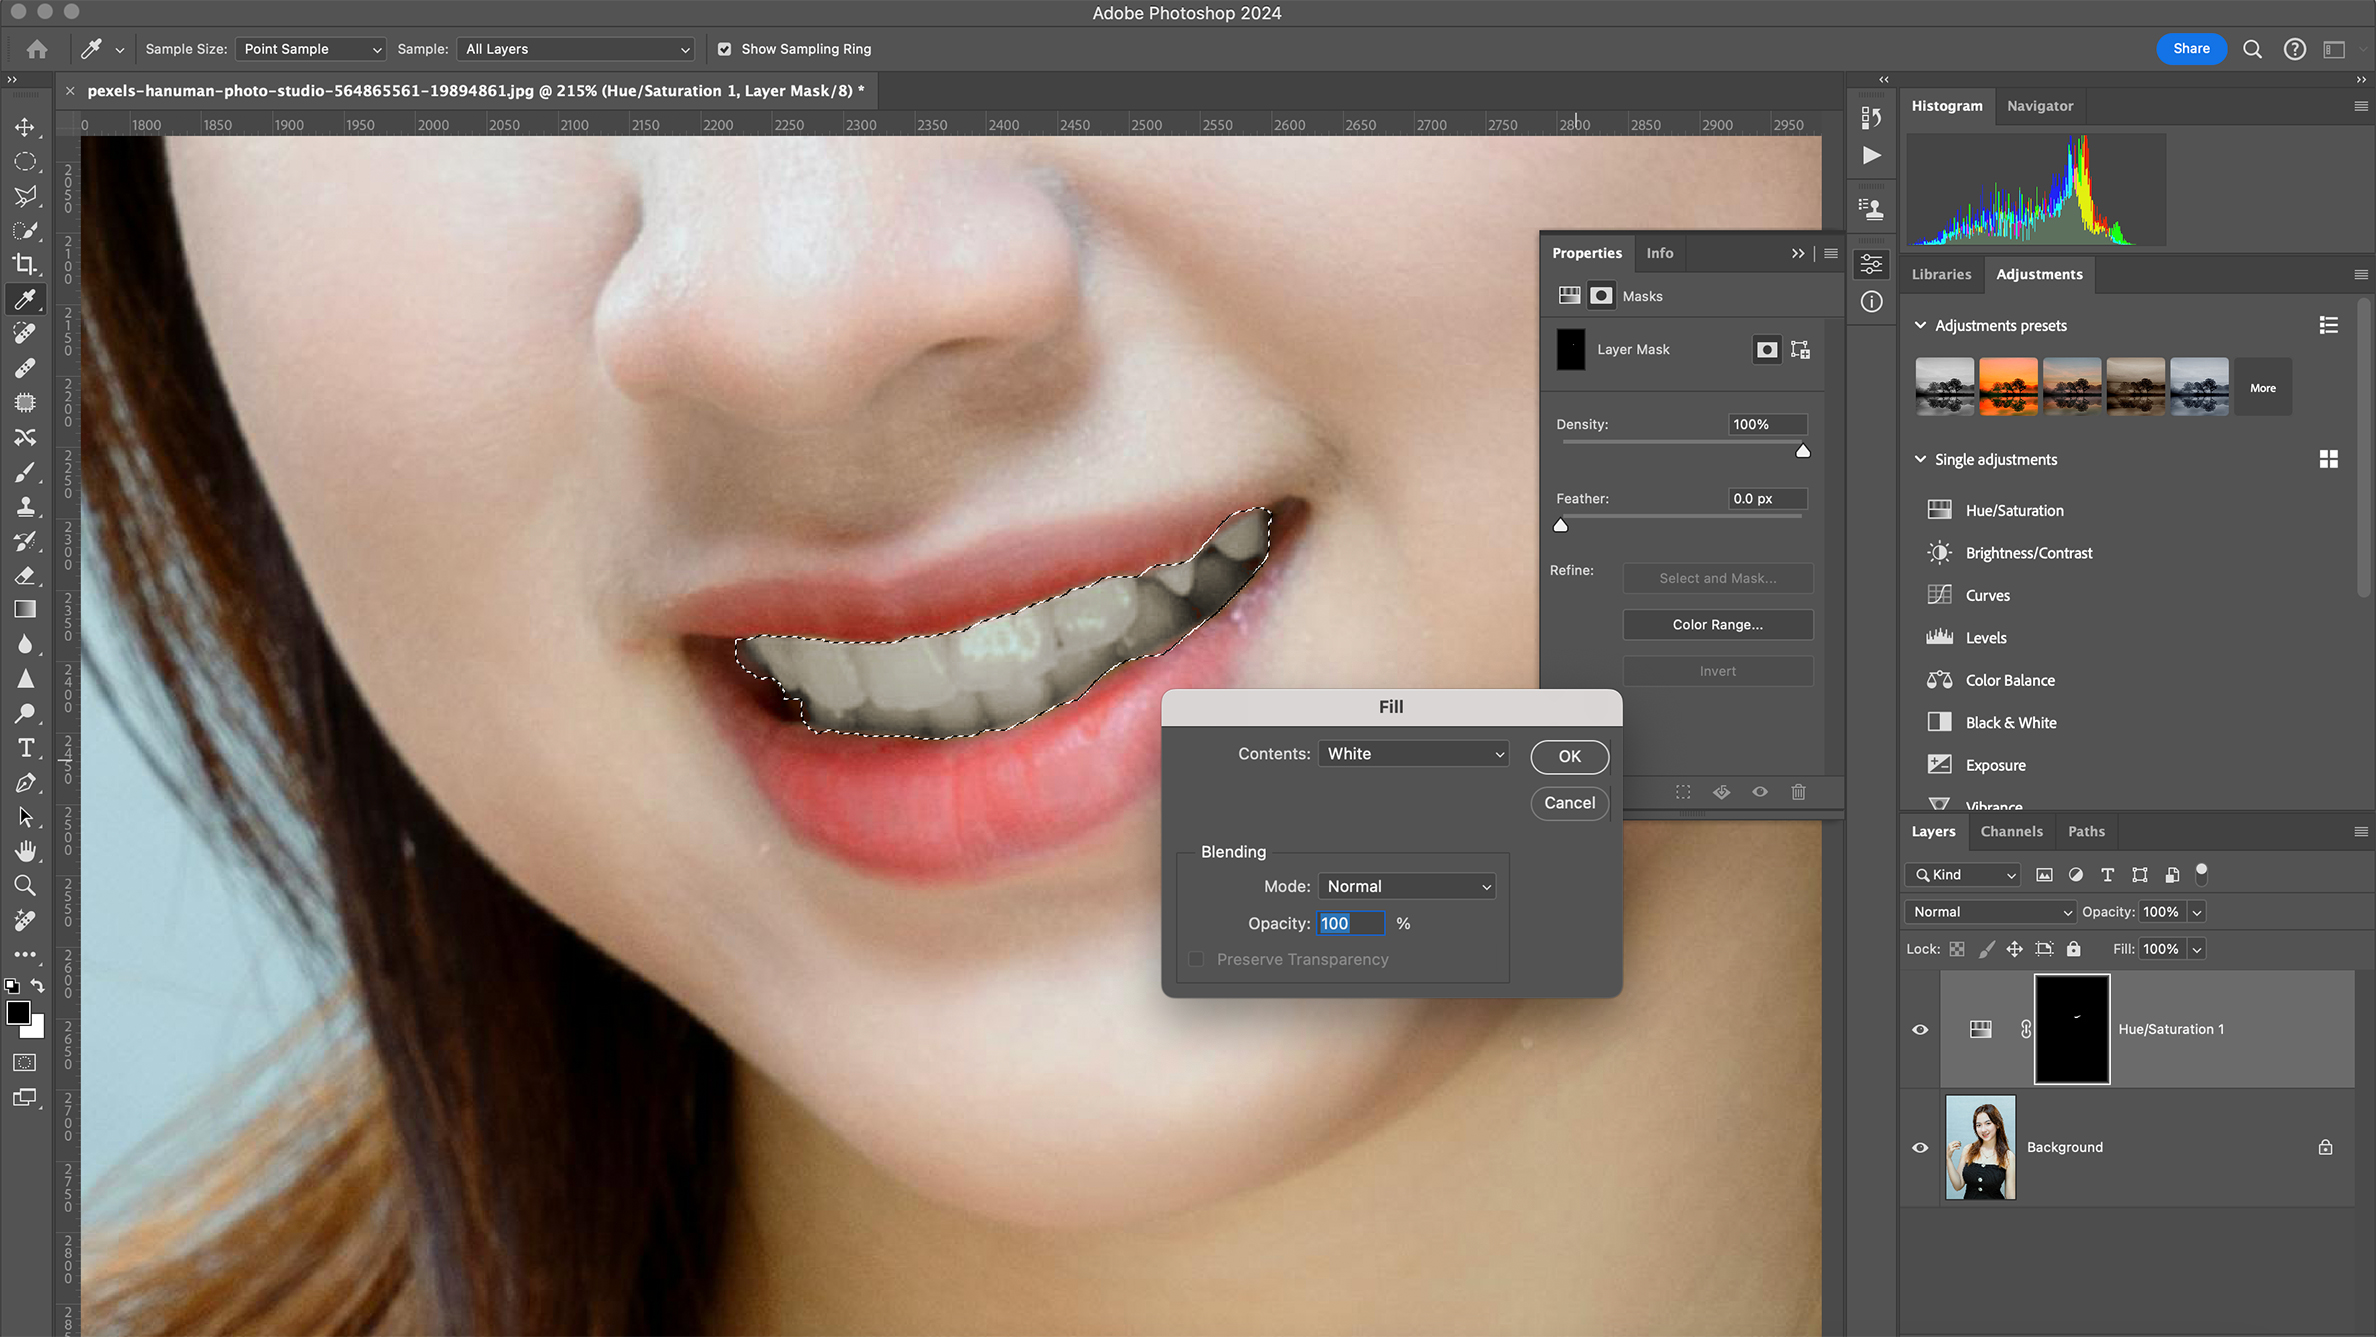
The global adjustment has reduced yellow across the whole image, spoiling the model’s skin tone. Create a selection around the teeth using a Lasso Tool (L) or Quick Selection Tool (W). Feather the selection and fill with White (Edit > Fill).
3. Target adjustments
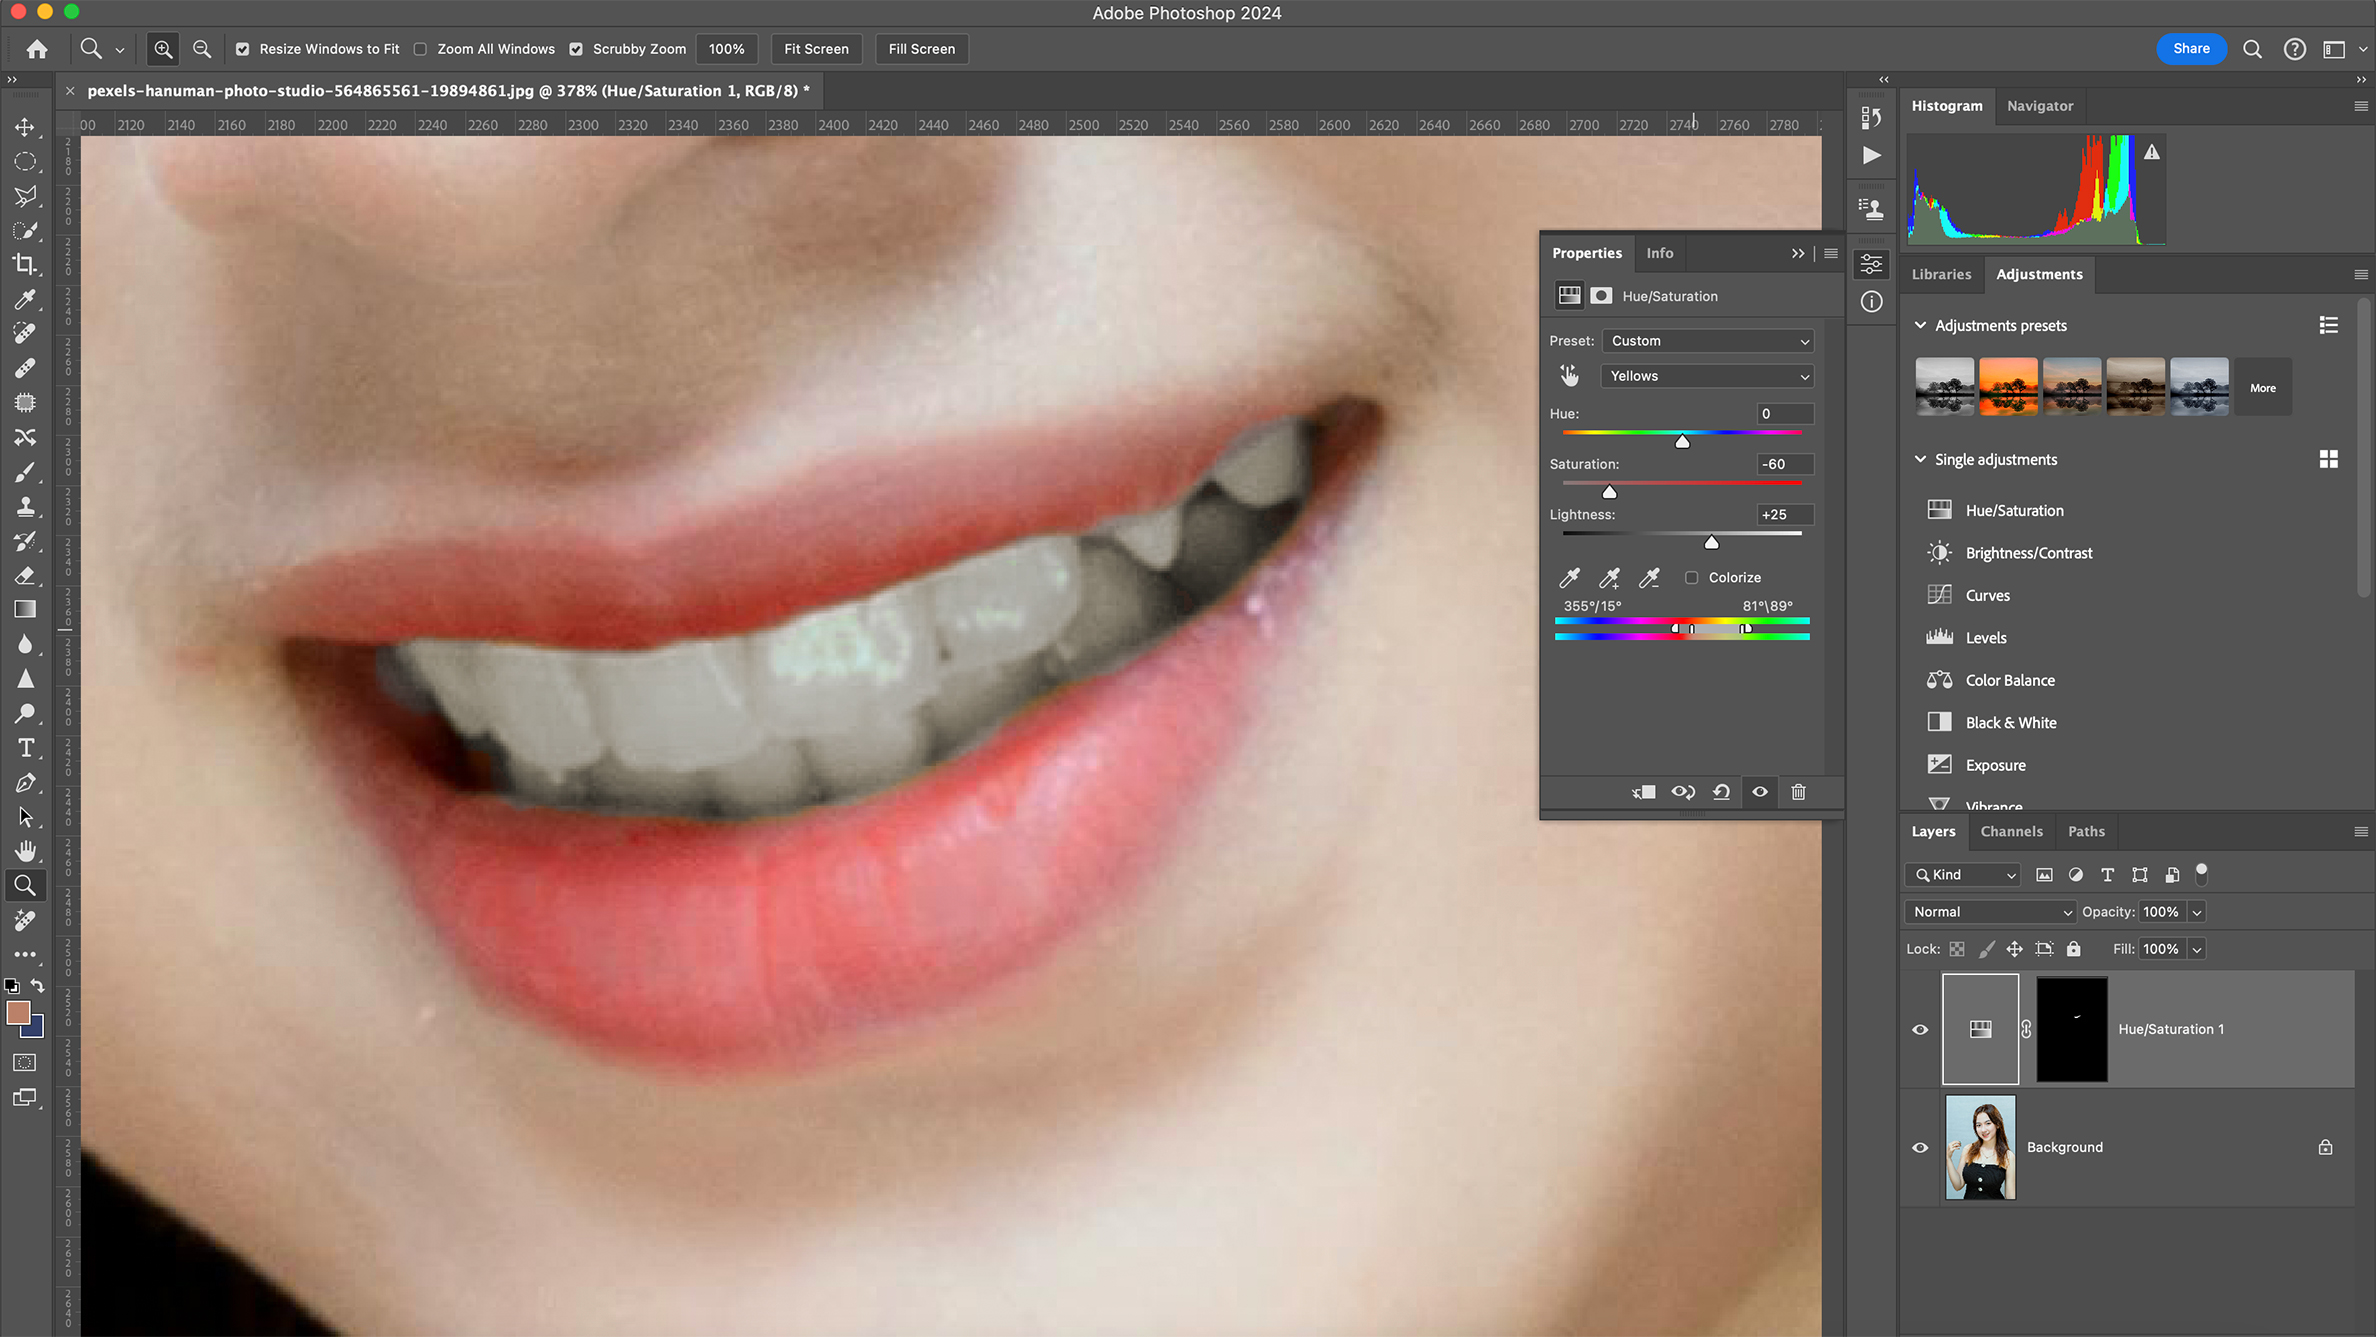
To maintain natural colour variation, target the strongest yellows by altering the Colour Adjustment range using the sliders at the bottom of the Hue/Saturation dialogue. Avoid sharp gradations by over-restricting the range.
4. Lift eye exposure
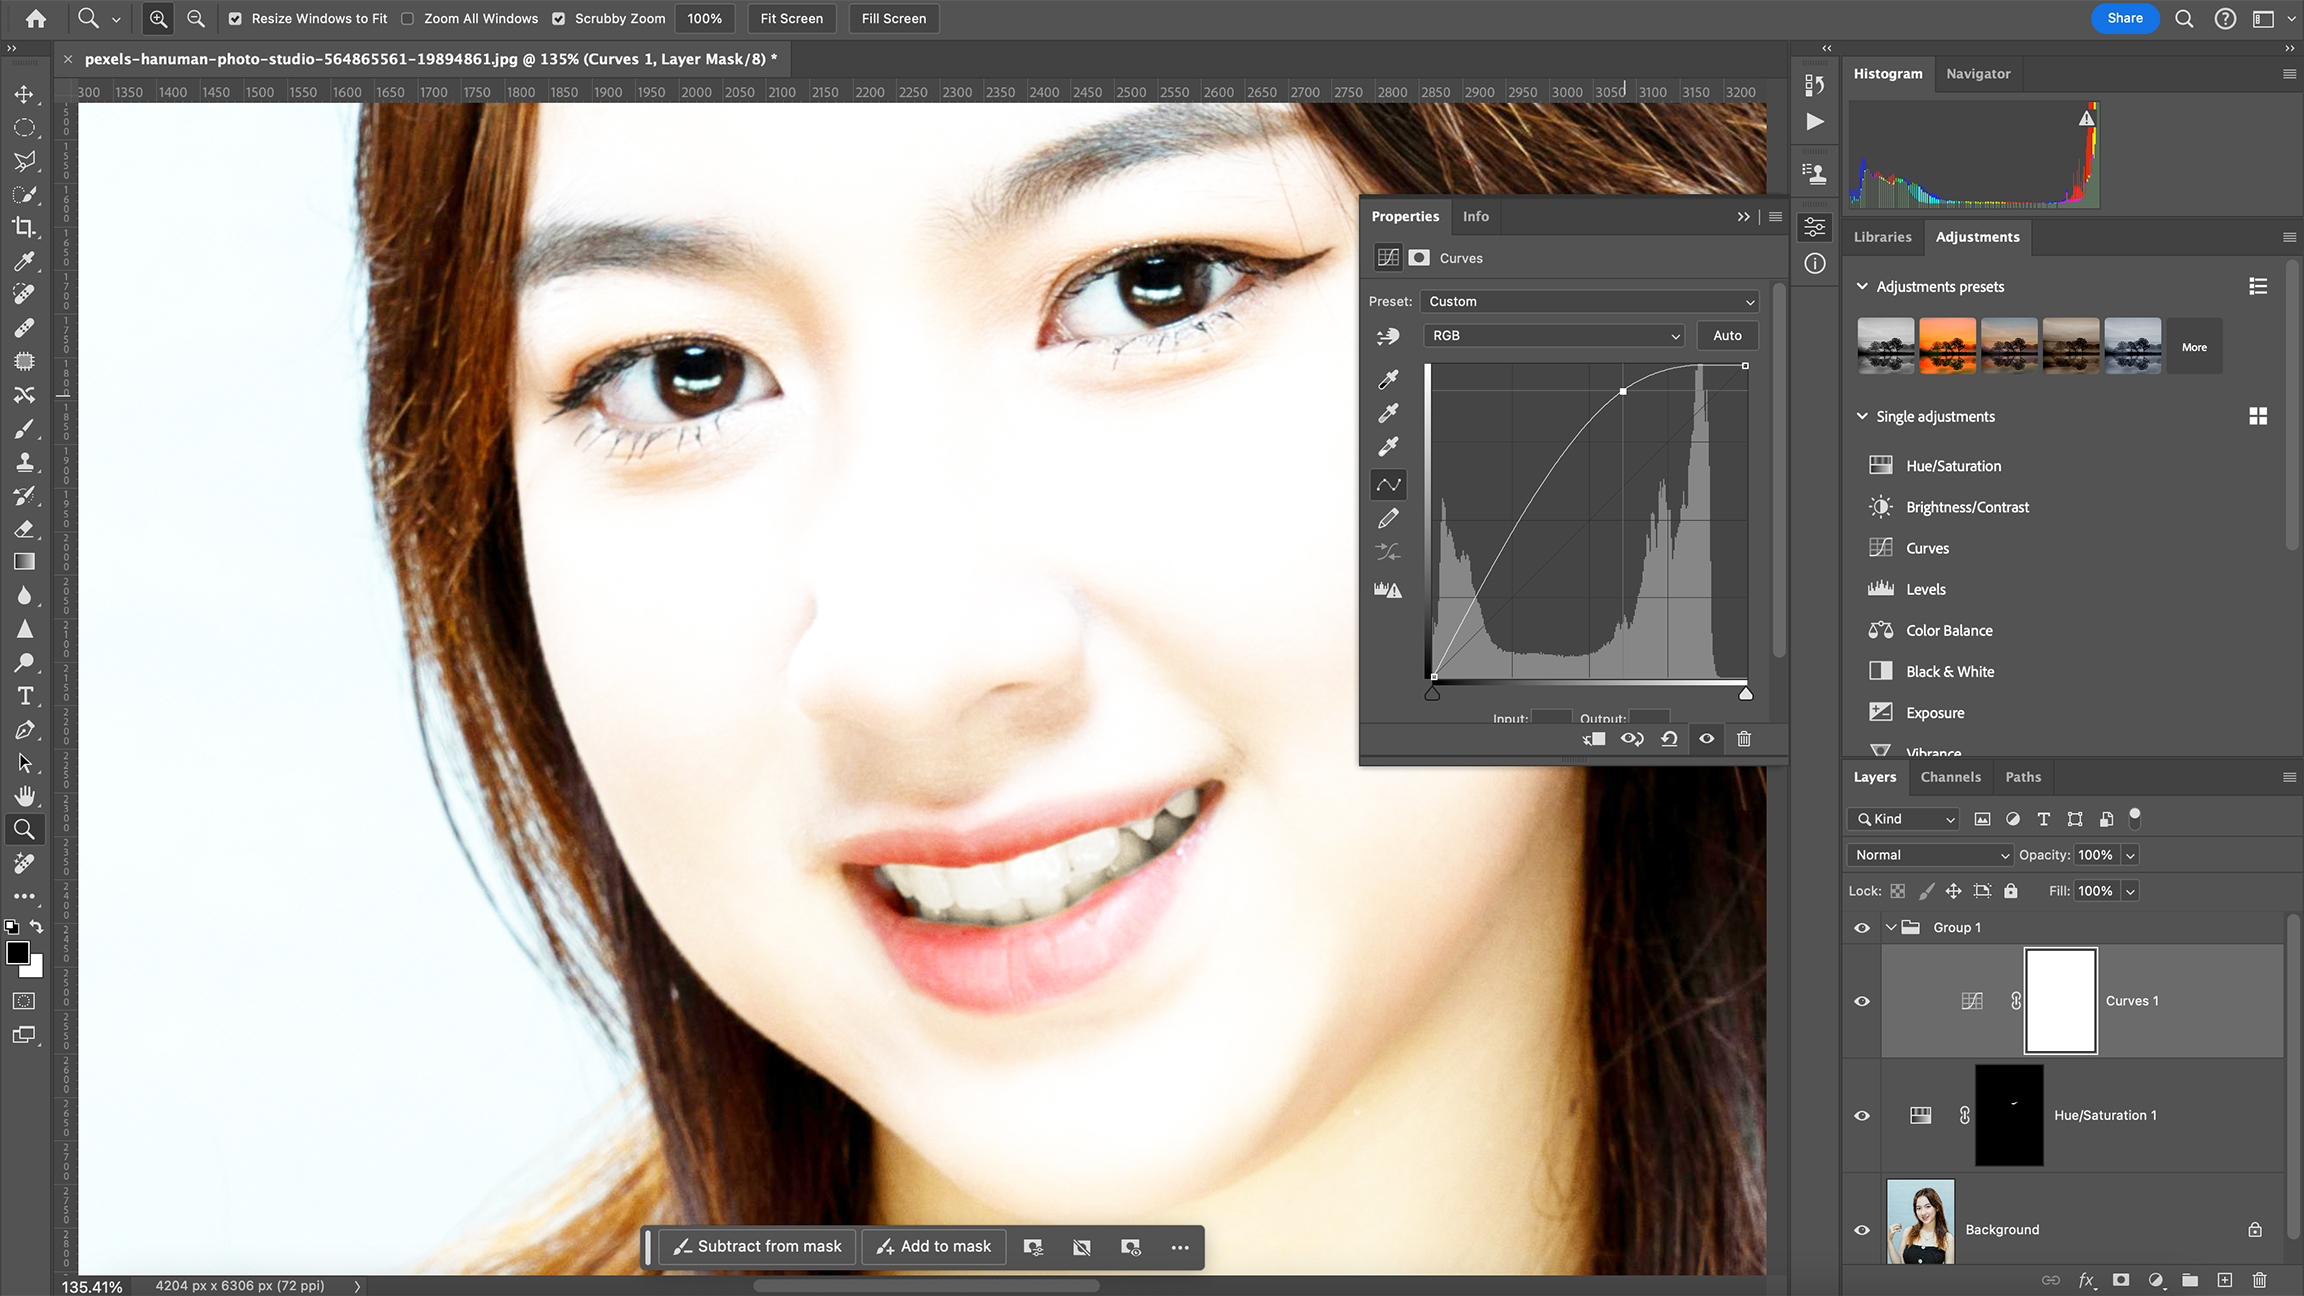
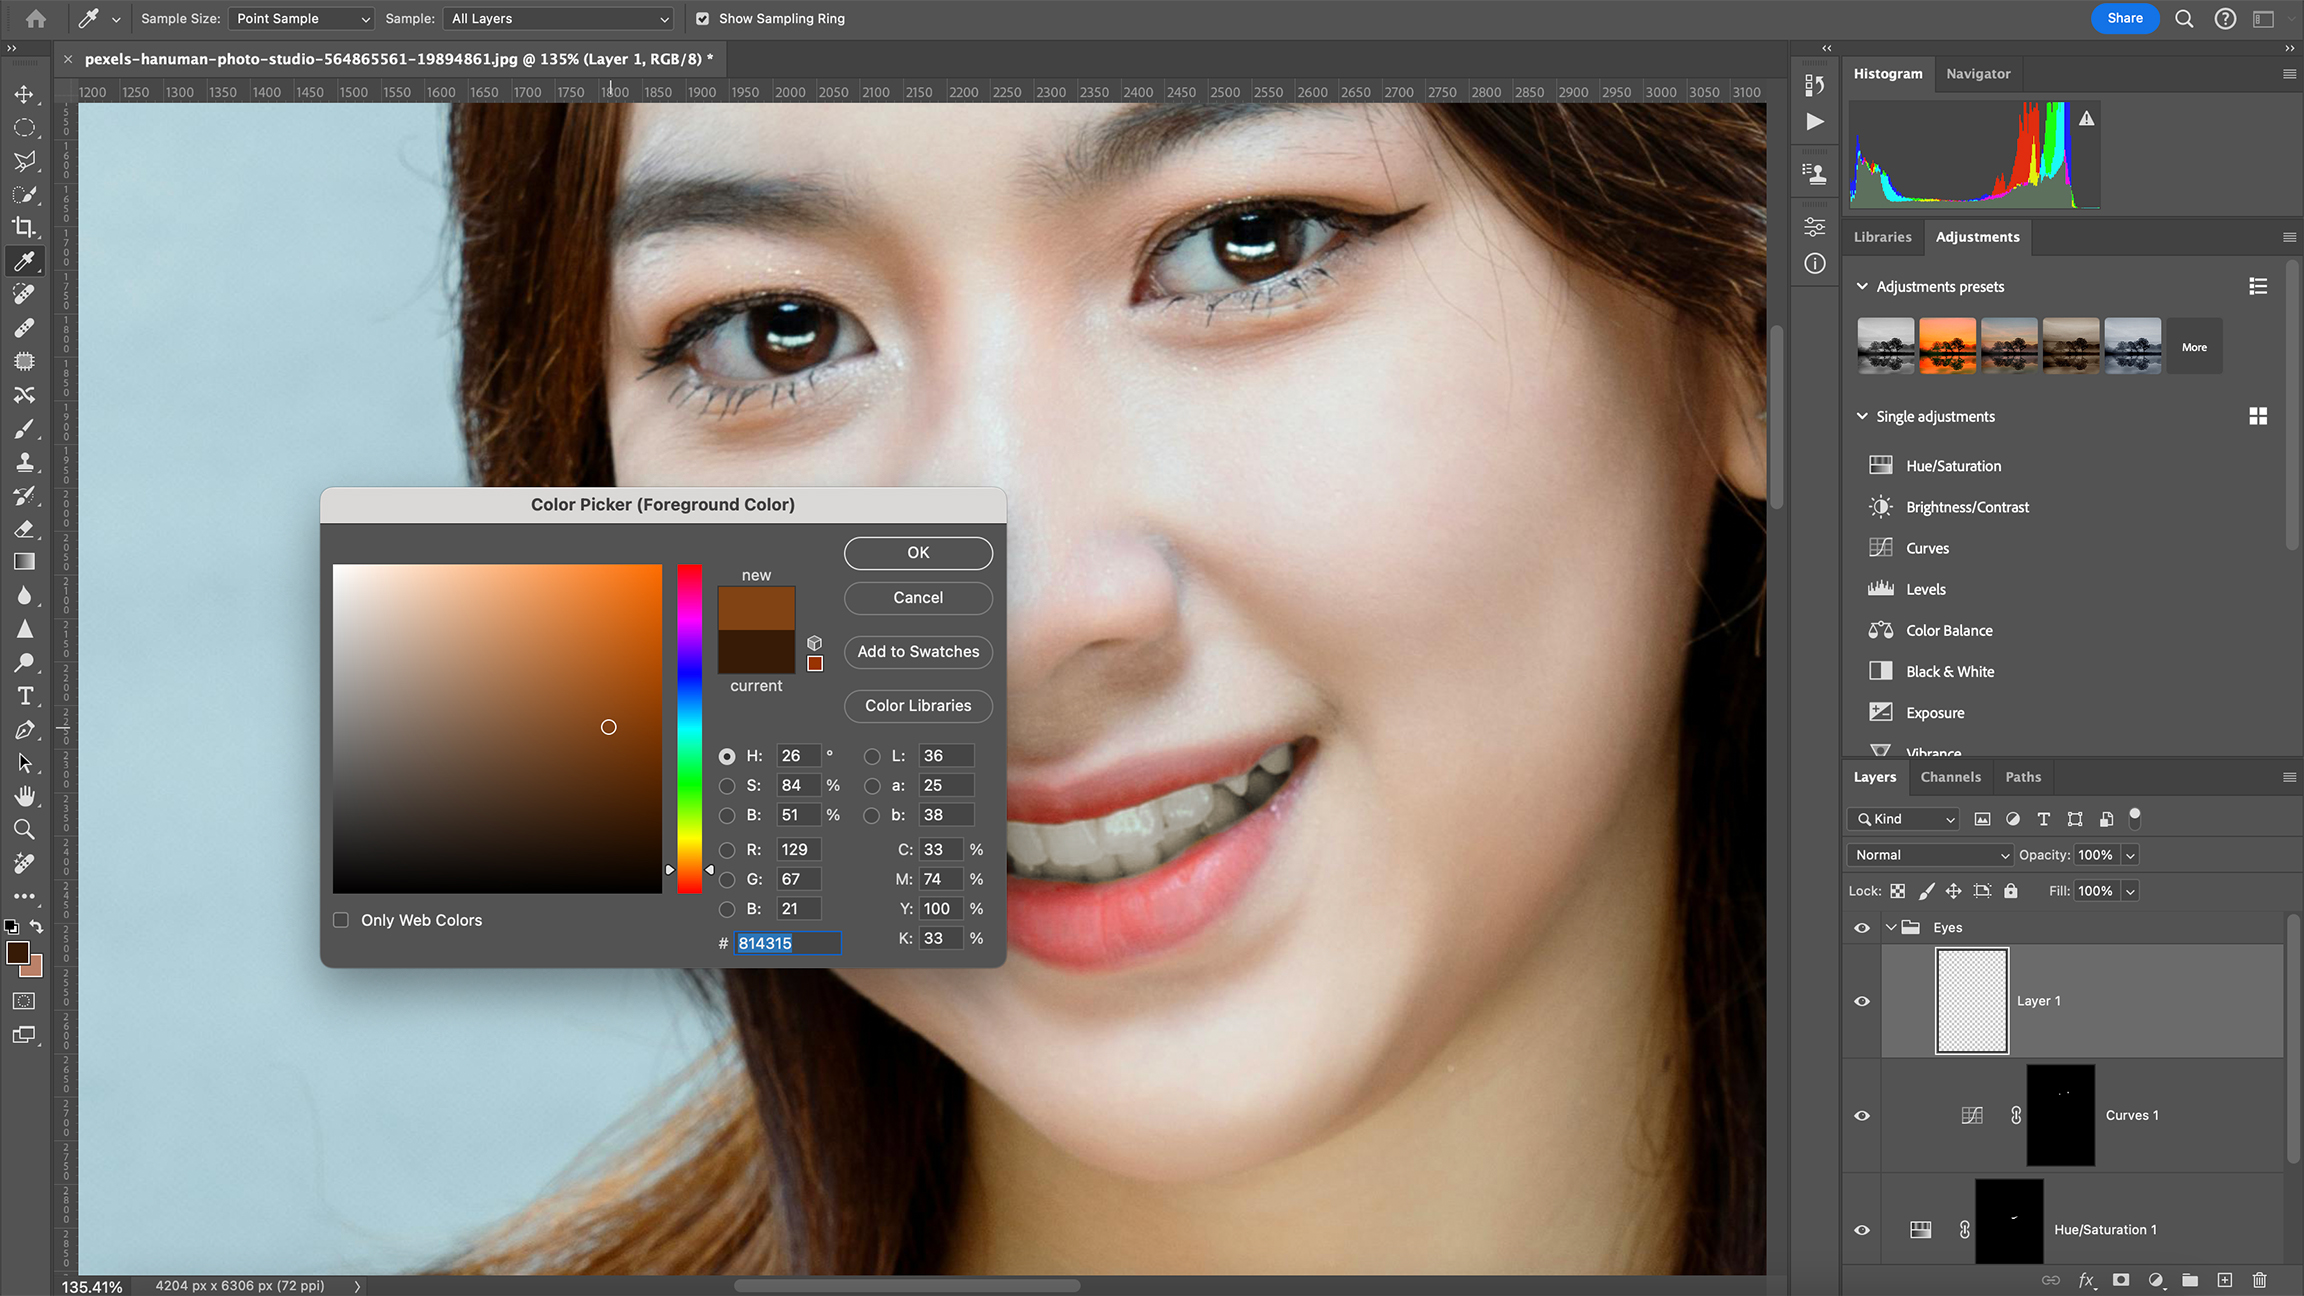
Create a new Layer Group and name it Eyes. Now create a Curves Adjustment Layer and lift the curve at the top until it almost touches the top of the graph. Invert the Layer Mask (Ctrl/Cmd + I) and paint over the eyes with a soft white brush.
5. Sample eye colours

With the Brush Tool active (B) click the Foreground Colour and sample the dominant eye colour. Move the sample point in the Colour Picker up and to the left. With a smaller, harder brush (ours was Size: 90px and Hardness: 35 per cent) brush the bottom of each eye.
6. Create structure
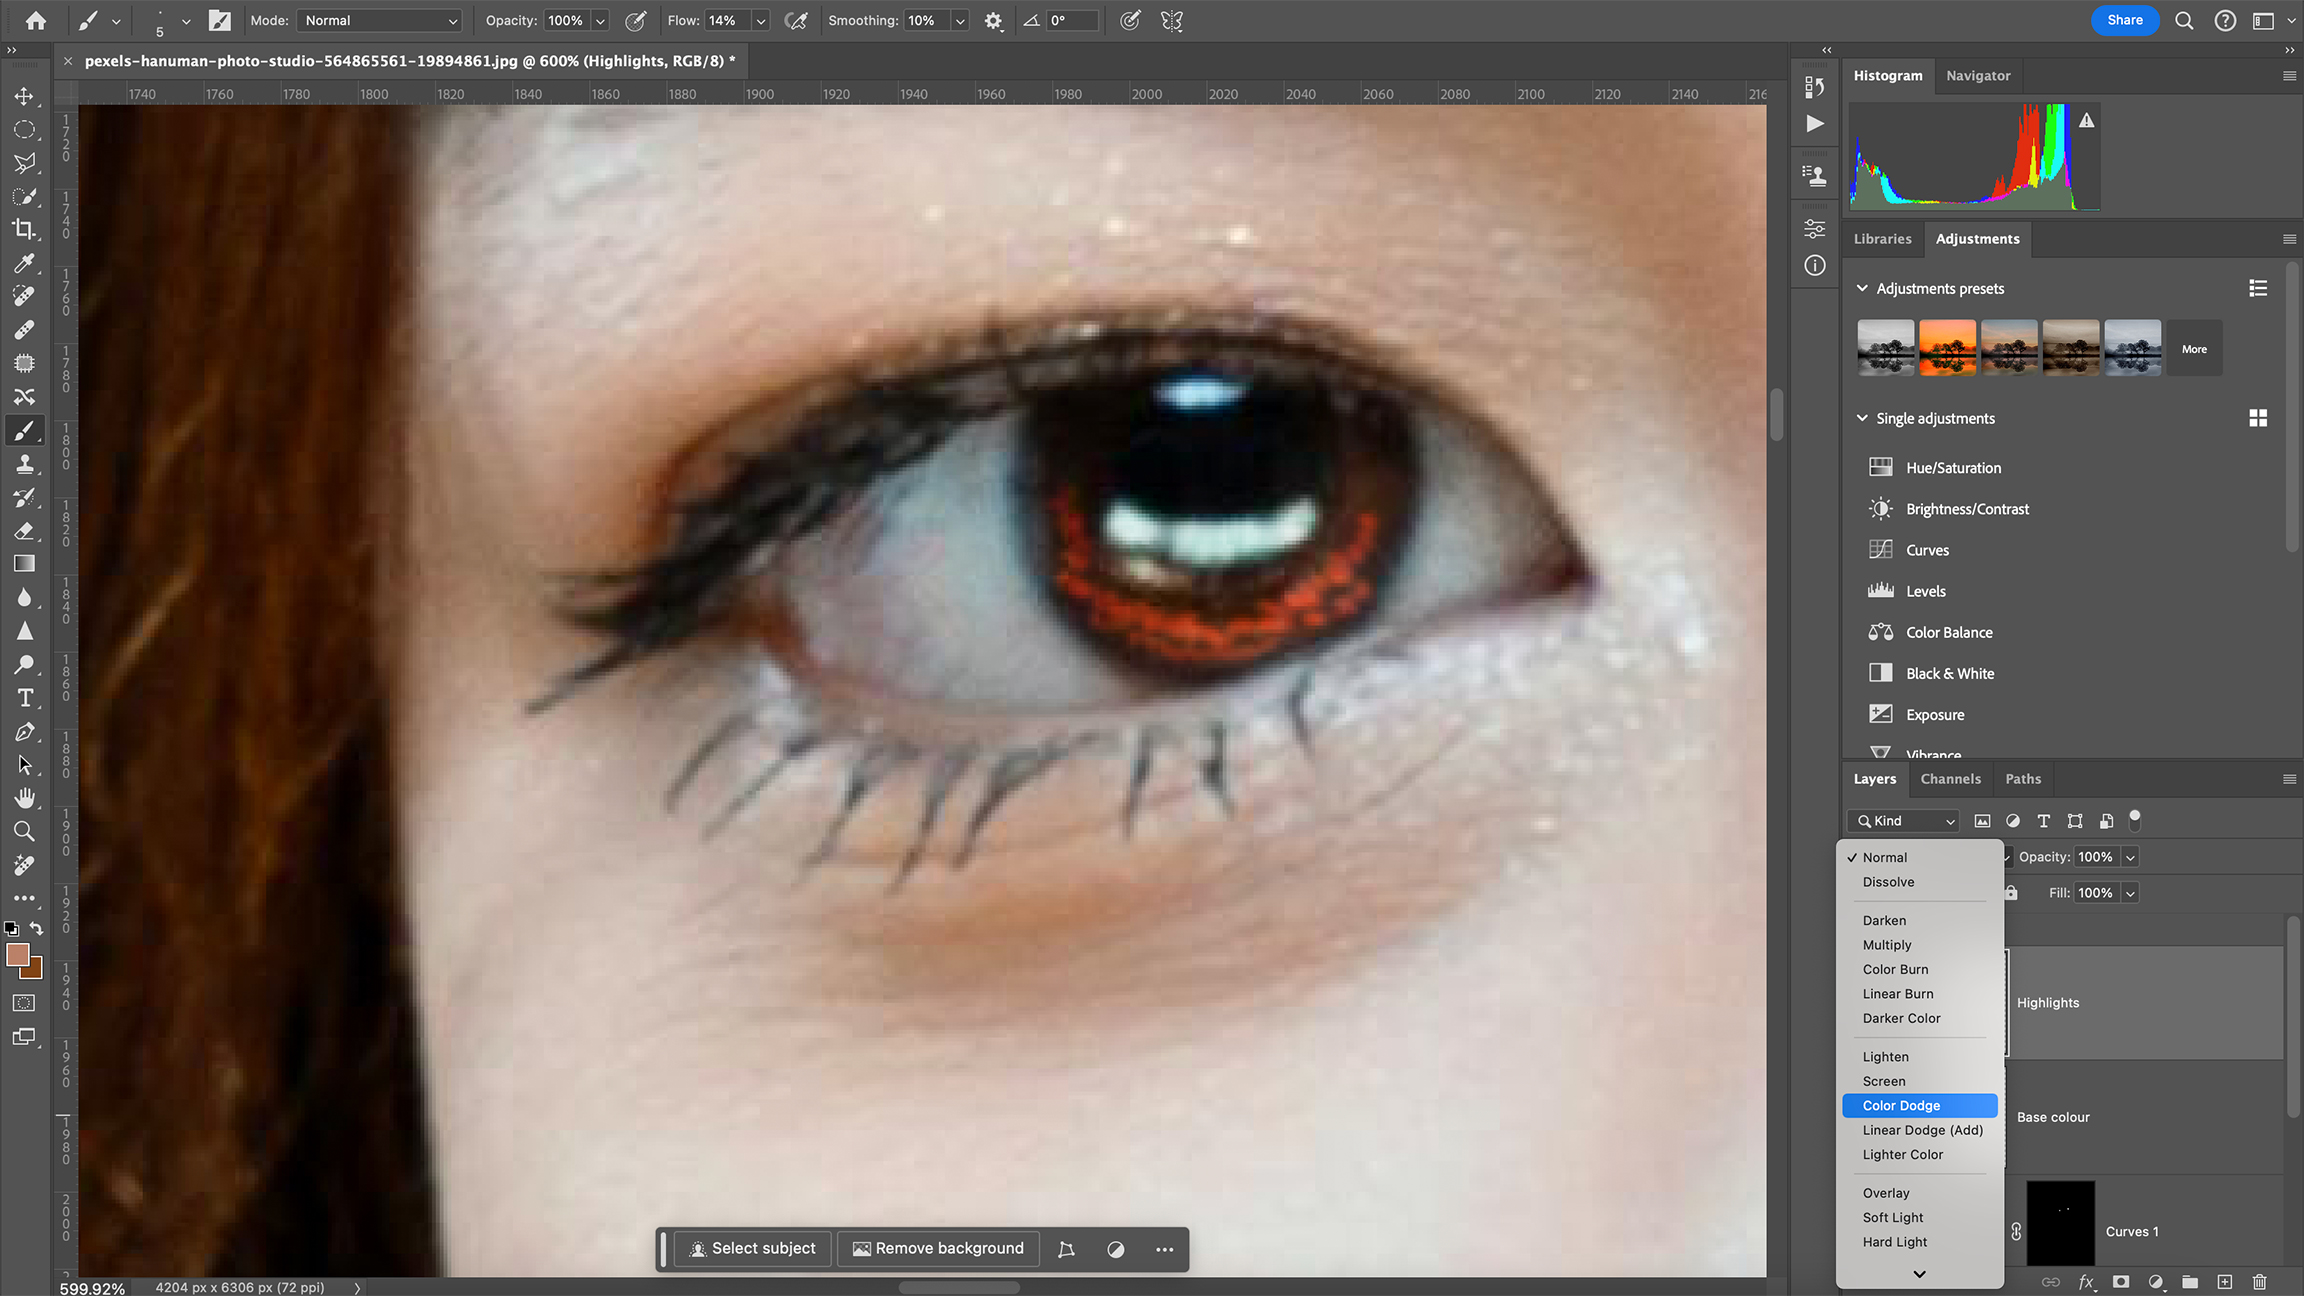
With the Brush Tool active (B) click the Foreground Colour and sample the dominant eye colour. Move the sample point in the Colour Picker up and to the left. With a smaller, harder brush (ours was Size: 90px and Hardness: 35 per cent) brush the bottom of each eye.
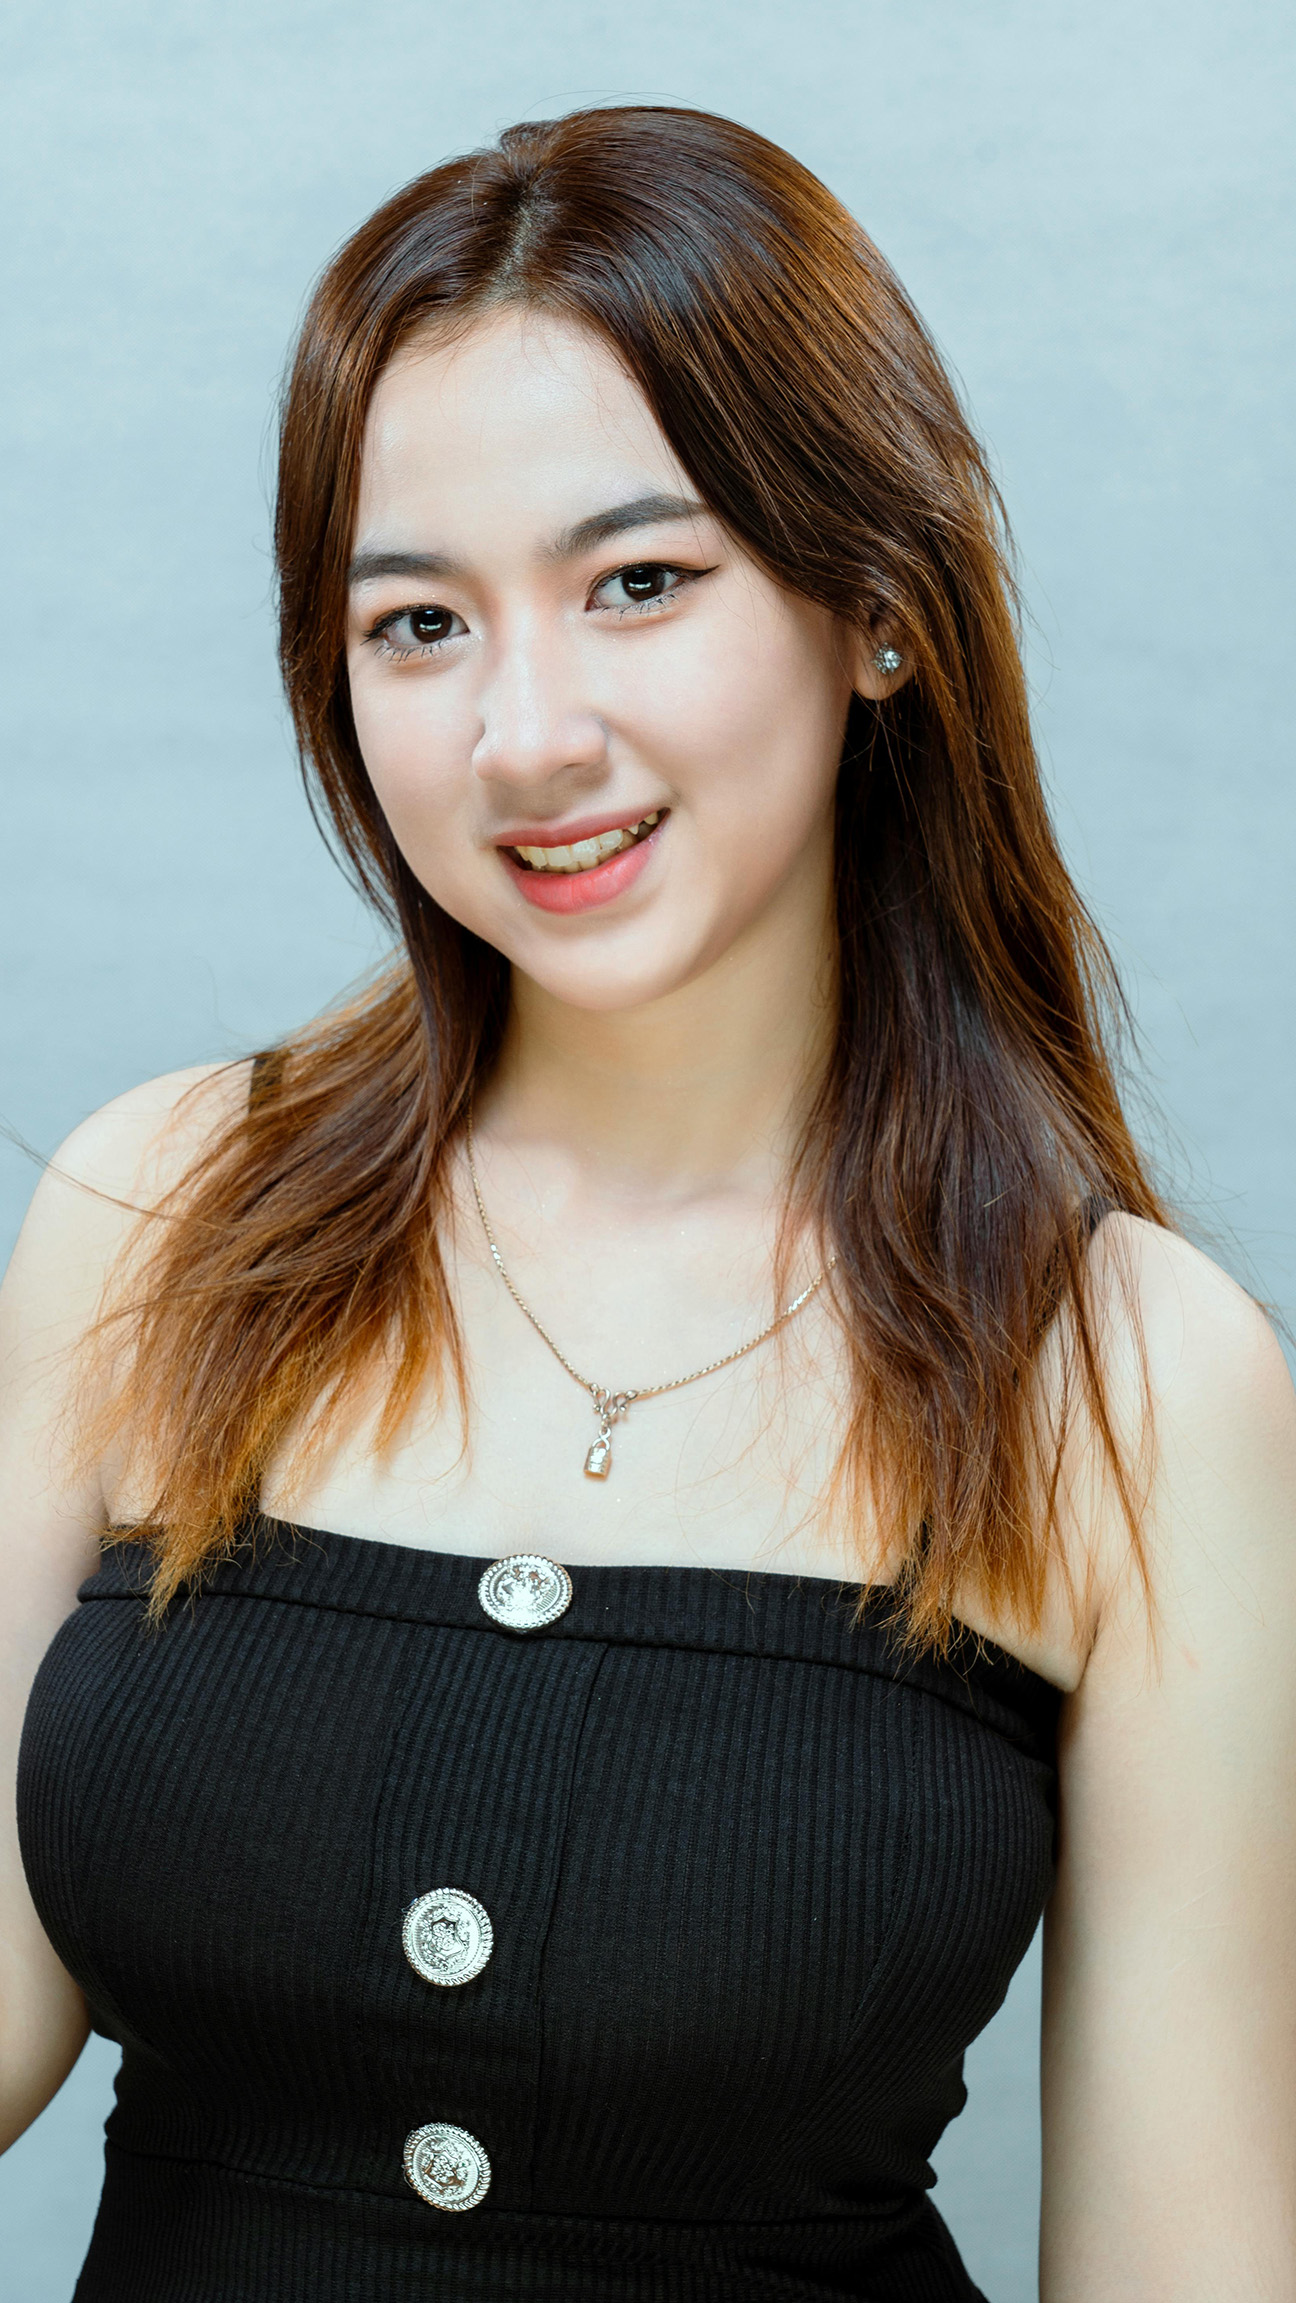
Before and After

More tutorials


