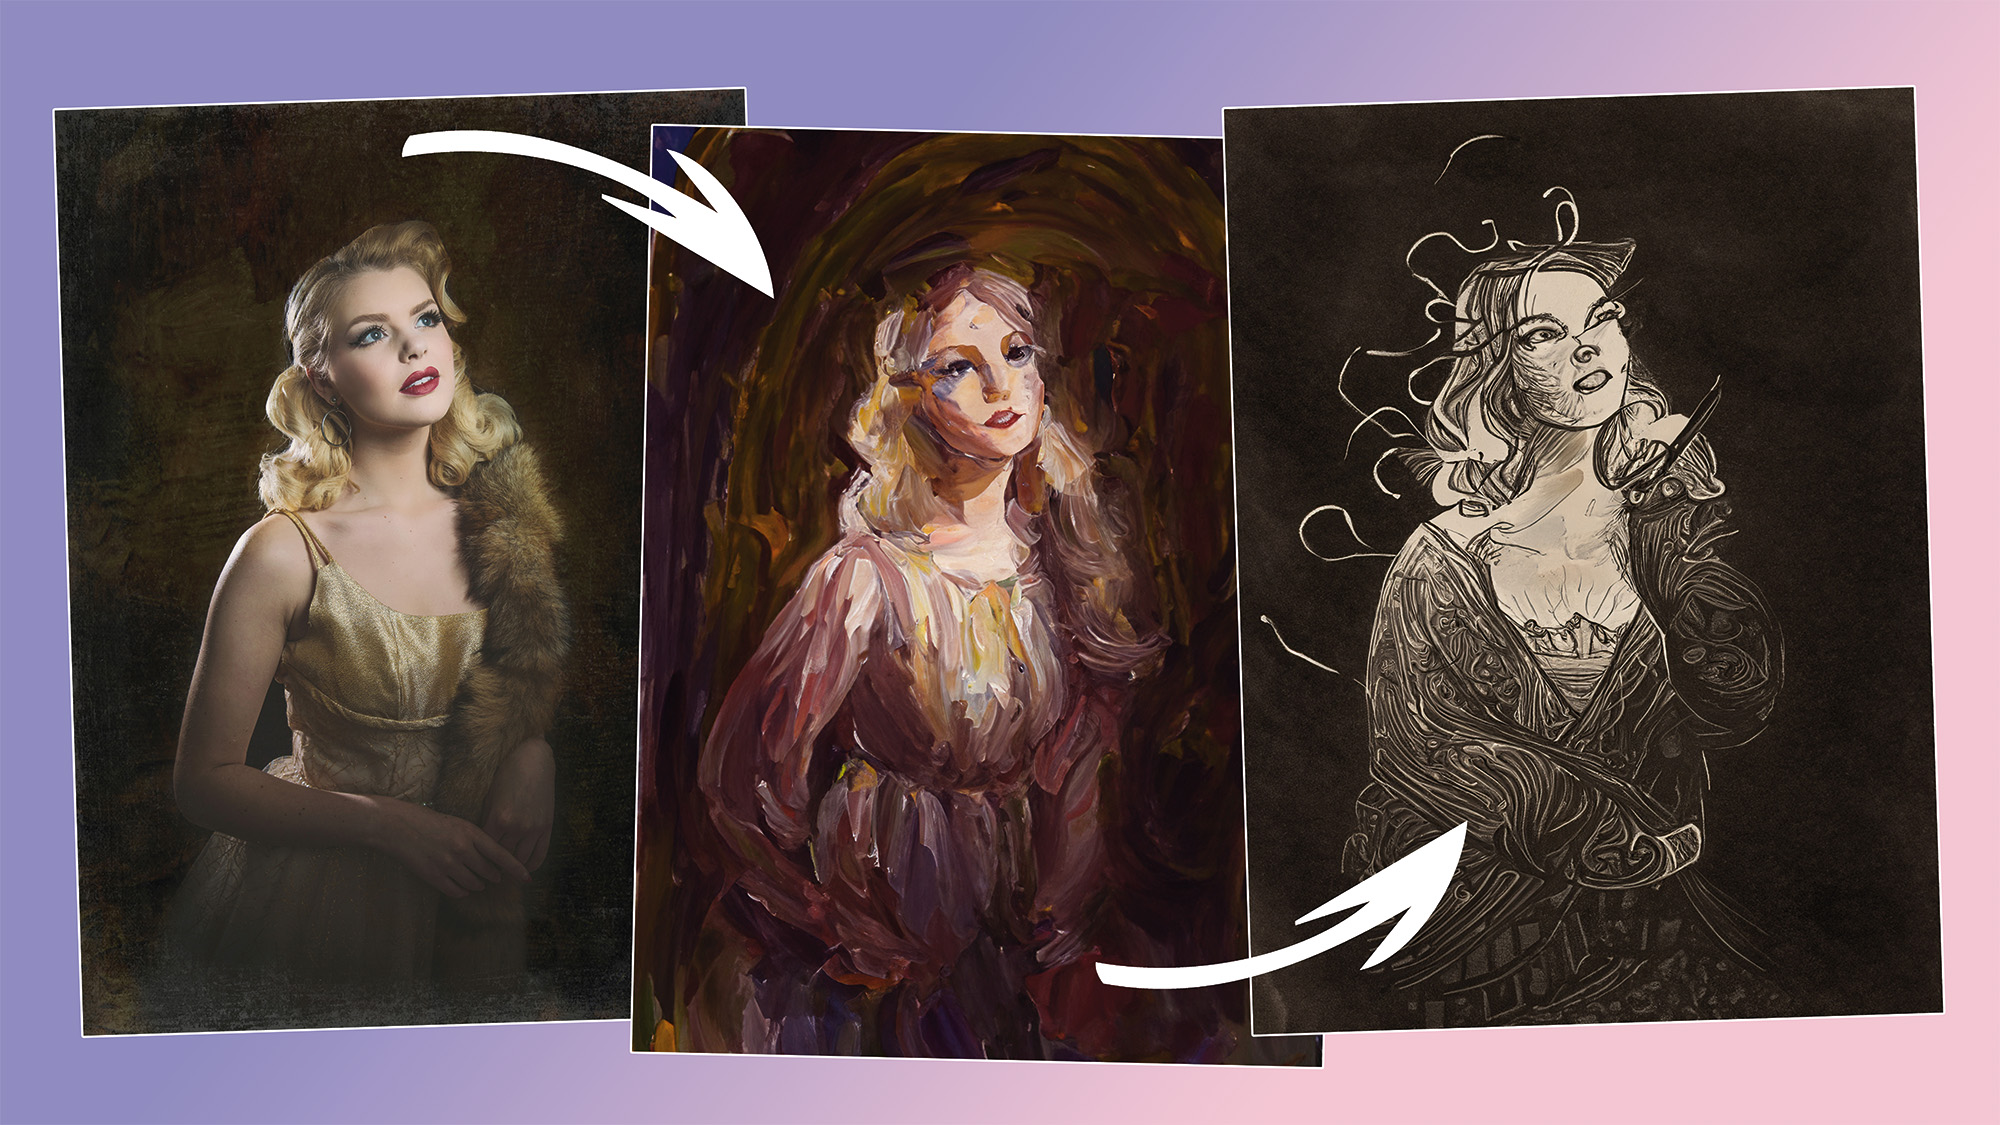
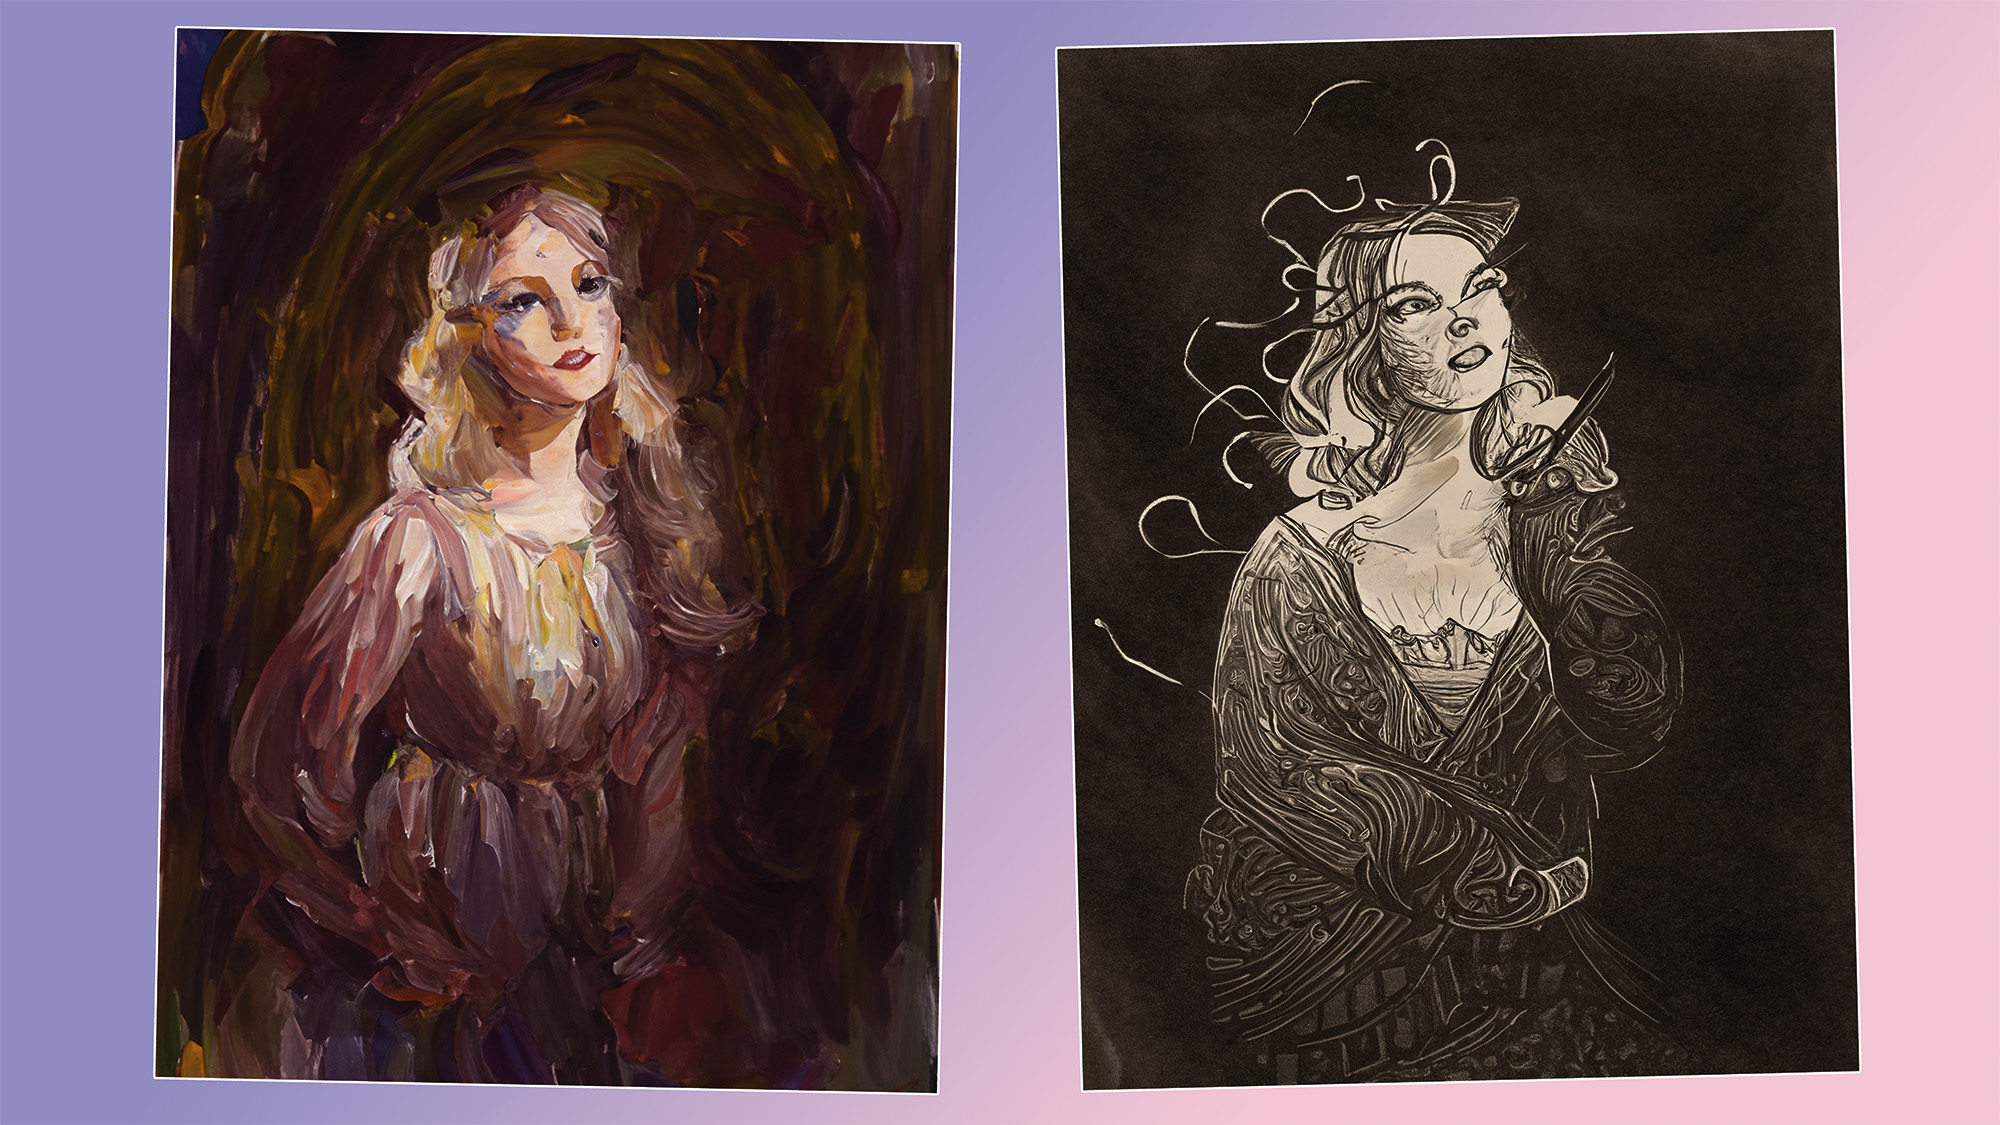
I've found that Adobe Photoshop's Generative Fill can create a variety of convincing artwork styles, in addition to replacing elements and creating entirely new ones. This seems to work best when there’s a central subject, rather than an entire scene, so I'd suggest working with portraits and still-life images where the subject is isolated.
The key is getting the artwork to be based on the photo, rather than something completely random. If the result is too abstract, try changing the Blending Mode to Lighten, Overlay or Luminosity.
So, fire up Adobe's best photo editing software, open a suitable image and let's get started...
1. Create a quick mask
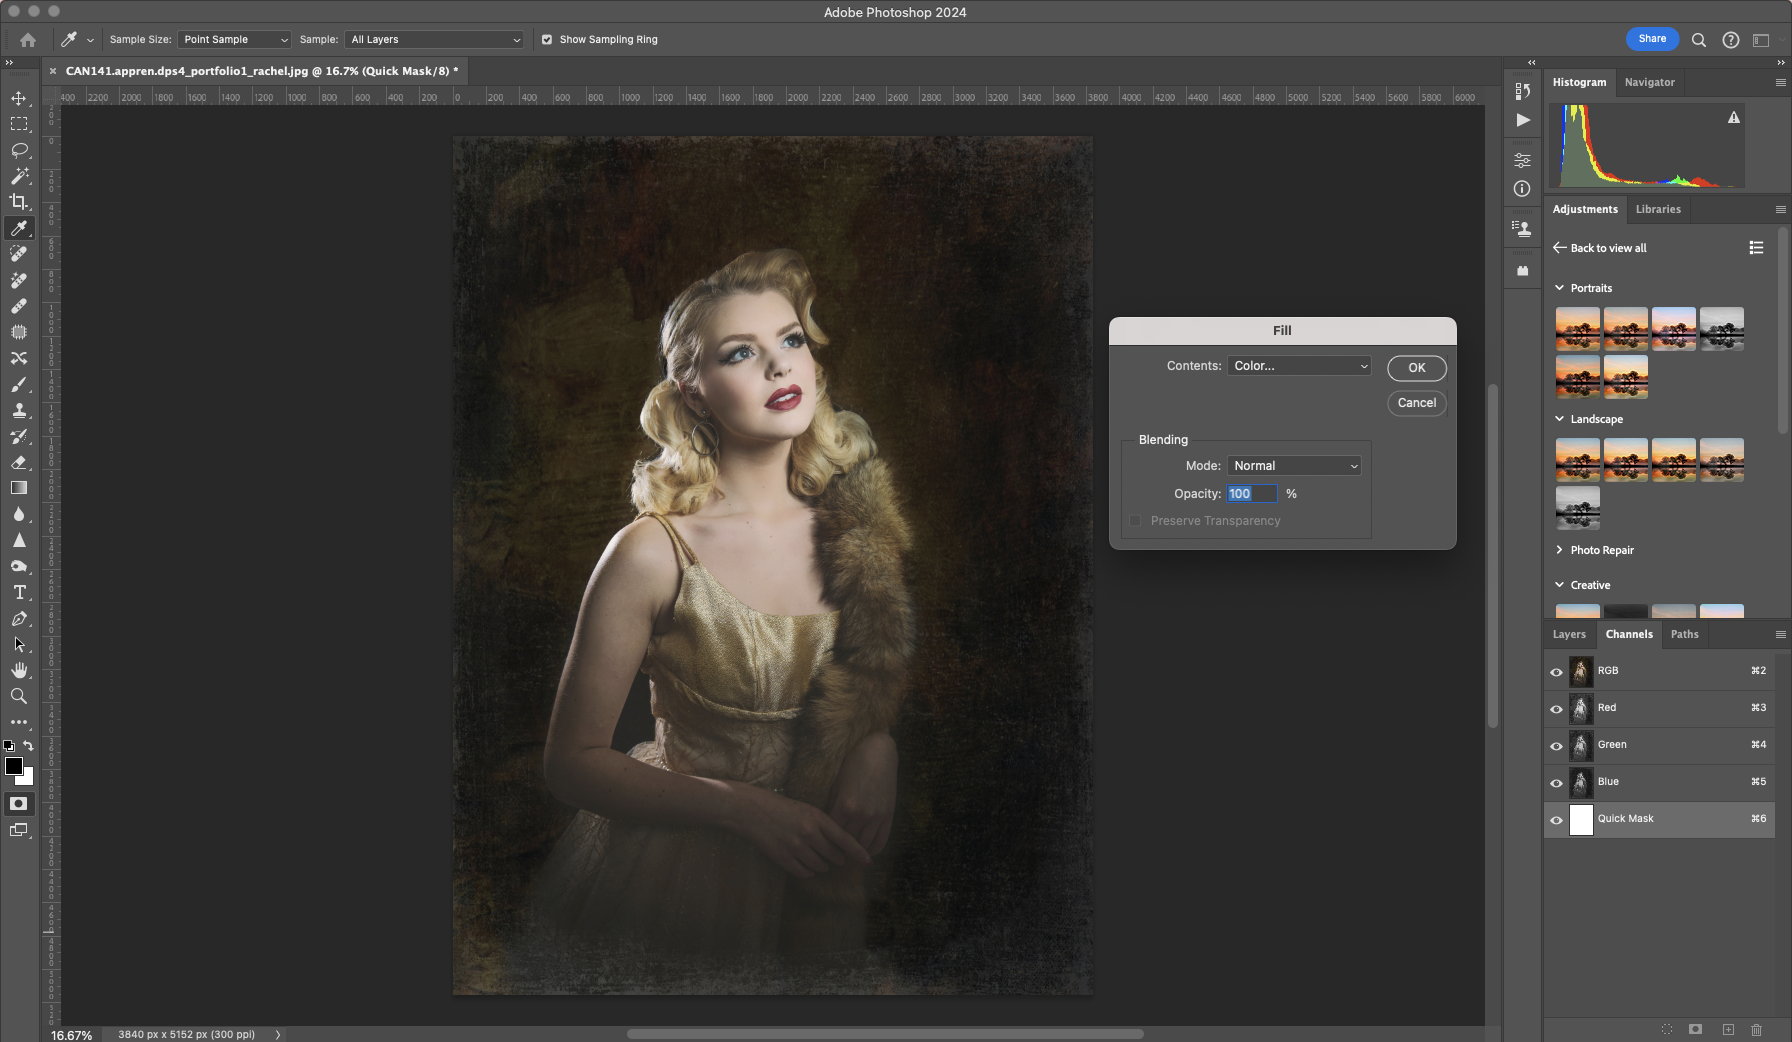
Press 'Q' to activate Quick Mask mode, or go to Select > Edit in Quick Mask mode. Then go to Edit > Fill. Ensure the Opacity is 100%, and the Mode is Normal, then click on Contents and select Color… even if it’s already selected, as doing it again will force the next dialog screen to appear.
2. Make an opaque fill
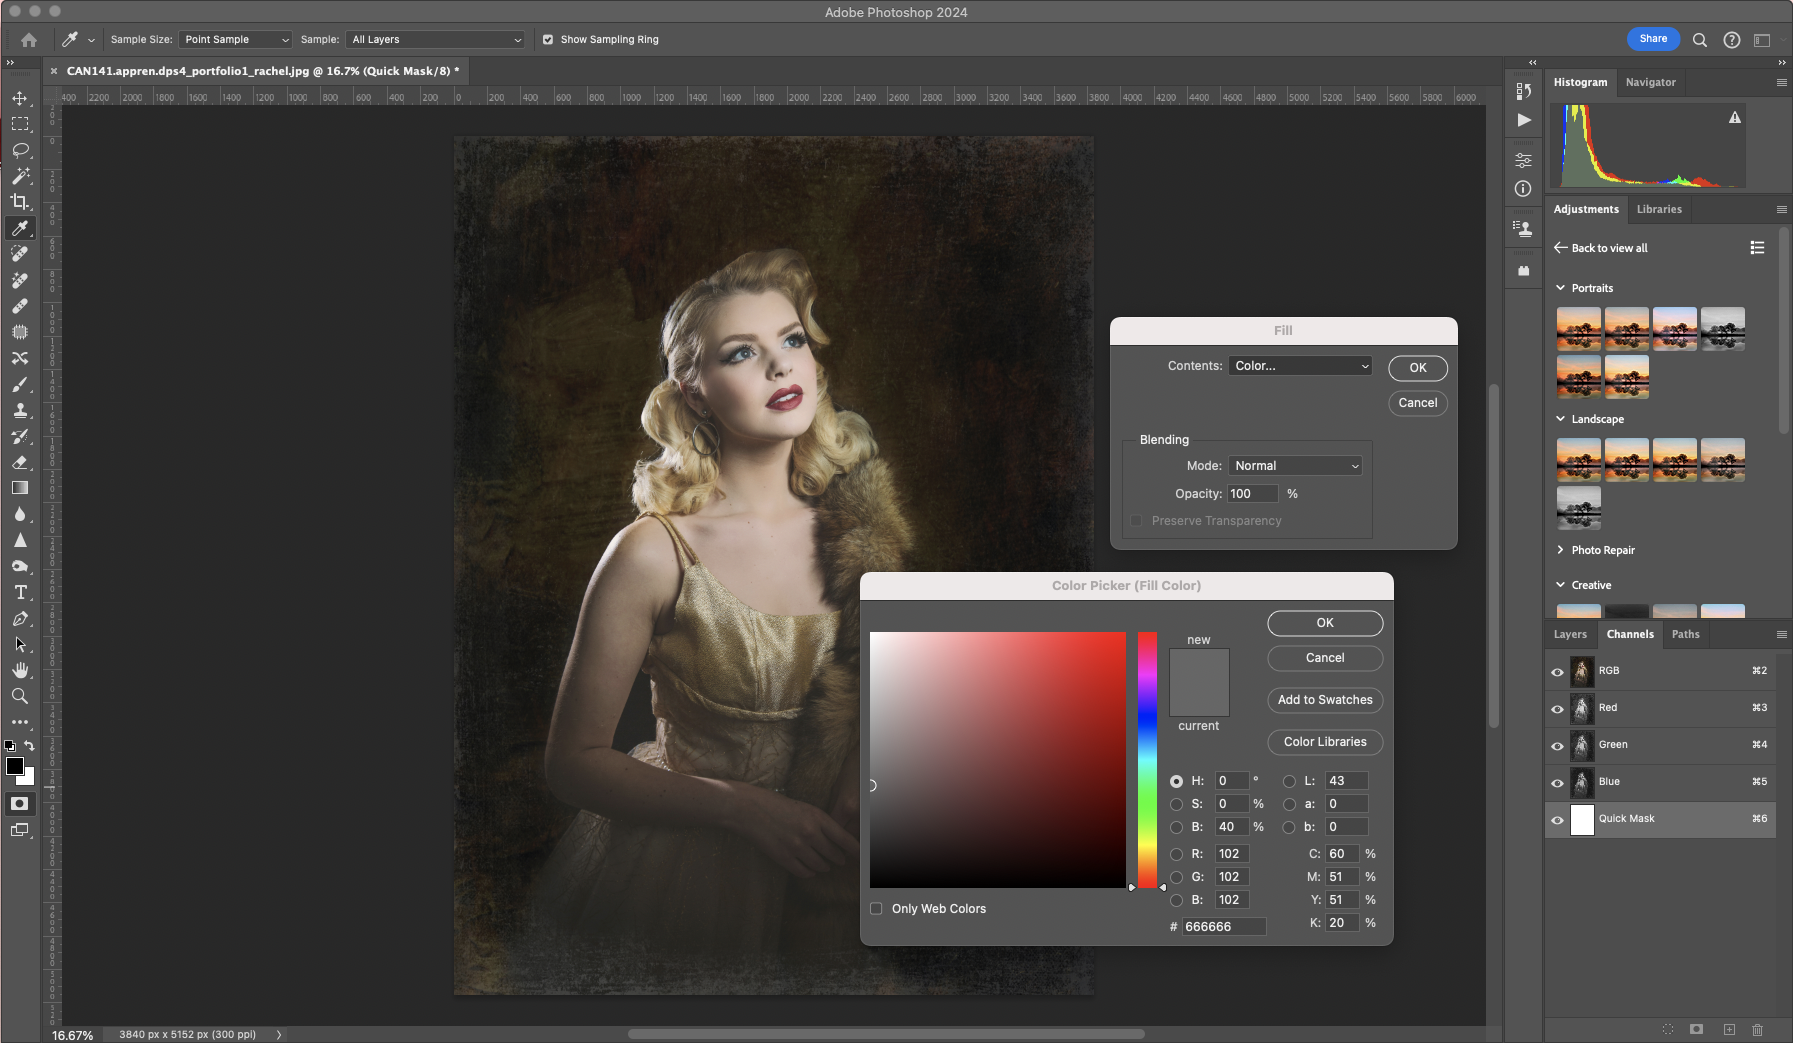
When you select Color… the Color Picker will appear. Enter these values for HSB: H:0, S:0, B:40. Click OK to confirm this, and OK again to apply the light grey fill. The screen will now have a red overlay to show that this has worked. Press 'Q' to exit Quick Mask mode.
3. Try some different styles
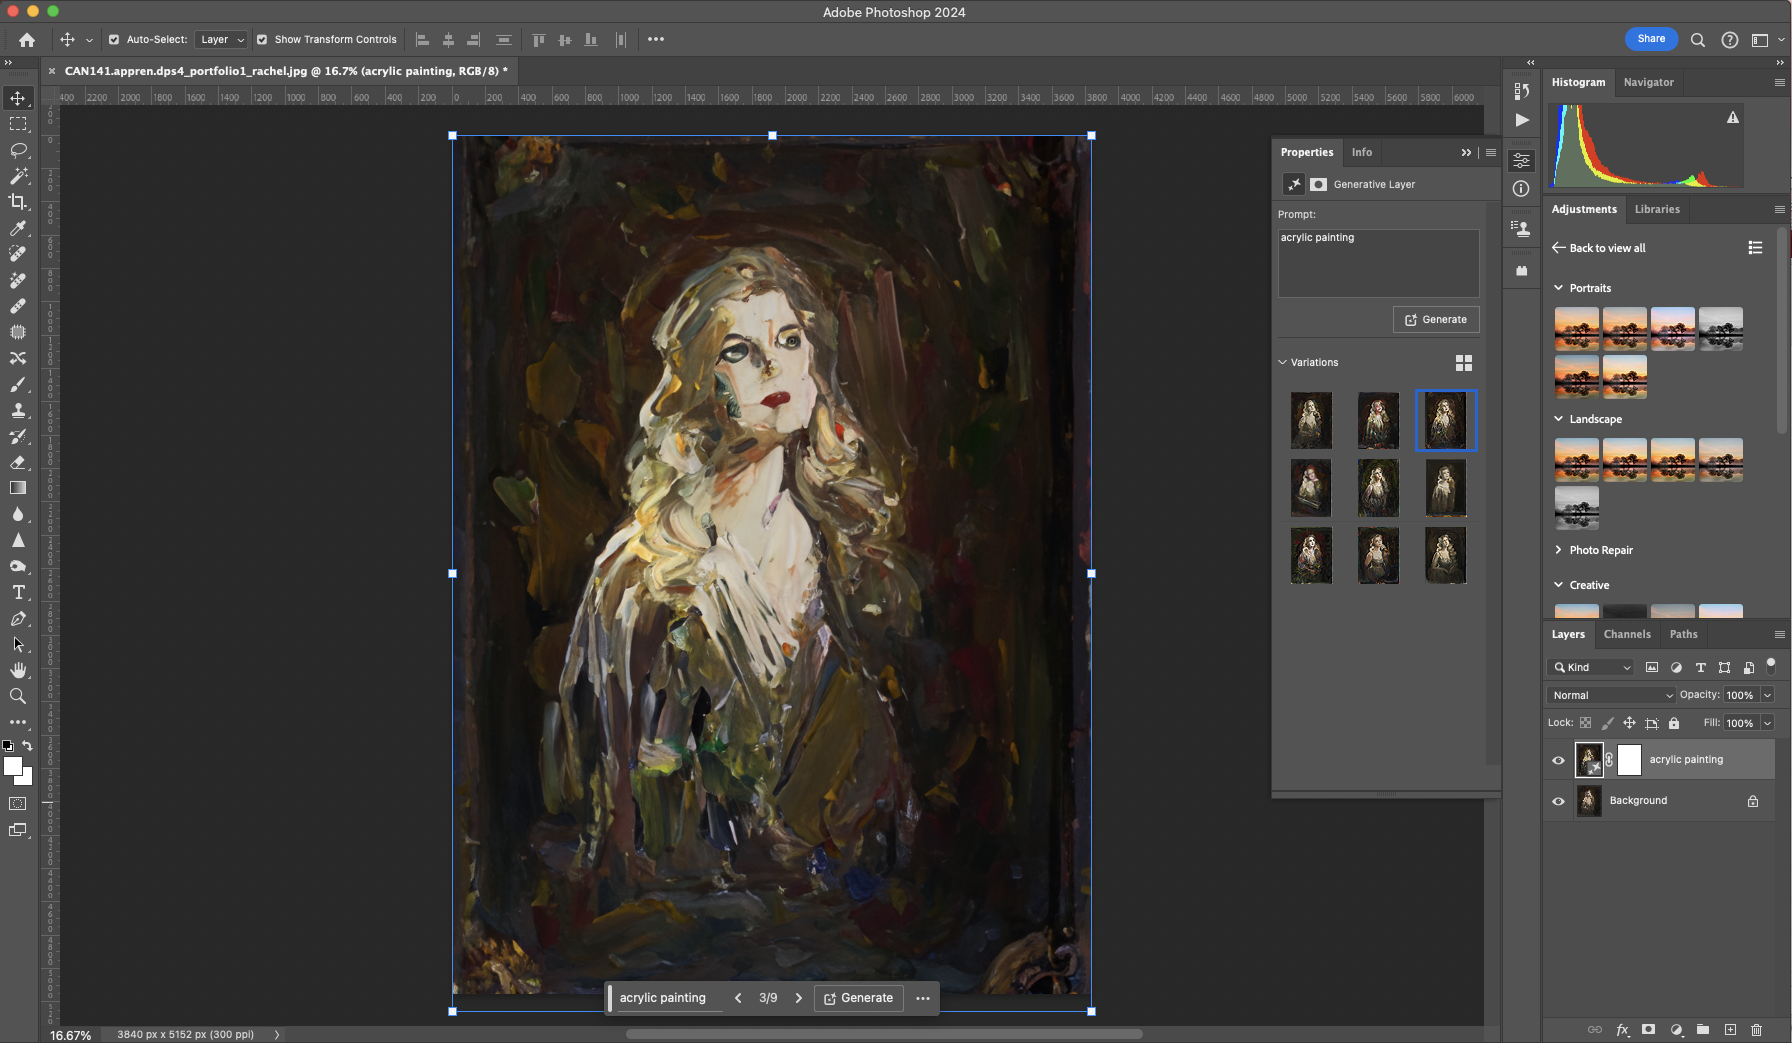
The Contextual Toolbar will now appear. Click on Generative Fill and type "acrylic painting" and hit Return. Photoshop will now generate three artwork versions of the image. Review the thumbnails and click Generate to try new options. Have a go with other key words like "oil painting" or "crayons".
You may also like...
Into AI? Check out the best AI image generators. But if you're more of a traditionalist and would like to supercharge your editing skills, take a look at the best Photoshop tips. Finally, if you'd like to create digital artworks by hand, you might want to pick up one of the best drawing tablets for photo editing.


