Autumn has turned into winter, bringing with it colder temperatures, later sunrises, earlier sunsets and an increase in activity in our gardens.
Step out of the backdoor into your garden and you’ll likely be greeted by a fantastic display. Tiny spiders weaving their intricate, beautiful webs adorn your shrubs and trees and, if you don’t have a garden, a short walk to a local park or nature reserve will present you with plenty of chances to capture a webbed wonder with your camera.
Watch video: Spin a wicked web this winter
Now, simply pointing and shooting at a web may return results you won’t be pleased with. Instead, a little consideration into lens choice and other factors will elevate your images into something worth sharing. By their nature, Spider webs are small and easy to miss, particularly if your framing is somewhat on the loose side.
This is where a macro lens can come in handy – most offer a 1:1 magnification ratio so your subject is captured in ‘real life’ size, enabling you to get in much closer than you thought possible. Macro lenses can be expensive, but one solution (even if you are using an RF mirrorless camera) is to pick up used lenses like the EF 100mm f/2.8 Macro. Mirrorless shooters can make use of these EF lenses when paired with an appropriate adaptor, and this older glass represents good value for money. However, if you don’t have a macro lens, even the long end of your kit lens will suffice as these can typically focus to around 25cm from a subject.
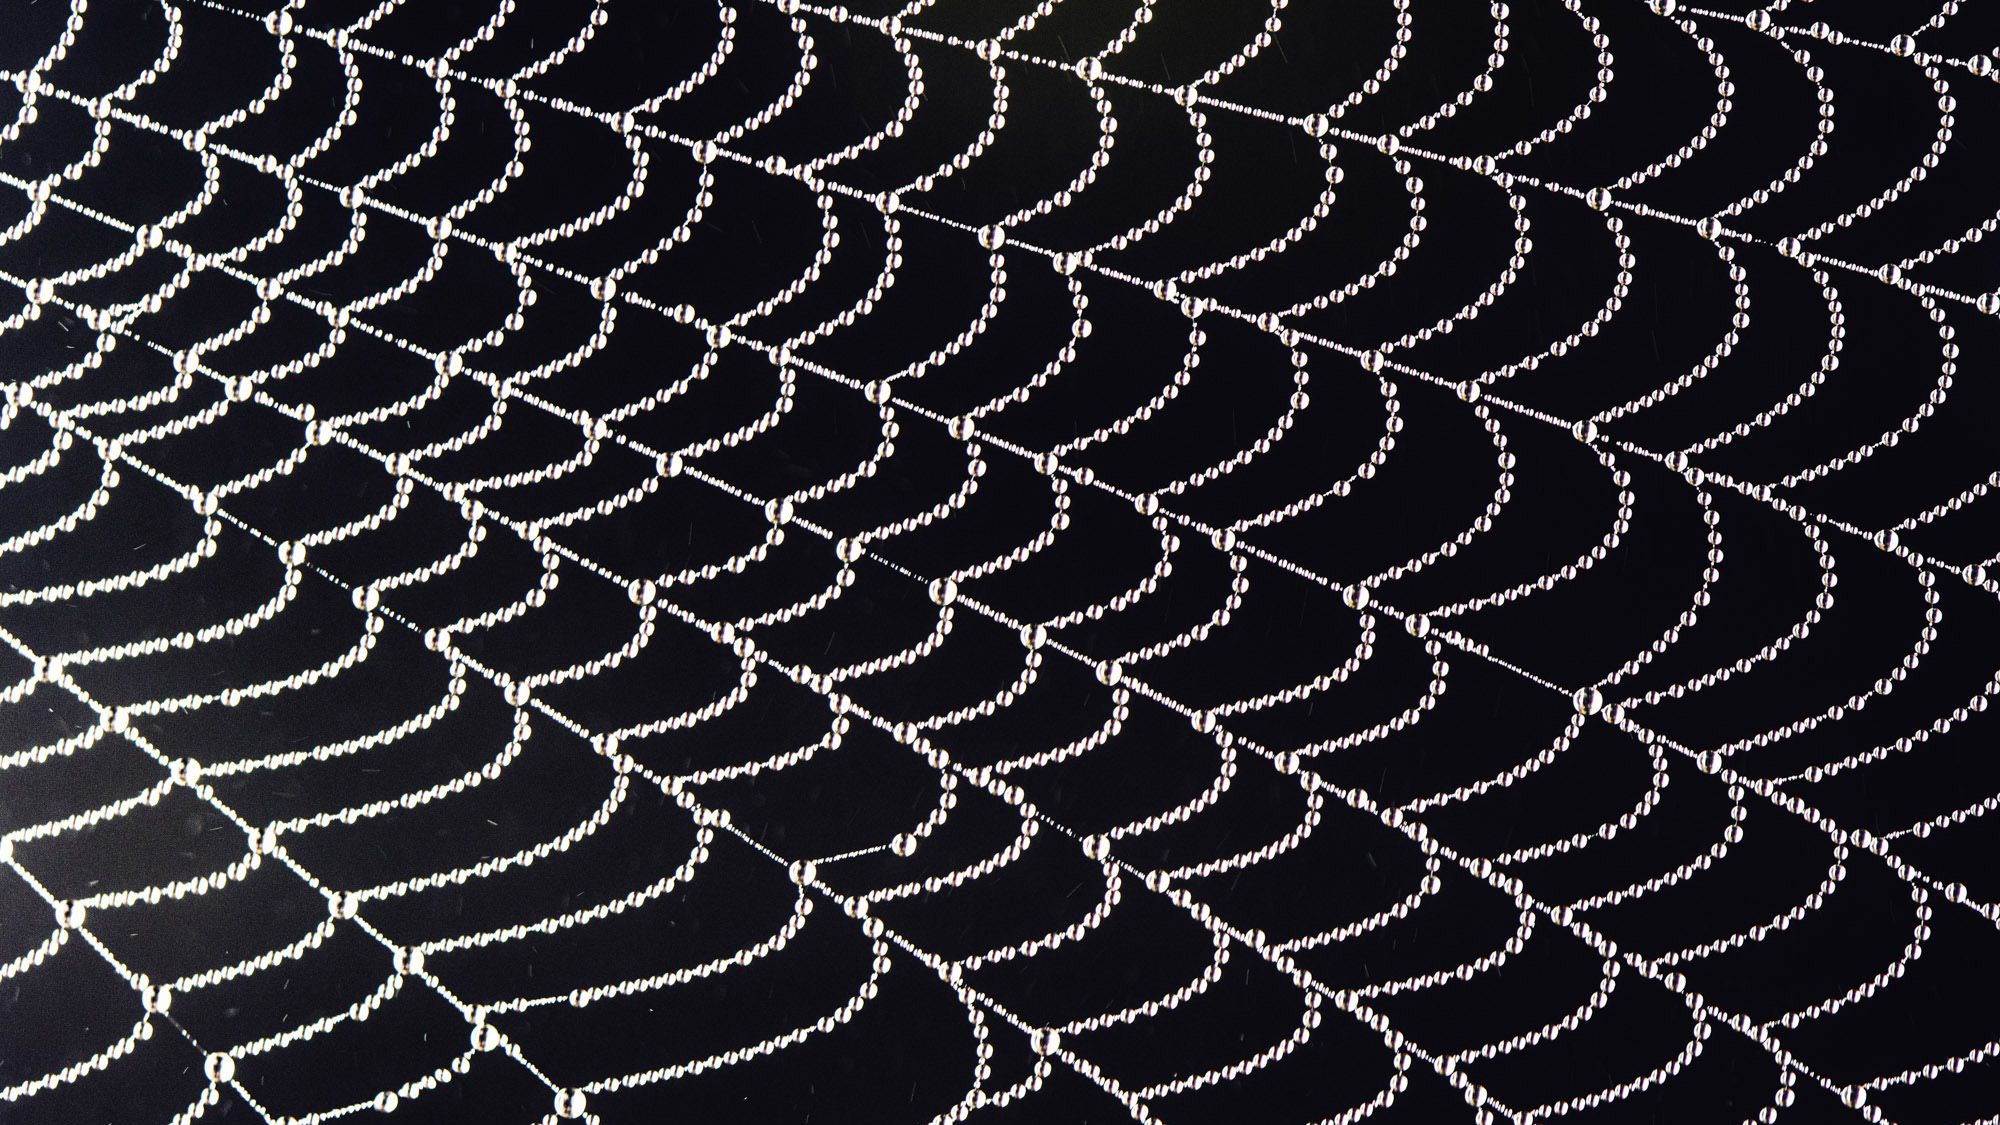
Adding the final layers of craft and polish to the photo may require some DIY ‘special effects’, and for this, you will need nothing more than a water sprayer bottle, which will help replicate the look of morning dew.
1. Use a tripod
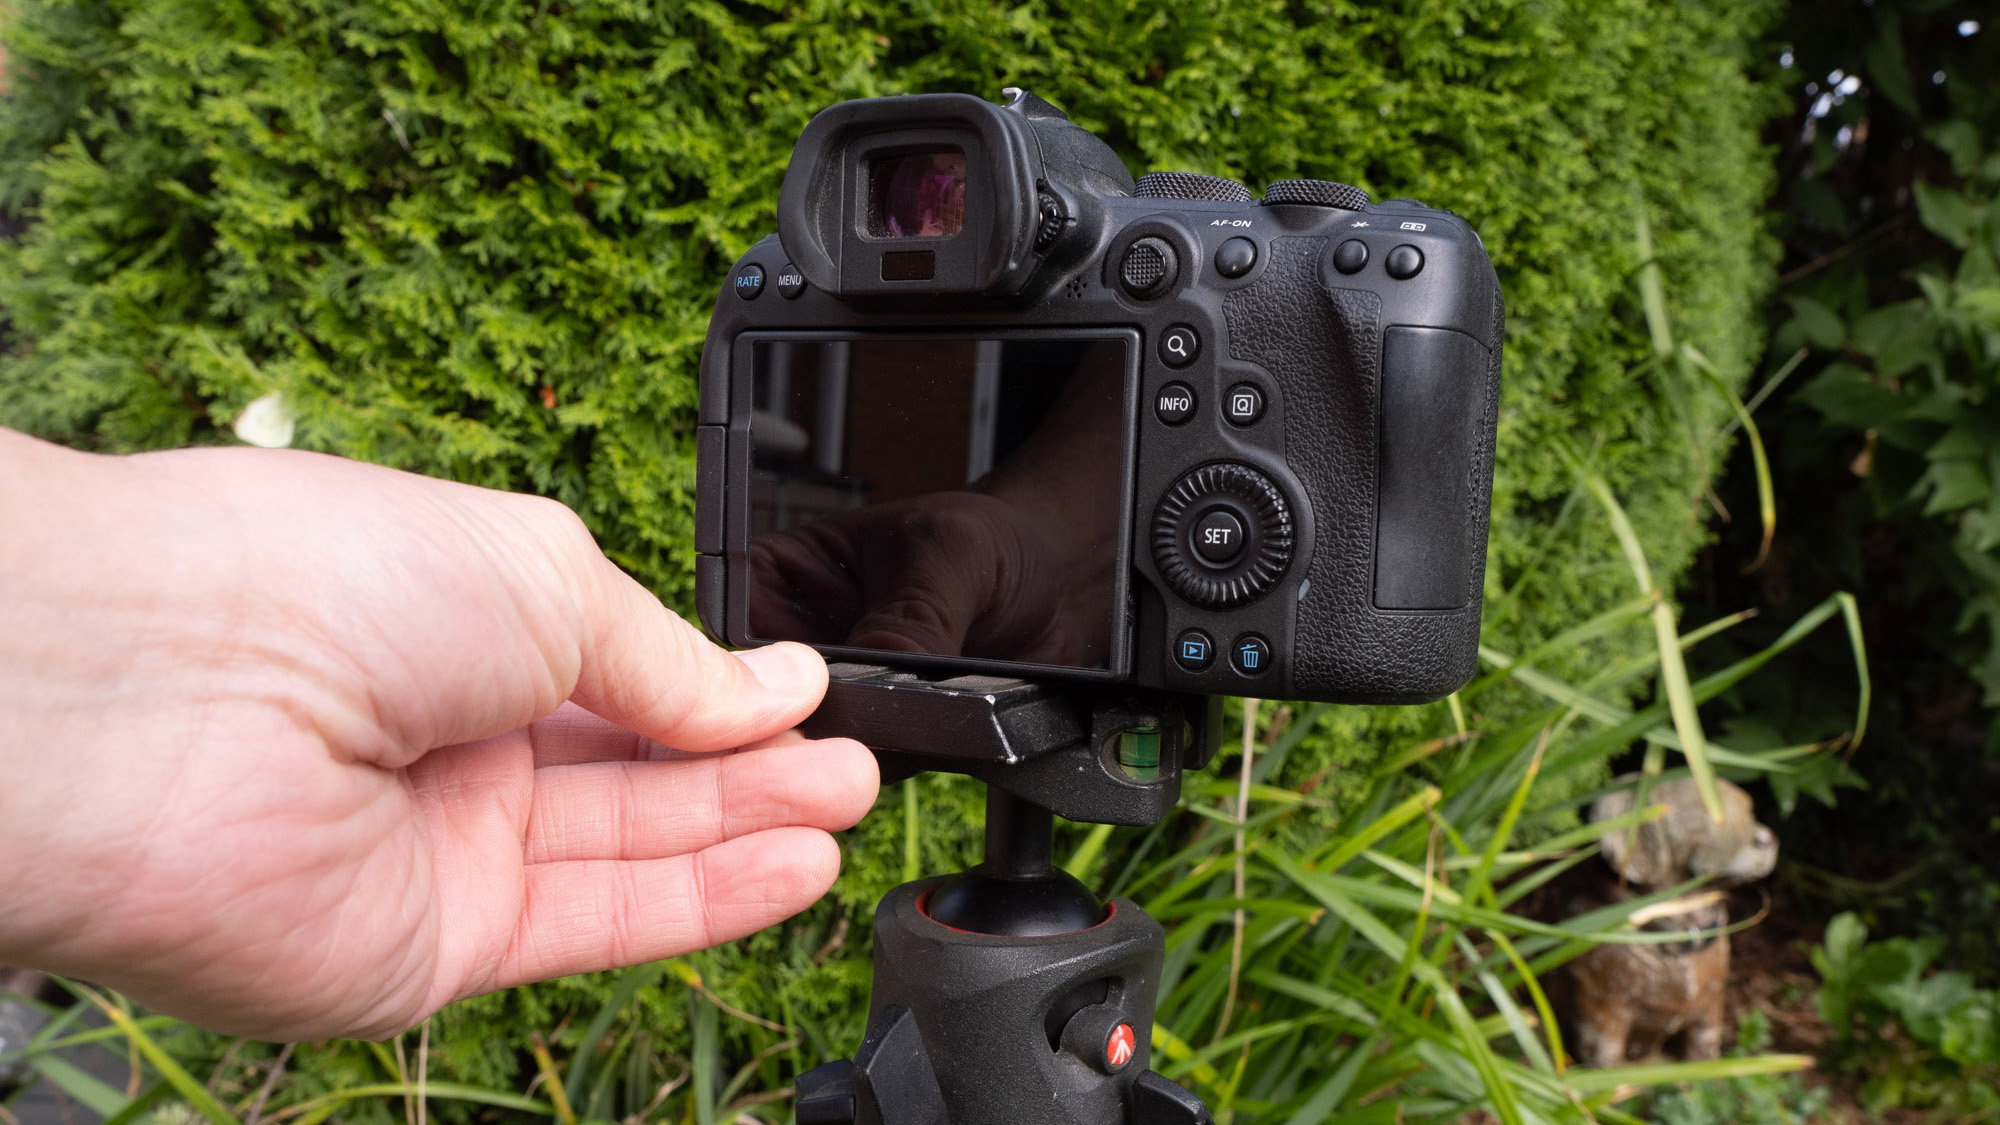
You’ll be making fine adjustments to the focus and composition as we’ll be fairly close to our subject. Make your life easier by attaching the camera to a tripod so you can keep everything steady and take your time to achieve the perfect composition.
2. Dial in your settings
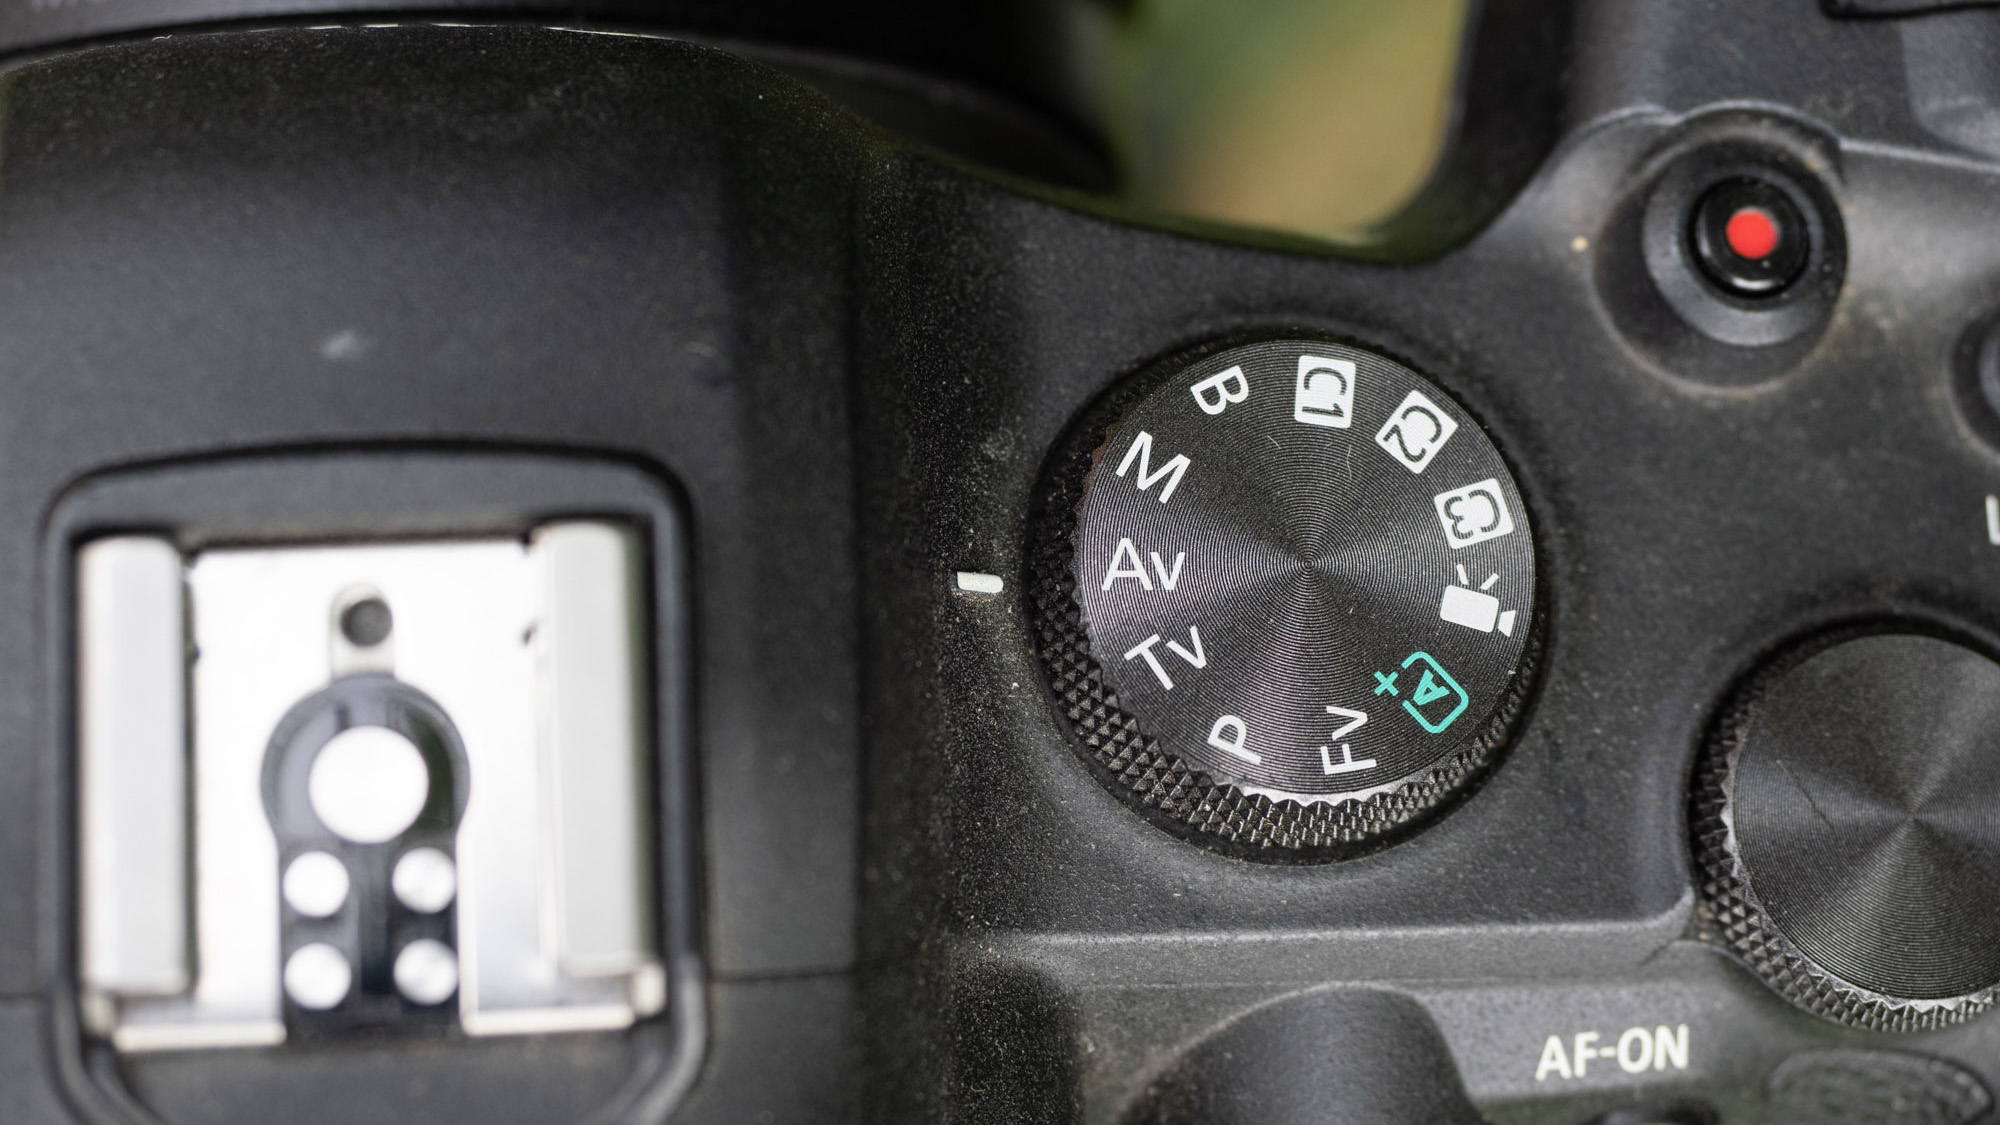
Select Av (Aperture Priority) from the mode dial. In this mode, you select the aperture and the camera works out the shutter speed for you to deliver a correctly exposed frame. Select f/4, which will blur the background without softening your subject too much.
3. Take control of focus
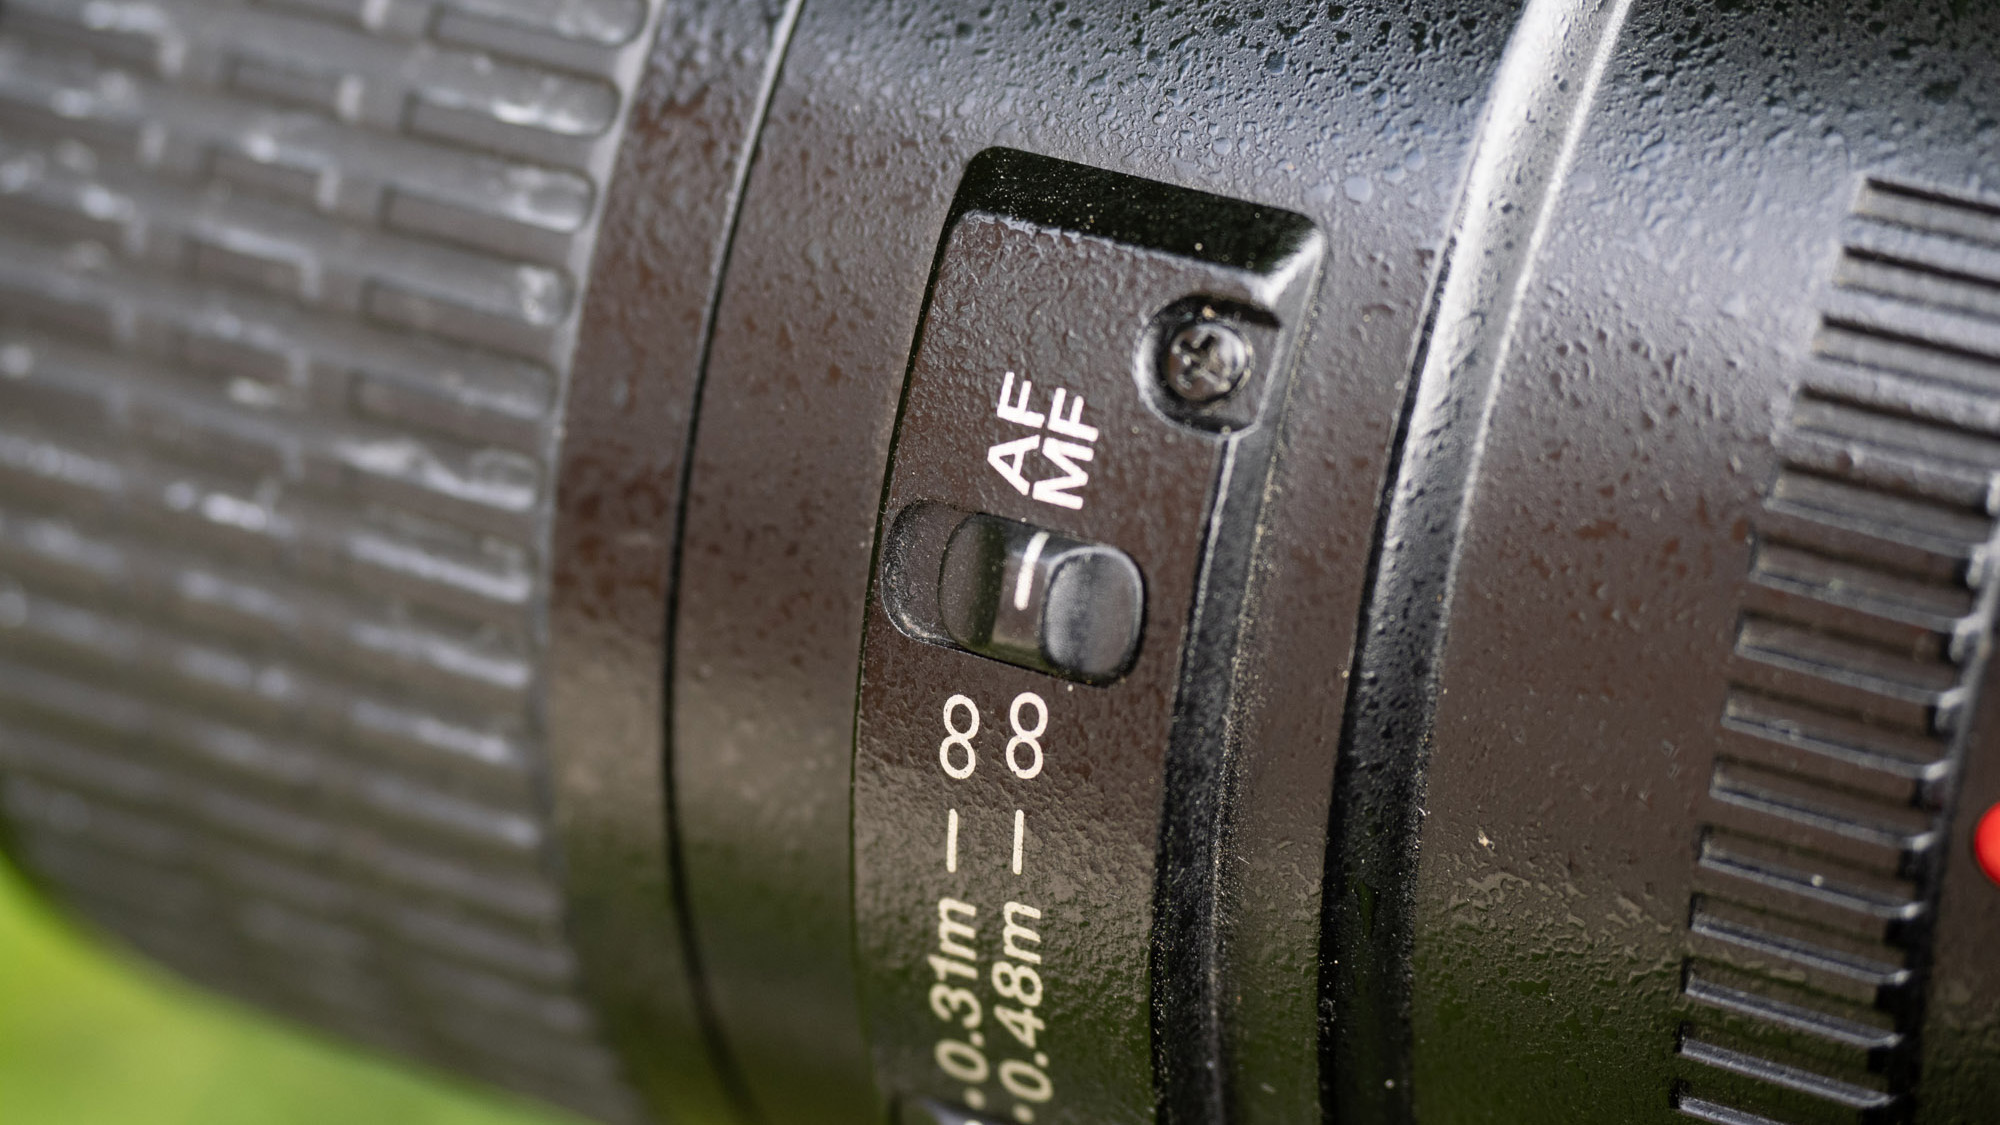
While Canon cameras offer exceptionally accurate AF systems, there’s no substitute for Manual focus when it comes to precision for macro photography. Switch between AF and MF modes using the switch on the side of the lens.
4. Get a little help to focus
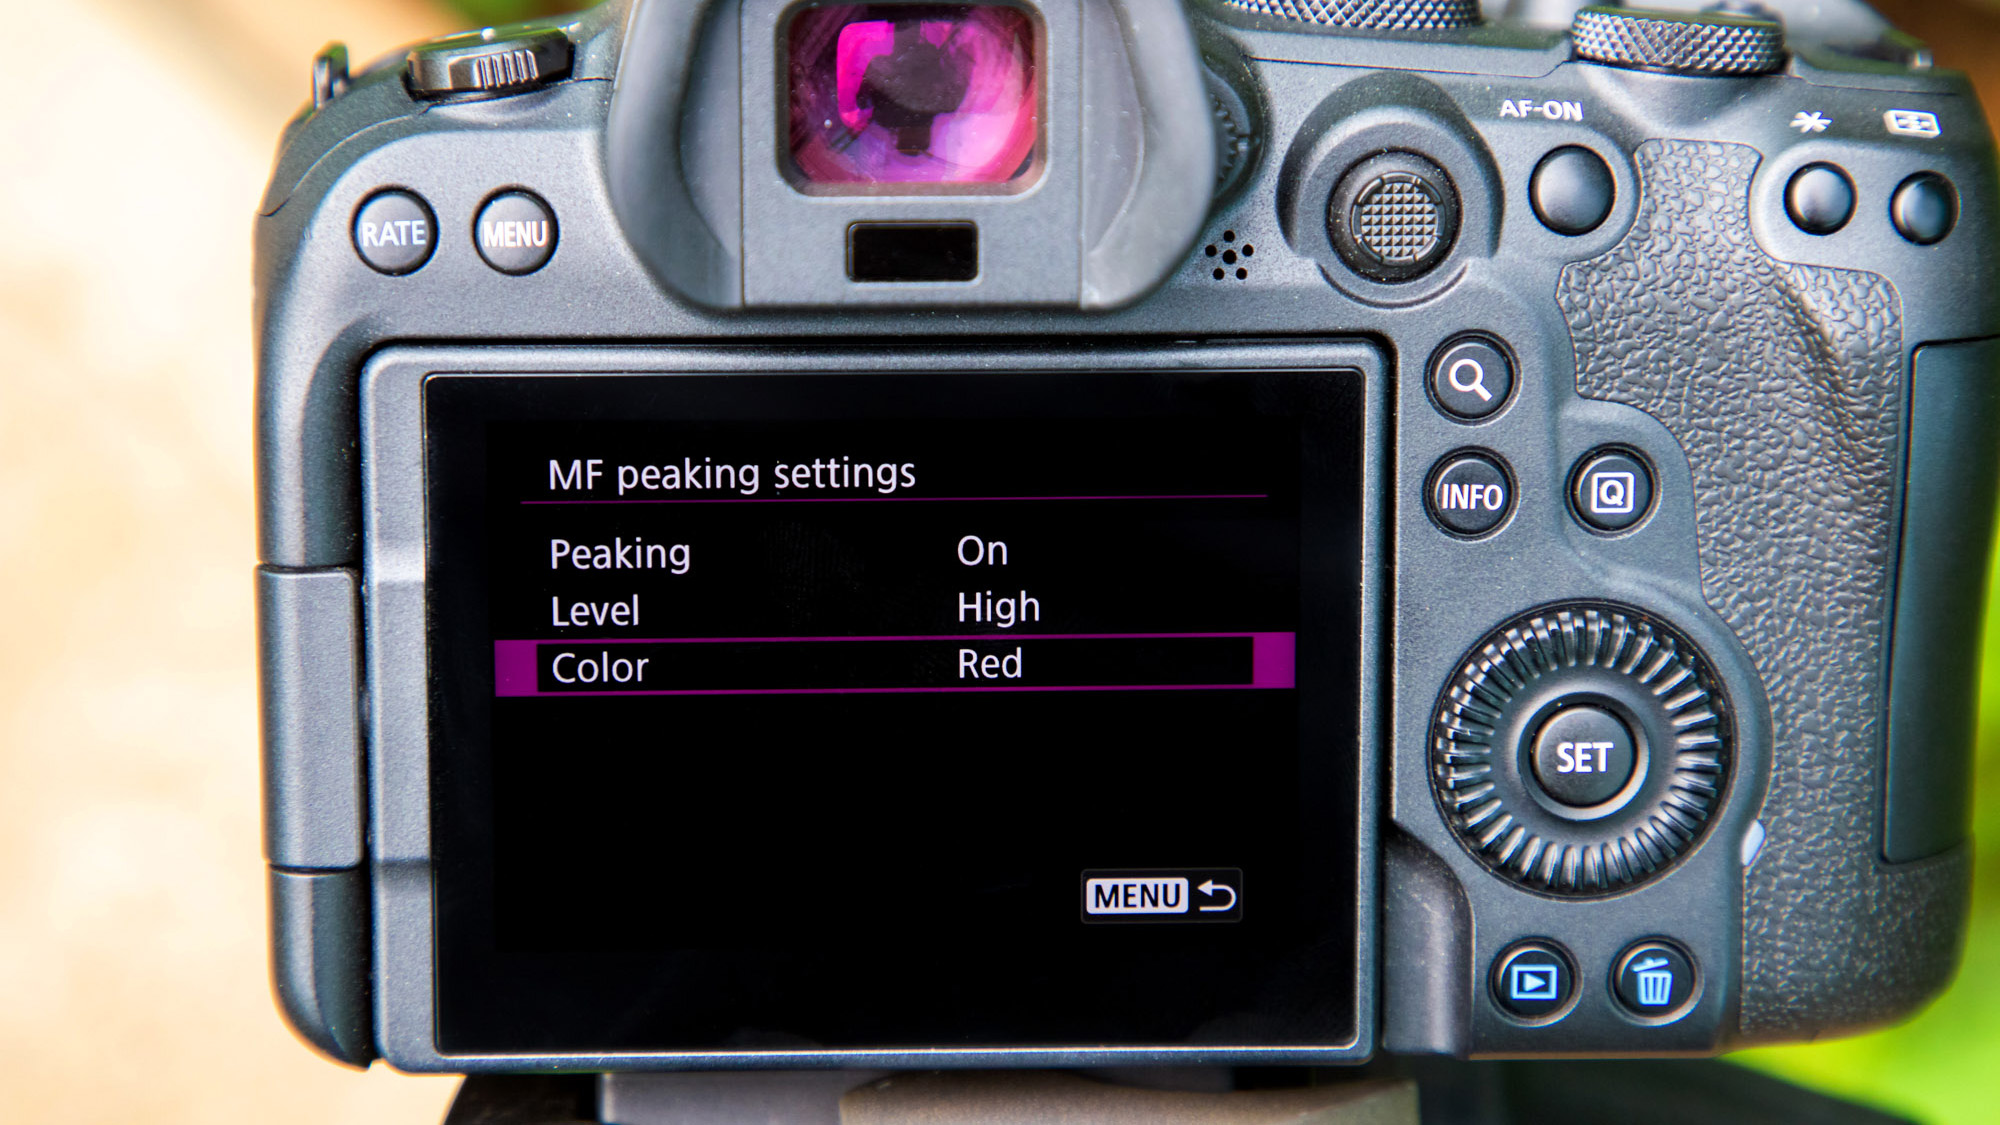
Some Canons feature Focus Peaking. This feature will highlight where the focus is in the frame with a colourful overlay on areas of contrast. This will help you really take your time to make sure the thin lines of the web are properly in focus so they are pin-sharp in your photographs.
5. Unleash the spray
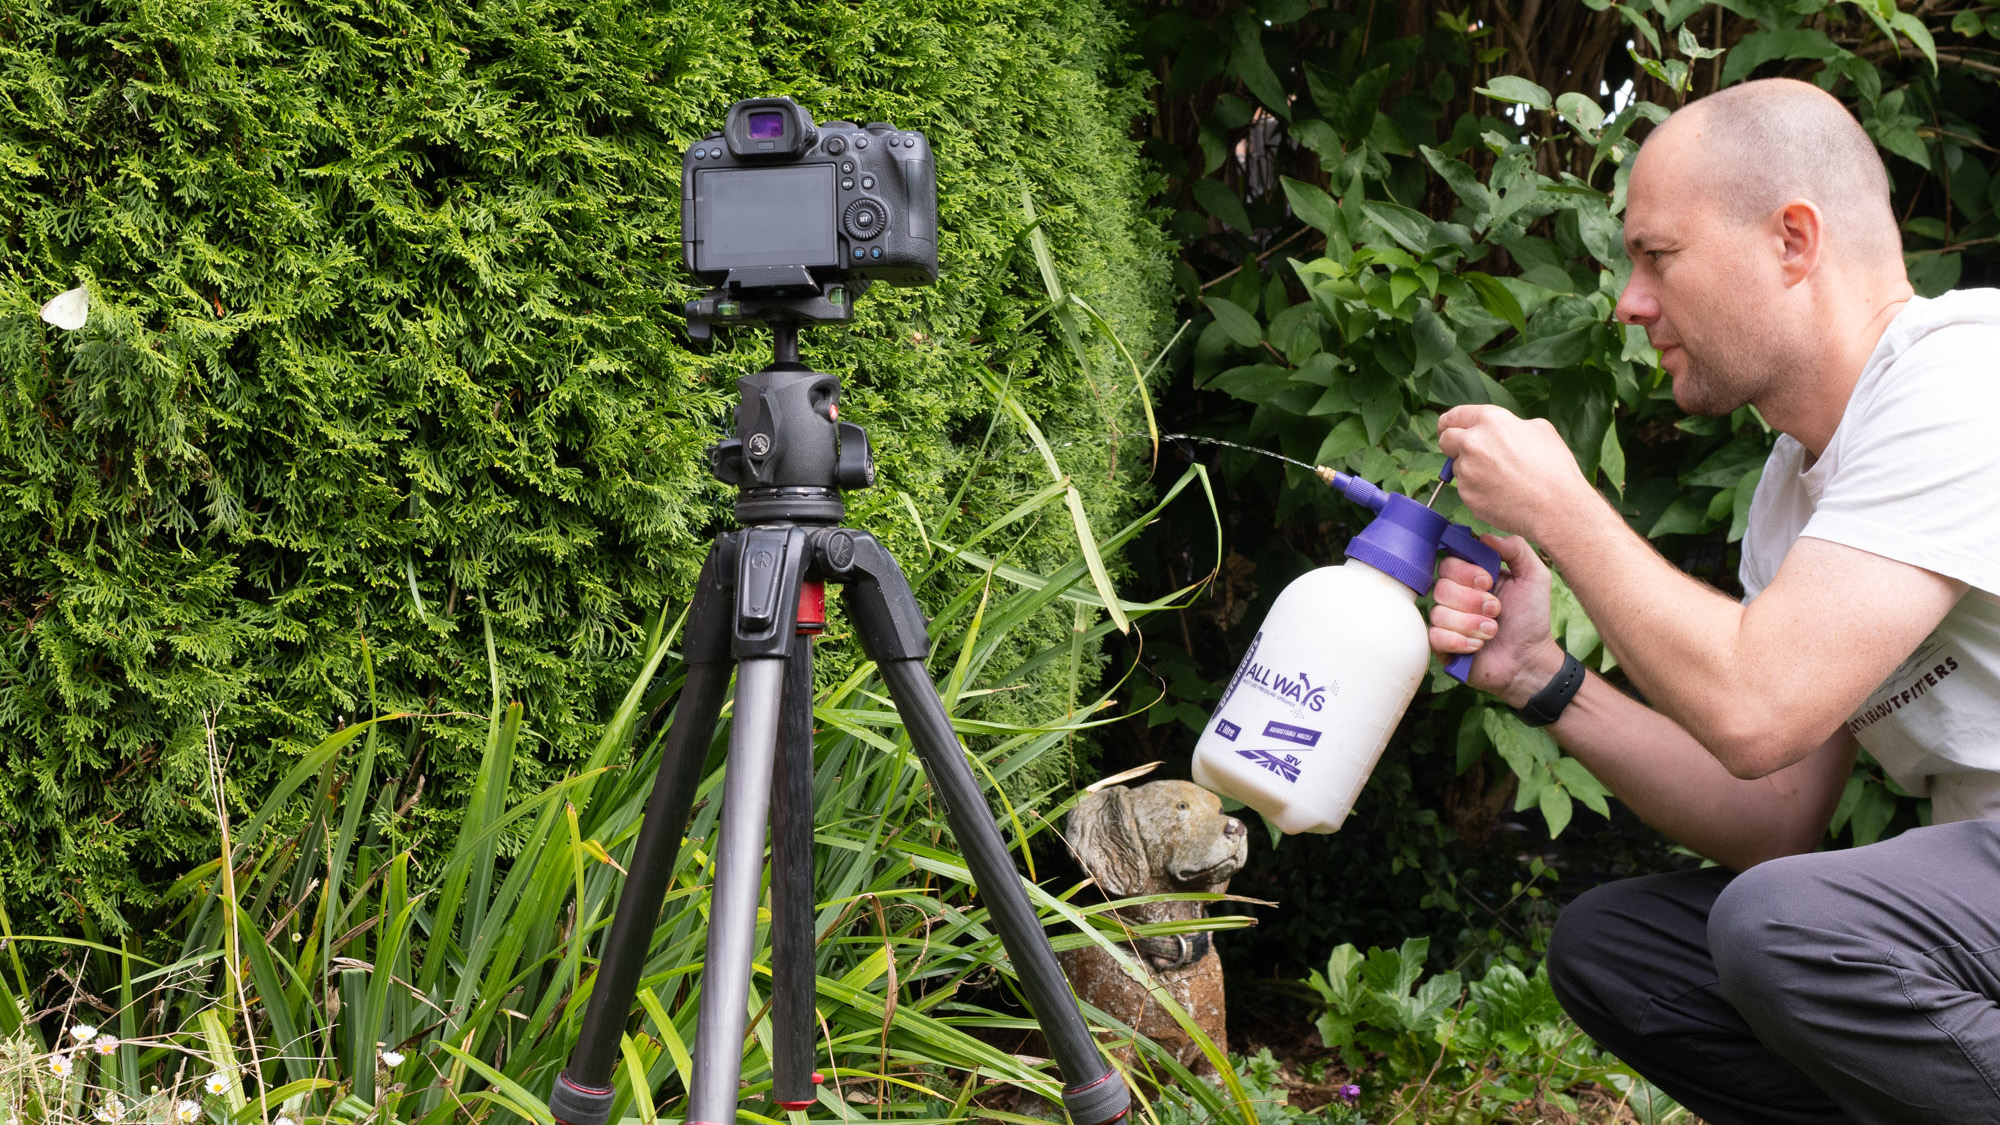
Wait until the last moment before giving your web a spray with a mister bottle. Take your image quickly before the droplets disappear and fall from the web. You can also activate the 10 Sec Self-timer mode to free up your hands so that you can spray your mist while the camera fires.
6. Add some punch in post
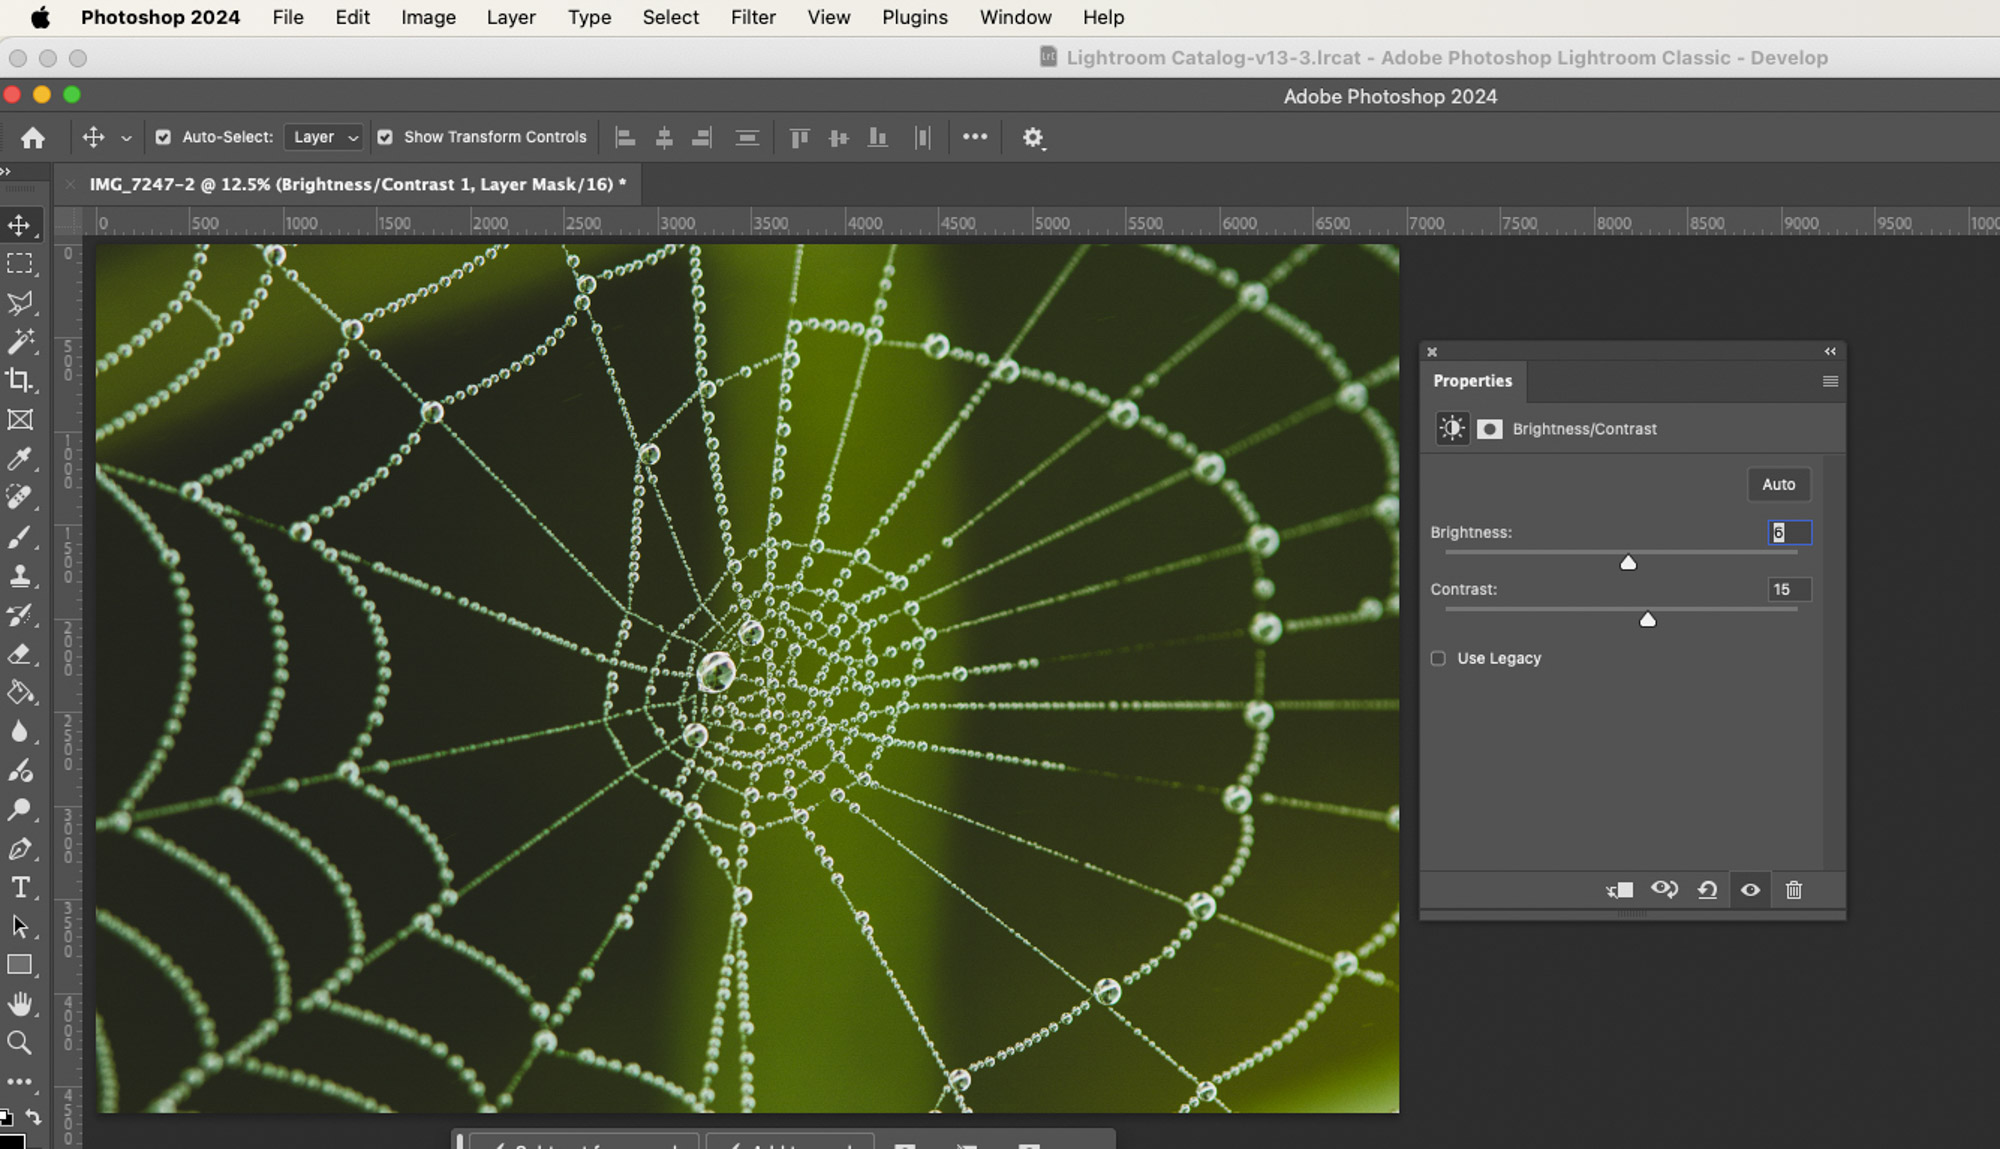
The fun doesn’t have to stop when the shutter is clicked. If you have image-editing software such as Photoshop CC you can take your images further. Here, I boosted the sharpness and contrast to help the web pop from the background, and I balanced the exposure, too.
If you're serious about scenery, take a look at the best cameras for landscape photography along with the best lenses for landscapes.