Two-minute review
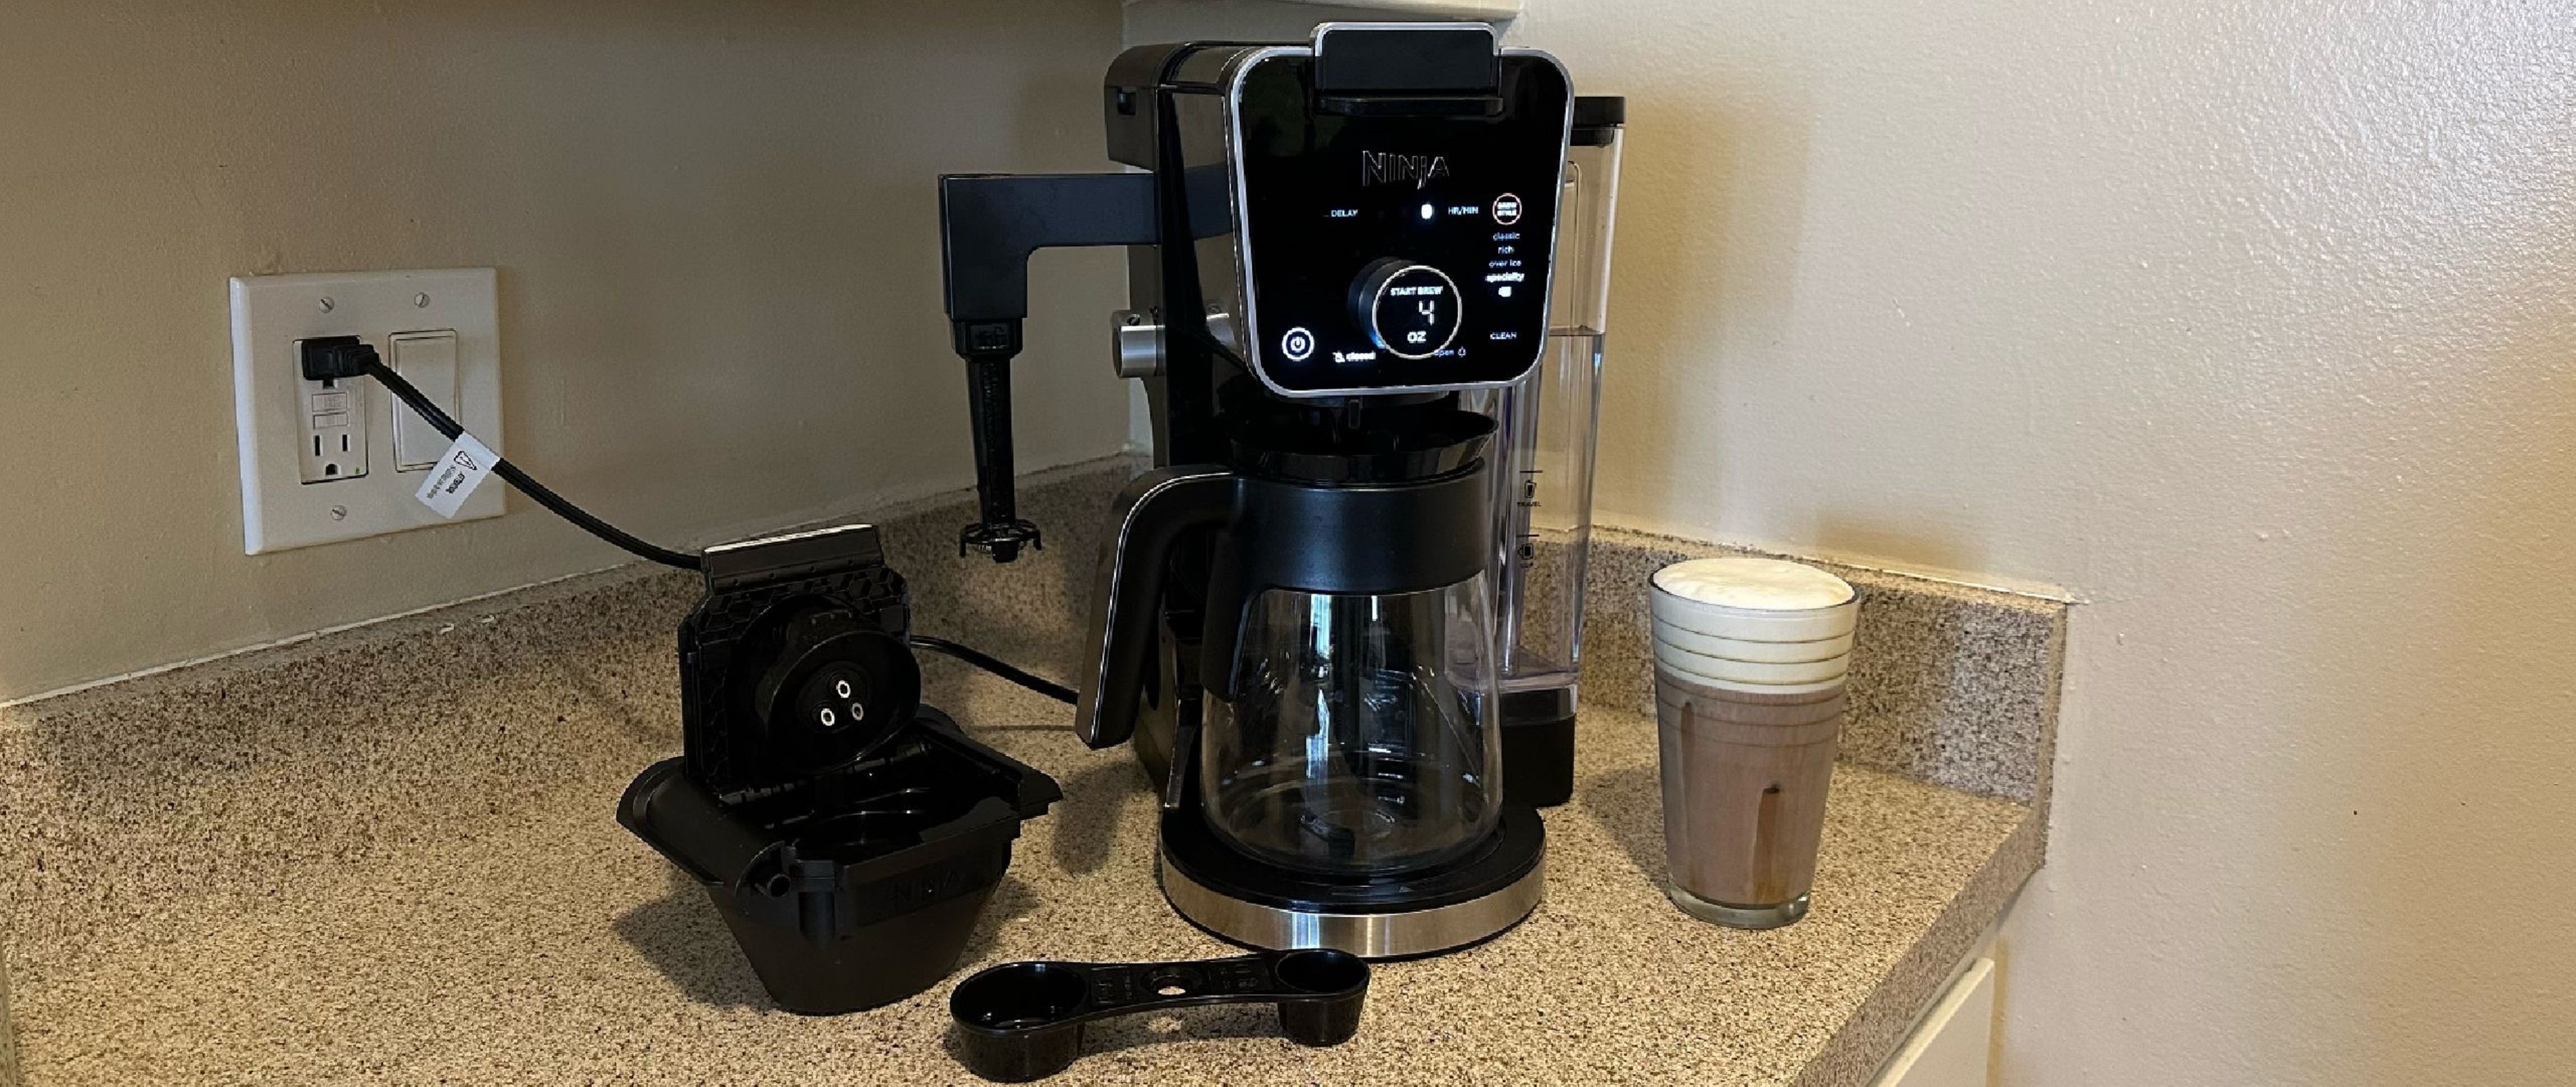
The Ninja DualBrew does a whole lot more than just brew your typical carafe of coffee. You can set the machine to make smaller amounts of coffee for individual servings, or it’ll make a specialty espresso-like brew. That’s not all it’s capable of, as you also get a K-cup pod adapter to use K-cups with the coffee maker rather than coffee grounds and a filter. To top it off is a hot water feature and a milk frother to make foam for drinks.
This isn’t Ninja’s first foray into the coffee maker game. The brand that’s synonymous with making quality and affordable smaller kitchen appliances has ventured into the territory before. The Ninja Specialty Coffee Maker, for example, offers most of the DualBrew’s features but doesn’t work with K-cup pods, and it’ll set you back $169.00. There’s also a relatively similar model to the DualBrew, the Ninja Espresso and Coffee Barista System, for espresso capsules rather than K-cup pods. It costs slightly more than the DualBrew at $249/£200.
After testing the DualBrew, I can confirm it makes a great cup of joe relatively easily, whether you're using the traditional grind and filter method or slotting in the K-cup pod adapter to brew that way. The control panel is more complicated than some, but most should get the hang of it after a few brews. There’s plenty of size variety when brewing, and you also get to choose from different brew styles: classic, rich, over-ice, and specialty. I didn’t notice much of a taste difference between the classic and rich brews. The over-ice option did succeed in making a less watery iced coffee. However, the specialty brew, which makes a 4oz espresso-like coffee, didn’t come close to espresso quality, though the brew was stronger than typical coffee.
Some special features on the Ninja Dual Brew are worth noting. First, it can dispense hot water, and there’s no coffee taste whatsoever as a completely separate water line is used. A milk frother, though it doesn’t heat the milk, does a solid job of making lasting foam to put on lattes and cappuccinos. Its water tank can also be easily moved from the side to the back of the machine, giving you a better fit depending on your space.
If you’re someone who loves options when brewing coffee, the Ninja DualBrew is for you. It may be expensive, but the different sizes and brew styles keep up with some of the best coffee makers around. The K-cup adapter also makes it easier for individuals that want to be less involved in the coffee-making process from time to time and have an easier clean up. No matter how you use the machine, you’re almost guaranteed to have a good cup of coffee.
Ninja DualBrew Pro review: price and availability
- List price: $229.99 / £200
- Only available in the US
You can purchase the coffee maker direct from Ninja or various third-party retailers, including Amazon and Target for a list price of $229.99 / £200. There are a few variants, like an option that includes a permanent filter on Amazon for $239.99 / £192 or another from Best Buy for $249.99 / £200 with a thermal carafe rather than the traditional glass, keeping your coffee warmer longer.
You may think paying over $200 / £160 for a coffee maker is a bit excessive, but it’s a whole lot more than just a coffee maker. It keeps up with Keurig machines, delivering single-serving pod coffee. Of course, there’s a variety of other brew sizes using traditional grinds and even an espresso-like option for specialty drinks. Something like the Cuisinart Coffee Center 2-in-1 offers similar functionality for $199.95, but you’ll lose features like the separate water line for hot water and a milk frother.
The Ninja DualBrew Pro is only available in the US.
- Value score: 4.5/5
Ninja DualBrew Pro review: specifications
Ninja DualBrew Pro review: design and features
- Adjustable water tank
- Extensive, easy-to-use control panel
- Variety of brew size options
- Foldaway milk frother
The Ninja DualBrew is slightly larger than your average coffee maker, measuring 15.5 x 9.08 x 11.18in / 39.37 x 23 x 29.9cm (h x w x l), with the 60oz / 1.7 litres water tank installed on the side. Its 15.5-inch height could prove to be a problem for those with lower cabinets, as when lifting the lid of the K-Cup adapter to add a K-Cup for brewing, it would hit the top of my cabinets. This wasn’t an issue with coffee grinds, as the lid actually slides back into the coffee maker.
This machine is built mostly of sturdy black plastic with stainless steel accents. Your typical appliance look, but the stainless steel managed to be full of my fingerprints within the first few minutes of being out of the box. The setup is simple though, as the Ninja DualBrew came fully assembled sans the milk frother tip, which just locked into place in 2 seconds.
If you’d rather add more bulk to the back of the machine, the water tank can be easily installed in the rear with no tools, making it a slimmer 15.5 x14.26 x 7.08in / 39.37 x 36.2 x 17.9cm (h x w x l). It just requires removing a small plastic tab and swinging the base around. Be sure to remove the water tank before doing this.
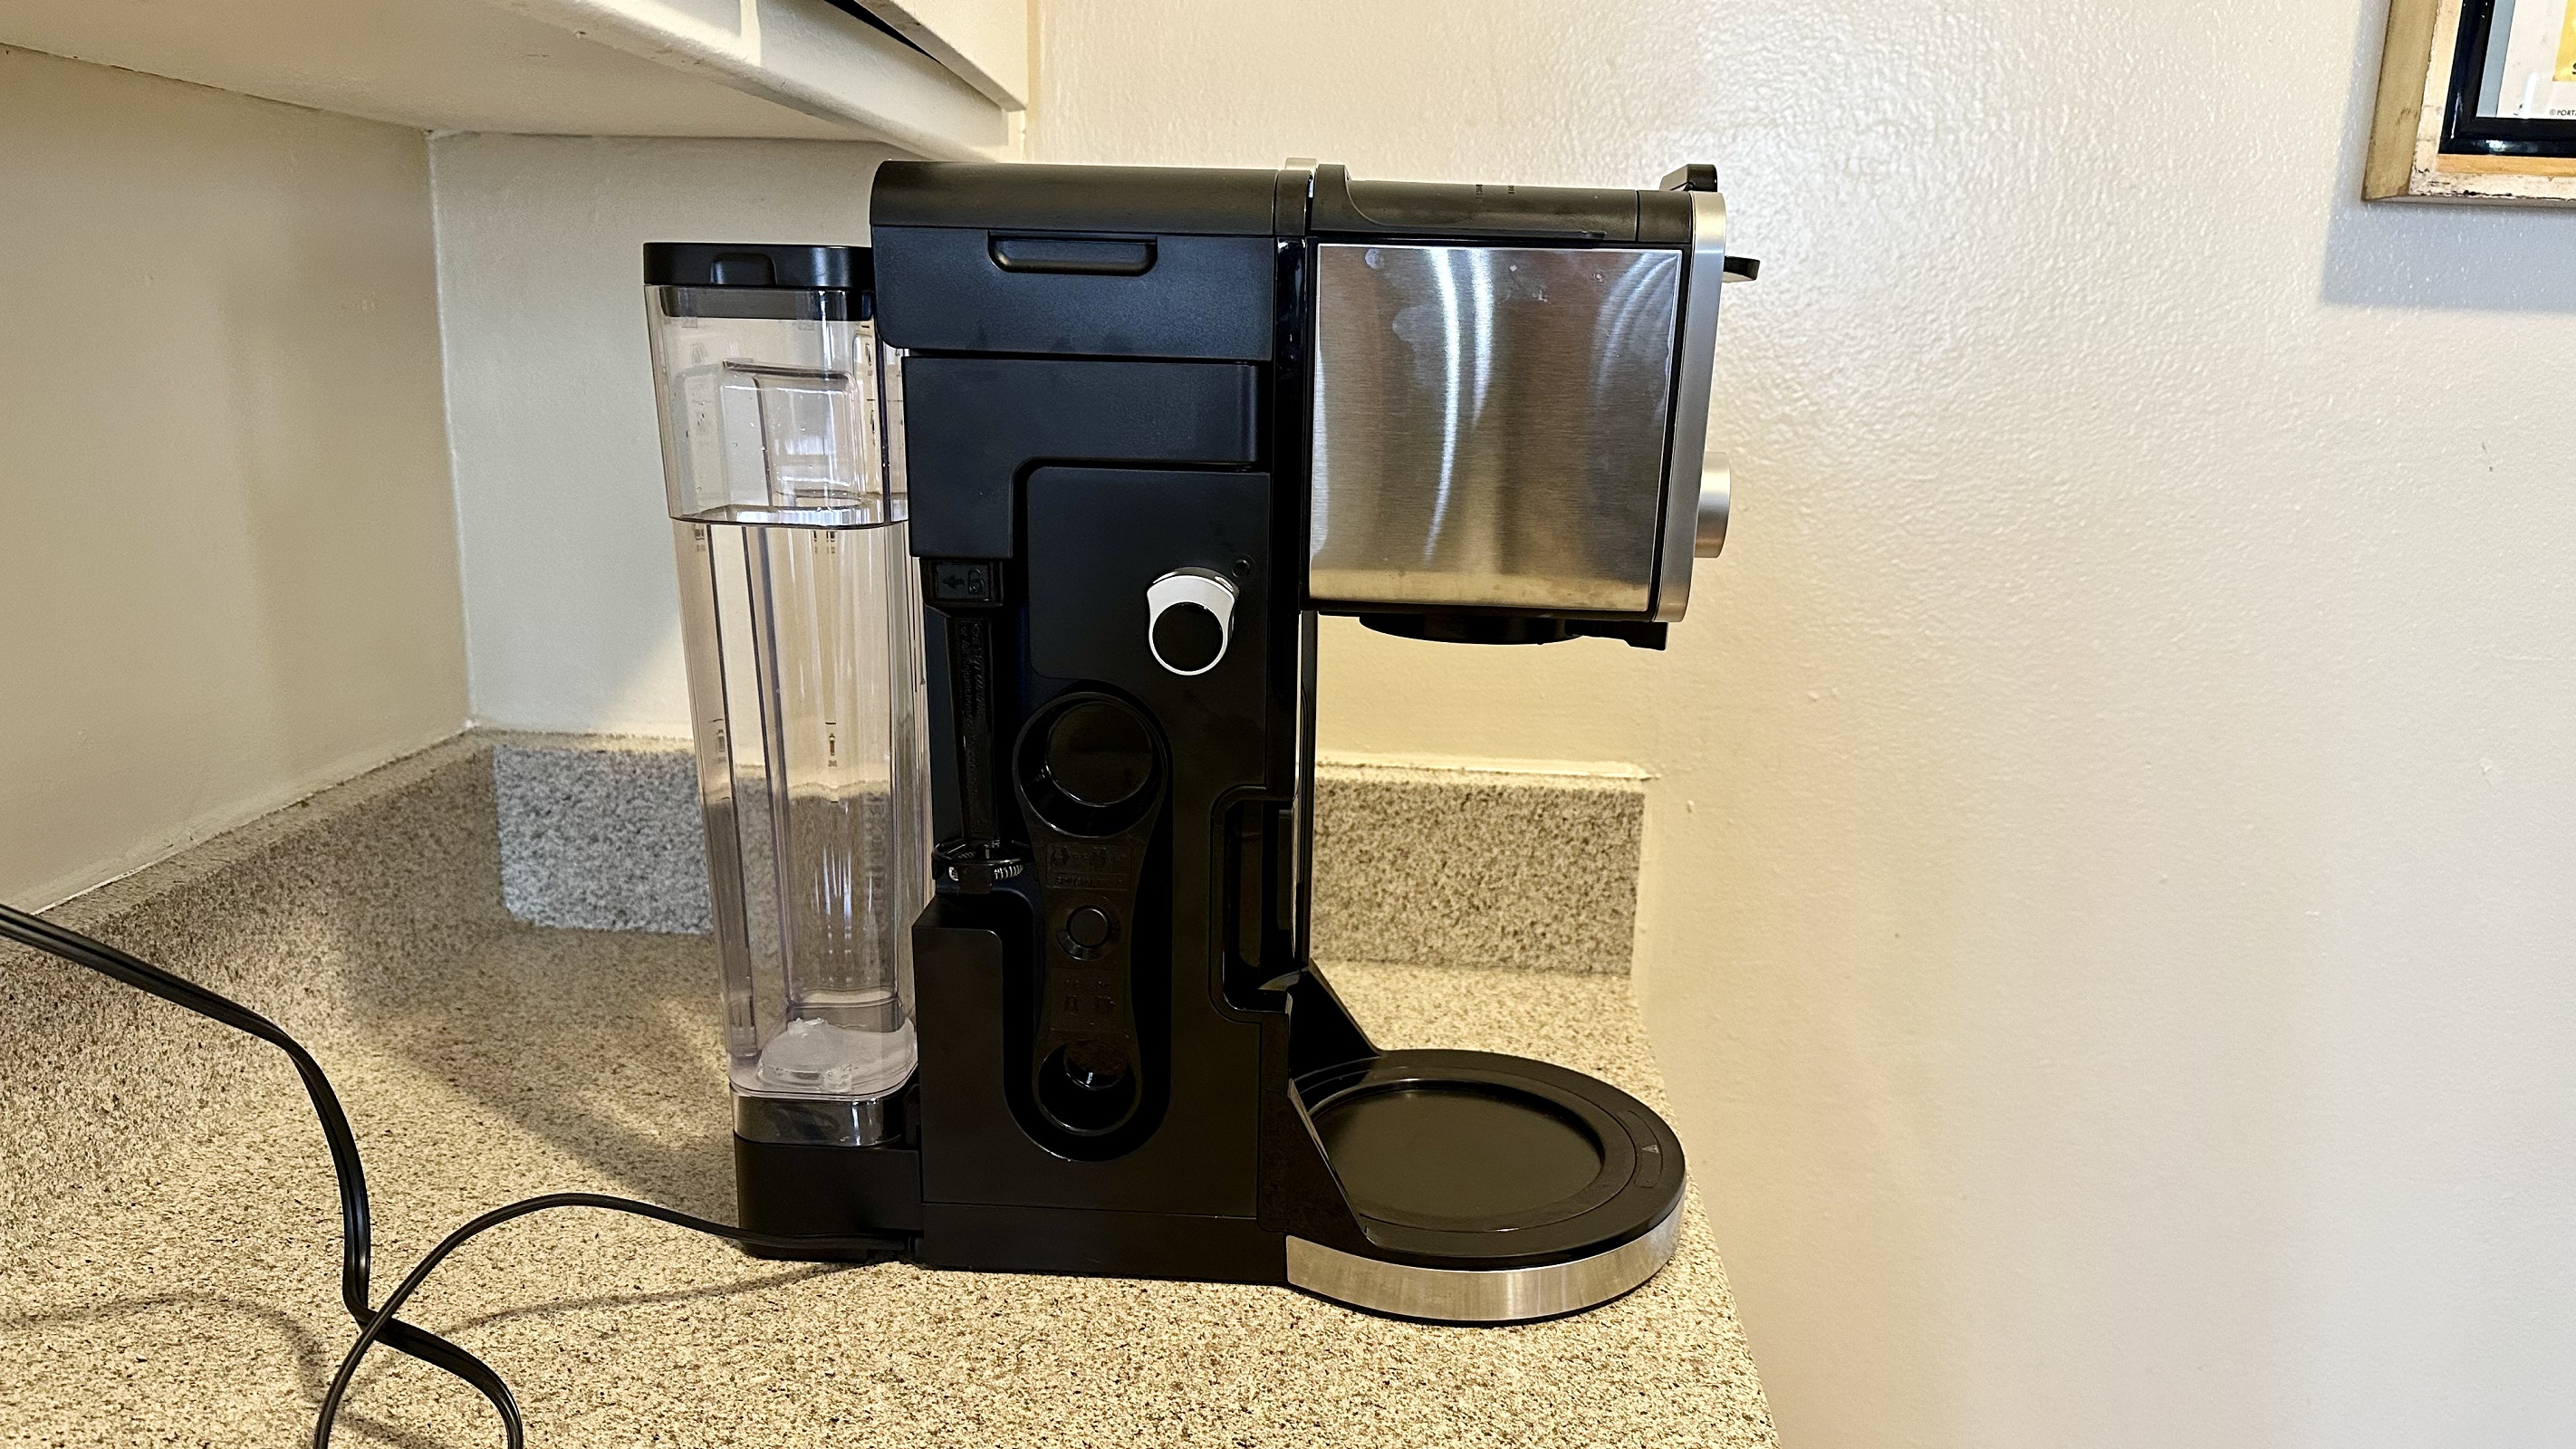
To make life easier, the water tank tells you how high to fill it for each size brew, showing you the same symbols on the control panel. It also slides off the base to fill up at the sink. Don’t be afraid to fill the water tank up all the way, even if you’re just brewing a cup, as the machine does the water measurement when brewing for you.
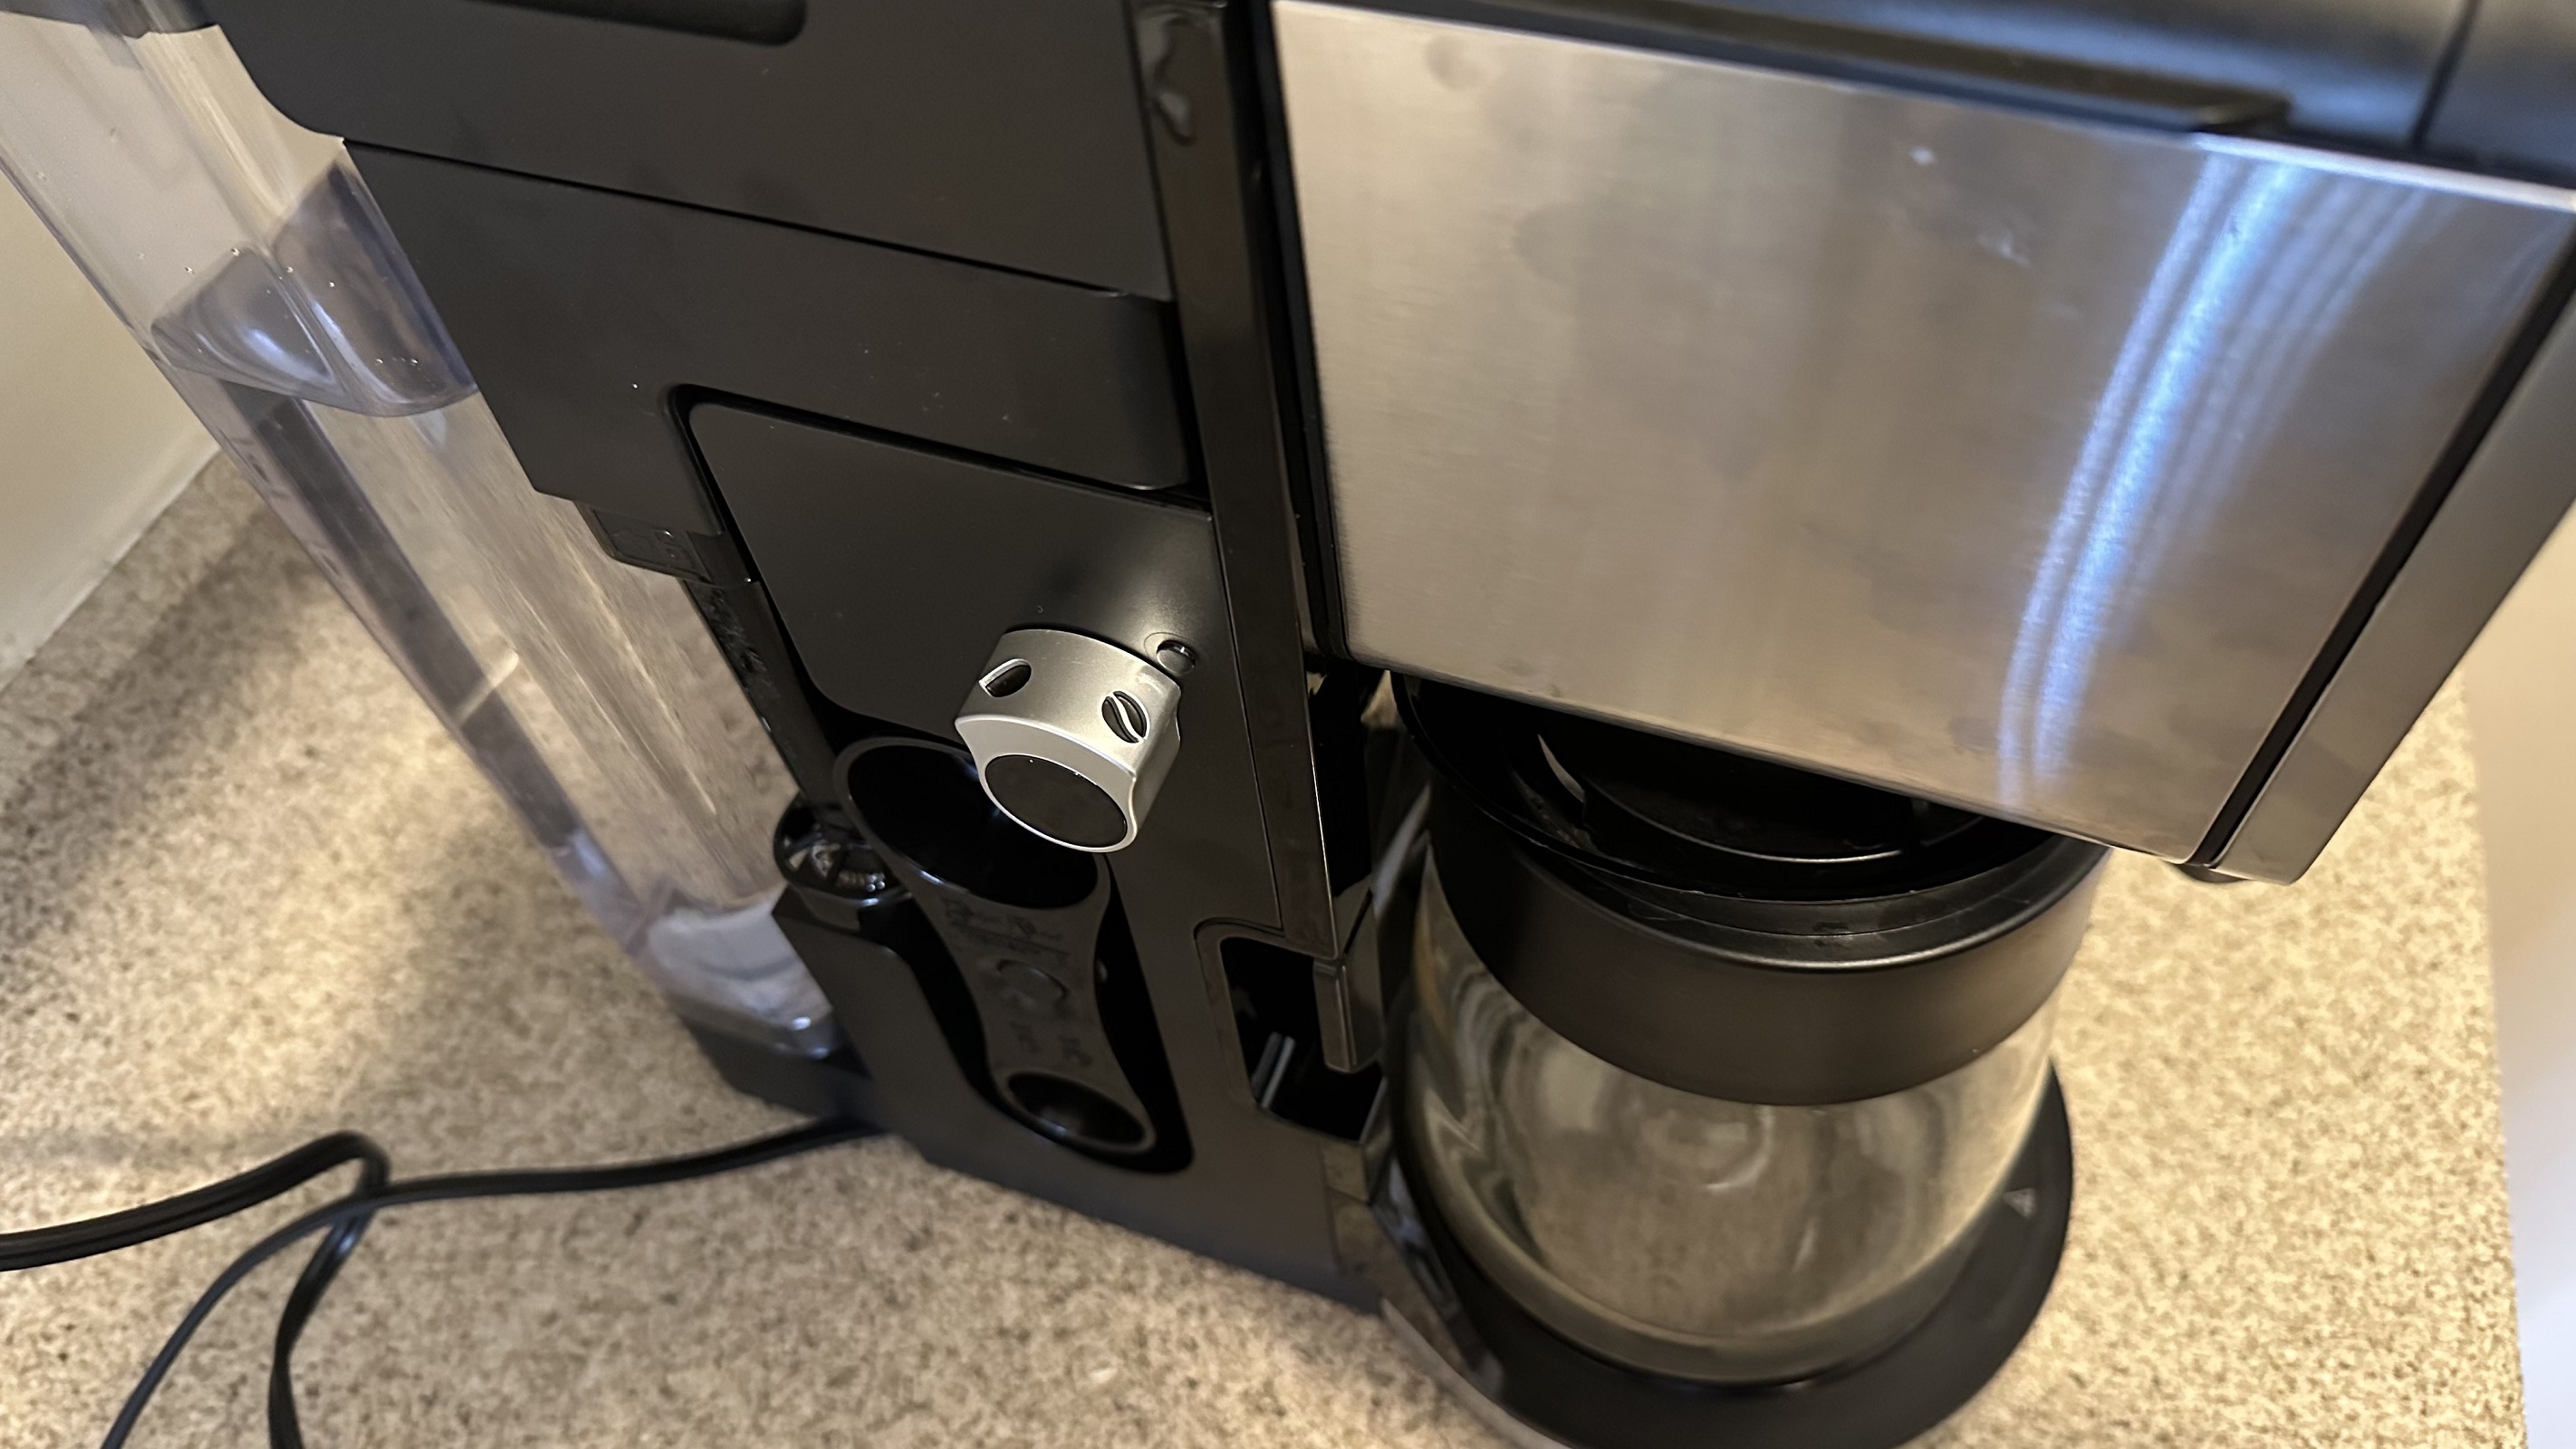
You want to be sure there’s space on the side of the Ninja DualBrew to make use of the milk frother and the coffee grind measuring scoop. The milk frother hinges out when in use and folds back into the machine when you’re finished. Its tip is also removable for cleaning. The Ninja Smart Scoop is easy to take off and on, and it even tells you how many spoonfuls of grinds are needed to make different brew sizes. The smaller end of the scoop measures out to be about about one tablespoon, while the larger end is just under three tablespoons.
However, the real star of the show is the control panel. The Ninja DualBrew has many more settings than your average coffee maker, so it may take a couple of extra minutes to get used to. After three weeks of use, I’m a pro.
An LCD display is located on a large dial, telling you the ounces of your brew - or time when not in use. The brew sizes range from 4oz to 55oz, depending on settings. Just above the dial are symbols, including a coffee cup, XL travel mug, and carafe, along with indicator lights to give you a general idea of the brew size.
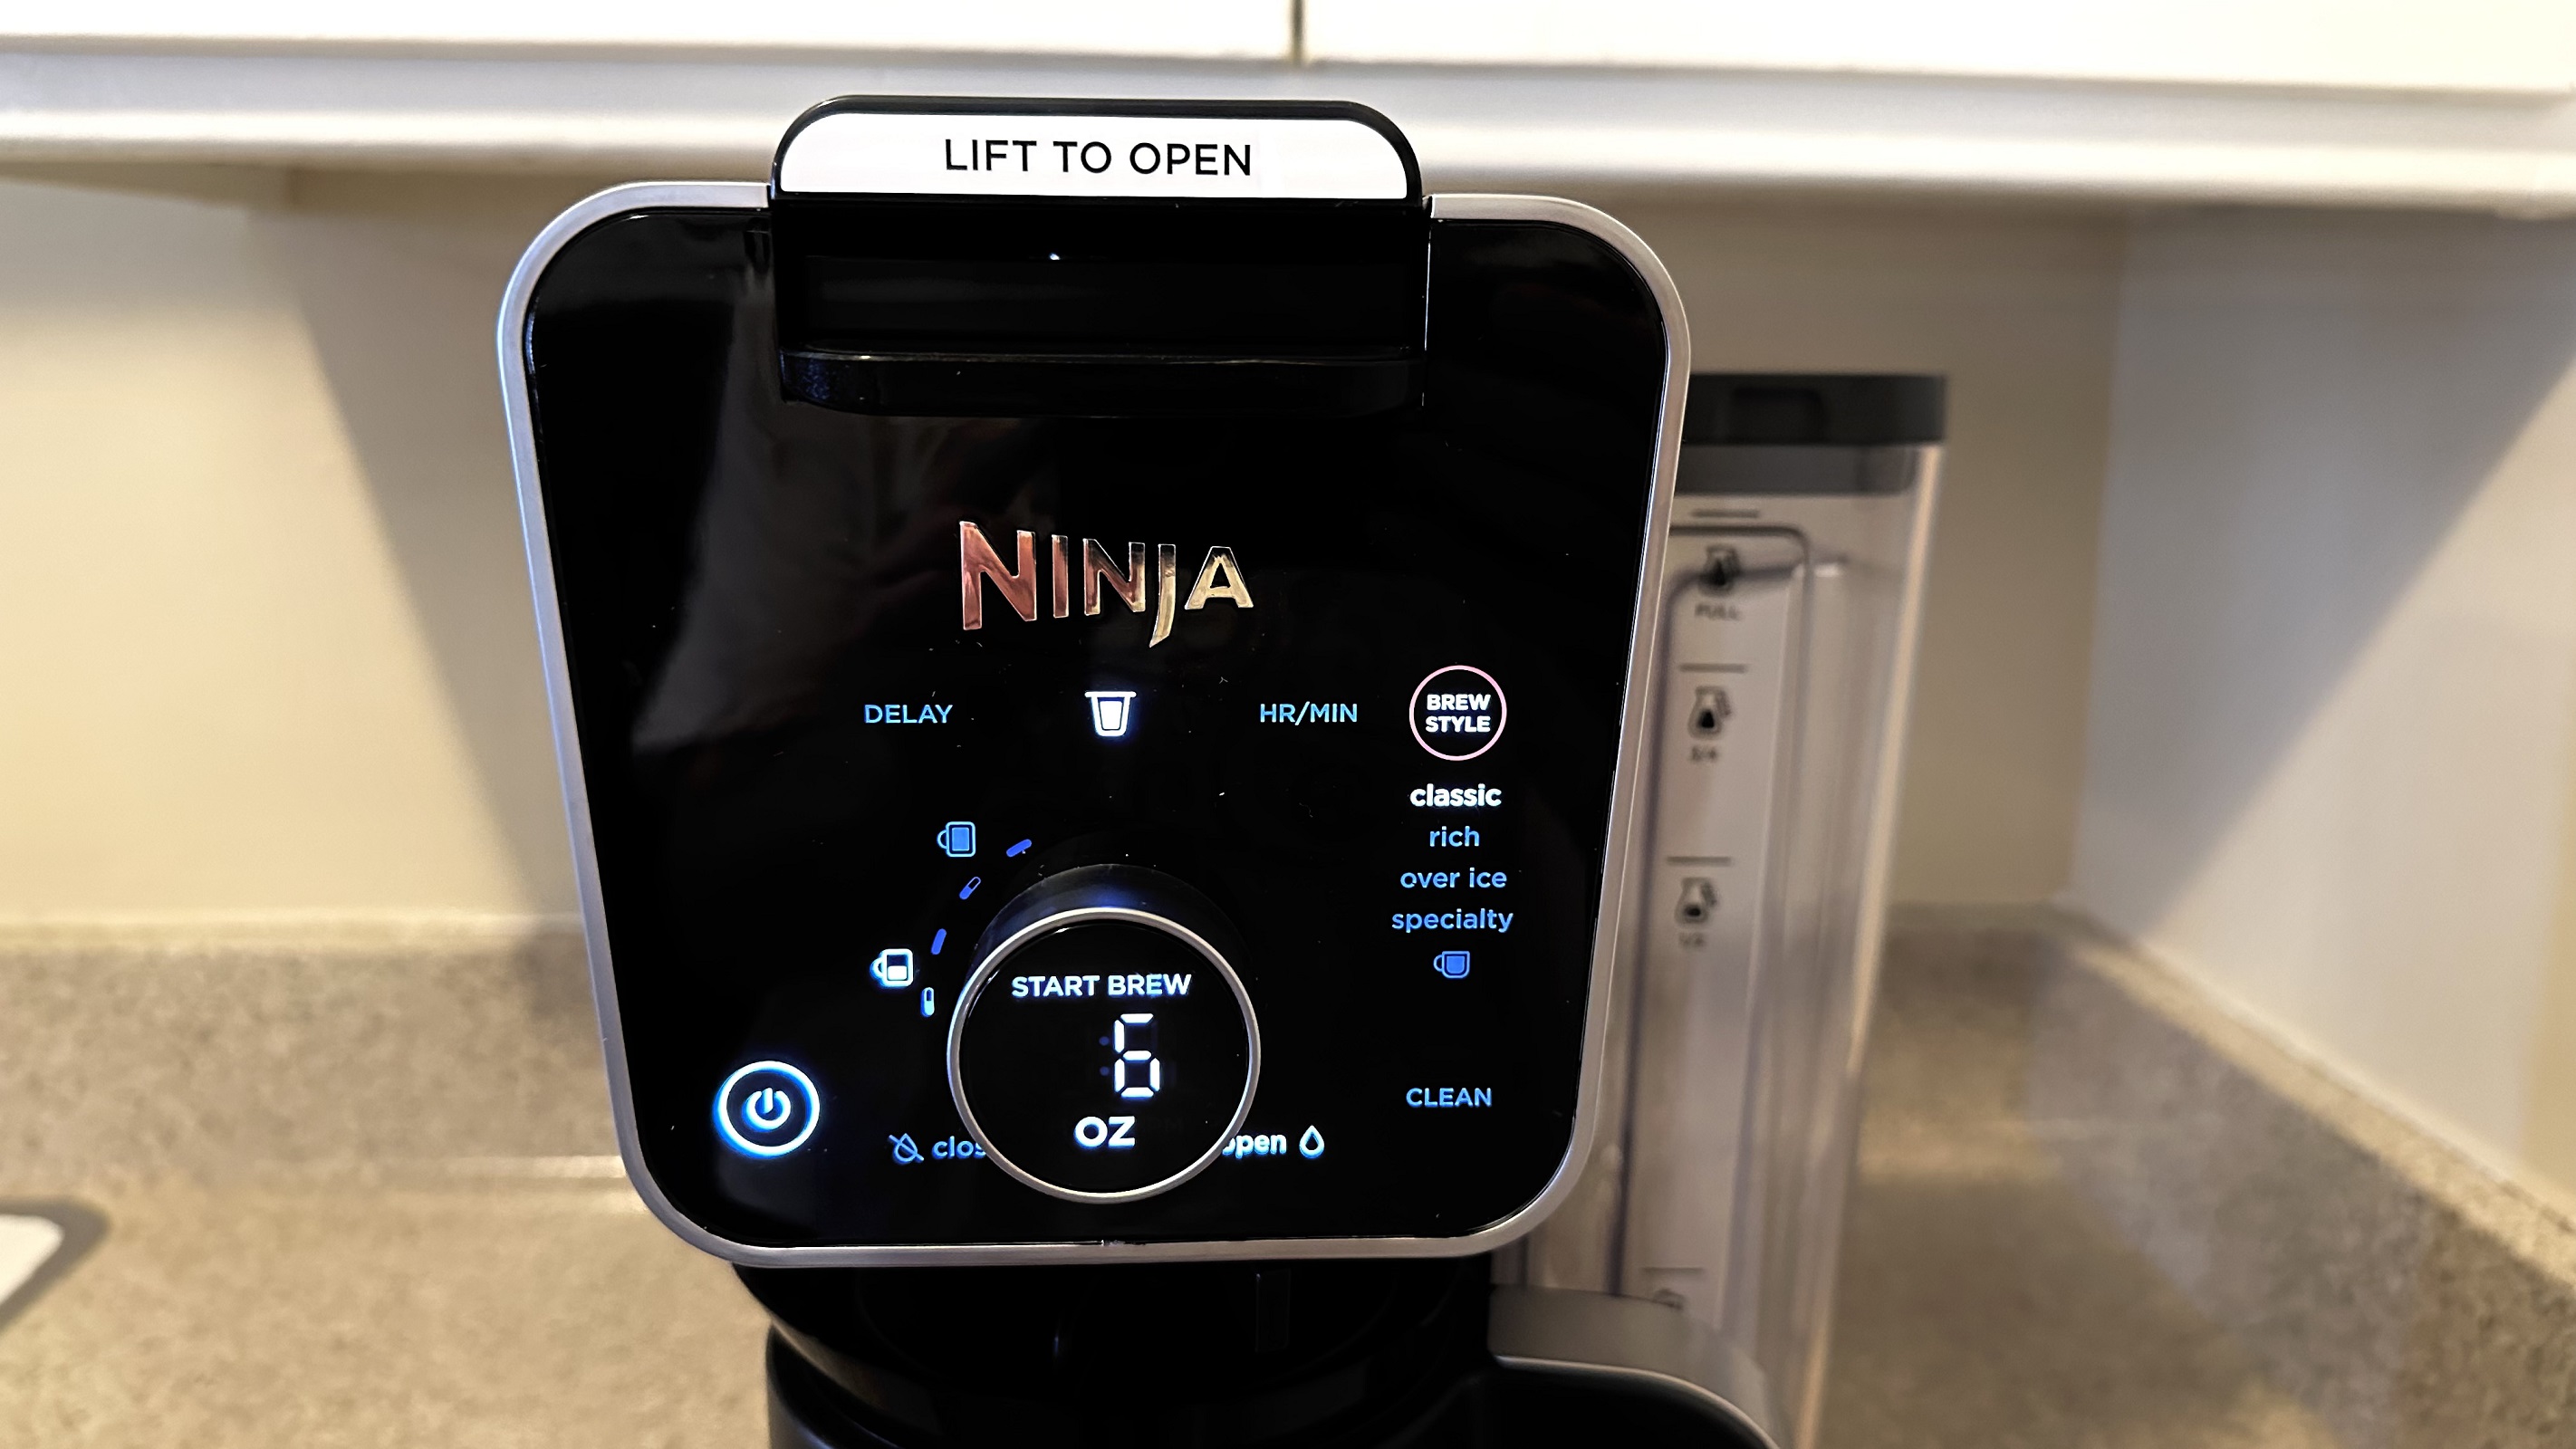
Above the dial is a delay button, which lets you set a specific time to have your coffee brew, and on the opposite side is a brew button to select from brew styles that include: classic, rich, over ice, and specialty - a 4 oz size for an espresso-like brew to use in lattes or cappuccinos. Your selection will be lit up, making life easier. Under the dial is a simple feature, but it might be my favorite part of the whole machine, a notch that you slide to open or close the brew basket, preventing drips after your coffee is finished brewing.
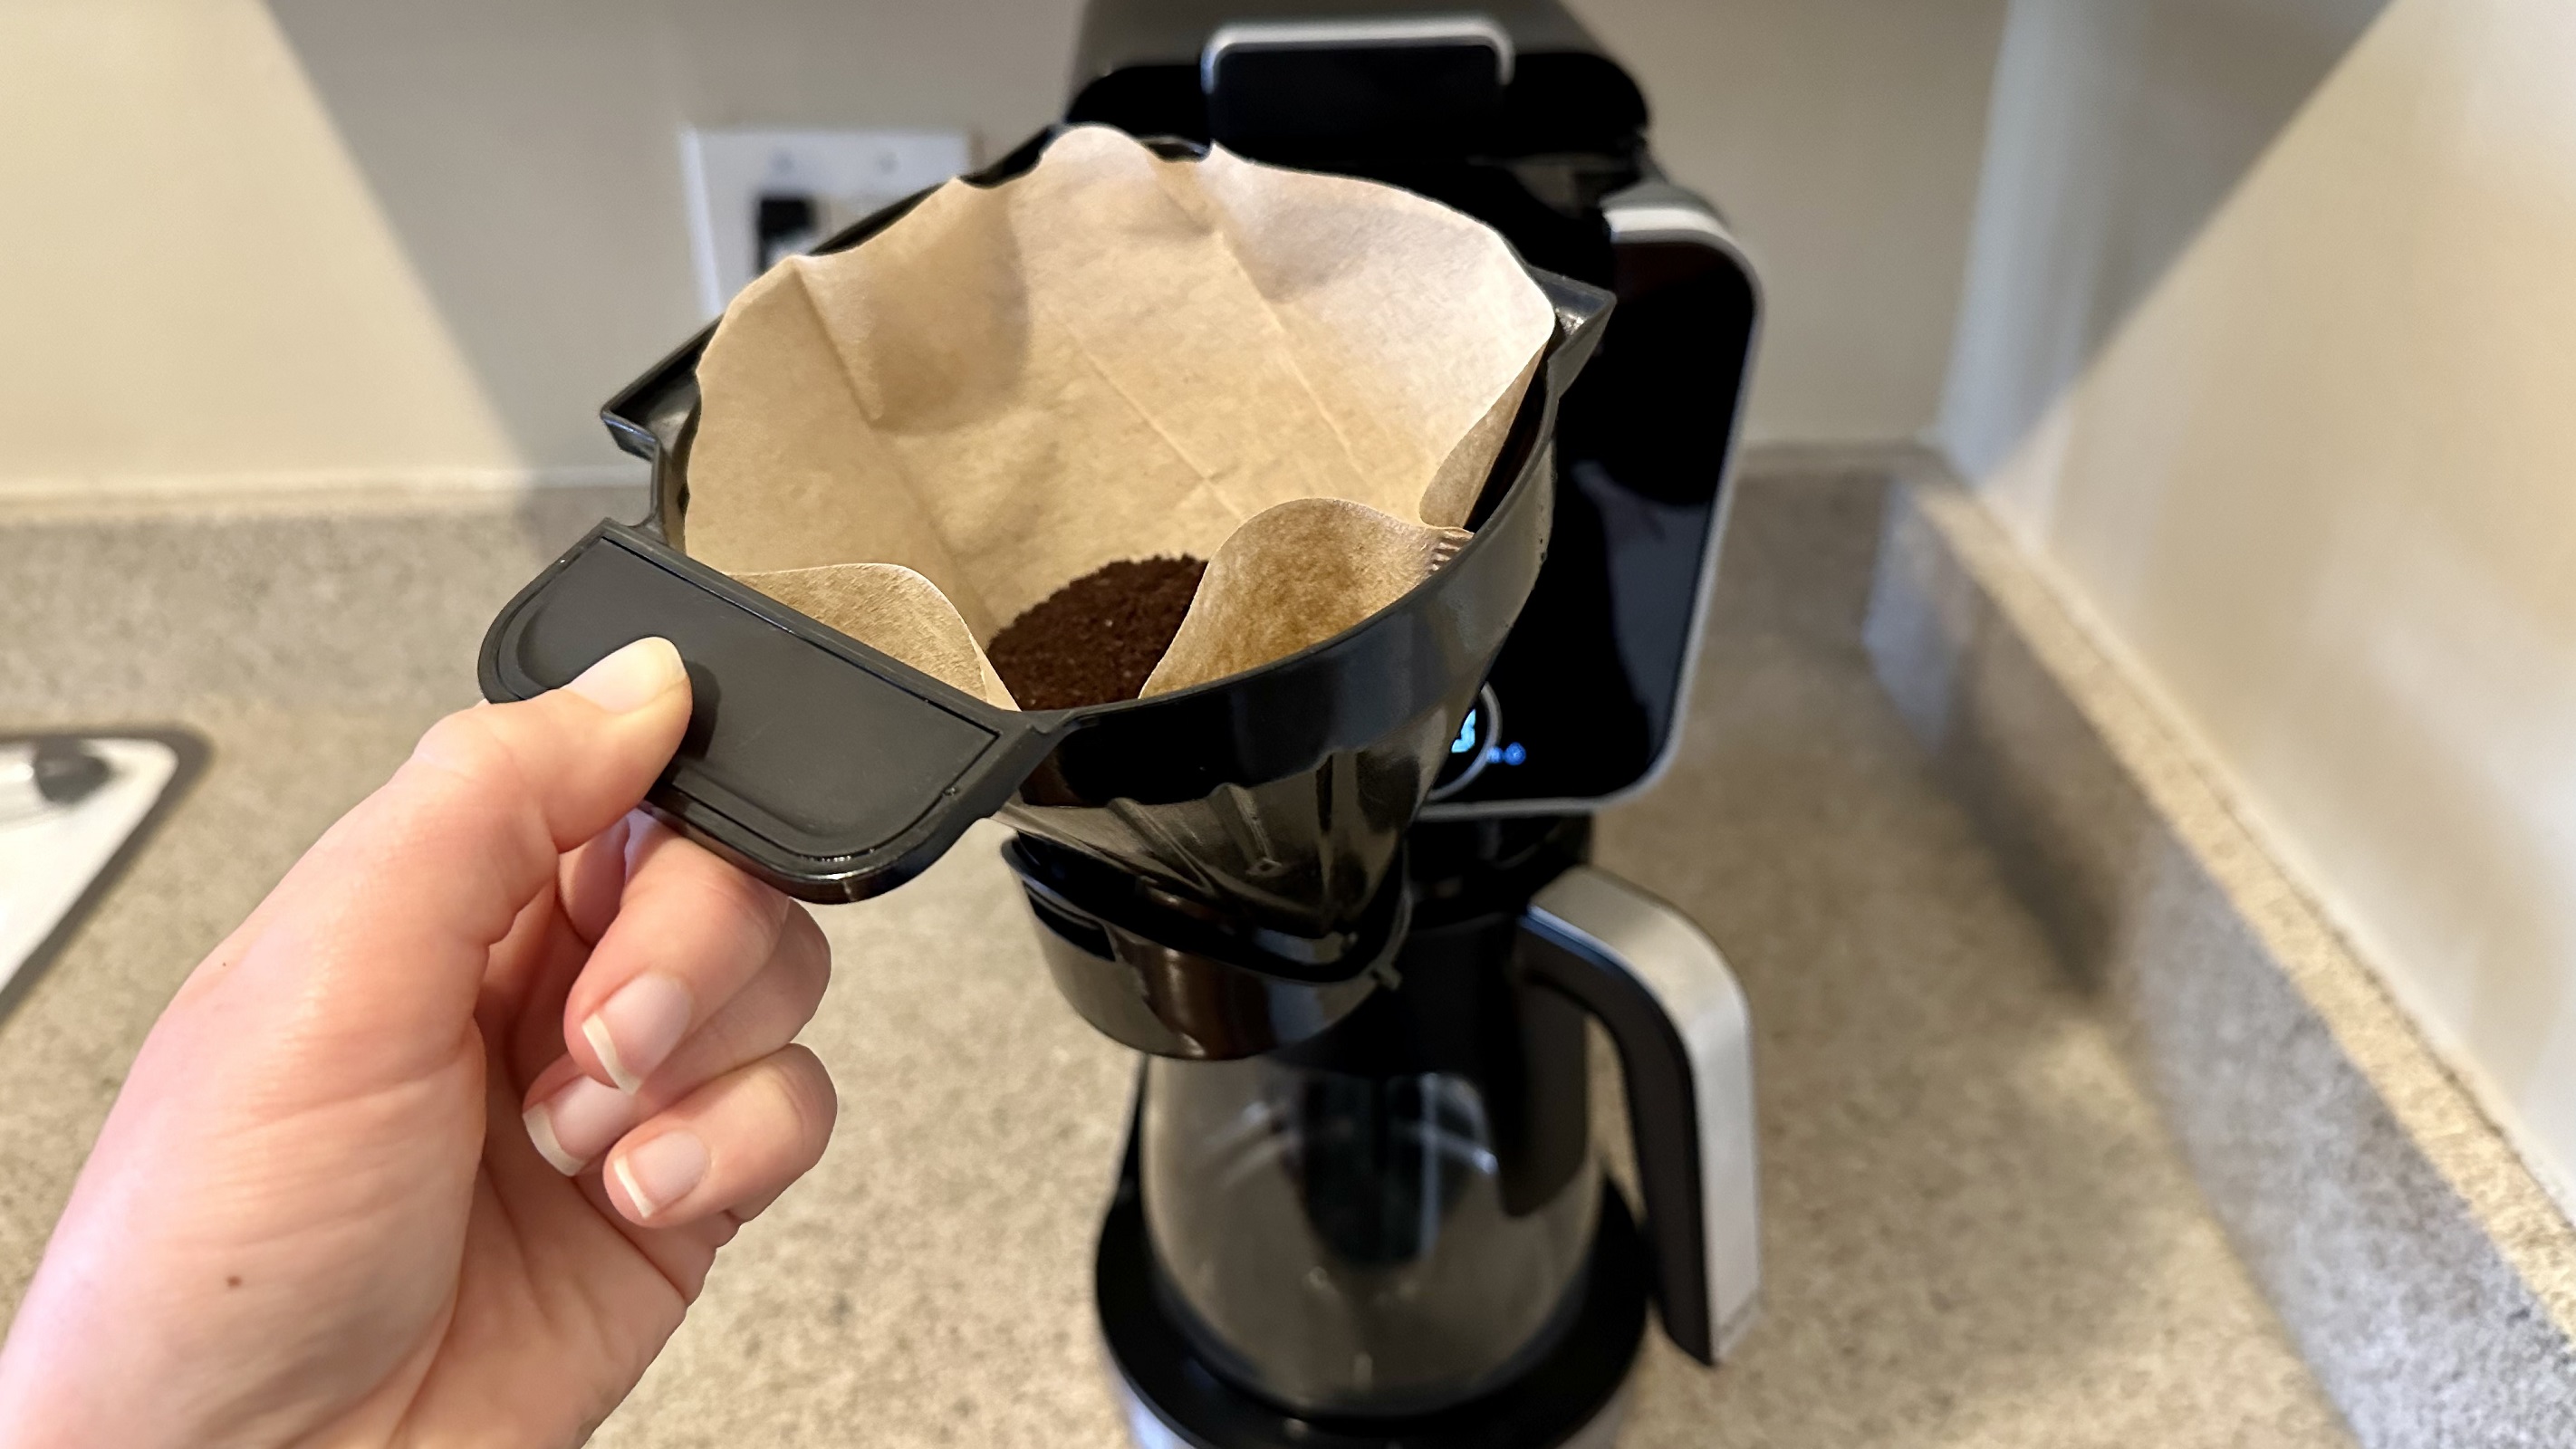
For a regular cup of joe with traditional coffee grinds, you’ll use the brew basket and #4 paper cone filter. The Ninja DualBrew Pro does come with five filters to get you started. After the brew is complete, you can slide the lid open and easily remove the brew basket and filter for cleaning. A coffee grinder would’ve been a nice addition, but you’ll have to use a separate mechanism or purchase pre-ground coffee.
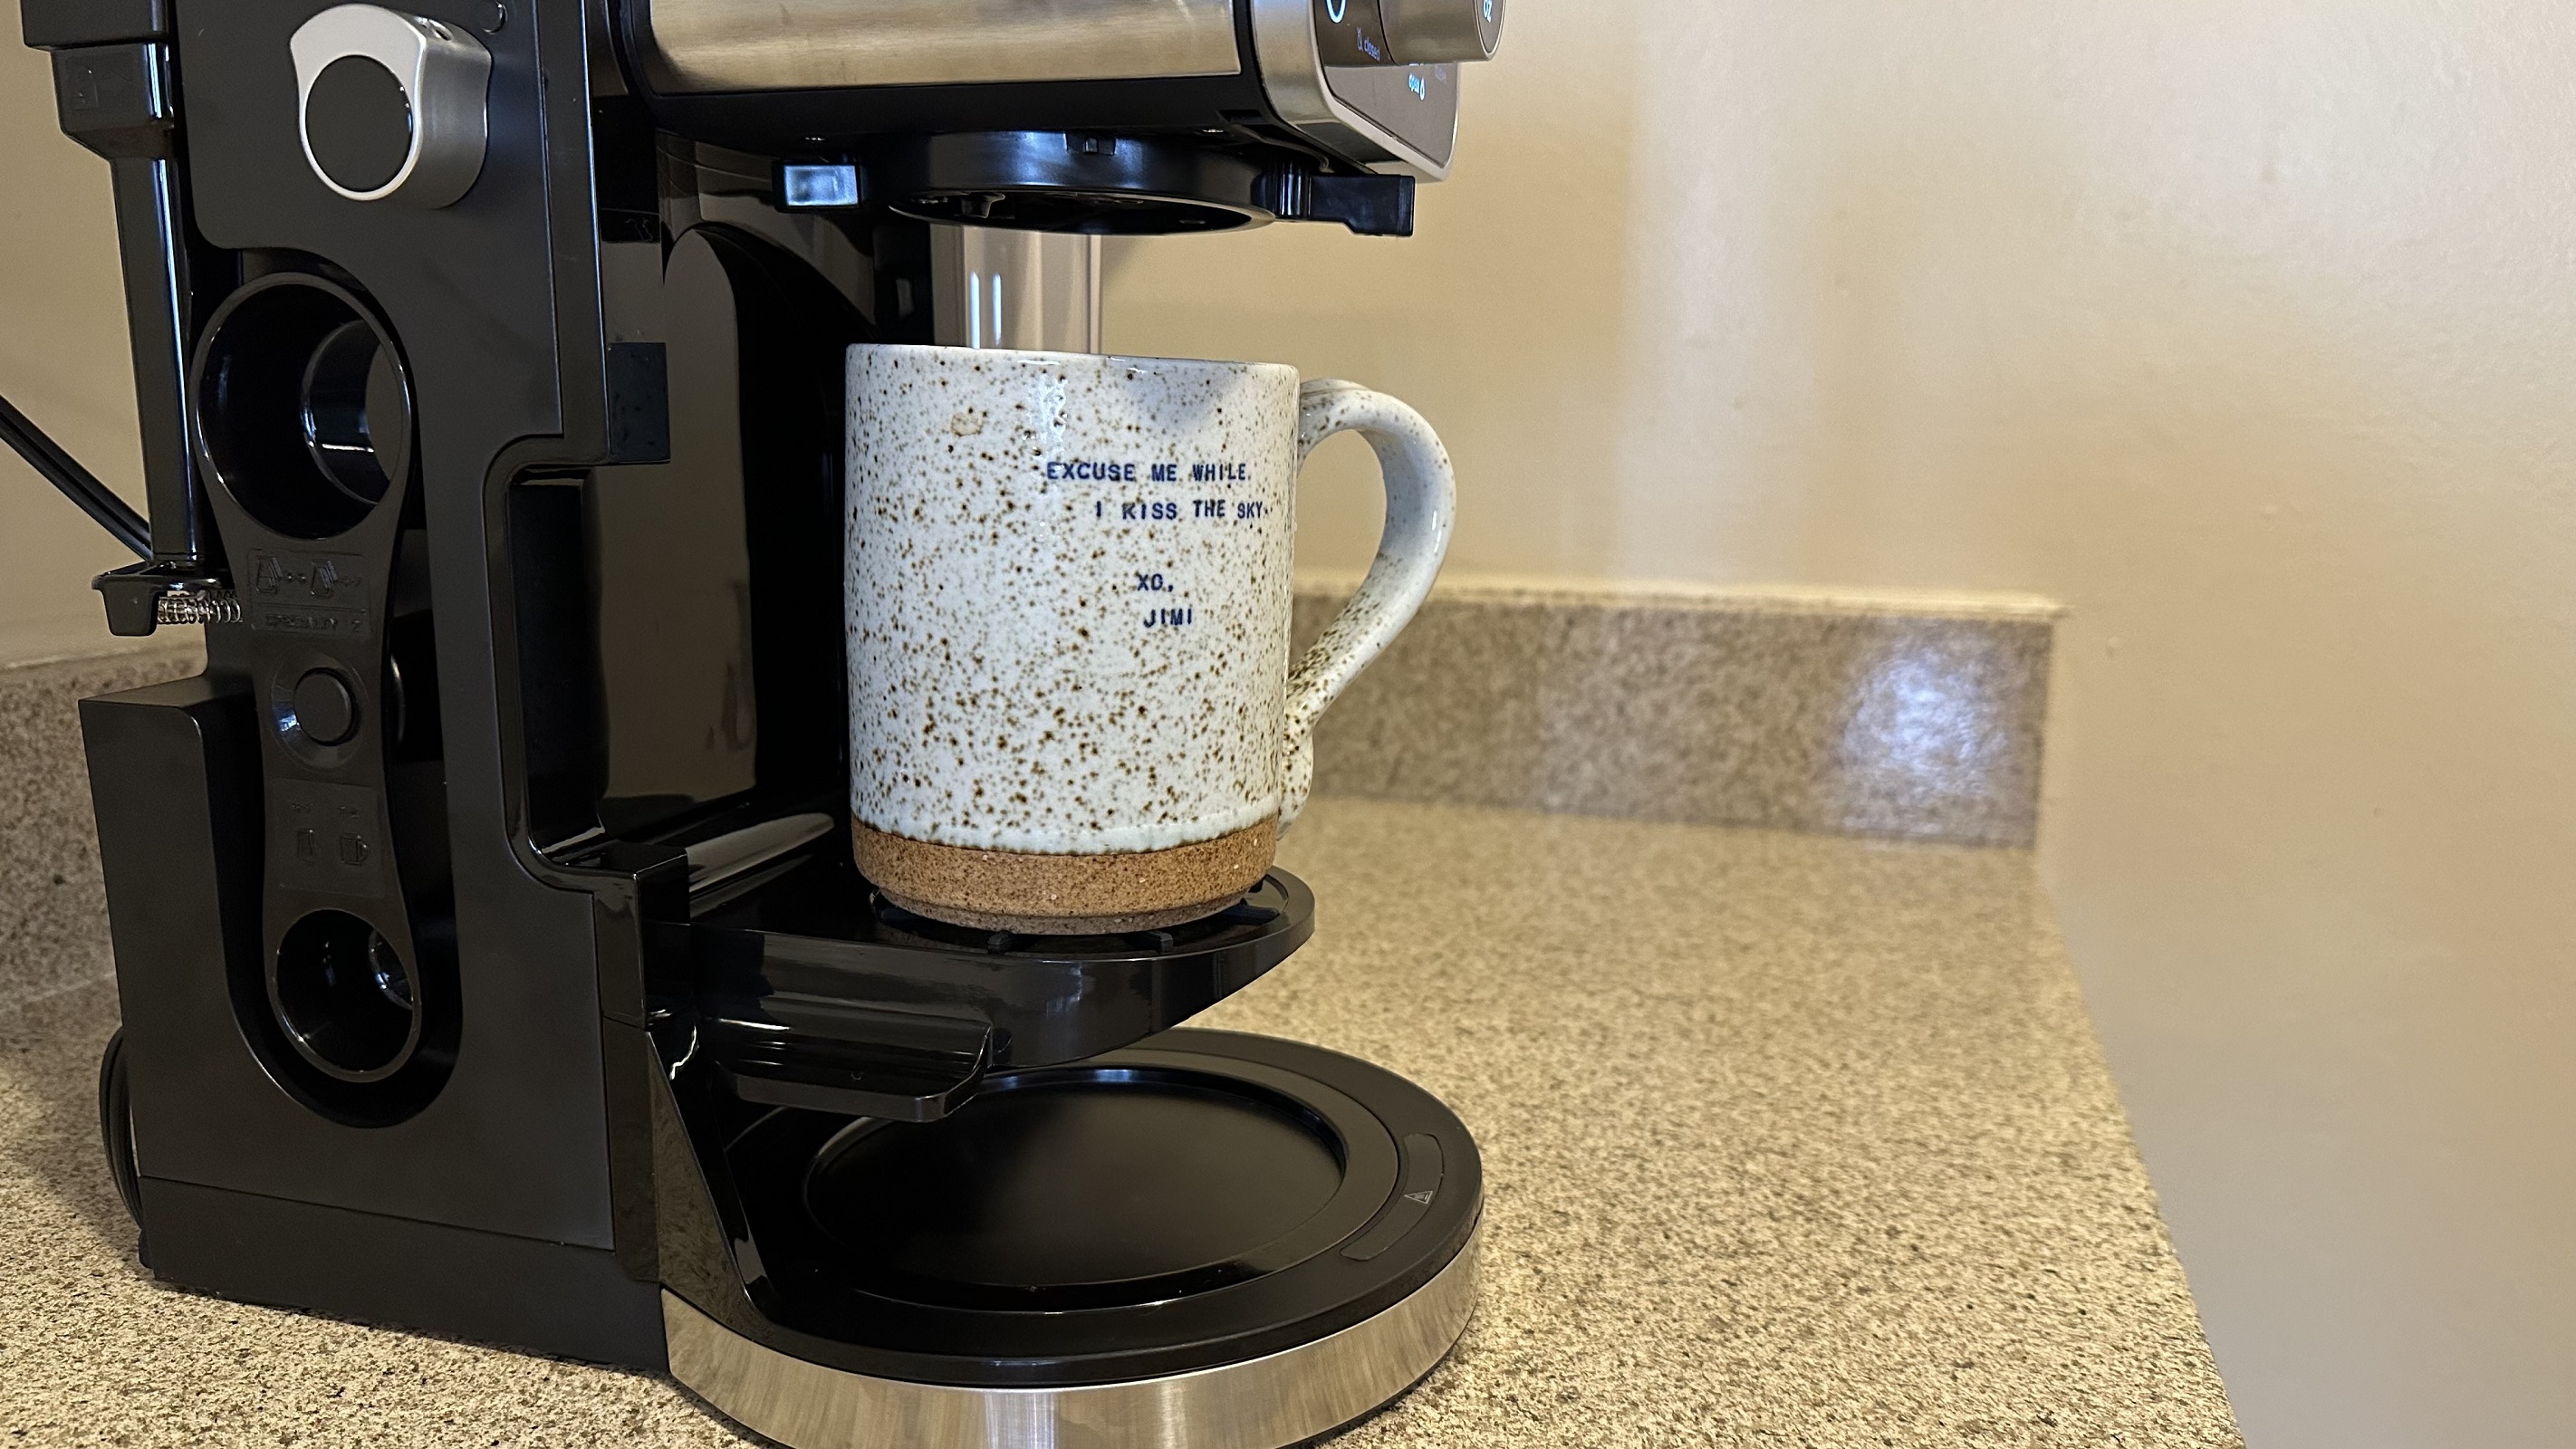
With larger coffee brews that use the carafe, a warming plate automatically turns on, staying warm from 15 minutes up to four hours. Its factory keeps the plate on for two hours, but it’s not difficult to adjust that time setting. If you’re making a smaller brew, it’s not required to use the carafe. A regular coffee mug will do, and there’s a single-serve platform that hinges down to rest the mug on, preventing any spills or splashes.
The carafe is built of solid glass with a plastic rim and twist-on lid with a long straw-like appendage to deliver the coffee to the bottom of the vessel. I’m not going to lie, I often struggled to get the lid on correctly, but it does help keep the coffee warmer longer and prevent spills.
When you want to brew a cup of coffee using a K-Cup pod, there’s an adapter that has to be put in place right on top of where regular grinds brew. Be sure to leave the brew basket installed, but you don’t need a filter. The DualBrew automatically recognizes when the adapter is installed. It’ll automatically limit your settings, preventing you from making a coffee larger than 12 oz. The adapter is also different than a regular Keurig, as it has three wider “needles” that puncture the top of the pod compared to the typical one, helping better saturate the coffee.
The machine is full of labels informing you of how to insert and remove the K-cup adapter, among other things. Those labels are easy to remove after you figure everything out. When it comes to the K-cup adapter, after removing and inserting it a few times, it became second nature. However, there’s nowhere to store the bulky adapter other than keeping it inserted in the machine in place of using regular grinds.
You aren’t limited to brewing coffee. The DualBrew also dispenses hot water when you move the knob on the side of the machine from the coffee bean to the water droplet. The control panel will change instantly, giving you similar size options as the coffee mode, only this time, there’s a boil or hot water temperature selection button. You can also dispense slightly more water than coffee, a full 60oz, making it simple to make everything from instant oatmeal and mac and cheese to tea and hot cocoa. The water also dispenses from a separate water line, so there’s no coffee cross-contamination.
- Design score: 4.5/5
Ninja DualBrew Pro Specialty Coffee System review: performance
- Flavorful, rich coffee
- Warming plate keeps coffee hot for up to 4 hours
- Specialty brew style lacks most espresso attributes
If you’ve brewed coffee in a traditional coffee maker before, you should have no problem using the Ninja DualBrew. In fact, even though it has more functionality, it might be easier than some because everything is so well labelled. Your first cup should be brewed in a matter of minutes. In the three weeks I’ve been using this coffee maker, I’ve tested almost everything it has to offer.
To begin, I brewed a traditional 8oz cup of coffee with regular coffee grinds. It was simple enough to put the filter in place, and I used the Ninja Smart Scoop on the side to measure the ideal amount of coffee and slid the lid close. Next came the water tank, which easily comes off the base to fill at the sink. I turned the dial on the control panel to the 8oz setting and ensured the classic brew style was selected. I popped the single-serve platform down, added my mug, and pushed the dial-in to begin the brew. After just over 3 minutes, there was a fresh cup of coffee at slightly too hot 140°F / 60°C to immediately drink.
As the coffee was brewing, the same indicator lights that let you know the size selection before starting the brew would light, letting you know how far along you were in the brewing process. This function is especially handy for bigger brews, as they take longer. As the coffee was brewing, it was quiet, averaging about 55 dB which is an equivalent noise level to a normal conversation between two people. After it finished, there’d be a relatively loud beep and a good deal of dripping. Luckily, the notch just below the dial closes the brew basket to keep messes at bay. The coffee itself was rich with no burned taste.
I tested the other two brew styles: rich and over-ice using the exact same settings and grind measurements as my classic brew. When using the rich brew style, it actually makes slightly less coffee, so my 8oz brew became 7oz. It took slightly under 3 minutes to brew and was 145°F / 62°C. After tasting the coffee, there wasn’t a noticeable difference from the classic brew. I ended up testing on larger size settings with similar results.
For the over-ice brew, Ninja says that it’ll produce a more concentrated brew and suggests that you fill whatever vessel the coffee is dispensing into full of ice. I followed the instructions and made the same 8oz brew, which took just under 3.5 minutes. Some of the ice melted, while the drink’s temperature immediately after brewing was 42°F / 5°C. As an avid iced coffee drinker, I really wanted this feature to work great, and to my surprise, it did. Unlike when you throw ice cubes in hot coffee, it wasn’t watered down, plus it was cool and refreshing as soon as it finished brewing.
The Ninja DualBrew has a warming plate, but it only turns on after brewing ¼ carafe sizes or larger. I brewed a full carafe to see how warm it would stay across several hours. It took 8 minutes to brew a full 55oz carafe, and immediately after finishing, the coffee was 170°F / 76°C. Two hours later, it was still 160°F / 71°C, not a significant drop in temperature, and the coffee had no burned taste. The warming plate was supposed to turn off after two hours, as I did not adjust any of the settings, but it stayed on for another hour. At hour three, the coffee was 140°F / 60°C, still hot enough to enjoy with no burned taste.
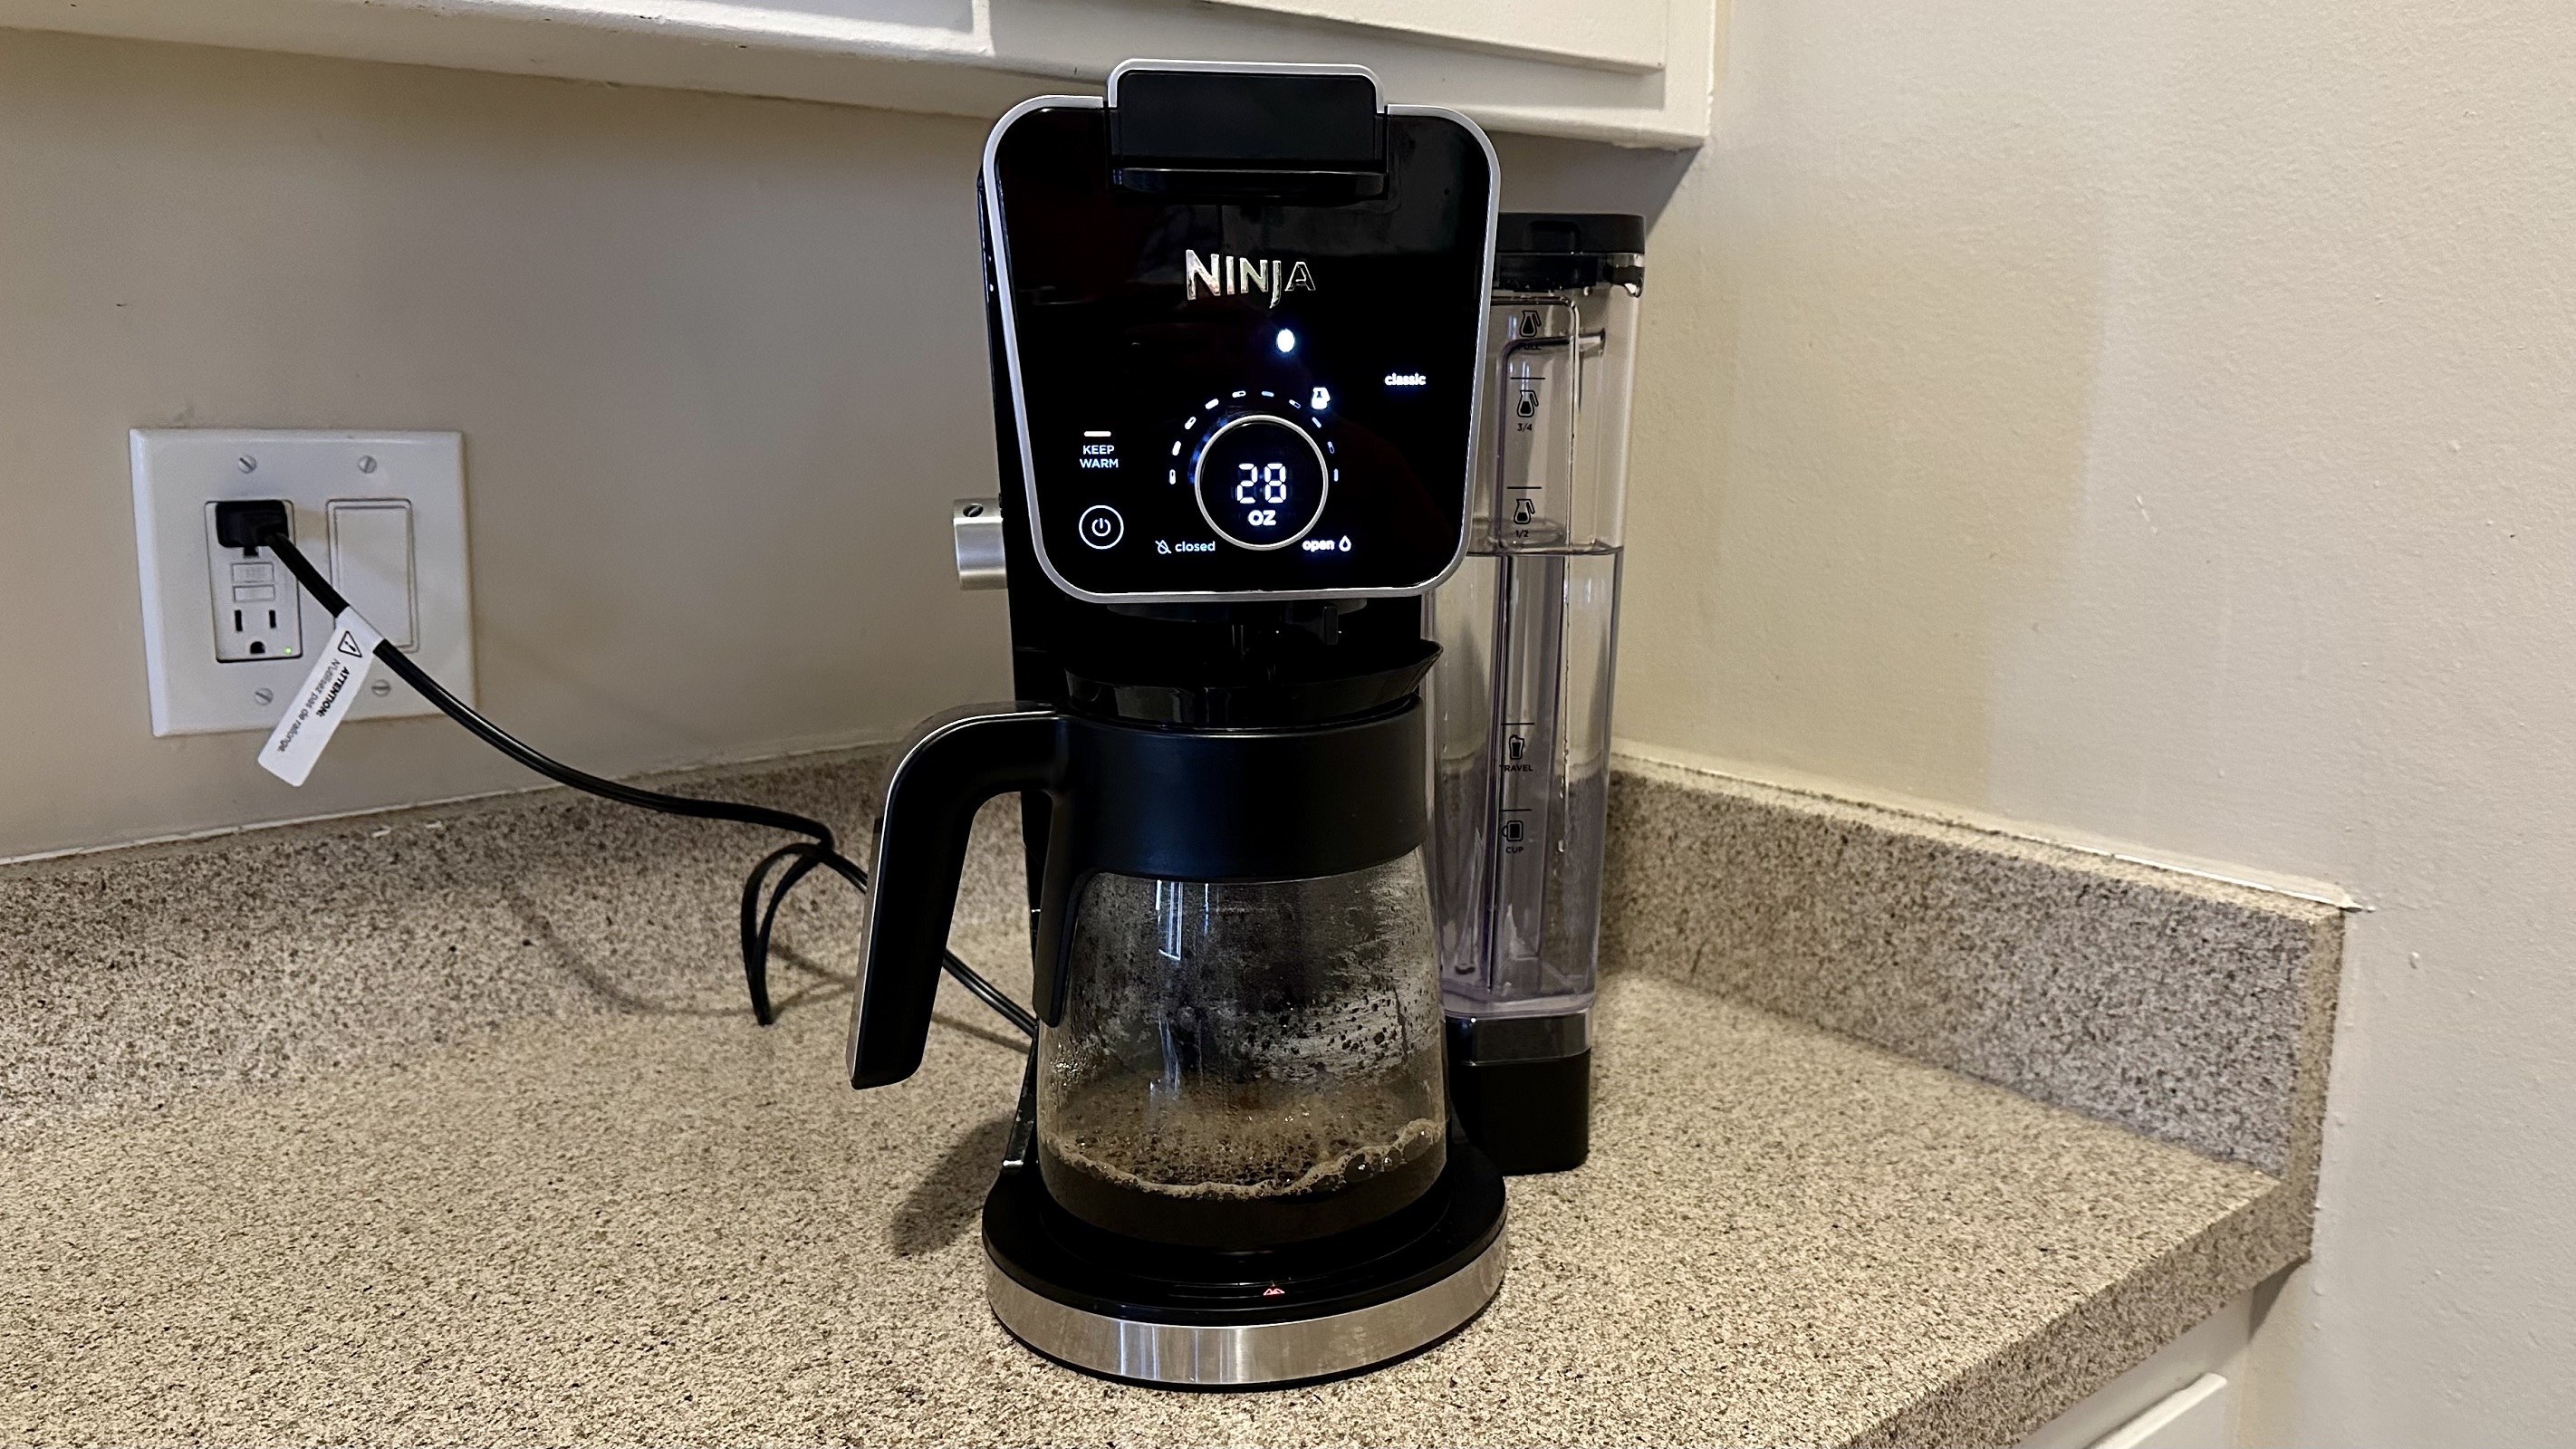
Adjusting the amount of time the warming plate stays on is simple. You just hold down the keep warm button with the dial illuminating the amount of time set. It can stay on for up to four hours and is adjustable by 15-minute increments. You can also opt to turn on the warming plate without brewing a carafe. I did this for hour four of my full carafe brew, and the coffee was still 135°F / 57°C. However, the plate will stay warm for over 30 minutes after you turn it off, and a light on the base of the brewer will illuminate to indicate it’s hot.
Given the DualBrew name, this coffee maker also works like a Keurig machine, brewing K-cup pods. You do need to insert an adapter into the space just above the brew basket. It’s a bit confusing at first, but after doing it a few times, I got the hang of it. The control panel automatically recognizes the adapter has been inserted and will limit your brew size from 4 to 12 oz.
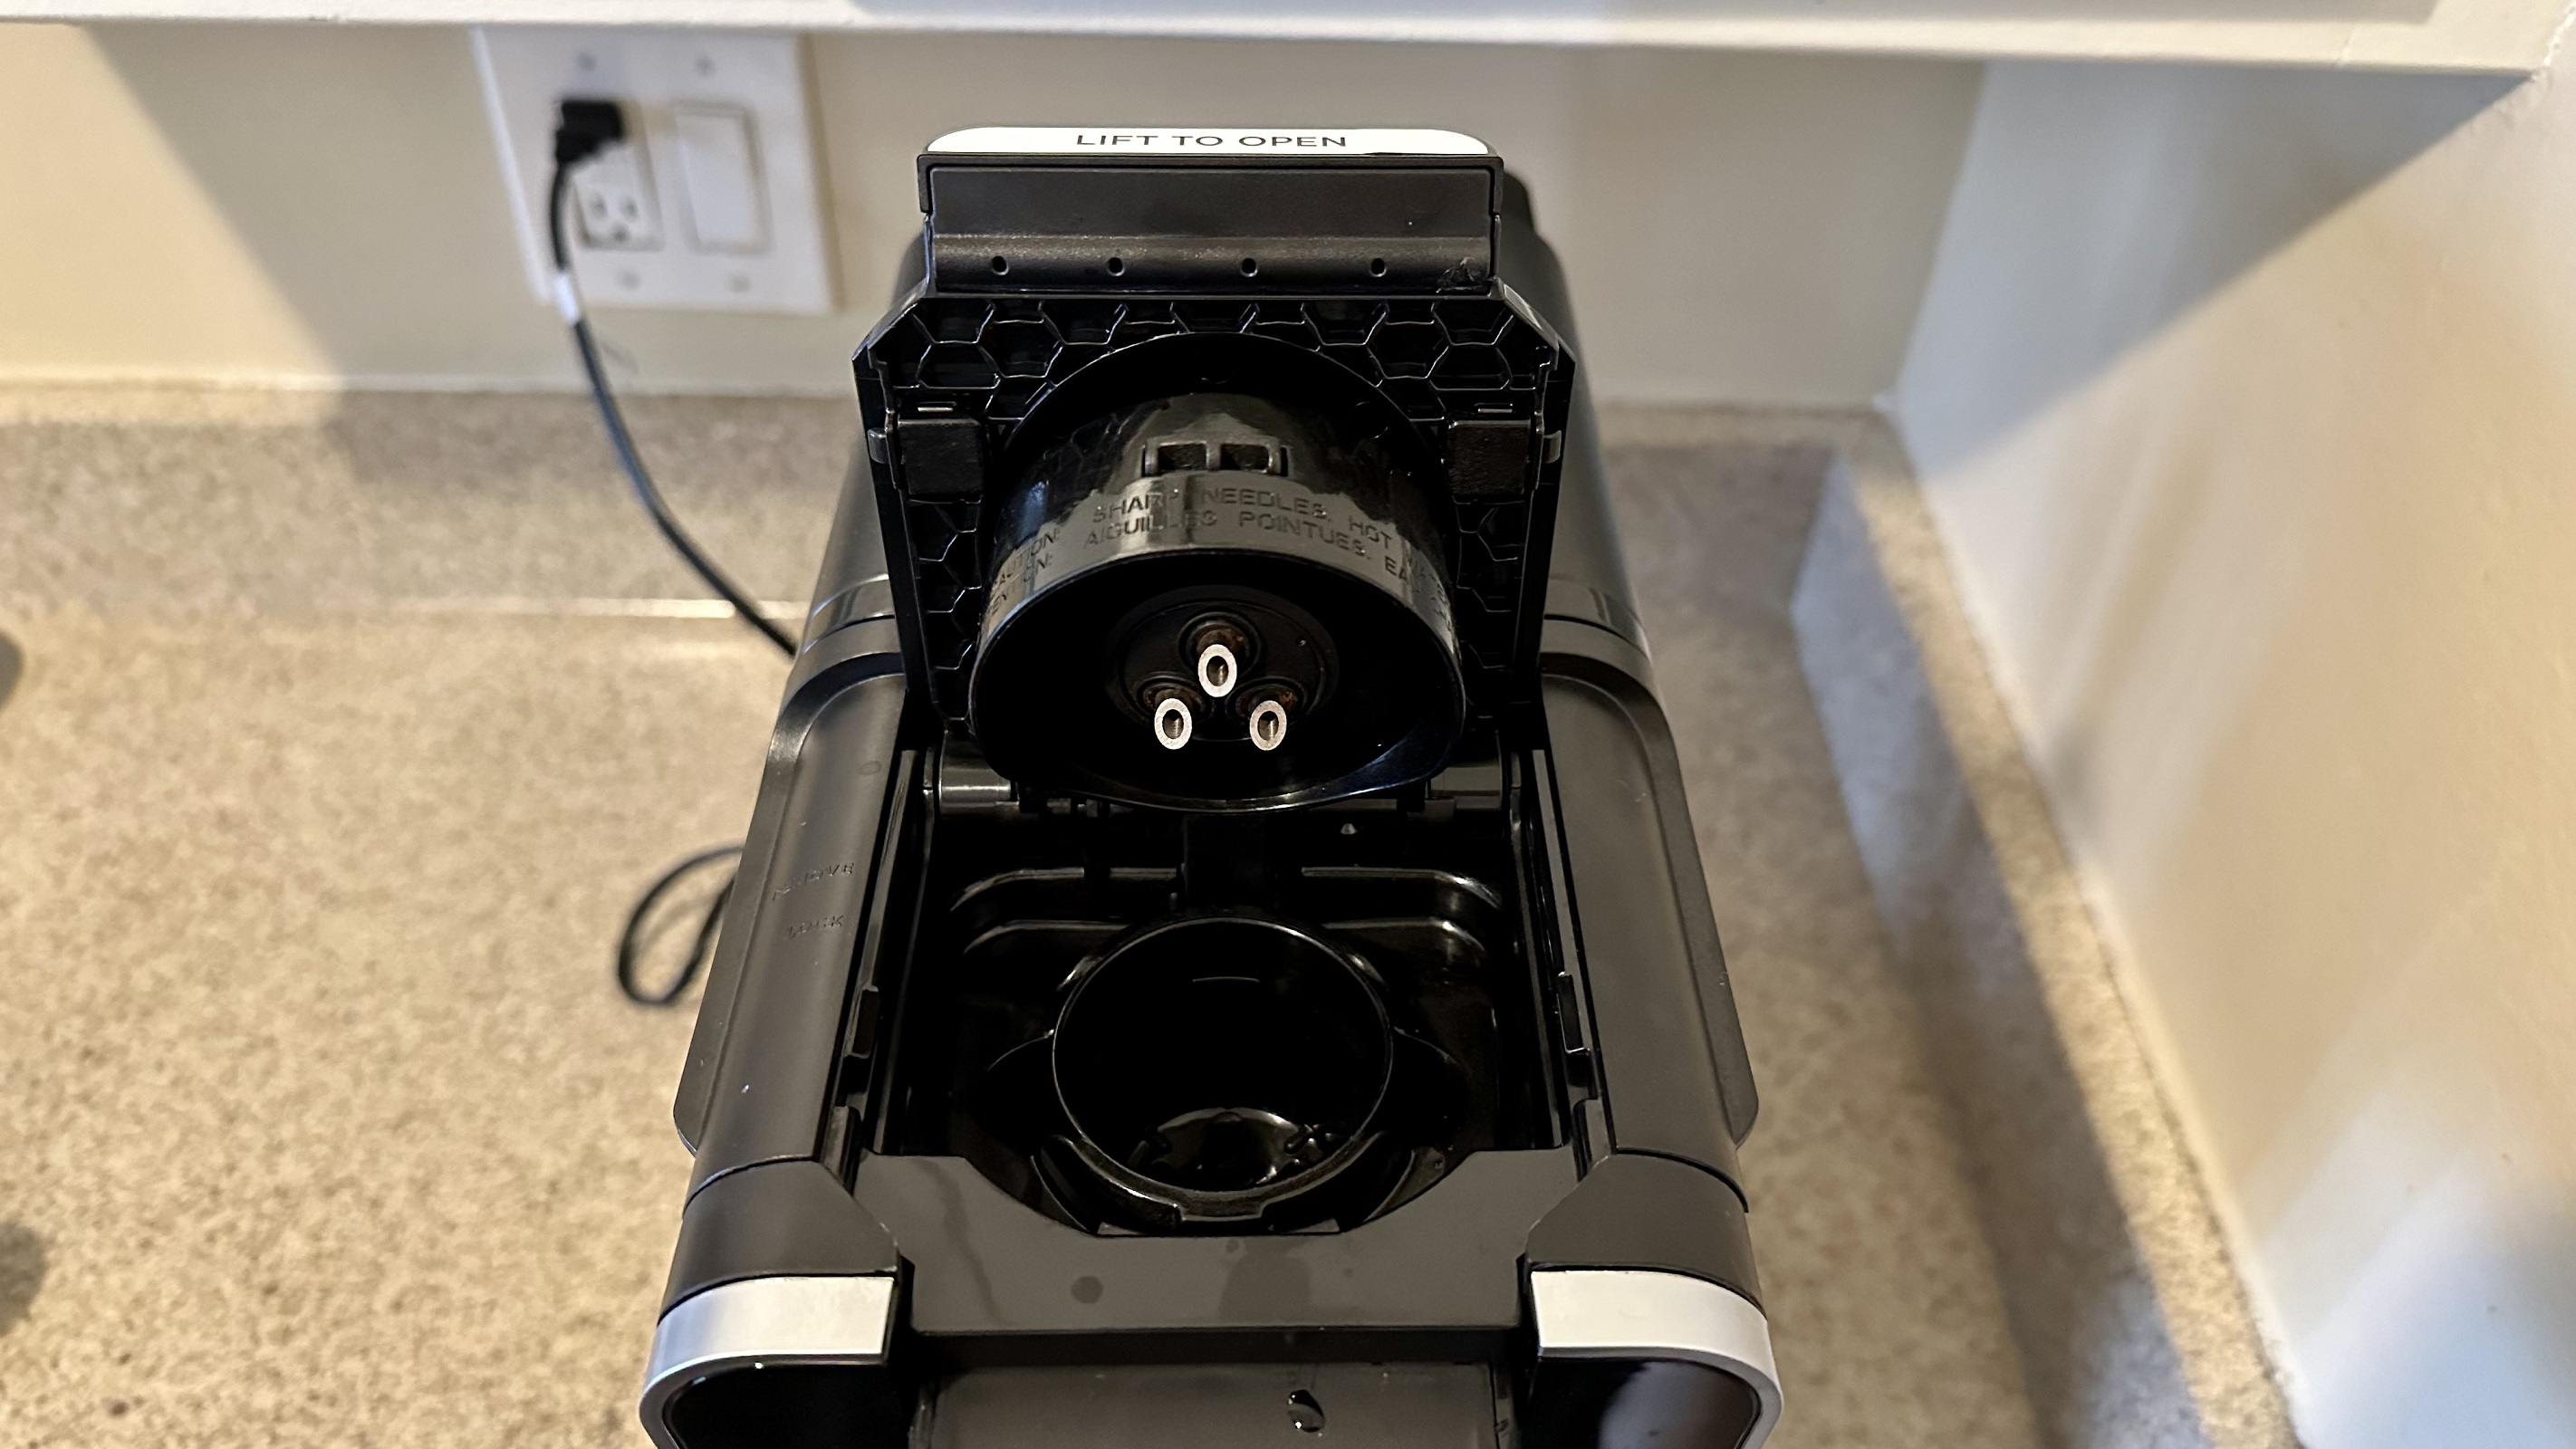
I did the same testing as the 8oz brew with traditional grinds, and it yielded similar results when using the classic, rich, and over-ice brew with the K-cup pods. However, since you’re using pods over grinds, starting the brew and cleaning up after is a bit easier, as you don’t need to deal with filters or measurements. You just simply pop open the top of the adapter and take out or put in the pod.
One of the most intriguing features of the Ninja DualBrew is the specialty brew style, which is meant to mimic an espresso for specialty coffee drinks. Using the Ninja Smart Scoop, I measured out two large scoops, as instructed, and placed them in the brew basket with a filter, like when brewing normal coffee. I adjusted the brew style to specialty, and the brew size was automatically changed to 4oz.
After 3 minutes, it finished brewing and had a temperature of 110°F / 43°C. That was slightly colder than I expected, but that could’ve been due to the vessel I put it in. You can also use K-cups with the specialty brew setting, and it yields similar results. As someone who owns a Breville espresso machine and uses it regularly, this espresso-type brew doesn’t compare. There was no golden crema on top - not that I expected there to be. It also didn’t have the same robust, bold flavor I expect from espresso. Instead, it just tasted slightly stronger than normal coffee.
This specialty brew is definitely not something you want to sip on like a traditional espresso, so I made an oat milk latte with it. Its flavor wasn’t as strong as I like, but still enjoyable to drink - and make - thanks to the milk frother.
The milk frother on the Ninja DualBrew hinges right out from the machine and works great, though it doesn’t heat the milk. If you want your milk warm, you’ll have to put it in the microwave before frothing. Using the frother is as simple as placing it in the milk and pressing the button on top, and the results were better than I expected. After 30 seconds of frothing oat milk, you get a ton of thick, velvety foam to throw on top of a cappuccino or latte. Using 2% milk, I had similar results. And the foam held its shape for a good 10 minutes after initially frothing it.
If you want to make something other than coffee, the Ninja DualBrew also offers hot water by turning a knob on the side. The hot water comes from a separate water line than the coffee, and I can attest that there’s no coffee taste whatsoever. There are two heat settings, boil and hot. When using the boiling setting, hot water came out after just a few seconds. However, the water wasn’t actually boiling, as it measured at 180°F / 82°C, but still worked for steeping my tea. The hot setting dispensed water at 160°F / 71°C, which could work for making hot cocoa or a hot water bottle.
When it comes to cleaning after brewing a coffee, it’s fairly simple. The entire brew basket easily lifts out of the machine, so you can toss out the filter and grinds without getting dirty. You just rinse the brew basket in the sink, and you should be good to go for the next round of coffee. As I mentioned earlier, the clean-up after using the K-cup adapter is even easier, you’ll just occasionally want to wash the pod adapter and needles for the best performance. If you used the milk frother, you can remove the tip and clean that in the sink as well.
You’ll want to deep clean and descale the machine once in a while when performance isn’t up to par or you notice calcium build up. A light will automatically illuminate orange, letting you know if the machine feels like it’s time for a cleaning. After three weeks of heavy use, the indicator light still hasn’t come on, so I haven’t tested the cleaning mode.
There are clean cycles for each mode: grounds, pods, and hot water. For grounds, make sure the coffee maker is in that mode and the brew basket is installed. You’ll fill the water tank with a descaling solution or white vinegar, and the carafe should be placed below to hold the dirty water. You just press the clean and start brew buttons and let the machine do its thing. It should take about 75 minutes. You’ll want to run a classic brew with just water to rinse out the machine after, and you’ll be good to go. The same steps are taken with the pod mode, only the K-cup adapter will be installed. For the hot water mode, ensure you’ve got the knob on the side switched to the water droplet. That’s it for maintenance, making for super manageable upkeep.
- Performance score: 4/5
Should I buy the Ninja DualBrew Pro?
Buy it if...
Don’t buy it if...
Also consider...
If you’re not sure about a pour over coffee maker, here are a couple of other options to consider...
How I tested the Ninja DualBrew Pro Specialty Coffee System
- Tested over three weeks
- Made at least one drink from the machine per day
- Replaced my Breville espresso machine
I tested the Ninja DualBrew over three weeks, brewing at least one cup of coffee from the machine per day, and testing out different settings, sizes, and brew styles. It was easy to adjust to using the Ninja DualBrew, as I’ve used plenty of coffee makers before. The control panel is a bit more high-tech than some, though it’s simple to understand and enjoyable to use.
The Ninja DualBrew didn’t require me to make many changes to my home. I just put it where my Breville espresso machine was. It had around the same footprint as the Breville when the water tank was installed on the side, but putting the water tank on the back did free up more counter space which was handy.
Read more about how we test.
[First reviewed May 2023]

