Long-time readers know I like to experiment with remote monitoring projects. A few decades ago, I described my “Cheap Remote” based on a Blue Earth Microcomputer, as an inexpensive device about the same size as today’s Raspberry Pi and other single board computers. I needed the money I’d budgeted for a commercial remote control to cover the cost of an air conditioner for the shelter for a translator I was installing in Midland, Texas.
Lately I’ve been looking for an inexpensive way to monitor a remote transmitter over a limited bandwidth internet connection.
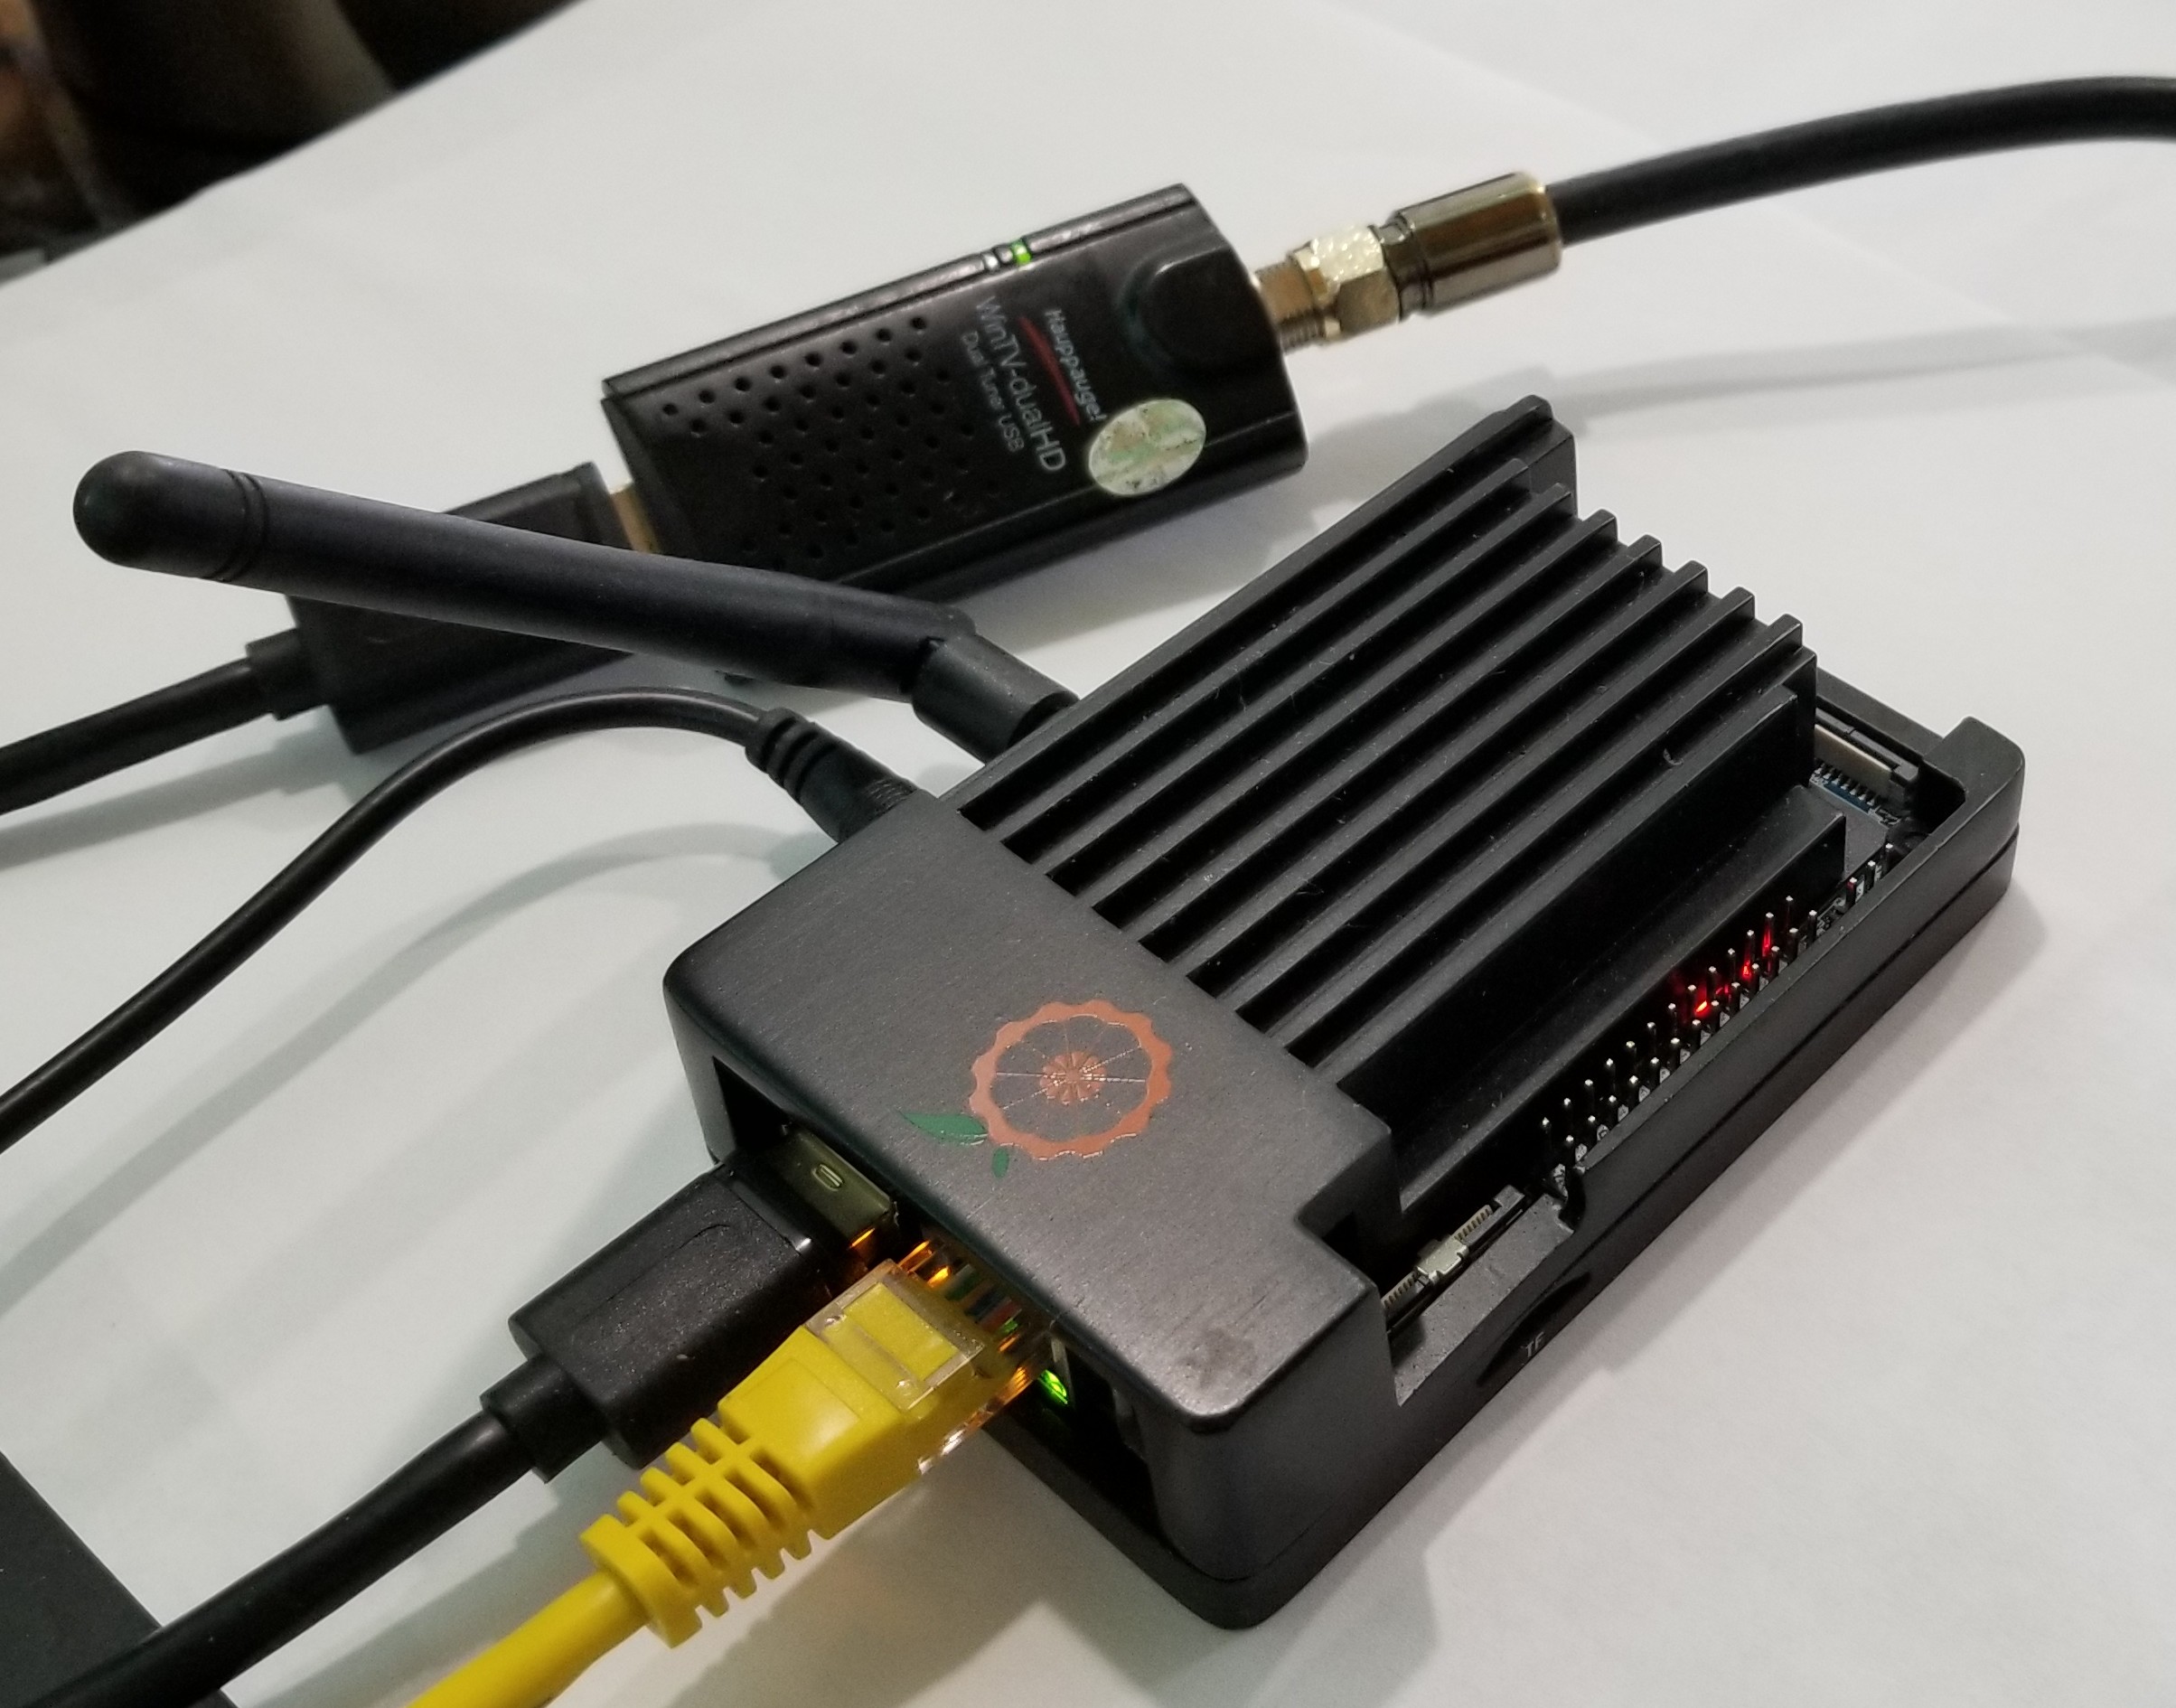
The result is the OTA (Over-the-Air) Pi Monitor. Using an Orange Pi 4 LTS and a Hauppauge WinTV-dualHD Dual USB tuner, the whole setup, with case and power supply, can be put together for less than $200. It requires about 2 Mbps of upload bandwidth (adjustable) when viewing the video clips.
Hardware
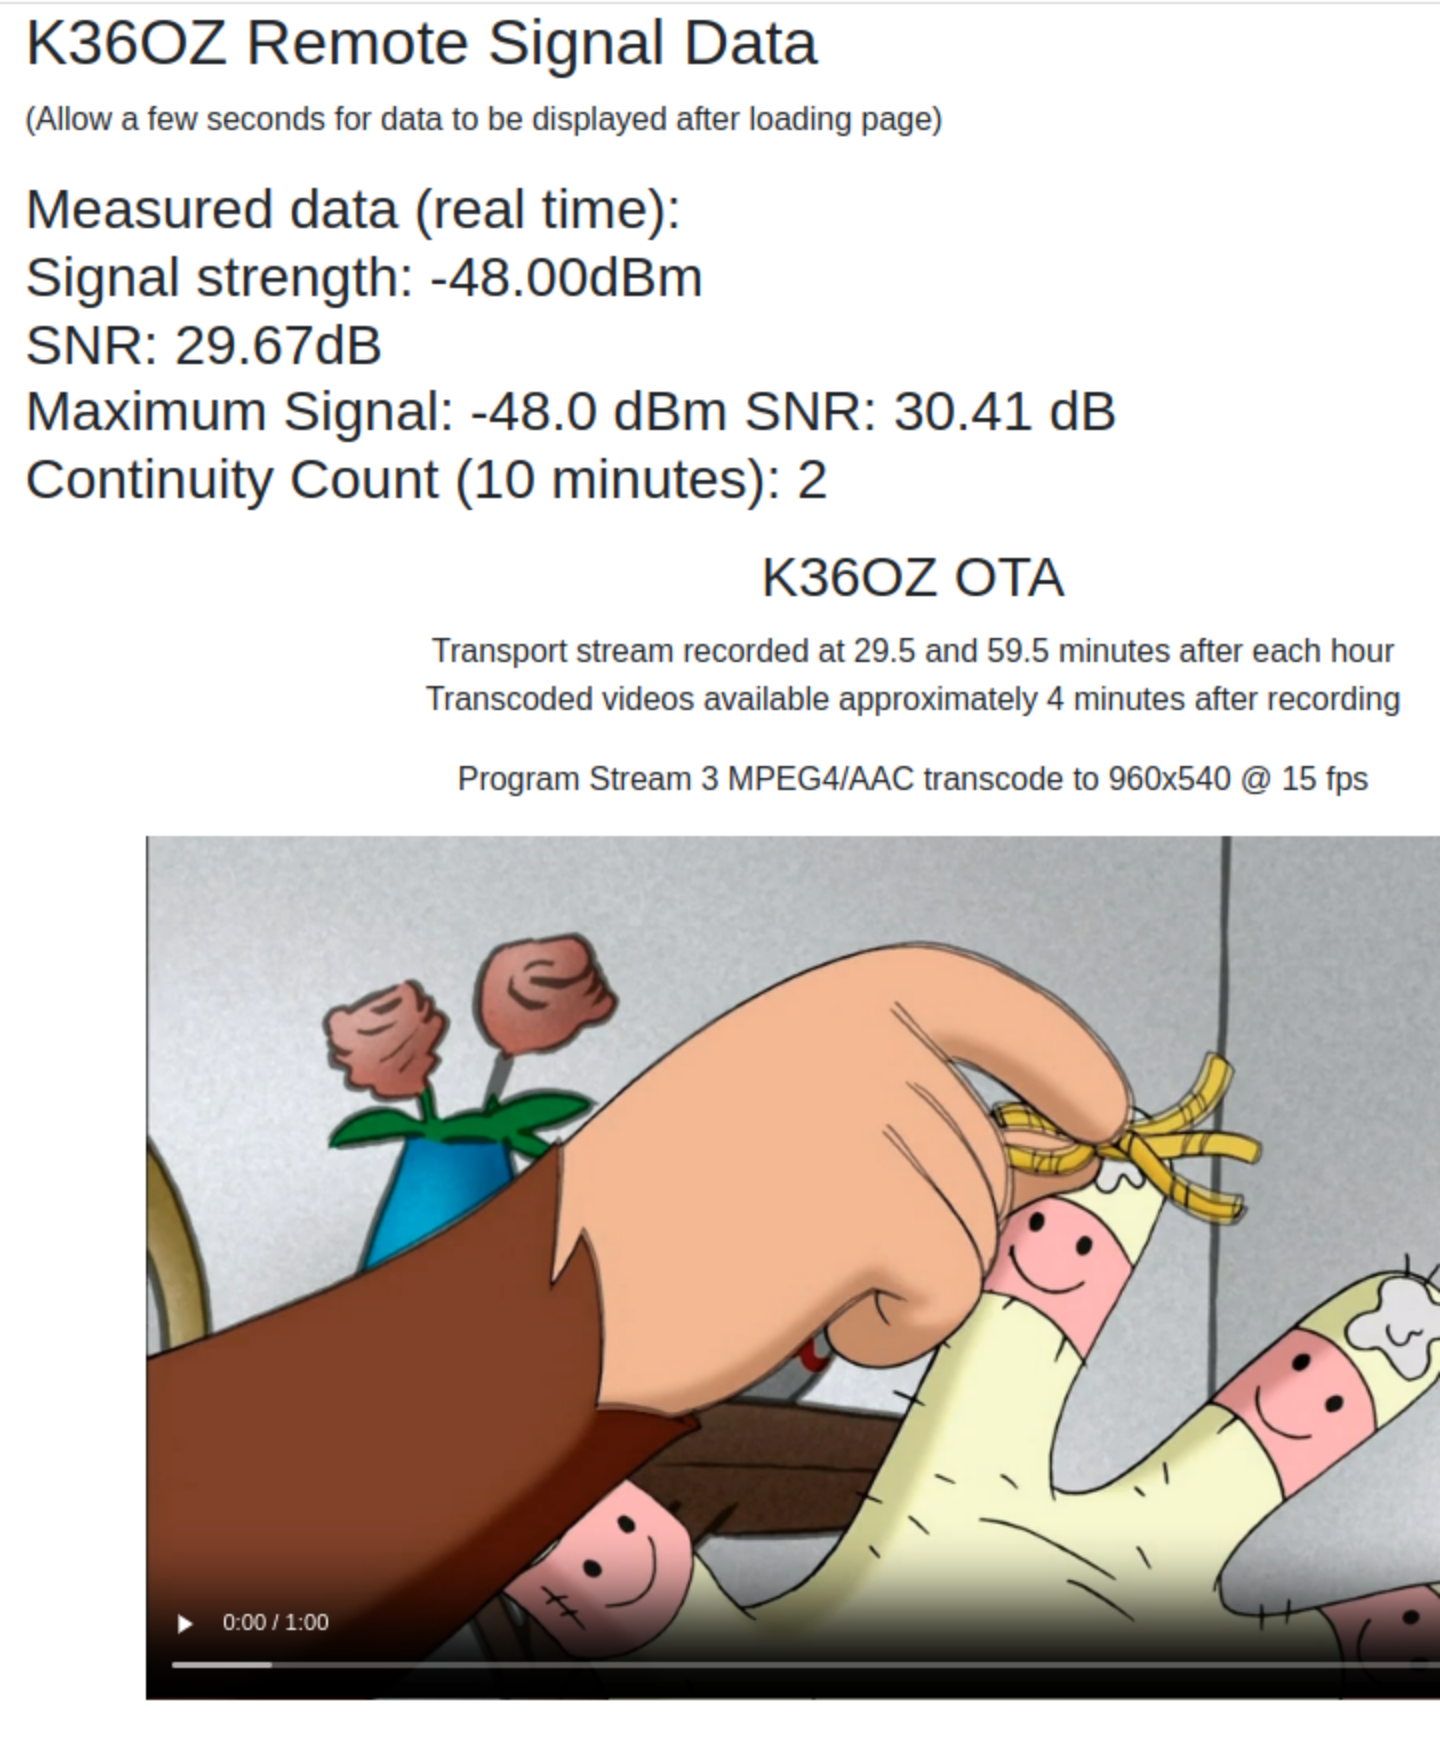
Fig. 1 shows part of the web page available after connecting to the device. There is a real-time display of signal level, SNR and a continuity count (10-minute interval). Video is available for the main HD program and the SD programs. A short segment is recorded at the top and bottom of each hour.

I designed the box to work without high-speed internet. HD video is transcoded from MPEG-2 to AVC (MPEG-4) at quarter resolution (960x540) and frame rate is reduced to 15 fps. SD video is also converted to AVC at 15 fps. The peak bitrate for playback of the downconverted HD stream is under 2 Mbps and around 1 Mbps for the SD streams. The video plays in a web browser. Below the video is transport data with PID data and bit rates (not visible on the screenshot).
The OTA Pi Monitor should also work with a Raspberry Pi 4, Orange Pi 5B or other single-board computer running a Linux operating system. The Orange Pi 4 LTS I used has 16 GB eMMC storage and 4 GB of RAM. Whether using an Orange Pi or other SBC, be sure the power supply can deliver enough current; otherwise, as I learned the hard way, the computer will crash when transcoding the video.
Program Flow
The OTA Pi Monitor programs are simple. As you can see from Fig. 2, it isn’t fancy! Operation is simple: A one-line script, sigdata2.sh, uses dvbv5-zap to grab the tuner data and provide the signal level, SNR and continuity error count. A small Python program, sigdata.py (only 3,905 bytes), runs that script every second to obtain the readings for the web page. A Flask module in the sigdata.py program provides a web server using a small index.html template. Flask’s socketio module receives the data from sigdata2.sh. A 656-byte javascript app, signalapp.js, displays the real-time data on the web page.

I wasn’t able to find a way to easily stream live video over an internet connection, so I decided instead to use dvbv5-zap, the same program used to obtain the data from the tuner, to do a 60-second transport stream capture every 30 minutes. The system timer, available on most Linux distributions, sets the recording times.
Once recorded, FFmpeg is used to extract program streams from the transport stream and transcode them for lower bit-rate playback. Finally, the tsanalyzer program from TSDuck is run to analyze the transport stream and generate a text file. All of this is done in the 15-line (including comments) tscapproc.sh script. The Flask web server displays the transport stream analysis text file and provides HTML5 links to the transcoded program streams (video and audio).
There isn’t room to include program listings in this column but I’m happy to share them; email me and I’ll send you the latest version. If there is enough interest, I’ll make them available for download.
The most complicated part of this project was getting all the pieces working together. Google searches helped and eventually I was able to assemble a working program. I’d been working on this project for a few years and I found when I tried to use my original software as a starting point it failed due to slightly different syntax in the updated libraries. When stuff fails, the error messages are not always clear, but copying the error message to Google and doing a search often provides a solution.
Program Component Details
Here are some more details on the software components in the OTA Pi Monitor.
Flask simplifies creating a website with real-time data and video. There are several tutorials online. The trickiest part was getting Flask SocketIO working with signalapp.js (delivered by the Pi) and socket.io.min.js (downloaded from cloudflare.com by the browser) to display the real-time data to the screen. I’m happy to share the solution I came up with.
The DVBv5-tools provide an easy way to interface with PCIe or USB DTV tuners. The OTA Pi Monitor relies on the dvbv5-zap tool. Most Linux distributions offer dvbv5-zap but the package name may vary. I found the best way to record the transport stream was to tune the signal with dvbv5-zap in the record mode, which sends the transport stream to a software DVR device, which can be dumped into a file using the “cat” command.
The dvbv5-zap program works well with the Hauppauge WinTV-dualHD tuner. Because the dualHD has two tuners, it is possible to do transport stream captures without stopping the signal quality readings.
TSDuck is a very powerful toolkit that can analyze and edit transport streams among other things. I’m using it as a text-based version of TSReader (learn more about it and download versions for most operating systems, including Windows, macOS, and common Linux distributions, including Ubuntu, Fedora, Debian and the Raspberry Pi OS at https://tsduck.io/).
I had to compile the program from source for use on the Orange Pi 4 LTS, but the build instructions on the TSDuck web page made that easy.
Transcoding is done with FFmpeg. All it takes is one command line to extract a program’s video and audio from a transport stream and output a file with different resolution (if needed), frame rate, and video and audio codecs at different bit rates and quality. I had trouble extracting specific program streams until I found the “-map p:#” command line option where “#” is the program ID number. That option will transcode the video as well as all audio streams under that program ID.
I hope you find this useful for monitoring remote translator sites or perhaps even as a simple way to check on your station when you don’t have access to a TV or antenna or are traveling out of the coverage area. I’m happy to share the files I used to create the OTA Pi Monitor and look forward to hearing from readers who’ve built one and improved it! I continue to update it as time permits and as noted, am happy to share the files and help you build one.
As always, your questions and comments are welcome. Email me at dlung@transmitter.com.


