The well-known practice of individually applying EQ to the mid and side channels is called mid-side EQing. EQs that use the mid-side (M/S) mode convert a stereo sound into mono and stereo channels.
The mid (mono) signal contains the information that’s the same in the left and right channels. The side signal contains audio information; that is, the difference between the left and right channels on a stereo track. Mid-side processing gives producers the ability to sculpt mixes far beyond conventional stereo processing.
Once the audio is converted into M/S, the mid information can be processed independently from the side information, then the audio is converted back into stereo left and right channels. In dance music production, mid-side EQing can be used to create remarkable stereo imaging results.
Today, we’ll explore how mid-side EQing can enhance your mixing. For best results, you’ll want to reference your mix using speakers that are positioned correctly in a studio environment, and/or a pair of good quality headphones.
Mixing elements using mid-side EQing
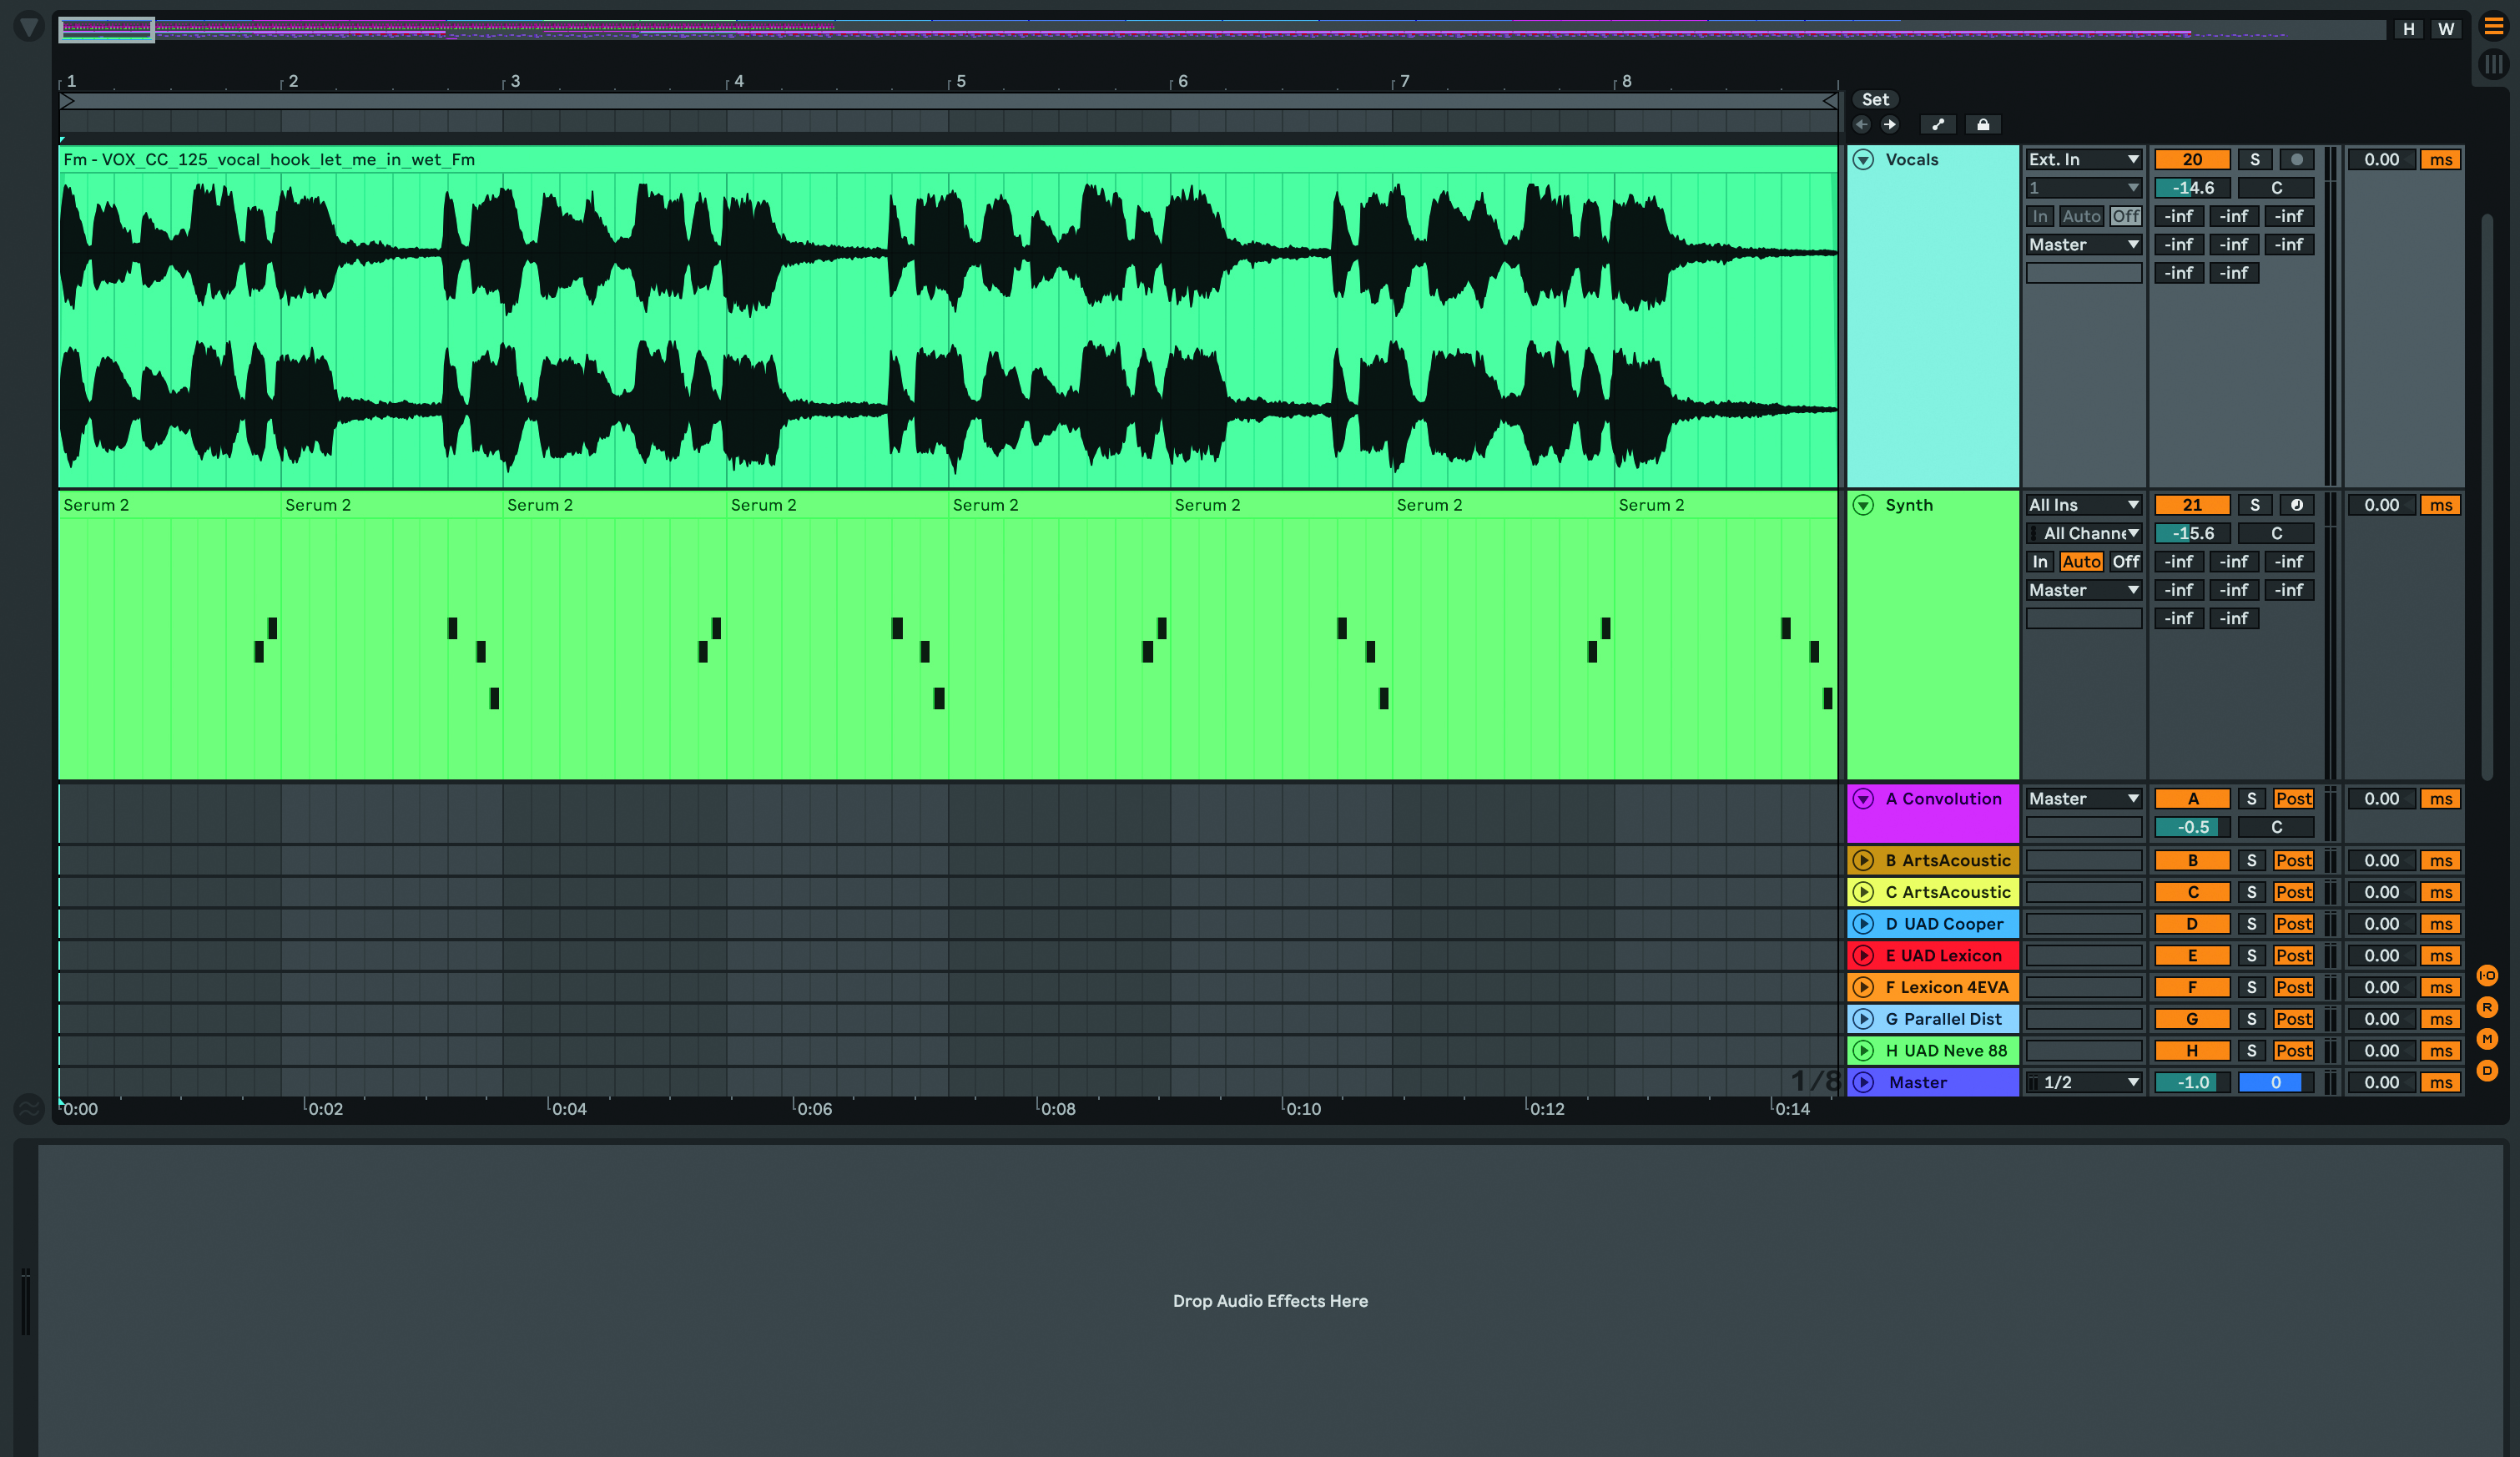
Begin with a mix that has several elements in the same frequency range; maybe a synth or a vocal, or a vocal and arp. Masking will generally occur on these tracks as they occupy the same frequency spectrum. Rather than panning these elements, use mid-side EQing to make the vocal the main element in the middle of the mix.
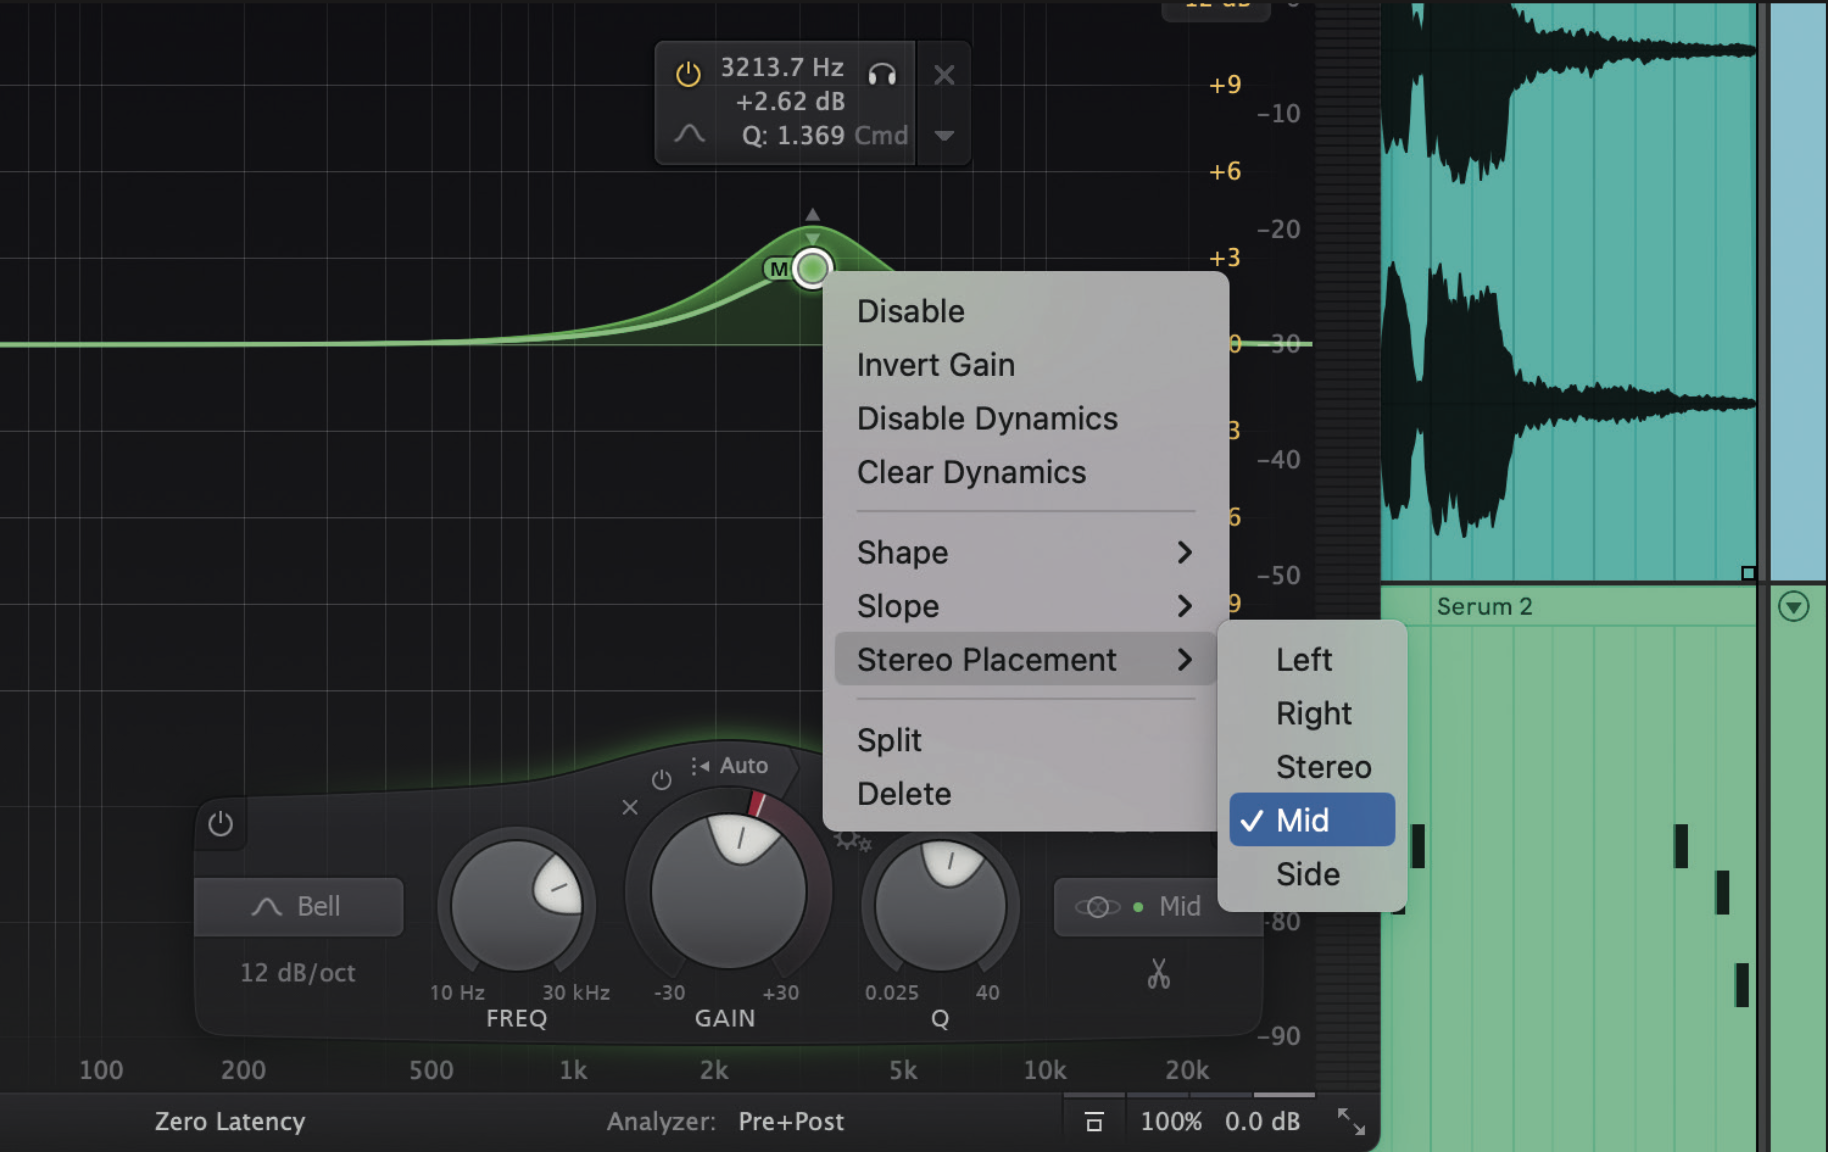
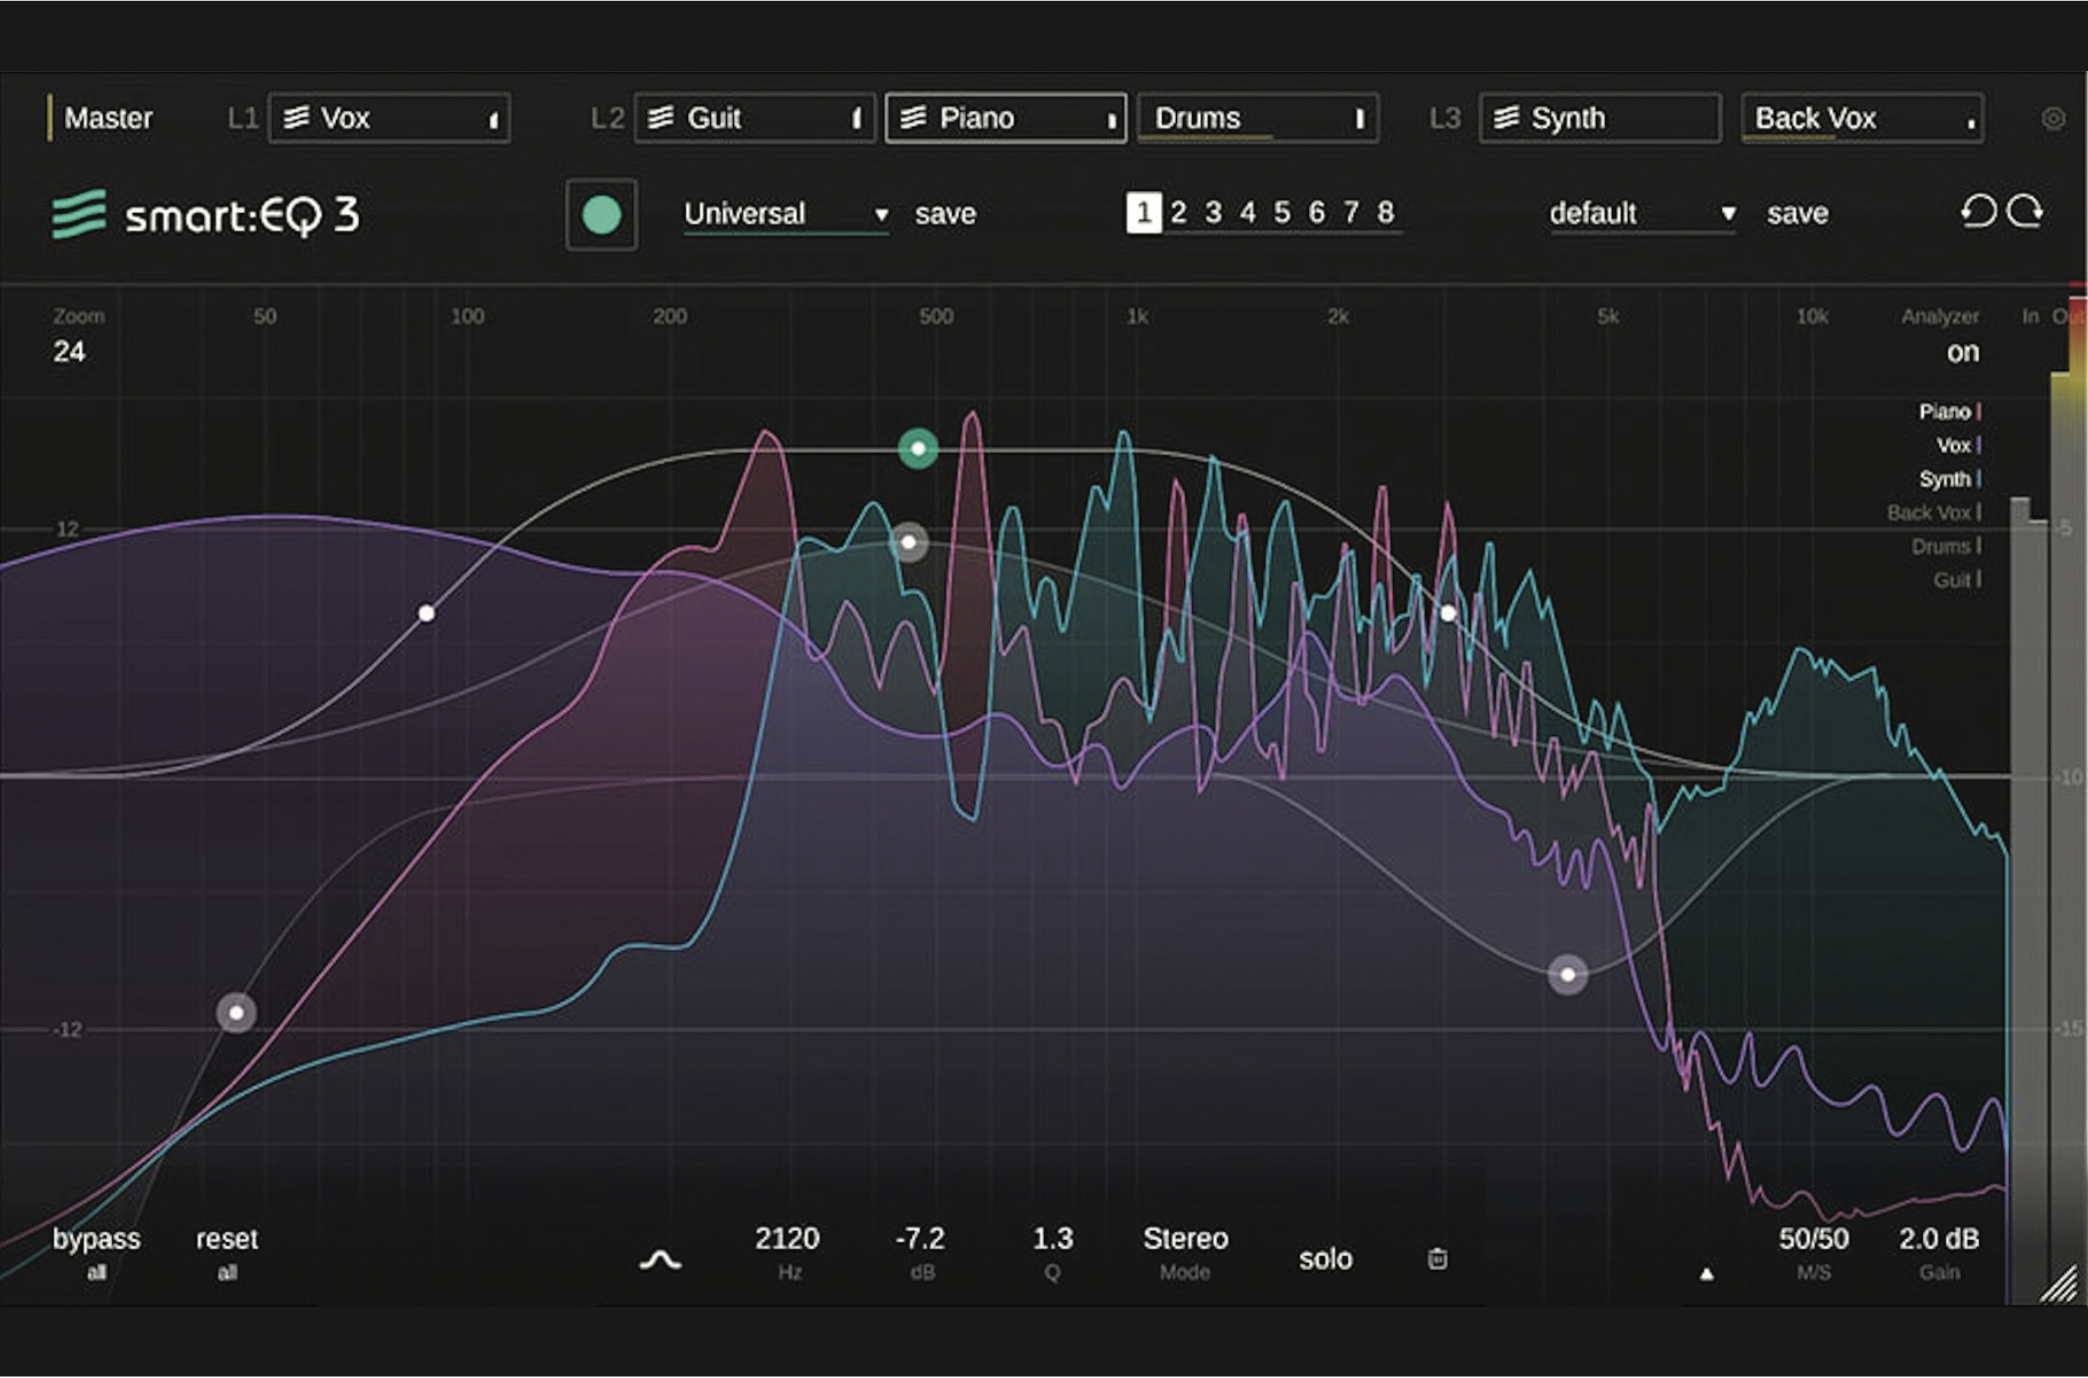
On the vocal track, add an EQ that offers mid-side mode, for example FabFilter Pro-Q 3, iZotope Ozone 11, sonible smart:EQ 4 or Ableton’s EQ Eight. Add a bell EQ and find the main frequency that you want to emphasise in the vocals. Select mid mode (often found in the stereo placement section) and boost this frequency. Only the mid frequencies are boosted.
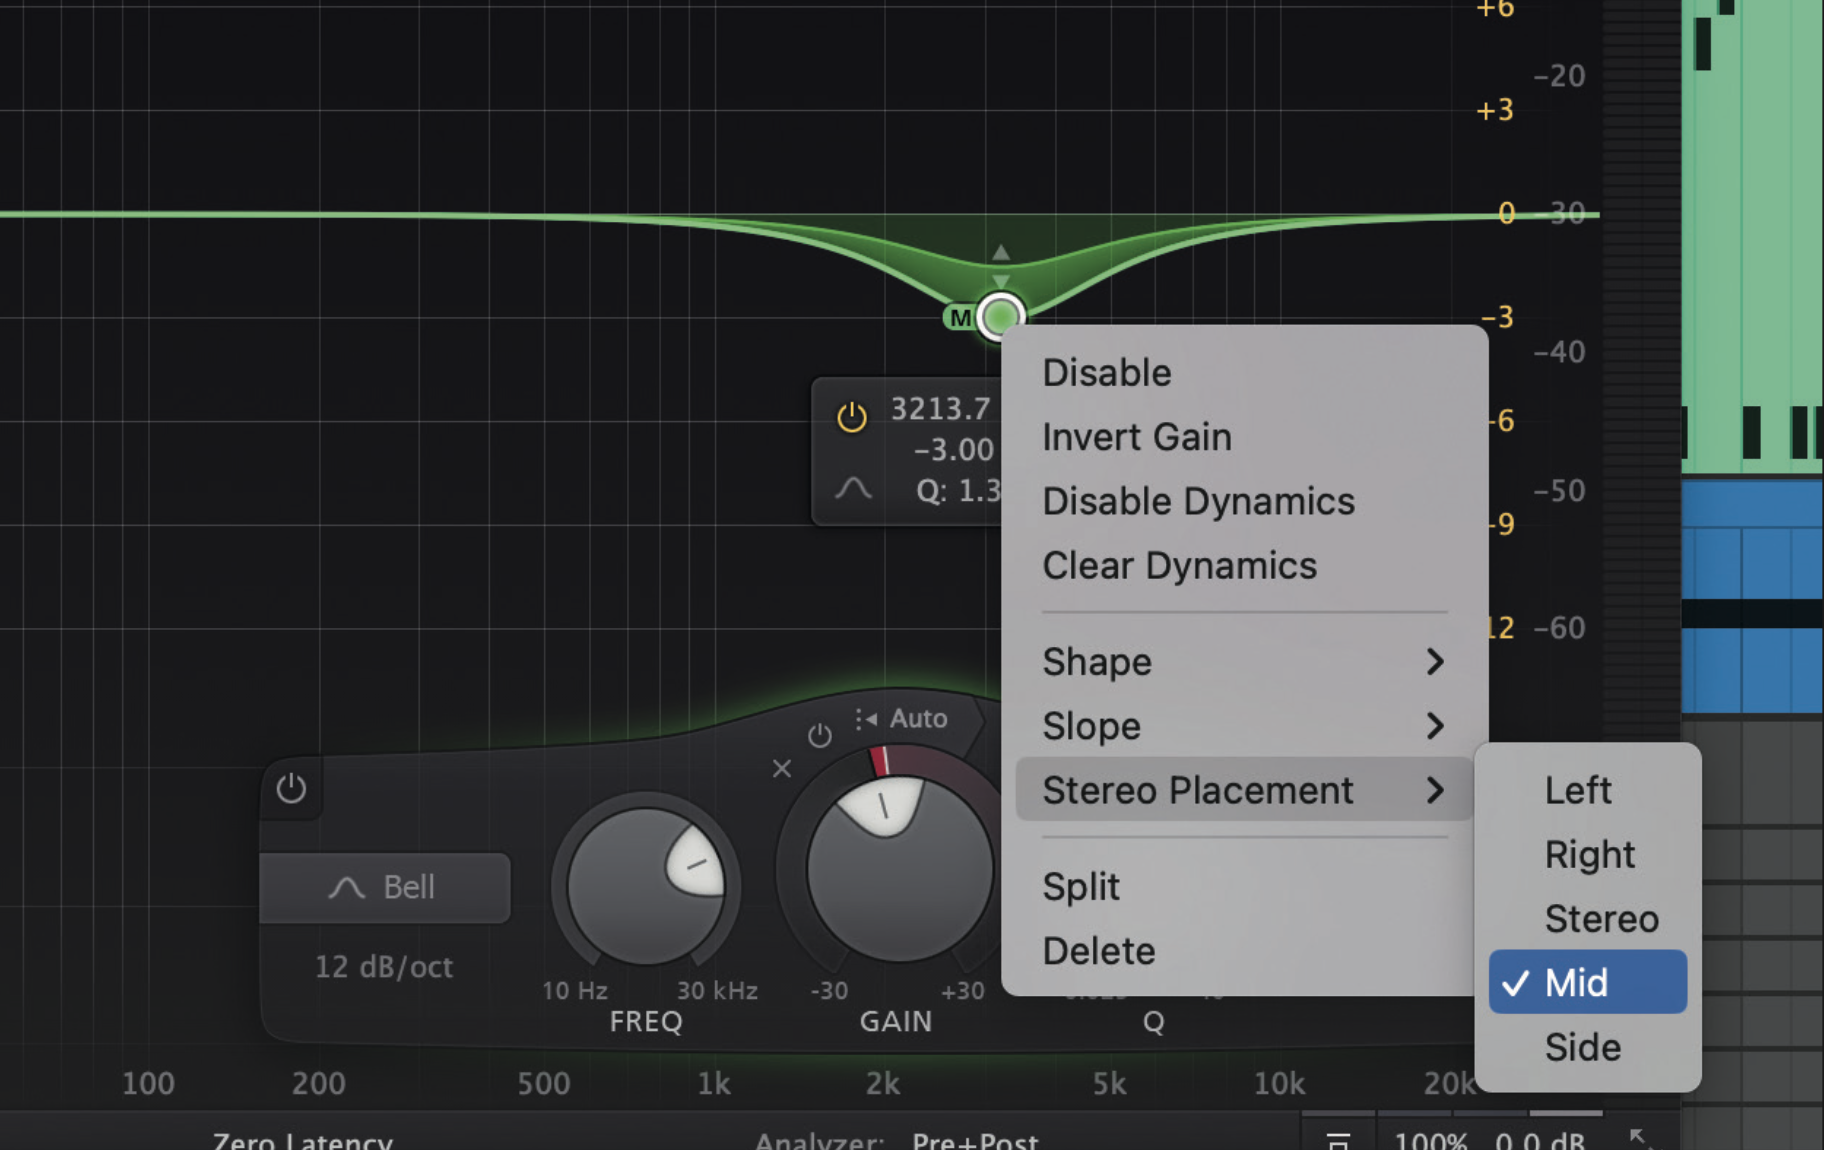
On the synth track, add an EQ with mid-side mode. Add a bell EQ and select the same frequency used for the vocal EQ. On the EQ, select mid and cut the frequency, so the second track is EQed in the opposite way from the vocal track. This creates space for the vocal by creating a dip in the mid information on the synth track.
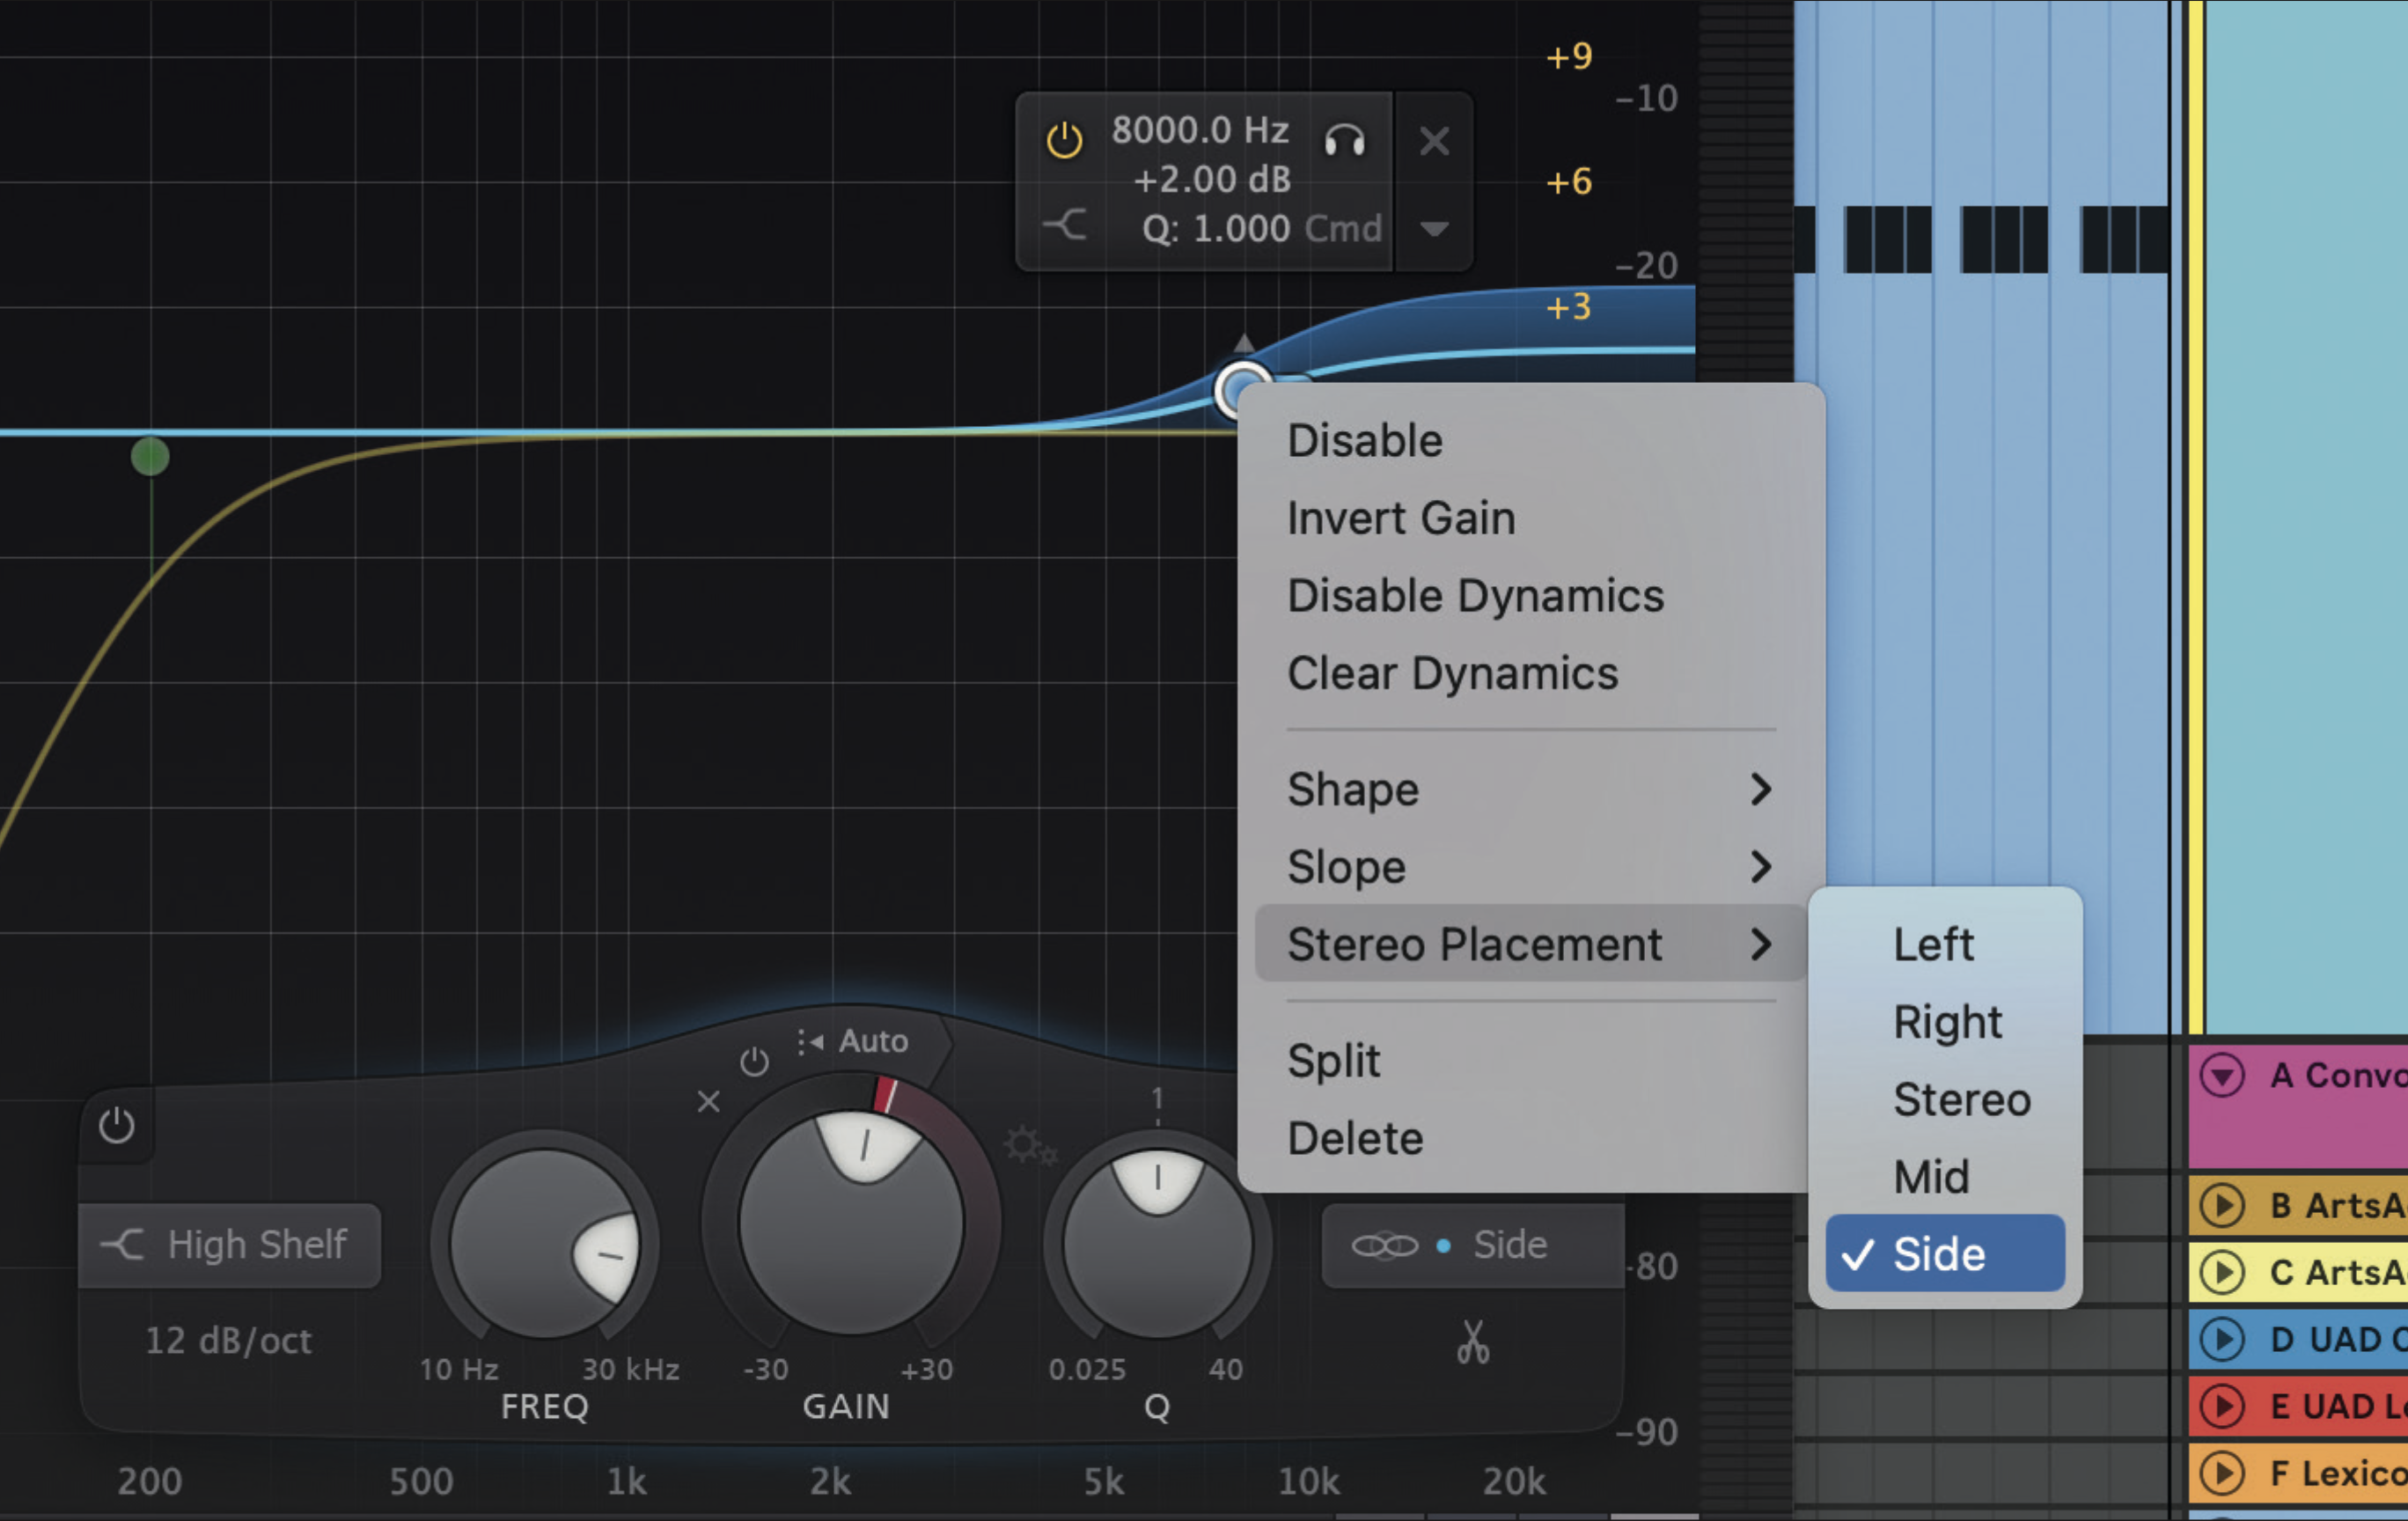
Add a hi-hat track to the mix and use mid-side EQing to create a wider sound. Add FabFilter Pro-Q 3 (or another EQ with mid-side mode) and add a high-shelf EQ between 8000–10,000 Hz. Select side mode and make the EQ dynamic to add movement. This EQ boosts the side information in the hi-hats to create extra top-end shimmer.
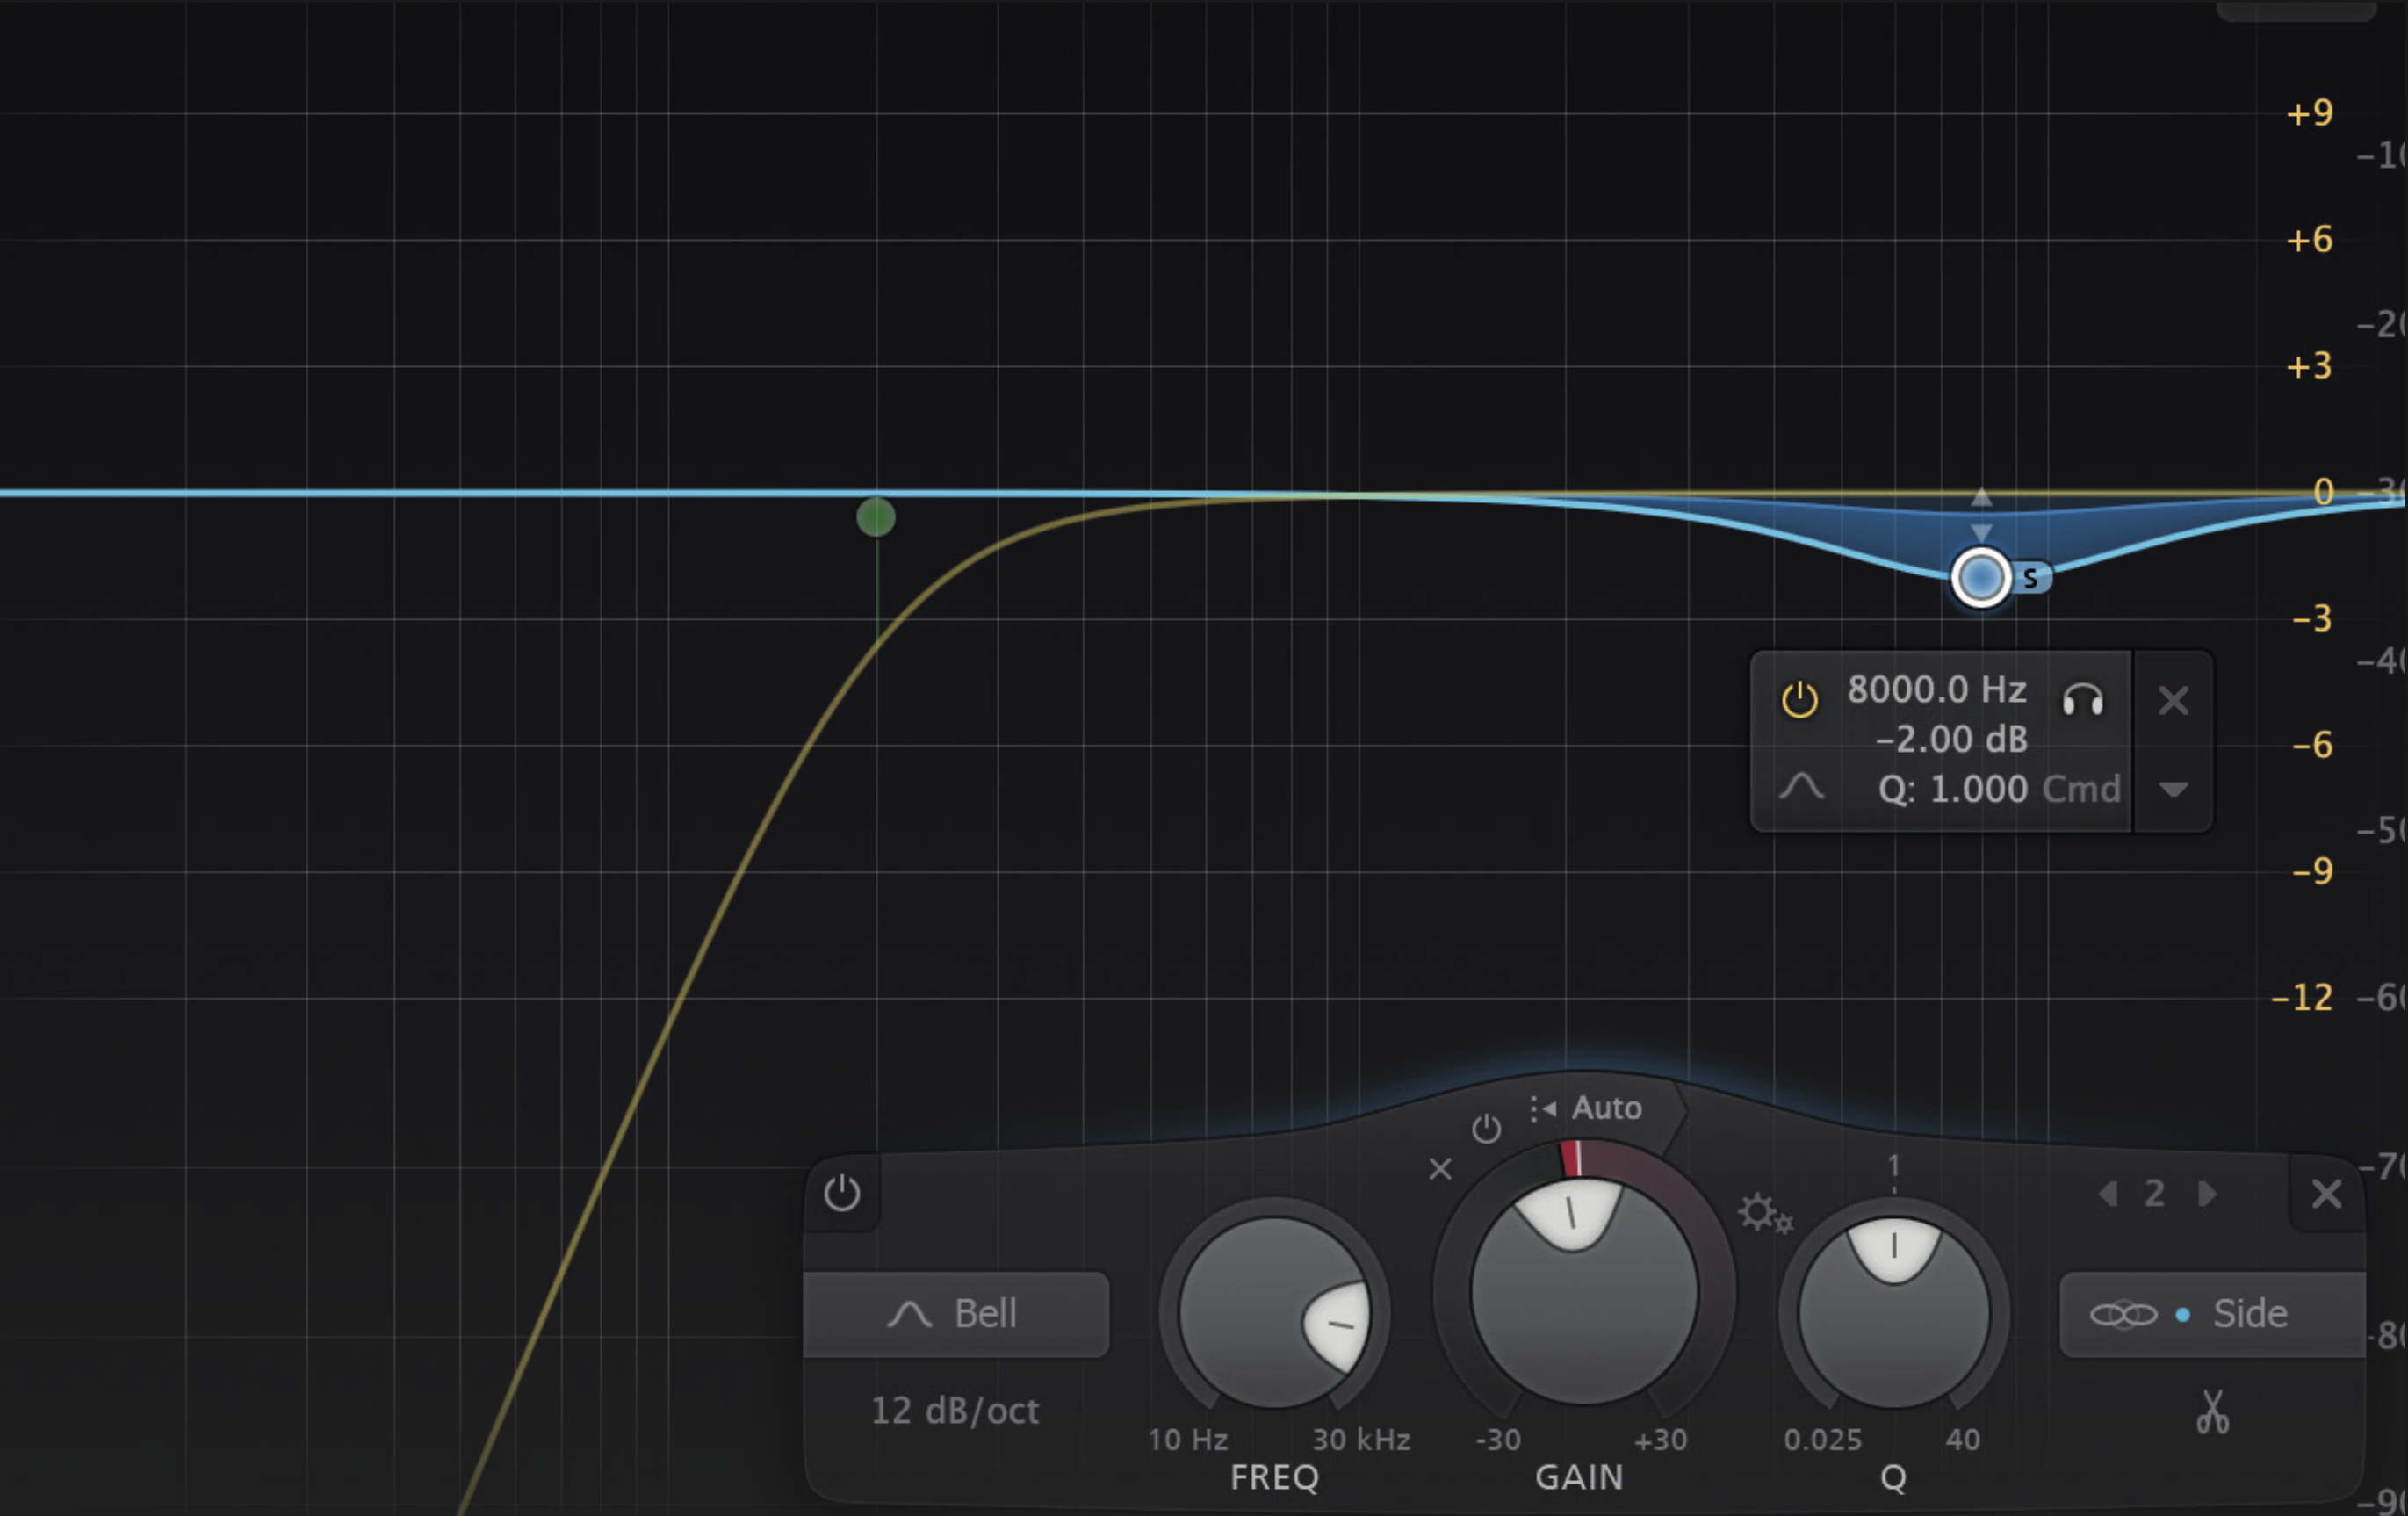
Add in an additional hi-hat track to your mix. Add your mid-side EQ, and select a bell or shelf EQ in side mode. Use the EQ to carve out frequencies that have been enhanced by other EQs and create space for each hi-hat. If you boosted your first hi-hat at 8000 Hz, use an EQ in side mode and make a cut at 8000 Hz.
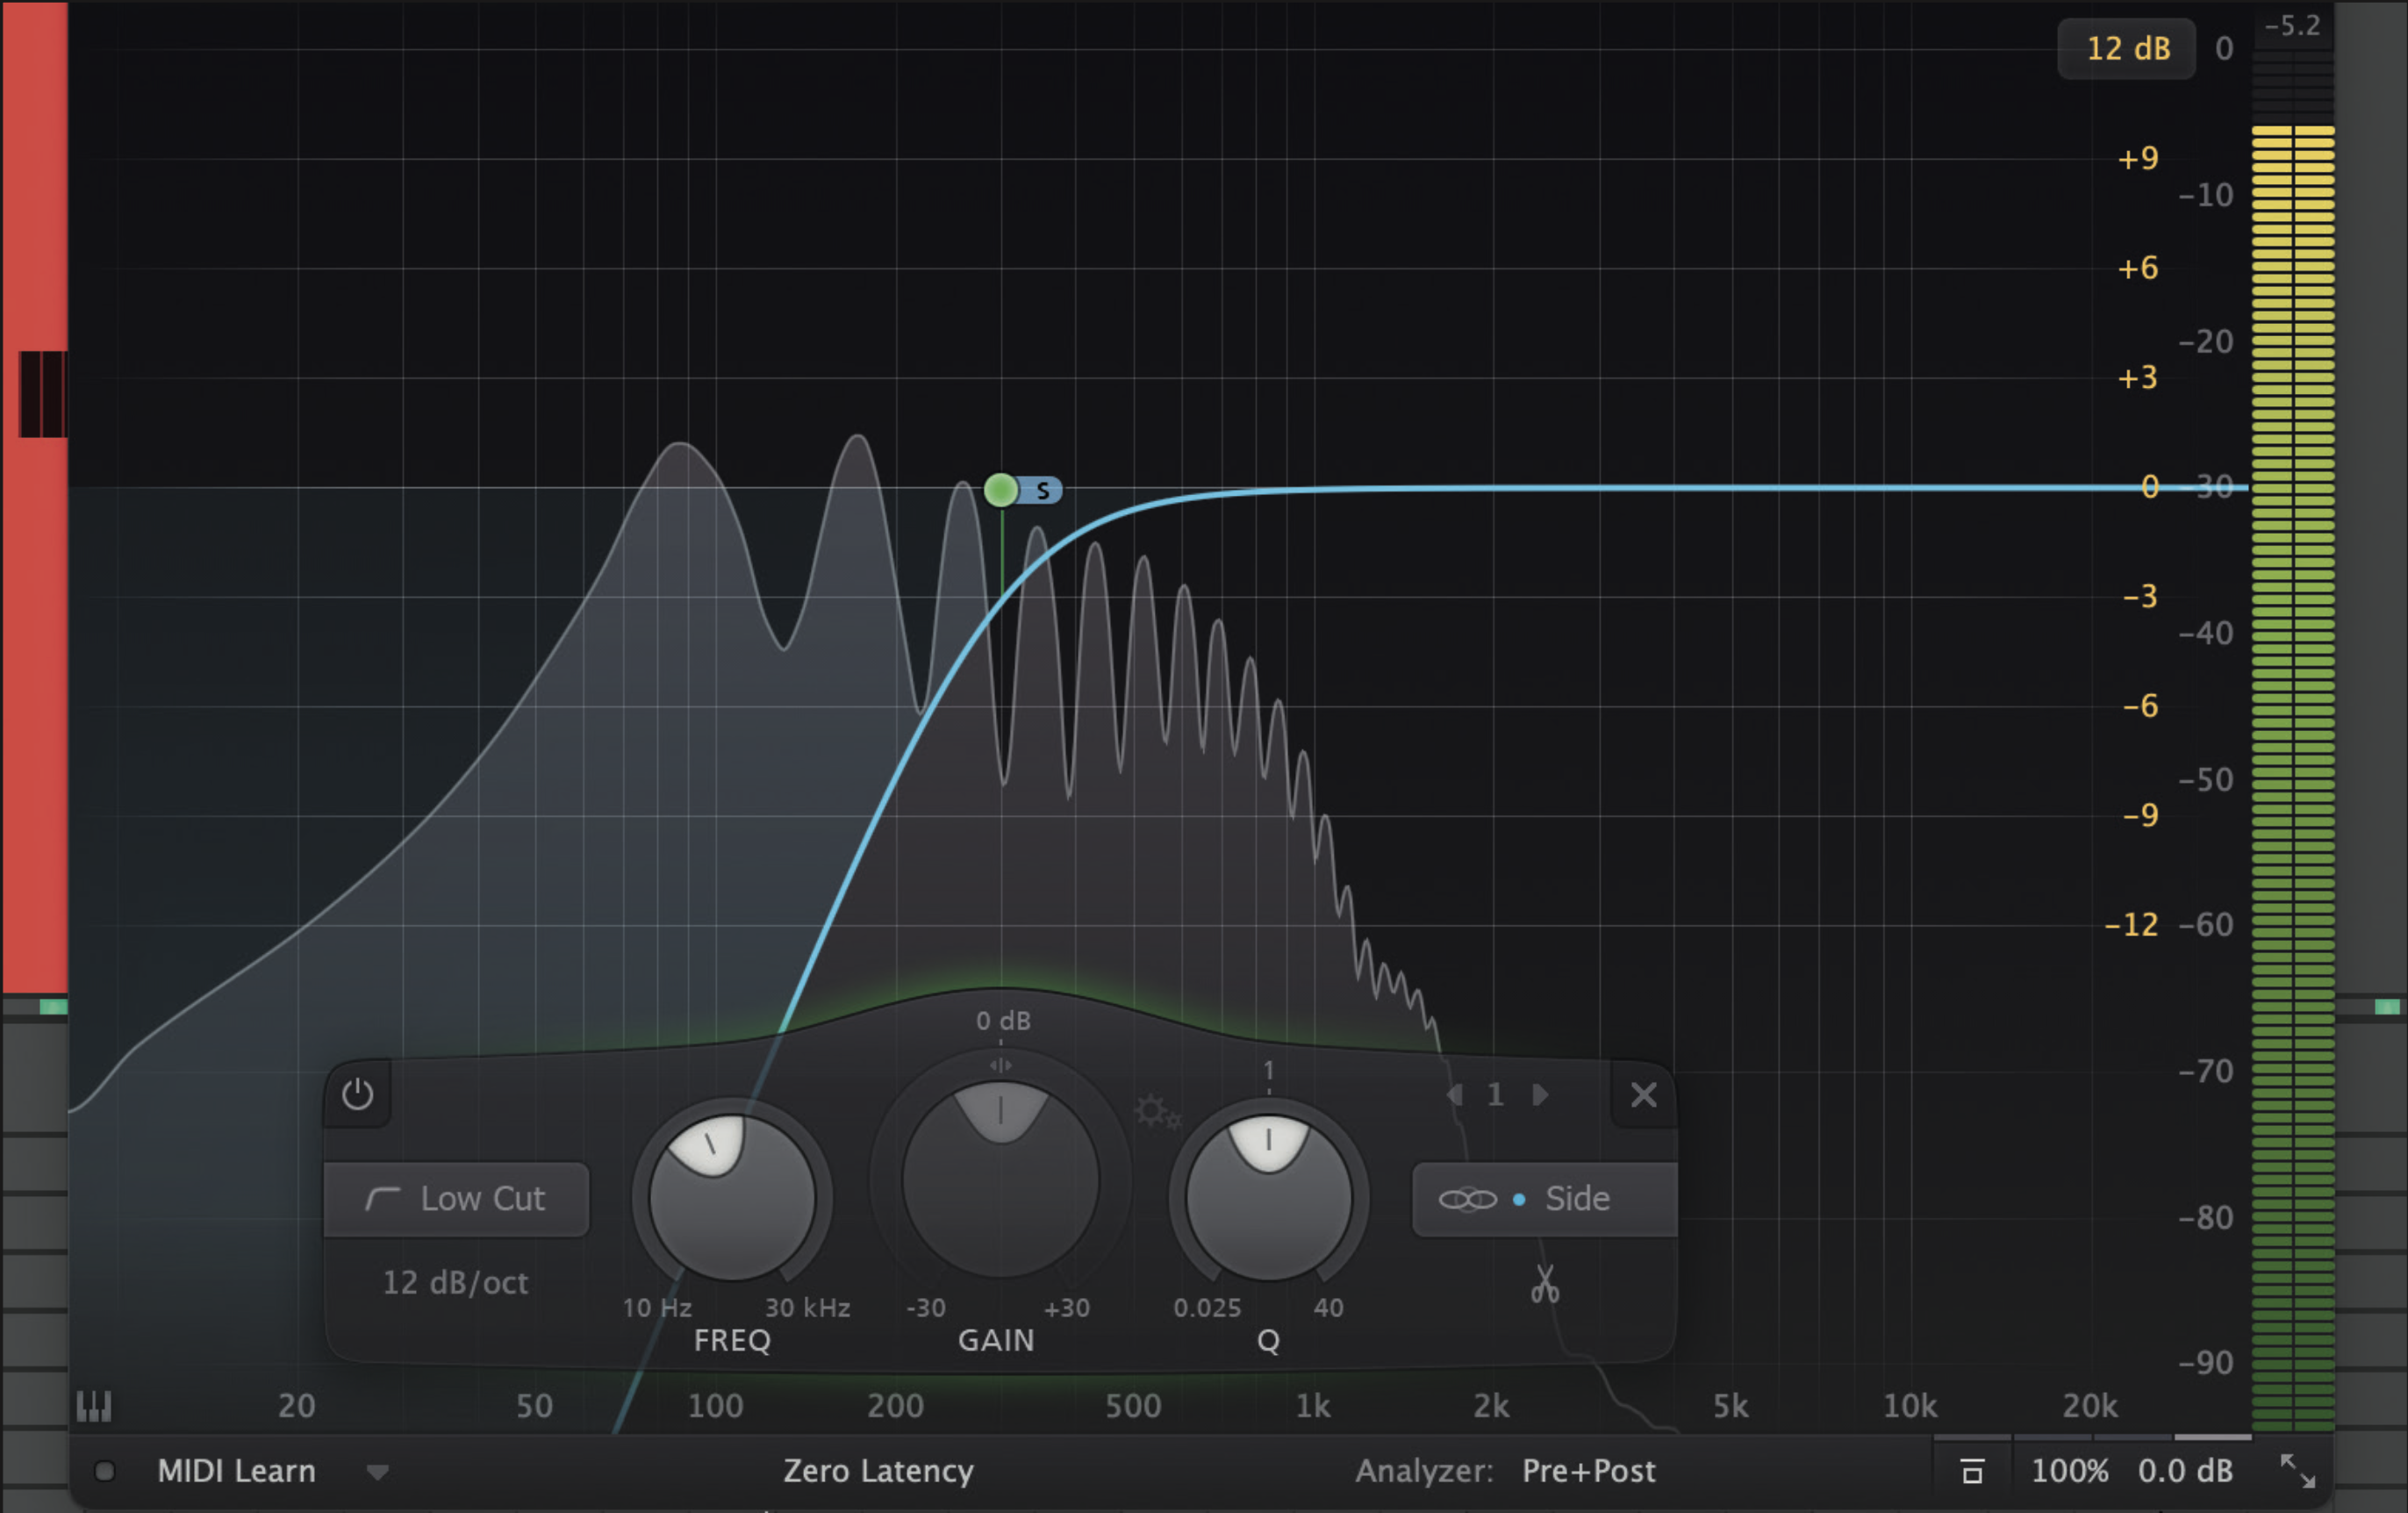
Electronic basslines can have wider high frequencies and a centred low. Use mid-side EQing to keep a tight low mono frequency and wider highs. Add an EQ, a low-cut filter, and select side mode. Cut from 80-300 Hz. This makes the bass mono below your chosen frequency, while keeping the stereo image in the top end.
Add wide space to a vocal track with reverb and mid-side EQ
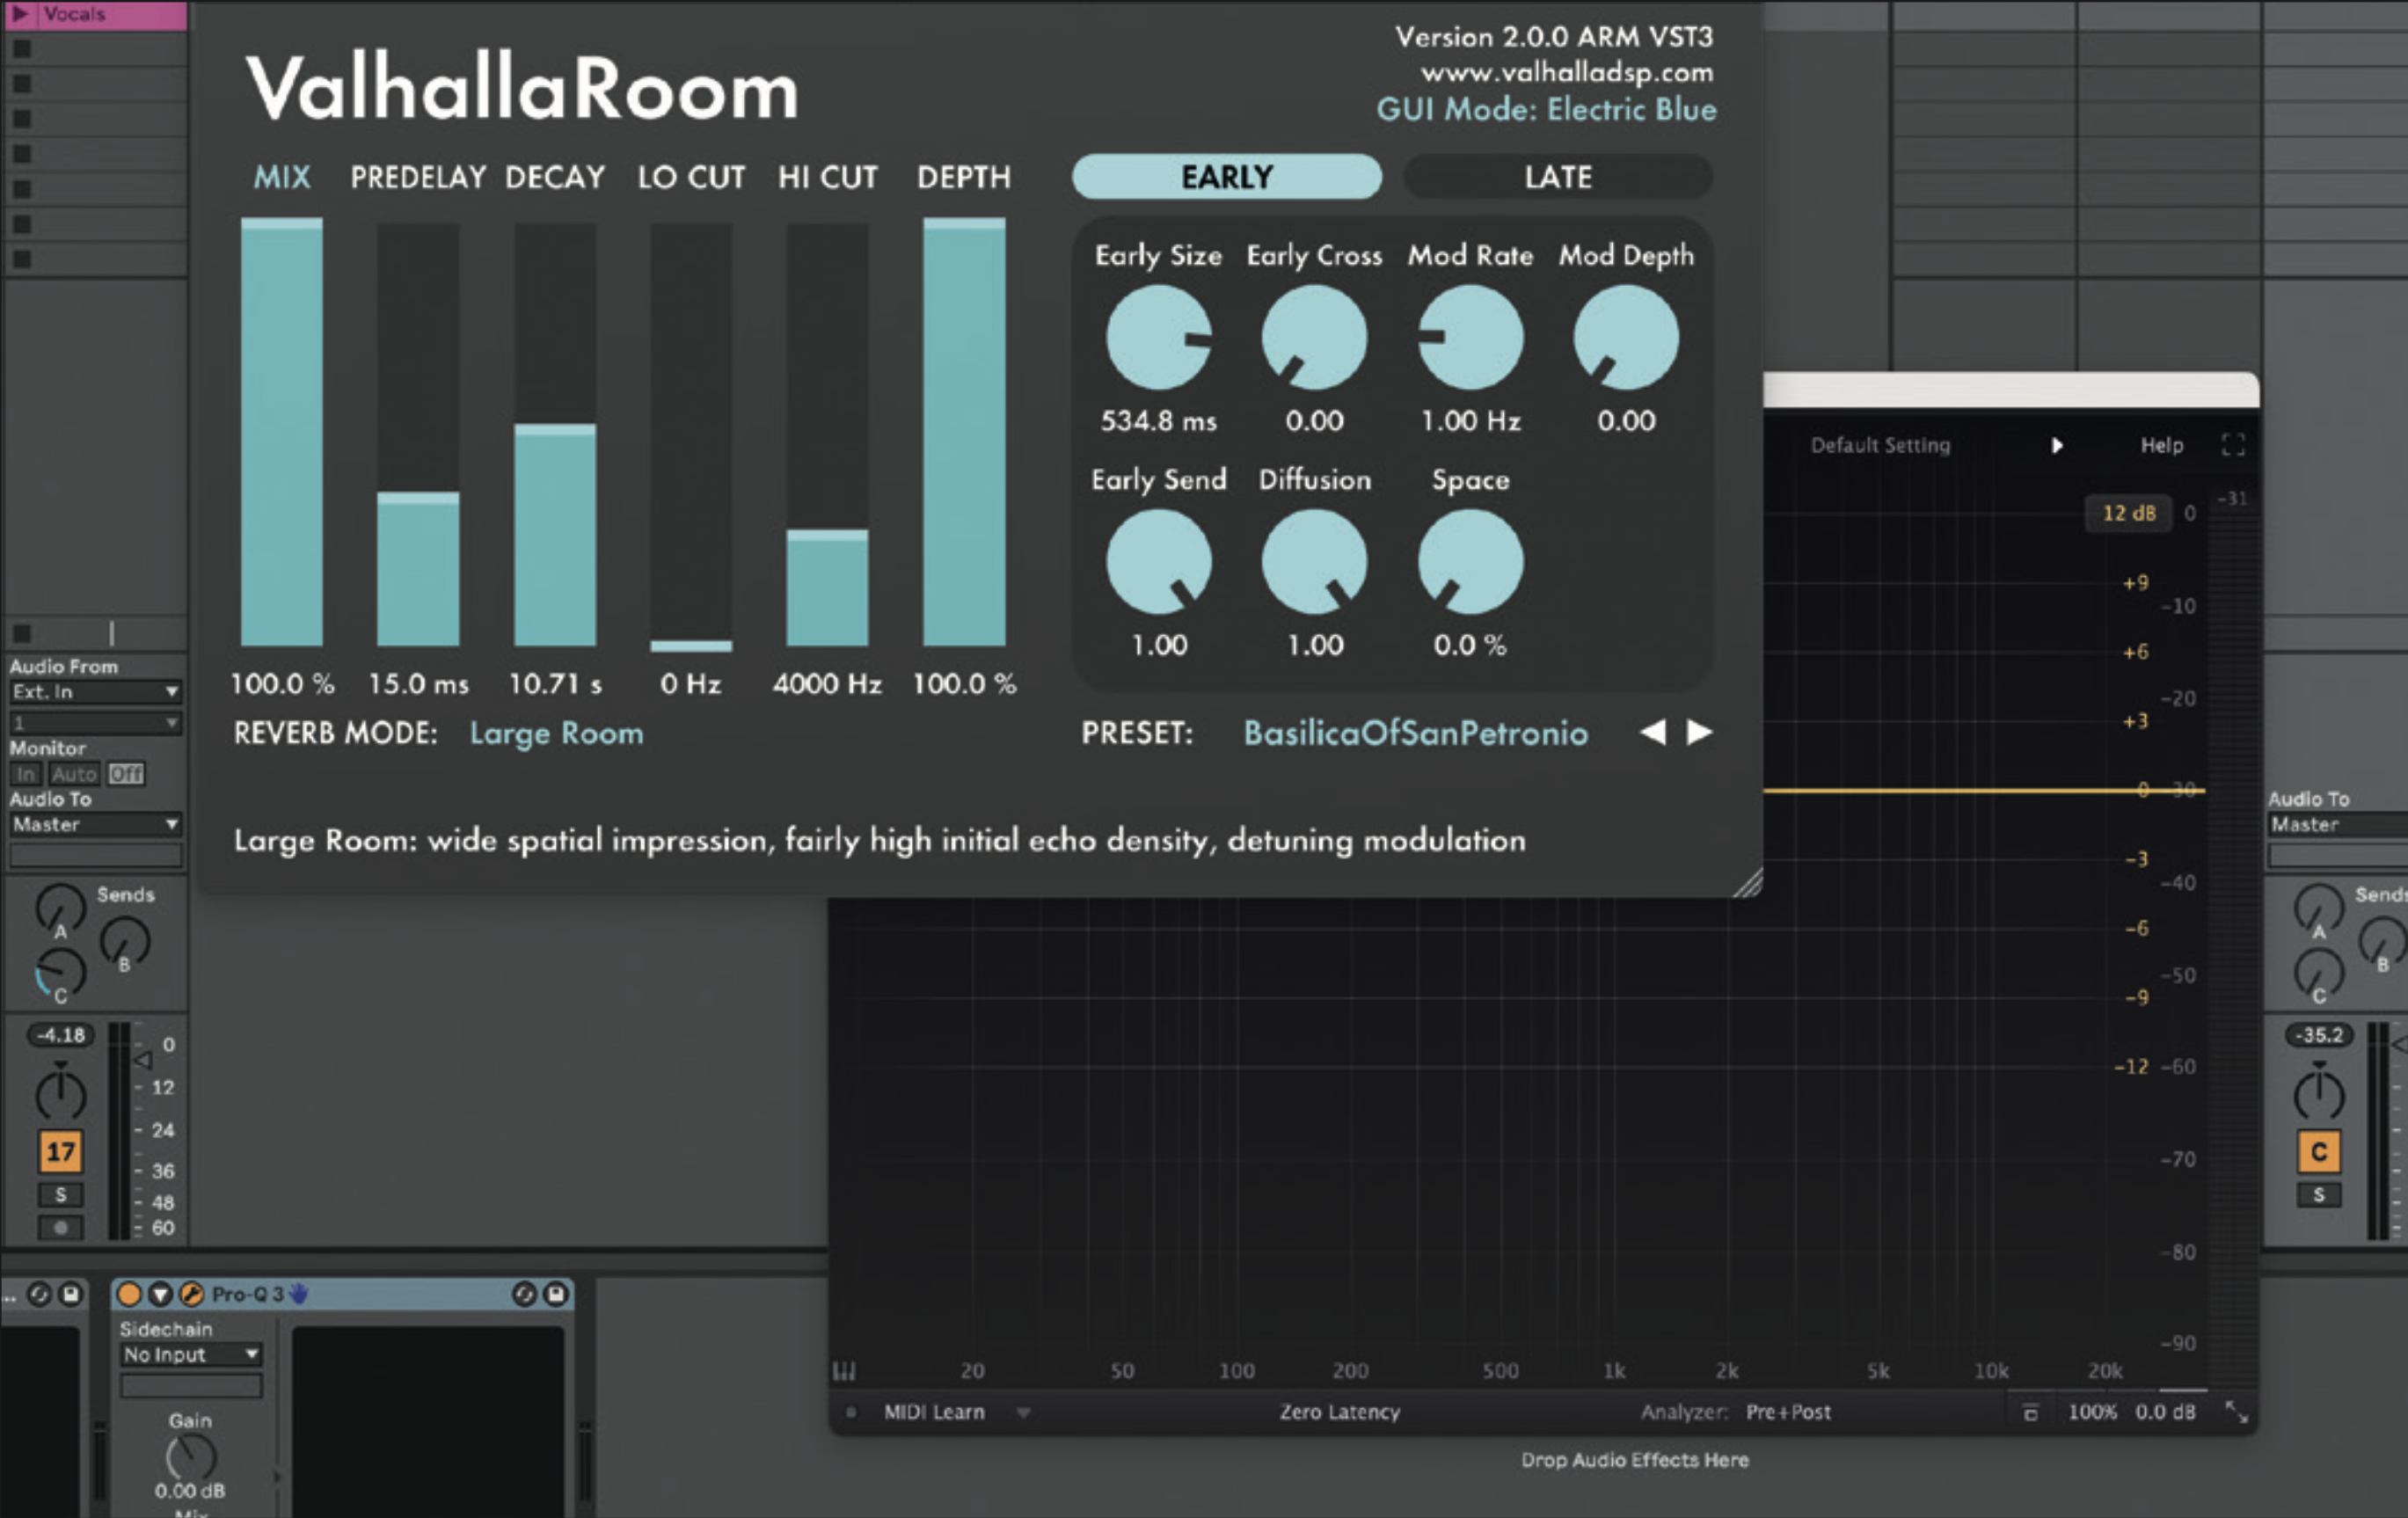
Start with a vocal track. Create a return track, and add a reverb with a long decay to the return track. Send the vocal to the return track. Next use mid-side EQing to add wide space and air to the high end of the frequency spectrum on the reverb. On a return track, add an EQ with mid-side mode after the reverb.
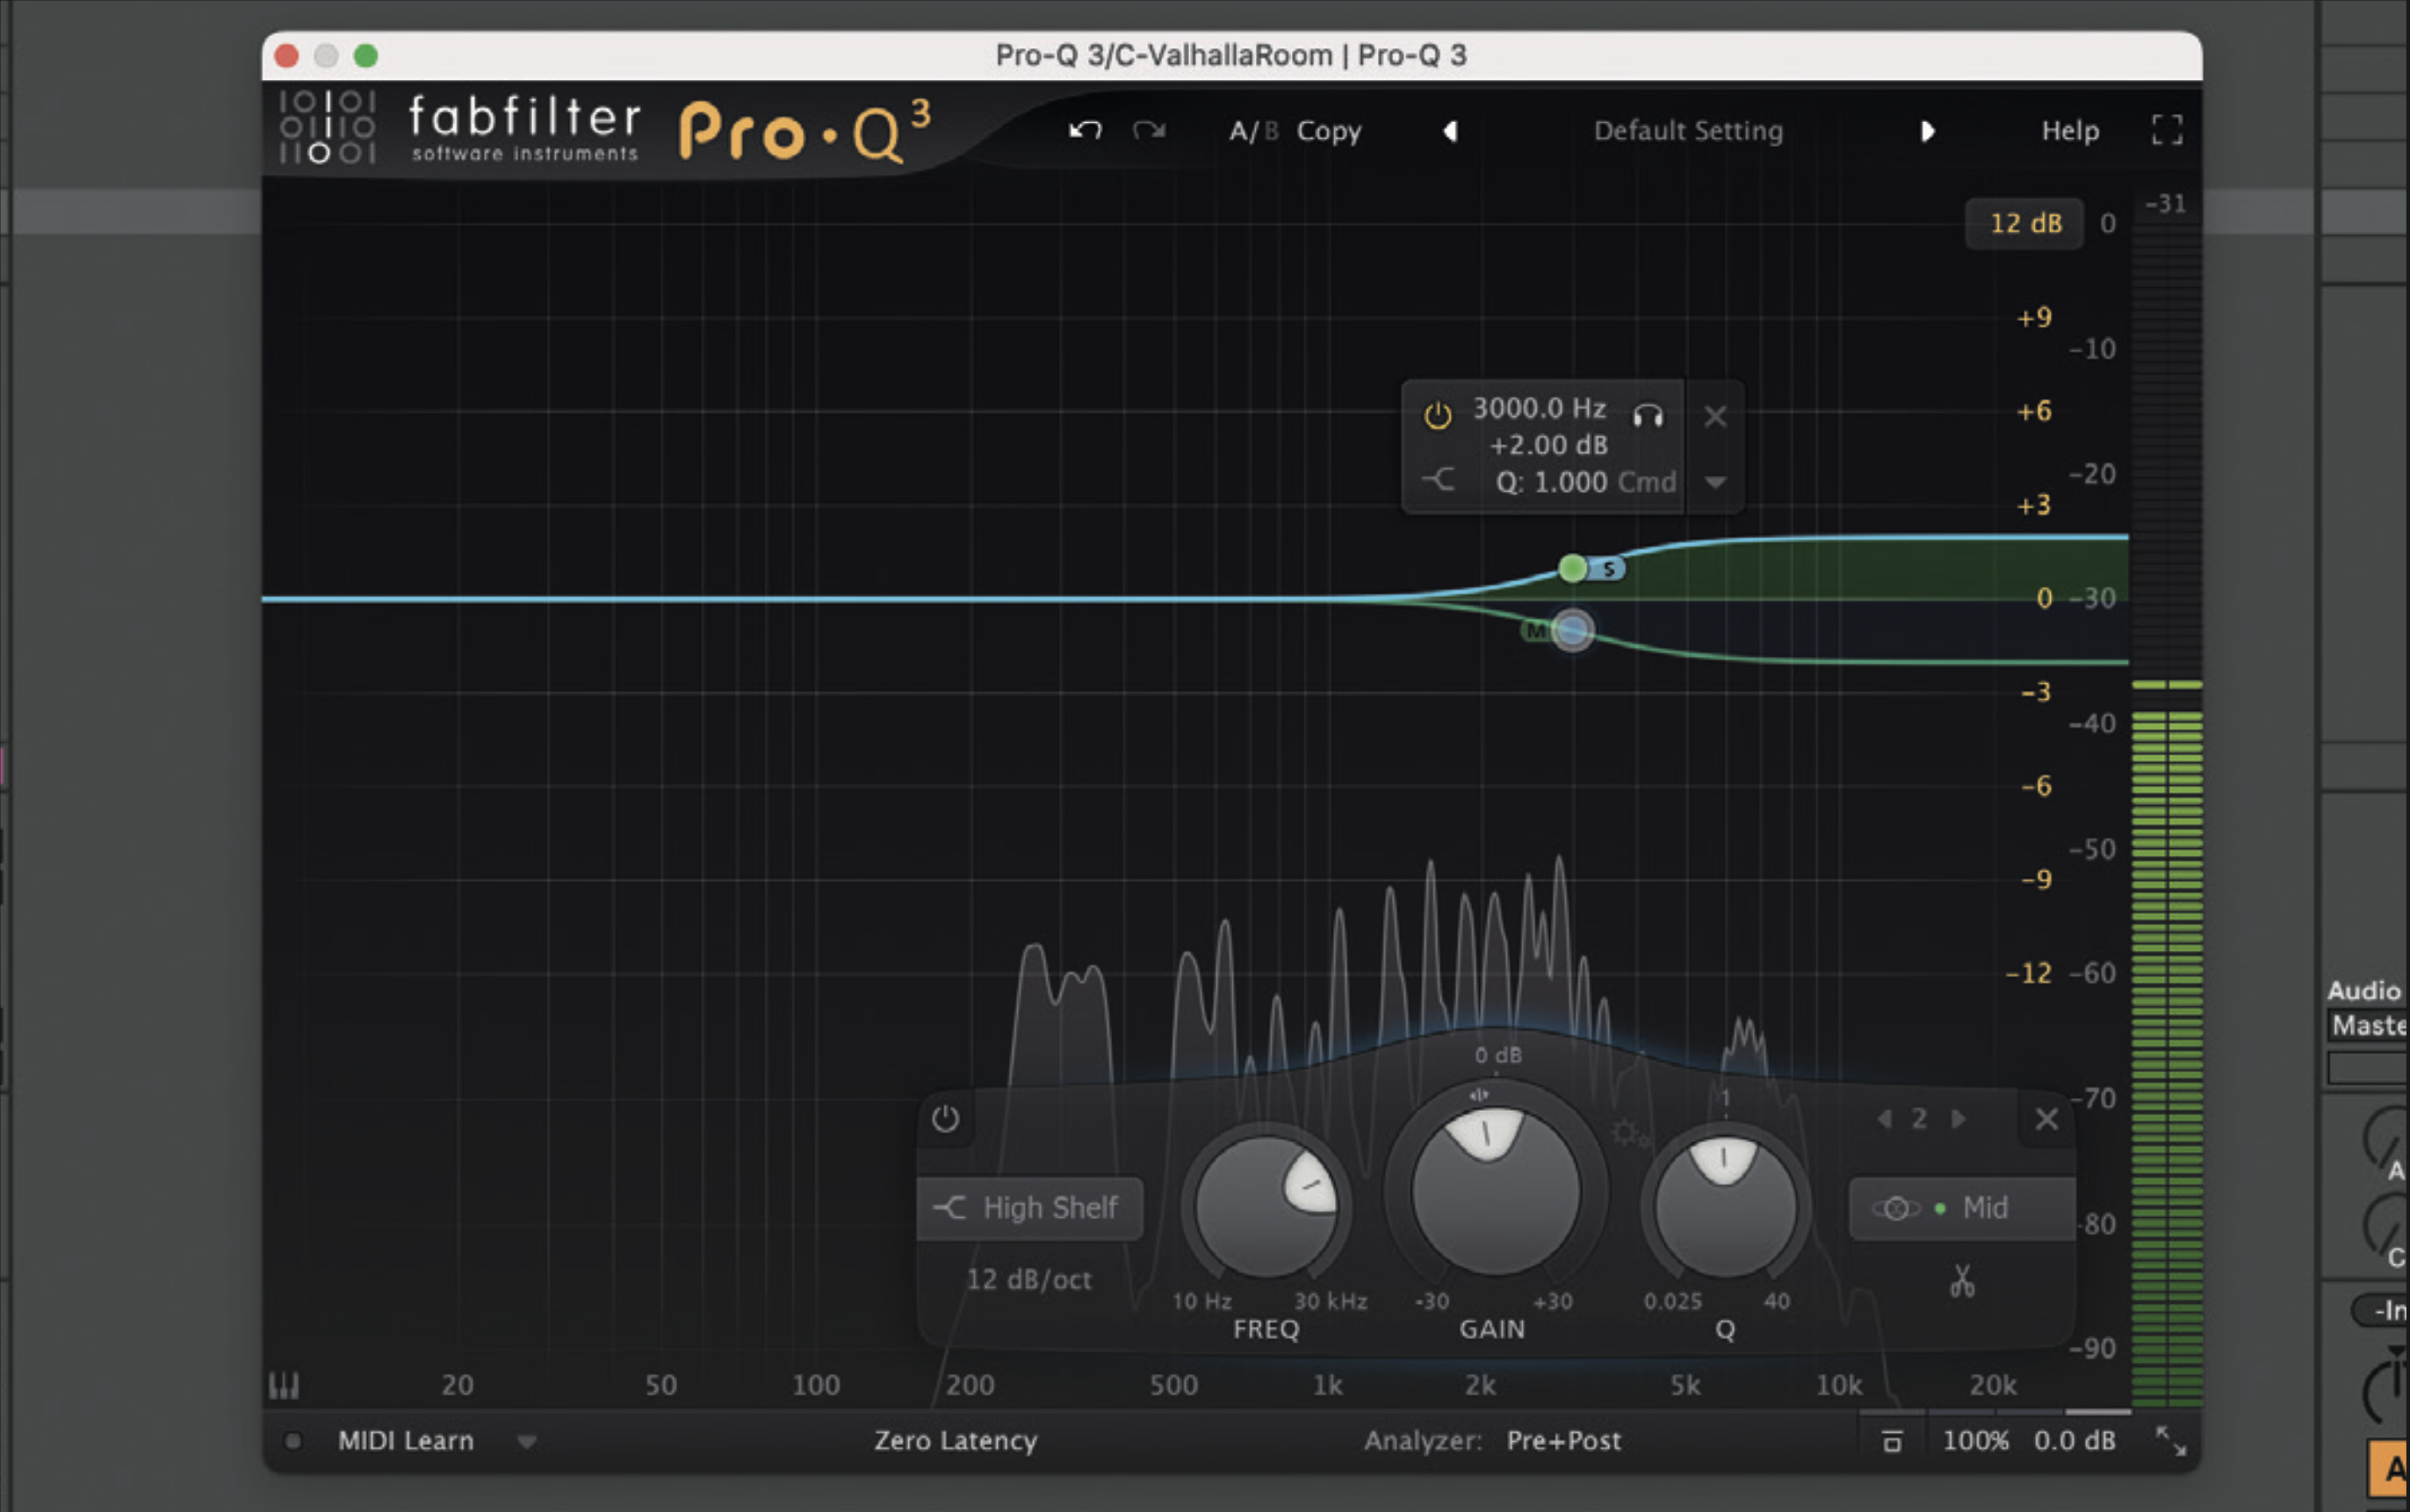
On the EQ, add a shelf EQ and set it to side mode. Create a boost at 3 kHz, or somewhere close to this area. Create a second EQ node, and select shelf EQ. Create a cut at 3 kHz (or the frequency you selected) and set it to mid mode. Listen to the vocal track and you’ll hear width and air has been added.
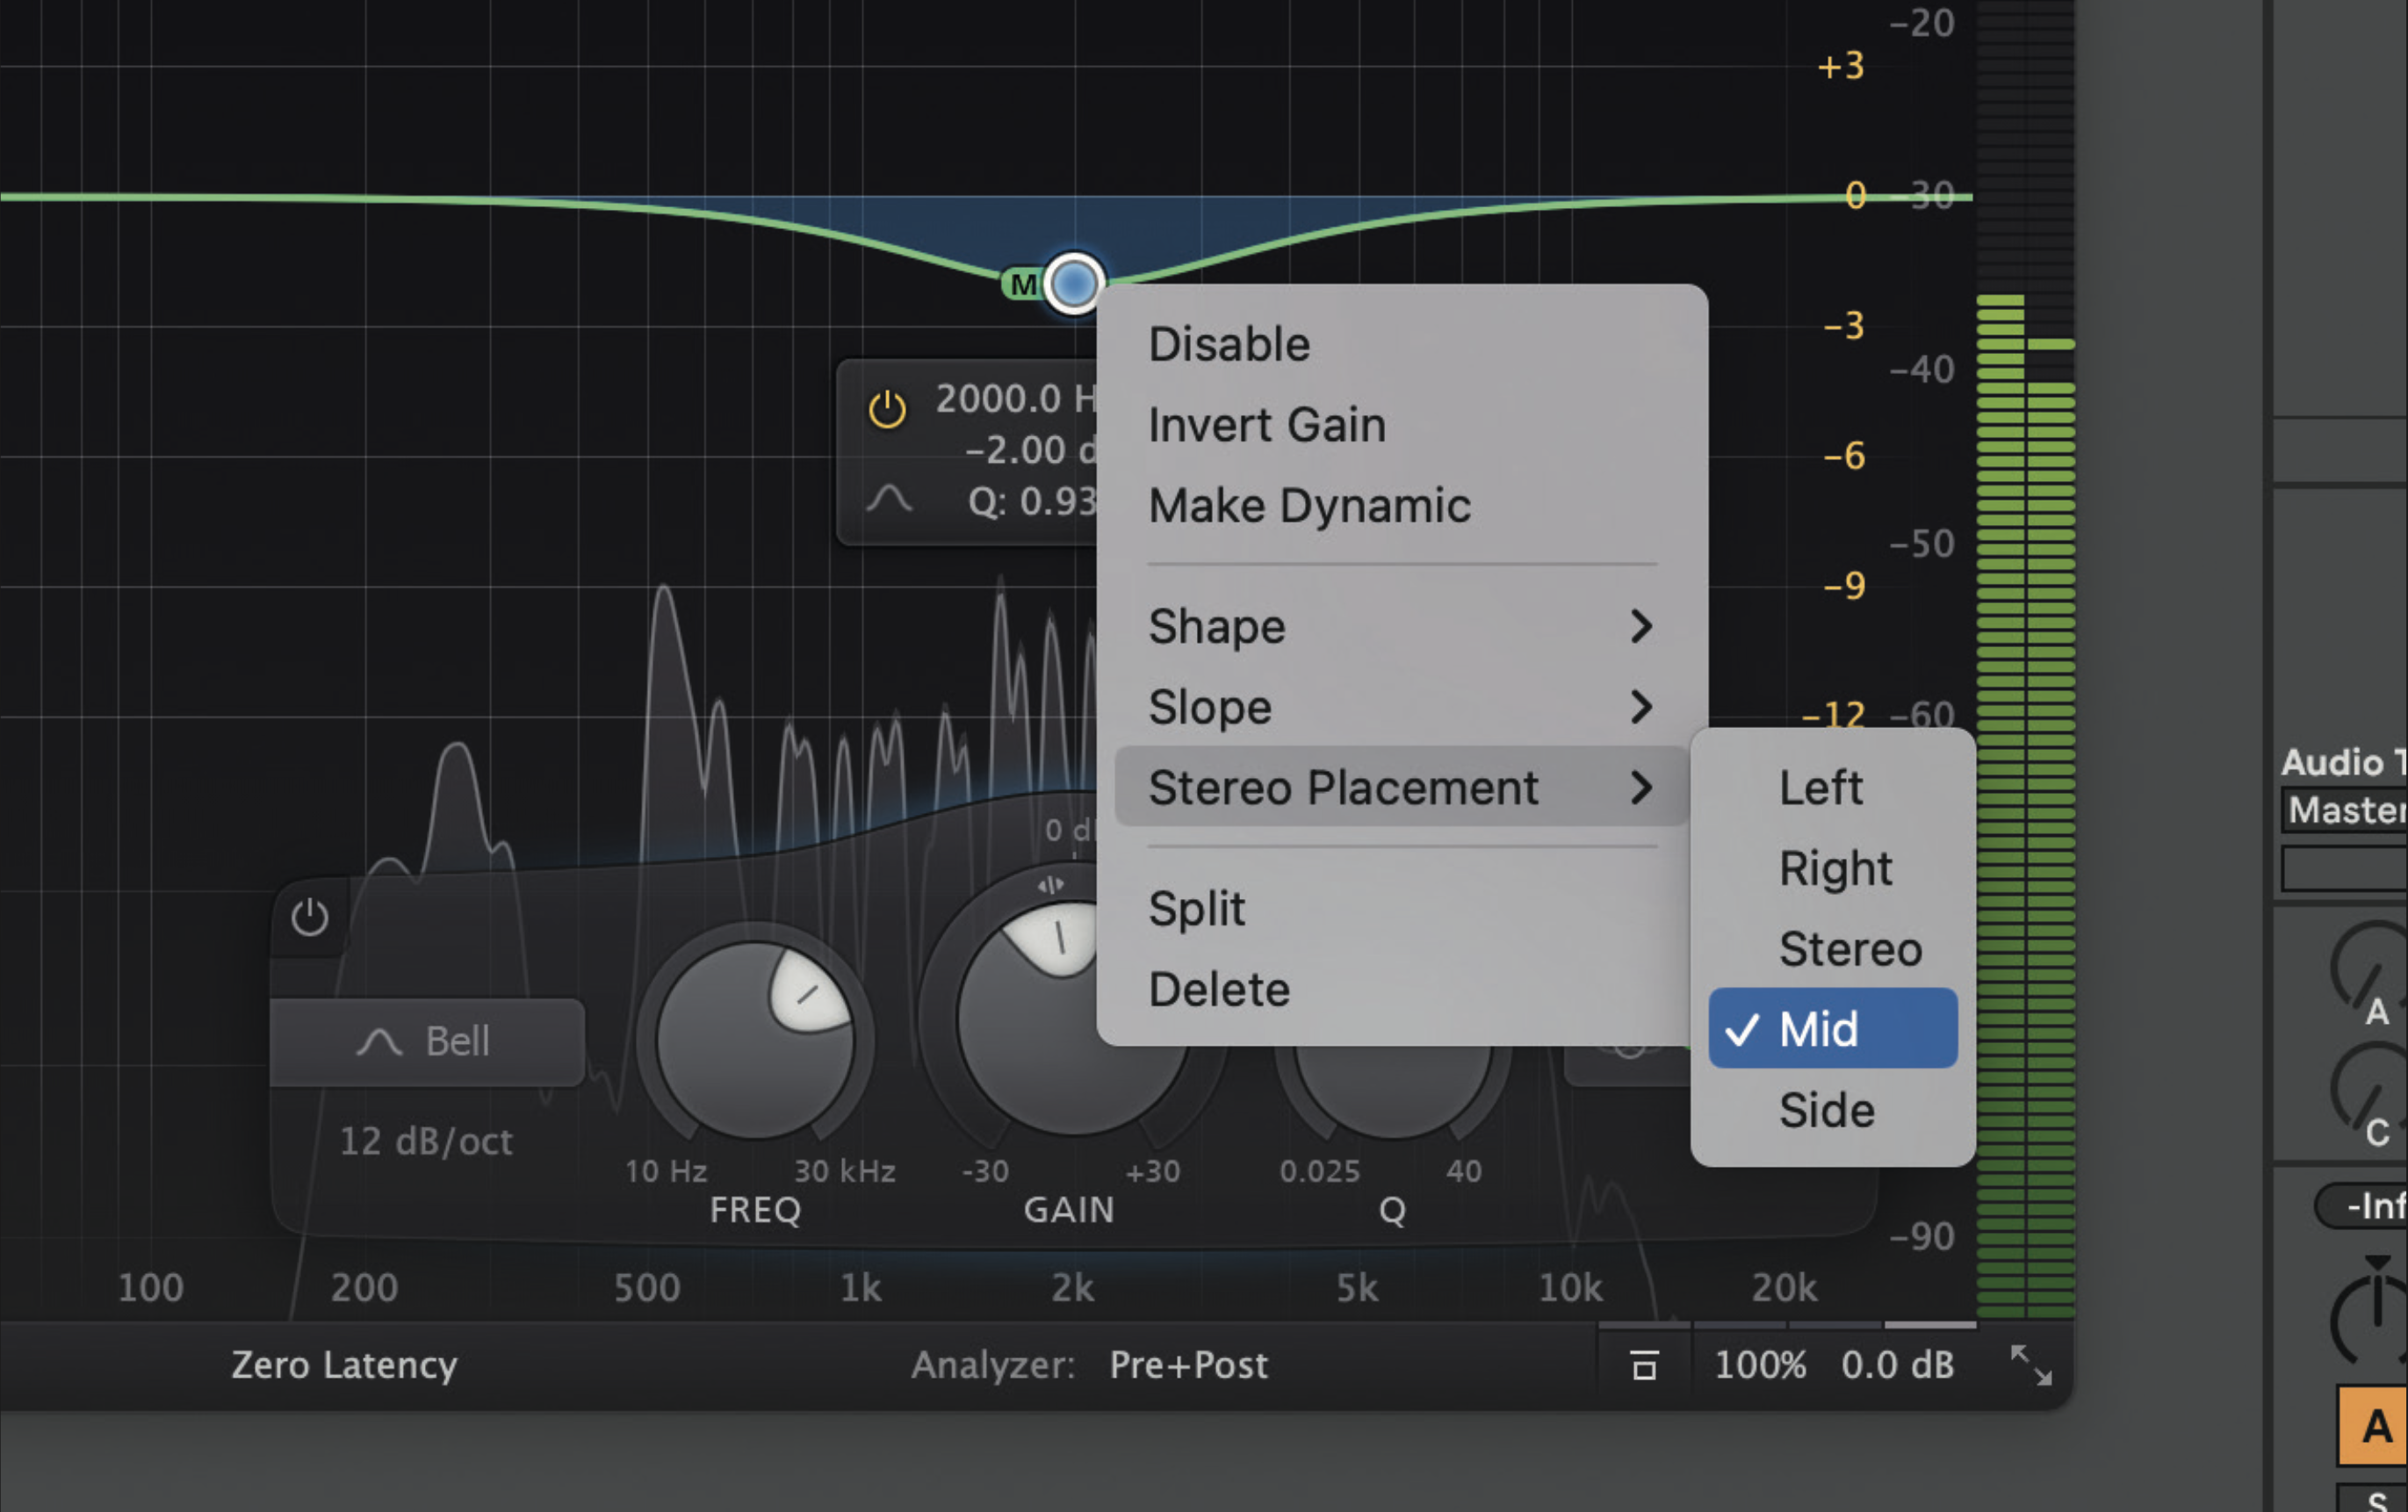
A second way to achieve a wider reverb sound is to scoop some of the mid-range frequencies from the mid channel on your reverb return. Try this technique by first flattening your previous EQ settings, and creating a bell EQ between 2-4 kHz. Set it to mid mode, use a wide Q and dip the frequency by 1-3 dB.
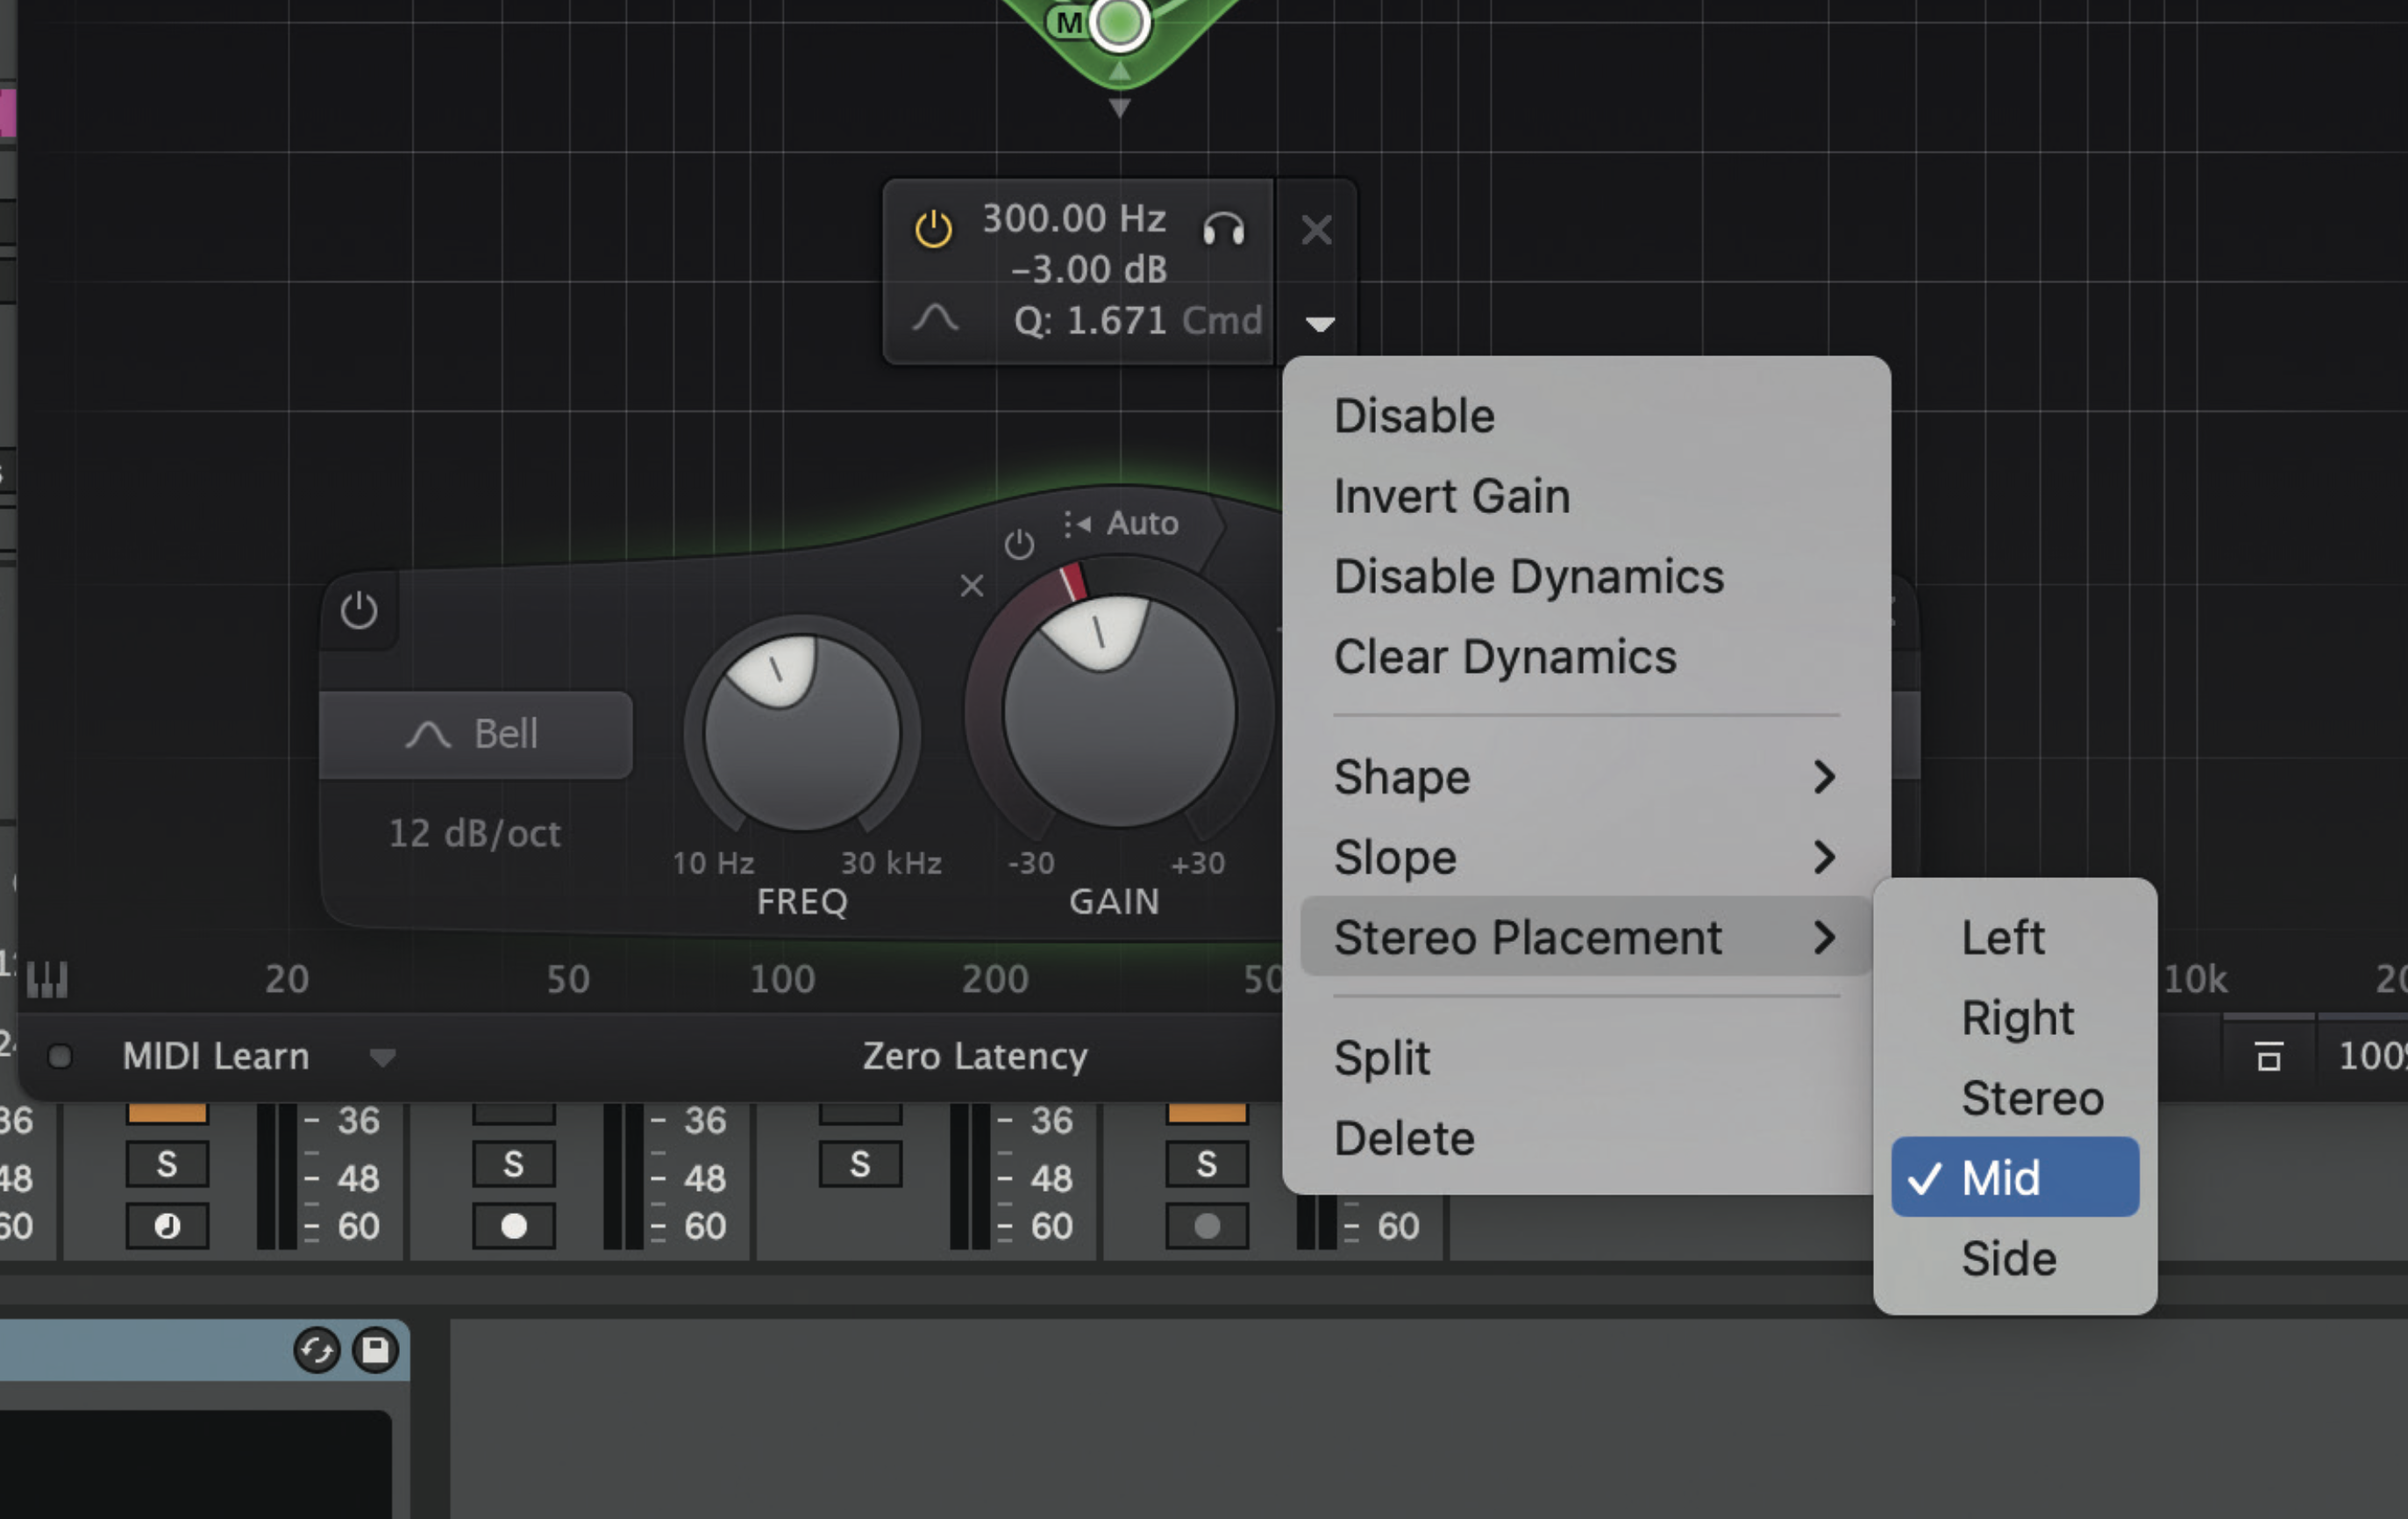
Add a drum loop to the mix and add a mid-side EQ to the drums. Make room for the vocals in the mix by selecting a bell EQ, setting it to 300 Hz and setting it to mid mode. Make a cut at around 300 Hz by about 3 dB. This technique makes room for the vocals to be added on top.
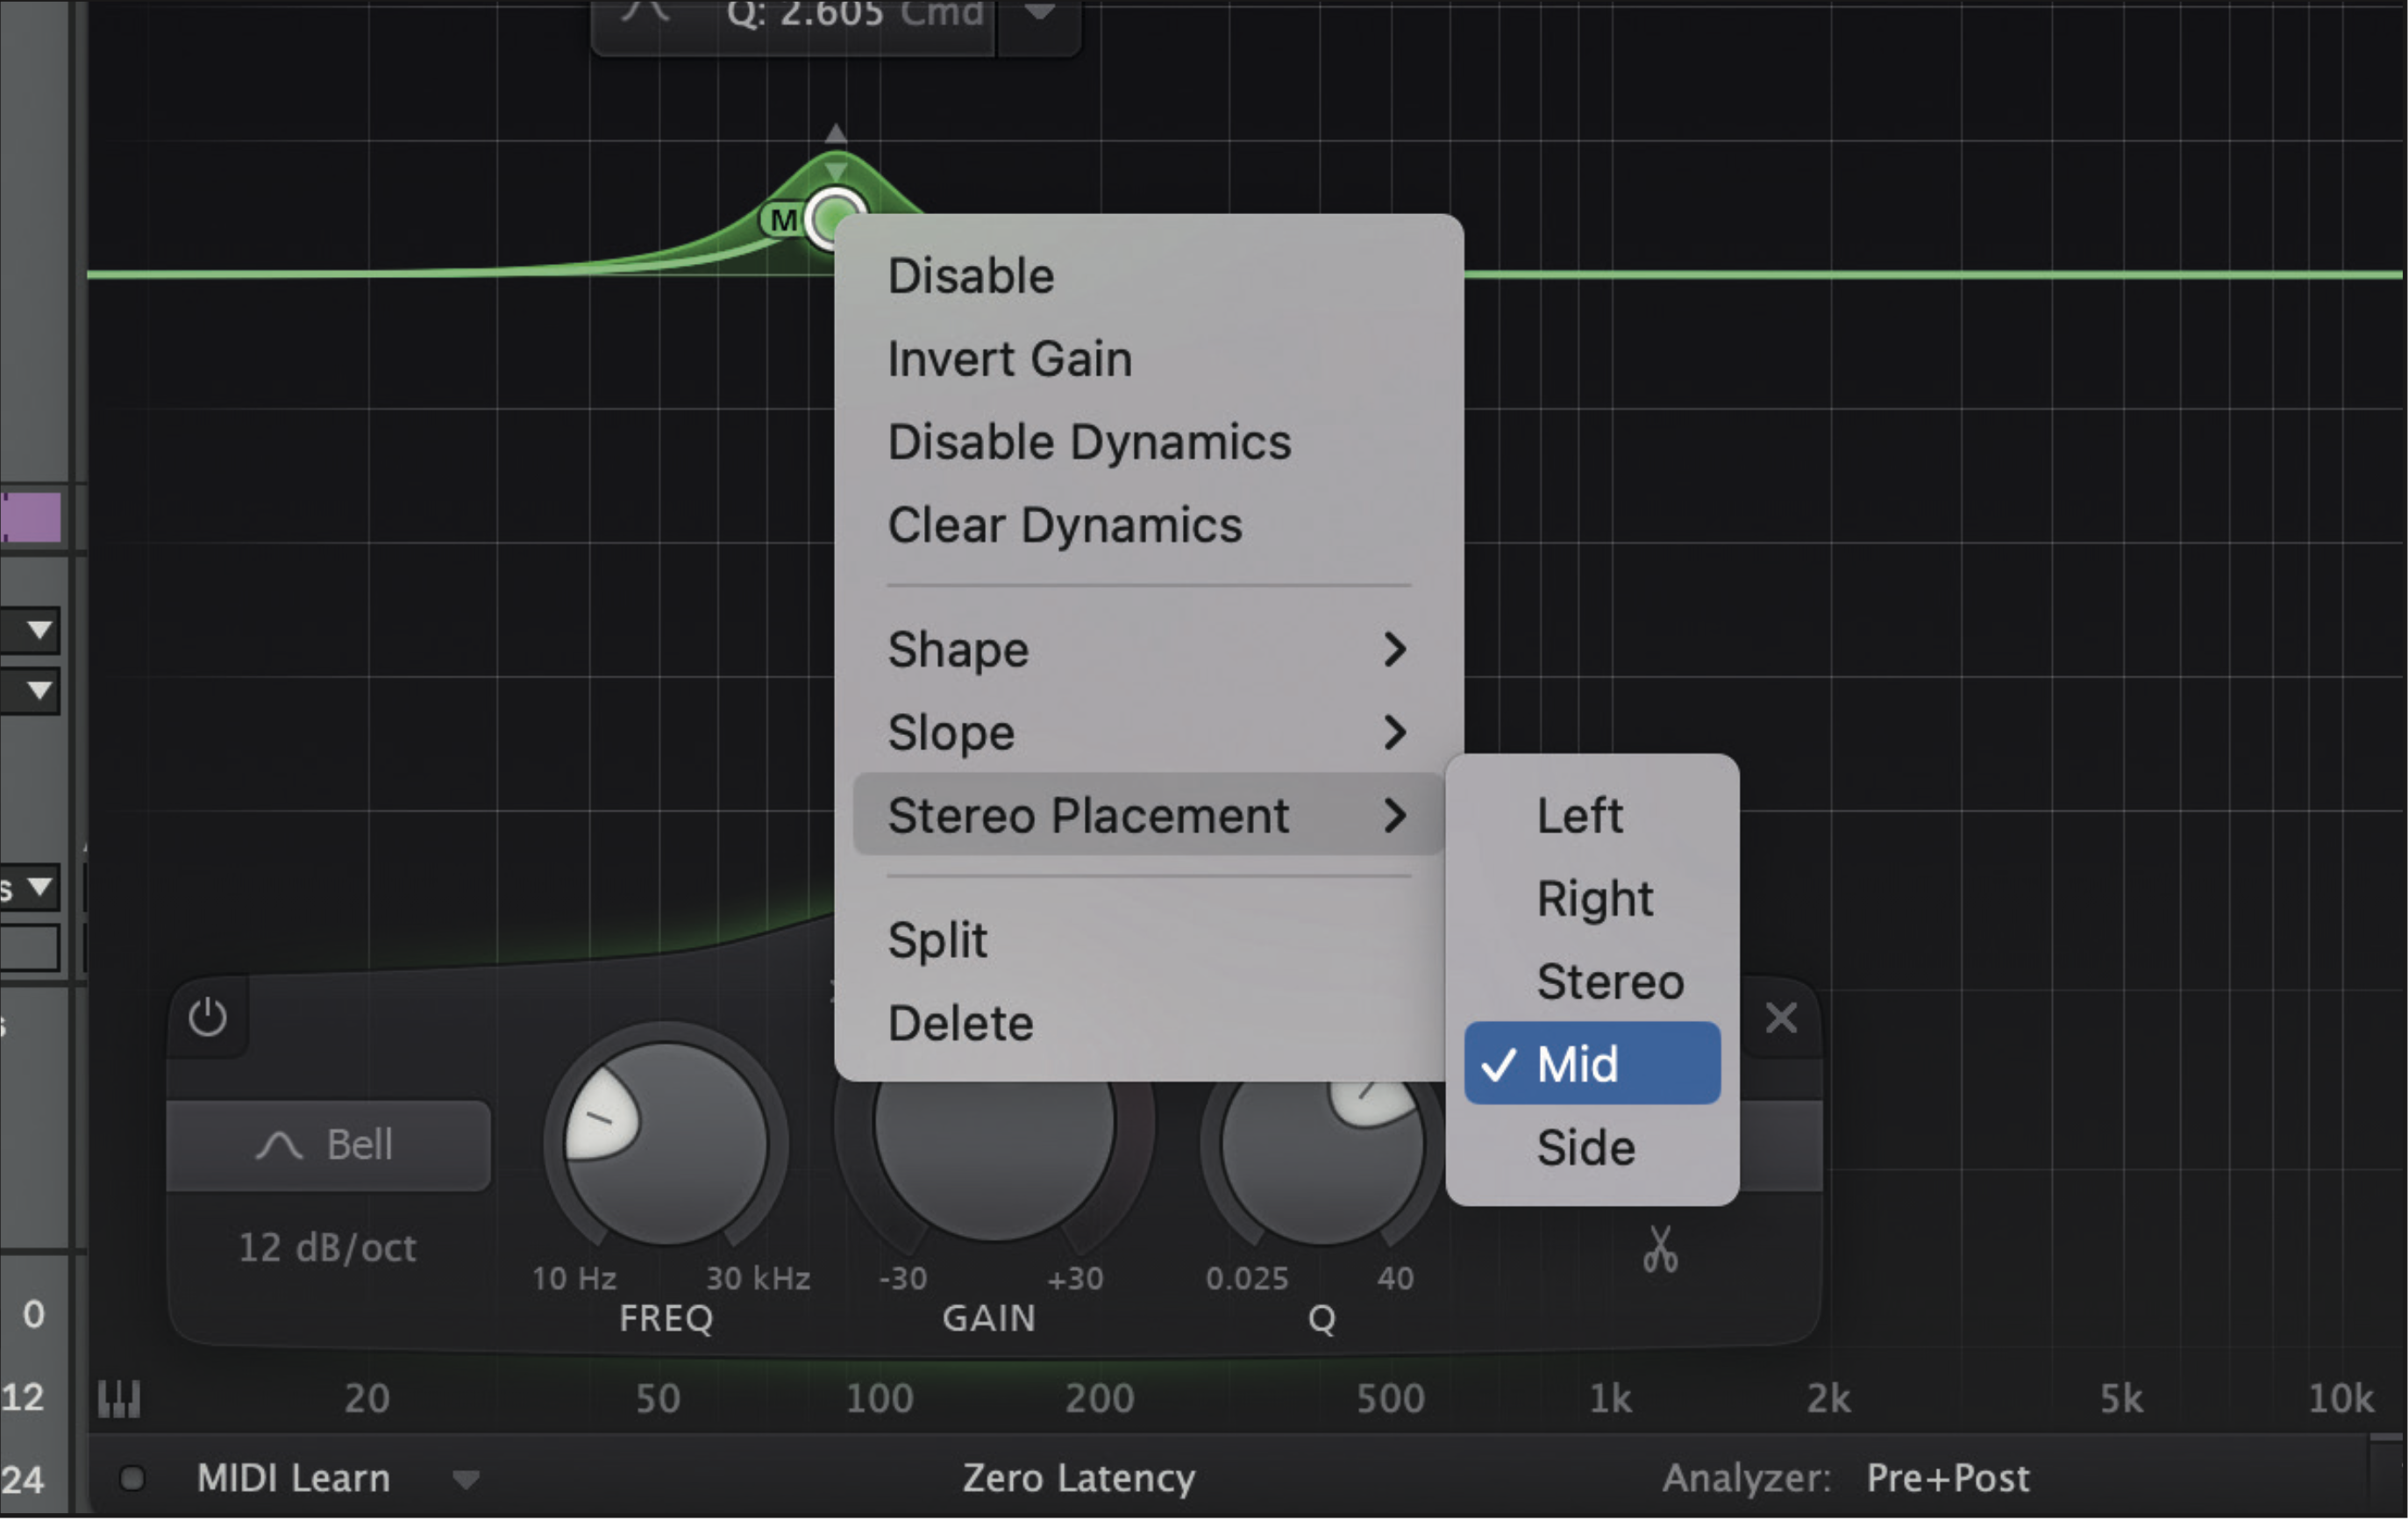
Boost the low end of the drums by adding a mid-side EQ. Create a bell EQ and set it to mid mode. Make a boost for the kick drum in the key of your track. Use a notes to frequency chart to find the correct frequency. For example, if your key is F, make a boost at 87.3071 Hz for the kick.
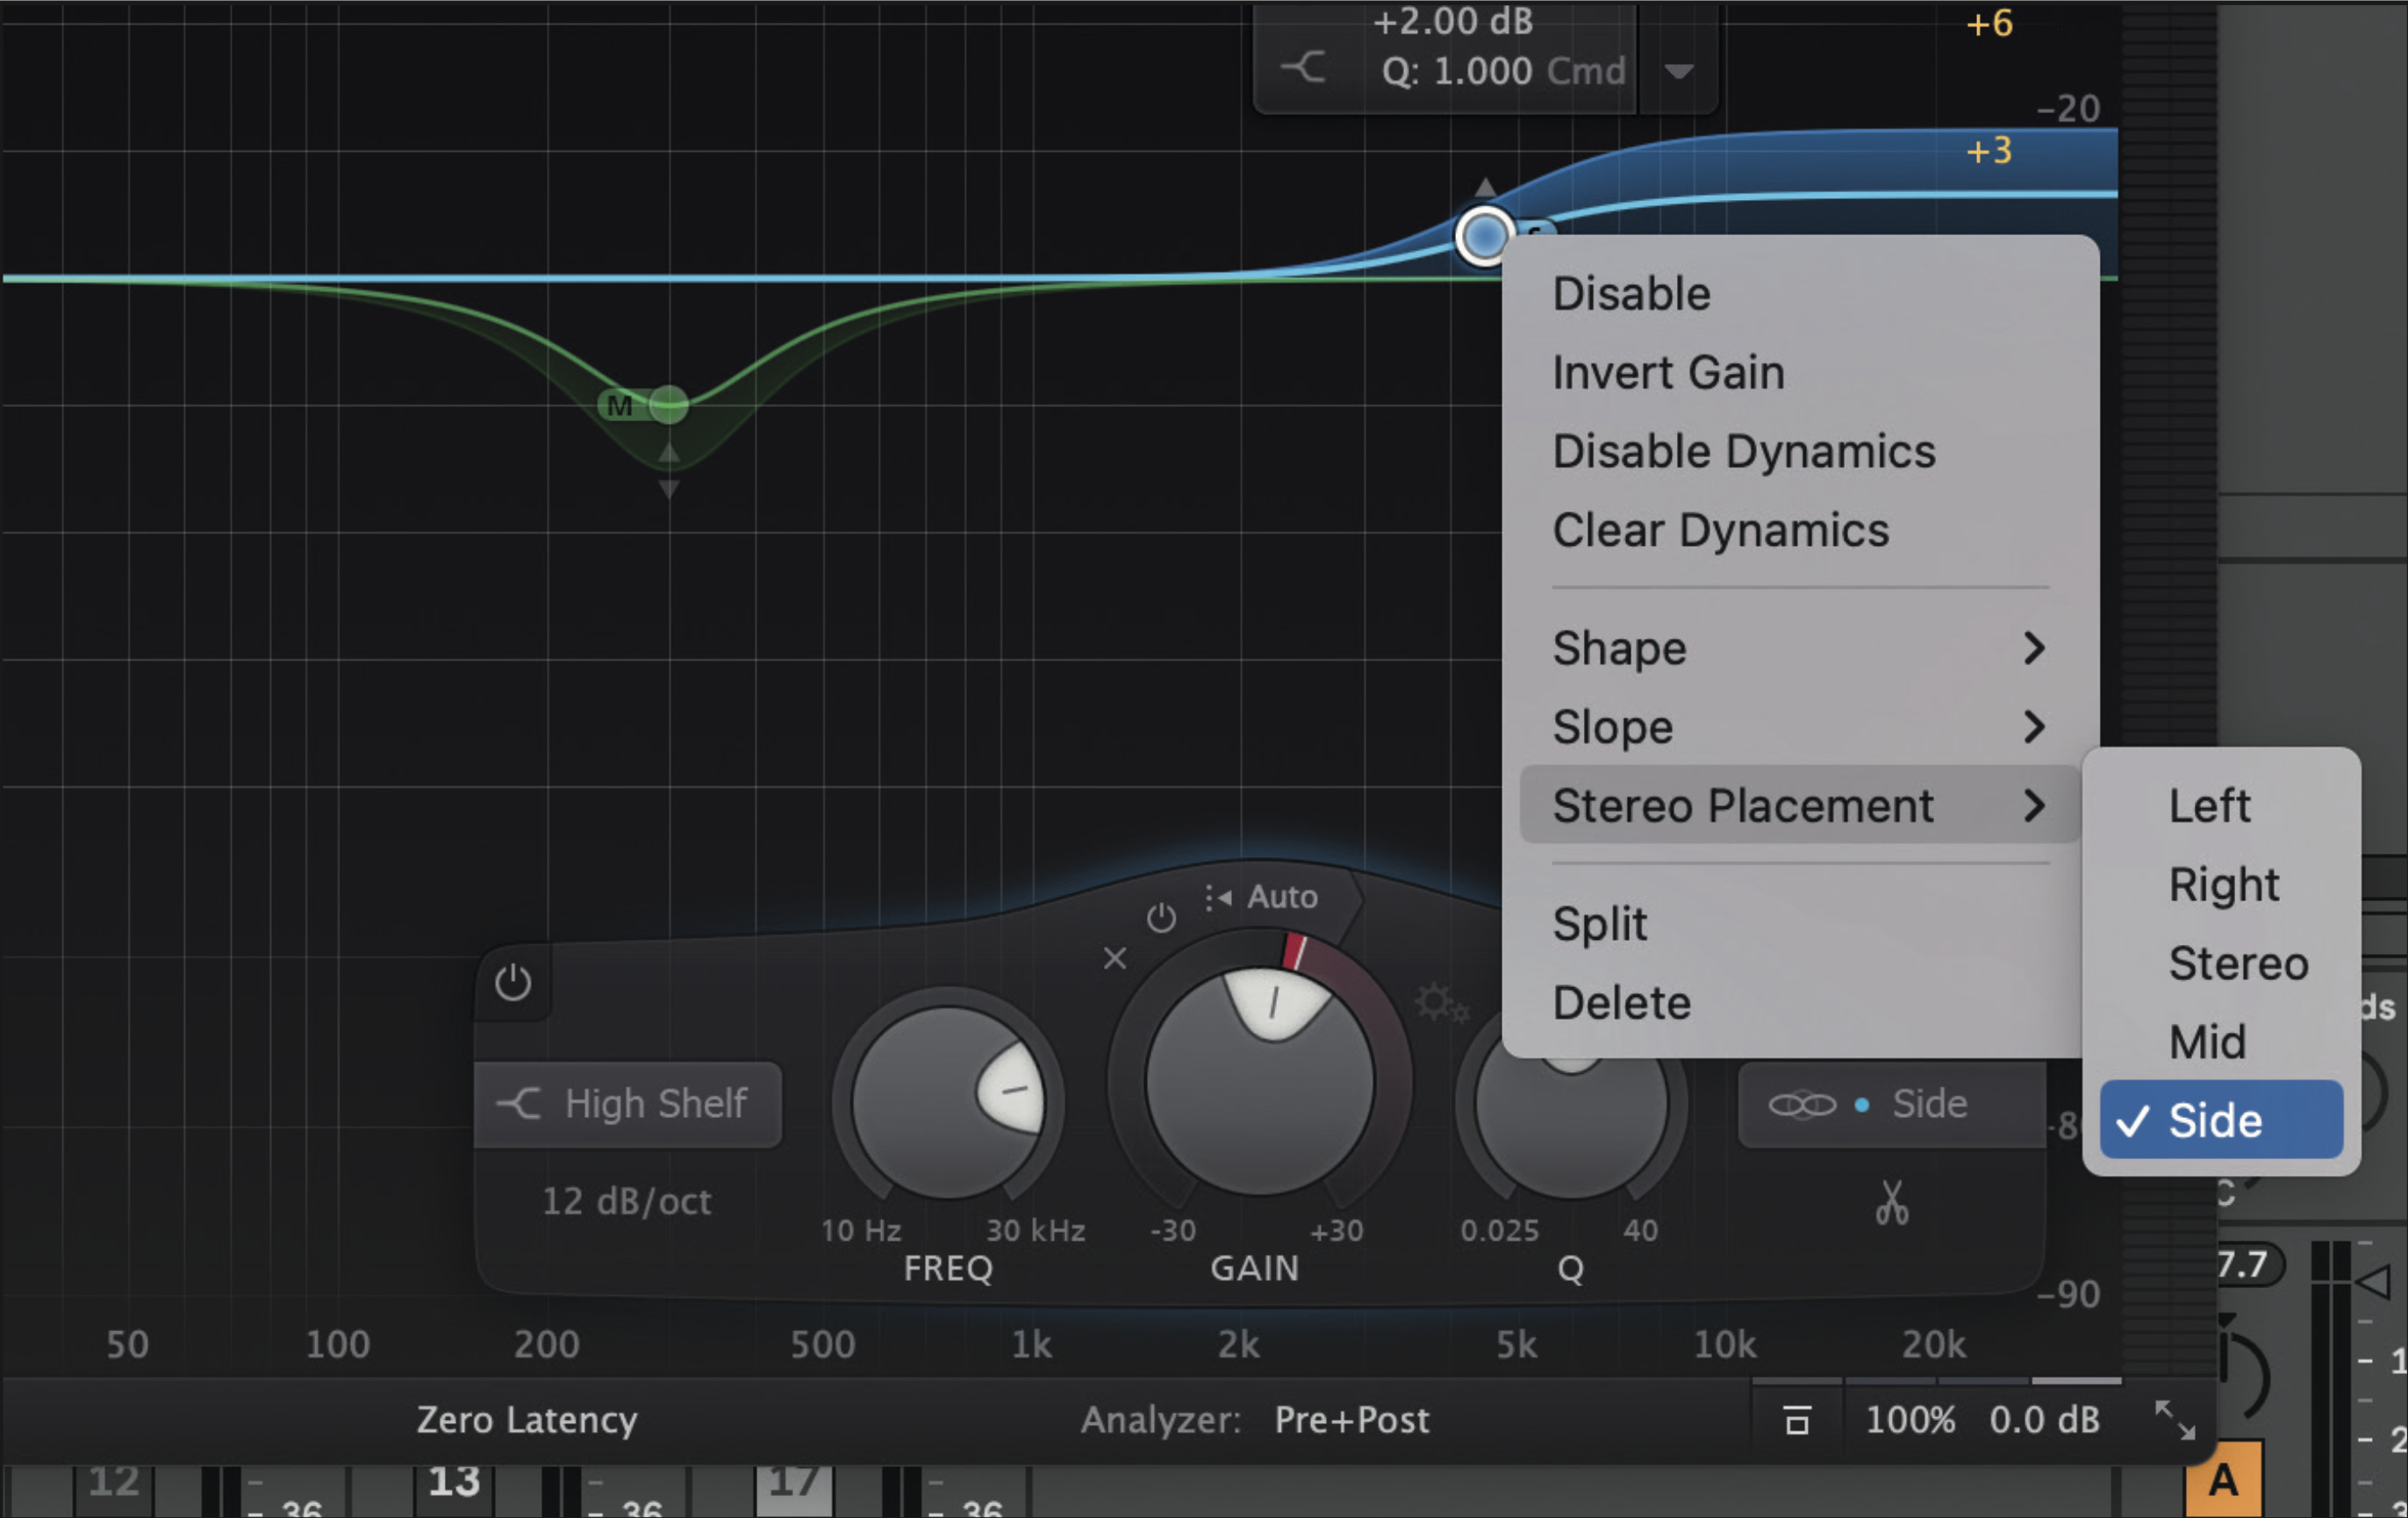
Add brilliance to the drum loop by adding a boost in the side information in the high-mid frequencies. Using the mid-side EQ, select a shelf EQ and set it to side mode. Boost the high-mid frequencies at around 4 kHz. Find the exact frequency for your drums between 2-6 kHz. This should give your high end some sparkle.
Pro tip: mistakes to avoid in mid-side EQing
Producers, mixing and mastering engineers are naturally drawn to mid-side as it offers precise control over your audio. Mid-side EQ techniques offer flexibility for balancing elements in a mix, and can help widen sounds. However, using incorrectly can damage your mix.
A simple mistake is not truly understanding what mid-side processing is. The mid is made up of the left and right channels added together. The sides are a mono signal, consisting of all of the information from the left side minus that from the right.
The mid and side are not perfectly separated, which is one reason why mid-side EQ can lead to issues in a mix. Overuse of mid-side EQing can create phasing issues between your tracks. Another common mistake is boosting the side information too much. Attentive listening and making intentional EQ decisions can help avoid problems.
It can be tempting to use mid-side EQ at the start of the mix, before panning. A better route is to start by making careful decisions about the placement of each element in the stereo field before using mid-side EQ. On the flip side, many producers reach for stereo widening tools, where mid-side EQ would work well.
Other recommended plugins
1. FabFilter Pro-Q 3
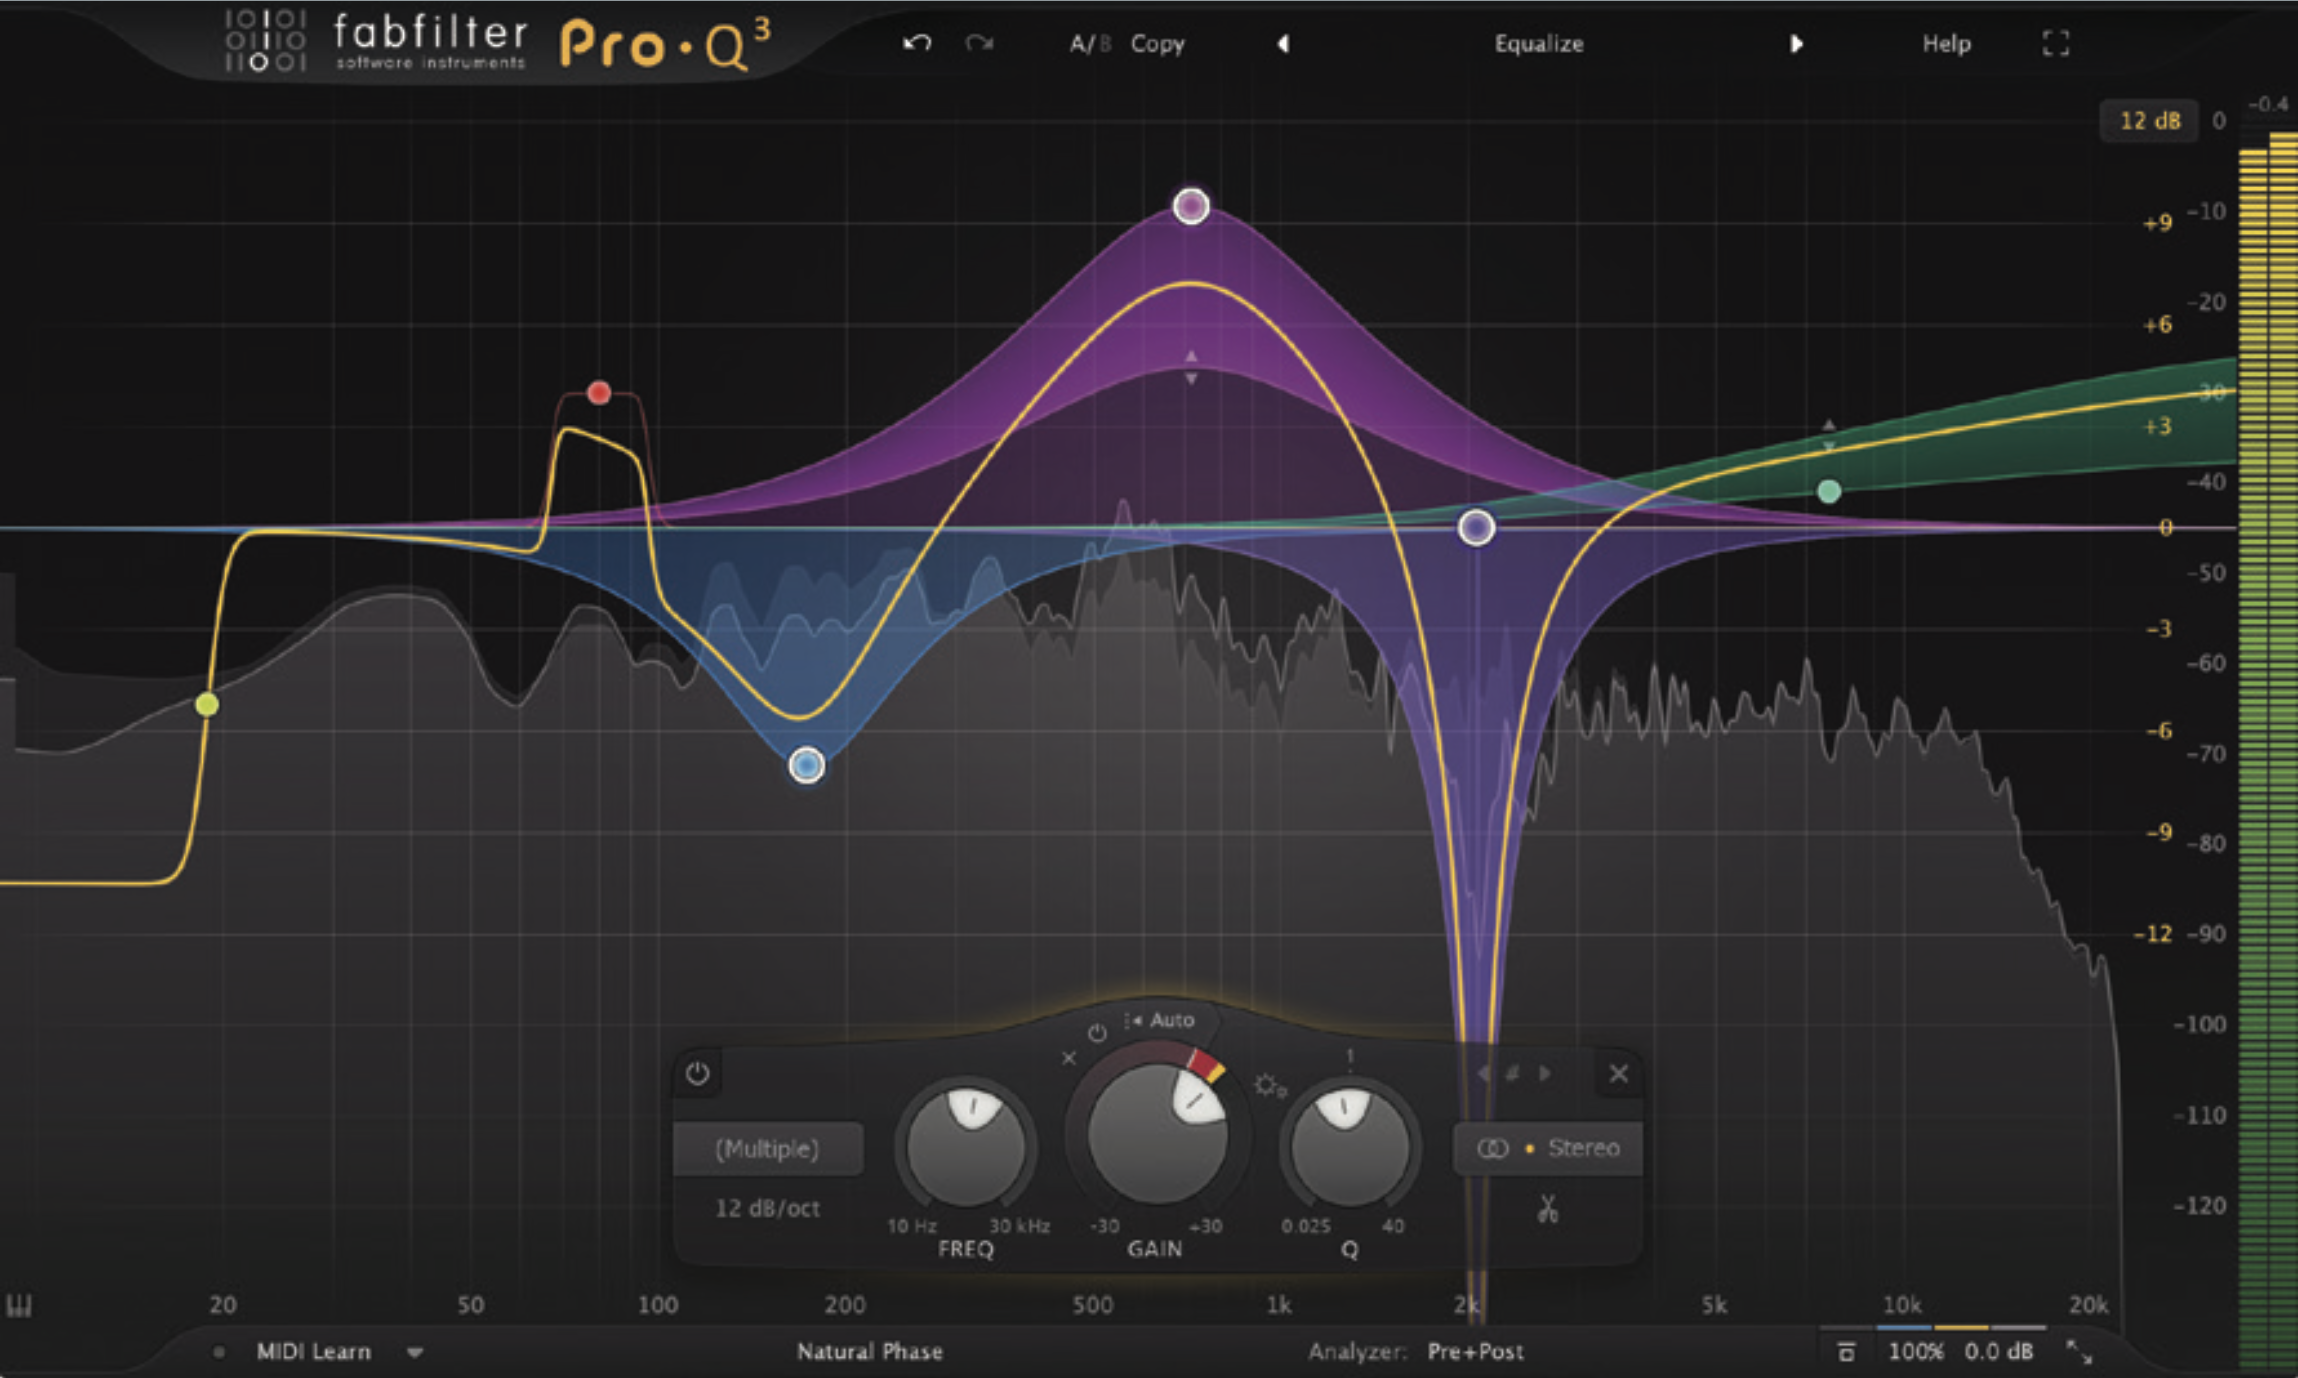
One of the best EQ’s on the market that offers per-band mid-side or left-right processing.
2. iZotope Ozone 11
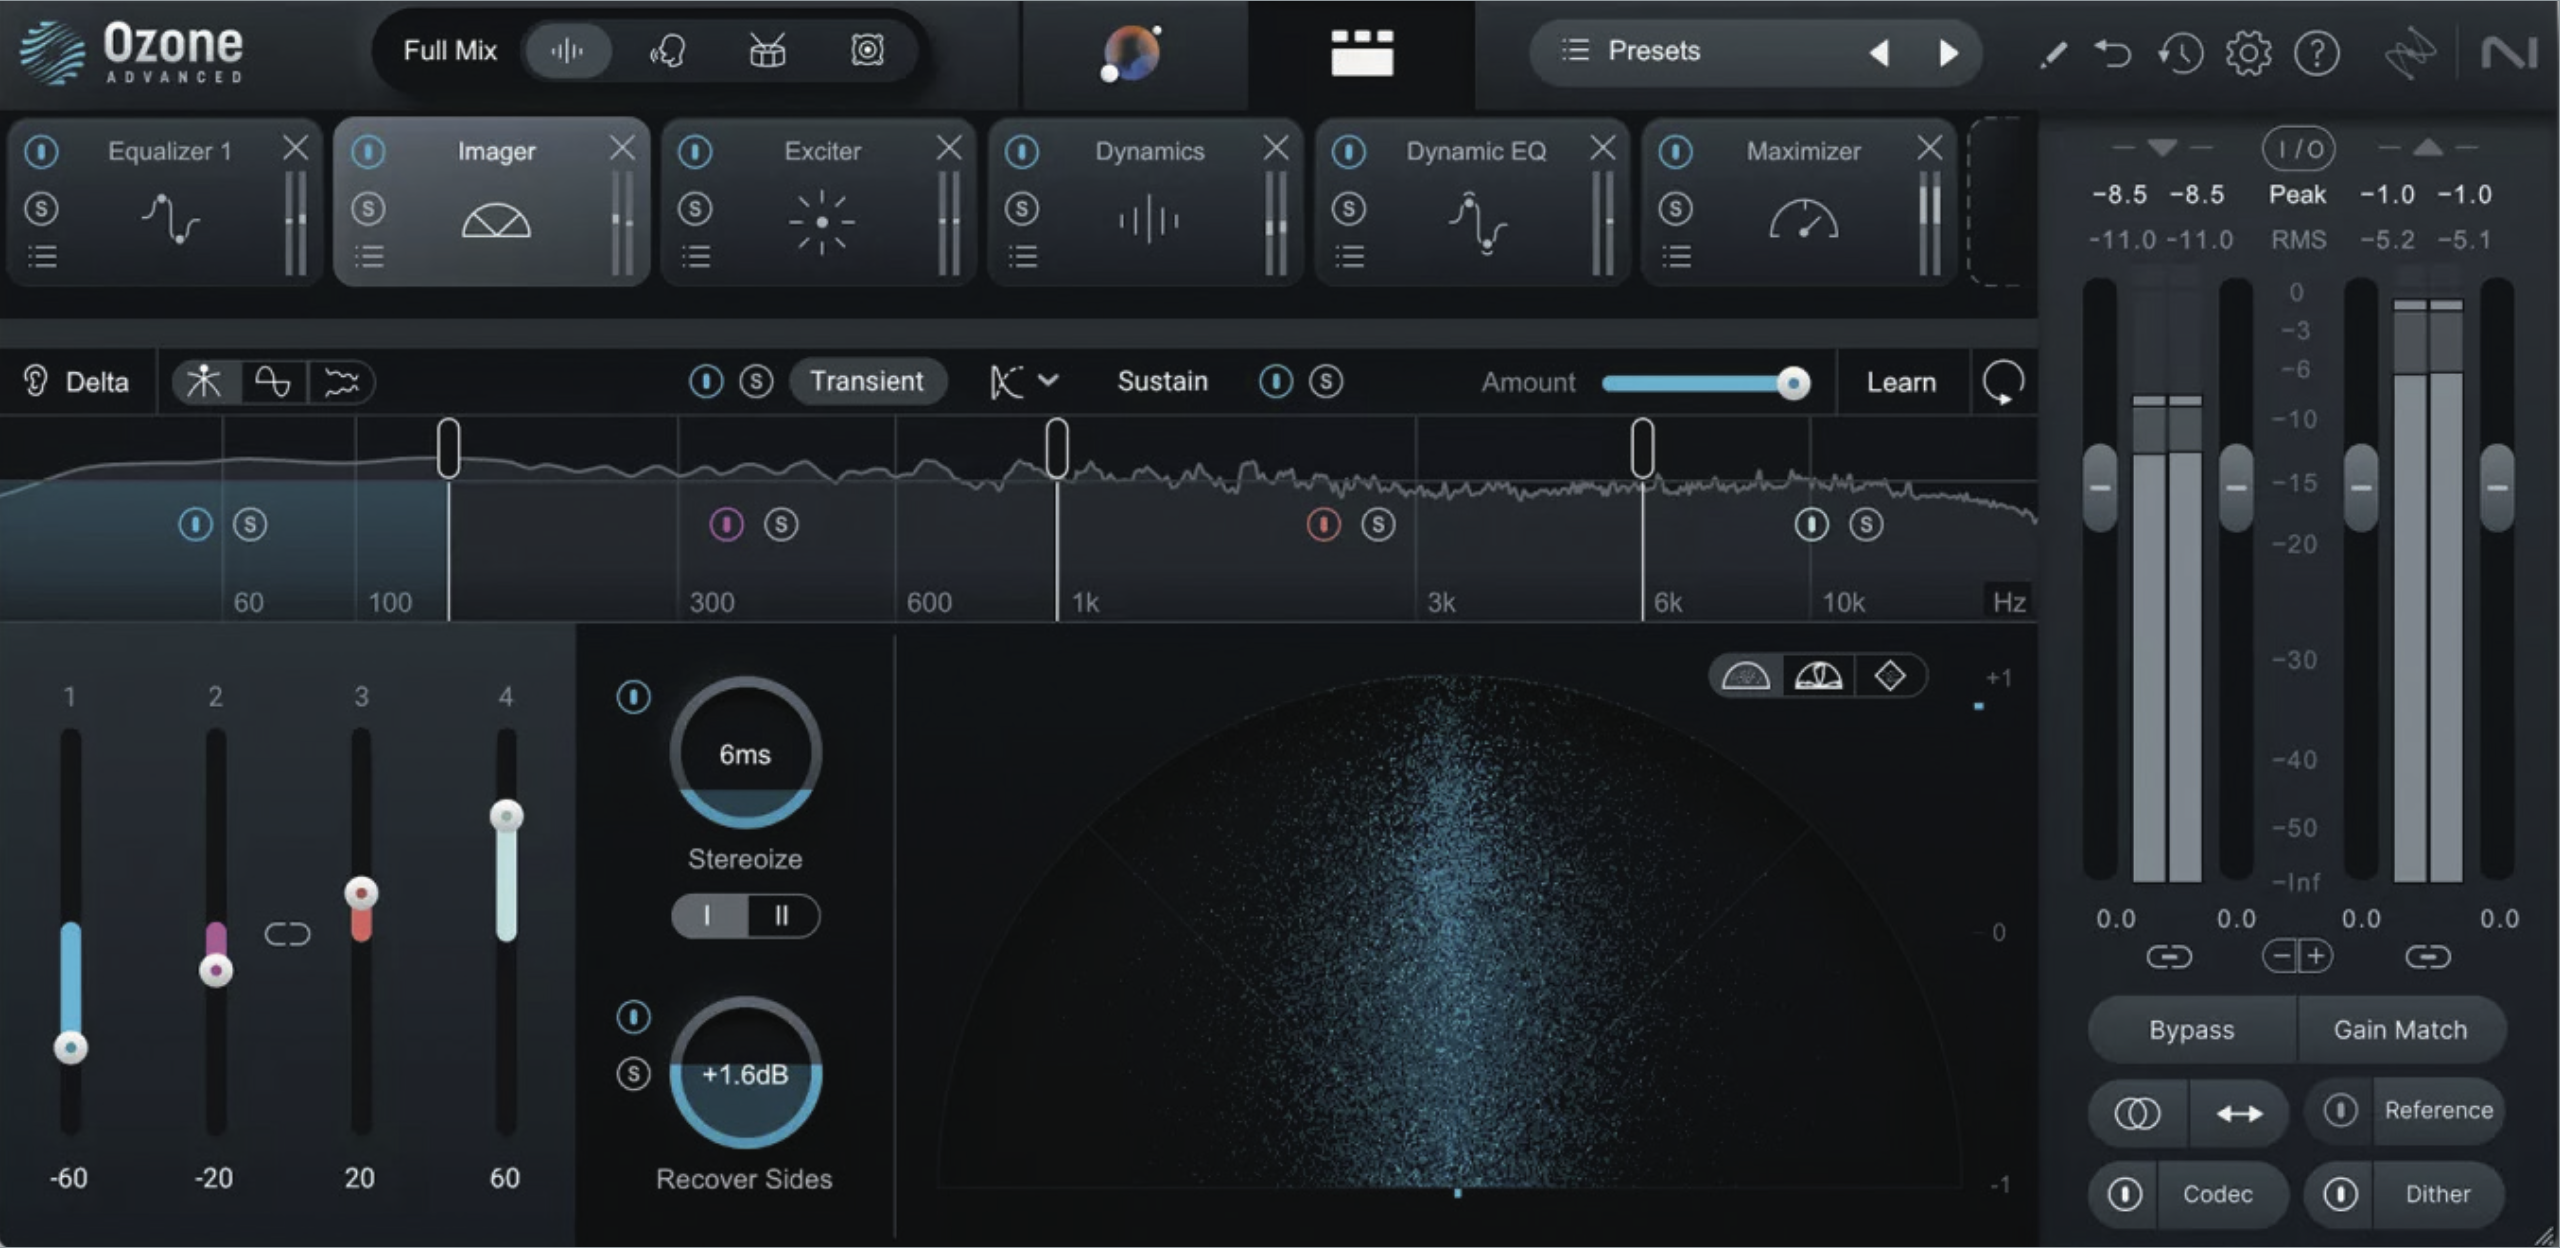
Ozone 11 features an easy-to-use interface, and allows producers to shape their stereo image with Mid-Side mode.


