Adding atmospheric effects to your renders can be something of a challenge, both in terms of your workflow and speed. You can use volumetrics for creating fog and mist, or particles for rain and so on, found using the best animation software and the best rendering software, but that might not always be the best solution.
You can add rain this way and there are benefits like true depth in the scene, although this comes at the expense of slower rendering times and a much longer workflow, as well as dealing with bigger file sizes. If the rain is a key component of your narrative, then that may be an acceptable price, but in many cases it’s a background element that’s there to give a sense of the environment; subtle and less in need of total realism.
Adobe After Effects can be used for this task in a multitude of different ways, but it has a neat plugin for adding rain rather quickly and with a good level of finish, although it needs a little more than just adding to your plate.
For this kind of task it can be worth spending a little extra time tweaking and adding layers for depth, but all in all it’s a fast process and renders quickly. All it takes is a few masks and simple After Effects adjustments to the rainfall plugin and you’re golden – unlike your scene’s weather. (For more advice, read our After Effects tutorials.)
Throw in some rain sound effects to add to the atmosphere and you can be done in just a few minutes, so follow along below to discover how you can add some precipitation to your renders quickly and easily.
01. Creating a new project's settings
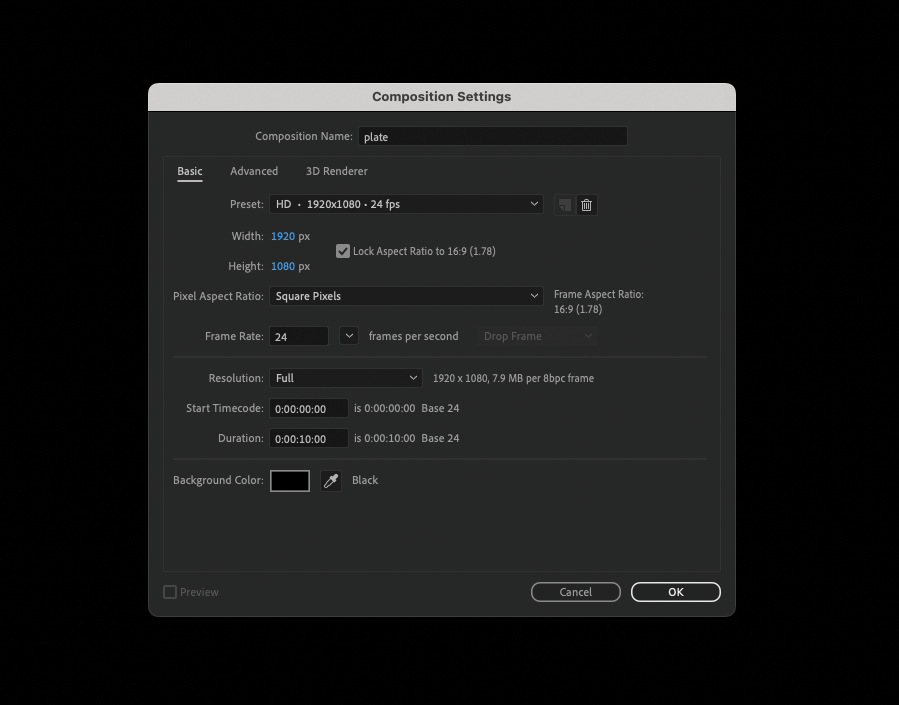
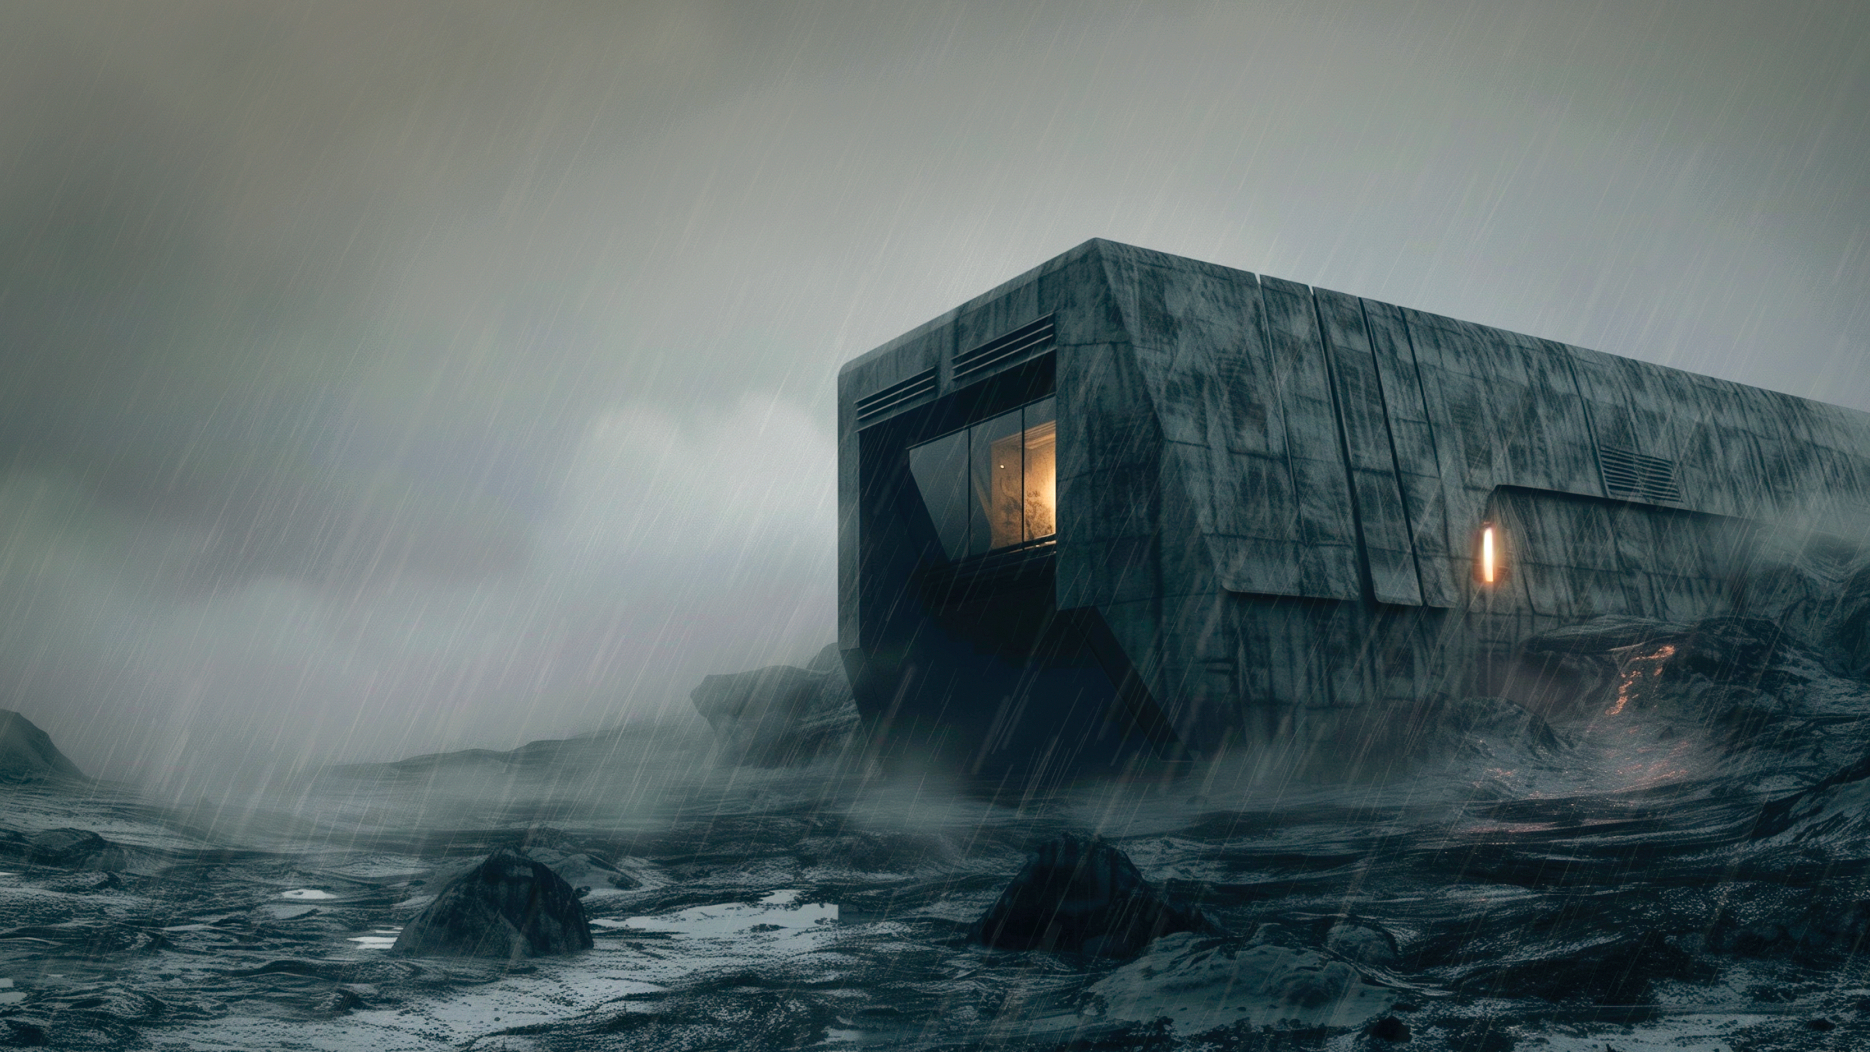
First up you need to get a project going. For this example I’m going 1920x1280 at 24 fps. Keep in mind that if you use a different resolution you may need to adjust your rain size (in the Rainfall effect, not your layer).
Once you have a project, create a new comp by hitting Ctrl+’N’. I chose to have it five seconds long, but you can make it any length as needed for your footage. I’m actually using a still image and this is a great tool for adding a little life to a single frame.
02. Adding the first rain layer
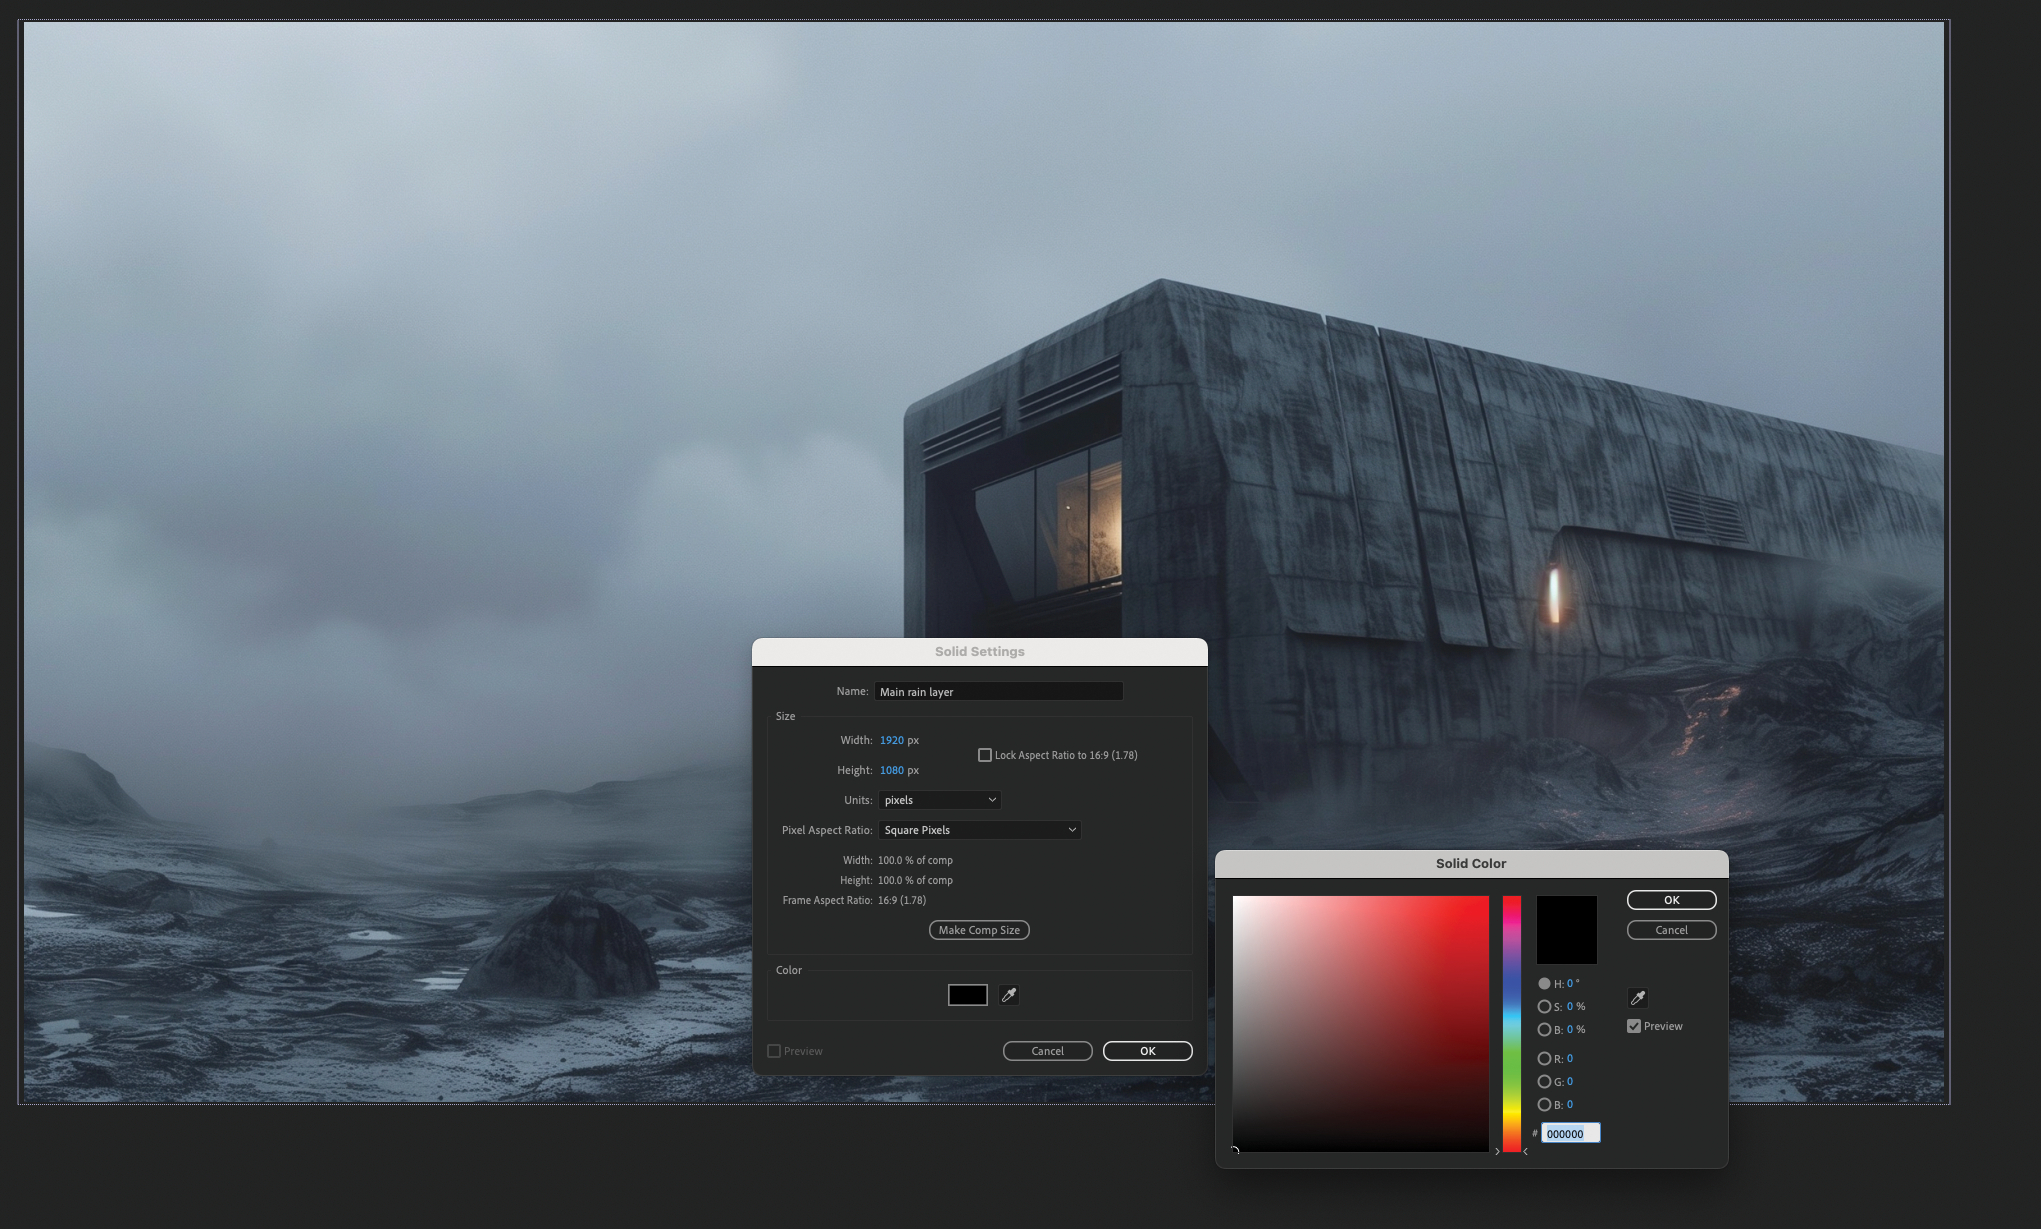
Press Ctrl+’Y’ to create a new layer, and name this something suitable, such as ‘main rain’, also making sure that it’s the same size as your comp by hitting the ‘Make Comp Size’ button. Set the colour to black and click OK.
This is where the first effect will be applied as an overall rain effect for the scene. Make sure the layer is above your plate layer and set the blending mode to Screen. If you don’t see the blending modes, you’ll need to press the blue icon second from the left, at the bottom of the Layers palette.
03. Making it rain
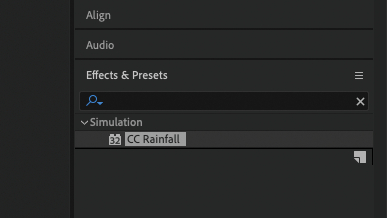
Assuming you’re working in the default After Effects workspace, head to the Effects & Presets panel on the right. If you have a custom workspace you can open it by hitting Ctrl+5. Use the search bar and type ‘CC Rainfall’. When you see it appear in the list, click and drag it onto your rain layer and you’ll see the controls appear in the Effect Controls panel.
04. Tweaking the effect
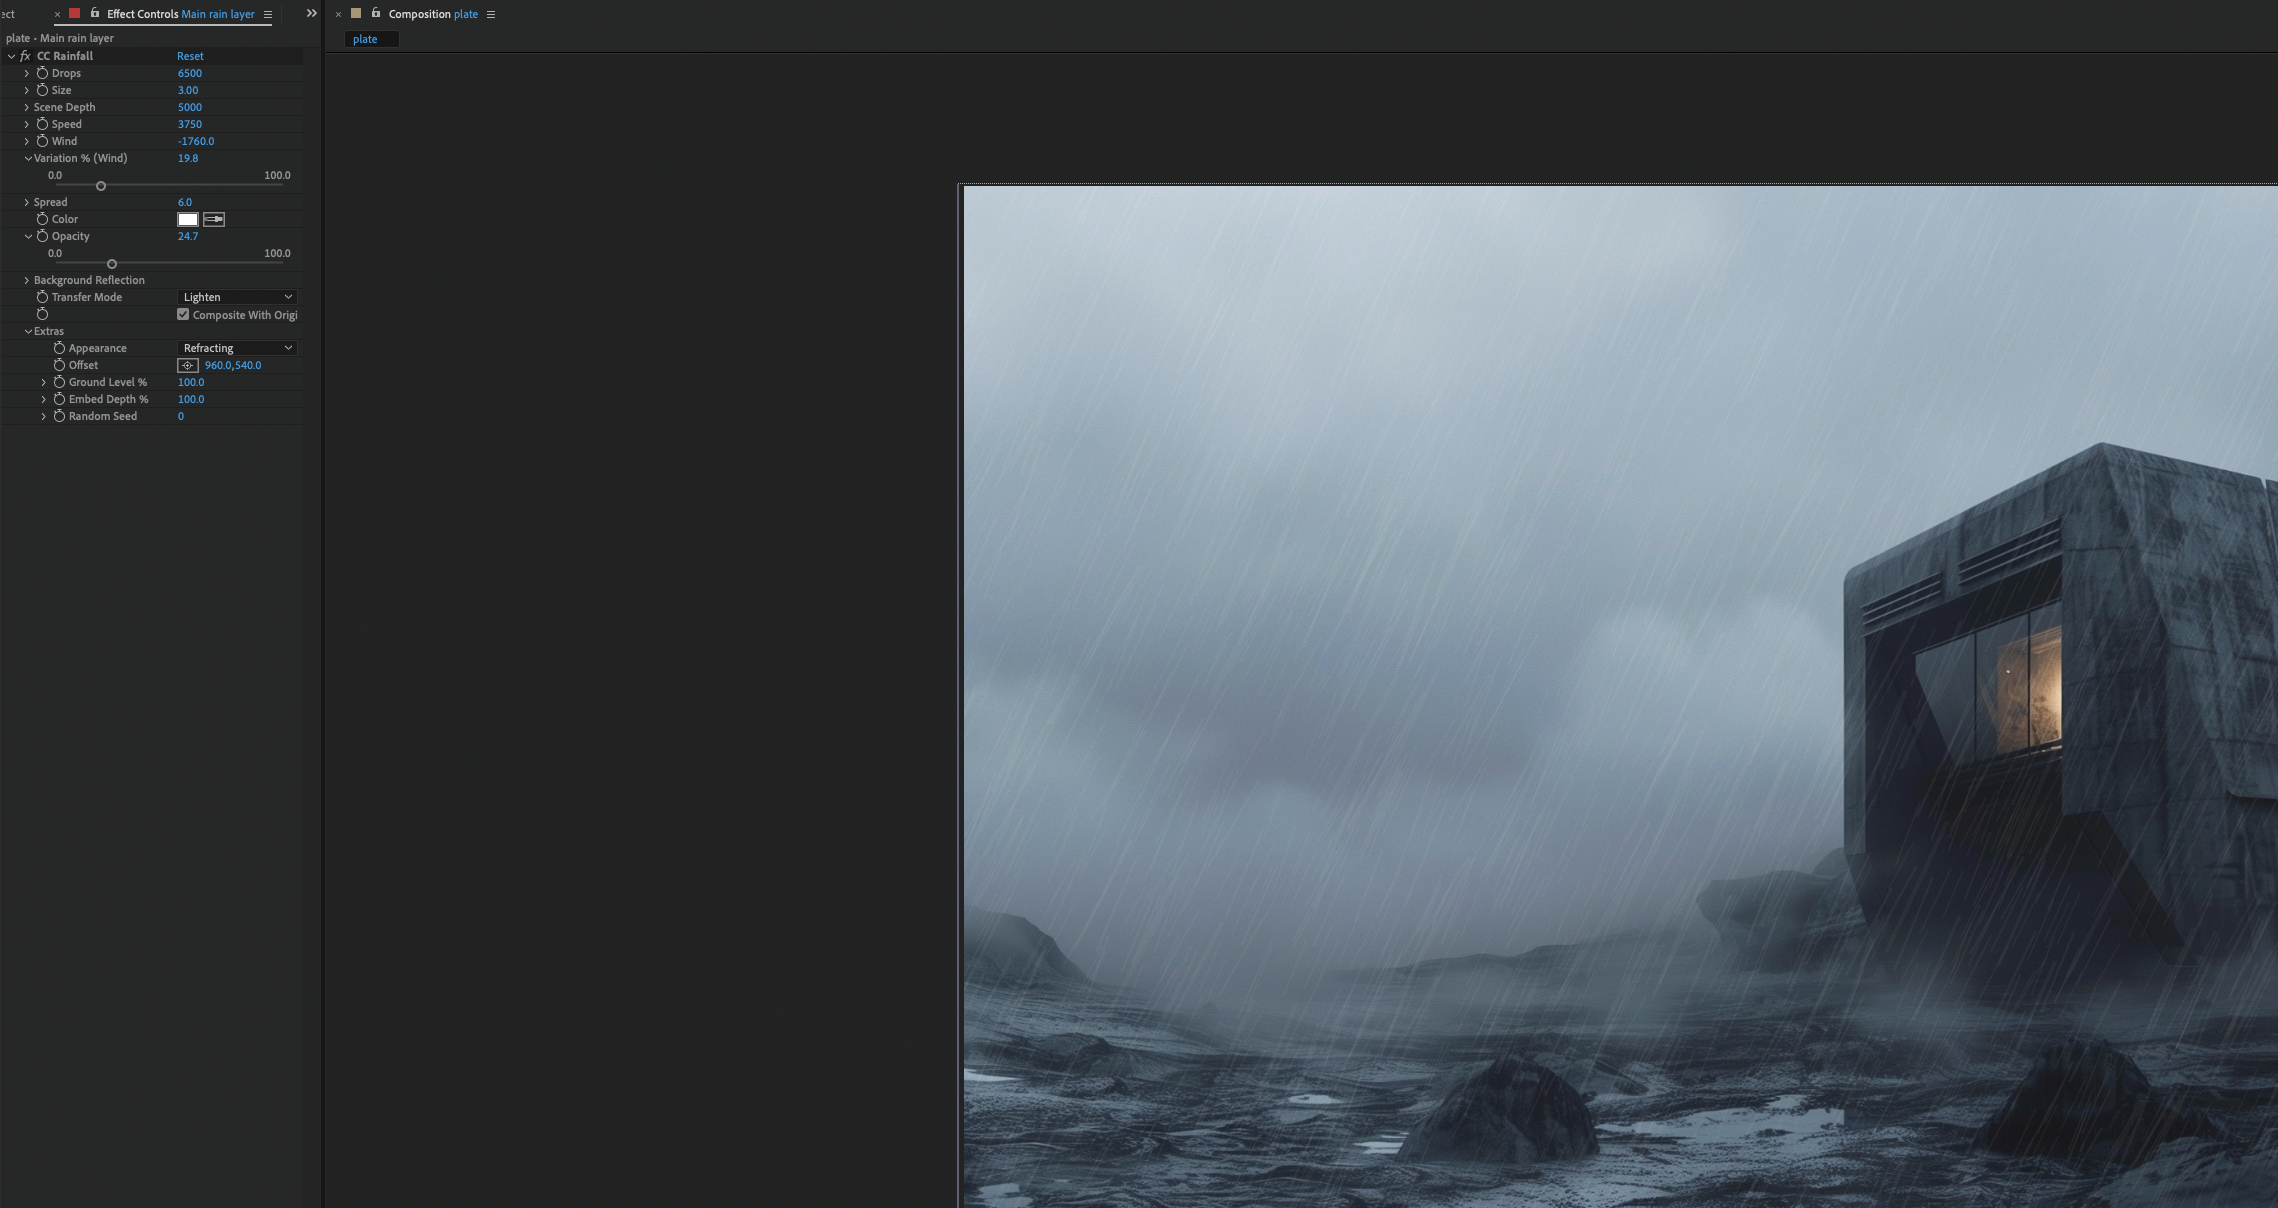
The controls for the rain are fairly self explanatory, but do think ahead about what you want to achieve. Consider this a kind of midground rain, so keep the Size medium and the Drops count quite high.
Adding Wind works wonders for getting some angle into your rainfall, so play with that but remember your setting so the other rain layers match.
Check the screengrab here for my settings. You can use a Wiggle expression to animate things. A little variation to Wind, Speed and amount works well for this kind of scene.
05. Creating the foreground rain
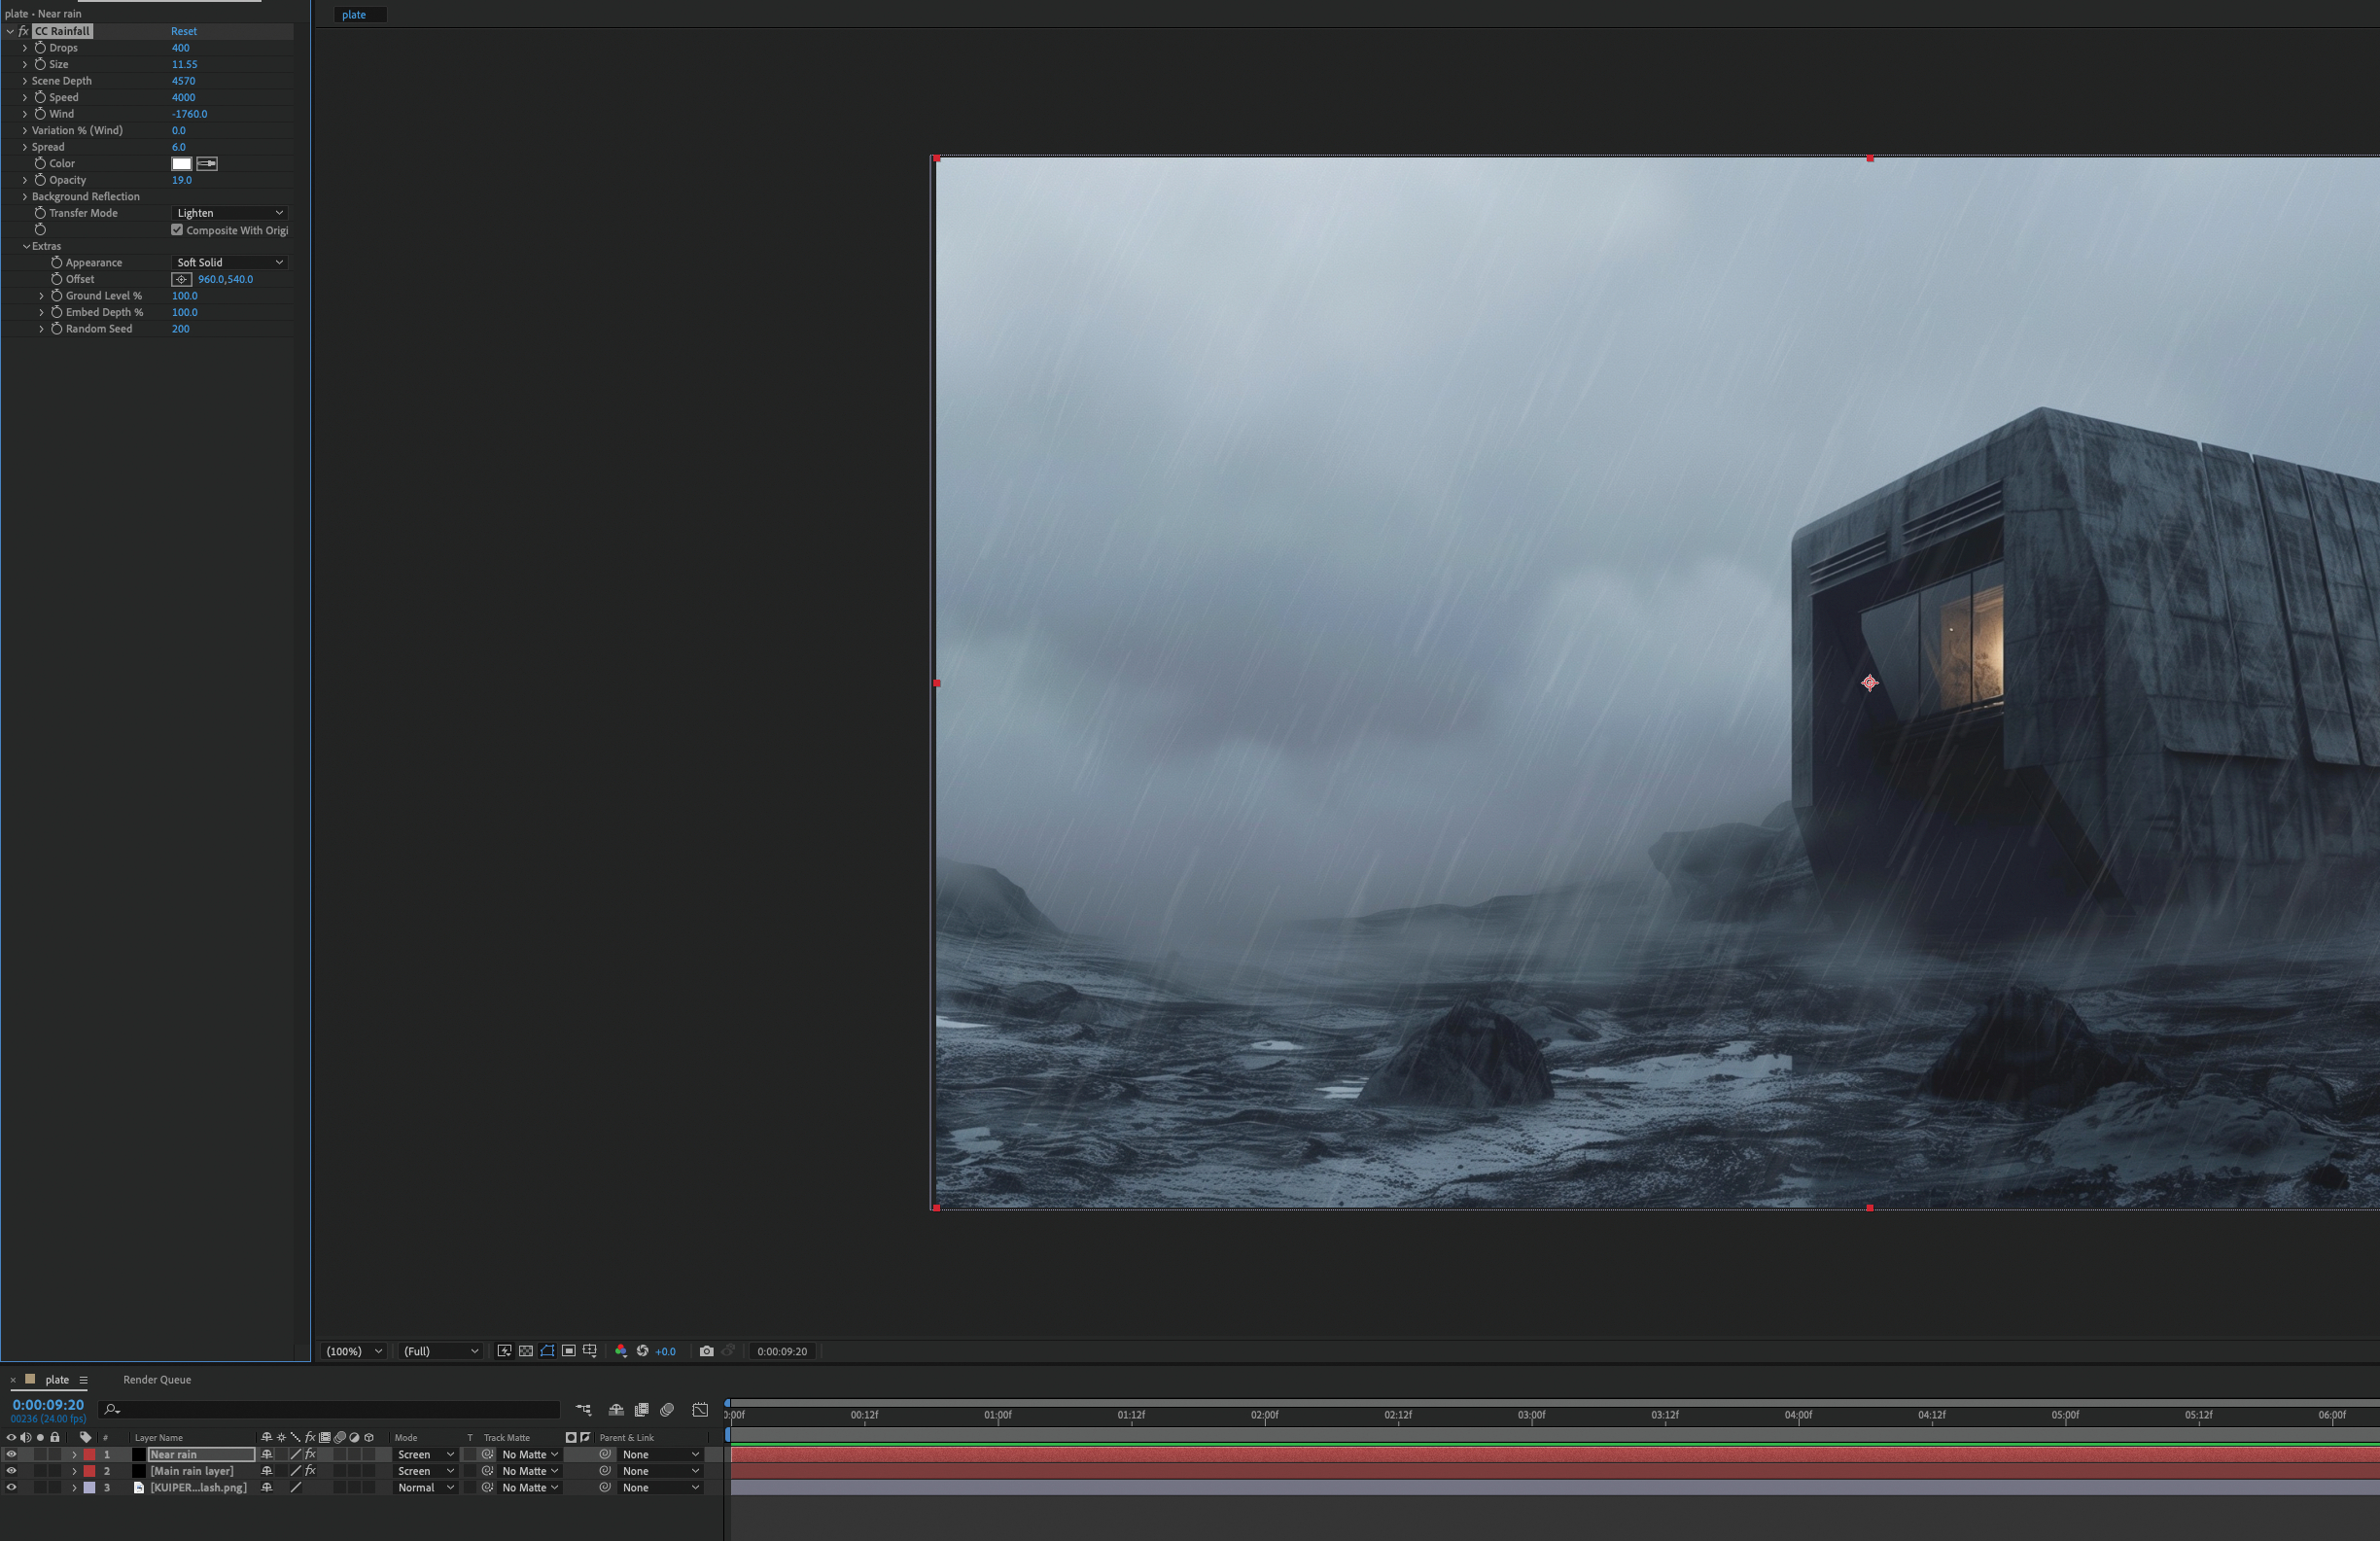
With your main rain layer selected, press Ctrl+’D’ to duplicate the layer. Right-click and rename it to something like ‘foreground rain’ and place it above your main rain (it should be by default).
Now you want to reduce the Drop count and increase the Size. Doing this might make them too imposing, so reduce the Opacity of the rain in the plugin, not the layer.
It’s also worth unfolding the Extras section and changing the Seed so you get a different rainfall pattern. Hit Spacebar to play your animation and check you’re happy.
06. Creating a distant downpour
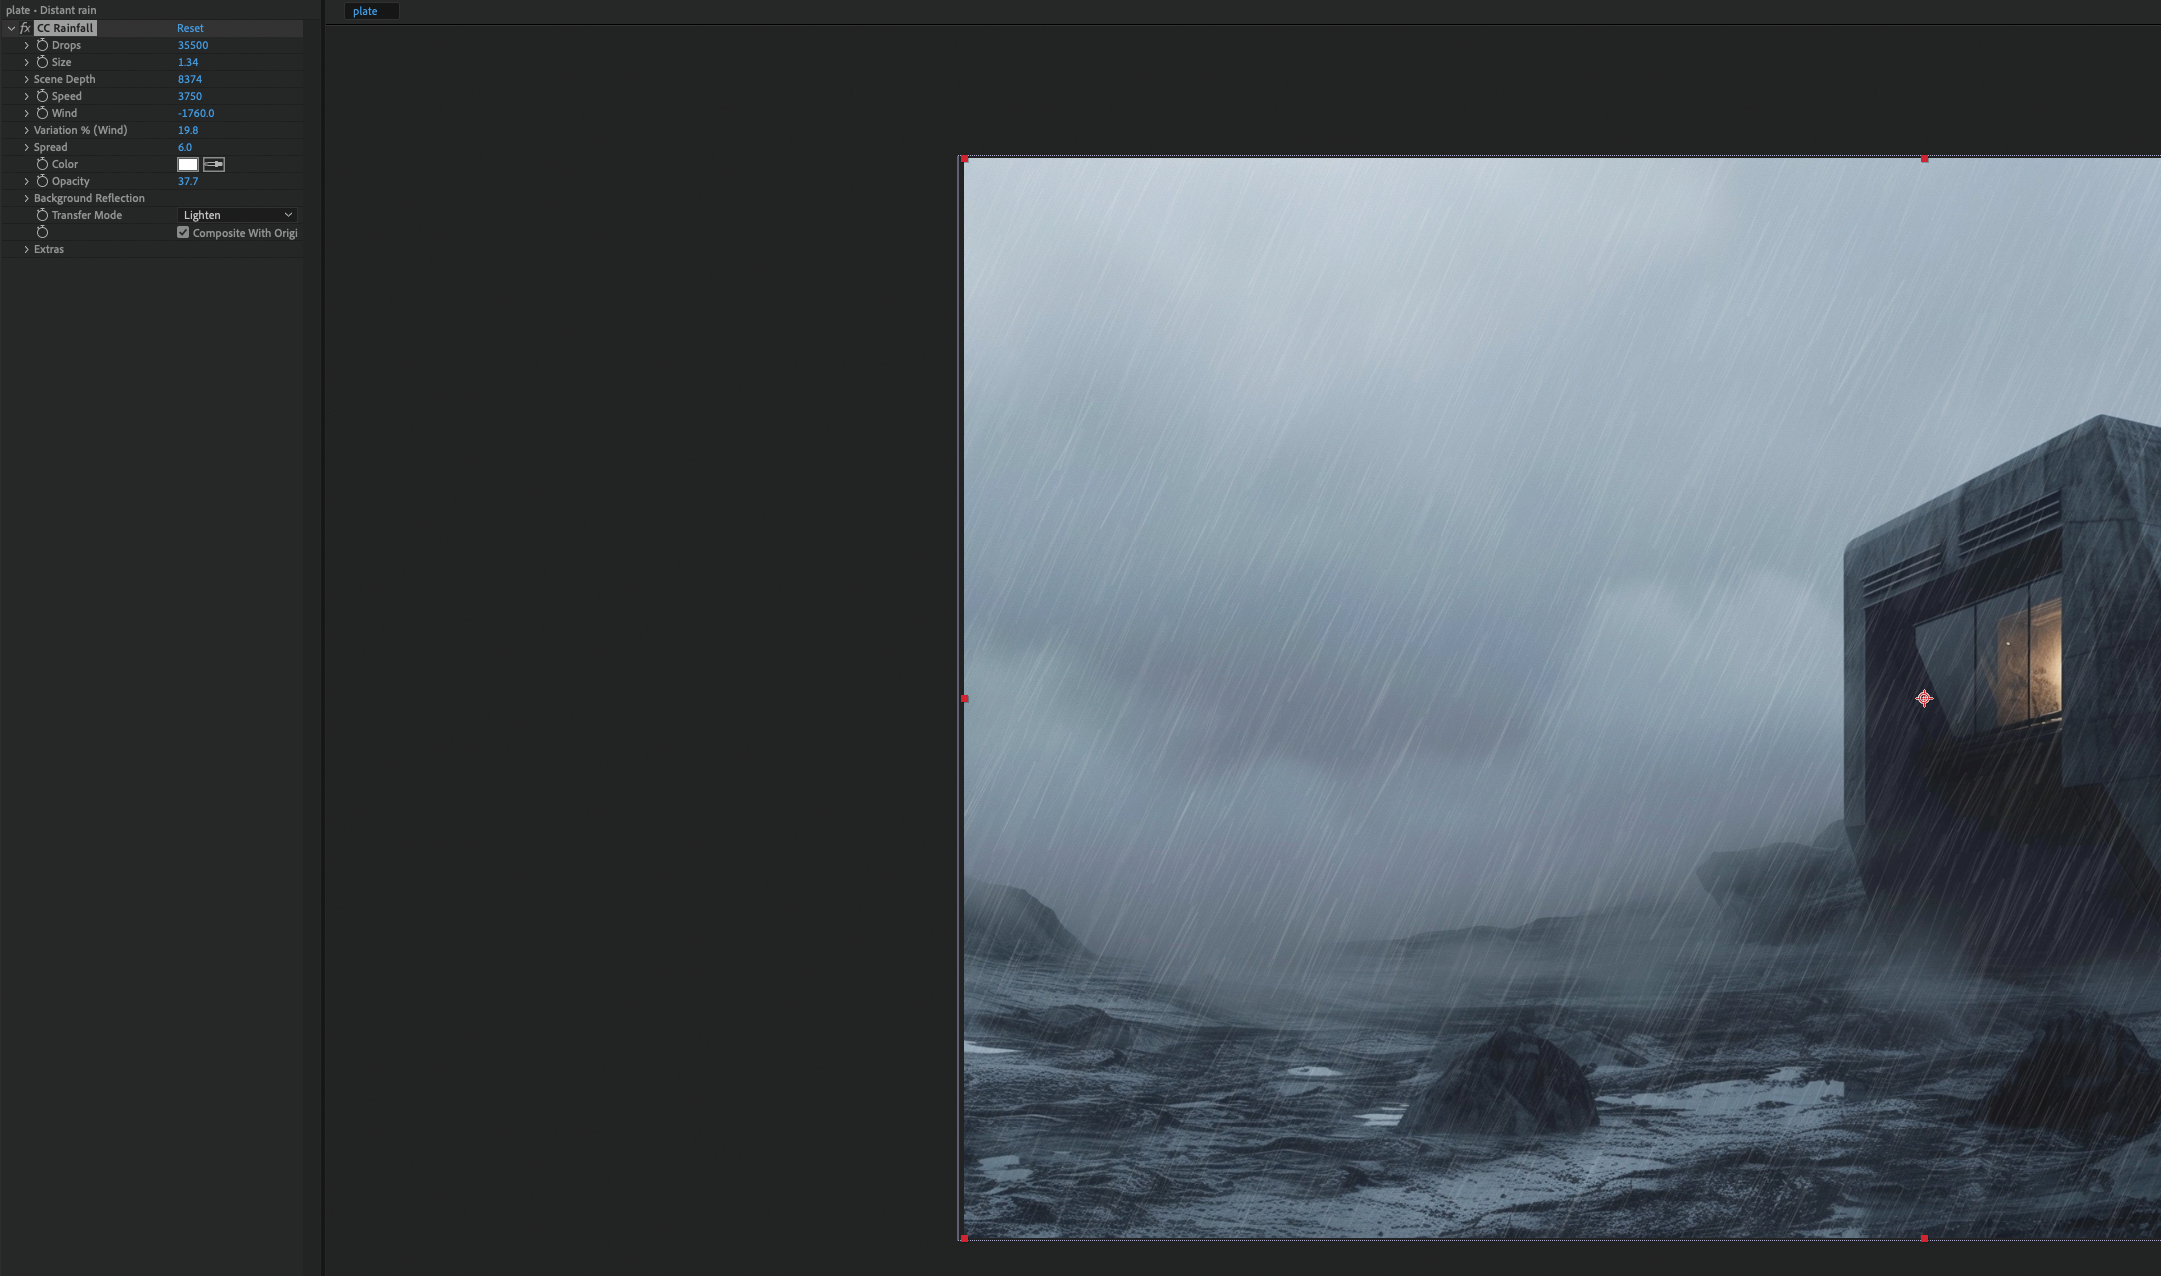
Now it’s time to add some distant rain. Duplicate your rain layer again and move it below the main rain layer, renaming it to ‘distant rain’ or similar. You need to decrease the Drop size and increase the amount by a lot.
This depends on your scene, but mine had 10 times as much rain. Change the Seed as before and play the timeline to see how it looks. Mine needs more depth.
07. Masking areas of a frame
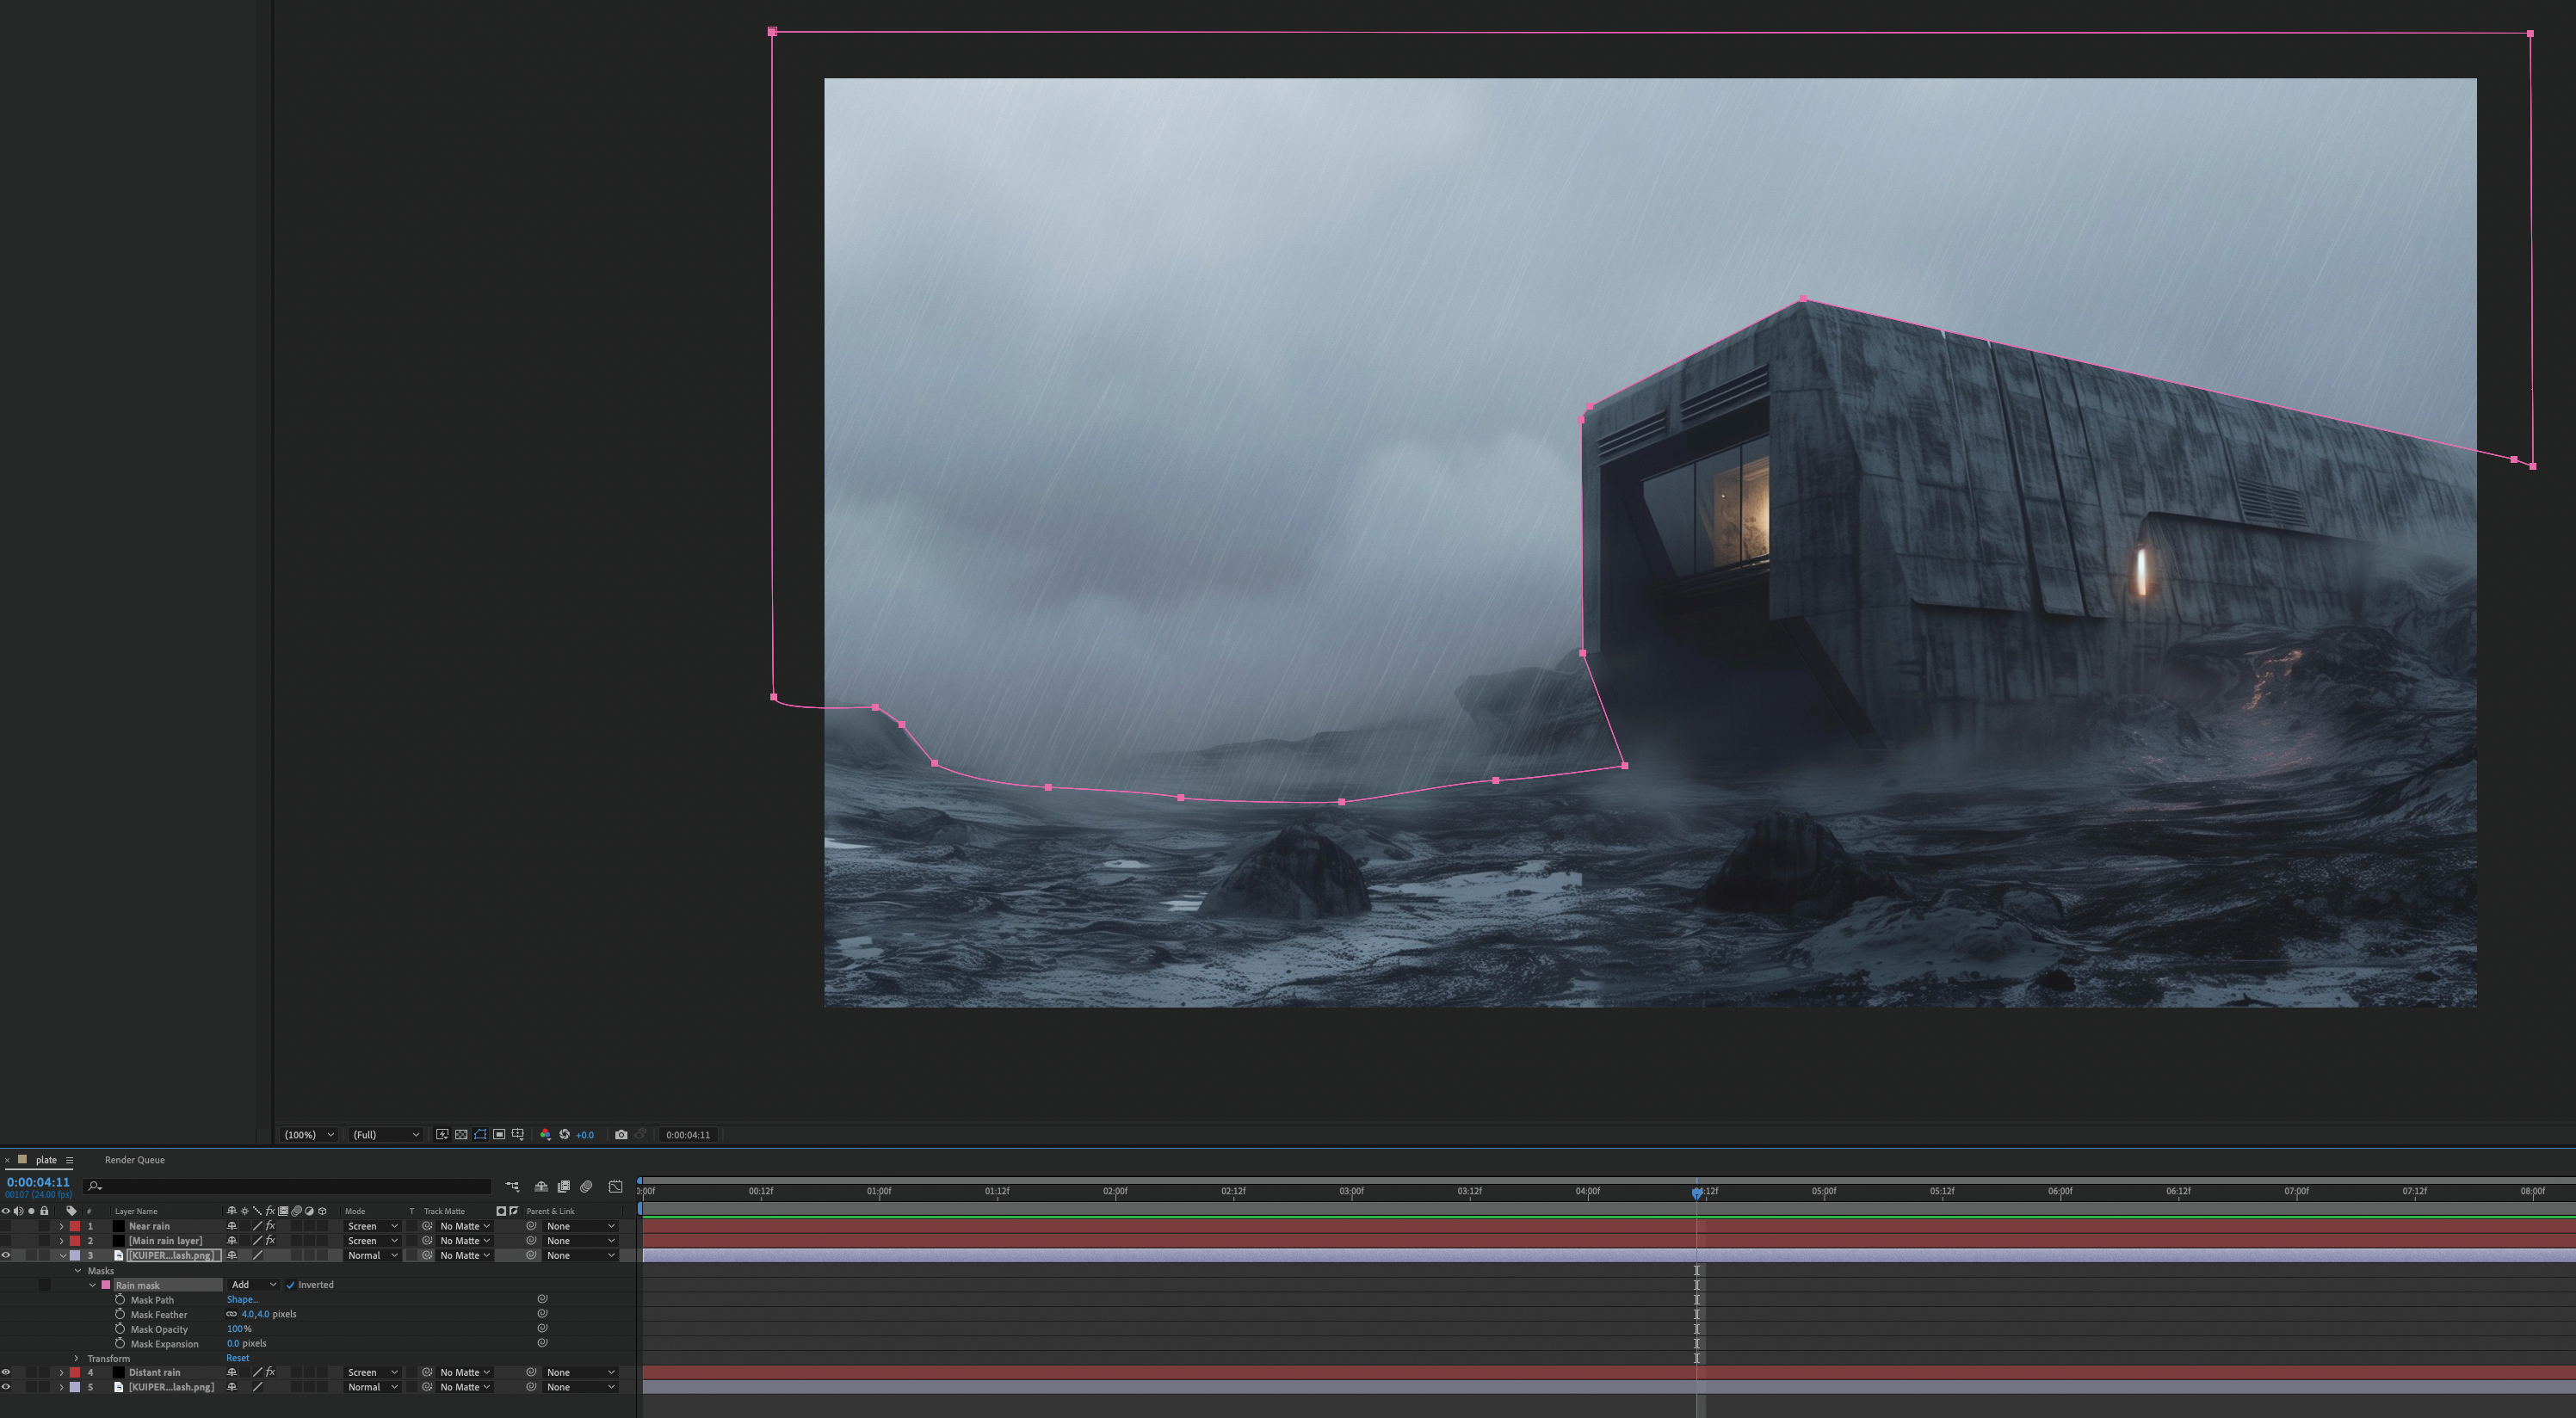
Currently, all the rain falls across the whole frame, which might look okay in some cases, but for many it lacks depth, so let’s fix that.
Make a duplicate of your background plate and put it above the distant rain layer, then select the Pen tool and draw a mask of your midground elements, in my case the building and any parts of the scene that are at distance from the camera.
Feather the edges slightly under the Mask options, which can be unfolded in the layer stack. Play the timeline again to check if you need any further adjustments.
08. Adding new light sources

A little bonus step here is to add some light flickering from a window, be that an old bulb or a fireplace.
Duplicate the plate layer again and place it over the background rain. Add a ‘CC Glow’ effect and a ‘CC Opacity Flash – random’ effect. A bit of trial and error is needed to get the intensity and speed to match your requirements, but it doesn’t take long.
Next, add a mask to the area you want the effect to show and then hit play. With that, you should now see a welcome, flickering light within the building.
09. Making final adjustments
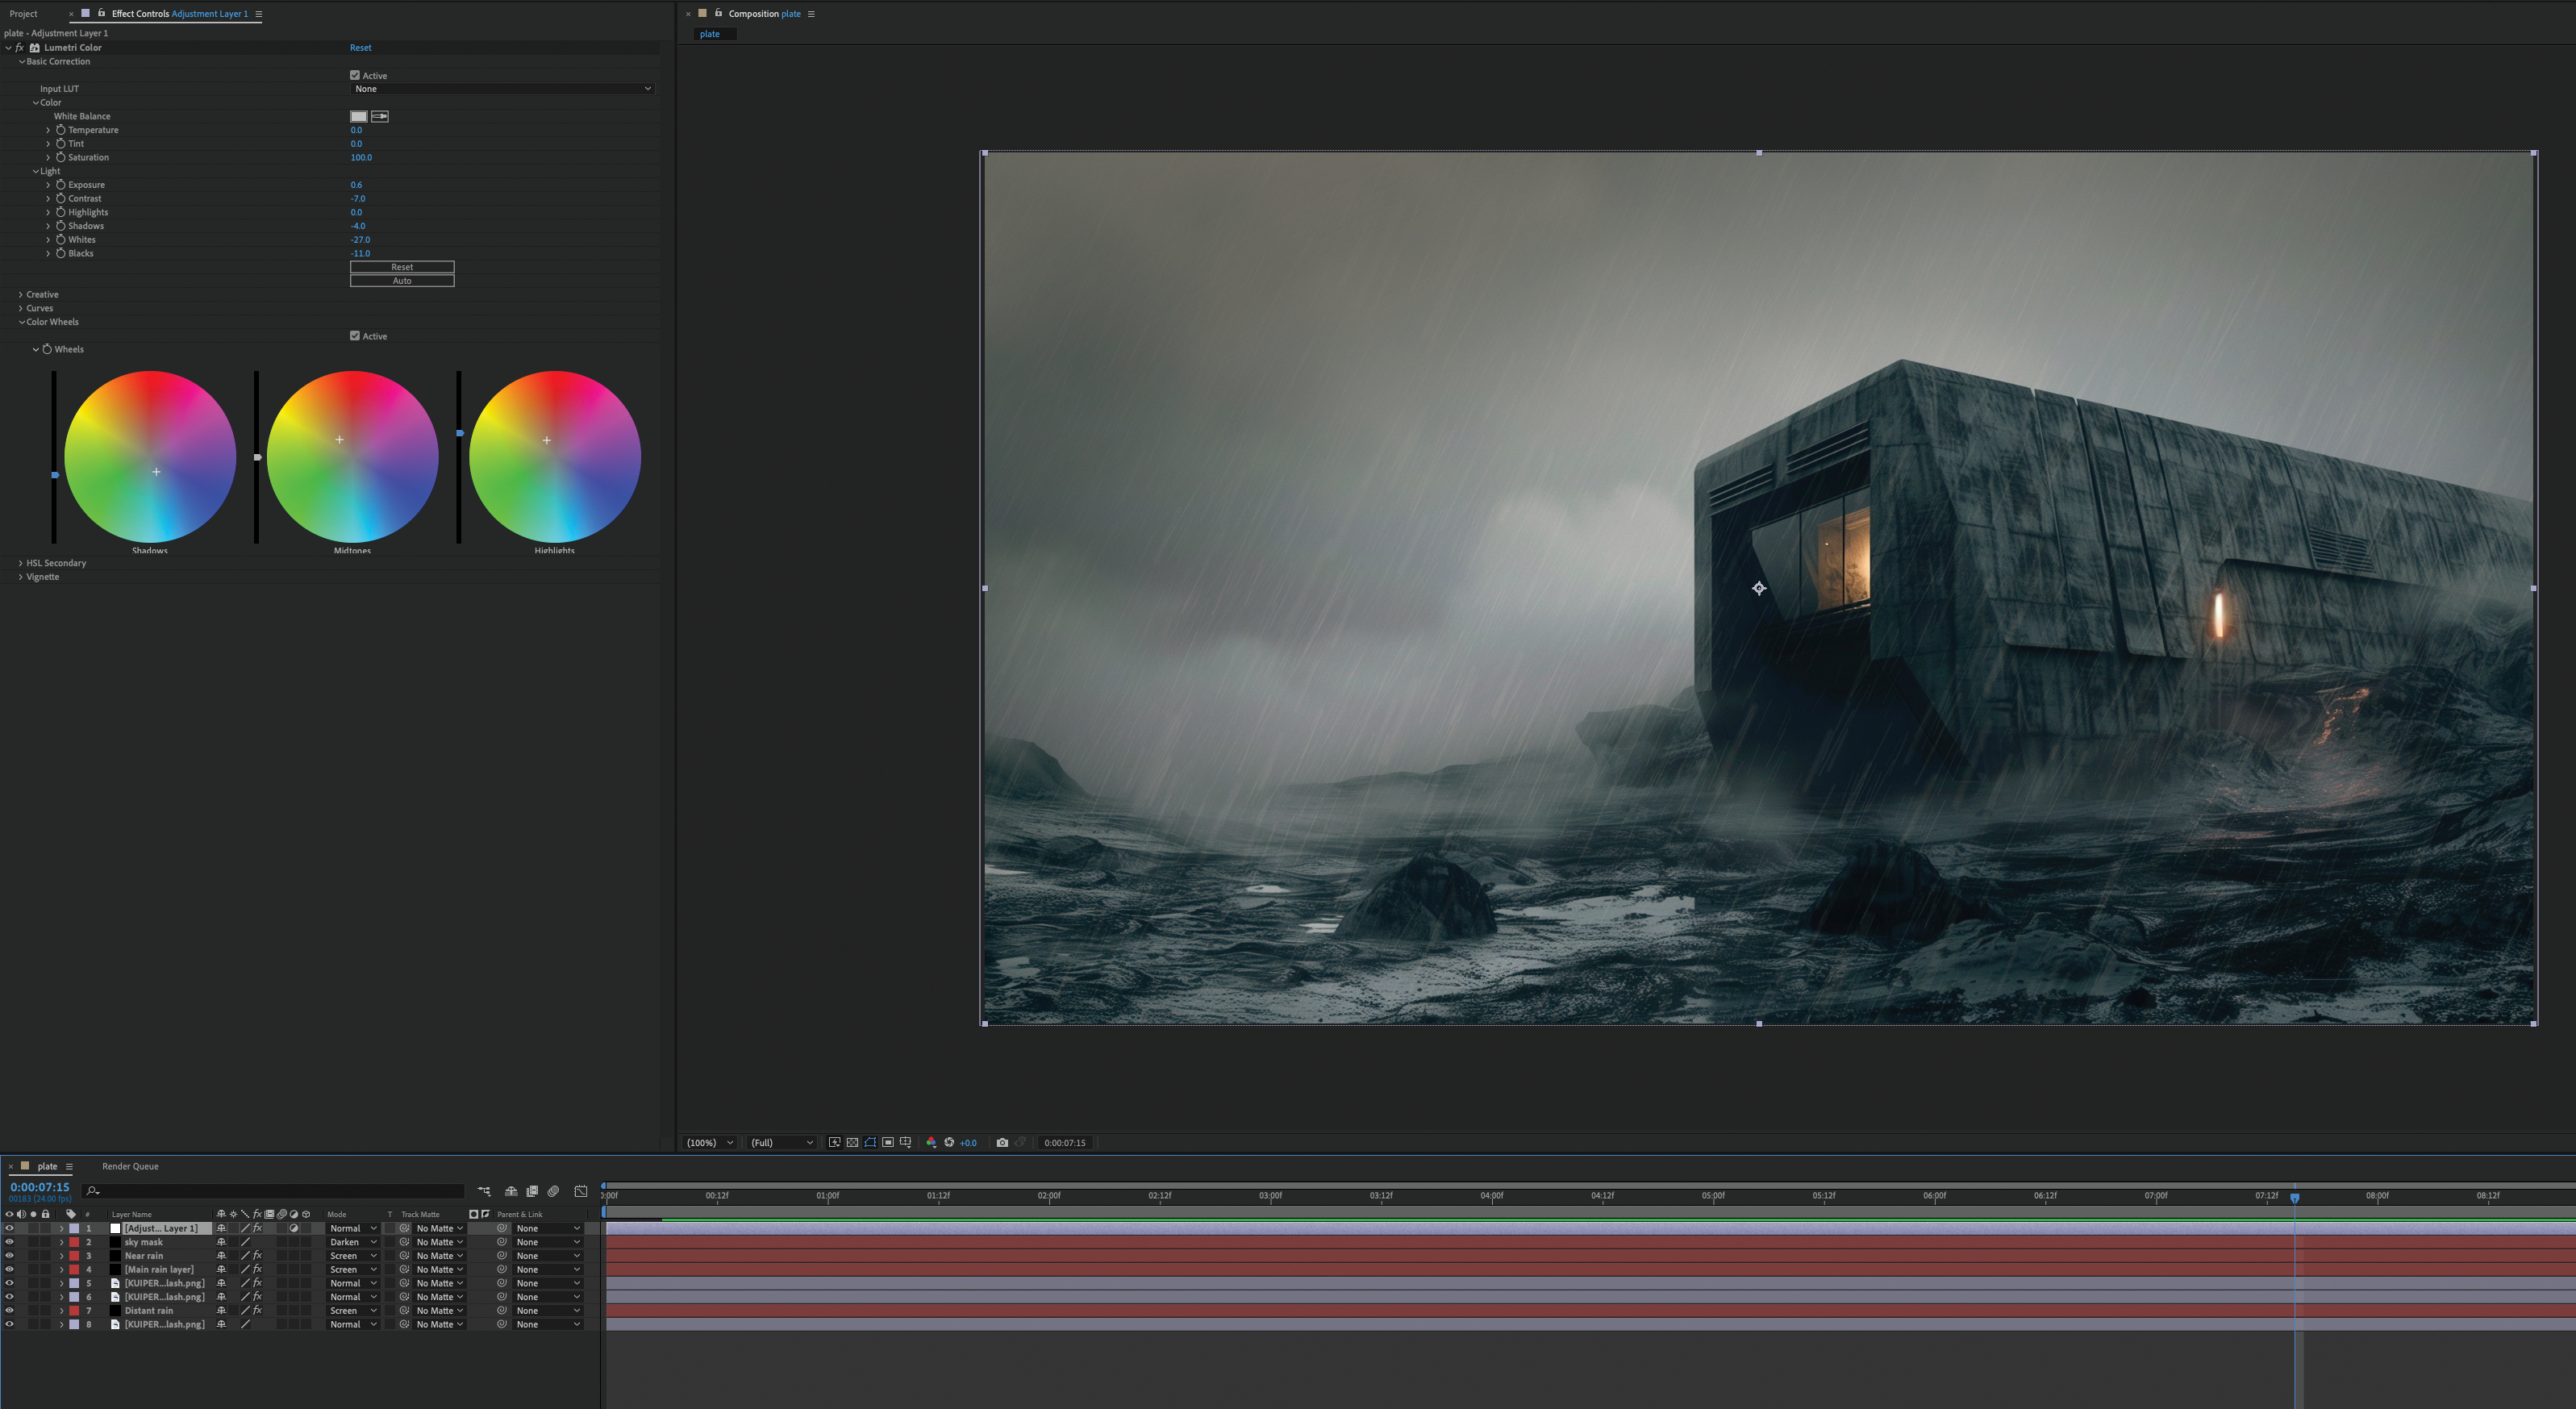
This last step is optional but can help bring it all together. I felt the sky was too light, so added a black solid and masked areas of the sky with a high Feather value, and reduced the Opacity to add moodiness.
Lastly, place an adjustment layer on top of the others and tweak your Colours, Exposure, Contrast and so on. Now all that’s left is to save and add to the render queue!
Inspired but need more? Then read our round-up of the best 3D art, as well as our guides to the tech you'll need, including the best laptops for 3D modelling and the best drawing tablets.