As both a photographer and the Cameras editor here at Tom's Guide, I use a lot of cameras. On every single camera where it's possible to do so, I enable the visual level.
A level does exactly what it says on the box: It gives you a visual guide to the angle of your camera, to help you figure out when the camera is perfectly level. This is extremely useful for the look and feel of your shots. If a photo has a wonky horizon, your picture is going to look amateur.
With iOS 17, your iPhone's camera now has a built-in level to help you get straight shots. Slowly but surely, Apple are introducing more features — big and small — that you'd find in today's best mirrorless cameras.
Now, this level isn't perfect. For one, it only shows left and right tilt, while the leveling tools in most cameras also show forward and backward pitch to help you figure out if your camera is positioned correctly — this would be extremely useful when trying to line up your iPhone on a tripod, for example, to ensure it's pointing straight ahead and not up or down. I'm not sure why this is omitted, as the iPhone's built-in level tool (found in the Measure app) shows pitch and tilt.
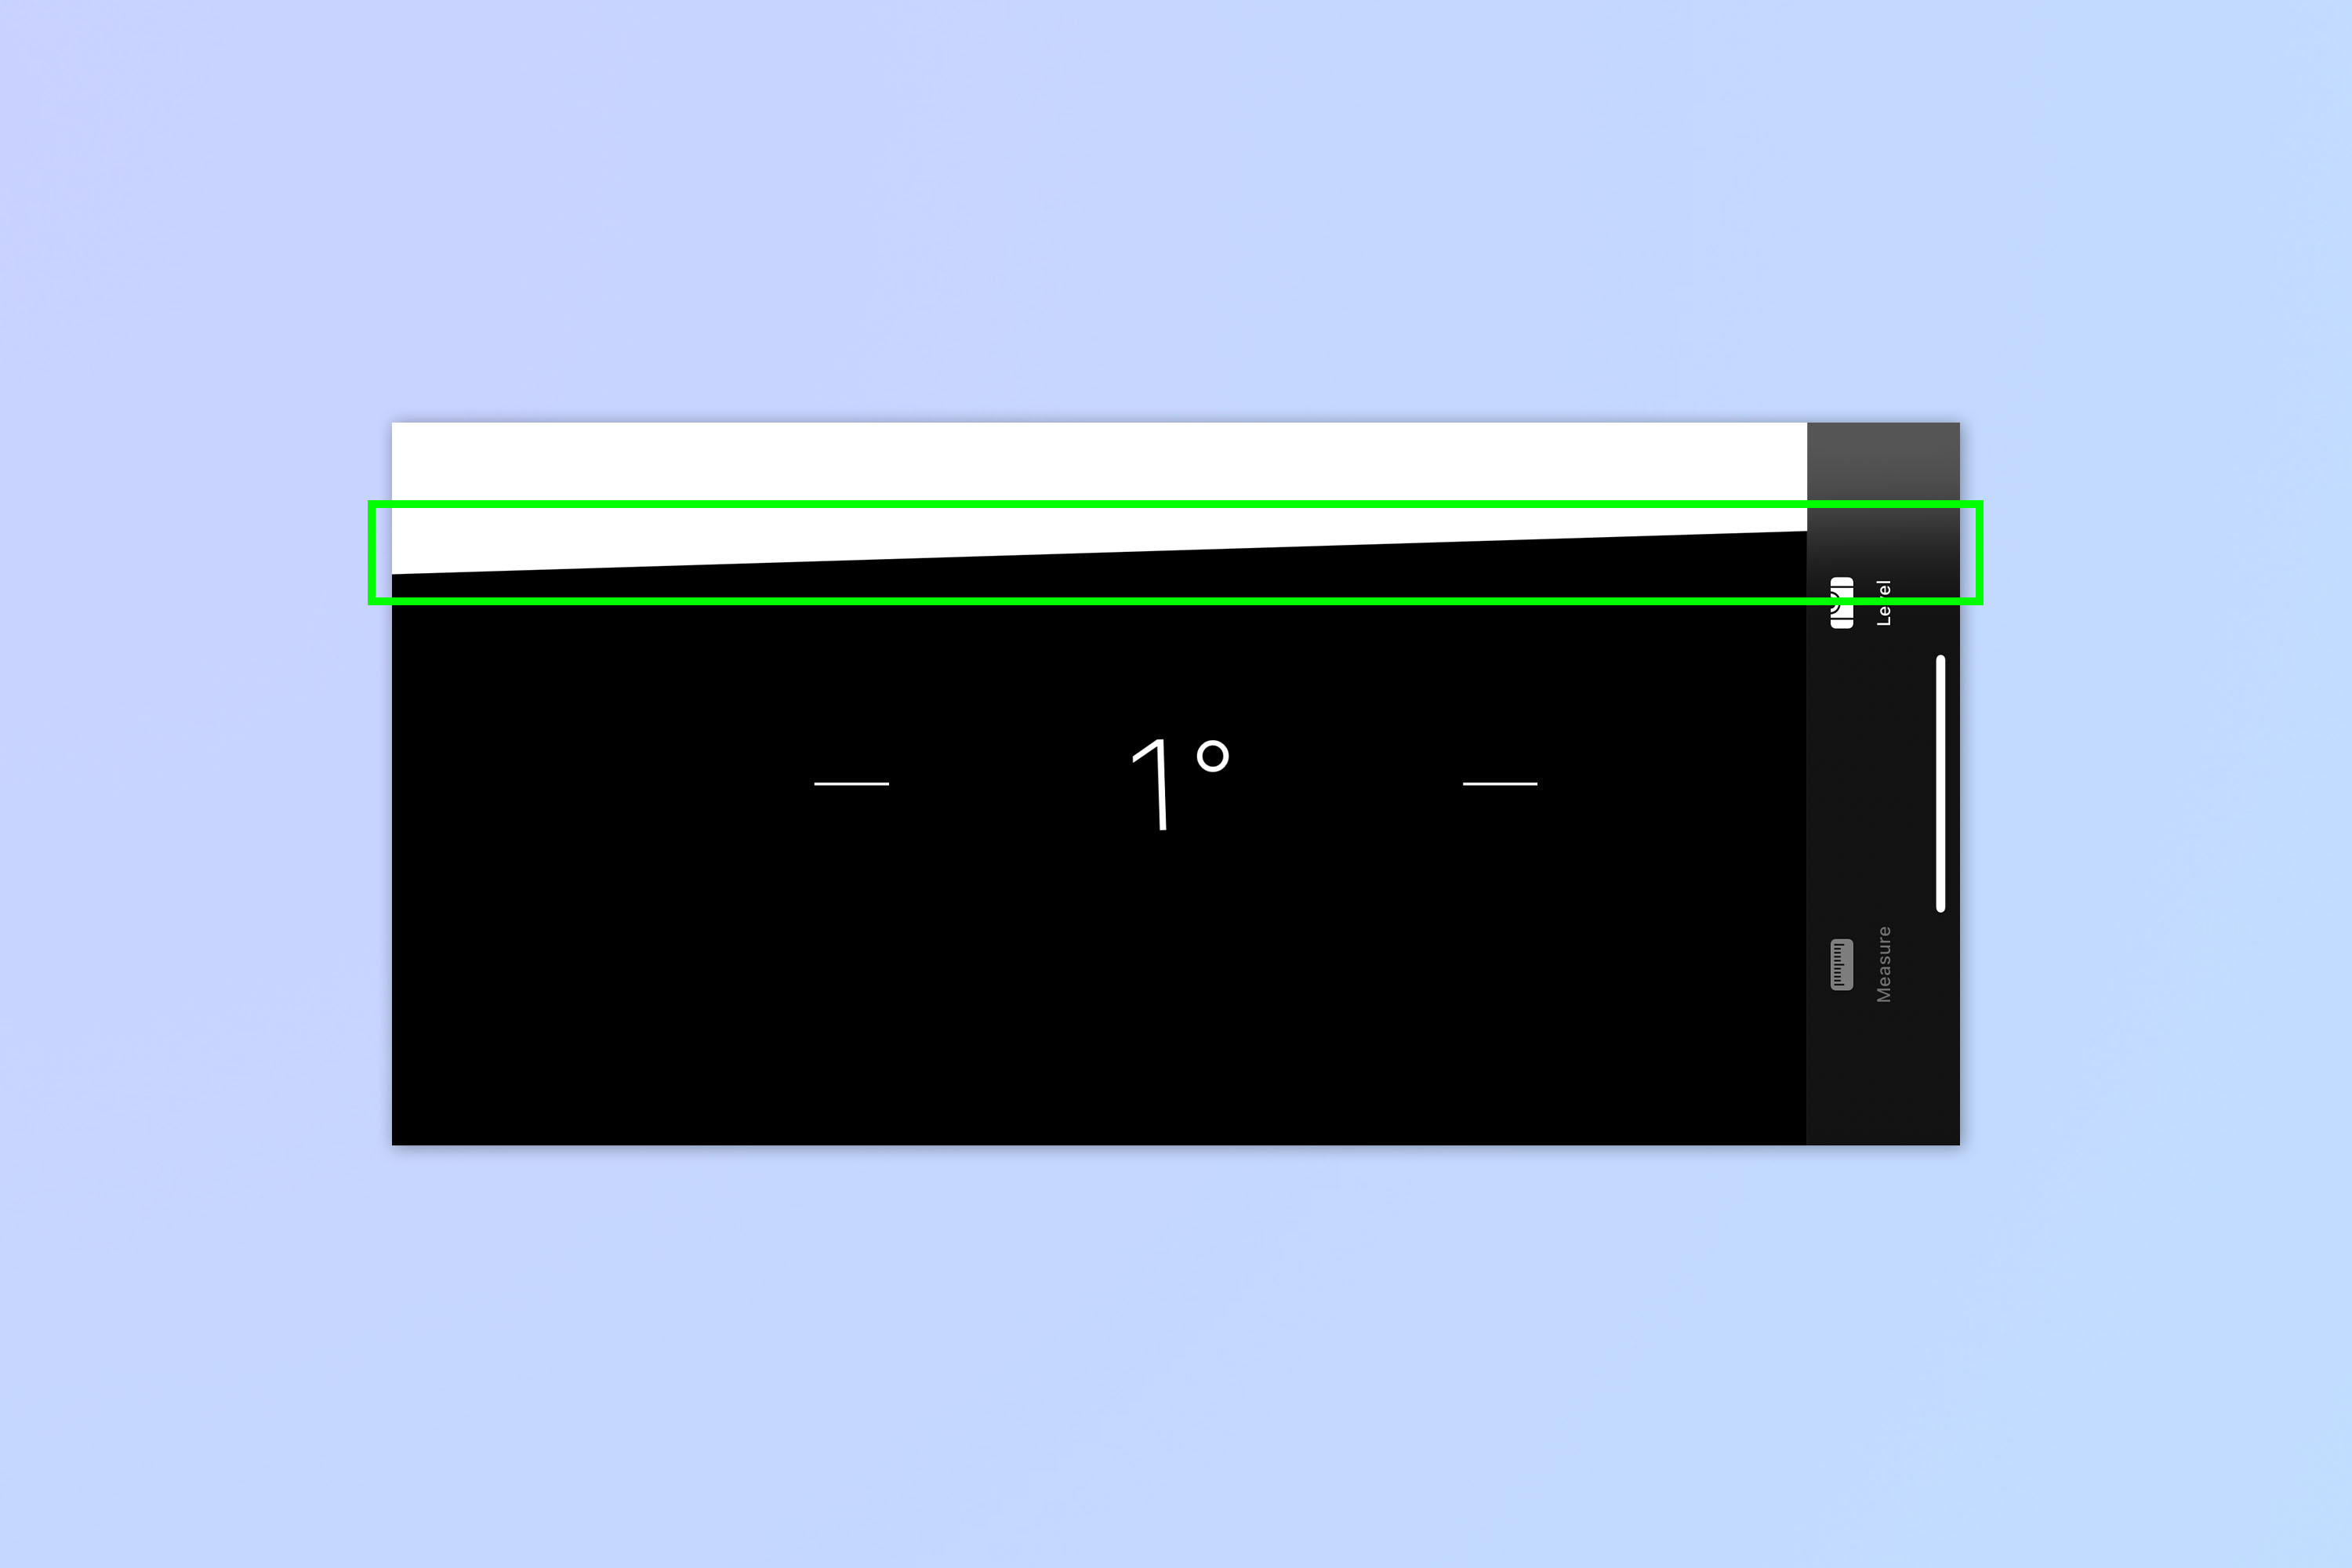
The camera level also only works in landscape orientation, which seems weird. I'm a portrait photographer and always use the level in portrait orientation too — horizons can still be wonky in portrait.
Regardless, it's still nice to be given proper photography features, especially on my iPhone 14 Pro Max, which Apple bills as a hardcore photography tool.
The camera level is easy to turn on, but hidden away in Settings. Here's how you turn it on.
How to enable the iPhone camera level with iOS 17
Before we get started, you'll need to be running iOS 17. Currently, iOS 17 is in public beta. We can show you how to install the iOS 17 public beta, so you can start trialling the latest iPhone features. Be warned though: public betas are still unstable, so make sure you back up your device on iOS 16 before installing the beta.
1. Go to Settings > Camera
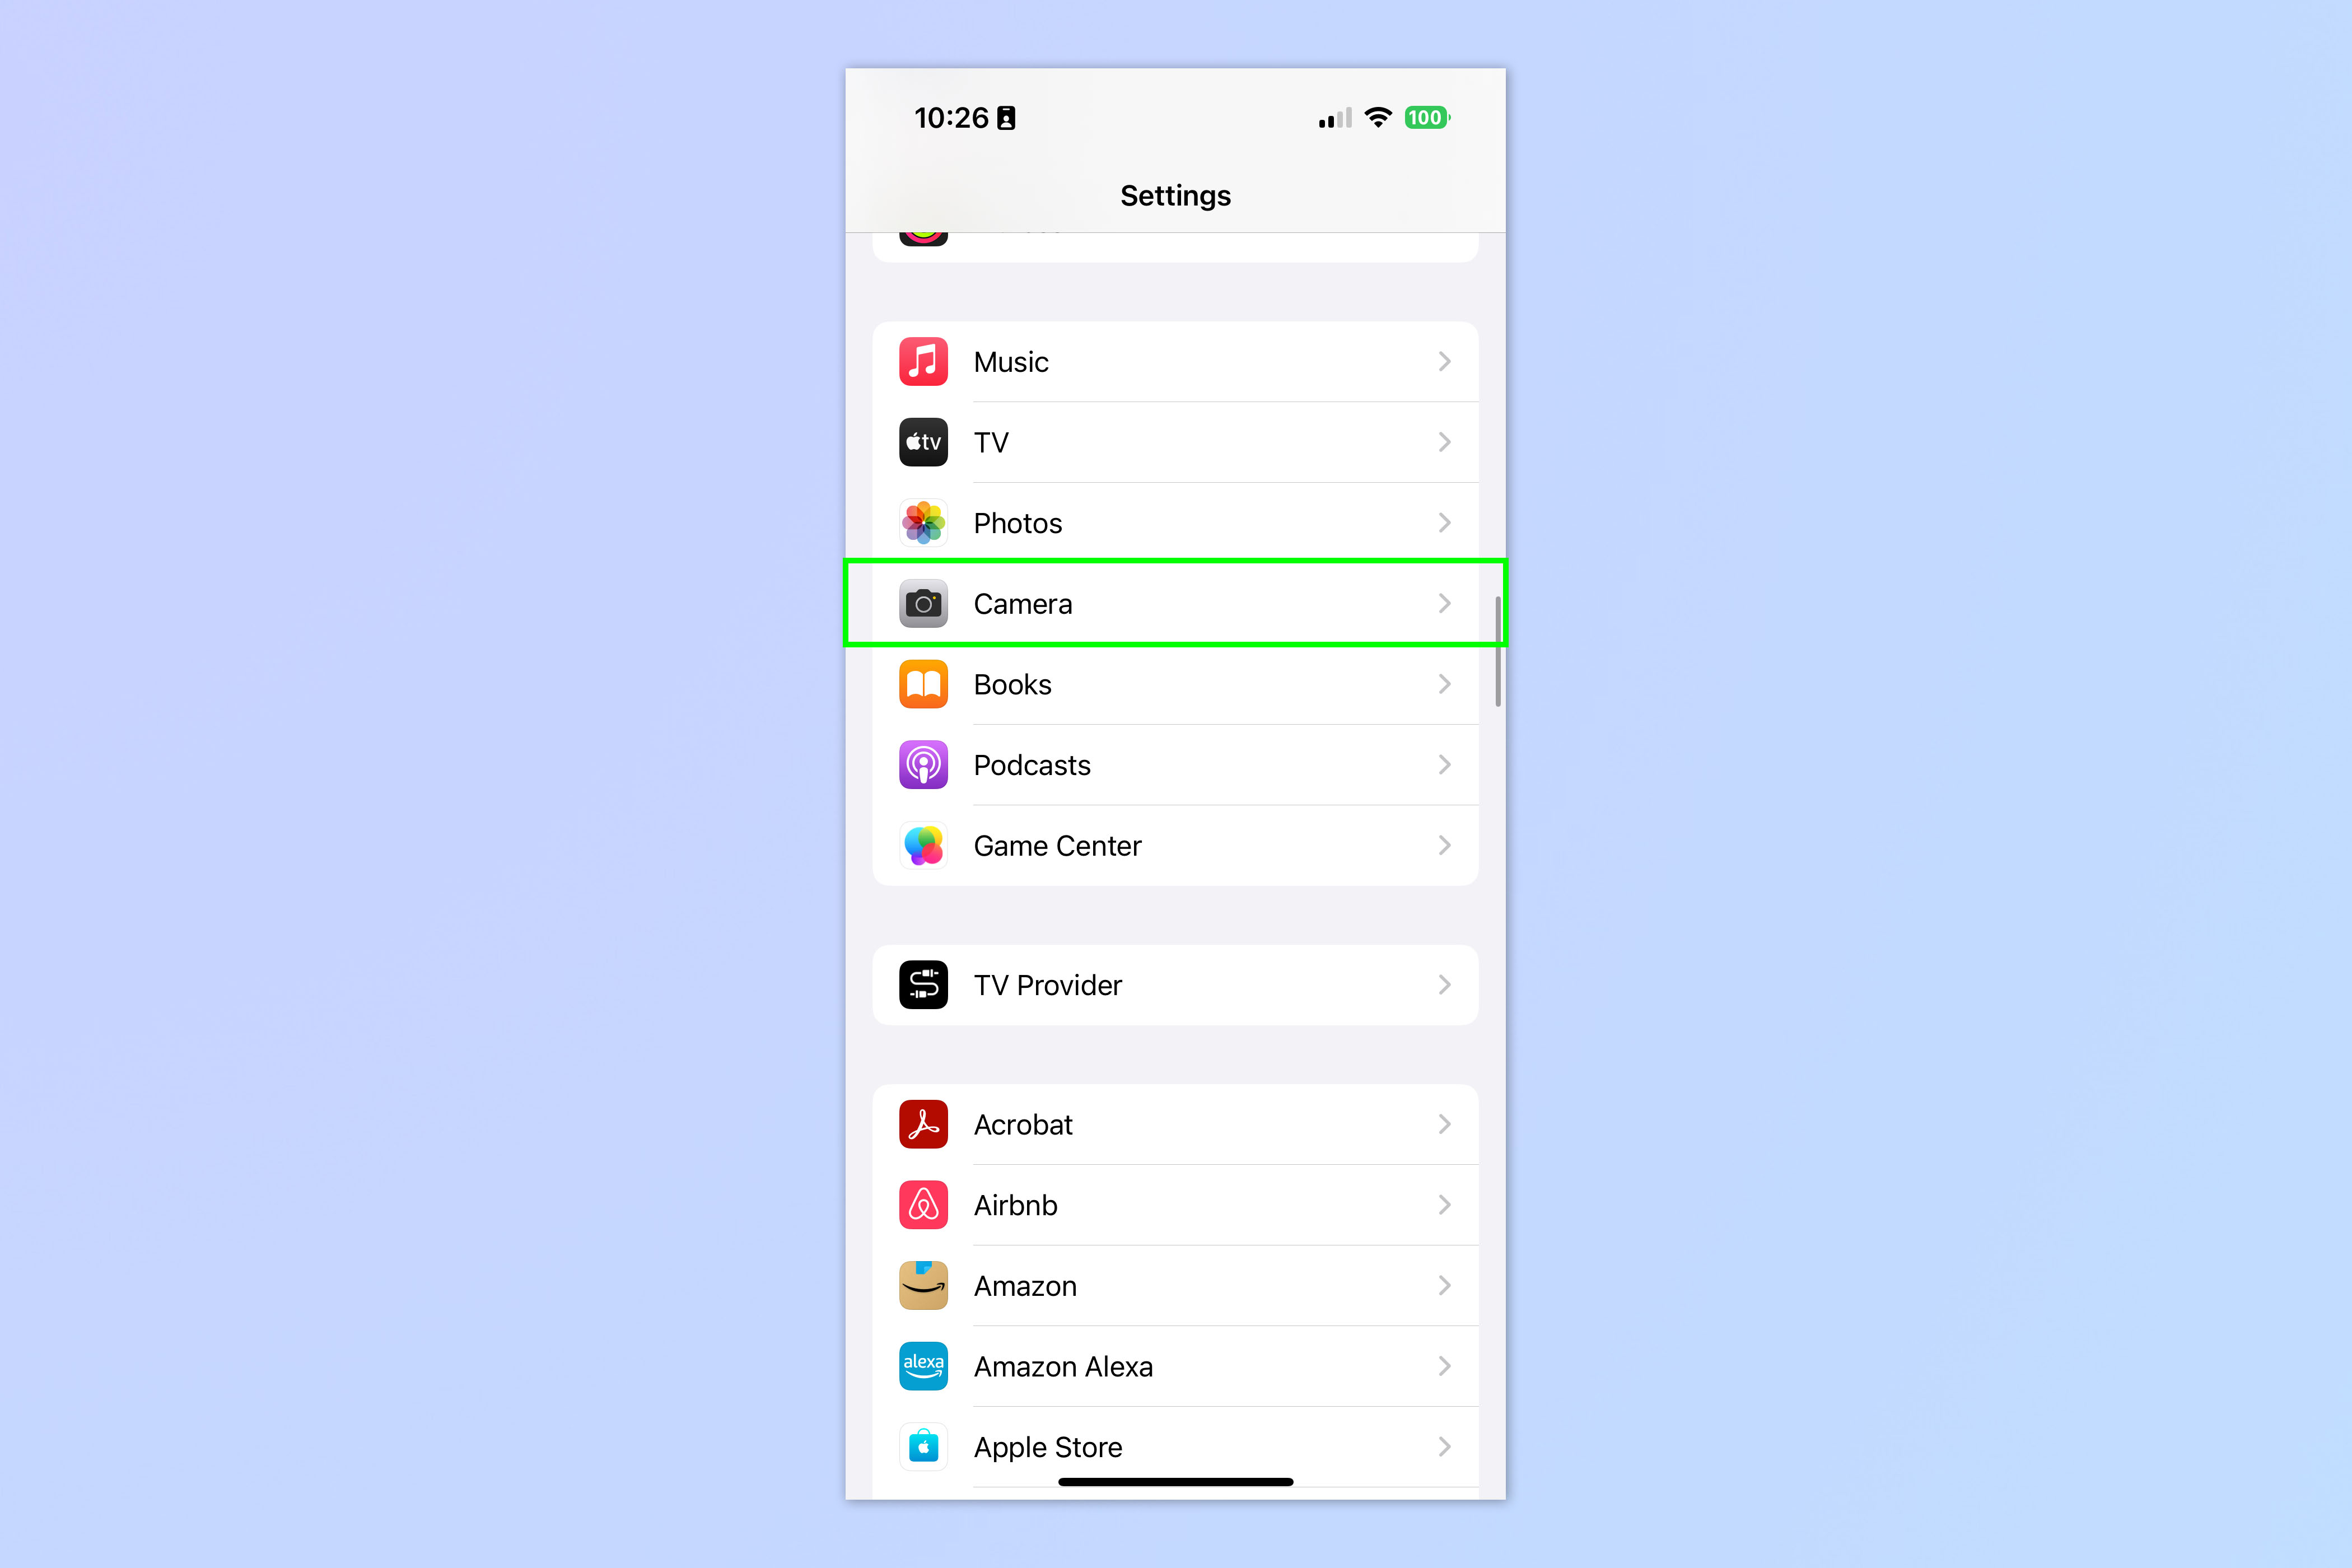
Open the Settings app and tap Camera.
2. Toggle on Level
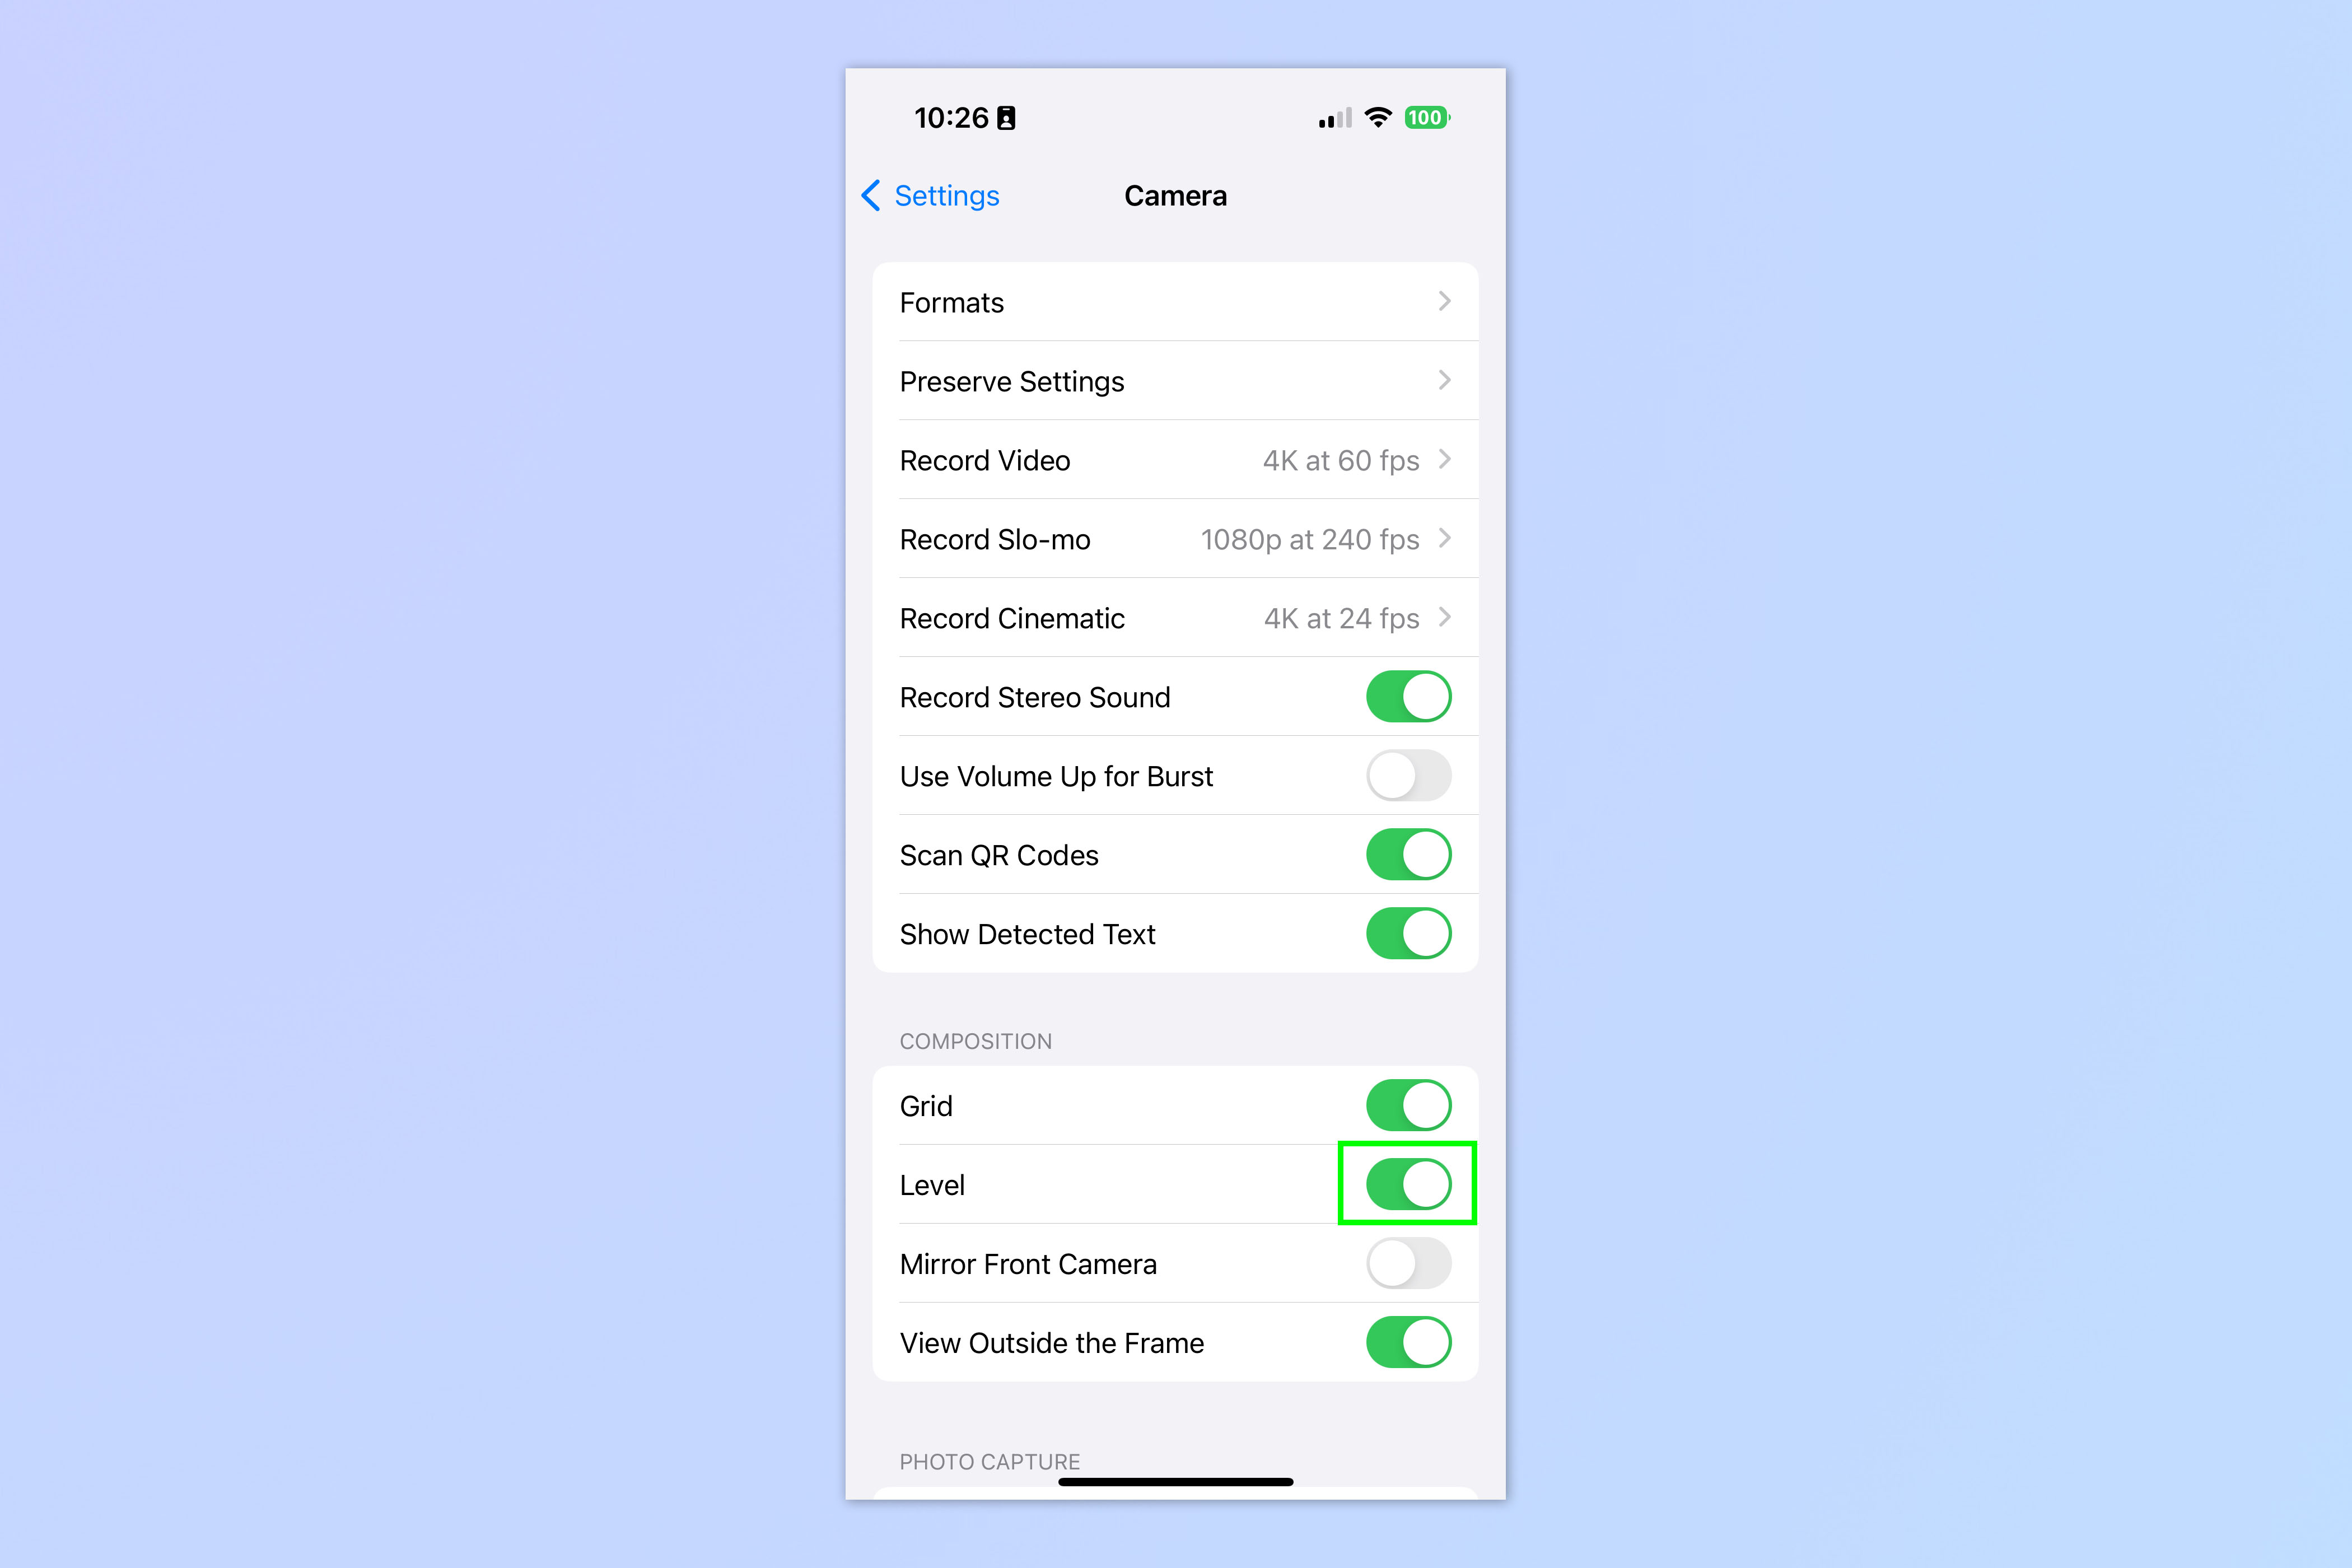
Scroll down and toggle on Level.
3. Use the Camera in landscape
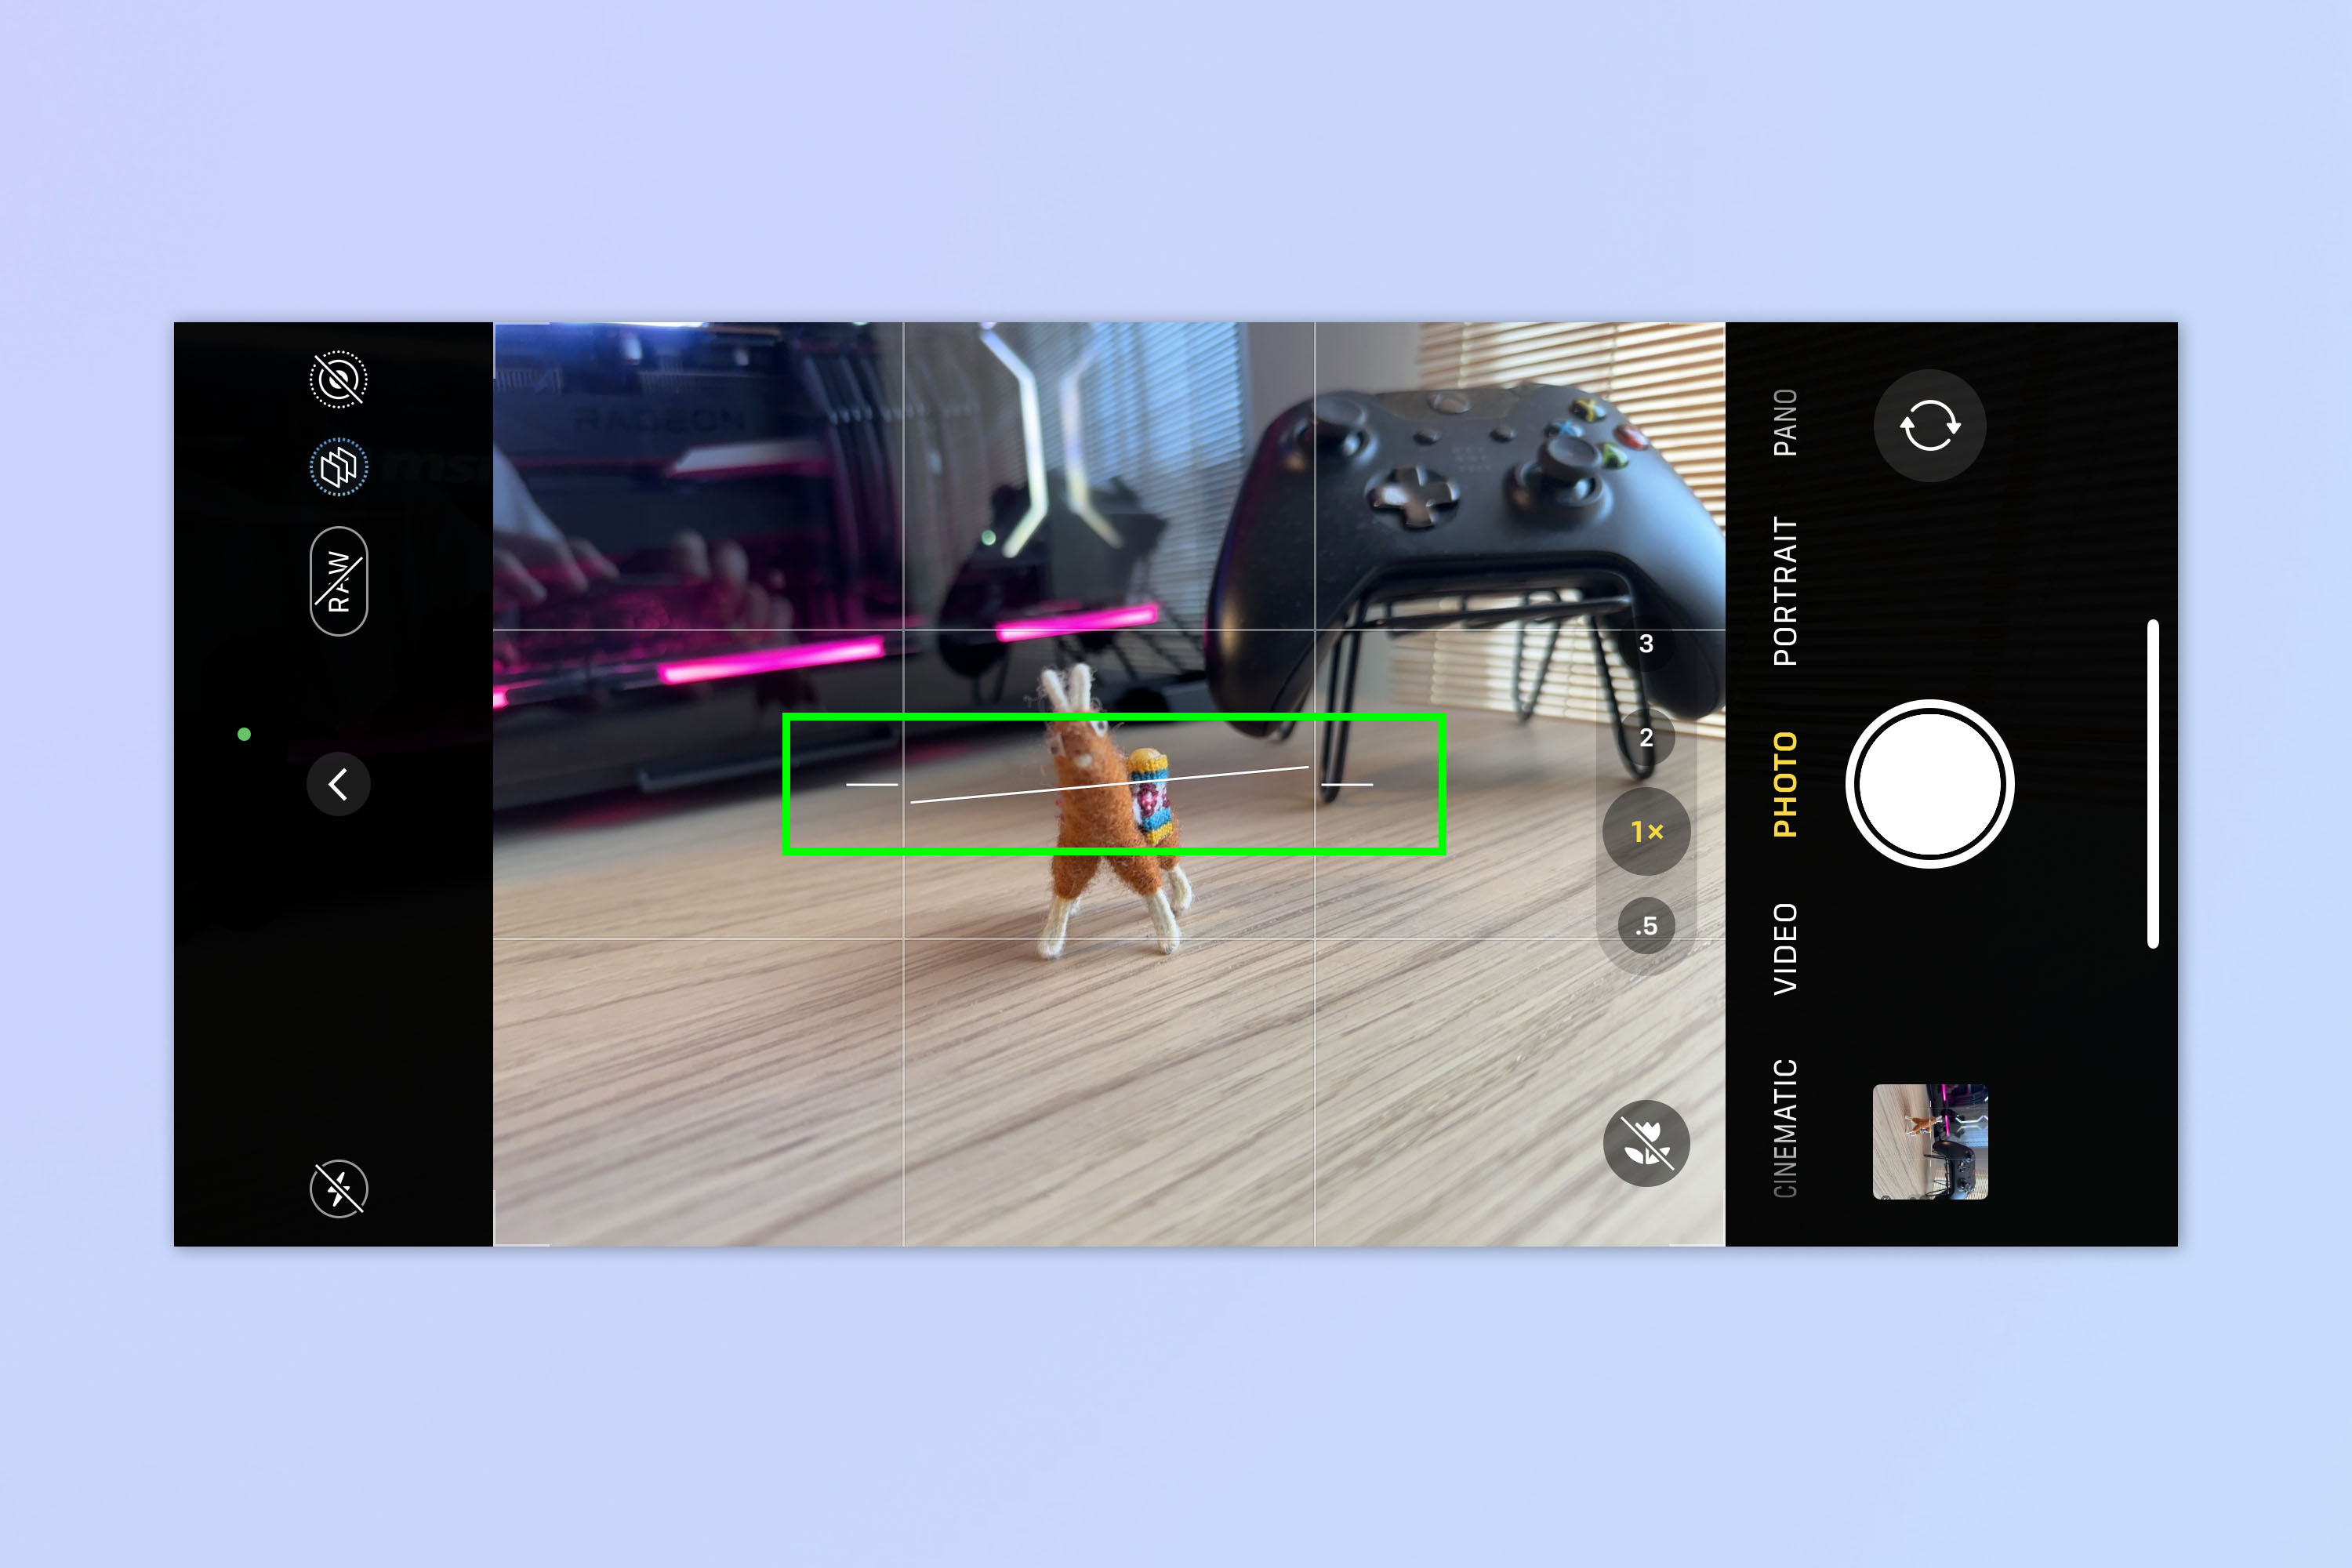
Now open the Camera app and turn your iPhone horizontally to enter landscape orientation. You'll notice that a level appears in the center of the image preview.
4. Line up the level
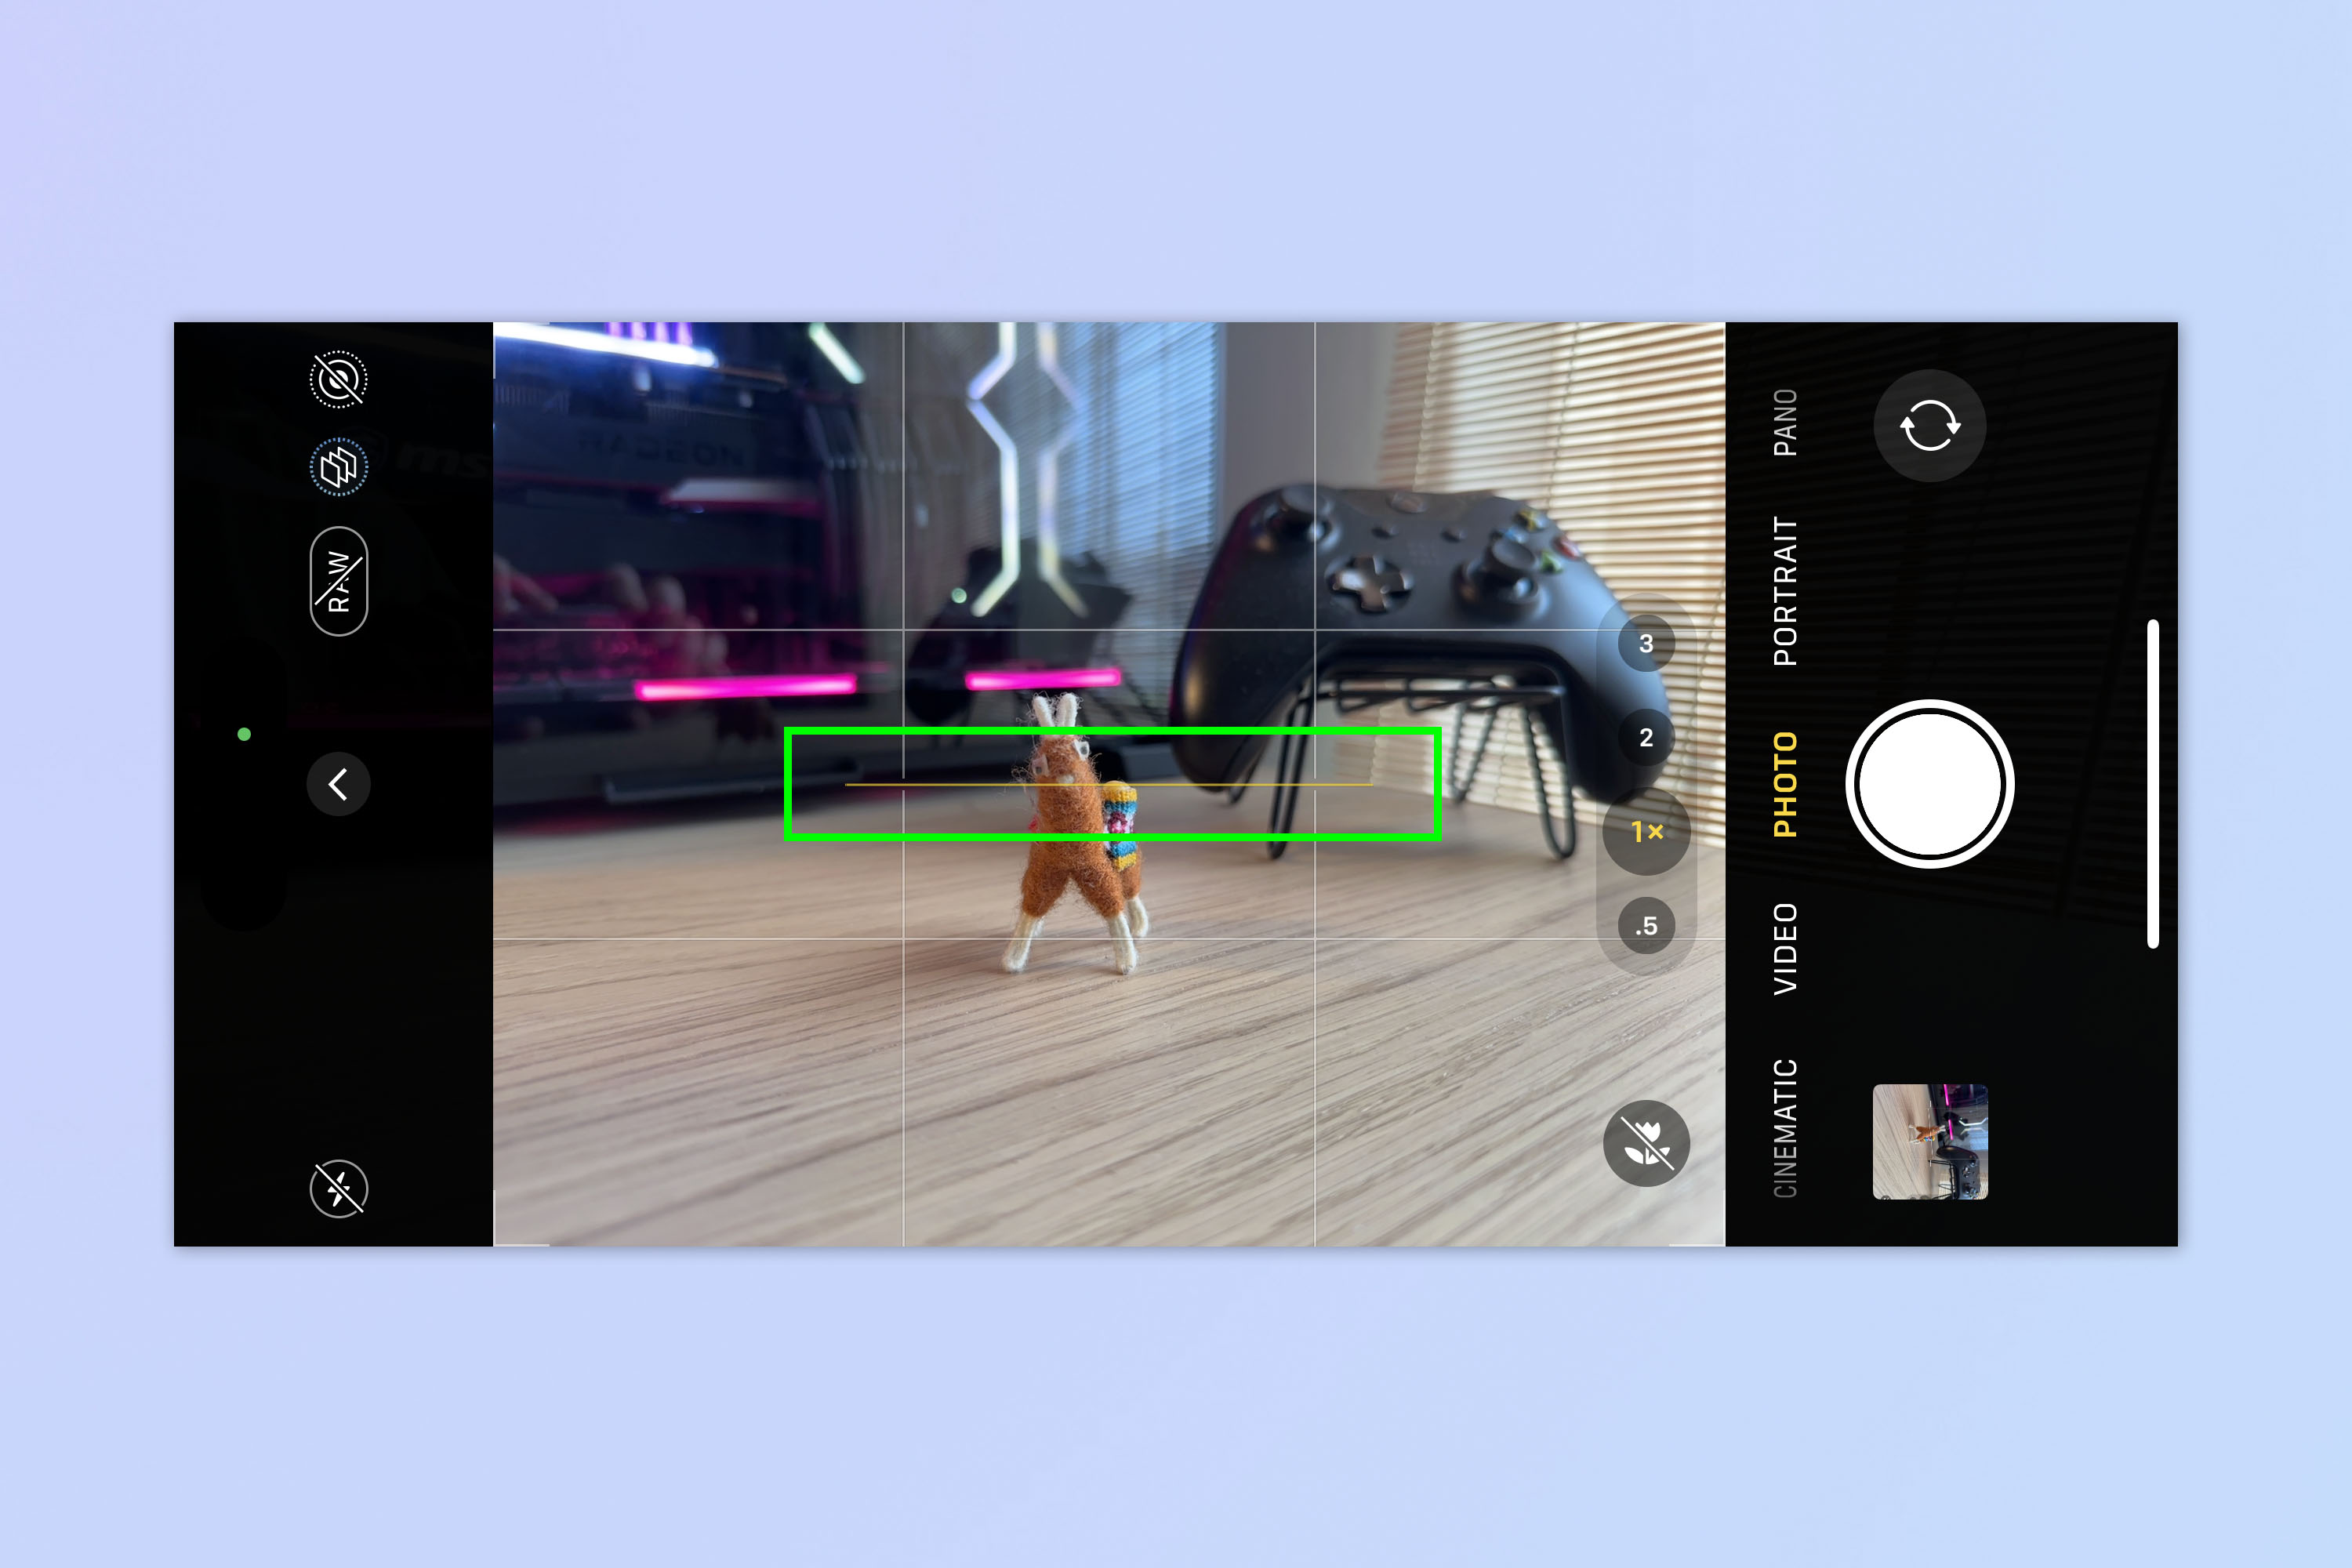
Tilt your iPhone accordingly to line up the level. Once you've lined it up and got a straight shot, the level will turn into a single golden line, then disappear (it'll reappear if you tilt the phone).
That's all there is to it. If you'd like to learn more about the new iOS 17 features, we can show you how to set up StandBy Mode on iPhone. If you're not getting on with the iOS 17 beta, you'll want to learn how to downgrade from iOS 17 beta back to iOS 16. If you also have an iPad, we can teach you how to install the iPadOS 17 public beta too.


