
The time to improve your iron shots in golf and experience you best ever ball striking season is here, and we have all the tools you need to achieve it.
Jo Taylor is a PGA Advanced Professional with a vast amount of experience in helping amateur golfers to play their best and shoot lower scores.
Whether you pull iron shots or are struggling to identify the cause of your shank, these tips will help you provide with a complete reset - followed by some expert guidance on how to build the best golf swing with an iron in hand.
Below, Jo Taylor outlines her top 10 tips to help you strike the ball better than ever before...
Improve Your Iron Shots In Golf: 10 Pro Ball Striking Tips
1. Set-Up
This checklist might sound lengthy, but it should become second nature, especially if you spend time working on it.
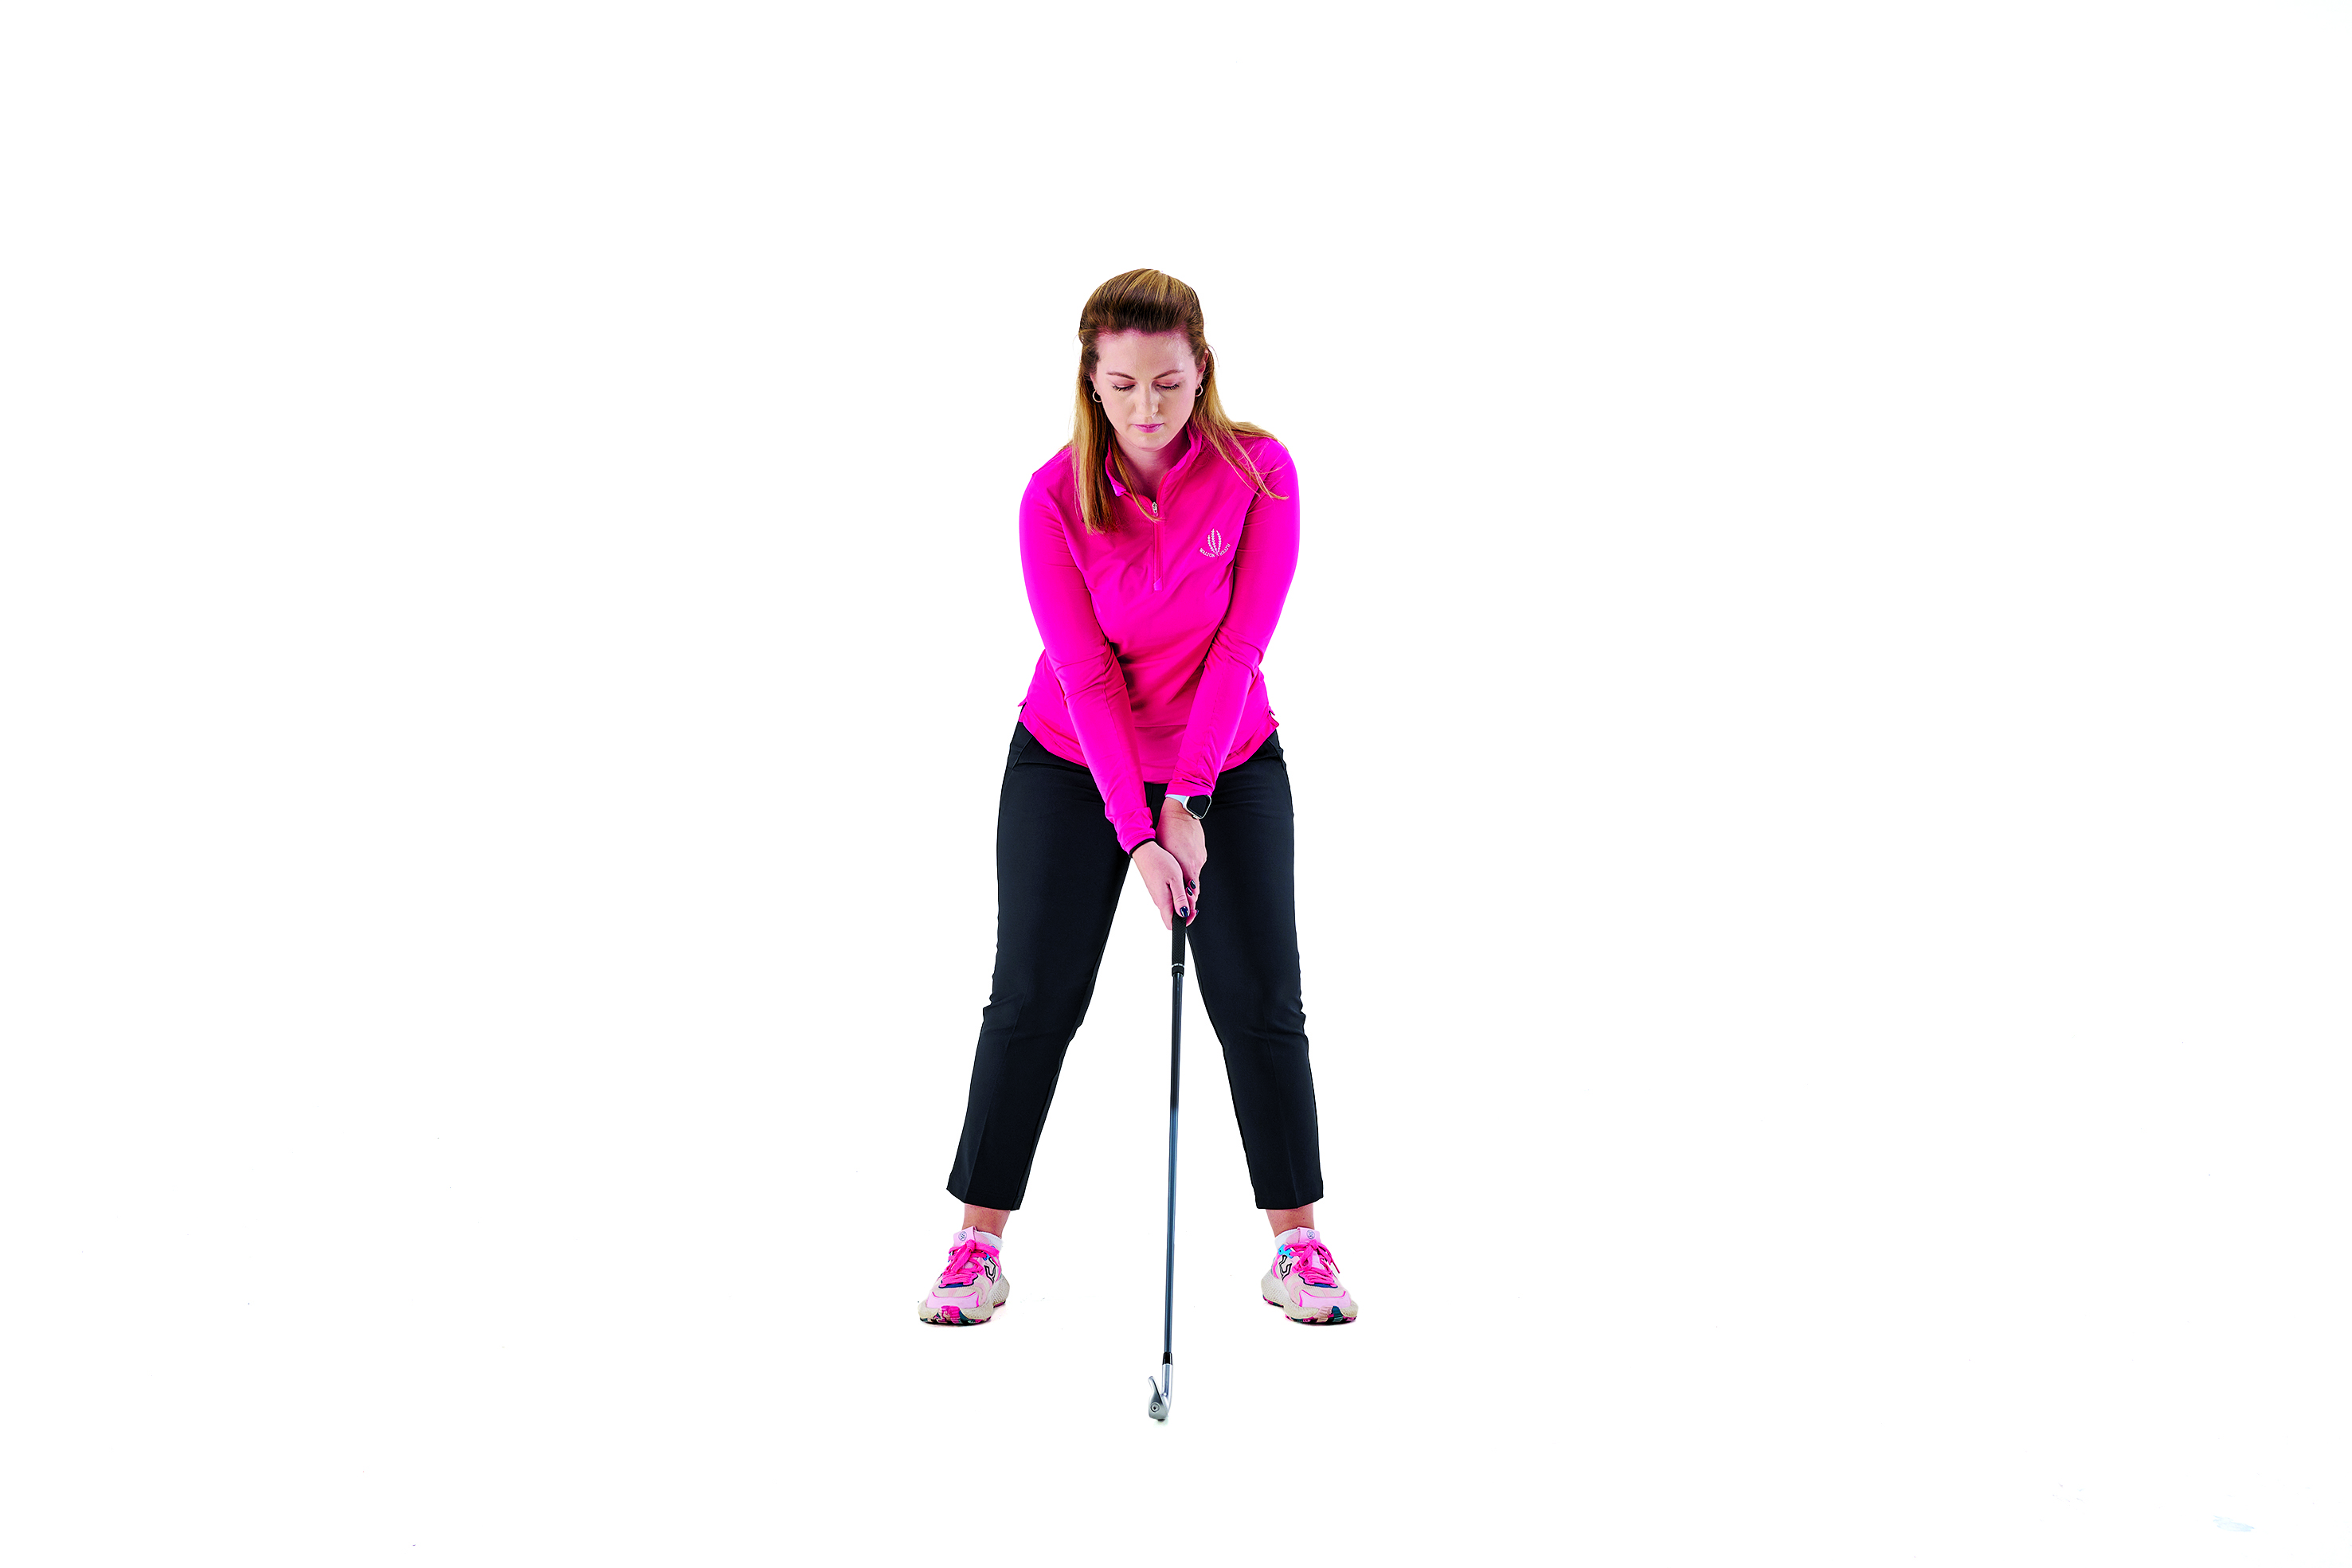
Firstly, you want to just tilt over from your hips. Then, feel as though your body weight is evenly distributed between each foot, and more on the balls of your feet as opposed to the heels and toes.
In terms of width of stance, I could draw a straight line from the inside of my feet to the outside of my shoulders. My spine angle is also nice and straight. An arched lower back will affect how you turn.
2. Ball Position
Staying with the fundamentals, and with a mid-iron, I see the perfect ball position in the centre of my stance (as in the image above). For longer irons, I shift the ball a ball’s width further forward. Some golfers, when they hear about compressing the ball, feel like they really need to hit down on it, so they have it too far back in their stance.
This results in too much shaft lean, so, at best, the ball will come out low. Most of the time, it leads to leaning back, with golfers ‘spinning out’ to get the ball airborne, or ‘scooping’.
3. Regular Checks
Incorrect ball position is a common fault. When you’re practising, I strongly recommend you get into the habit of putting one alignment stick down just in front of your toes (which you can also point at your target) and another to line up the ball in the centre of your stance. Never feel like you’re past needing to do this – tour players do it all the time.
When hitting an iron, tee it up so the ball is just above the grass. Remember, it’s ball then turf contact that you’re looking for. If you tee the ball up too high, it’s only going to encourage you to hit up on it.
4. Takeaway And Turn
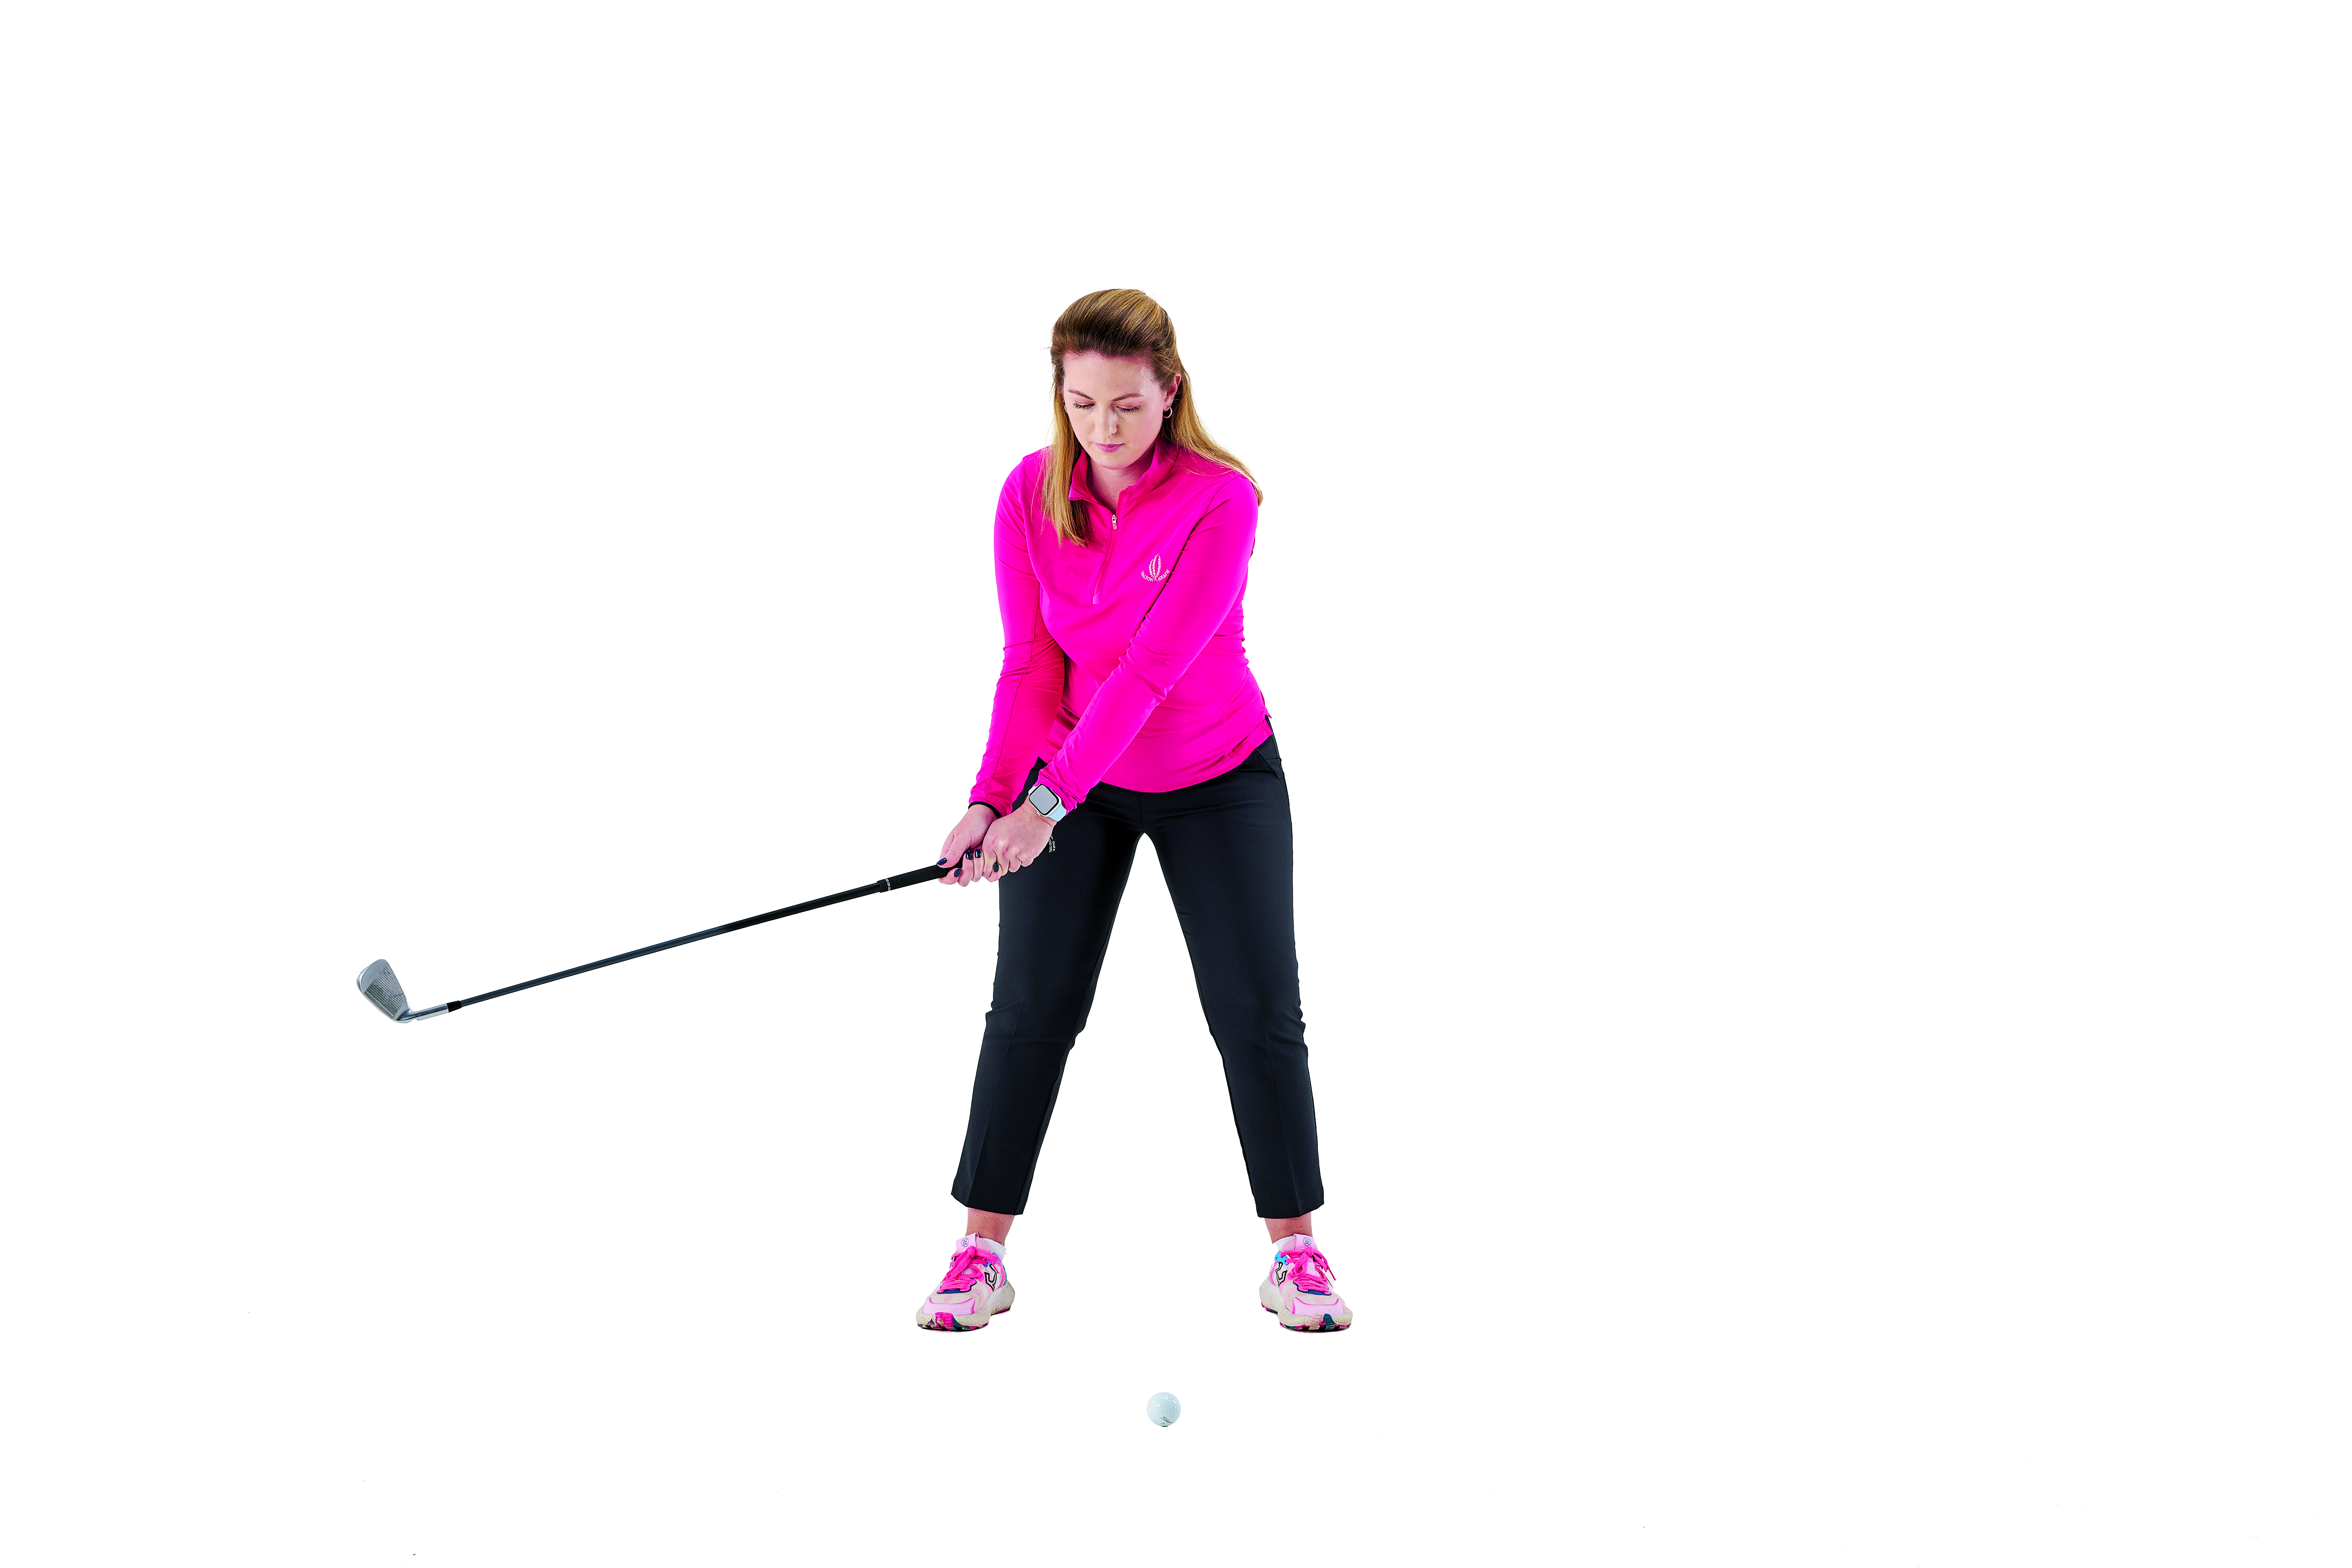
The key swing thought for me when I start my swing is ‘shoulders’. It’s the shoulders (and torso) that I want to initiate the takeaway, not the hands and arms. I don’t want the club to come inside too quickly.
If you get all ‘handsy’ with the takeaway, it can encourage the club to come around the body too quickly – and it can get stuck behind you. Often this will mean the club is across the line at the top of the swing, which affects how you transition into the downswing.
5. Stop Swaying
One of the main faults I see is swaying, both with the upper body and the hips, where there’s a movement away from the ball. These are not good positions!
Swaying tends to lead to that scooping action, where players feel they need to help the ball into the air, and also a throwing action of the hands and arms towards the ball.
6. Rotation
In order to make a full shoulder turn, aided by my your hip turn, the pressure should shift onto your trail side. At the top of the backswing, you should feel like you have about 75% of your weight on your back foot.
Starting the downswing with your hips is also very important, as this is something a lot of amateurs don’t do.
7. Impact And Finish
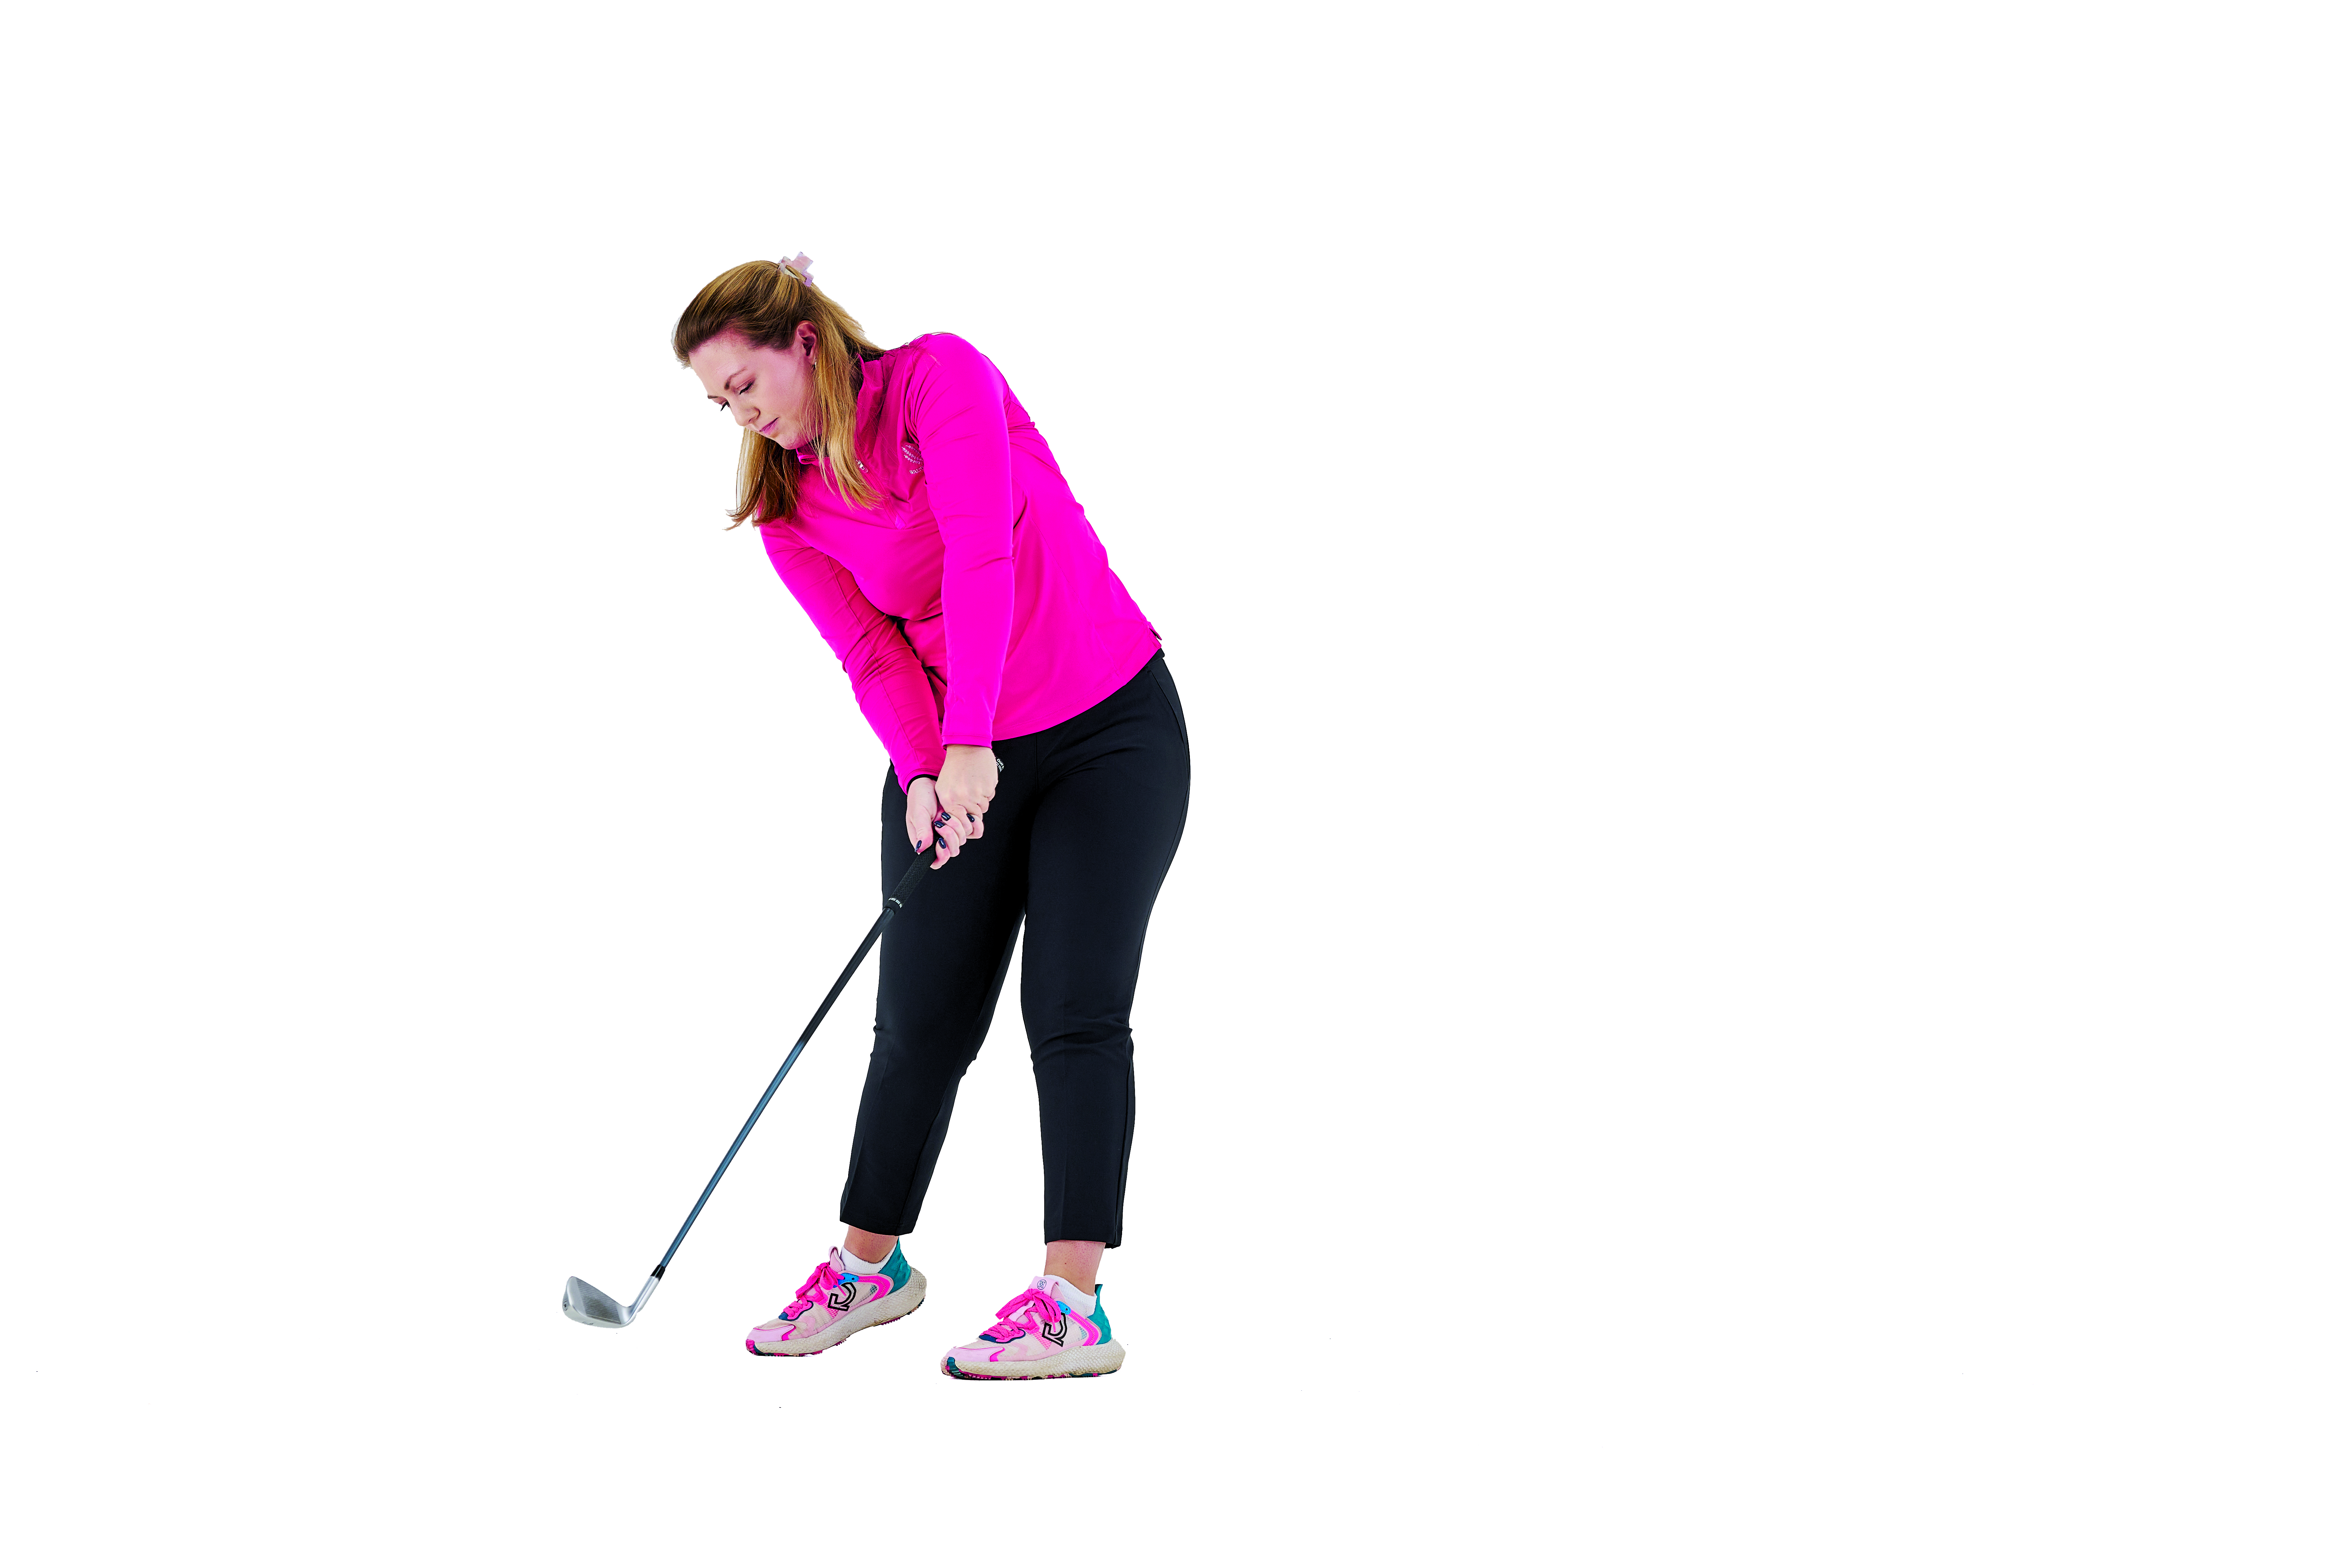
At impact, my body weight has transferred into my lead side, the hips have turned through and the left side of my body is fairly straight. I finish with my hips and chest facing the target. I could, if I wanted to, lift my right foot up – there’s no pressure on it.
I get asked about the importance of a good finish position quite a lot. Personally, it’s not something I think about – or should I say, it’s not my focus. If my fundamentals are sound, and my transfer of weight and sequencing are bang on, the finish should be nice and balanced naturally.
8. Sequencing Drill
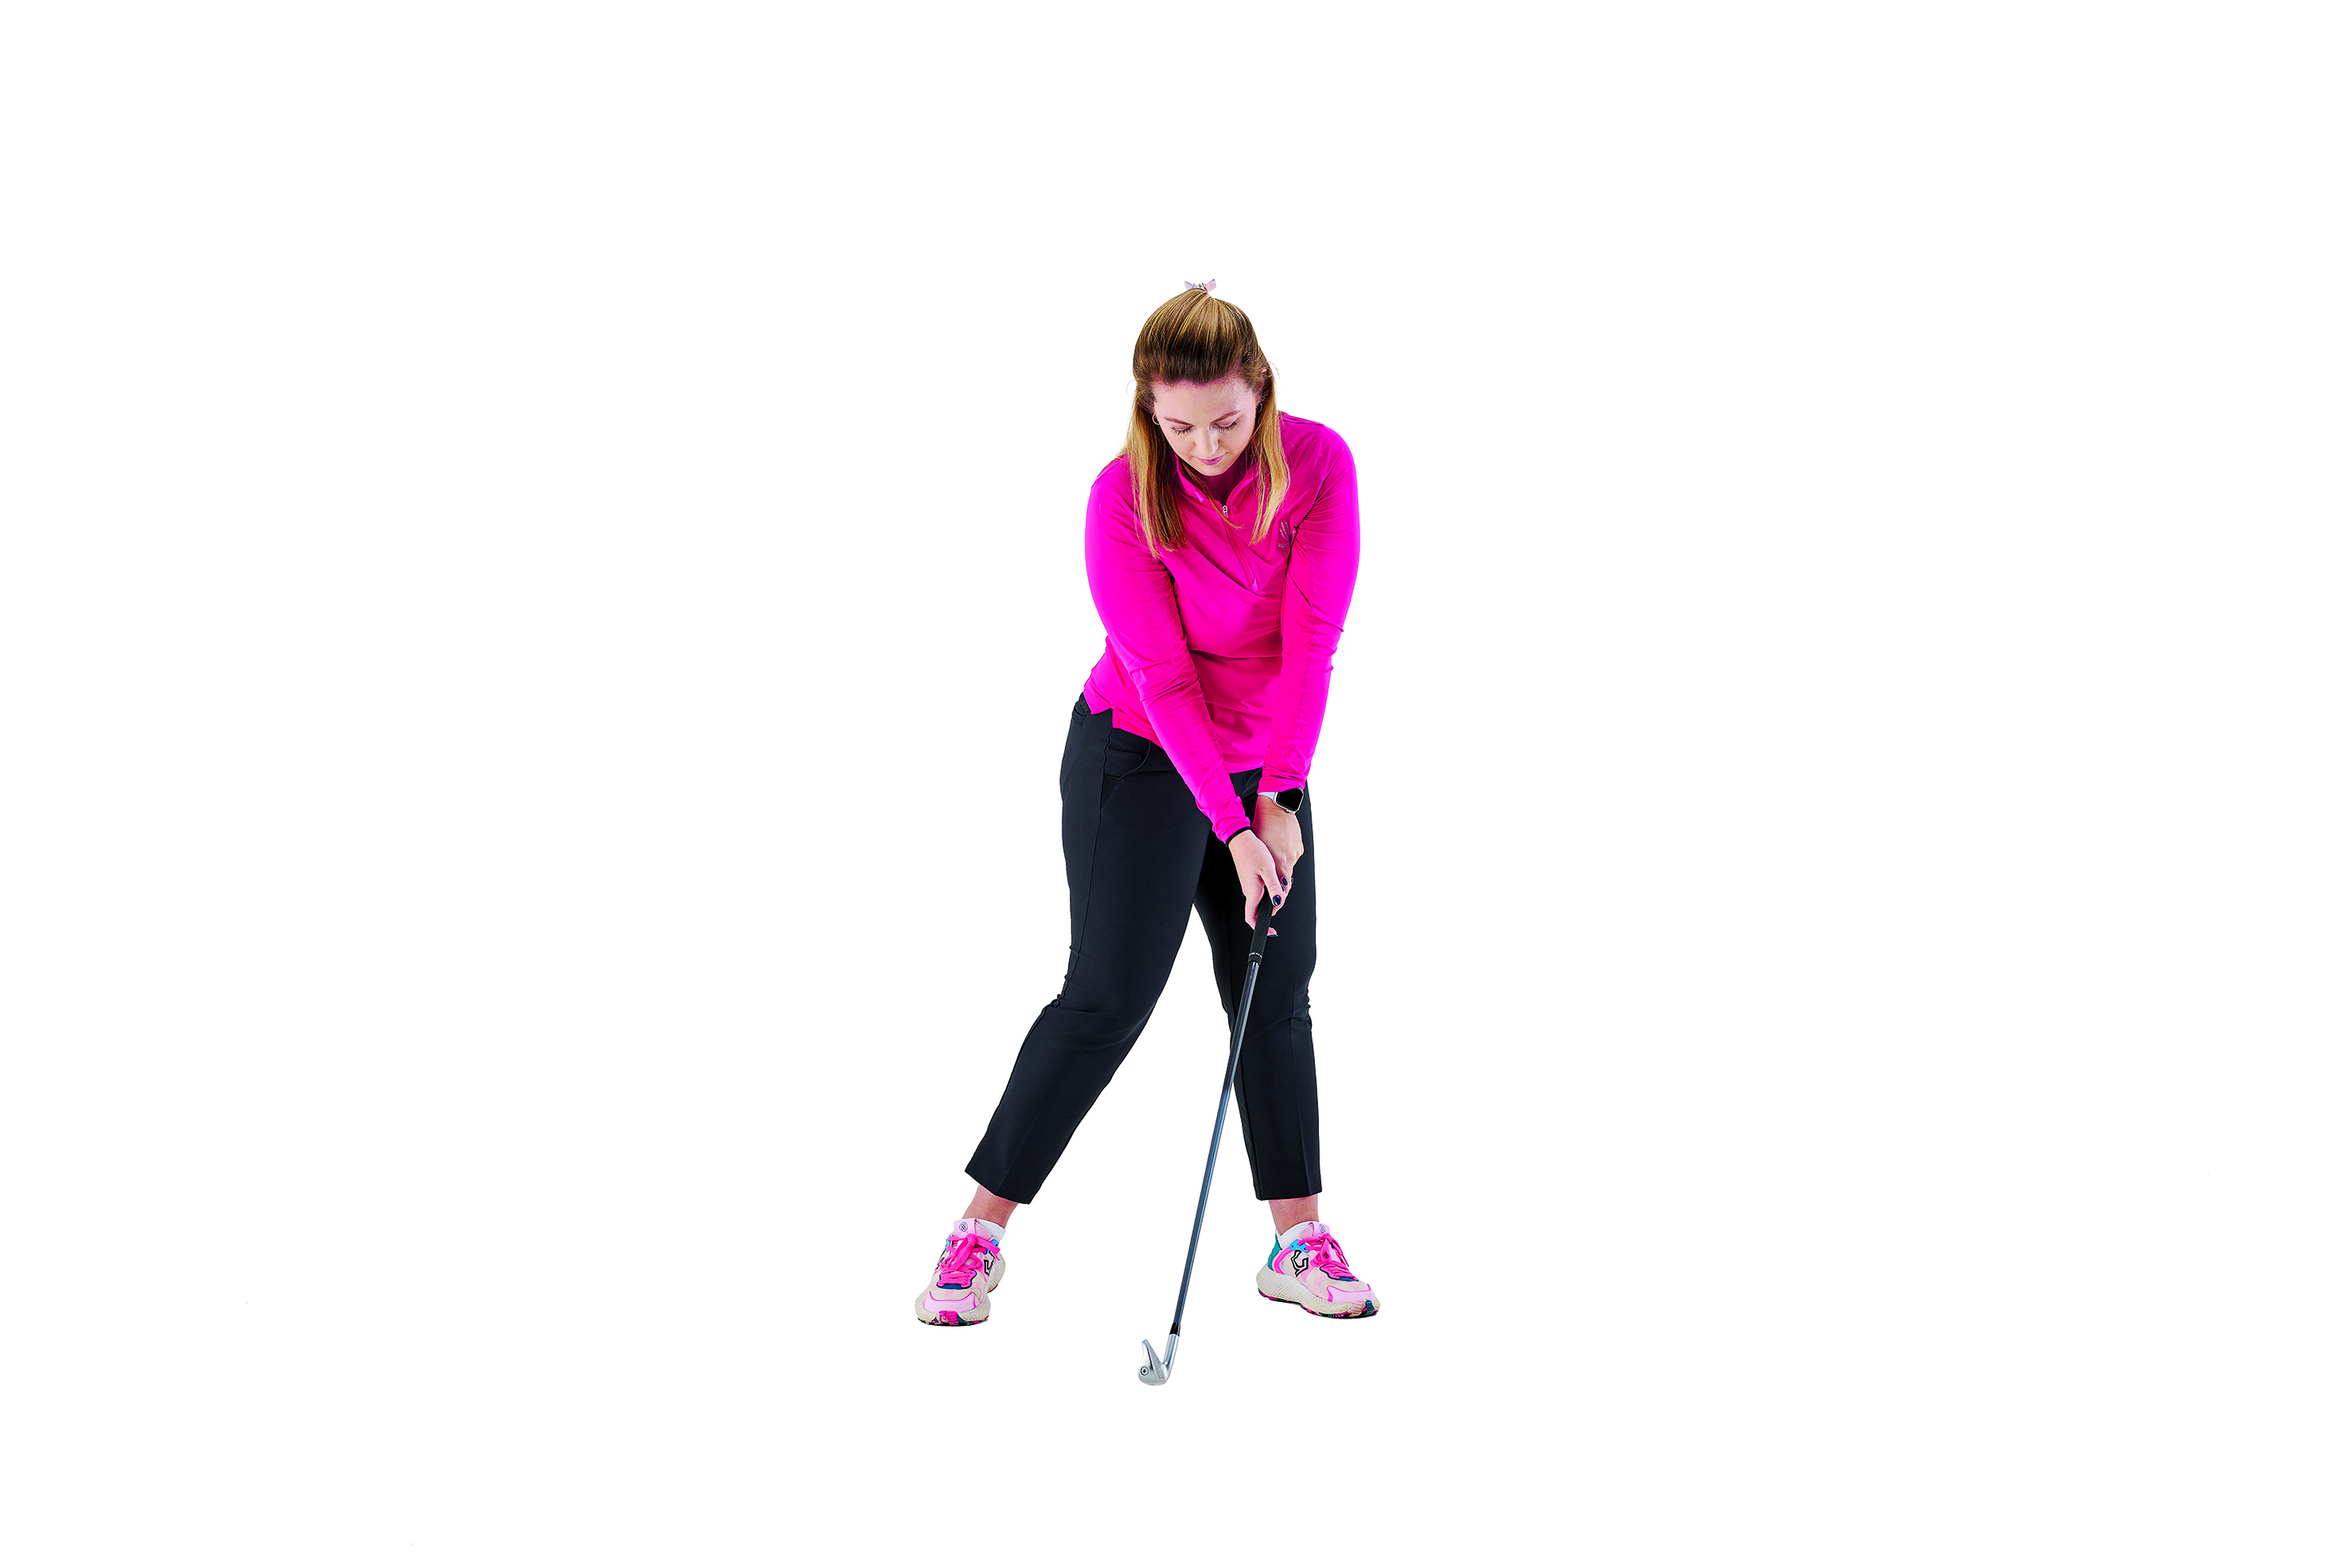
This is one of my favourite drills. It’s really effective in getting you used to the right feelings of good rotation and sequencing, and how the pressure should shift during the different stages of the swing. It’s a bit like how Happy Gilmore did things but without the run up!
Start in a normal posture; then start your backswing while moving your lead leg back towards your trail leg. From there, with your feet now together, complete your backswing to the top, before moving the lead leg forward again as you transition into the downswing. You don’t have to hit balls, although you can add that part in when you feel confident enough to do so – it’s doable. However, the main purpose of this drill is to nail your sequencing.
9. Ball Striking
Combine the above drill with this one and you’ll soon up the quality of your ball-striking. Pop something down a couple of inches in front of the ball, such as a coin (broken tees are also good).
If you move through properly, you should hit the ball and then brush the coin. Keep missing it and it would most likely suggest the low point of the swing arc is a bit too far back.
10. Practice
One of the areas in which professionals and amateurs differ so much concerns how they practise. Pros are far more focused on their target and the distribution of their shots, whereas amateurs tend to just hit ball after ball without a specific goal.
Make sure you have a target and make a record of how many finish as intended – that could be as simple as a score out of ten. Before hitting another shot, step away and come back in behind the ball, so you have the same pre-shot routine as you would out on the course.
Improve Your Iron Shots In Golf: My Expert 10-Point Checklist
1. Master your set-up – including stance width and weight distribution
2. Find the perfect ball position – centre of stance for mid-irons
3. Check and check again – use an alignment stick or two to check your set-up
4. Turn and Takeaway – feel like you start the golf swing with your shoulders
5. Stop swaying – this will create ineffective positions in the golf swing
6. Rotation – start the downswing with your hips
7. Impact and finish – transfer bodyweight to your lead side and rotate hips
8. Sequencing – try this great sequencing drill
9. Ball Striking – focus on the low point of your swing arc
10. Practice – create a target and track your progress


