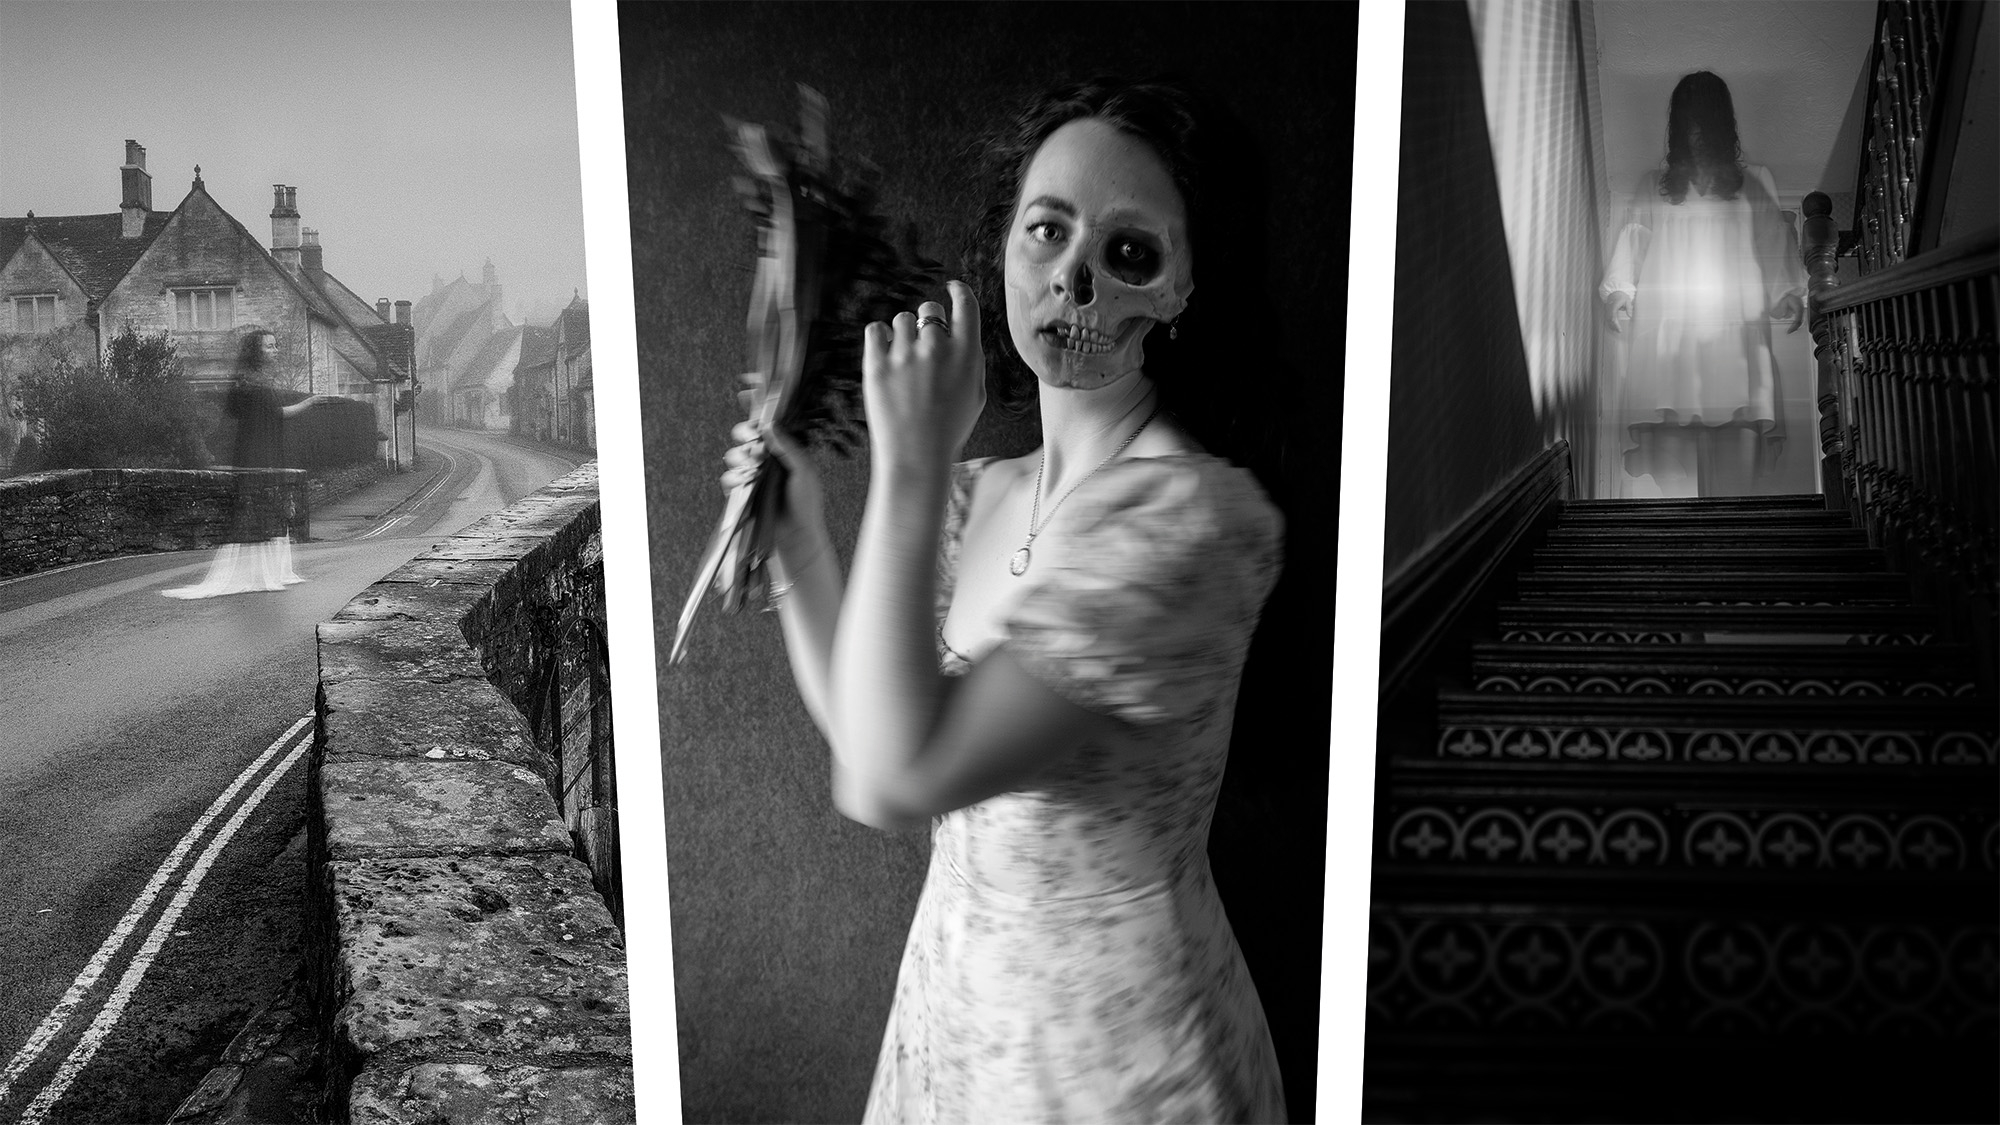
There seem to be fewer images of 'real-life' ghosts than ever before. And that's arguably because the emergence of digital-editing software – and more recently smartphone filters – has trained us to treat any photograph that doesn't quite add up with an increasing degree of skepticism. And indeed, it's never been easier to fake convincing paranormal illusions.
So, this Halloween I'm going to show you how to create five spooktacular and spine-chilling ghostly portraits to freak out your Instagram followers, friends and family. I'll begin by teaching you how to recreate a scene inspired by the modern supernatural-horror classic Ring (1998). By merging two exposures in Adobe Photoshop CC, you can effectively create the illusion of a horrifying specter crawling out of a television screen.
Then I'll show you how to create a convincing apparition on location – with ease – before delving into a classic-looking portrait with an undead twist, à la The Picture of Dorian Gray (1890). My penultimate petrifying project shows you how to record a ghost in your own home, while my freaky final technique will help you create an unsettling close-up CCTV portrait that wouldn't look out of place in a Paranormal Activity flick.
All you need is a standard lens, a tripod, a couple of lights (torches will do) and a copy of Photoshop or equivalent layer-based editing software like Affinity Photo 2. If you've been meaning to brush up on your photo-editing skills and aren't easily perturbed, you've come to the right place.
Now, read on... if you dare.
1. Check out this project inspired by Ring
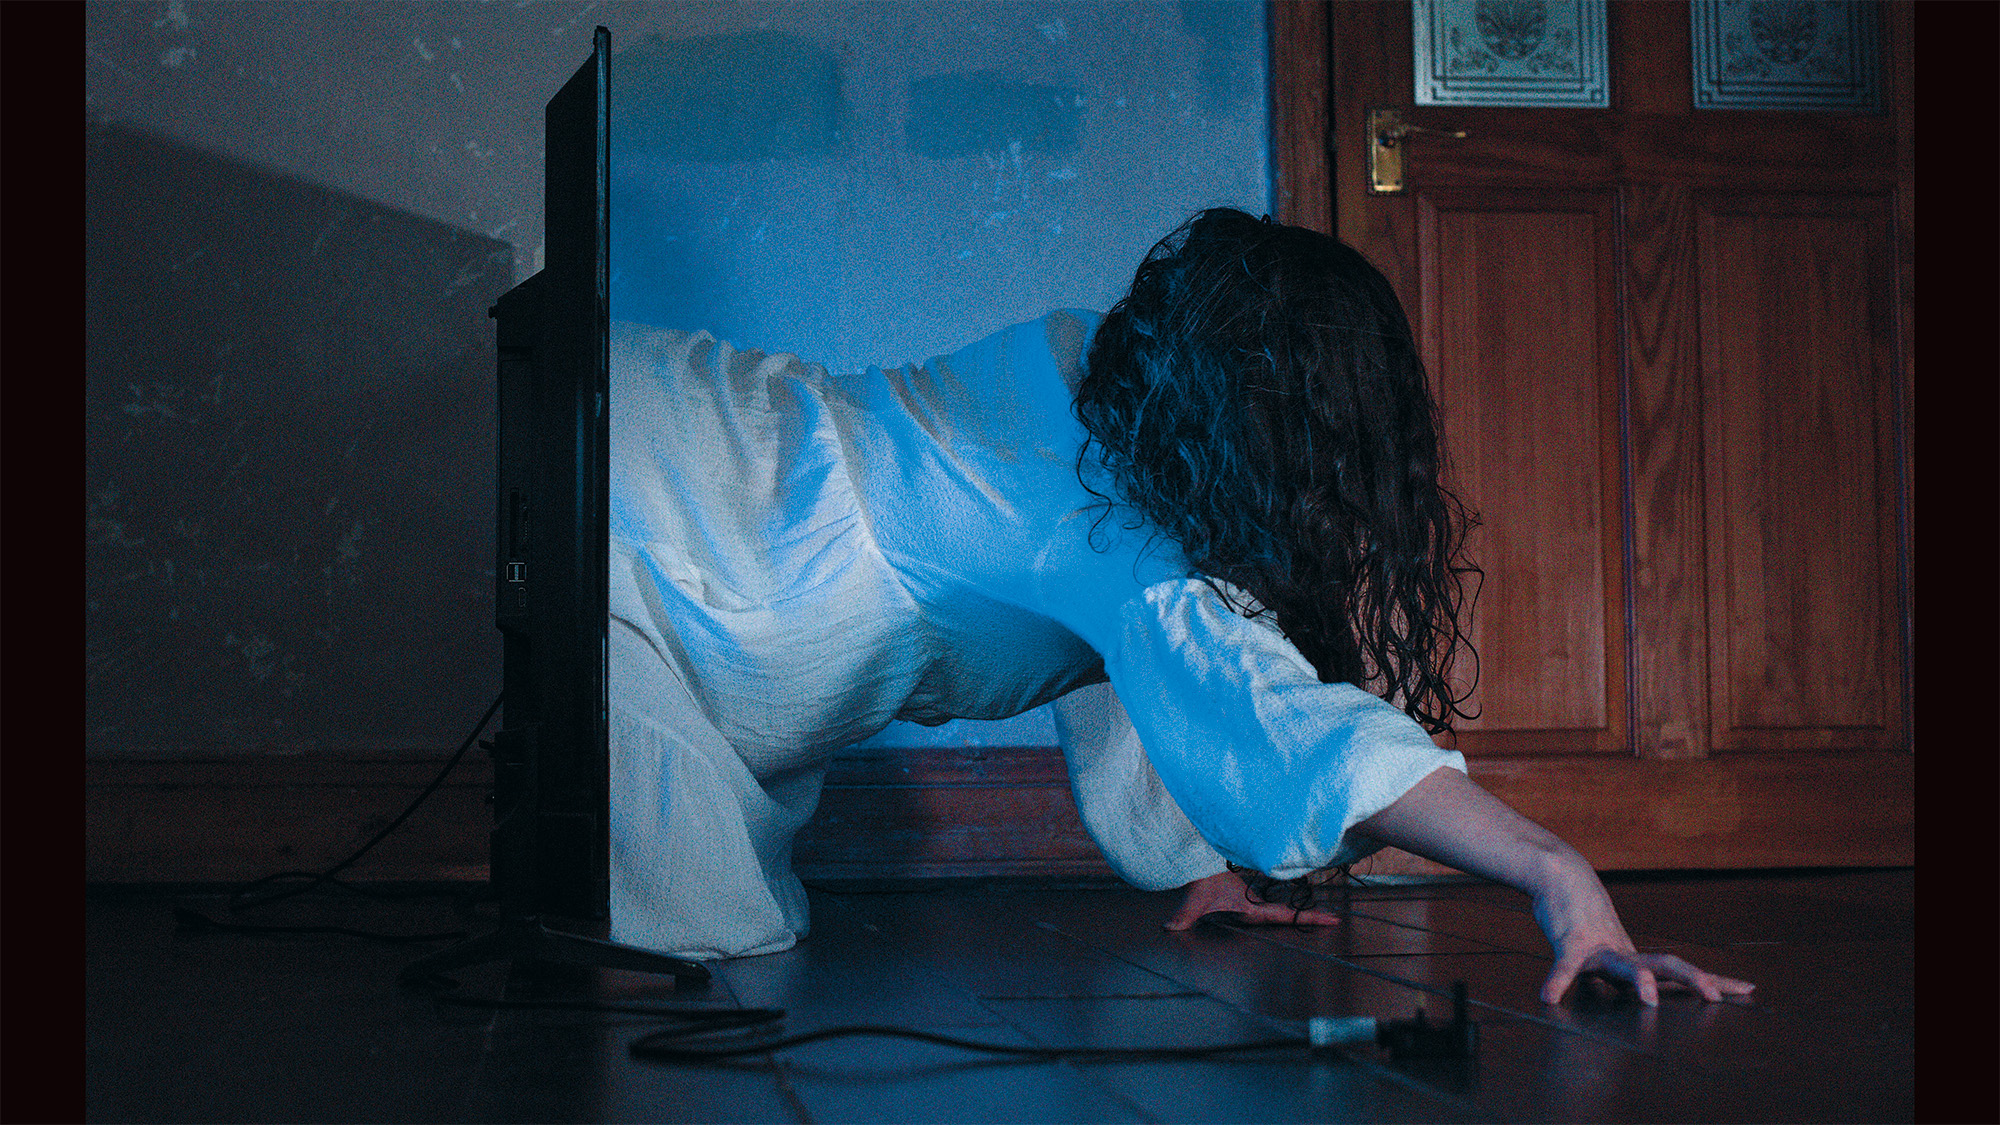
This composite was inspired by Ring antagonist Sadako Yamamura, who infamously crawls out of television screens in the 90s psychological horror. By locking your camera on one of the best tripods for photography and capturing two images – one with the model and one without – you can merge a convincing movie still in post-production. The trick is to use the television's blue light to illuminate your model. The steps below detail this project in full...
- Put a TV on the floor and set it to emit a solid blue light. This won't be enough to illuminate your model entirely, so direct a secondary light toward the TV at a 3/4 angle (I used a Lume Cube Panel). Place a plug by the TV so it looks like it's on of its own accord, creepy.
- Our subject was inspired by Ring antagonist Sadako Yamamura. The terrifying apparition's white dress is particularly helpful, since it's easier to photograph in low-light than a darker item of clothing. The model also wet her hair to create a bedraggled look.
- Maintain identical framing between shots by using a tripod. We used a Manfrotto
PIXI EVO, with the legs fanned out so our camera was placed near to ground level.
If your camera has a tilting screen, like my Nikon D850, this will make framing your shot much more comfortable.
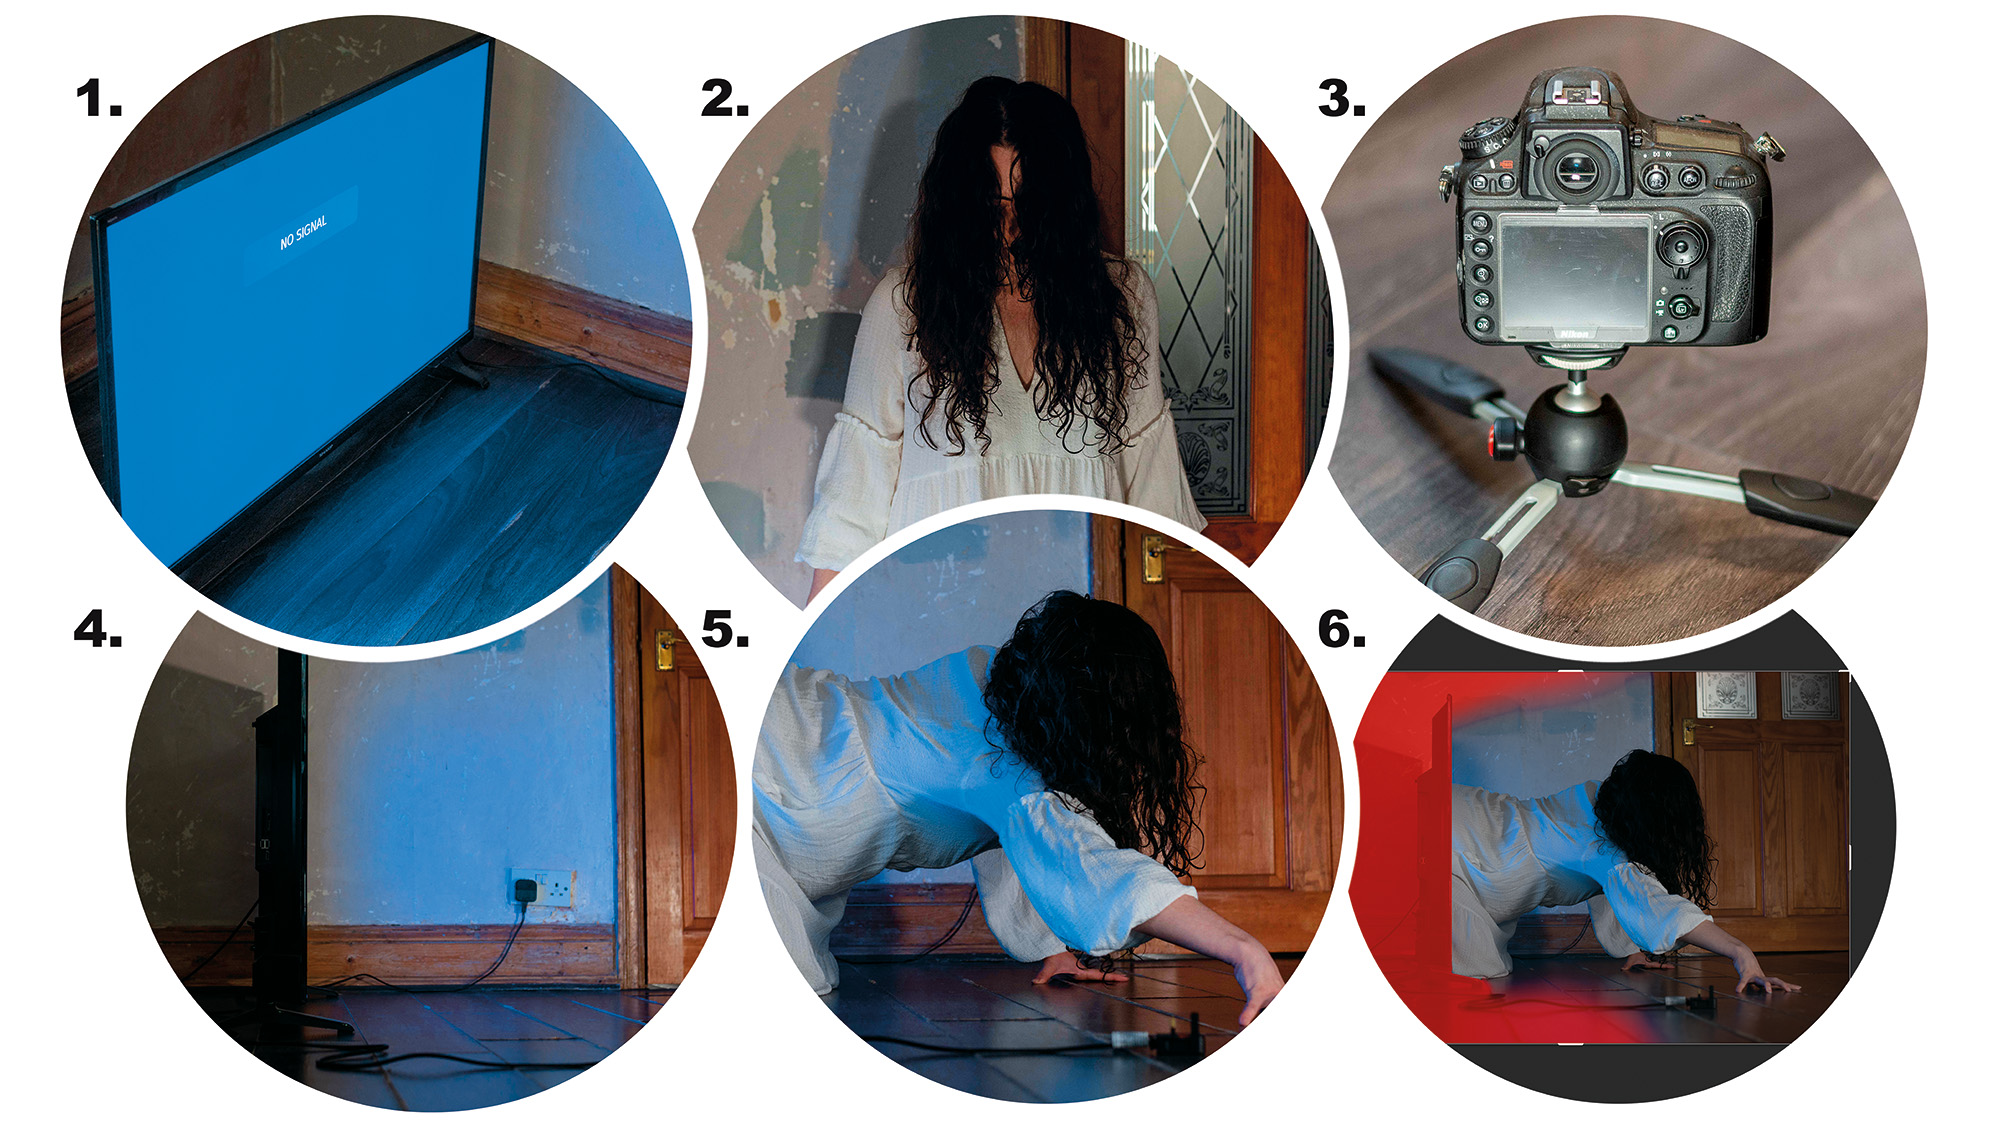
- Frame the TV side on. Make a mental note of its position and move it back to provide room for your model. Ask them to adopt a crawling position in the center of the frame and focus on them using AF. If you're not using back-button focus, switch to manual focus to prevent refocusing. Take the shot.
- Ask the model to leave the frame and carefully move your TV back into the exact position it was before. Don't change your exposure settings or point of focus. The reason I switched to manual focus in the previous step was to maintain identical focus in both images. Fire the shutter.
- Import your images into the same Photoshop document. Select Edit>Auto-Align Layers. With the model image on the top layer, select the 'Add layer mask' icon. Hit Cmd+I to invert the layer and use a soft white brush to paint the model into the frame. The TV should provide a nice hard edge to work from, making the transition between images seamless.
- I used Aperture Priority and shot with an aperture of f/3.5, 1/50 sec and ISO800. The eerie lo-fi nature of this image means you can get away with using a higher ISO and introducing a little noise.
2. Capture a classic ghostly composite
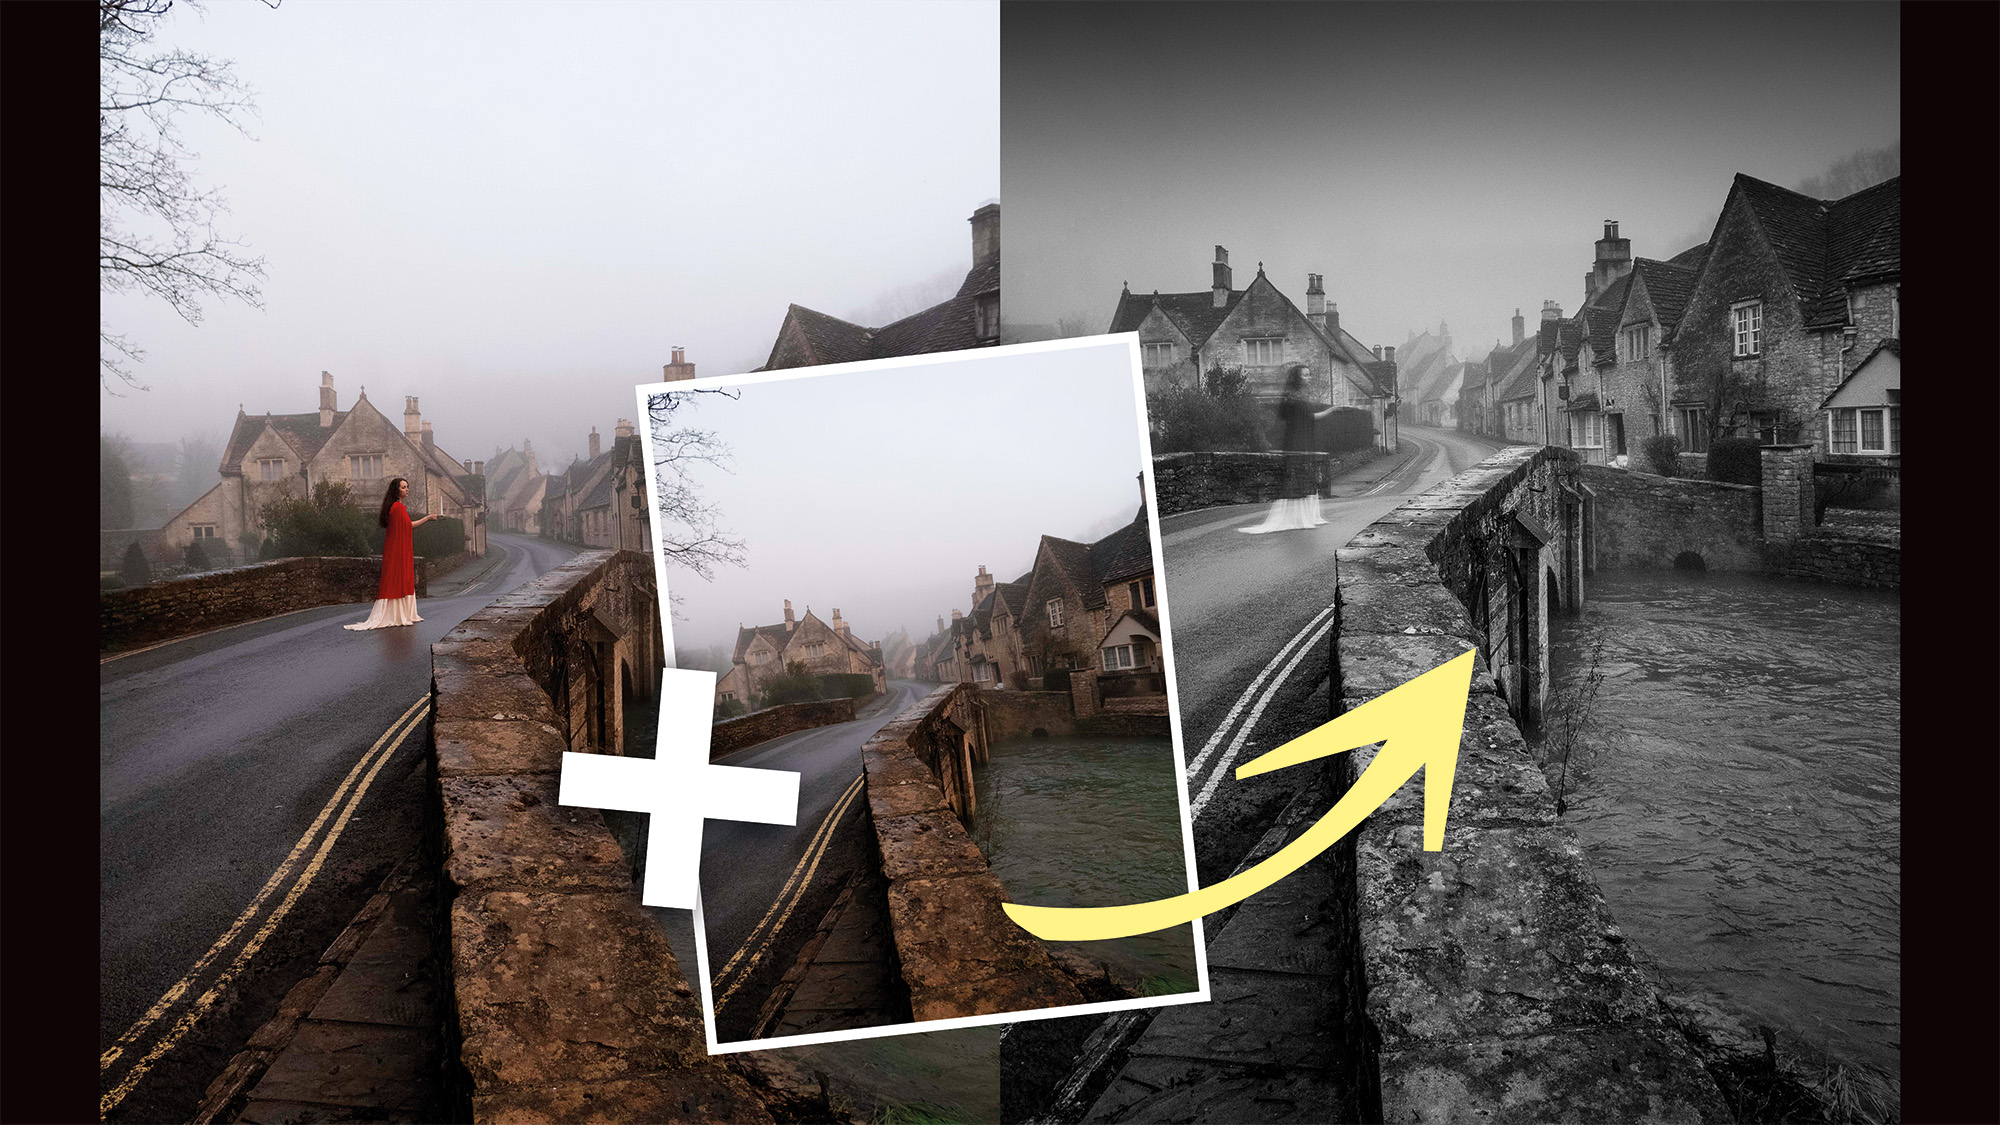
This project explains perhaps the easiest way to 'photograph' a ghost. Set up a tripod and frame your scene. Focus on your subject using AF and switch to manual focus to lock it in place. Take the shot and ask your model to exit the scene before taking a second image. Overcast conditions are ideal as the lighting won't change drastically between exposures.
Open the images in Photoshop. Place the subject image on the top layer and reduce the opacity accordingly. For a better effect, mask and invert (Ctrl/Cmd+I) the subject layer and use a soft white brush to reveal only the subject. Then use Filter>Blur>Motion Blur to blur the subject before reducing the opacity accordingly.
3. Create an homage to The Picture of Dorian Gray
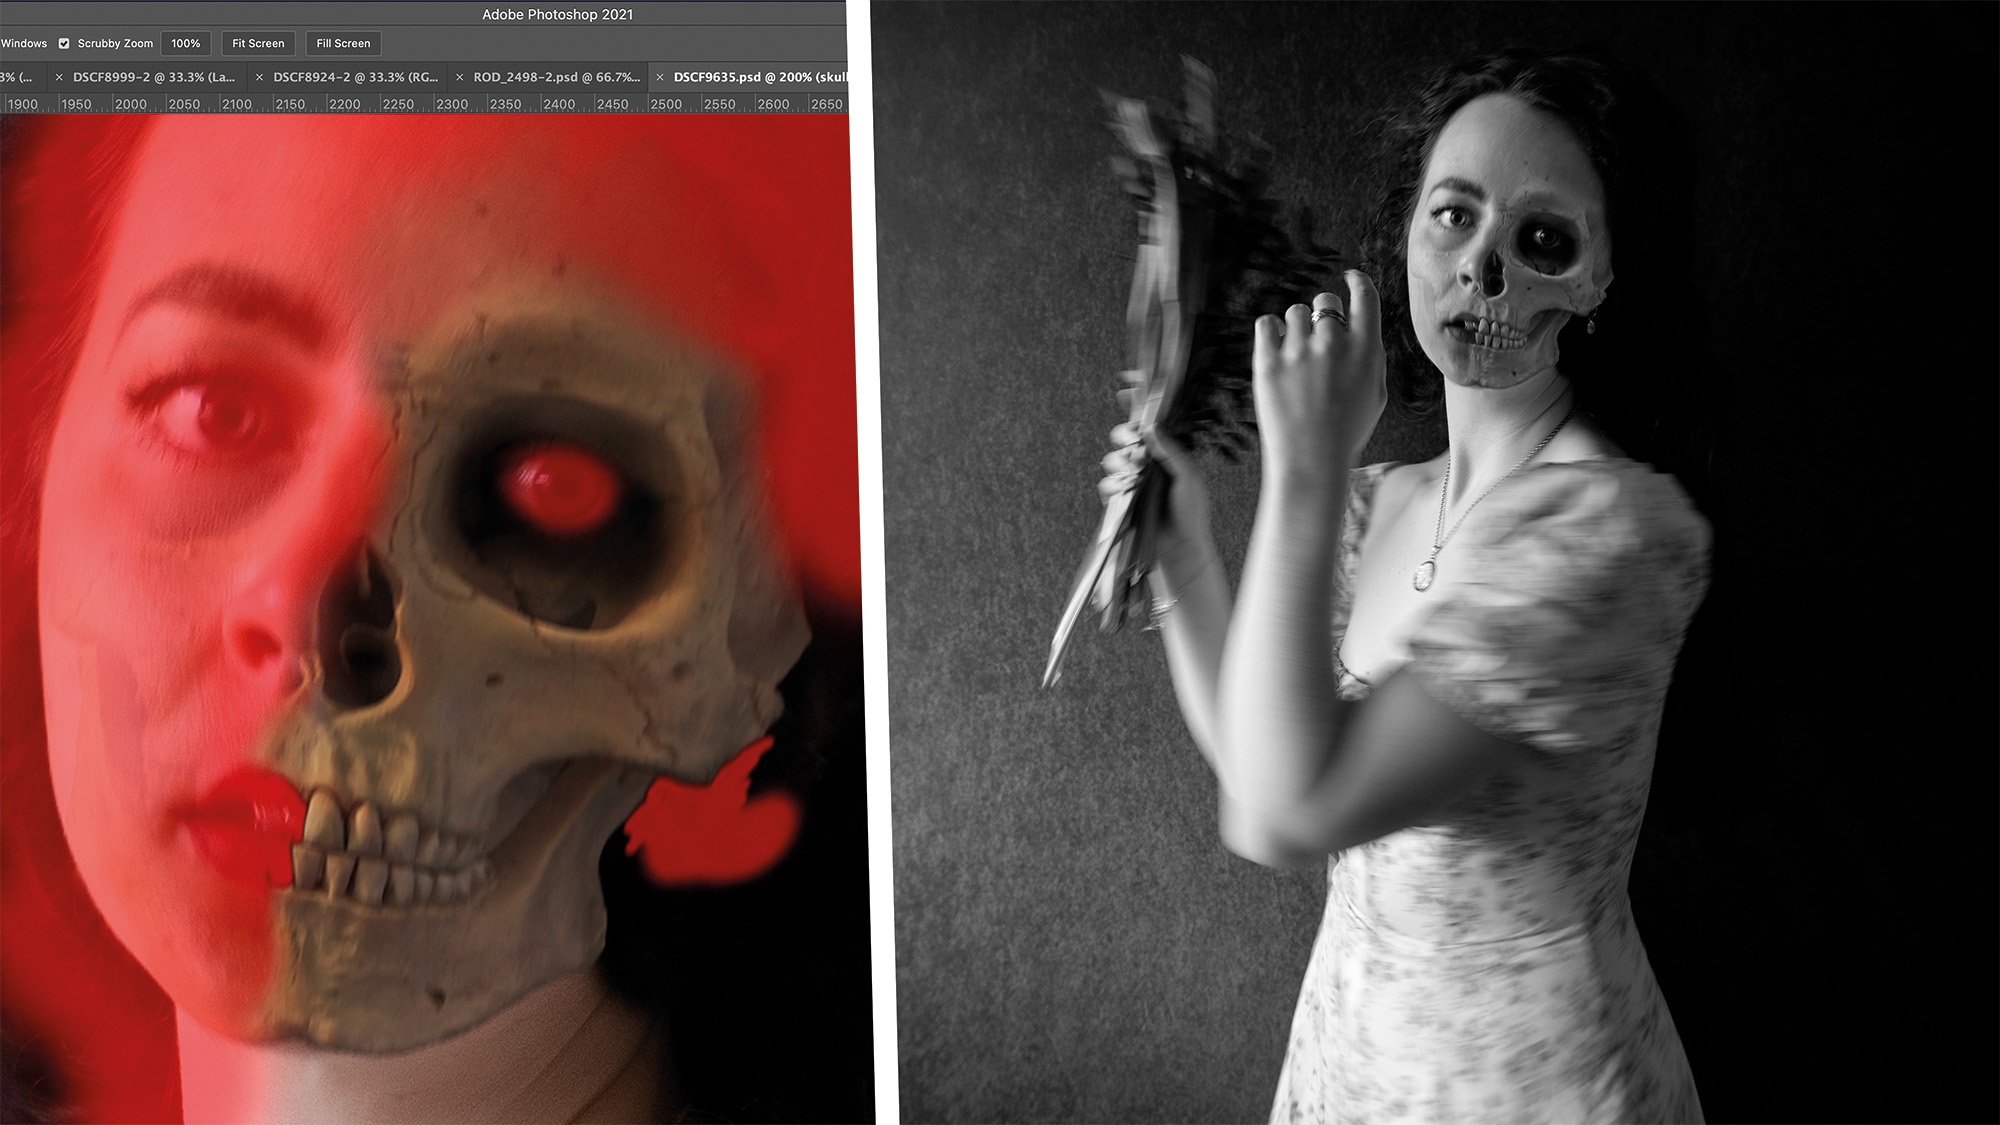
Simple layer-based compositing skills can be used to create this creepy portrait. Capture your subject's portrait. I set up the background next to a window so the model was illuminated from a single direction. I then found an image of a skull that had been photographed in similar lighting via Pixabay (the image was 638784).
Open both images in the same Photoshop document (with the skull layer on top) and use the Transform tools to resize, rotate, reposition and warp the skull over your subject's face. Mask the skull image and use a large, soft black brush to gently paint away parts of the skull.
Try using brushes of varying opacities to make the transition between face and skull even more seamless. Finish by merging all layers into a new layer (Ctrl/Cmd+Alt+Shift+E) and select Filter>Camera Raw Filter. From here, you can convert the image to black and white and apply your preferred tonal edits to help bind the composite together.
4. Invite an apparition into your own home
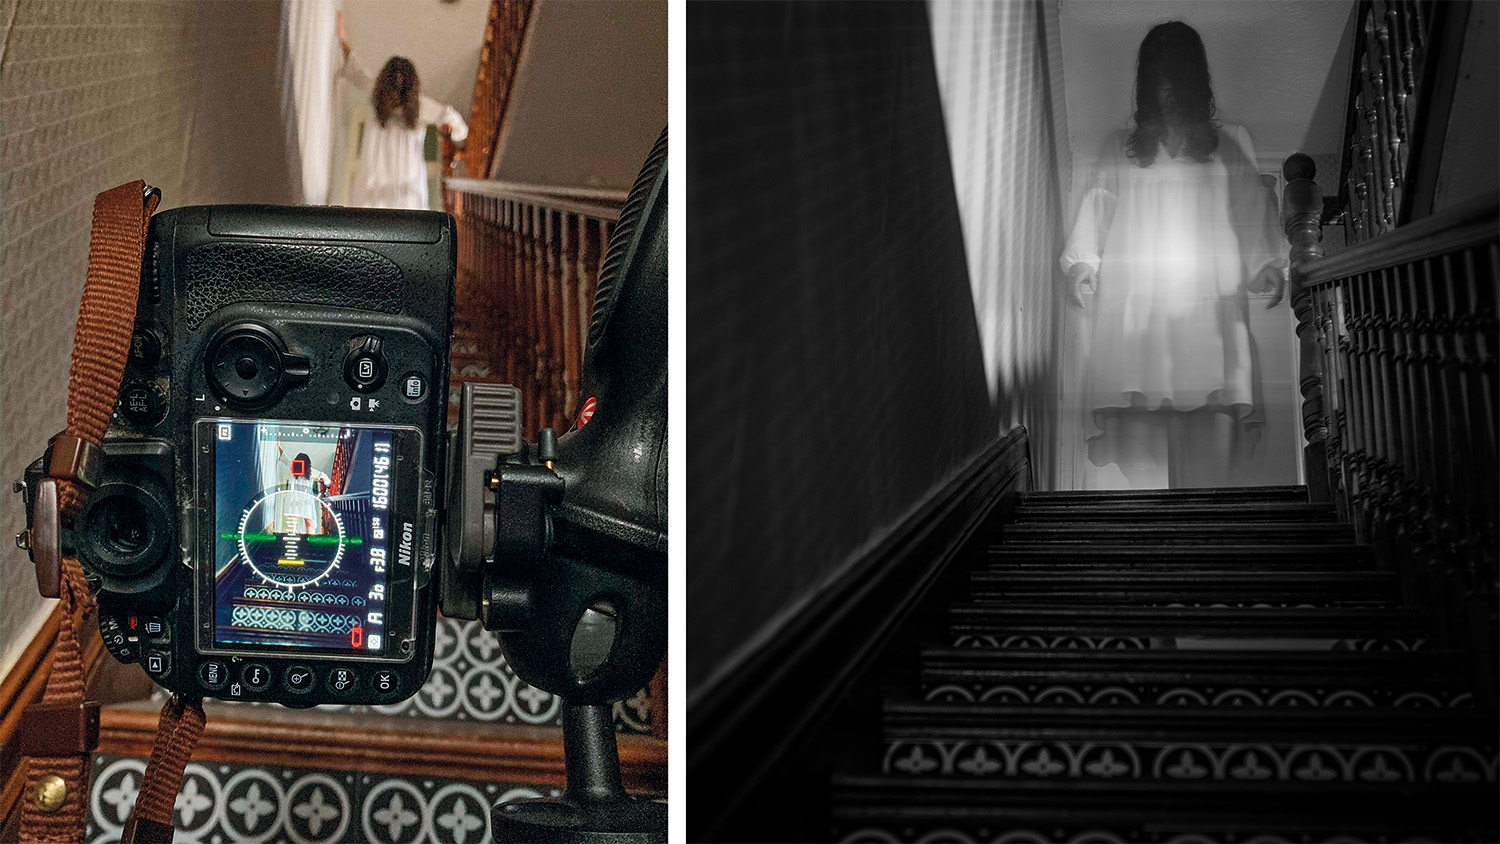
Photographing an apparition in your own home isn't for the faint-hearted, but it's not nearly has difficult as it looks. Pose your subject at the top of a staircase. Bounce a continuous light source off the wall behind them and direct another light source onto them – shine the second light through the banisters to create spooky shadows.
Place your camera on a tripod and use AF to focus on your subject. Switch to manual focus and fire the shutter. Ask your subject to vacate the frame and capture a second exposure. Convert both images to black and white, and import them into Photoshop. Ensure the subject image is on the top layer and add a layer mask.
Use a soft black brush to roughly cut the subject out. Duplicate the layer twice, but turn off the duplicates' visibility. Lower the original layer's opacity (I settled on 74%) and then turn on the first duplicate's visibility. Select Filter>Blur>Motion Blur and set the distance so this layer blurs beyond recognition (I used around 1100px).
Duplicate this layer and place the copy below the original subject layer. Turn on the final duplicate's visibility, select it and enter Camera Raw. Boost Contrast and Clarity and then reduce the opacity of the layer to taste (mine was 14%). Merge the layers into a new layer (Ctrl/Cmd+Alt+Shift+E) and edit the final image as desired.
5. Capture a ghost on CCTV
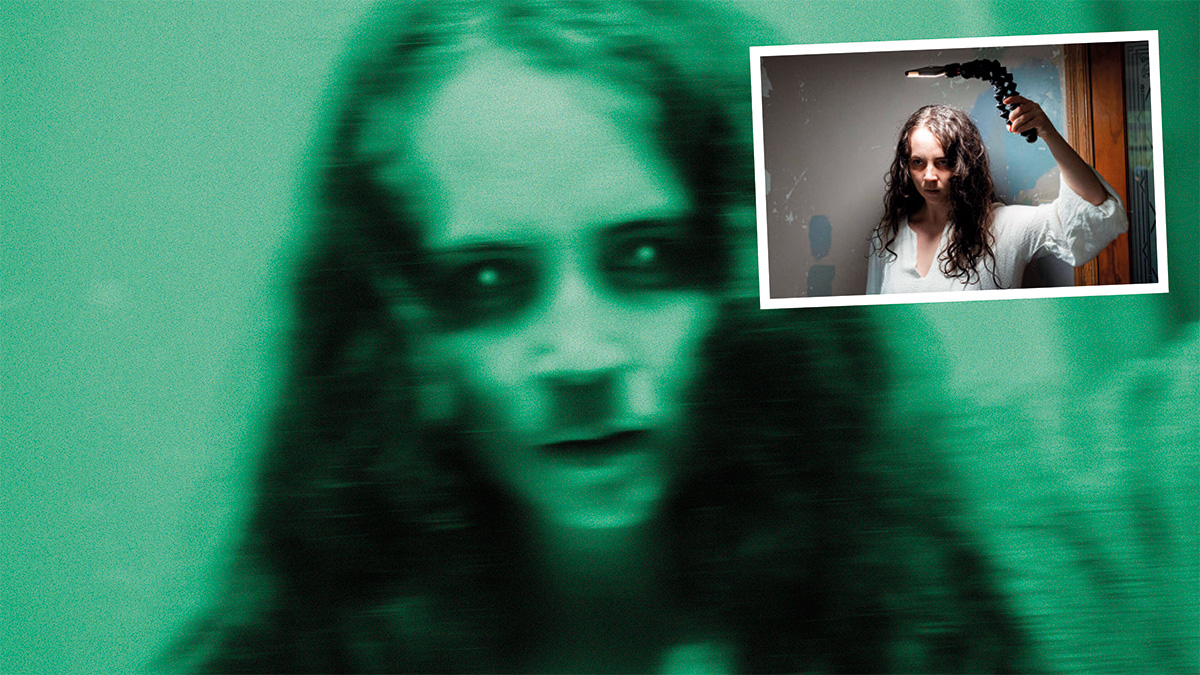
Imagine if your Ring Doorbell 3 captured an image like this? Ask your model to hold a light source above their head to create harsh low-key lighting and capture a frame-filling close-up. Turn the image black and white in Camera Raw before importing it into Photoshop. Use the Motion Blur Filter to blur it to taste and the Dodge tool to brighten the highlights. Then duplicate the layer (Ctrl/Cmd+J) and invert it (Ctrl/Cmd+I).
Select Filter>Filter Gallery and choose Diffuse Glow. Set Glow Amount (6) and Clear Amount (10) before using the Opacity slider to control the intensity of the effect. Create a Solid Color Fill Layer and set it to green (#3d8538) before changing the blending mode to Color Dodge and reducing the opacity accordingly. Select a soft green brush and dot each eye. Finish by selecting a slightly lighter green and reducing the size of the brush before dotting the very center of each eye to create a pair of creepy, illuminated pupils.
If you're into portraits, you might be interested in the best lens for portraits or the best photography lighting kits.

