When you’re in ecommerce, time is money. The faster you can get your online store up and running, the sooner you can start selling and growing your business.
10Web is one of the best AI website builders designed specifically for ecommerce. But unlike other AI website builders, 10Web doesn’t have its own proprietary CMS. Instead, it builds your website using WordPress.org, providing its own customized ecommerce-specific solutions on top of it. This is great for small businesses that are looking to scale, because it offers more portability than many other website builders.
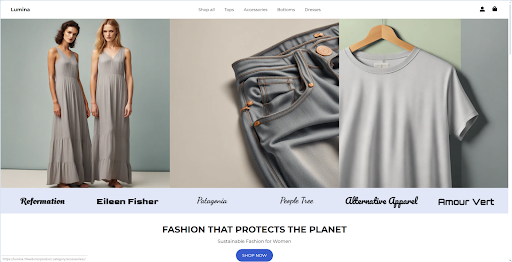
I spent 60 minutes of my time over the weekend trying to build an AI-powered ecommerce website with 10Web, just to see if it’s even possible.
Want to know what I found? Keep reading.

Step 1: Sign up for 10Web and select the AI Ecommerce Website Builder
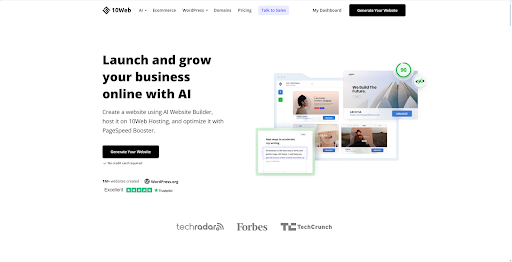
To get started, head over to the 10Web website (10web.io) and click on the "Sign Up" button in the top right corner. Fill in your email address, choose a password, and click "Create Account". Once logged in, select “Create a new website with AI” on the screen that asks “What do you want to do?” This will take you to the main dashboard to begin creating your online store.
Step 2: Answer questions about your business to generate tailored content
Upon selecting the AI ecommerce website builder, you'll be presented with a series of questions designed to help the AI understand your business and generate relevant content. These questions cover topics such as your industry, target audience, unique selling points, and the types of products you offer.
For my store, I chose "Fashion & Clothing Store" as my industry, entered a store name, and put in "Sustainable and ethically-sourced materials for women aged 18-35" under the store description. I also added some basic product names to kick off the website content. The more detailed and accurate your answers, the better the algorithm can tailor the generated content to your specific needs.
Step 3: Customize your website using the drag-and-drop editor
After completing the questionnaire, 10Web's AI generated a draft website filled with unique content, images, and a basic layout. Now, it was time to make the site my own using the intuitive drag-and-drop editor. You can access 10Web’s new Elementor-based AI builder by clicking “Preview & Edit” and choosing the pencil icon at the top right.
On the left side of the screen, you'll find a menu with various design elements, such as text boxes, images, buttons, and sections. Simply click on an element to add it to your page. You can rearrange elements by clicking and dragging them to your desired location.
To edit text, simply click on the text box and start typing. You can customize the font, size, color, and alignment using the formatting options that appear. To replace an image, click on the pencil icon by hovering over it and select "Choose Image" from the menu. You can upload your own images or browse 10Web's extensive library of stock photos. With the new AI builder, you can also have the algorithm generate unique images and artwork by clicking on “Generate with AI”.
Don't forget to customize your color scheme and typography to match your brand. Click on the "Site Settings" button in the top menu to access global settings like your color palette, font pairings, and button styles. Experiment with different combinations until you find a look that resonates with your brand identity.

Step 4: Add additional pages and products to complete your website
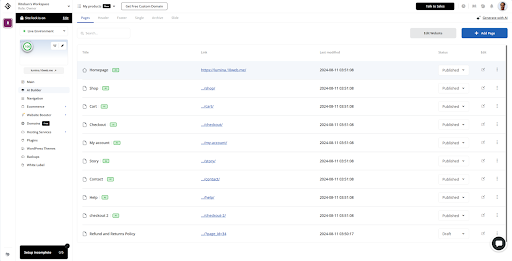
With my homepage looking polished, I decided to flesh out the rest of my online store. To do this, click on "Pages" from the top menu in the AI Builder to view your site structure. To add a new page, click the "+" button and select the type of page you want to create, such as "About Us", "Contact", or "FAQ". AI tools can recreate your page design and generate a draft for the page content, which you can edit and customize using the same drag-and-drop editor as before.
To add products, exit the AI builder and go to "Ecommerce > Products". Here, you can either manually add products one by one or import a CSV file with multiple products. For each product, fill in details like the name, description, price, images, and any variant options (e.g., sizes or colors). AI can help generate product descriptions based on key features you provide, saving you time.
Step 5: Configure your payment and shipping settings
To start accepting orders, you'll need to set up your payment and shipping options. From the menu on the left, go to "Ecommerce > Payment methods". You can enable options like WooPayments, Direct bank transfer, Check payments, and Cash on delivery. 10Web's platform ensures secure transactions and protects sensitive data.
Next, head to the "Shipping" section to configure your shipping rates and options. You can set flat rates, offer free delivery, or allow customers to pick up their orders. Be sure to specify any shipping restrictions, such as countries you don't ship to or items that require special handling.
Finally, navigate to the "Tax" section to set up tax calculations for your store. 10Web's AI can help determine the appropriate tax rates based on your location and the locations of your customers, ensuring compliance with local regulations.
Since this was just a test run, I decided to leave these options as-is for the sake of this article. But you can play around with them depending on your requirements in 10Web’s interface and your site’s WordPress.org dashboard.
Step 6: Review and launch your ecommerce website
Before launching your store, take some time to thoroughly review each page and test the functionality. I like to click through my site as if I were a customer, checking for any errors, broken links, or formatting issues. Verify that your payment and shipping settings are correctly configured by placing a test order.
10Web's AI ecommerce website builder includes built-in optimization tools to ensure your site loads quickly and performs well on both desktop and mobile devices. To access these tools, go to "Website Booster". Here, you can compress images, minify code, and leverage browser caching to improve site speed and performance. 10Web also supports integration with Cloudflare CDN for even better performance.
Once you're confident that your store is ready for launch, click the "Publish" button in the AI Builder to launch your website. 10Web will handle the rest, pushing your site live and providing you with a custom domain name (or connecting to your existing domain if you have one).

Final thoughts
Creating an AI-powered website with 10Web's ecommerce platform was an incredibly smooth and efficient process. My build time clocked out at exactly 54 minutes, although it’s worth noting that it didn’t give me a chance to perform a lot of customizations to the generated online store. That said, 10Web’s algorithms were remarkably accurate, delivering satisfactory designs and content on the very first try.
Despite being an AI builder, I like the amount of customizability that 10Web offers store owners. Since this is a WordPress website builder, you can also take advantage of WordPress’s huge library of third-party plugins to add new features that 10Web doesn’t provide by default. However, 10Web already offers plenty of shipping, payment gateway, analytics, and performance optimization tools built into its platform from the get-go.
Overall, I’d recommend using 10Web to build an ecommerce website, especially if you’re strapped for time. However, putting in some effort to learn the ins and outs of 10Web, Elementor, and WordPress will definitely lead to better results beyond AI generation.


.jpg?w=600)


