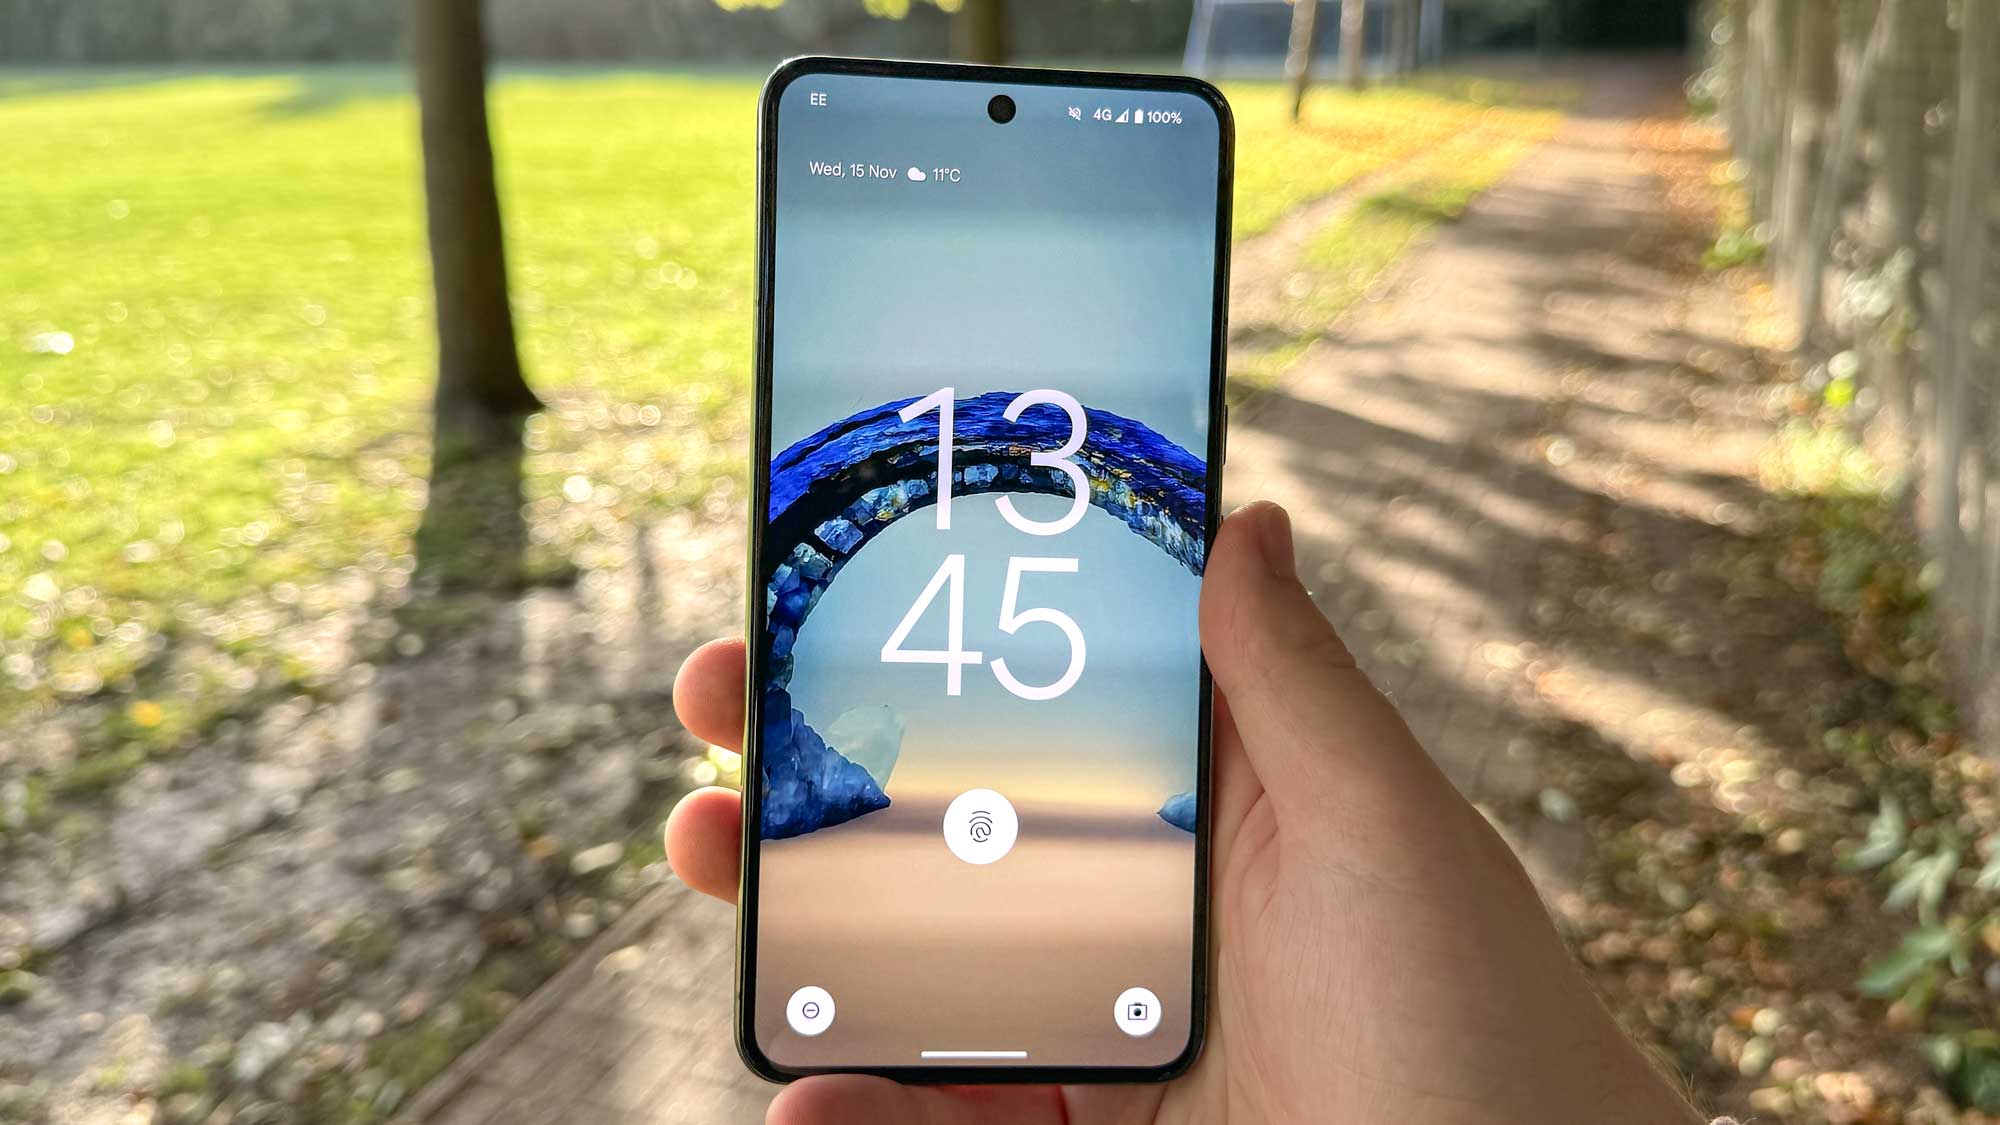
The Android on-screen magnifier is an accessibility feature designed to help anyone with a visual impairment by magnifying the content displayed on the screen. It's one of several features provided by Android to make smartphones more inclusive and user-friendly.
If you've ever wondered how to set up and make the most of an on-screen magnifier on your Android phone, you're in the right place. In this step-by-step guide, we'll walk you through the process of enabling the magnifier and look at its various settings, ensuring that you can customize the experience to suit you.
How to use Android 14 on-screen magnifier
Note: you'll need to be running Android 14 in order to use this feature. We can show you how to update Android if you need help.
How to set up Android on-screen magnifiier
The first five steps take you through the setup process. If you've already enabled the magnifier and want to know how to use it, skip to the section below.
1. Go to Settings > Accessibility
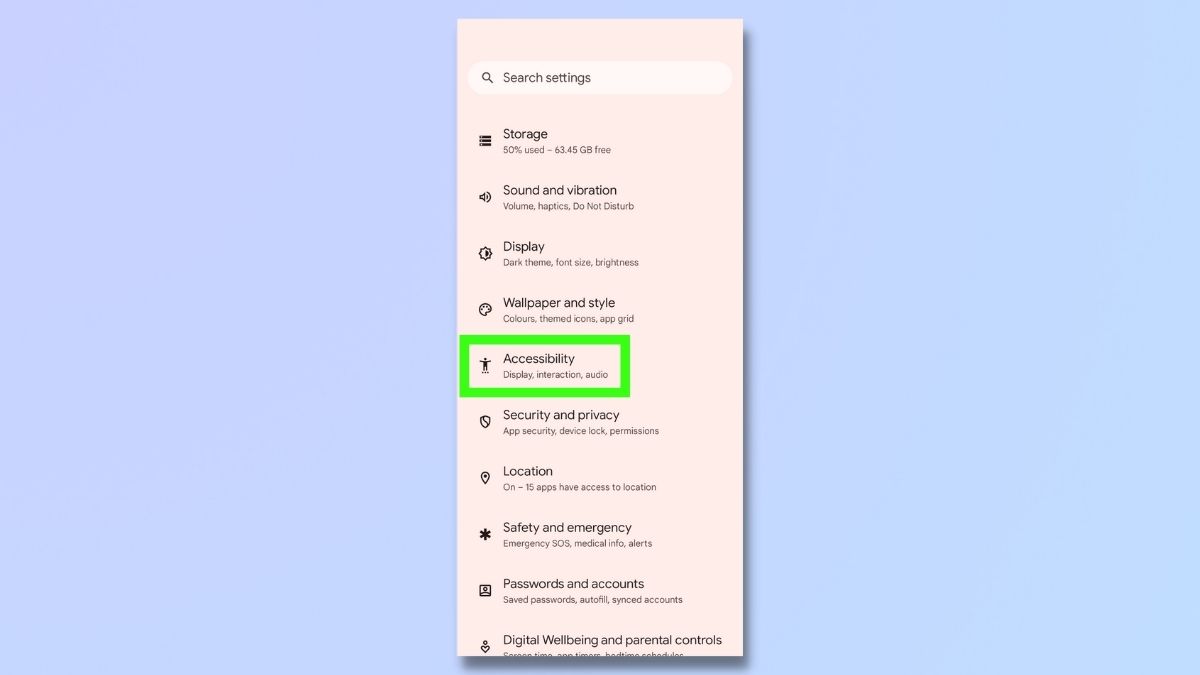
Firstly, open the Settings app and select Accessibility.
2. Select Magnification
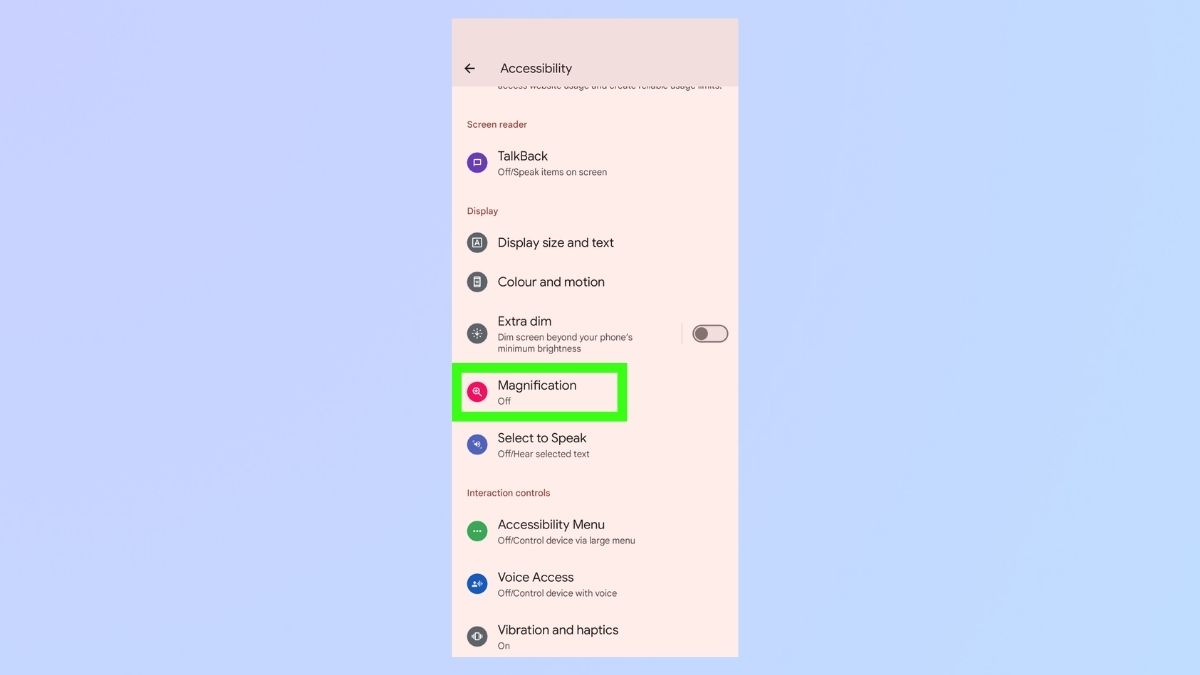
On the Accessibility menu, scroll down and select Magnification.
3. Toggle on Magnification
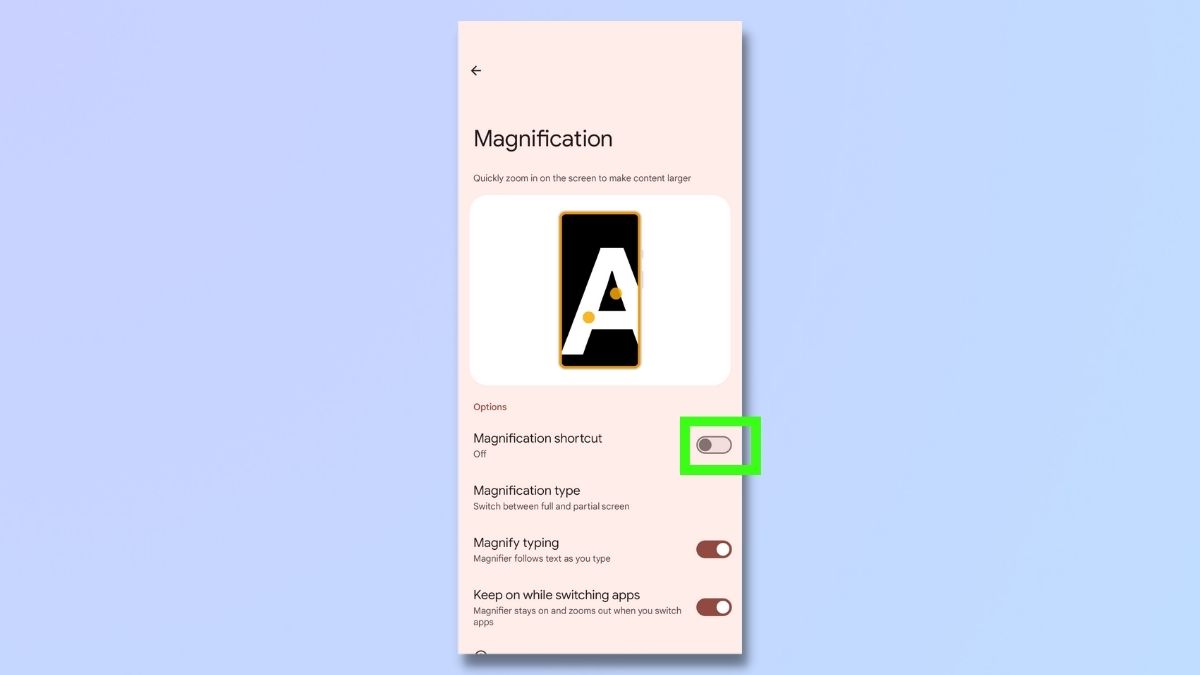
Toggle on Magnification.
4. Tap OK
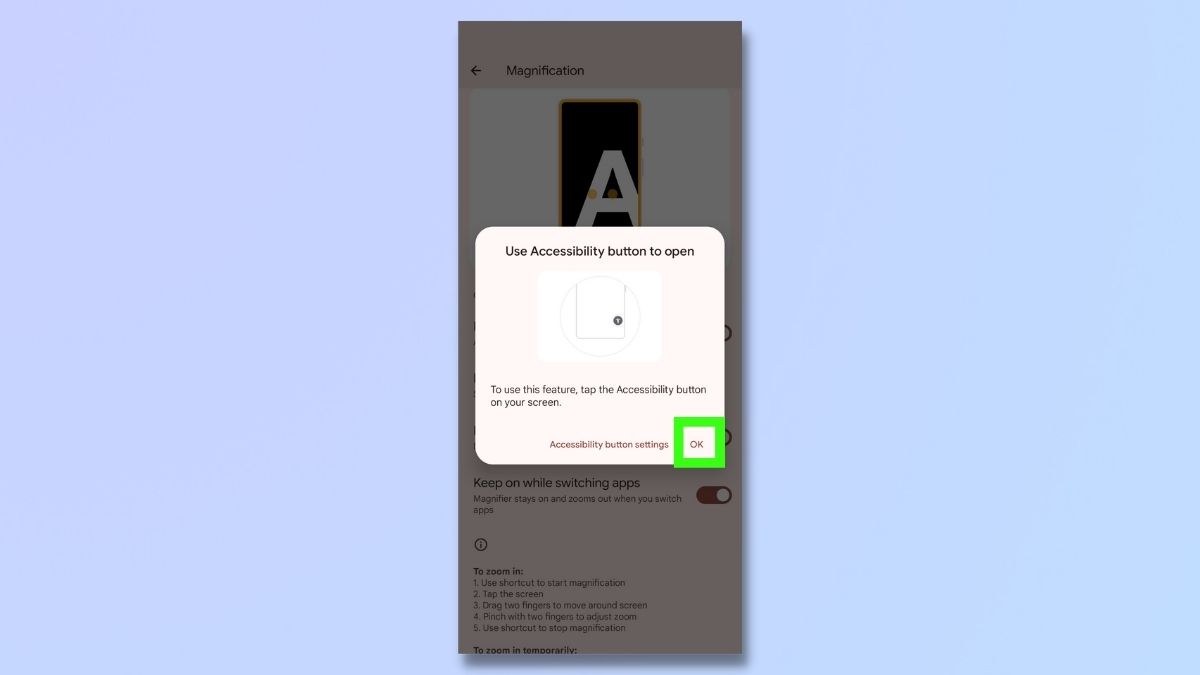
When you switch Maginification on, a pop-up window will appear on your screen, explaining how the feature works. It also gives you access to the button settings. We'll look at these settings for the magnifier in the section below. Tap OK.
5. Select Magnification button position
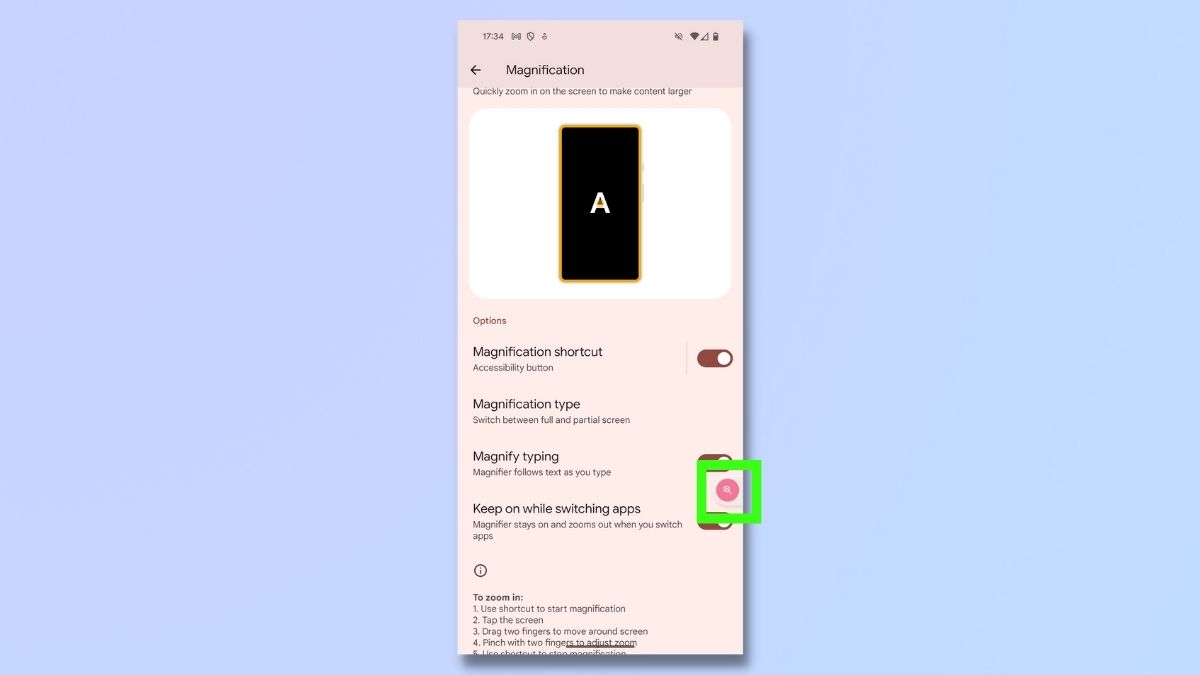
A tab showing a magnifying glass icon on a red background will now be visible on the right-hand side of your phone screen. This is the Magnification button.
If you want to change its position, you can move it to a different part of the screen by dragging it.
How to use Android's magnification
Now we'll cover how you actually use the magnifier!
1. How to use the Magnification button
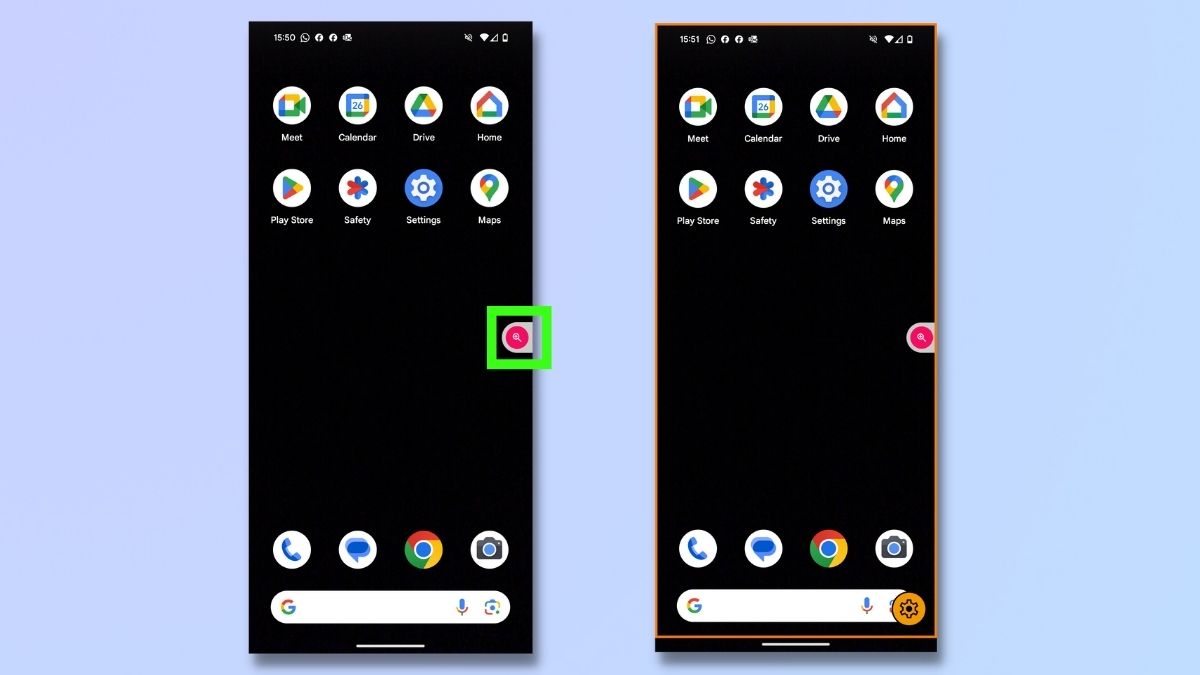
To use the Magnification button, simply tap it once. You can clearly see when you are in Magnification mode, as your phone screen will have an orange border. There is also an orange settings icon at the bottom right of the screen. We'll look at the settings button in a few steps.
2. Magnifying your screen
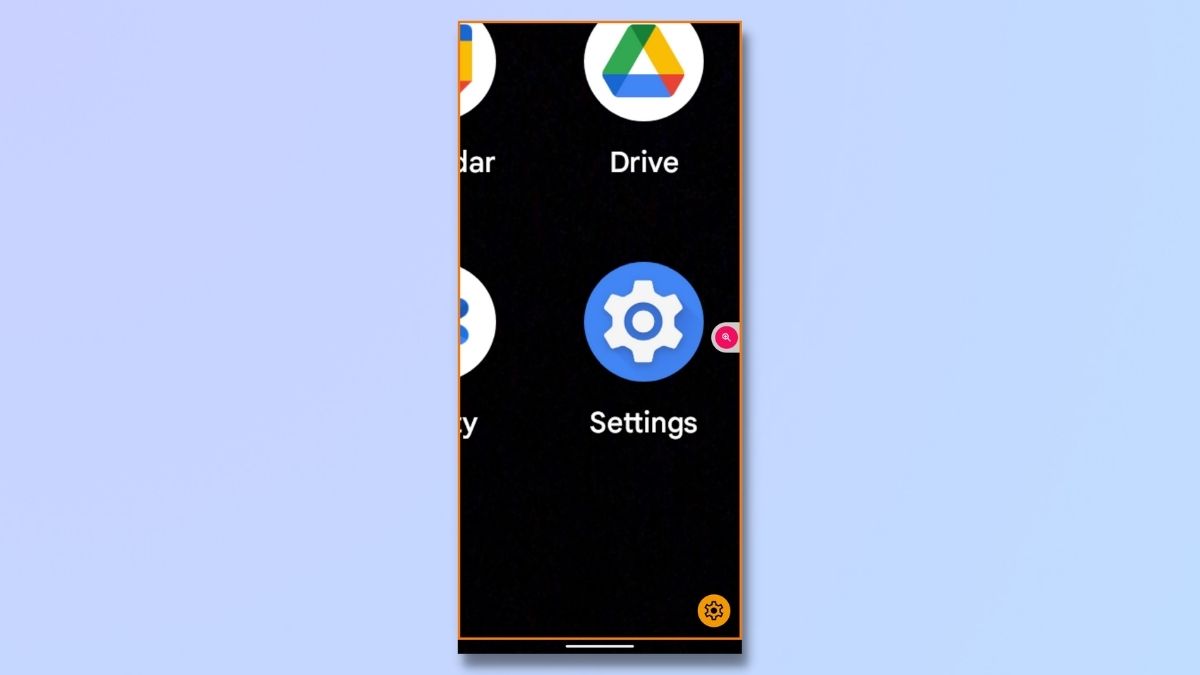
Once you're in Magnification mode, you can enlarge any part of the display by tapping on the screen. You can pan around the screen by dragging your fingers. Simply pinch in and out to adjust the level of Magnification.
3. Settings — Accessibility button & gesture
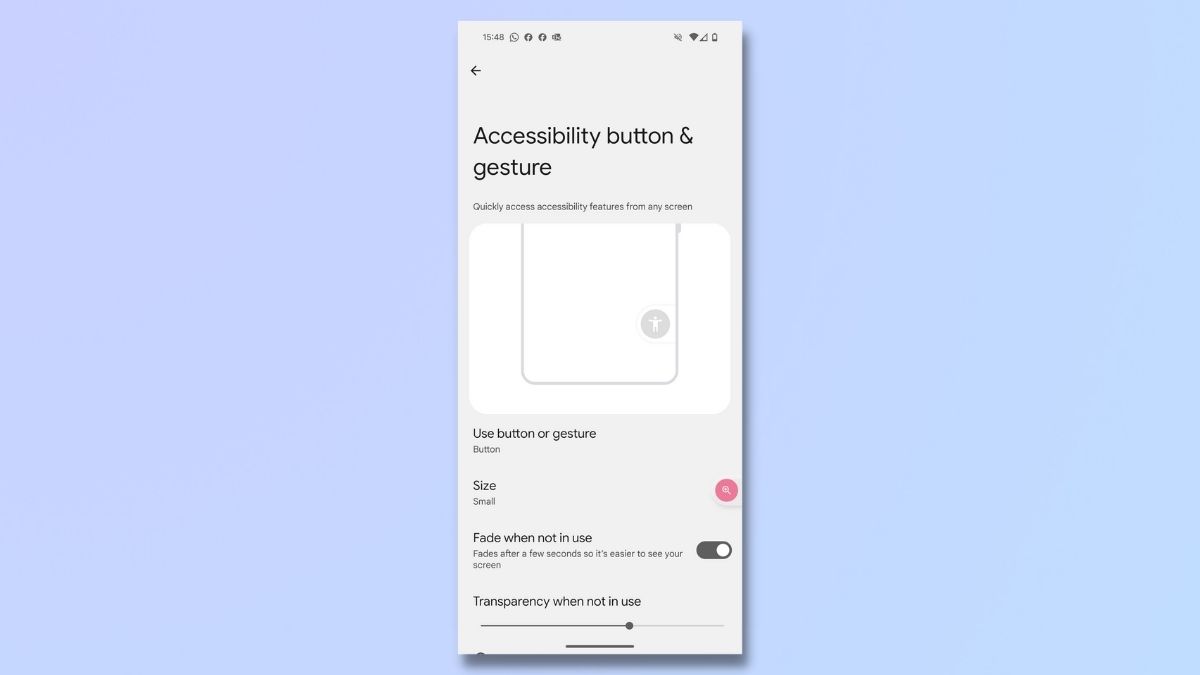
There are three different places where you can adjust the settings of the Magnification feature.
The first is from the pop-up screen that appears when you enable the Magnification shortcut. (See Step 4 in the previous section).
If you want to access this screen after you have completed the setup, simply toggle Magnification off and back on again on the Magnification screen.
This screen gives you the following options:
Choose button or gesture
The Magnification tool works with the side button by default but you can choose instead to activate it with a gesture. If you select the gesture option, you can then turn on Magnification by sliding two fingers up from the bottom of the screen. You can turn off Magnification with the same gesture.
Note that if you select gesture, then the below settings are not available.
Size
Option to select small or large button size. This is set to small by default.
Fade when not in use
This is enabled by default. When the Magnification button is not in use it becomes transparent so that it doesn't obscure part of your screen. You can choose to turn this off.
Transparency when not in use
If you have enabled the Fade when not in use option, you can choose the level of transparency you want by moving the slider bar left or right.
4. Settings — Magnification page options
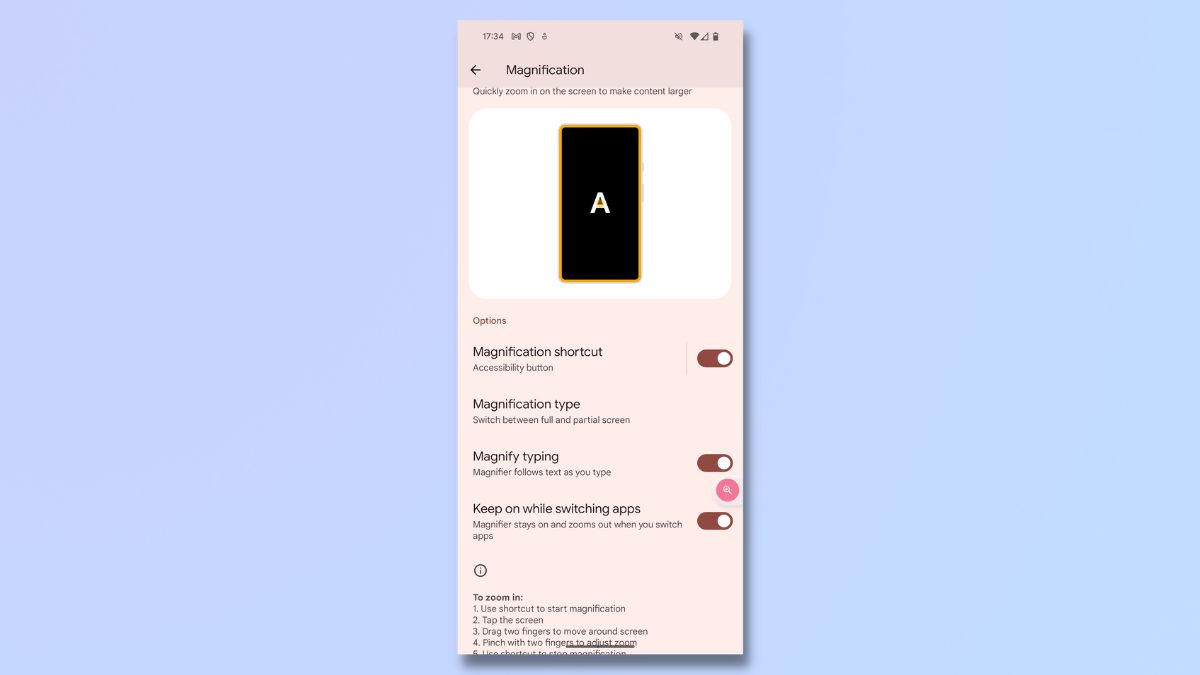
Another place where you can change Magnification settings is on the Magnification page in Settings/Accessibility. This is where you toggled on the Magnification shortcut in Step 4.
Here you can select your magnification type. You can choose to magnify the full screen, magnify part of your screen or switch between full and partial screen by tapping an on-screen button.
You can also enable magnification when typing and select whether you want the magnifier to stay on when you switch apps.
5. Settings — On-screen settings button
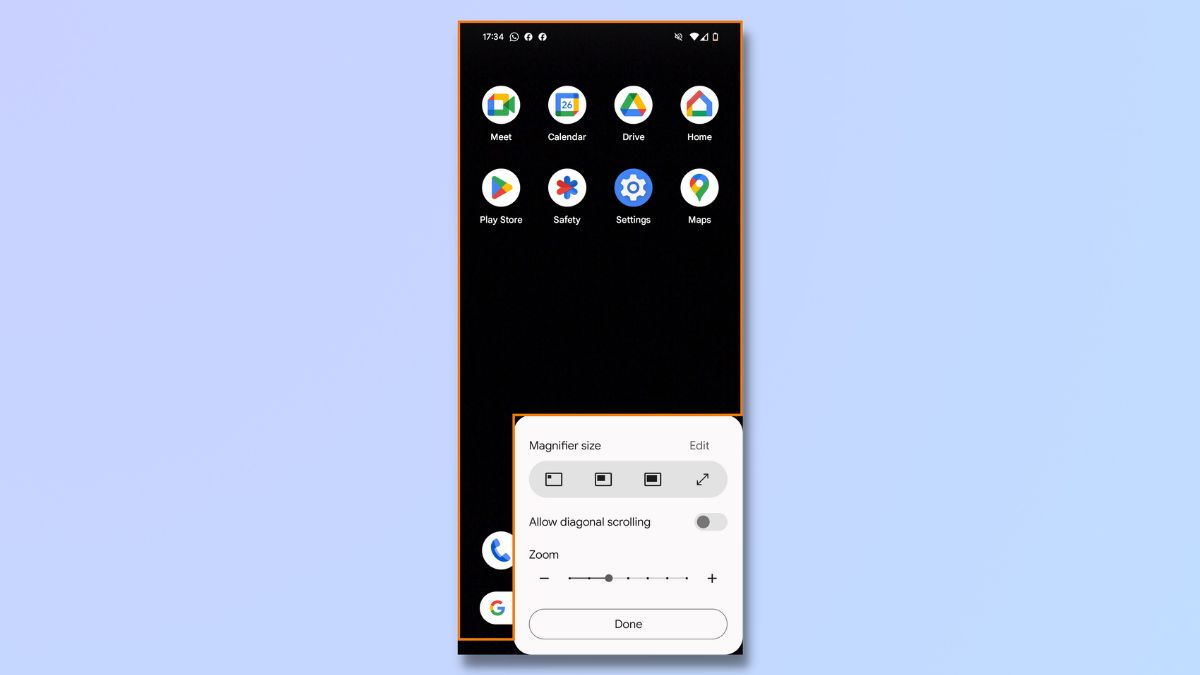
There is also the option to make changes to settings when you are using the magnifier.
As described a couple of steps above, when the Magnification tool is in use, there is an orange border on the screen, and an orange settings icon appears in the bottom right-hand corner.
Note that this settings option only appears if you have opted to switch between full and partial screen in Magnification type. This allows you to change settings. You can also change the partial-screen magnifier size, enable diagonal scrolling and enlarge the zoom area.
Android's Magnification tool is a great feature for those who might otherwise struggle to read their phone screens.
The various settings can be a bit confusing, but the chances are that once you've found the settings that suit you best, you won't need to change them again for quite some time.
Once you're familiar with the tool, there's no limit to the uses you can put it to. You can use it on any app or feature on your phone, so you can use it to zoom into text in photos, enlarge T&Cs on a web page, read email messages, and much more.
To learn more about what you can do with your Android 14 phone, check out our Android 14 review, or read our guides on how to use Android 14 AI wallpaper generator and how to enable flash notifications.


