The 3D scanning market can be pretty confusing at times. The number of different ways to 3D scan an object seems to increase with every passing year, and what was initially something only for the professionals is becoming available to the masses, with the best 3D scanners being more accessible than ever.
Not to add to the confusion but to explain the complexity at play, there are photogrammetry apps, laser scanners, structured light scanners, mobile scanners and even contact-based scanning technology. Each option comes with a plethora of hardware types and workflows. Suffice to say it’s not particularly straightforward, and you’d be forgiven for being confused when finding your way into the market.
Understanding the options available is the first step to ensuring you purchase the right type of scanner. We’re not talking about small amounts of money here, so it’s important to do your research first. Most artists will opt for either a handheld 3D scanner or a photogrammetry solution. These will generally allow for a smaller setup and are considerably more affordable than the high-end laser scanners some developers have made.
It's also worth ready my guide to the best photogrammetry software for which apps to use, as well as my explainer – what is photogrammetry? – for a basic top level intro to this new 3D art workflow.
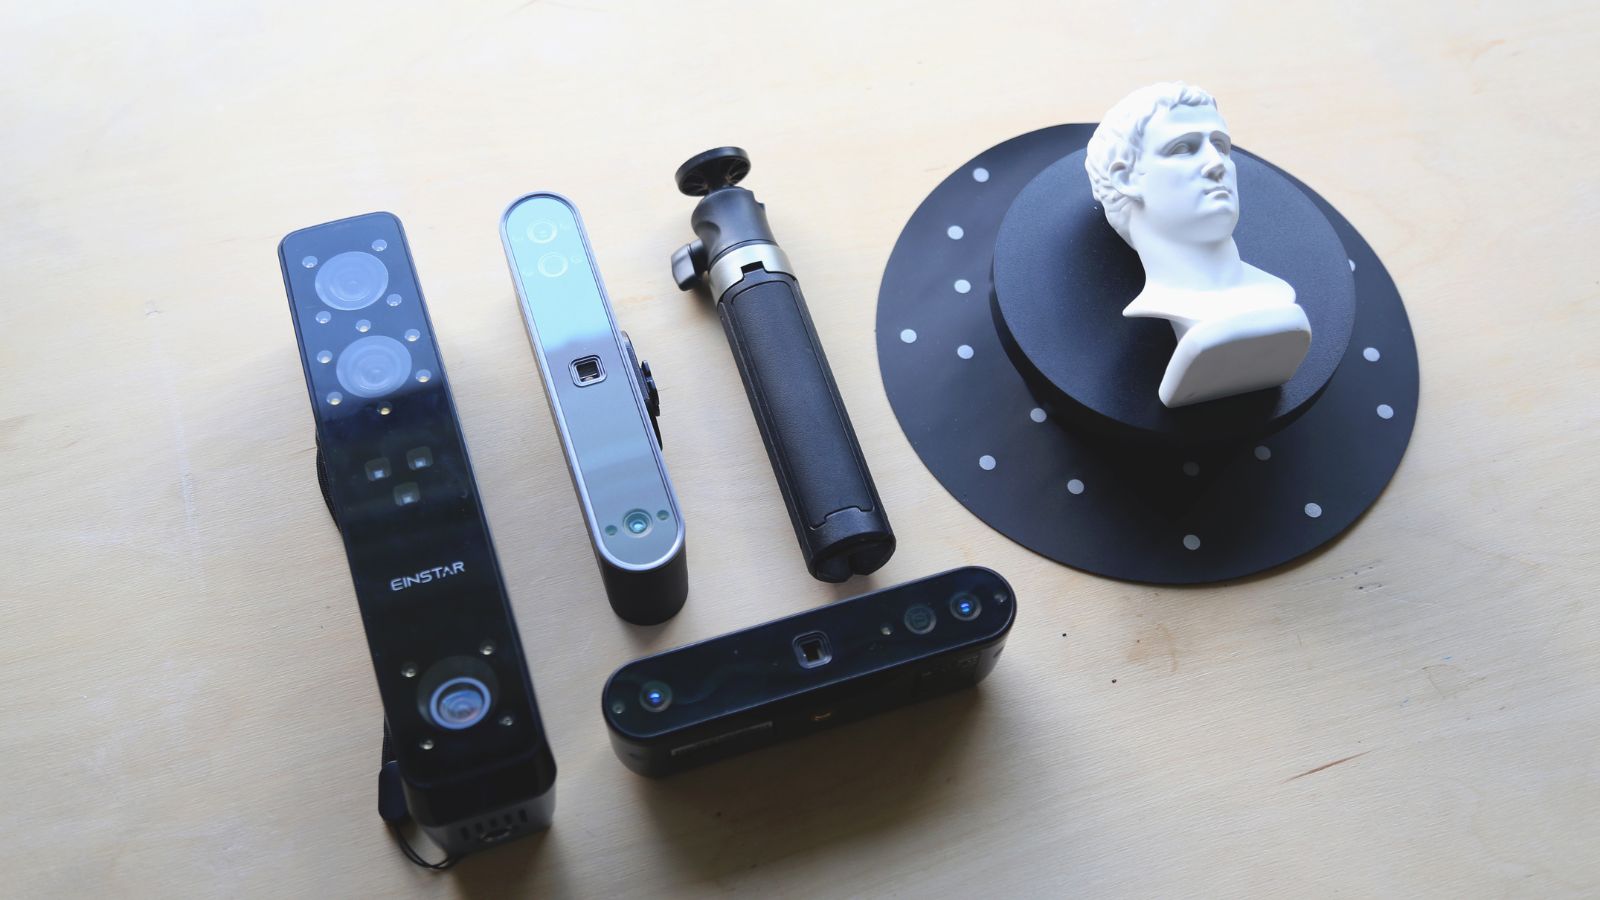
Using a handheld 3D scanner
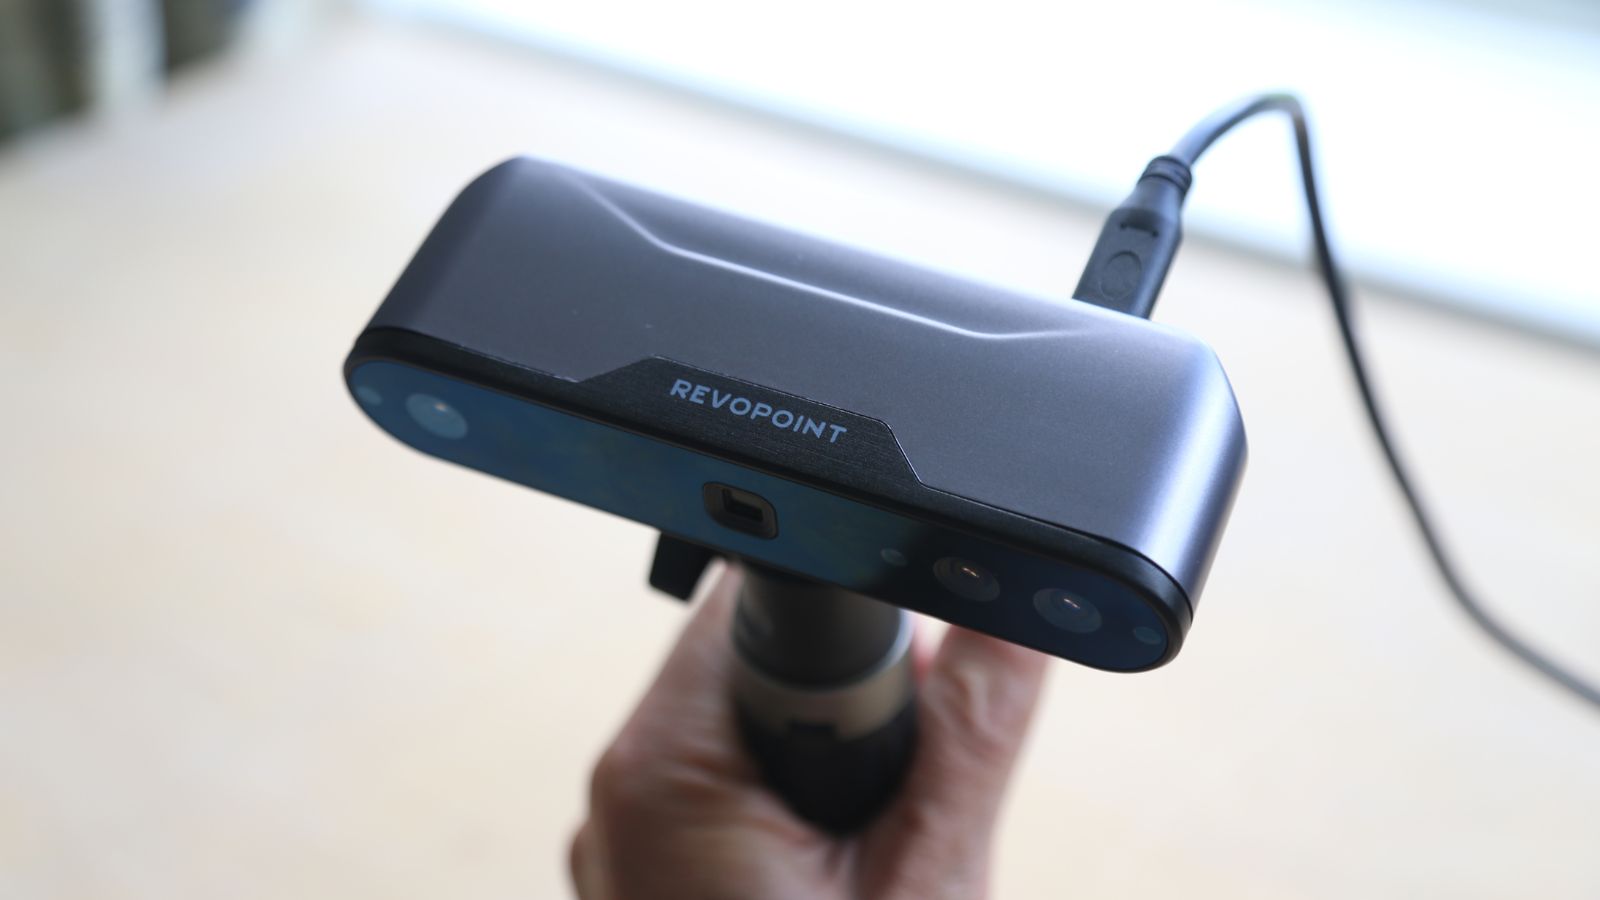
In this tutorial we’ll be looking at the workflow for handheld scanners in particular. These types of scanners rely on lasers or light to scan an object, and allow for a high level of precision in accuracy and colour replication.
Recent years have seen a rise in these types of scanners. The price is coming down all the time with some becoming affordable even for hobbyists and amateurs. The competition is fierce and will make for an interesting few years.
We’ll work our way through the steps that are common for all handheld 3D scanners. It can seem like a bit of a dark art but, in reality, it’s straightforward and accessible for users who are limited in technical know-how. Head here to download the assets you'll need if you'd like to follow along.
Using a handheld 3D scanner: how to choose
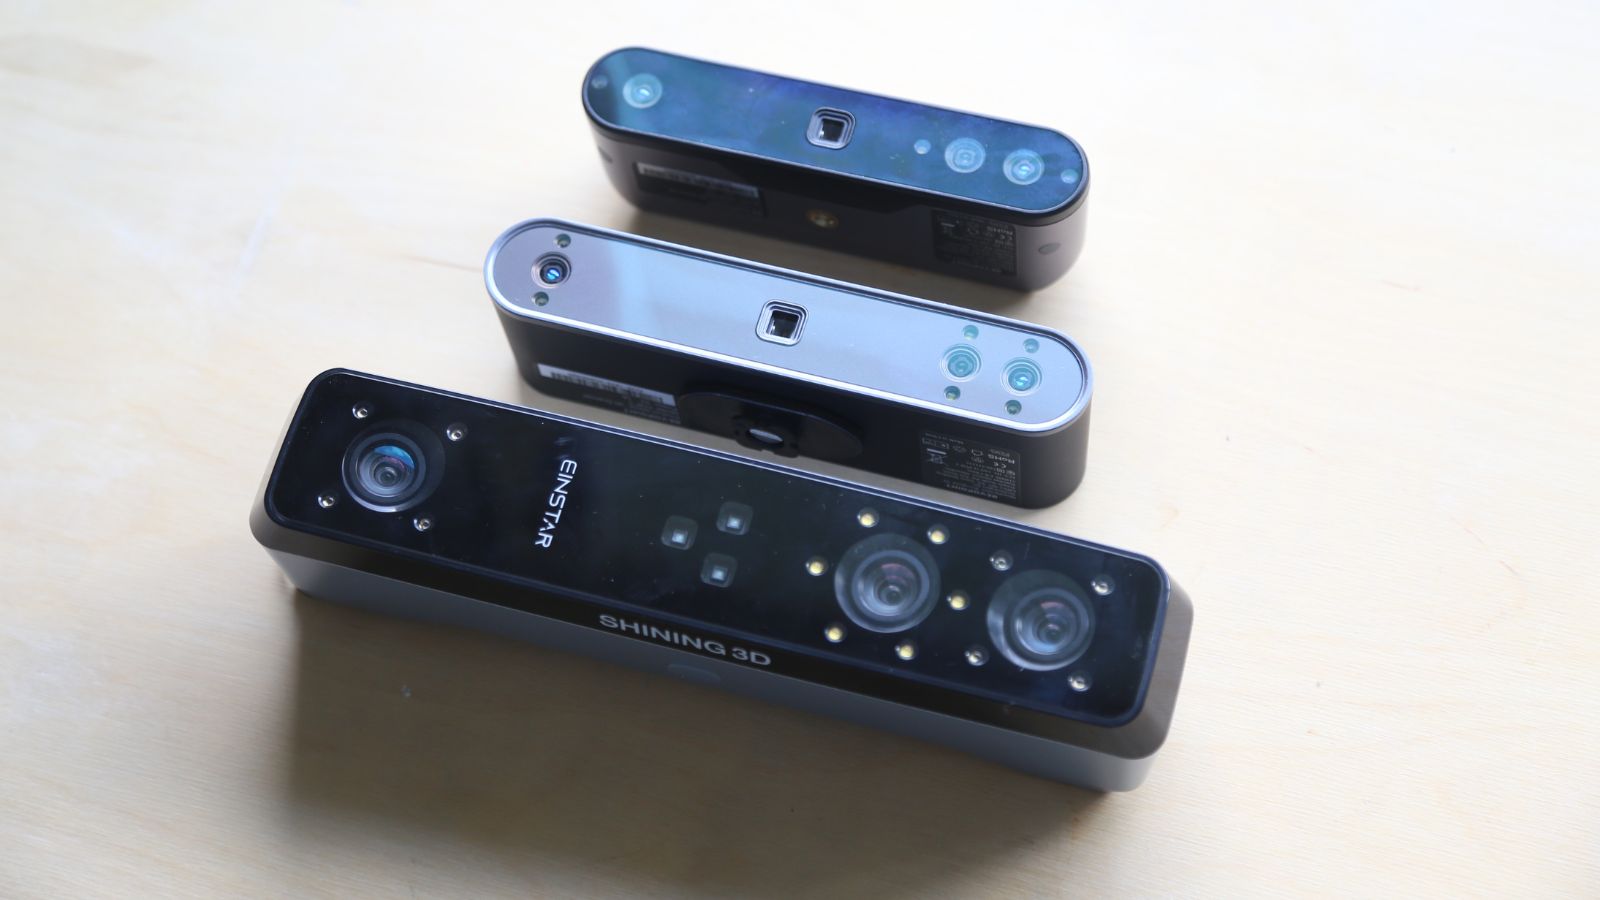
There are an increasing number of scanners on the market and choosing the right one is paramount. One of the primary specs is the single-frame accuracy. Scanners will capture around 14-18 frames per second and each will have a level of accuracy. The lower this number, the more precise the scan is. Anything as low as 0.1mm will be more than adequate for almost all applications.
Using a handheld 3D scanner: the workflow
Another consideration alongside the scanner will be the workflow you want to adopt. Scanners work alongside software, and each will have a set of platforms it works on. Some will only work on PC, while others work on all major platforms including Android and iOS. If you need a scanning workflow you can use on your mobile phone then make sure the software allows for that.
Using a handheld 3D scanner: model prep
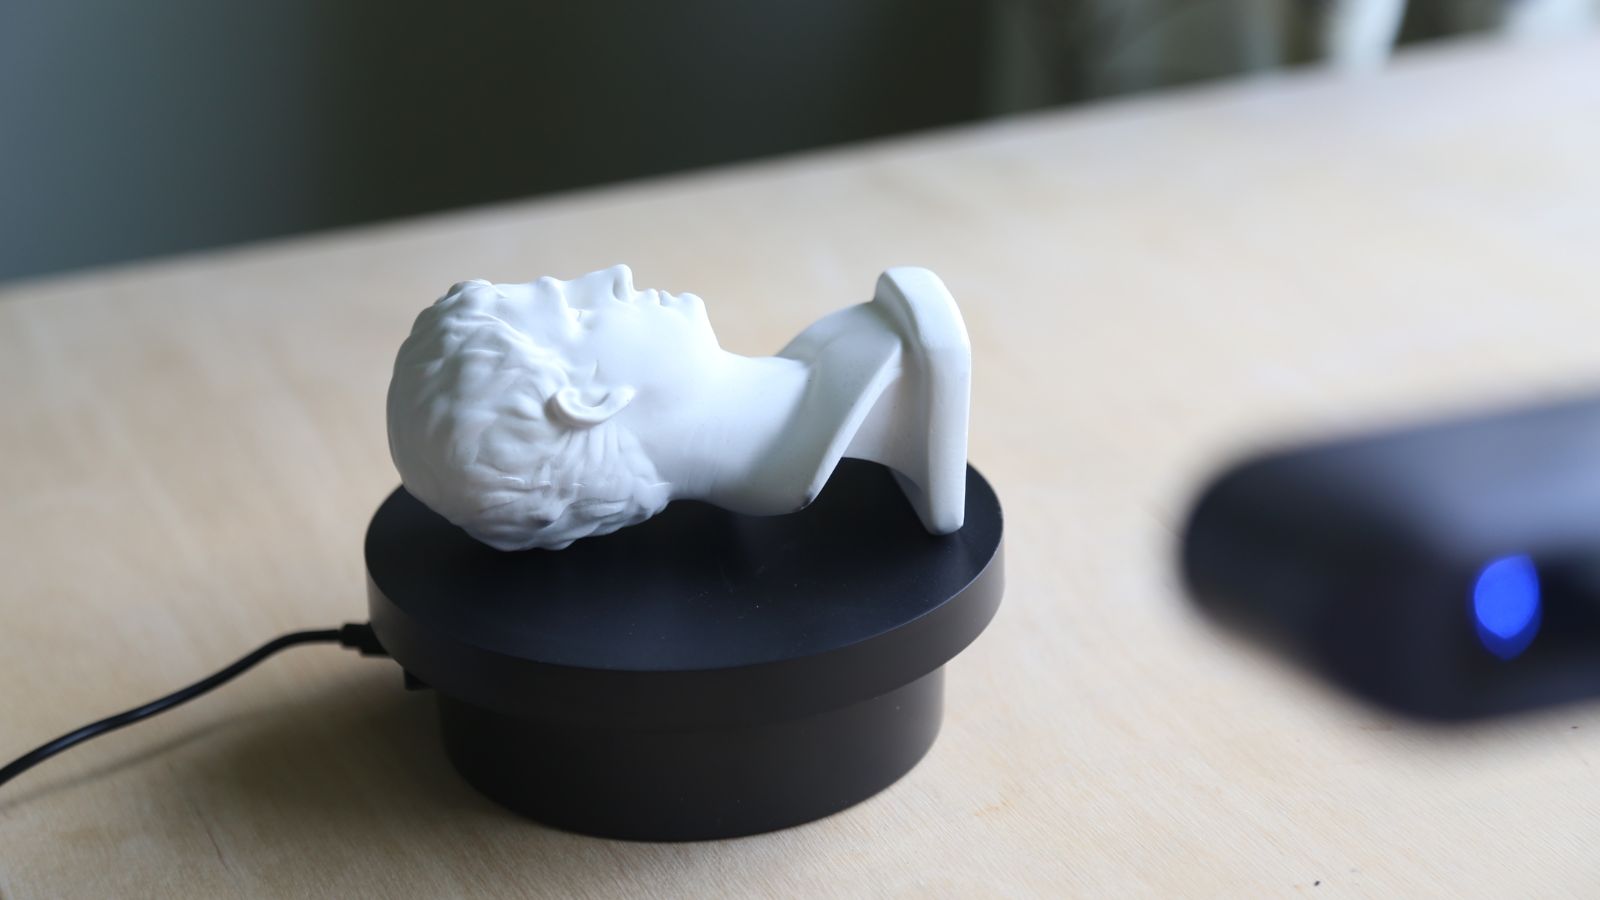
Before you’re ready to do anything with a 3D scanner, it’s worth taking the time to get your item ready for scanning. Scanners are getting better all the time with many able to handle glossy surfaces as well, but it generally pays to do a little preparation all the same. Specialist scanning spray, and even baby powder, can help to dull any shiny surfaces so they can be picked up accurately by the scanner.
Using a handheld 3D scanner: featureless scanning
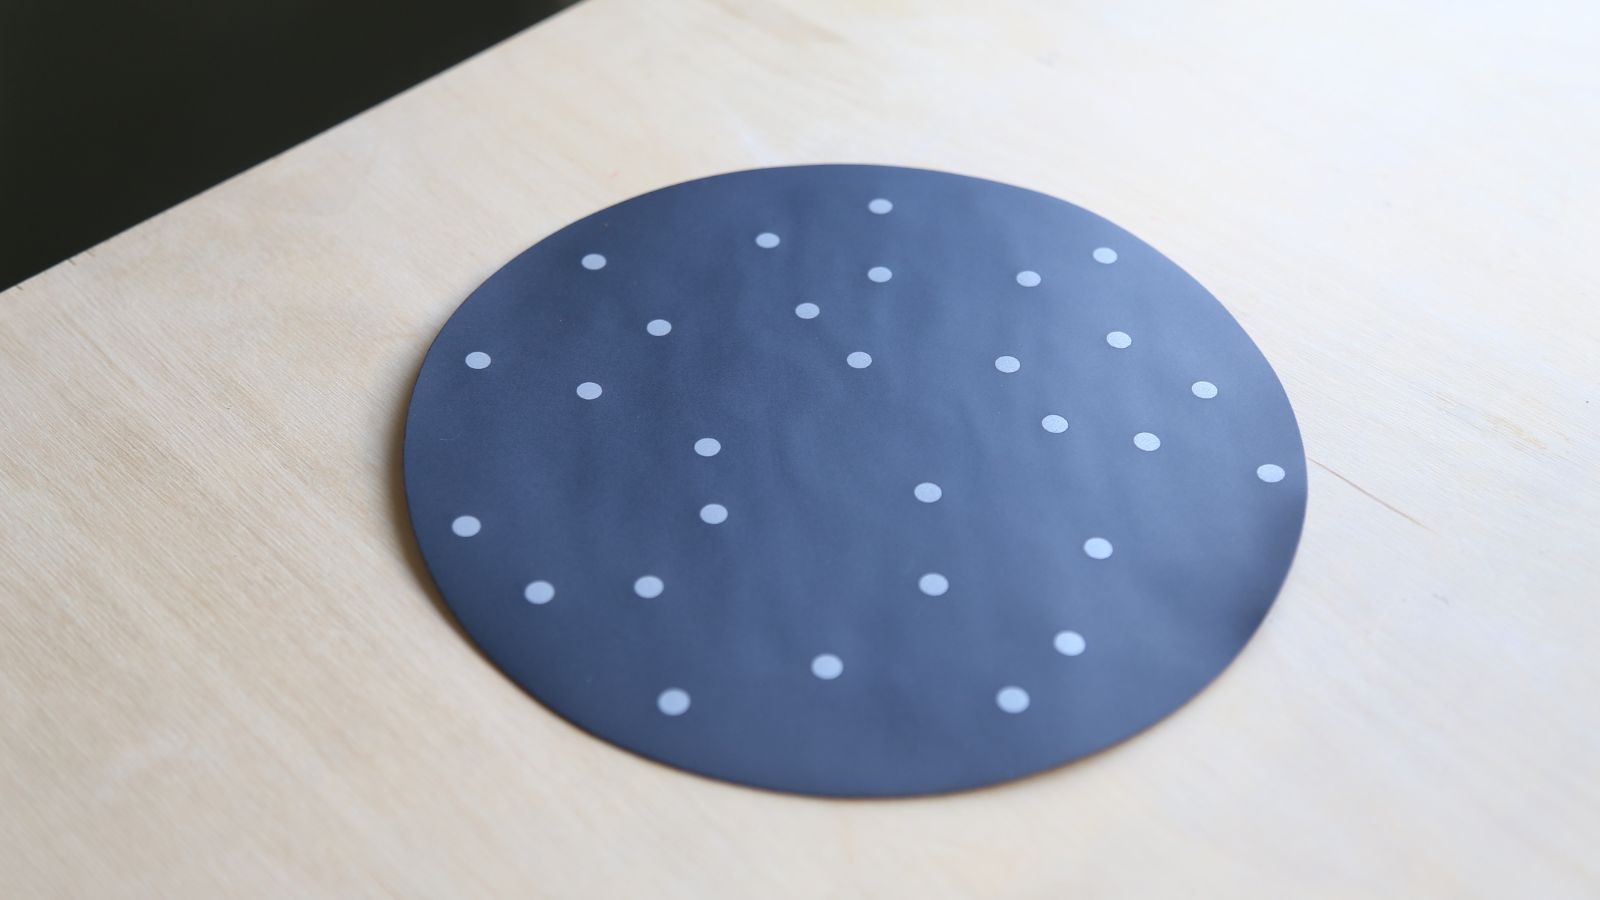
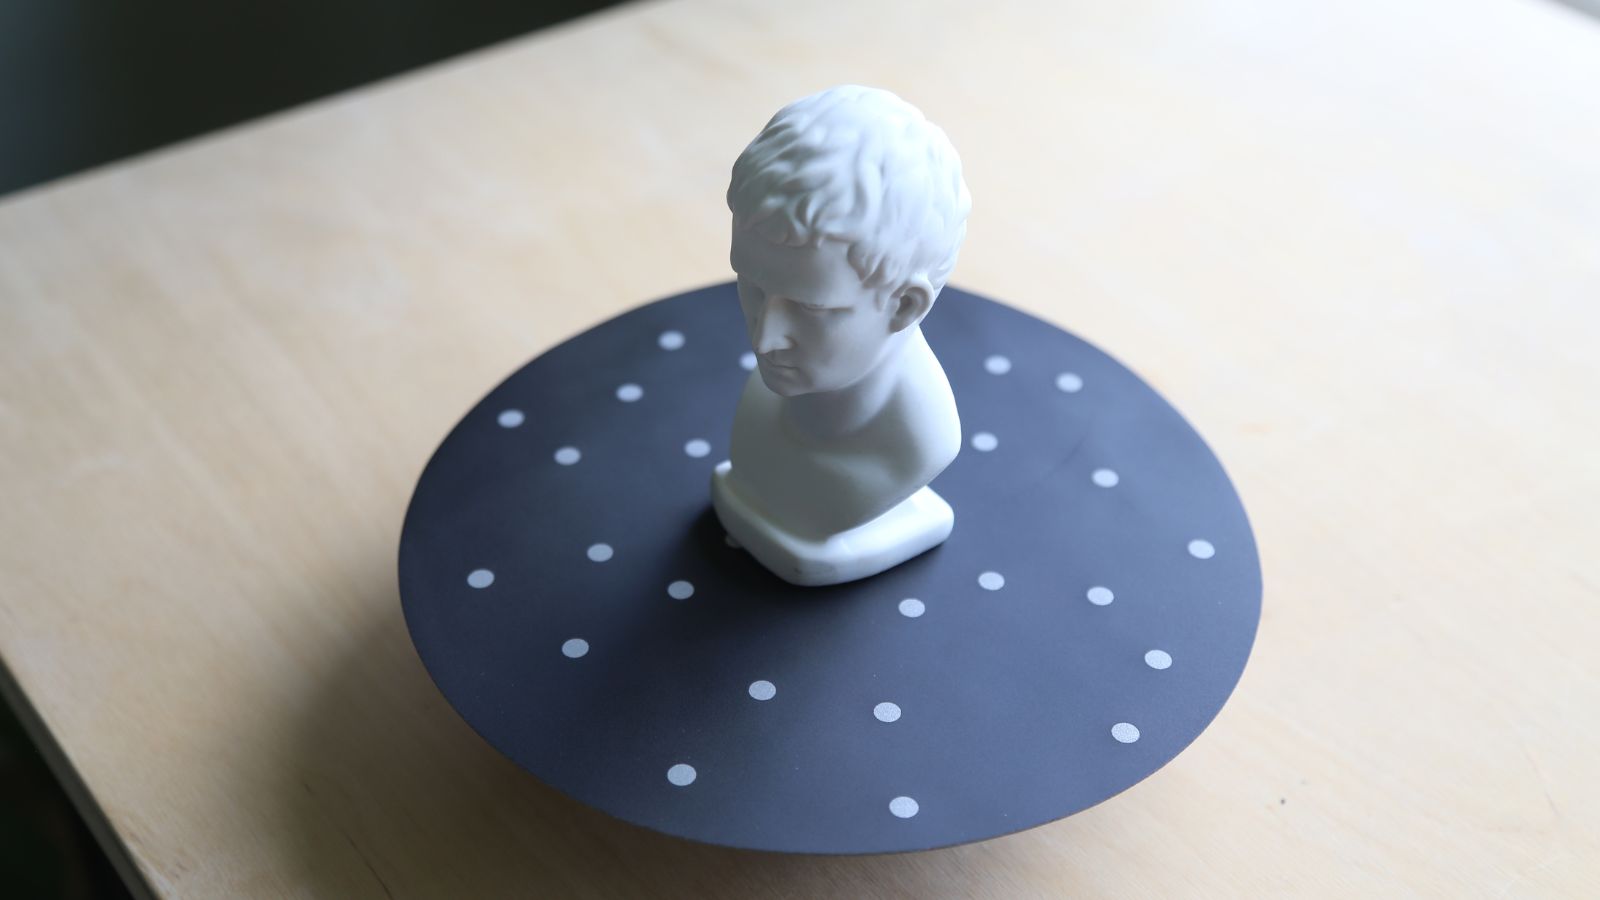
It’s possible to scan objects that have no discernible features, and some scanners include a mat covered in markers to help you with this. These markers are used by the scanner to determine the location of the object’s surfaces within 3D space. If you don’t have a dedicated mat you can easily create one using stickers attached to a piece of card, or simply adding markers to the surface below your object. These markers could be anything as long as they can be easily identified by your 3D scanner.
Using a handheld 3D scanner: unbox your scanner
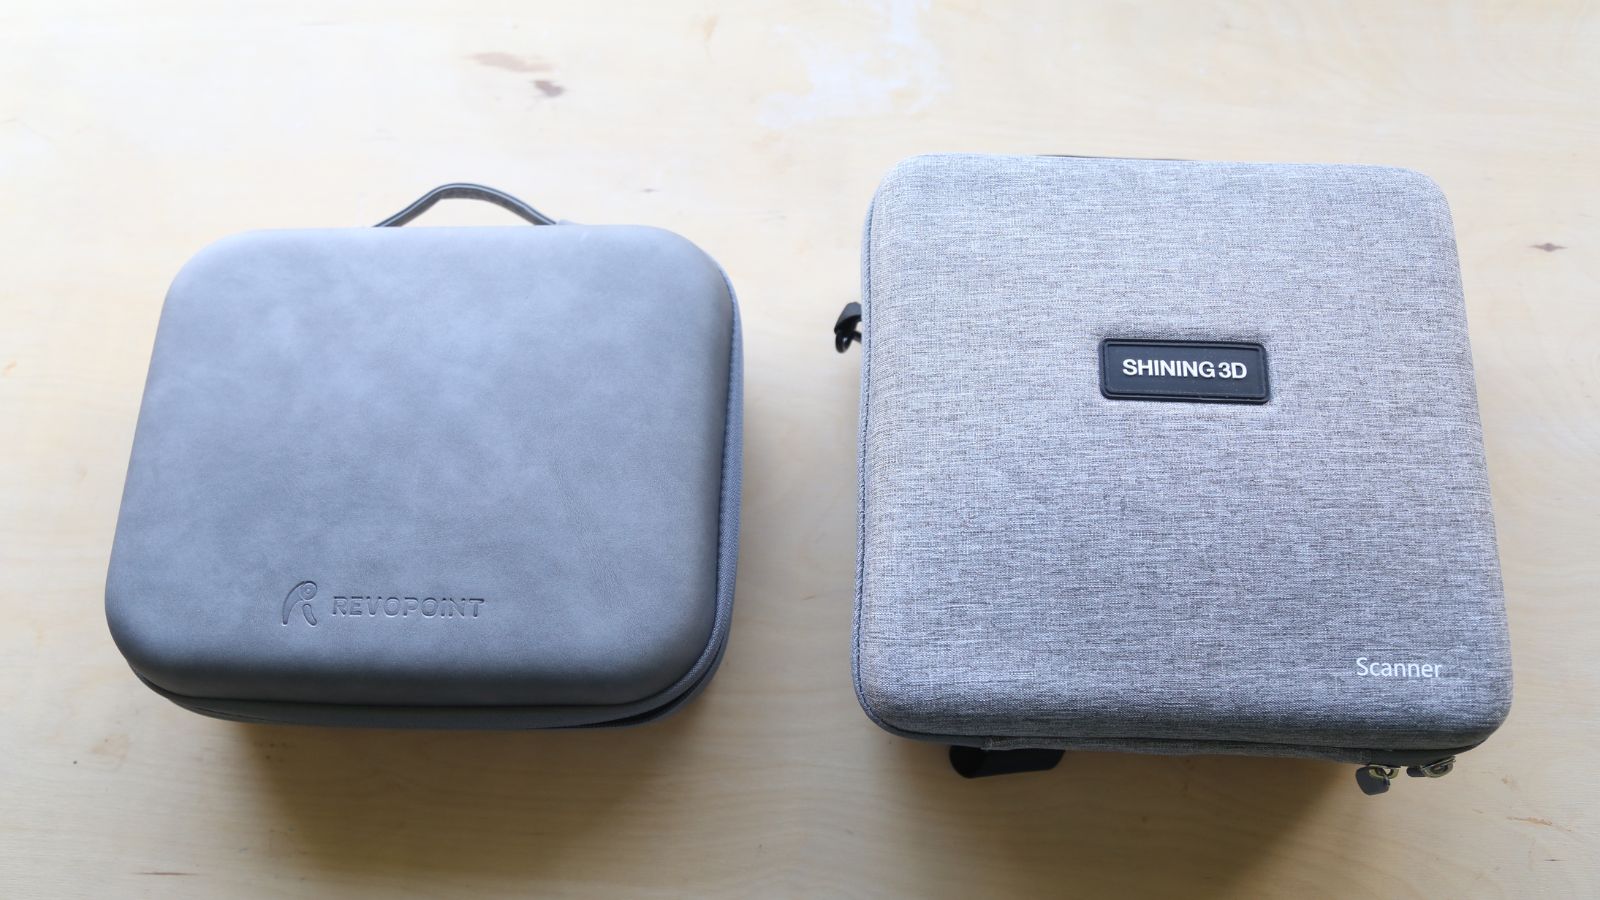
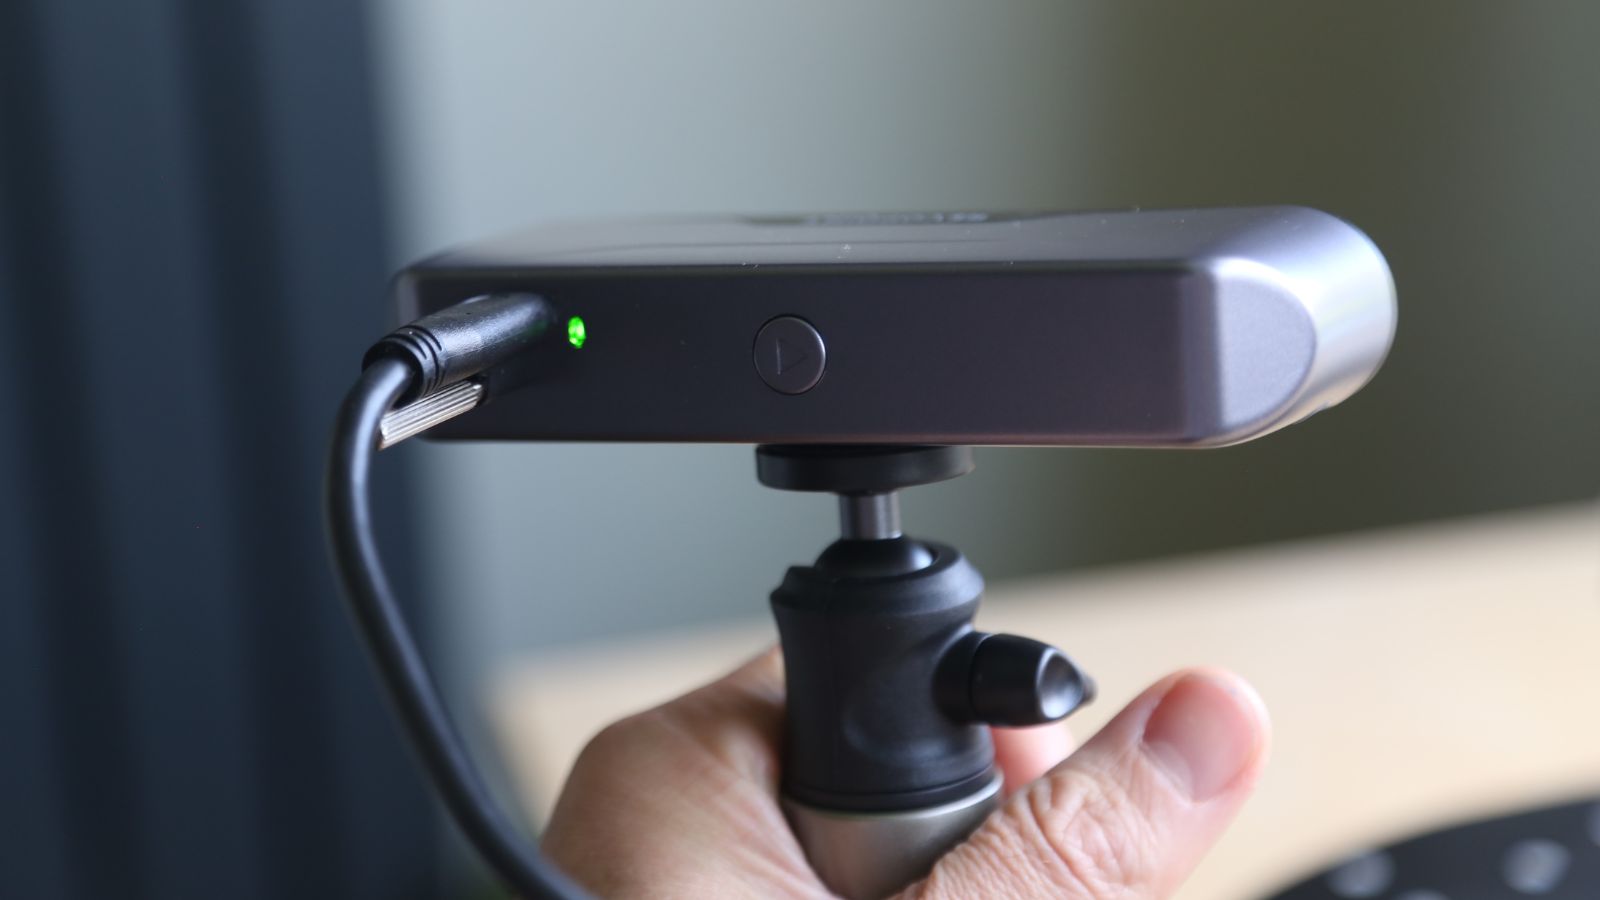
With your model prepped for scanning, you’re now ready to get your scanner all set up. I love unboxing a scanner for the first time. The new scanner, its accessories and the packaging all add to the anticipation of the scan. Use the included guide to help you get everything set up properly, or if that fails then there are plenty of video tutorials on the internet for most scanners.
Using a handheld 3D scanner: scanning methods

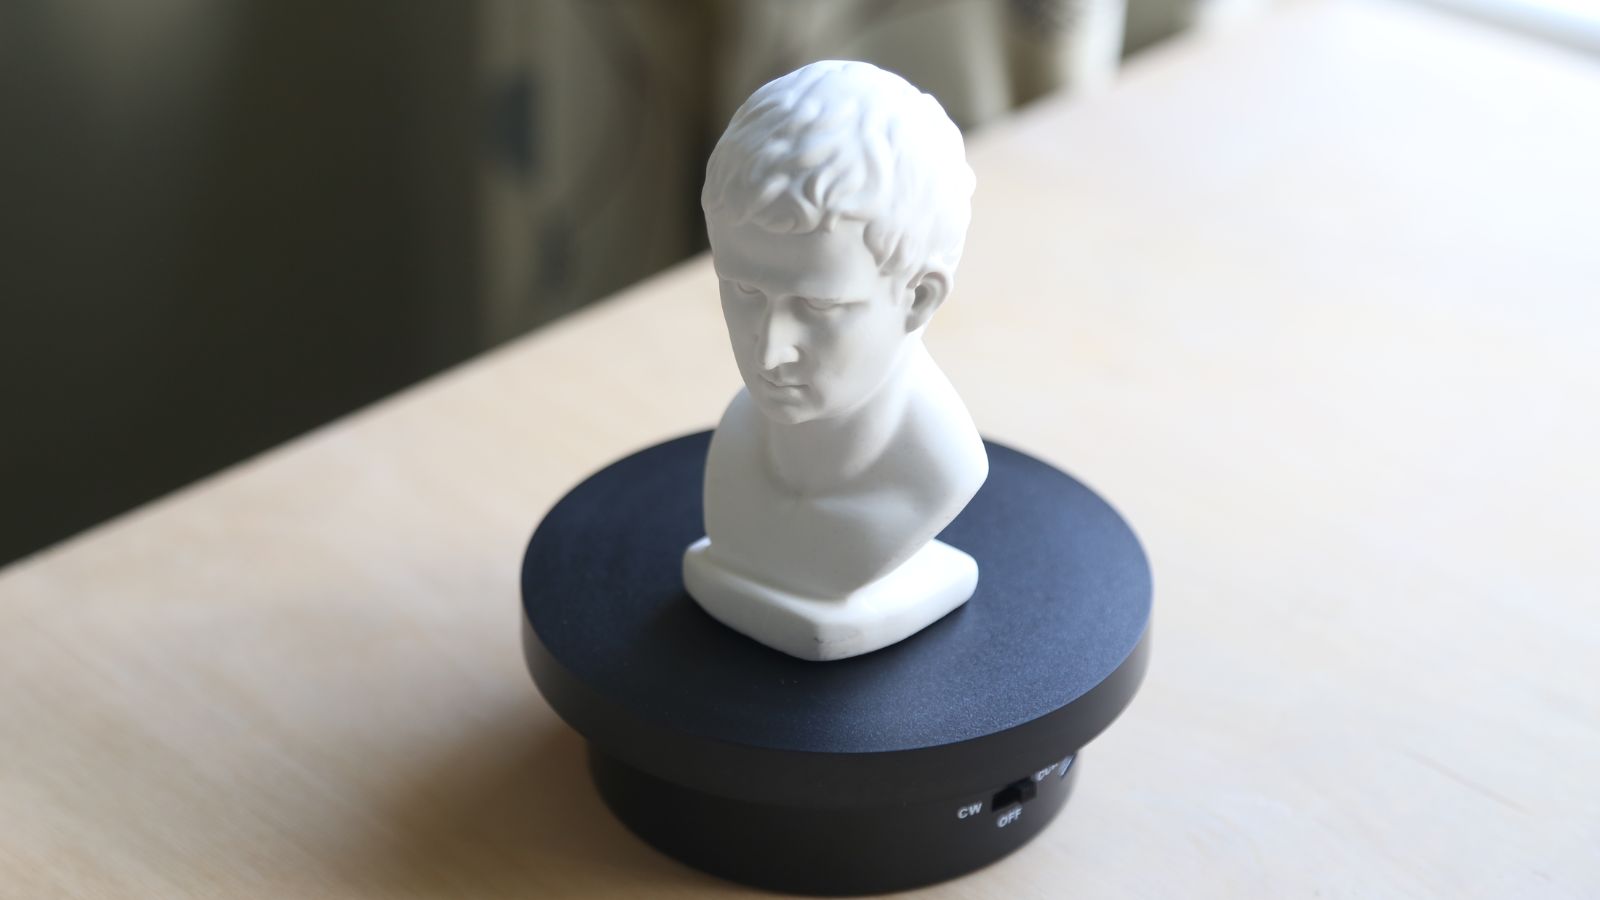
This will partly depend on your hardware and the size of the object you’re scanning. There are two main options. The first is to put the object on a turntable and use a tripod for scanning. This ensures the scanner can capture the data with little user error. The second option is to move the scanner around the object. This is essential for larger objects or where a turntable isn’t practical.
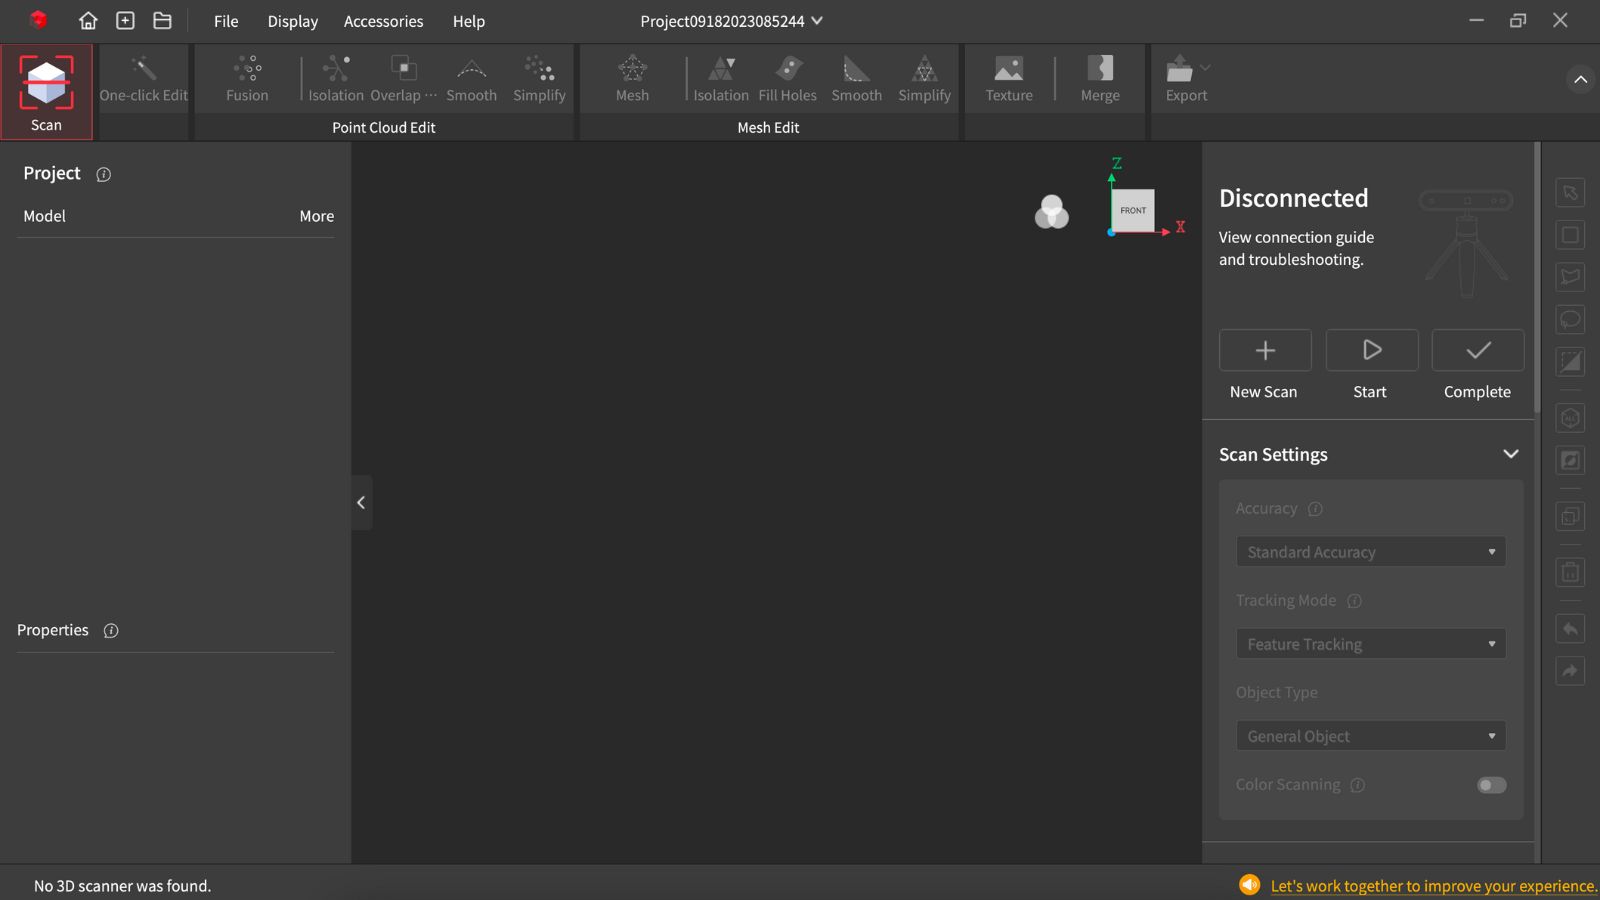
Using a handheld 3D scanner: installing software
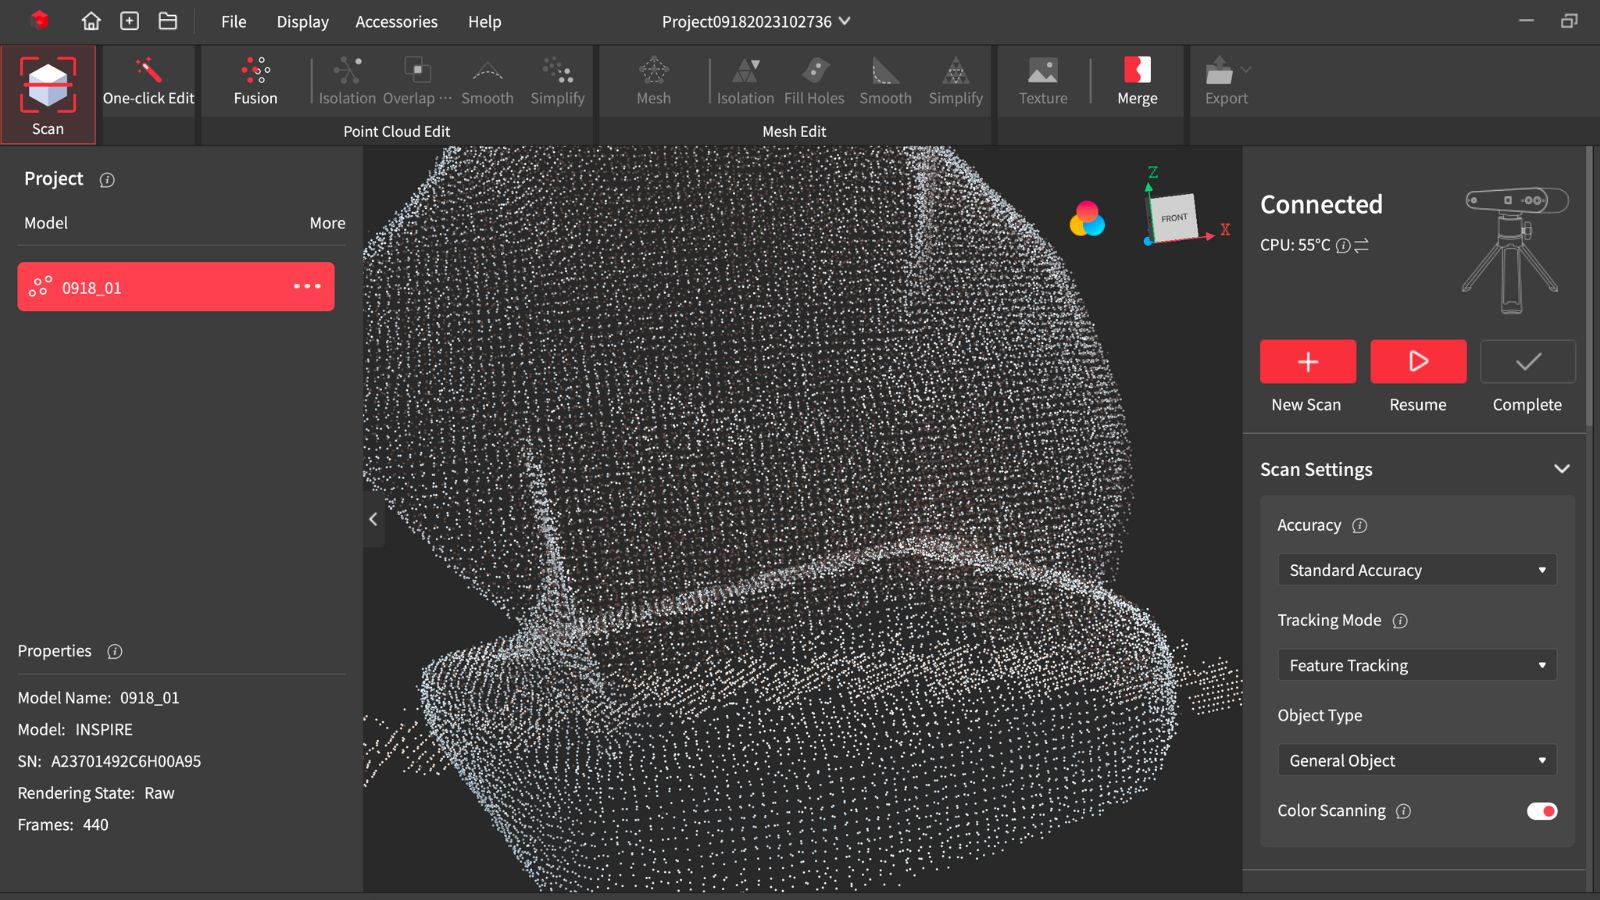
3D scanners come with their own software. To be more accurate, each company provides a piece of software that’s compatible with all of its scanners. The software is usually available on the company website and is generally free to download.
Some only work on one type of operating system, whereas others work on both PC and Mac. Some even have mobile apps that can be downloaded either from the Android app store or the Apple app store. The options available to you will depend on the scanner you’ve purchased.
Using a handheld 3D scanner: calibrating
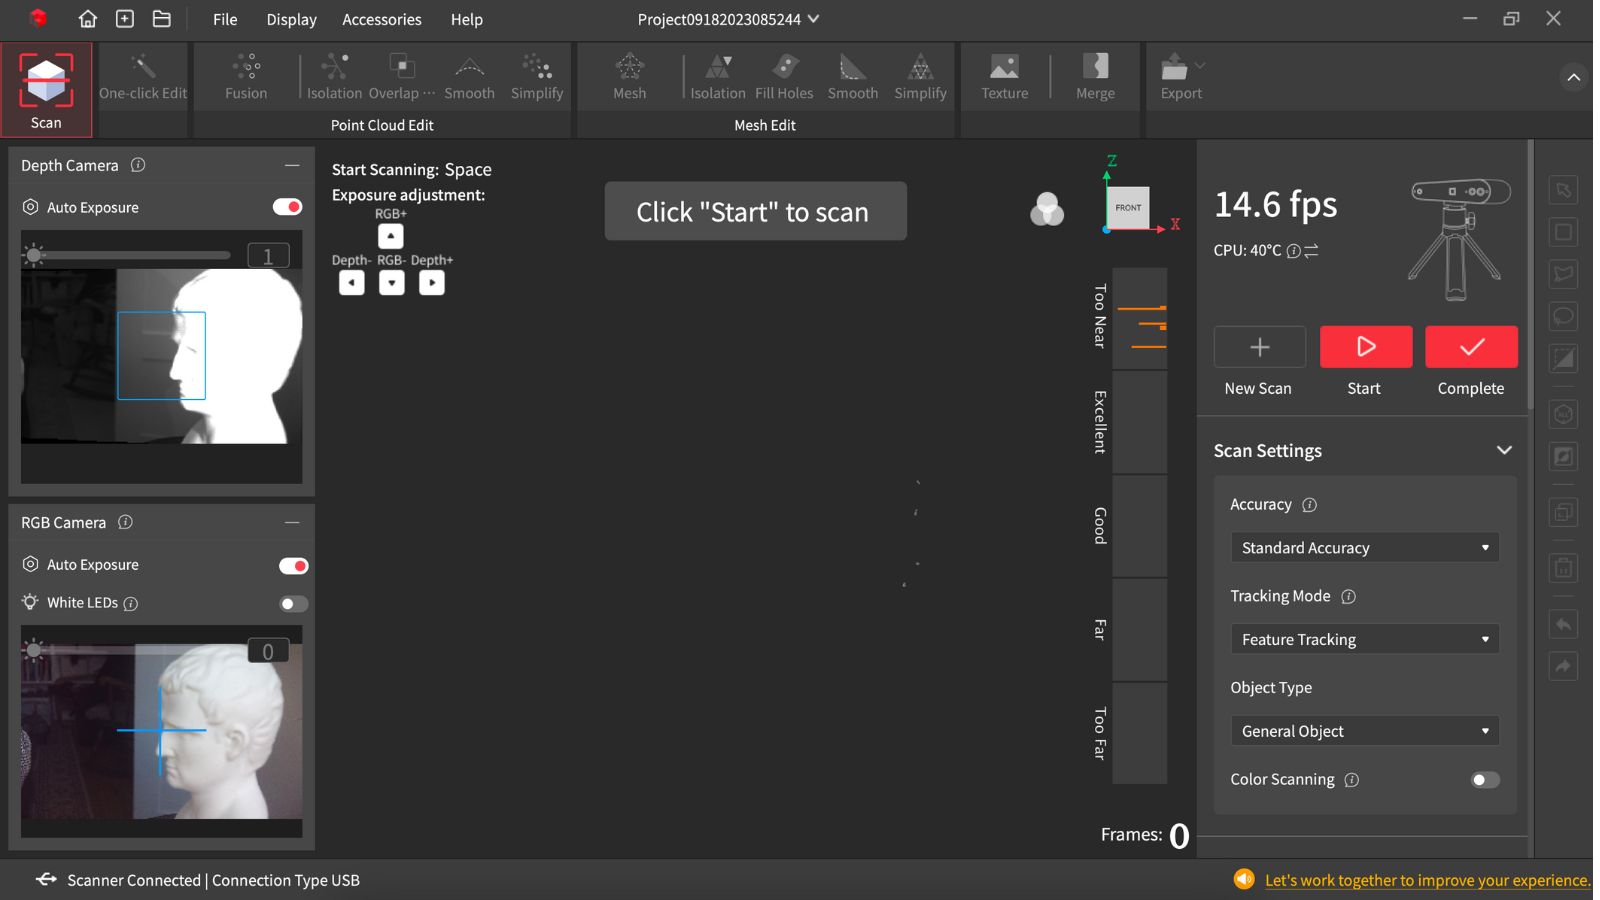
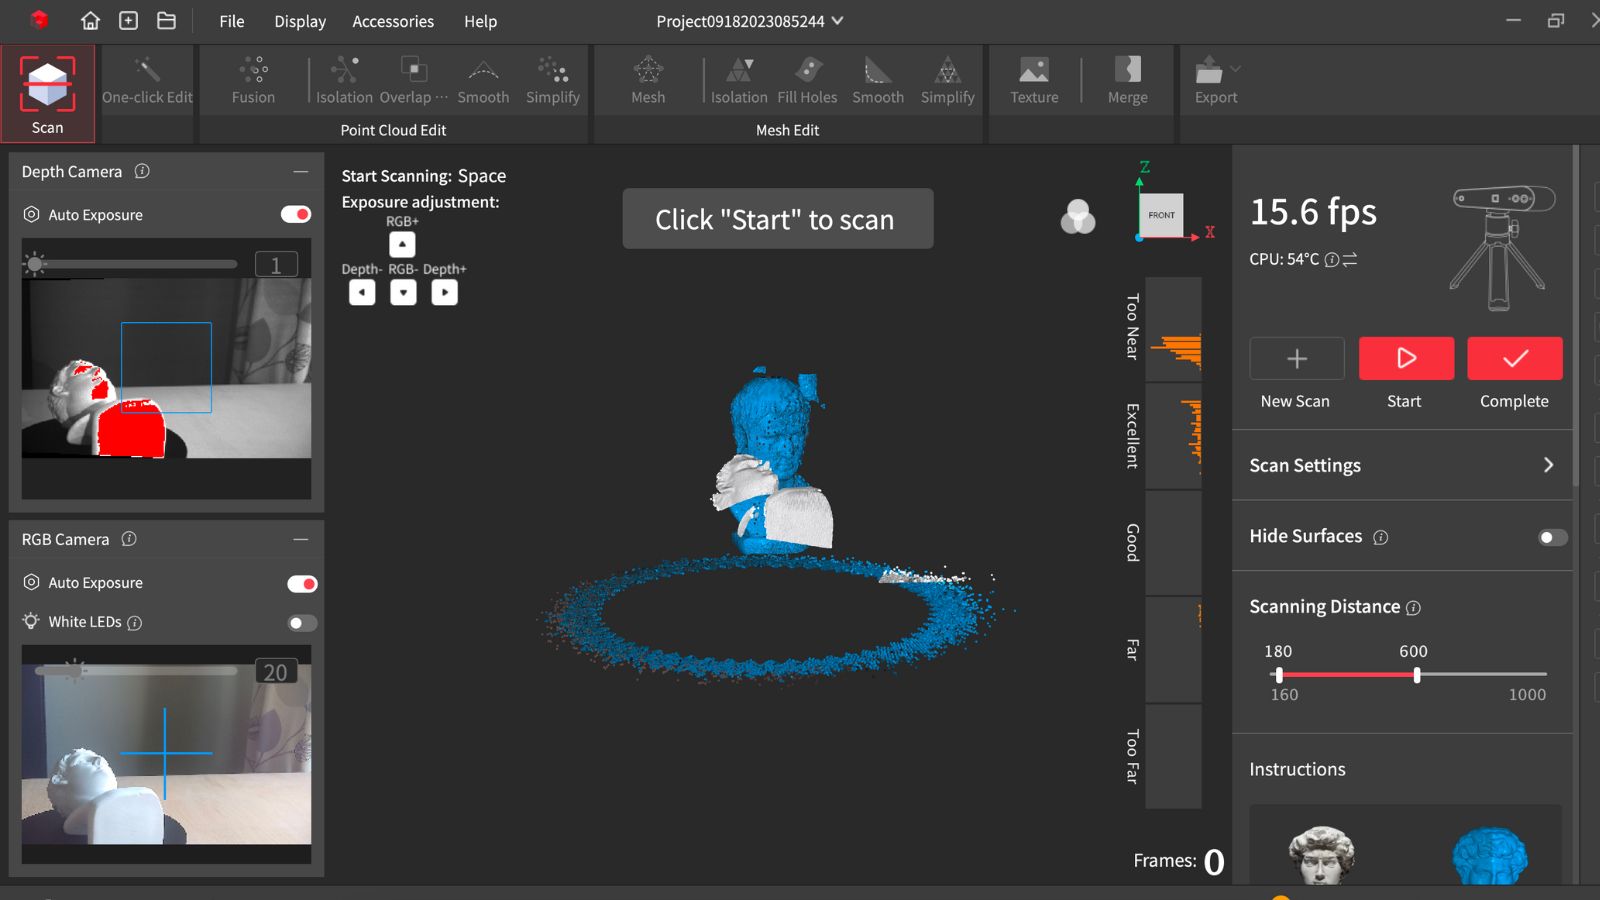
With your scanner ready and the software installed, it’s now time to calibrate the scanner. As we’re dealing with such minute measurements, it’s absolutely essential the scanner knows exactly where it is in 3D space.
The software will usually take you through the steps required for calibration, but it’ll typically involve moving the scanner in a set motion or fixing its camera on a calibration board. The software will let you know when the process is complete, at which point you’re ready to begin your scan.
Using a handheld 3D scanner: preferences
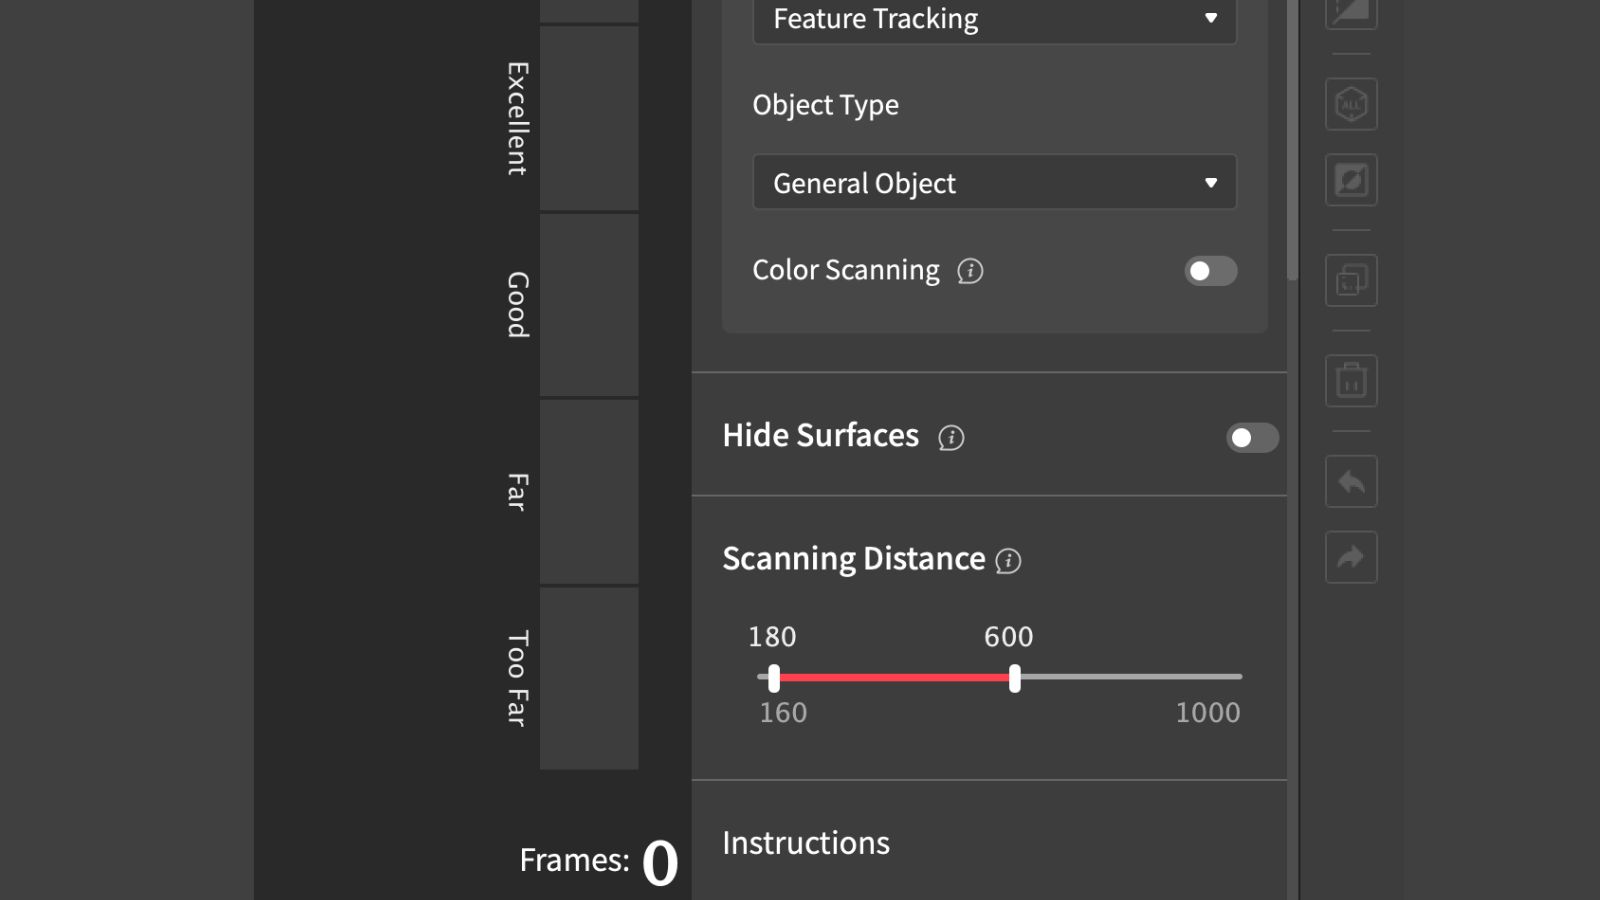
Before scanning, there are usually parameters to adjust for best results. Specifying the size of your object helps the scanner know what it’s looking for so it can adjust accordingly. Do note that each scanner is suited to a specific-sized object. The categories usually fall into small, medium and large. Make sure your scanner is built for the object and pick the preference in the software.
Using a handheld 3D scanner: marker preferences
The alignment mode specifies whether you’ll use markers or features to track the object. With markers you’ll need to make sure that you’ve applied a sufficient number of them to be picked up. Some scanners will also have a hybrid option that relies on markers and features. Finally, specifying whether you want textures captured or not will determine the output you get.
Using a handheld 3D scanner: start the scan
We’re finally ready to scan! Do this through the software or using the scanning device if it includes a dedicated button. If you’ve chosen to use a tripod and a turntable, then you can just leave it to complete one full rotation of the object.
If you’re manually moving the scanner around the object, you’ll want to do so slowly and methodically. Keep an eye on the resulting output in the software to see whether you’re picking up the object accurately or not. If you miss any parts you can just go back and scan those again.
Using a handheld 3D scanner: cleaning the scan
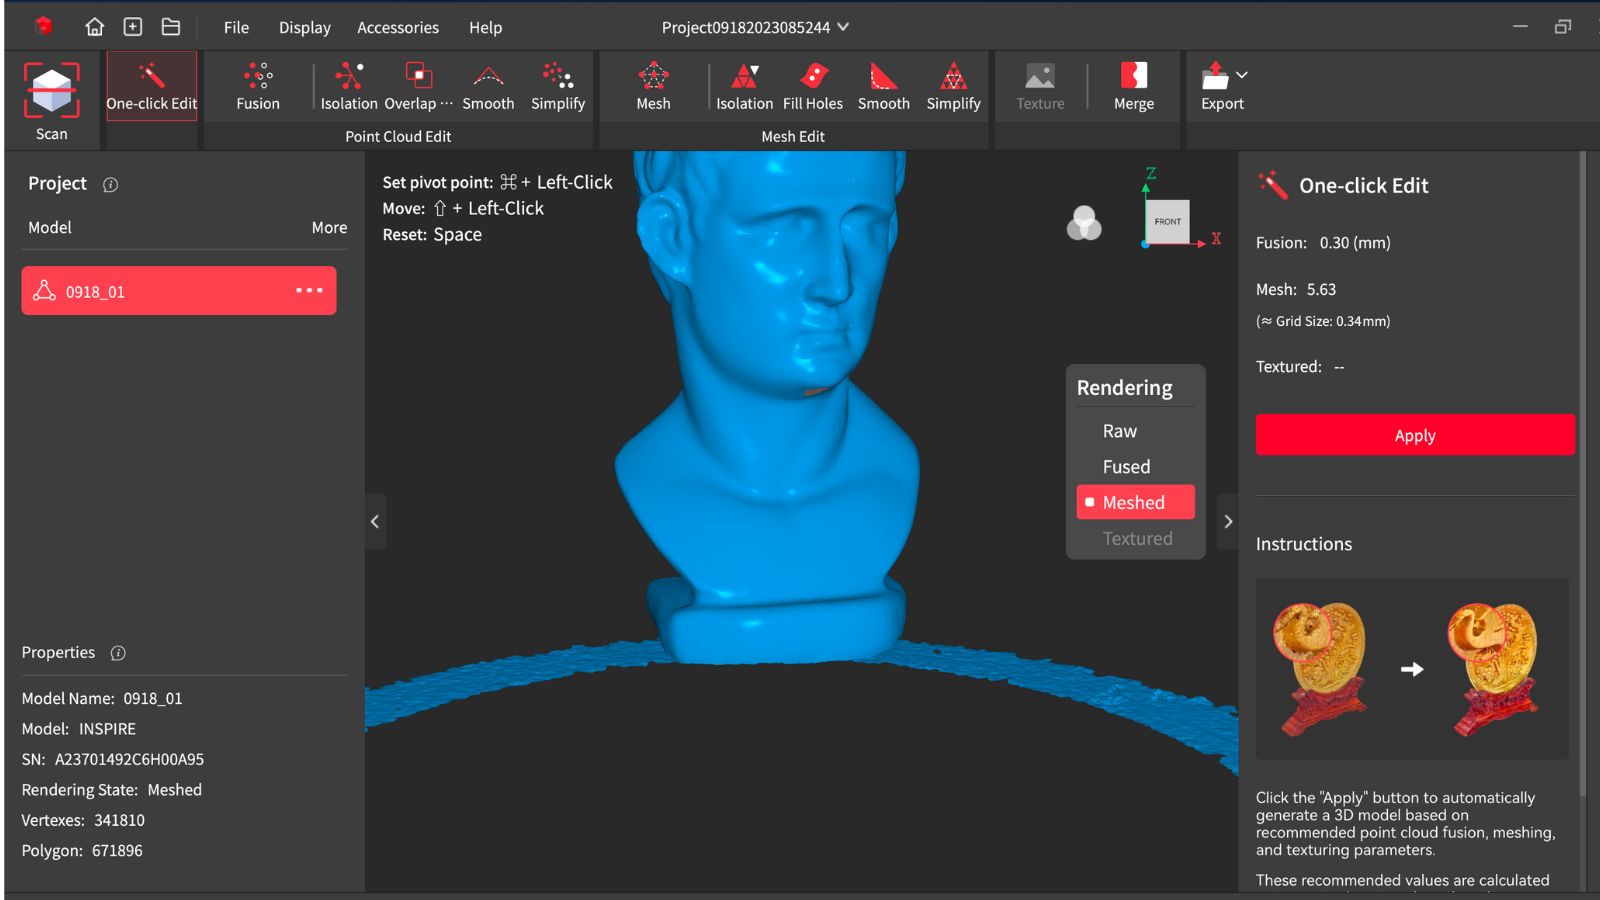
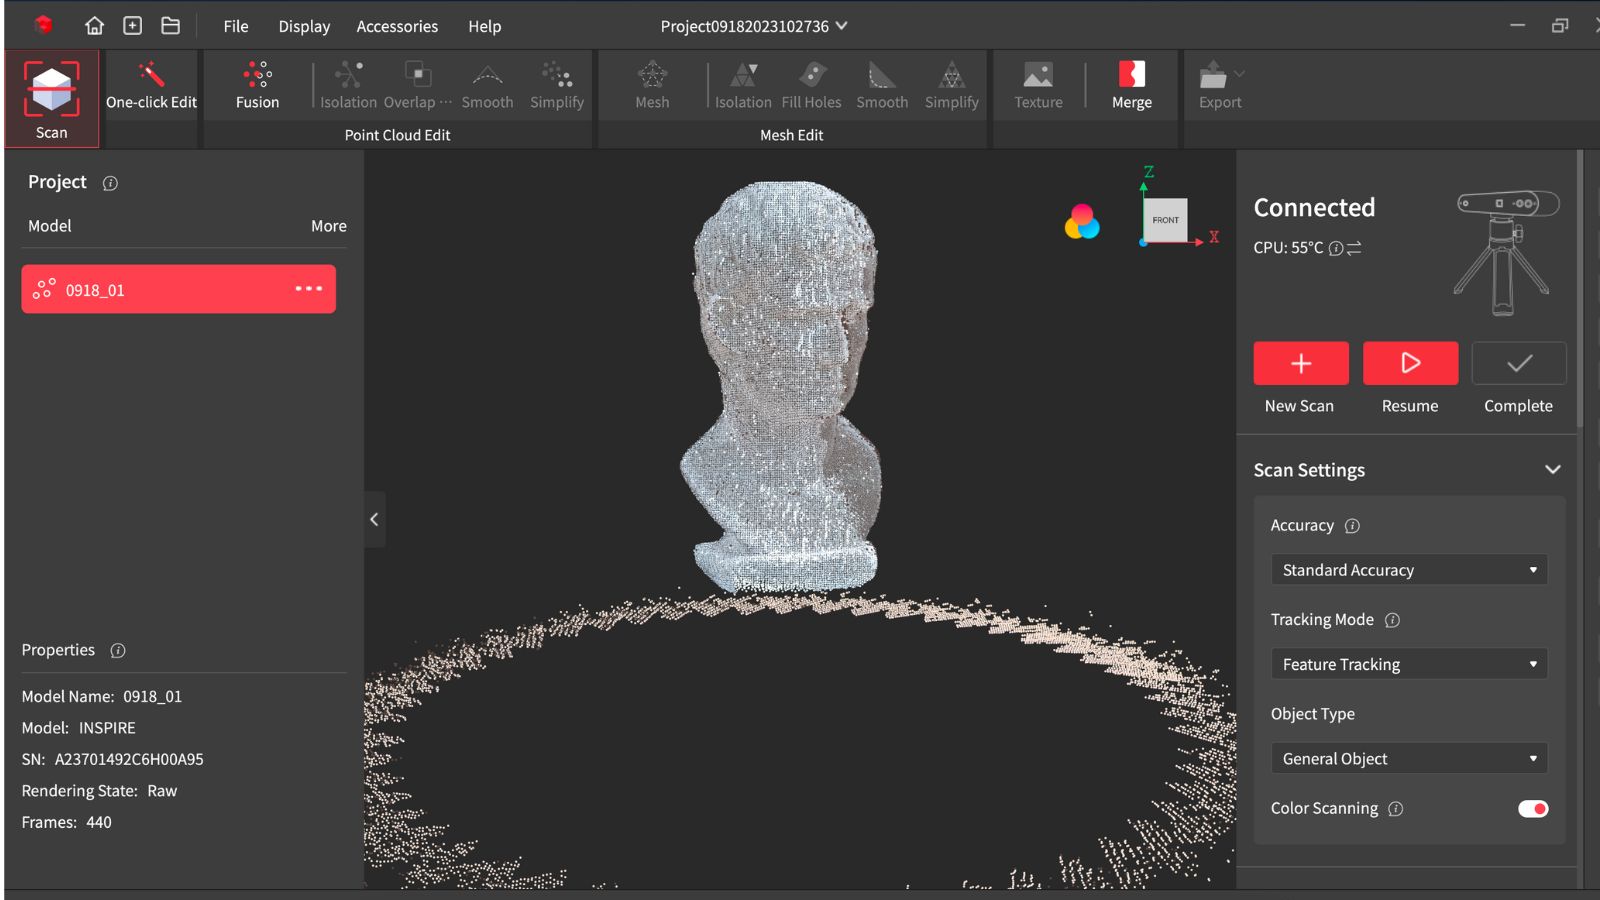
Before capturing a second scan, it makes sense to clean up the scan output. Your software will include a set of selection tools that enable you to select different parts of the scan. You can delete unnecessary data such as the turntable or objects in close proximity to the focus object. Removing this data will help minimise file size and avoid confusion as to what is part of the scan or not.
Using a handheld 3D scanner: new scans
We’re now ready to do follow-up scans. It’s rare to be able to capture all the data of an object the first time round, so this is where subsequent scans will fill in the missing parts and increase the detail of the output. This will obviously require you to move the object you’re scanning. Don’t worry about this confusing your scanner, as you’ll be able to align and merge your scans together afterwards. Do as many scans as you want, making sure you clean them up after each so you can easily track what data you’re capturing.
Using a handheld 3D scanner: align and merge
Assuming you now have two or more cleaned-up scans, we can now merge them together. The most common method is by finding common elements across your scans. That might be a common feature, a common marker, or just a point that appears on the scans. By merging additional scans one at a time you can ensure all your scanned data is aligned ready for one export.
Using a handheld 3D scanner: final cleanup
At this stage it pays dividends to do a final cleanup. Zooming on different parts of the scans and removing any unnecessary data will ensure your final result is made up of only the scanned object itself. A final check to make sure your scans are lined up is also prudent. Ensuring your scan and resulting mesh is perfect for final export takes a few minutes, but can save time in the long run.
Using a handheld 3D scanner: texture capturing
Texture information is usually captured using an RGB camera. Whether this data is captured is often dependent on if it’s turned on or off within the scanning software. Texture is not always required for a scan, but if it is then make sure this is turned on. The captured pixels are translated onto your model, which creates a corresponding texture map for later use in your chosen DCC or 3D printing software. Capturing this information obviously won’t be possible if you’ve had to spray your object to make it suitable for scanning.
Using a handheld 3D scanner: exporting
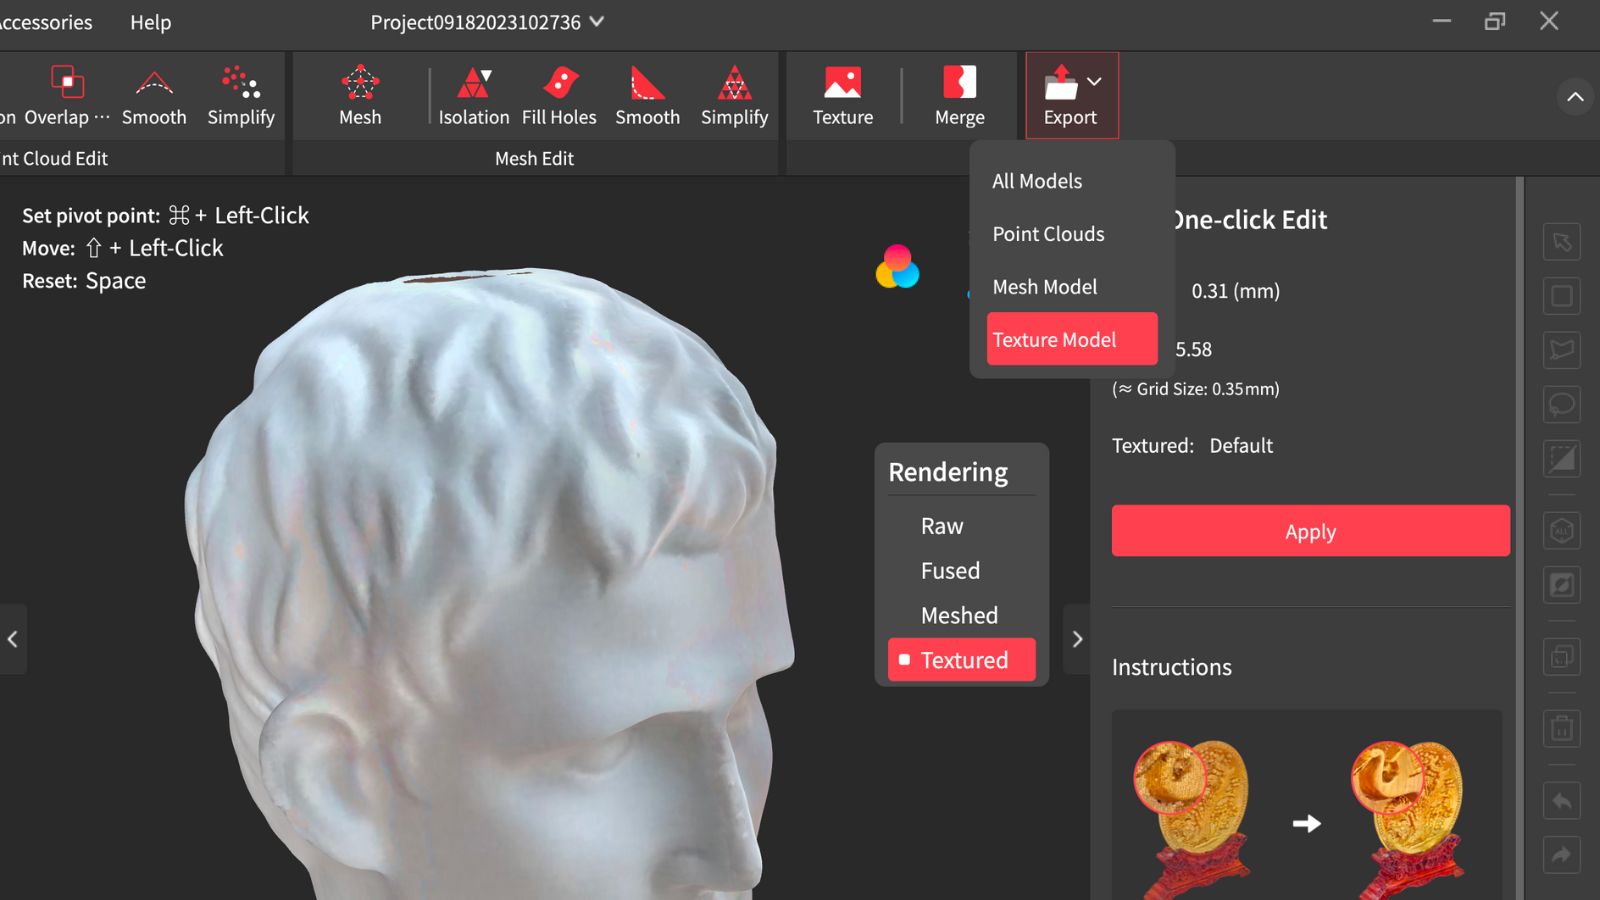
Everything is now ready to be exported from the scanning software into the next DCC. Scanners usually export to the most common formats including STL, PLY and OBJ. The format you choose will determine which file types are exported, but in general you’ll get a model file and a separate texture colour image. STL doesn’t support colour data, so if that’s important choose PLY or OBJ.
Using a handheld 3D scanner: quick tips
Here are a few more quick tips to help you achieve the best results possible when you're 3D scanning.
01. Use a turntable for consistency
It’s possible to capture accurate data by moving your scanner around an object, but if possible a turntable and tripod will help to guarantee great results every time. Turntables usually have the option to adjust their rotation speed, so if you’re getting poor results, try slowing your turntable down.
02. Mind the lighting conditions
Harsh shadows and colourful lighting make it difficult for your 3D scanner to capture accurate data. If you can control your environment then opt for consistent lighting, and make sure all sides of the object are lit. If you’re outside then scanning on a cloudy but bright day would be optimal.
Get more tutorials at 3D World
This content originally appeared in 3D World magazine, the world's leading CG art magazine. 3D World is on sale in the UK, Europe, United States, Canada, Australia and more. Limited numbers of 3D World print editions are available for delivery from our online store (the shipping costs are included in all prices). Subscribe to 3D World at Magazines Direct.