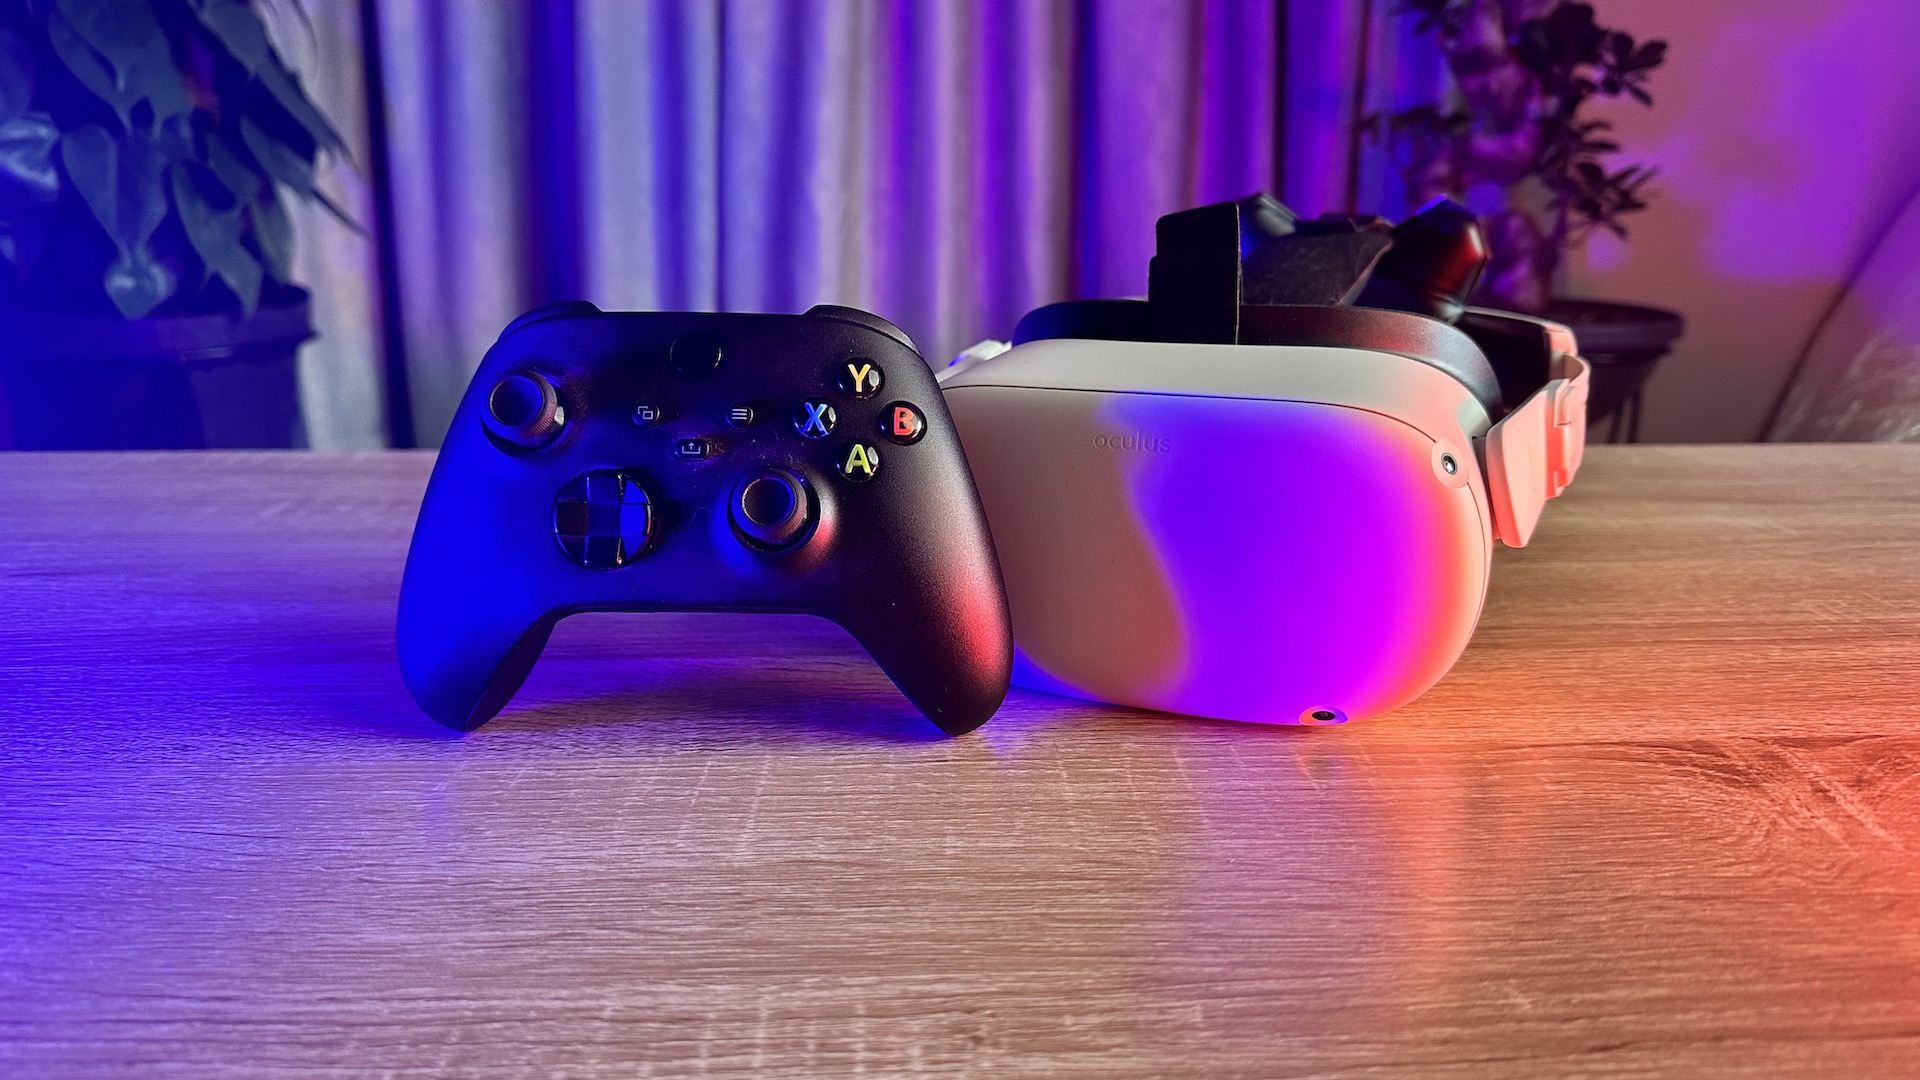
The Meta Quest and Meta Quest 2 both come with a pair of brilliant Touch controllers that let you feel and interact with the VR world. However, they aren’t always the best and most convenient solution.Fortunately, it’s easy to use a standard game controller in either wired or wired mode with either headset (though Quest 2 is far more common).
Why Use a Controller With Quest 2?
Meta Quest headsets (both versions) let you use your bare hands through the hand-tracking feature, which is great with certain games (e.g. Waltz of the Wizard) that are designed for hand-tracking in particular and media apps or the web browser, where you don’t necessarily want to grab a controller ever few seconds to scroll down a page or pause something.
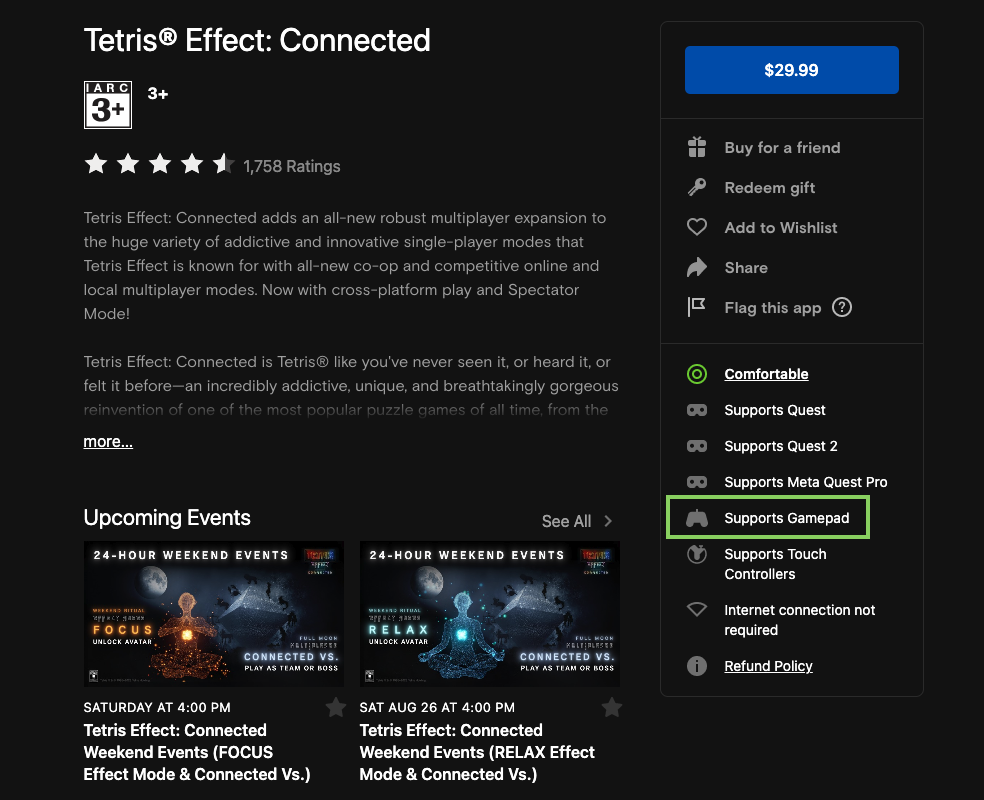
In addition to Touch controllers and hand tracking, the Meta Quest 2 has native support for traditional controllers or “gamepads”, if you’re old enough to remember the Gravis Gamepad. Why would you want to do this? Well, there are VR games (such as the Tetris Effect or certain racing titles) that simply play better with a controller, and if you can’t use (or don’t like) hand tracking then a standard controller can be a more comfortable away to operate media apps or the web browser, compared to having a touch controller strapped to your wrist. Whatever the reason you want to use a controller, you can do it thanks to Meta’s decision to add this feature to their headsets.
Which Controllers Are Compatible?
Officially, Meta lists “Bluetooth 3.0 Class 2” controllers as compatible. In practice, if you already have a controller there’s no harm in trying it with your Quest to see if it works. However, if you’re looking to buy a controller to use with your Quest, it’s essential to do a web search to see whether it works or not.
Here we’re using a standard Xbox Series X controller for the tutorial, but your mileage may vary if you have something more esoteric.
How to Connect a Gamepad to Your Meta Quest 2 via USB
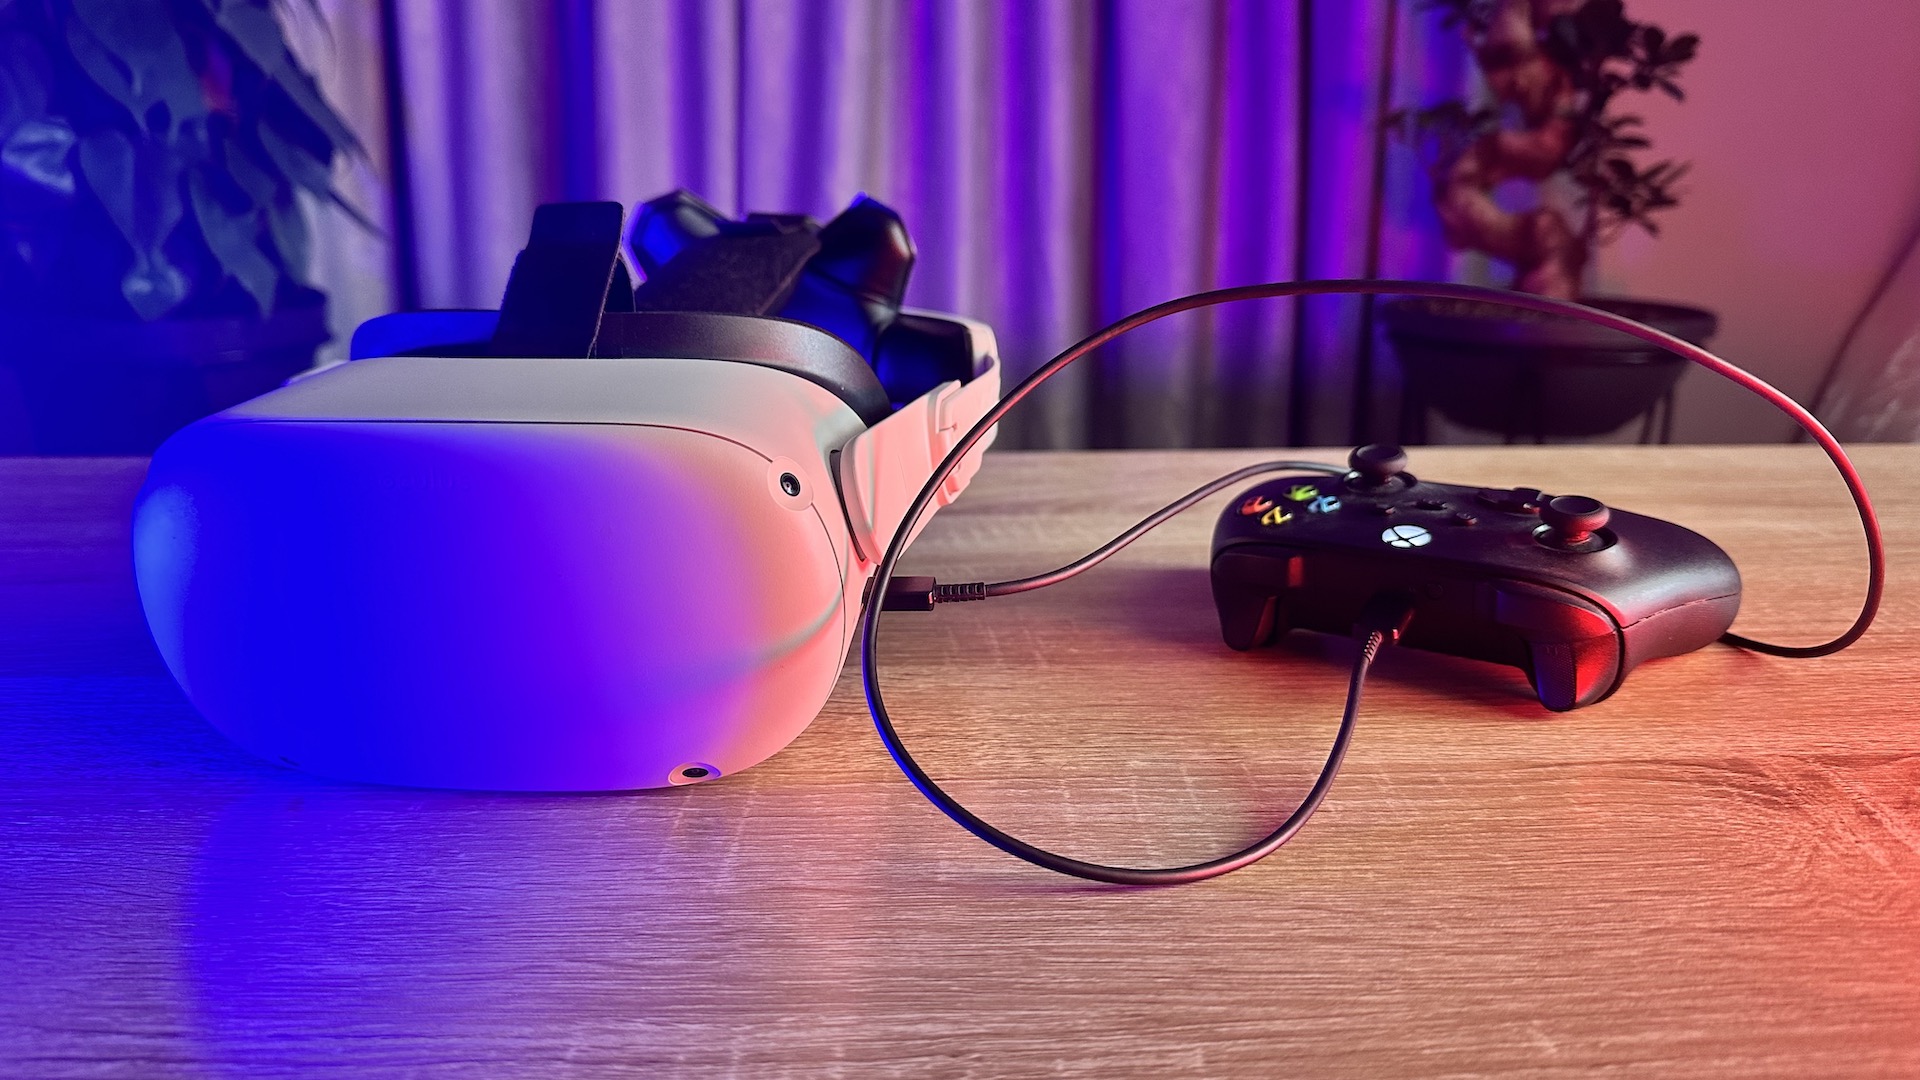
While we didn’t see it documented anywhere, our Xbox Series X controller has a USB-C port, and our Meta Quest 2 has a USB-C port so, you can see where this is going. It turns out that this totally works, and we could activate menu choices and scroll up and down text pages using the controller by simply plugging it in. We also made sure there were no batteries in the controller, so there was no doubt the magic was happening over the cable.
All you have to do is plug one end of your USB-C cable into the headset and the other into the controller.
How to Connect a Gamepad to Your Meta Quest 2 via Bluetooth
Connecting your controller via Bluetooth couldn’t be any easier. Before we show you the steps, please note that it’s not possible to provide screenshots of all the menus involved in the procedure, because casting, screenshots, and screen recordings don’t work when Bluetooth pairing is activated. With that said, here are the steps to follow:
1. Put on your Quest Headset. Get into the Quest VR Home environment the same way you usually do.
2. Select Quick Setting. Just select the clock at the left side of the menu bar.
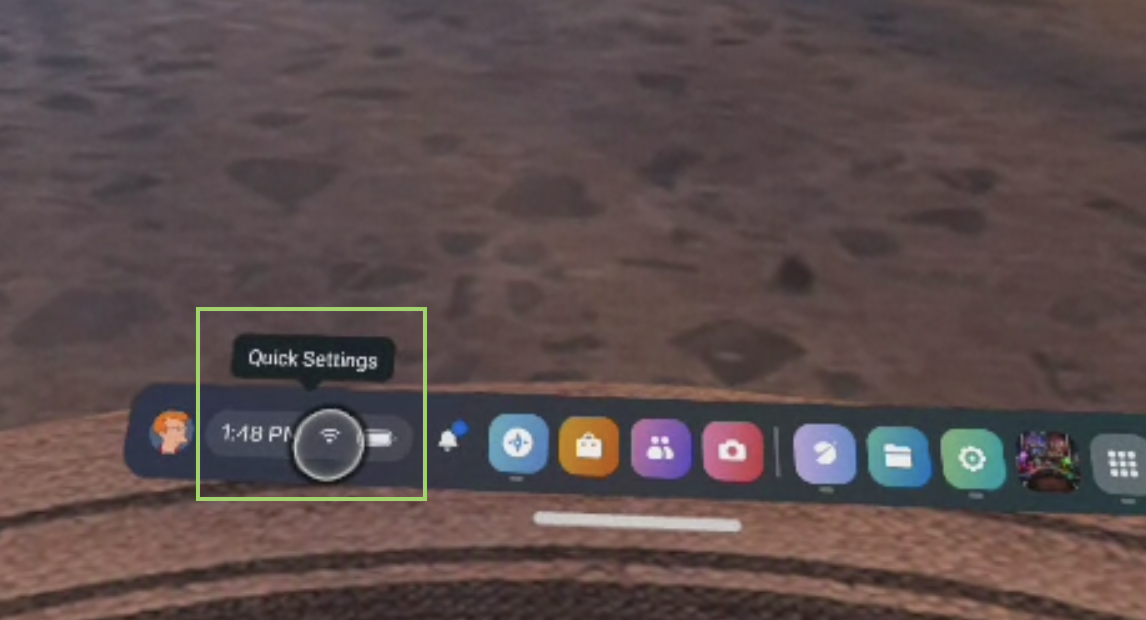
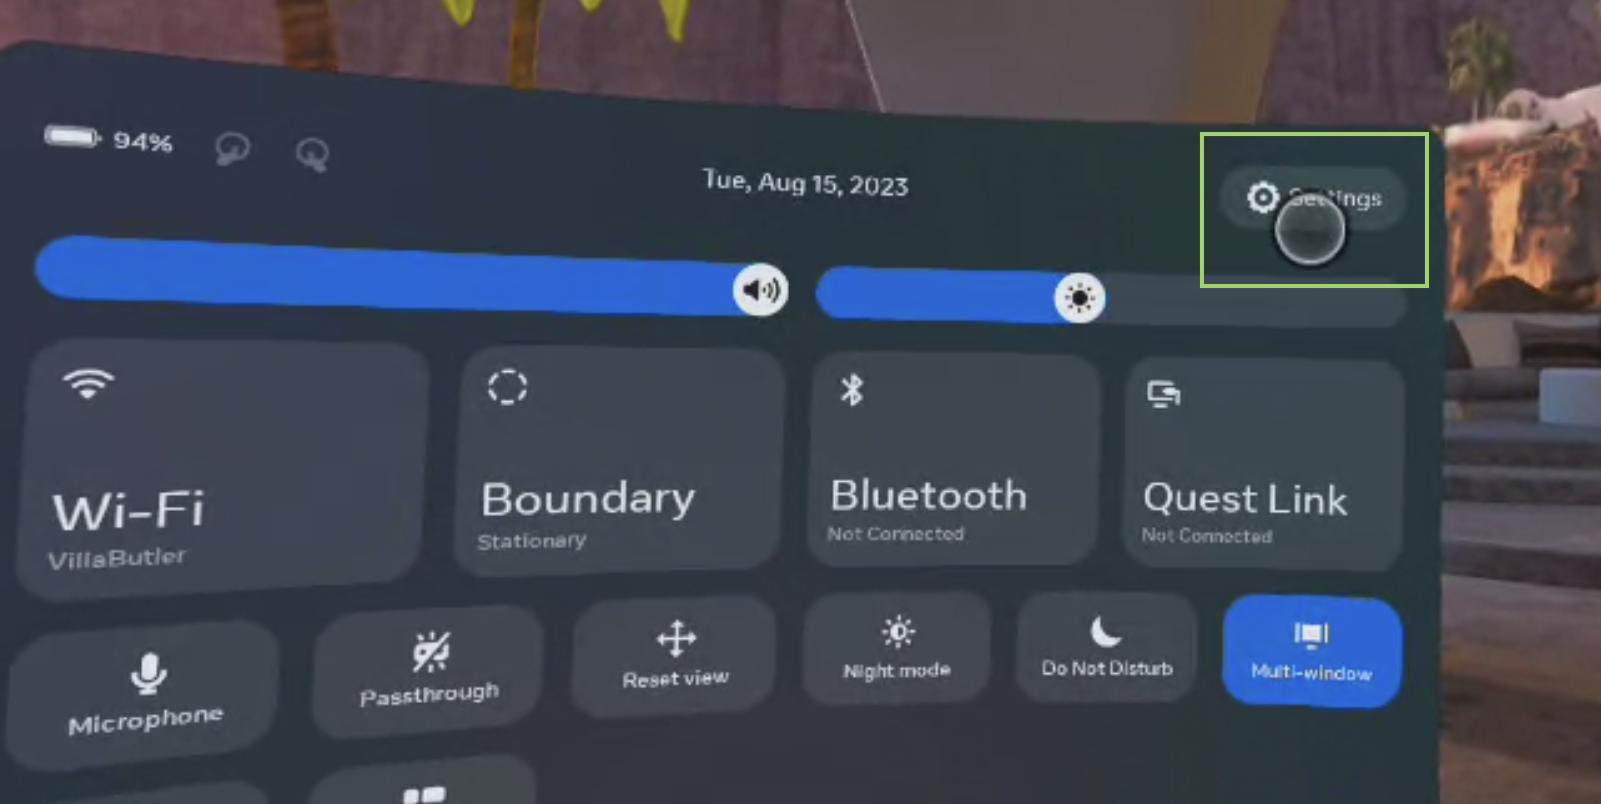
3. Select Settings. You’ll find it at the top right of Quick Settings.
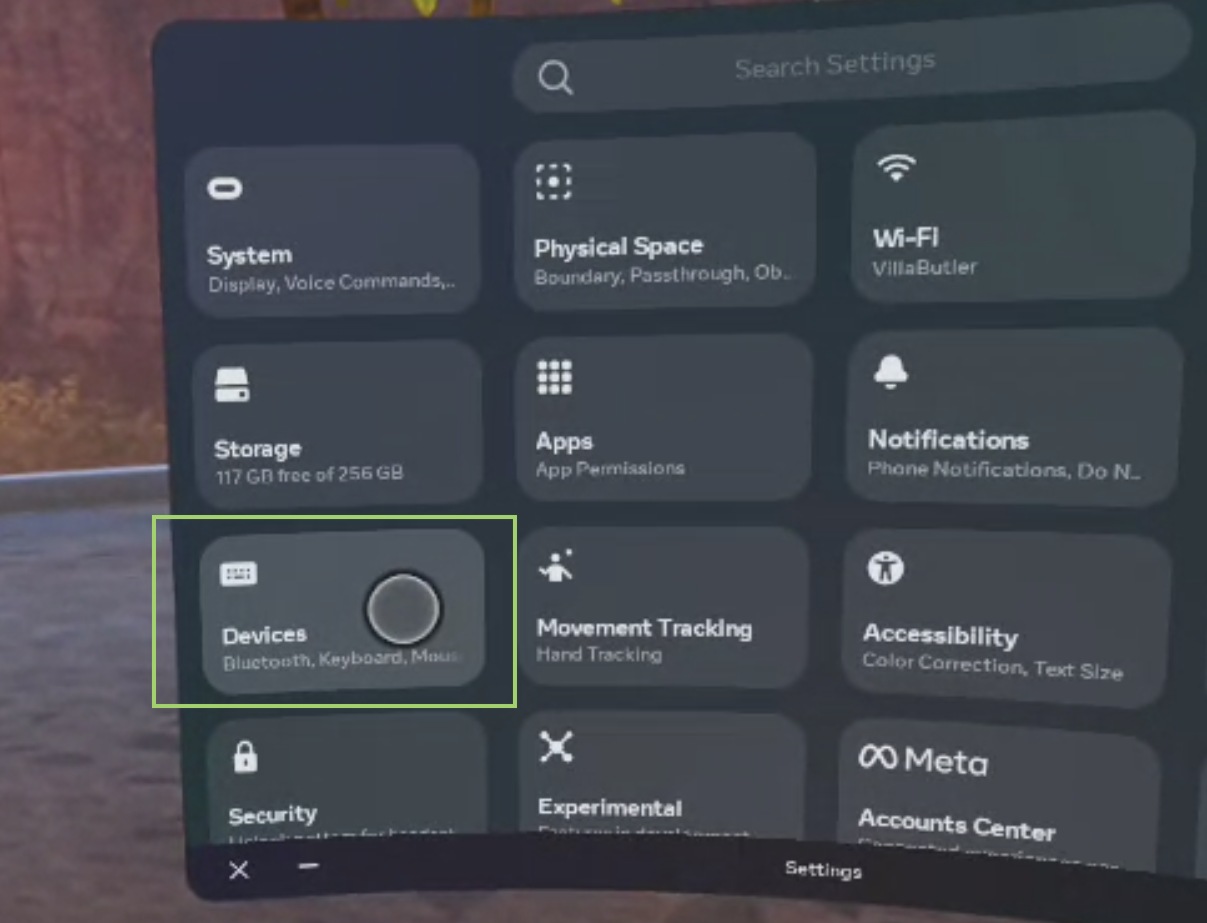
4. Select Devices.
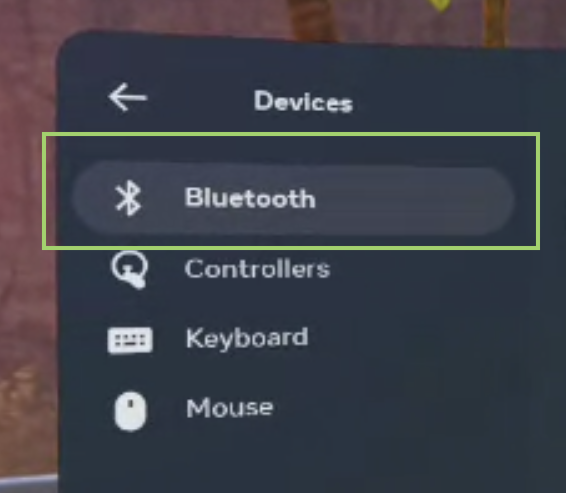
5. Select Bluetooth. This is usually already selected be default in the left sidebar.
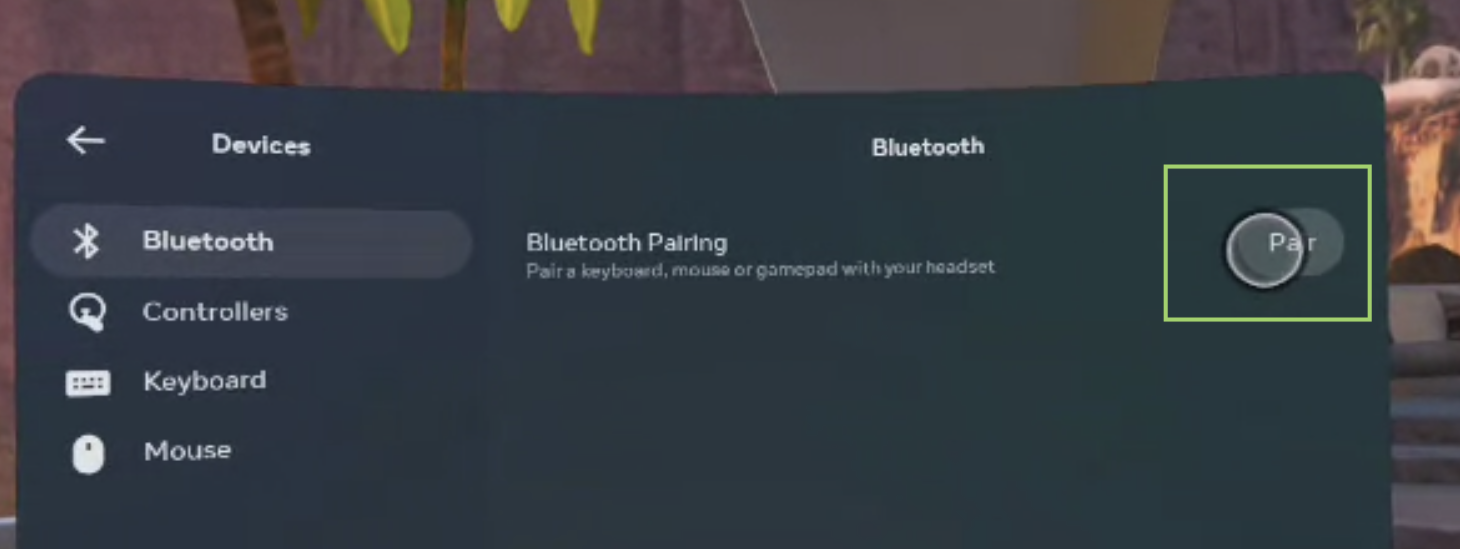
6. Select the Pair button. From here on, we’re unable to provide screenshots.
7. Put your controller in pairing mode. This differs from controller to controller, so check its documentation or look it up online.
8. Select Pair a new device.
9. Choose your controller from the list of available devices.
10. Confirm that you want to pair with the controller.
Now you can use the controller with apps and games that are compatible with it. If you want to know whether a given game or app supports a controller, head over to its store page and if it says “Supports Gamepad,” then you’re good to go.
