If you've just purchased, or are about to buy a new Samsung Galaxy device, you'll want to learn how to transfer data from Samsung to Samsung.
While getting a new phone is something we all do periodically, you still obviously won't want to go through the hassle of starting from scratch, loading apps, settings, and files onto your new tablet. Surely there is an easier way?
Samsung's Smart Switch app is the answer we're looking for, making it easy to transfer data from previous device to your shiny new Galaxy Tab S9. In this simple guide, we'll walk you through how to use Smart Switch to bring over your contacts, photos, videos, music, documents, and more in just a few steps.
So, without further ado, here's how to transfer data from Samsung to Samsung.
How to transfer data from Samsung to Samsung: Starting Samsung Switch
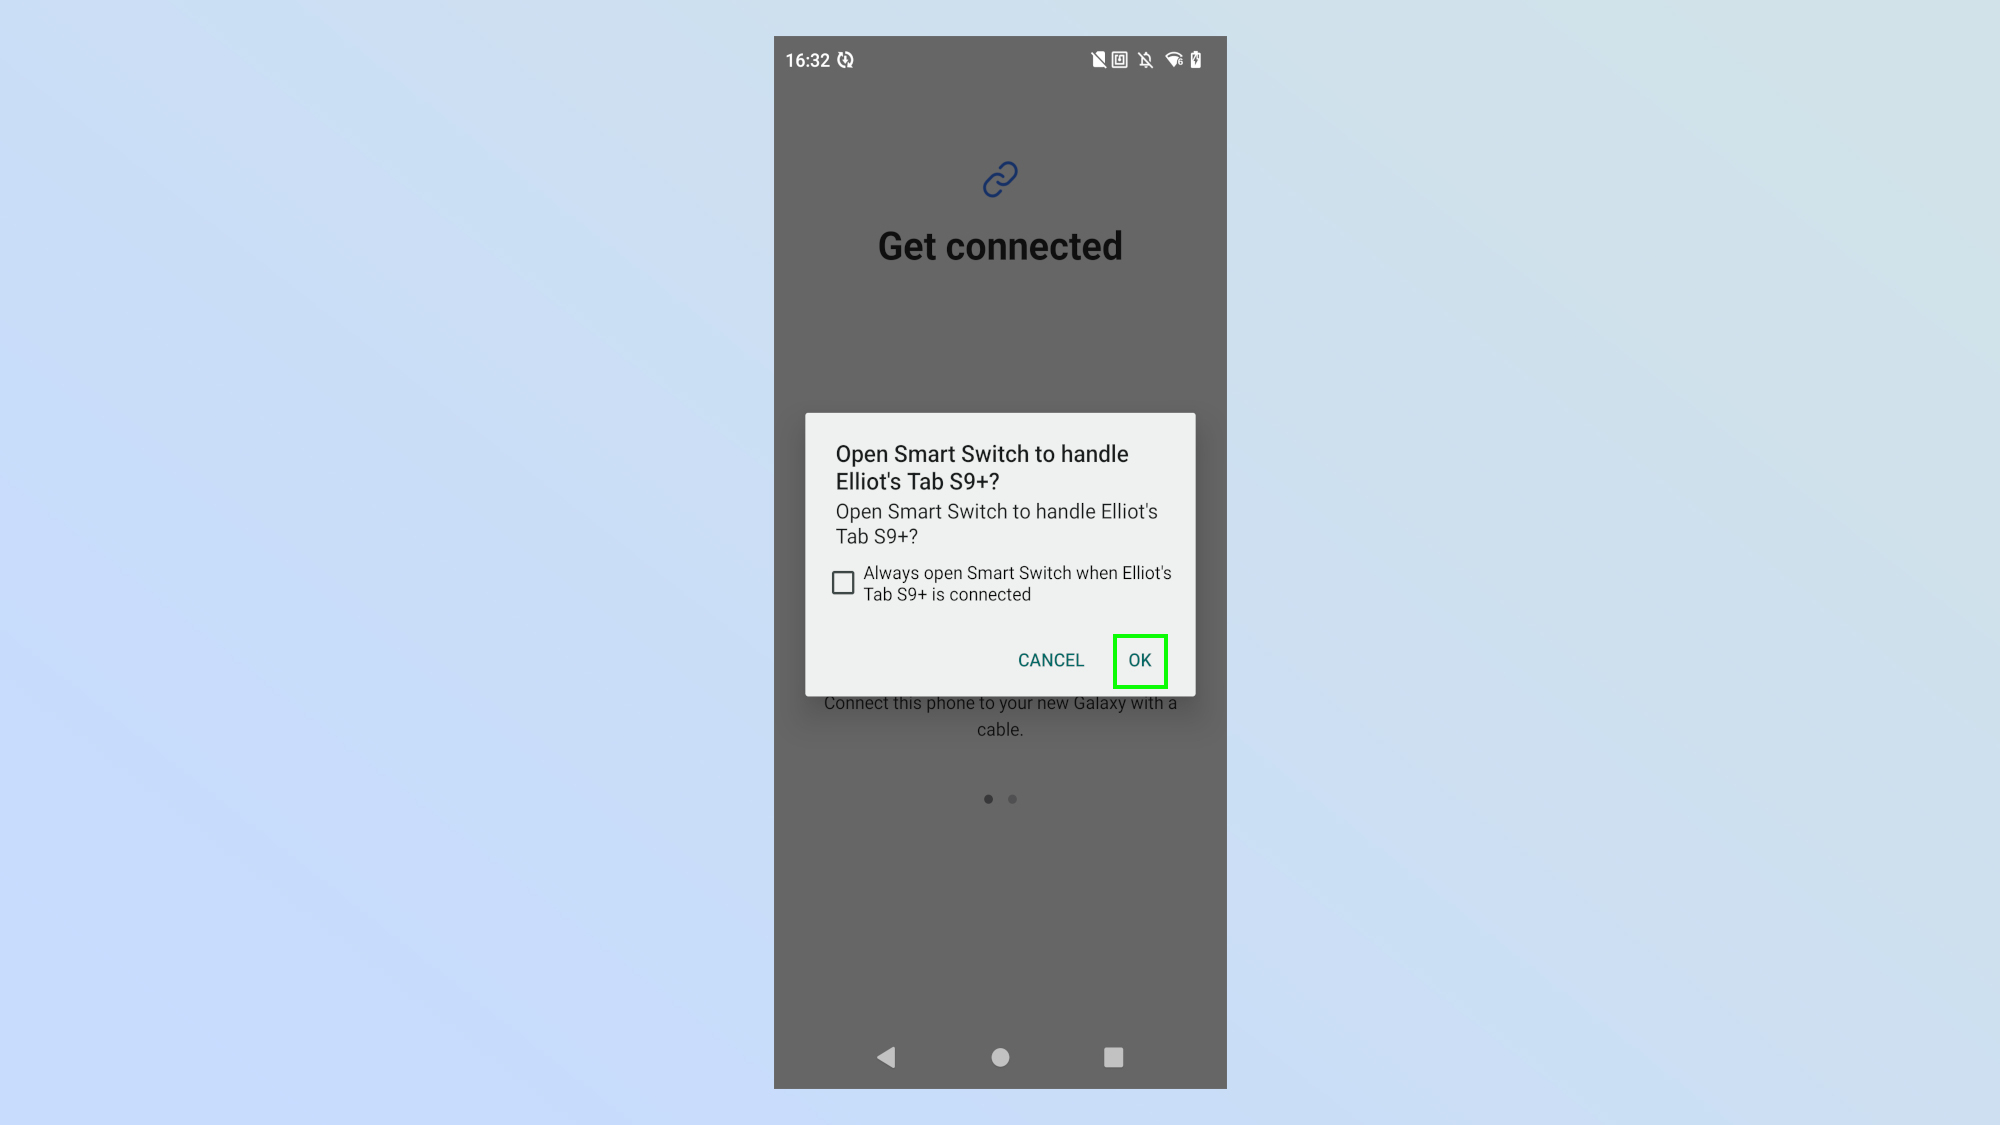
Anyone who has booted up a Samsung device recently will know that one of the biggest screens you'll be faced with is the Smart Switch, where you have the opportunity to pull data from your old device through to your new device.
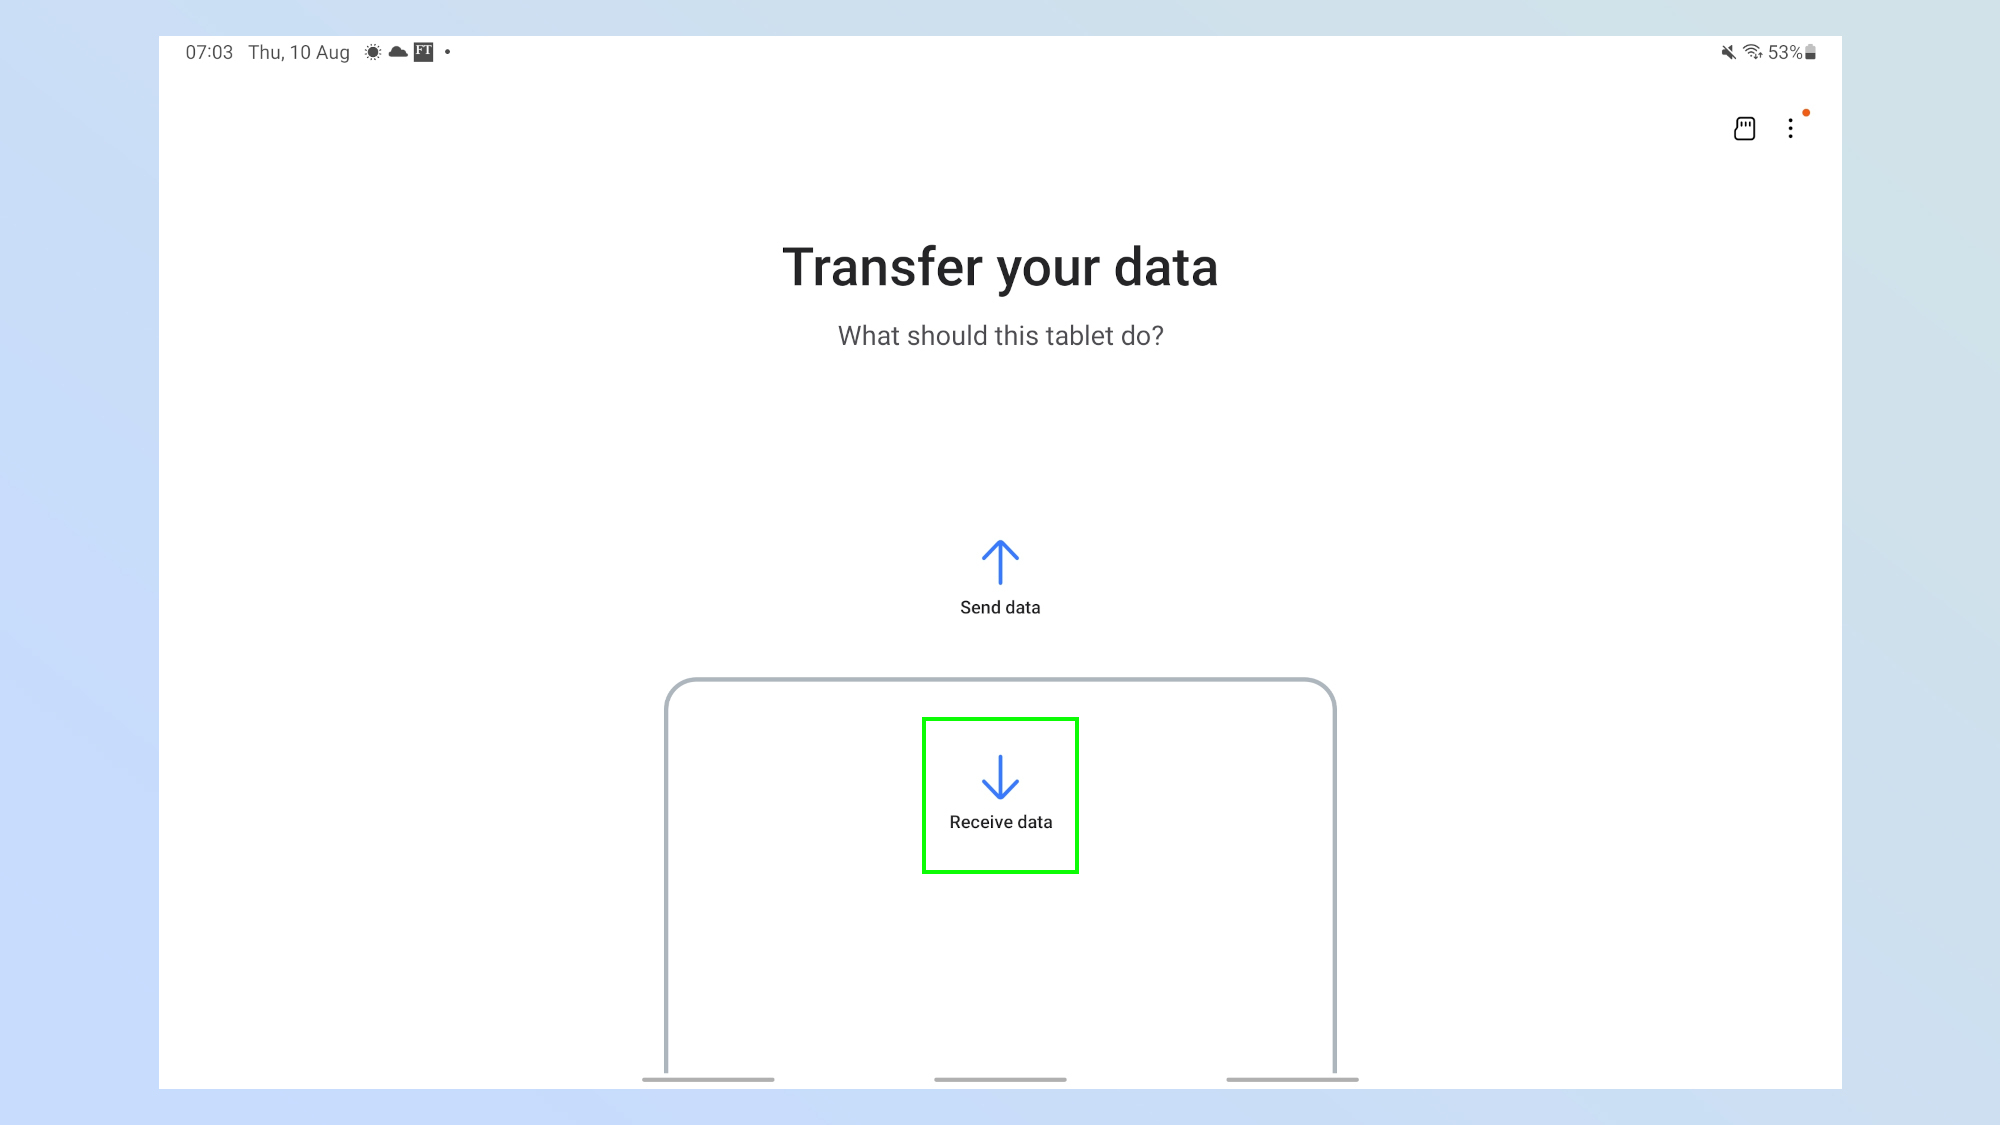
If you've passed this point, don't worry, you can still fire up the Smart Switch app and start up a transfer. If you do transfer data after setting up the device, you'll be presented with two options: send data or receive data. Tap receive data to import your old settings onto the device.
The rest of the set up is pretty straight forward, there is a kink in the road when we come to wireless or cable transfer but I'll help you though that. So, with out anymore hesitation, here we go!
How to import data wirelessly using Smart Switch
Here's how you import data wirelessly with the Smart Switch app.
1. Select 'Galaxy/Android'
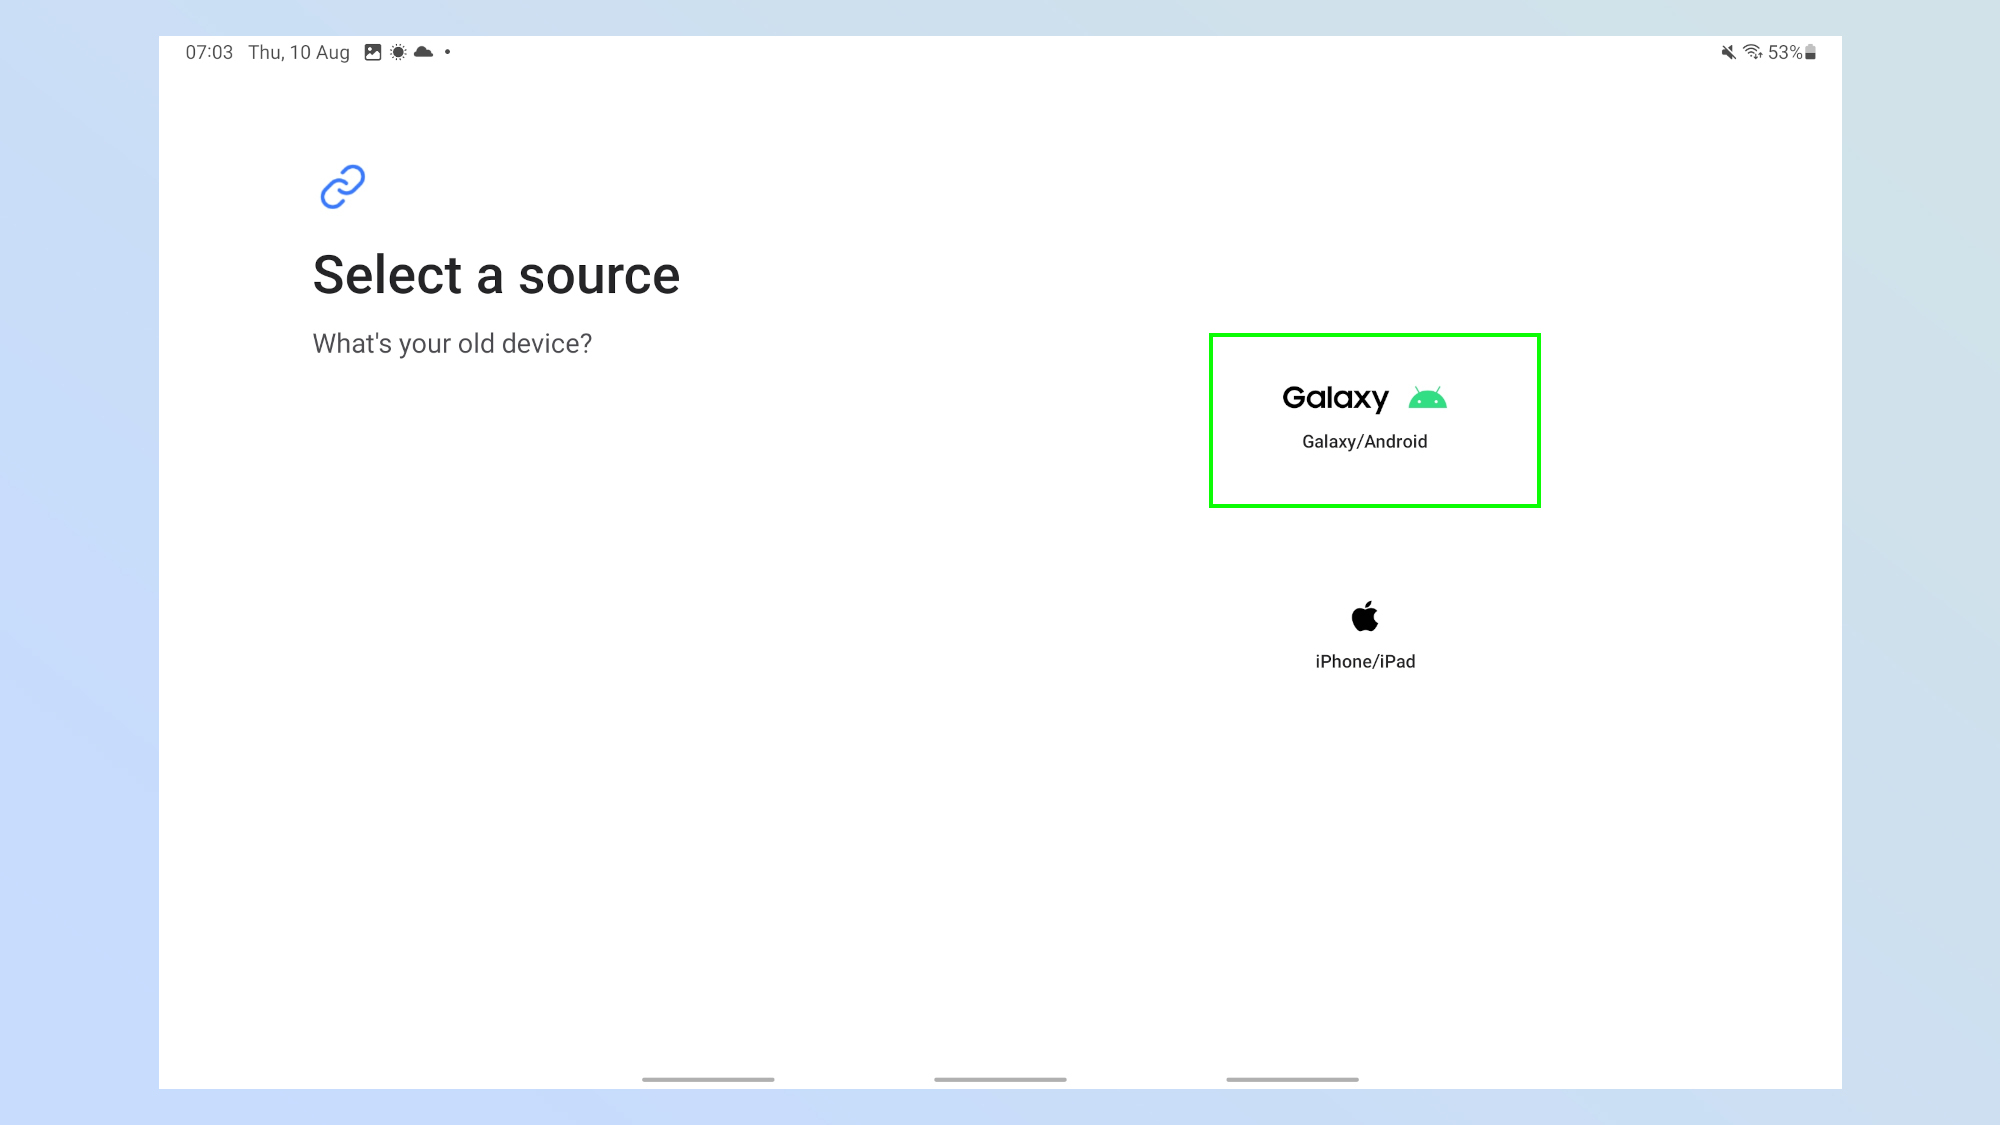
At the start of your journey you will be offered the choice between transferring data from a Galaxy device or an iPhone or iPad. Tap Galaxy.
2. Select Wireless
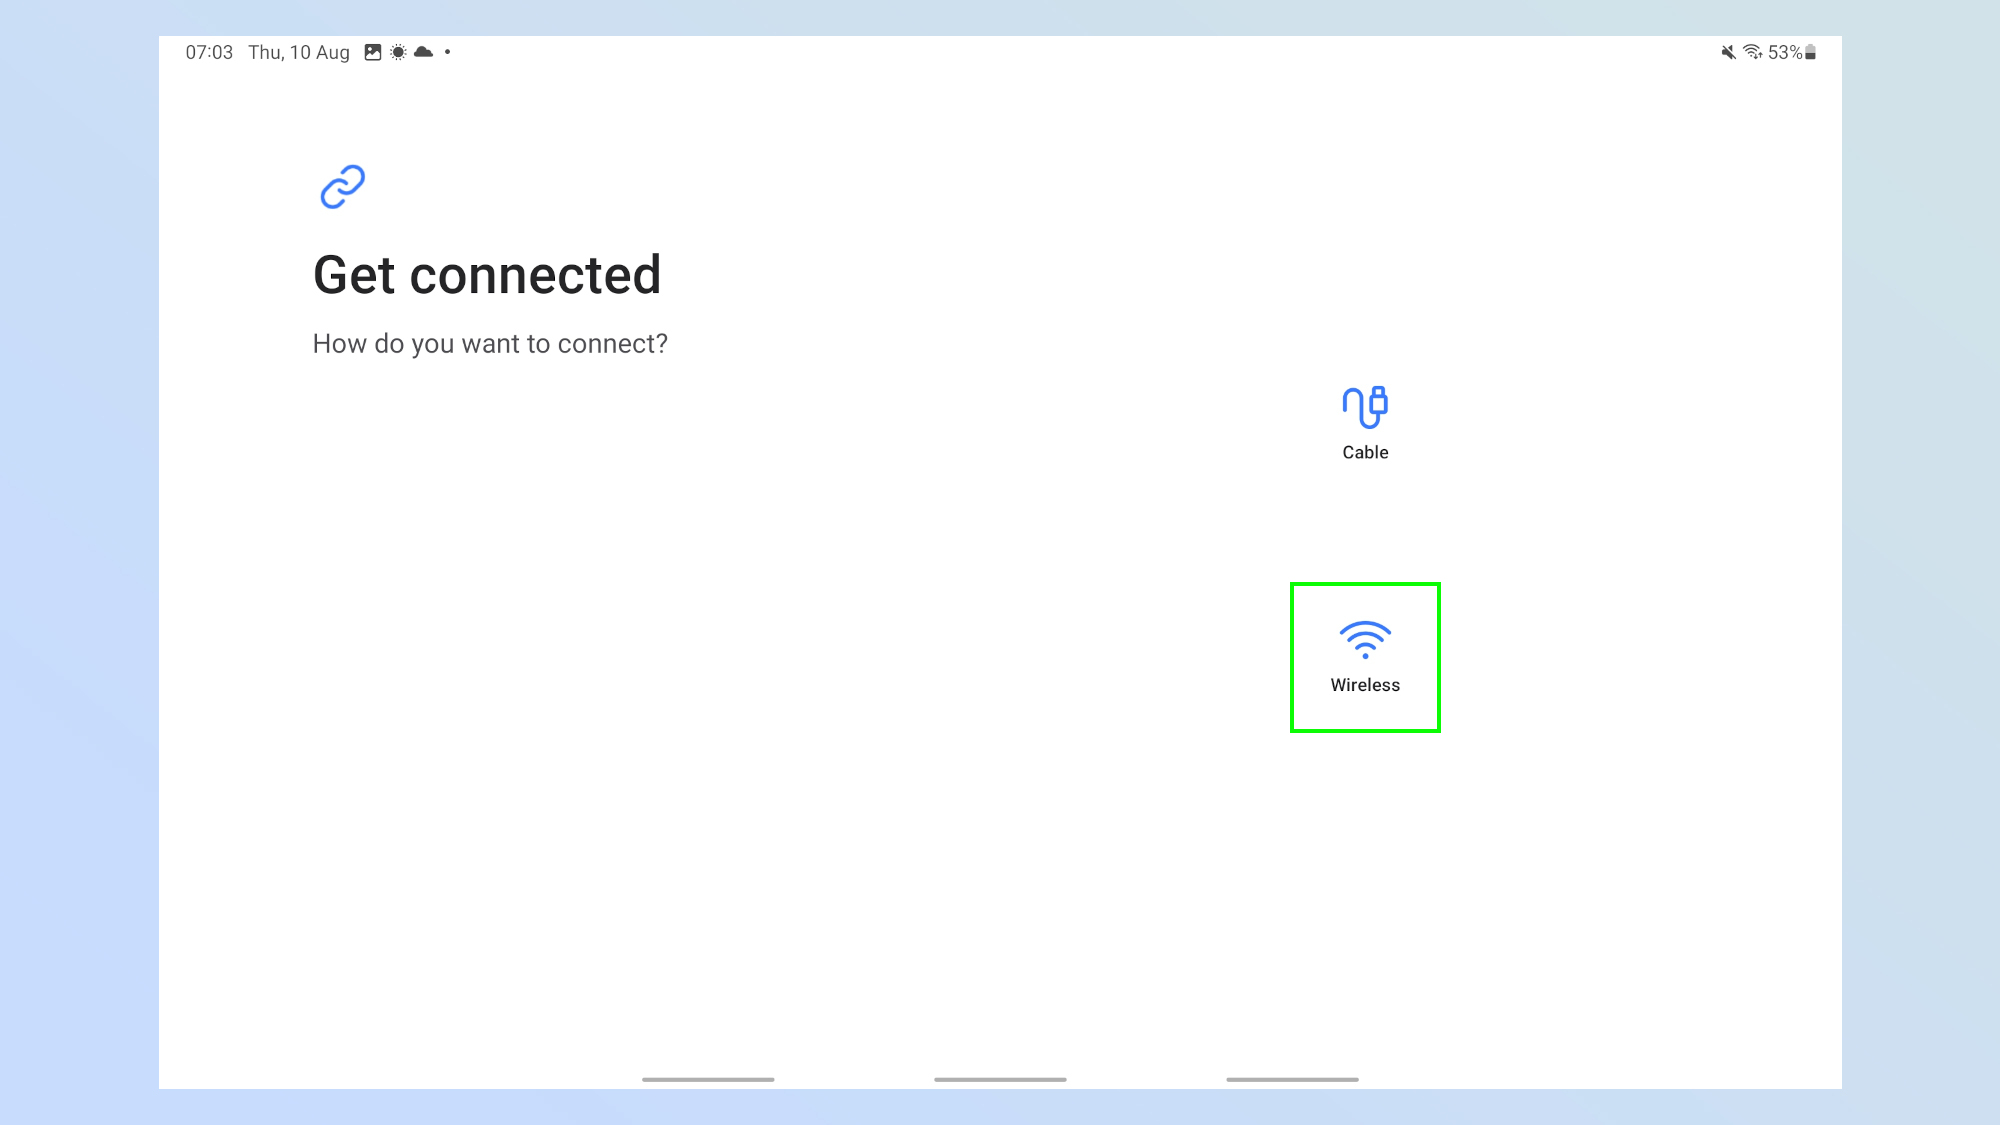
Next you'll be presented with the option to connect to your old device with a Cable, or with a Wireless signal. Tap Wireless.
3. Connect your devices together
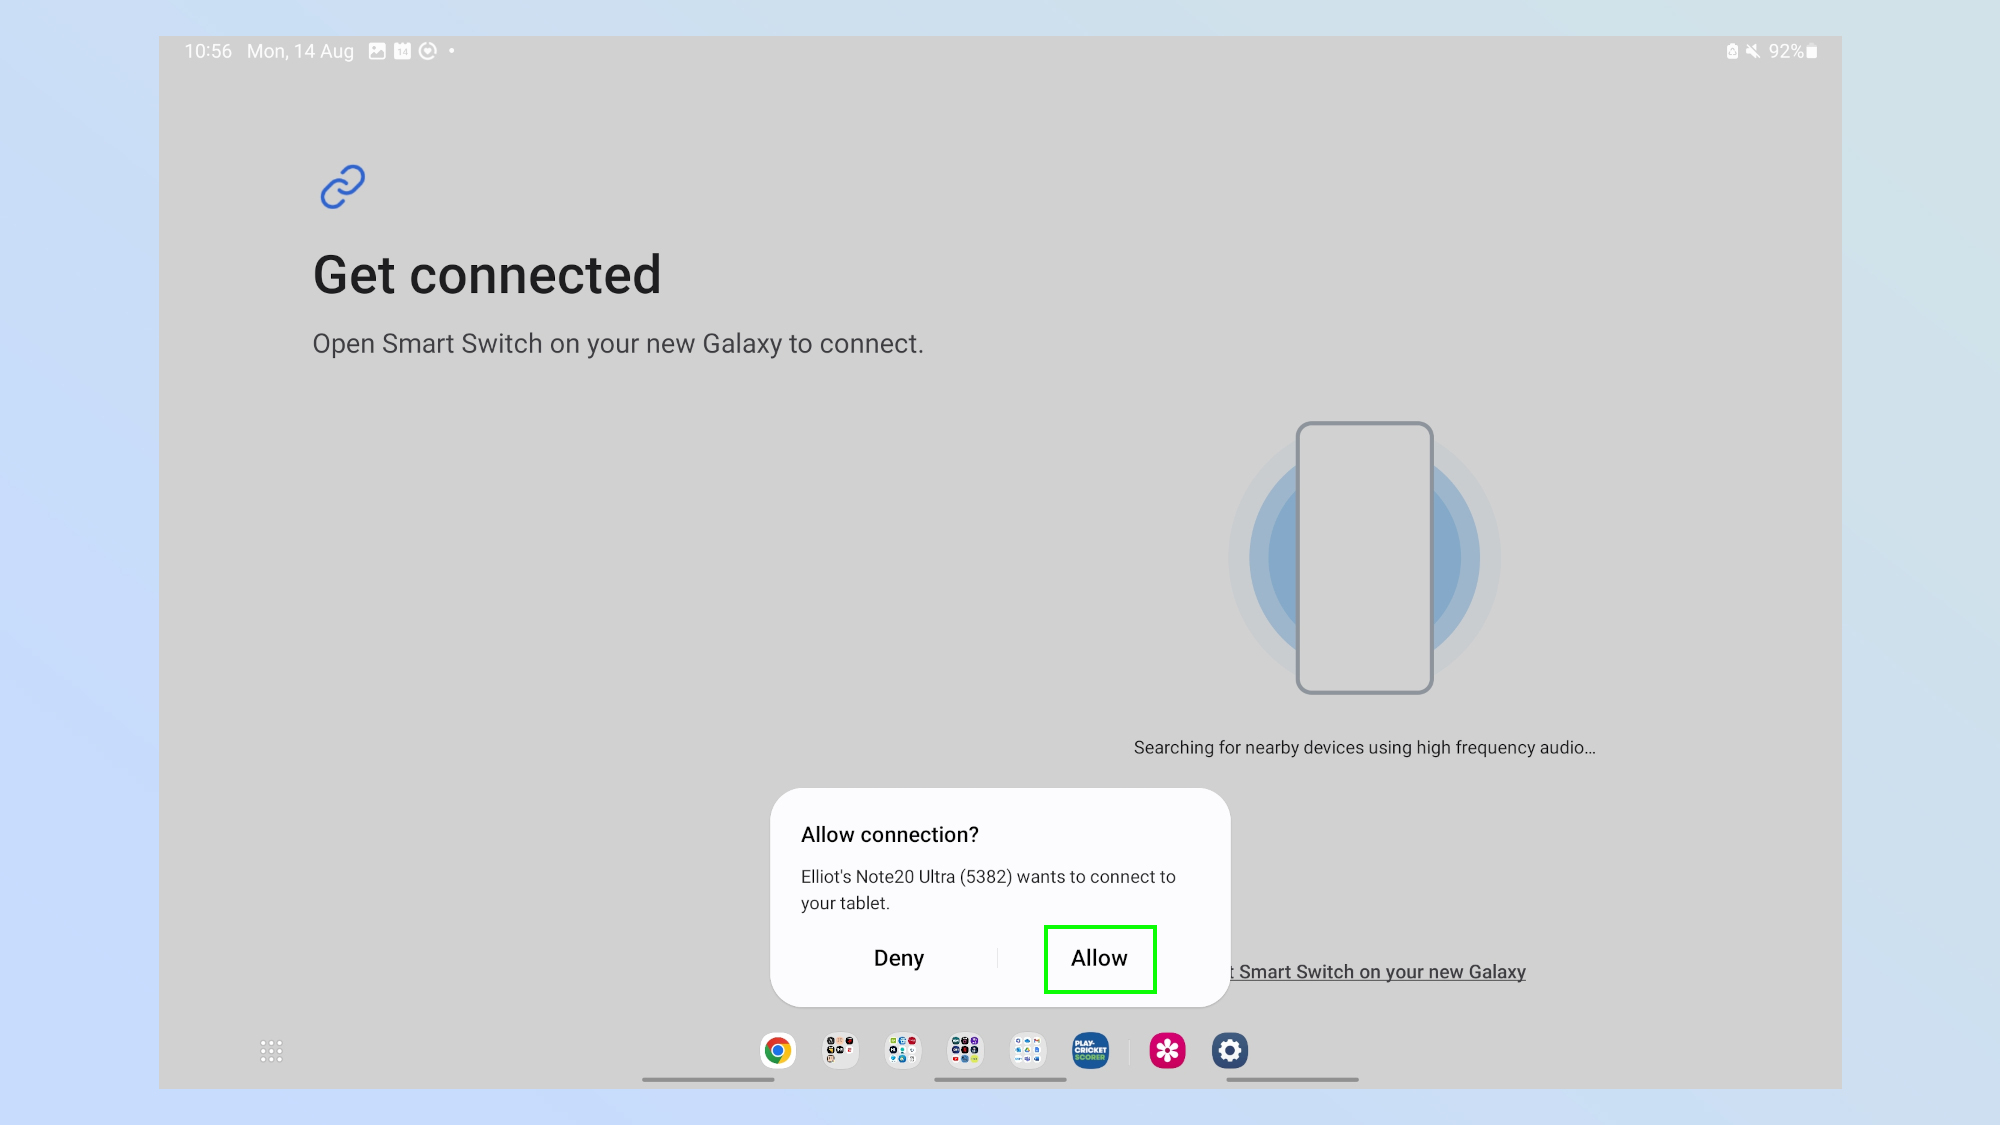
Your devices will start looking for each other, once they have found each other you'll be asked if you want to allow the connection. Tap Allow when the box appears.
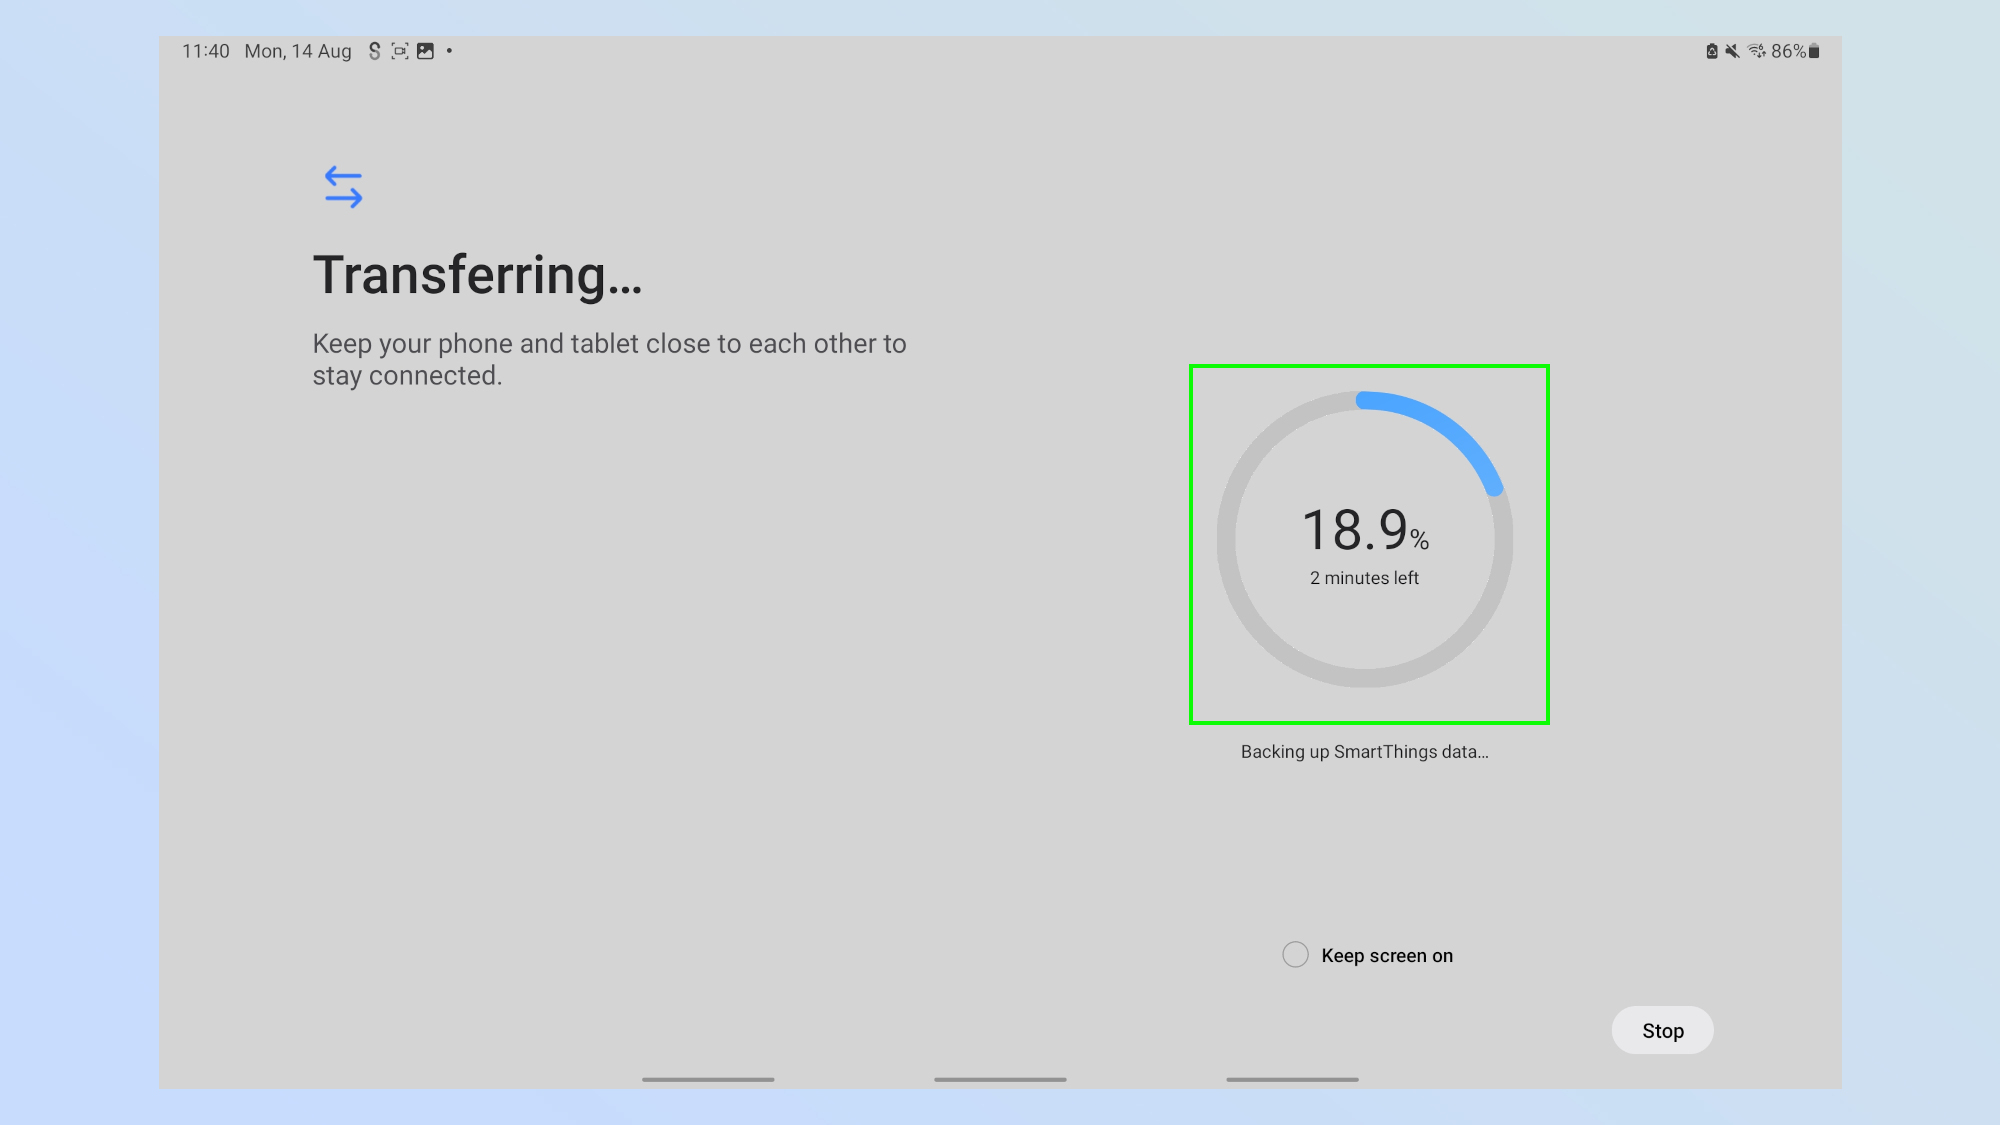
4. Wait for your new device to scan your old device
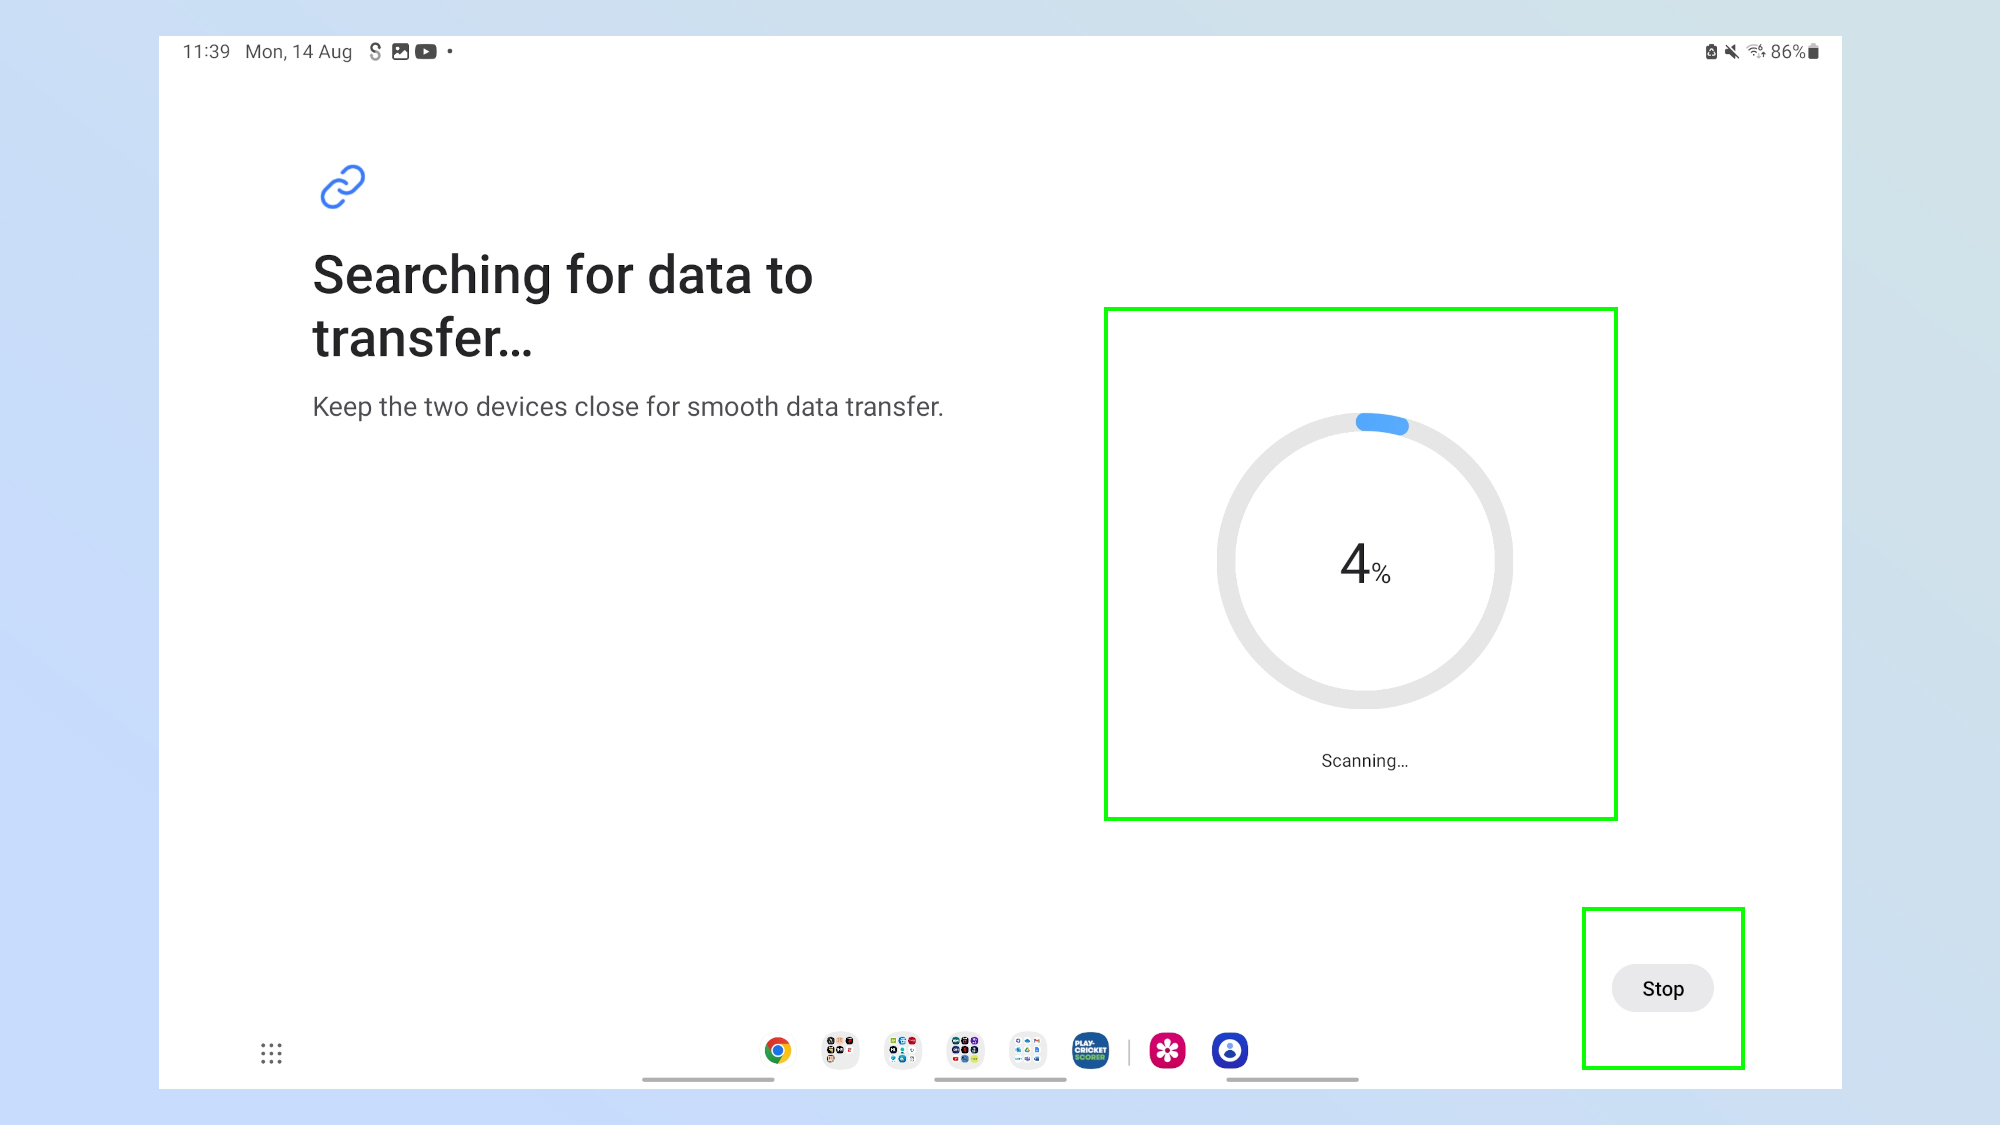
Now you'll be presented with a scanning screen. Simply wait for it to complete — this shouldn't take long. If you want it to stop you can always tap Stop at the bottom of the screen.
5. Decide what to transfer
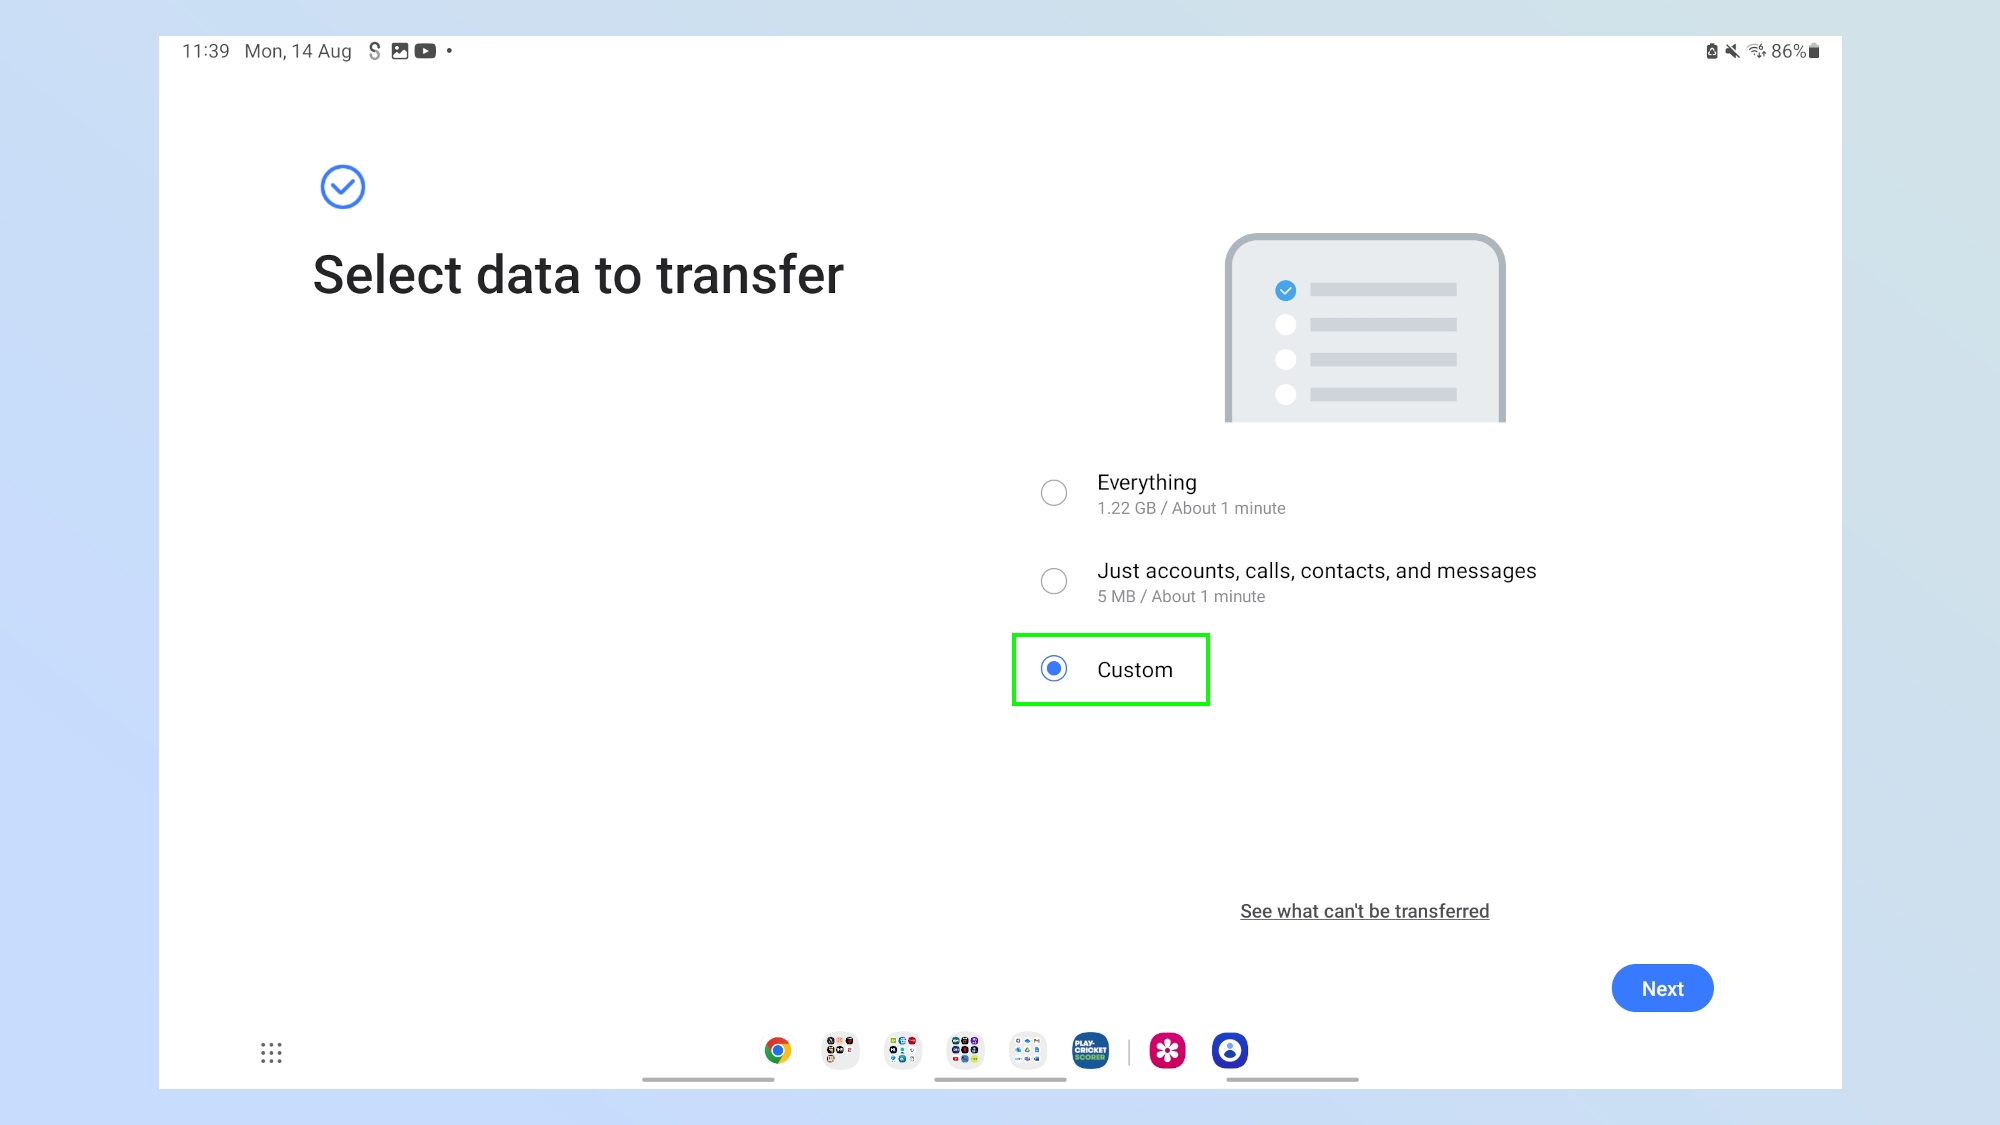
After the scan, you'll be presented with the option to transfer everything, which transfers everything on your old device including settings and applications. Alternatively you can choose to transfer just accounts, calls, contacts, and messages. You can tap on any of these options and be brought to step 7, but we are going to wee what happens when we tap on Custom.
6. Select the data to transfer
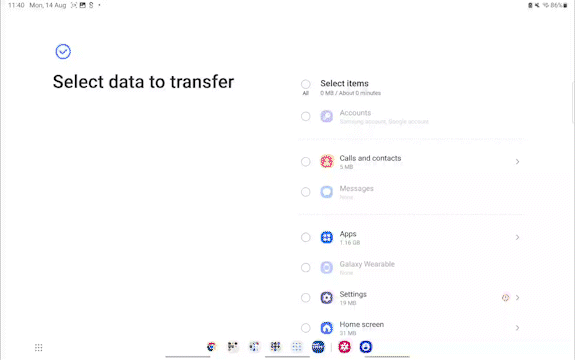
Now you can select the type of data you want to transfer. Once you've done that tap Transfer.
7. Wait for the transfer to take place
All there is to do now is wait. How long you have to wait depends on how much data you are transferring over.
8. Hit done
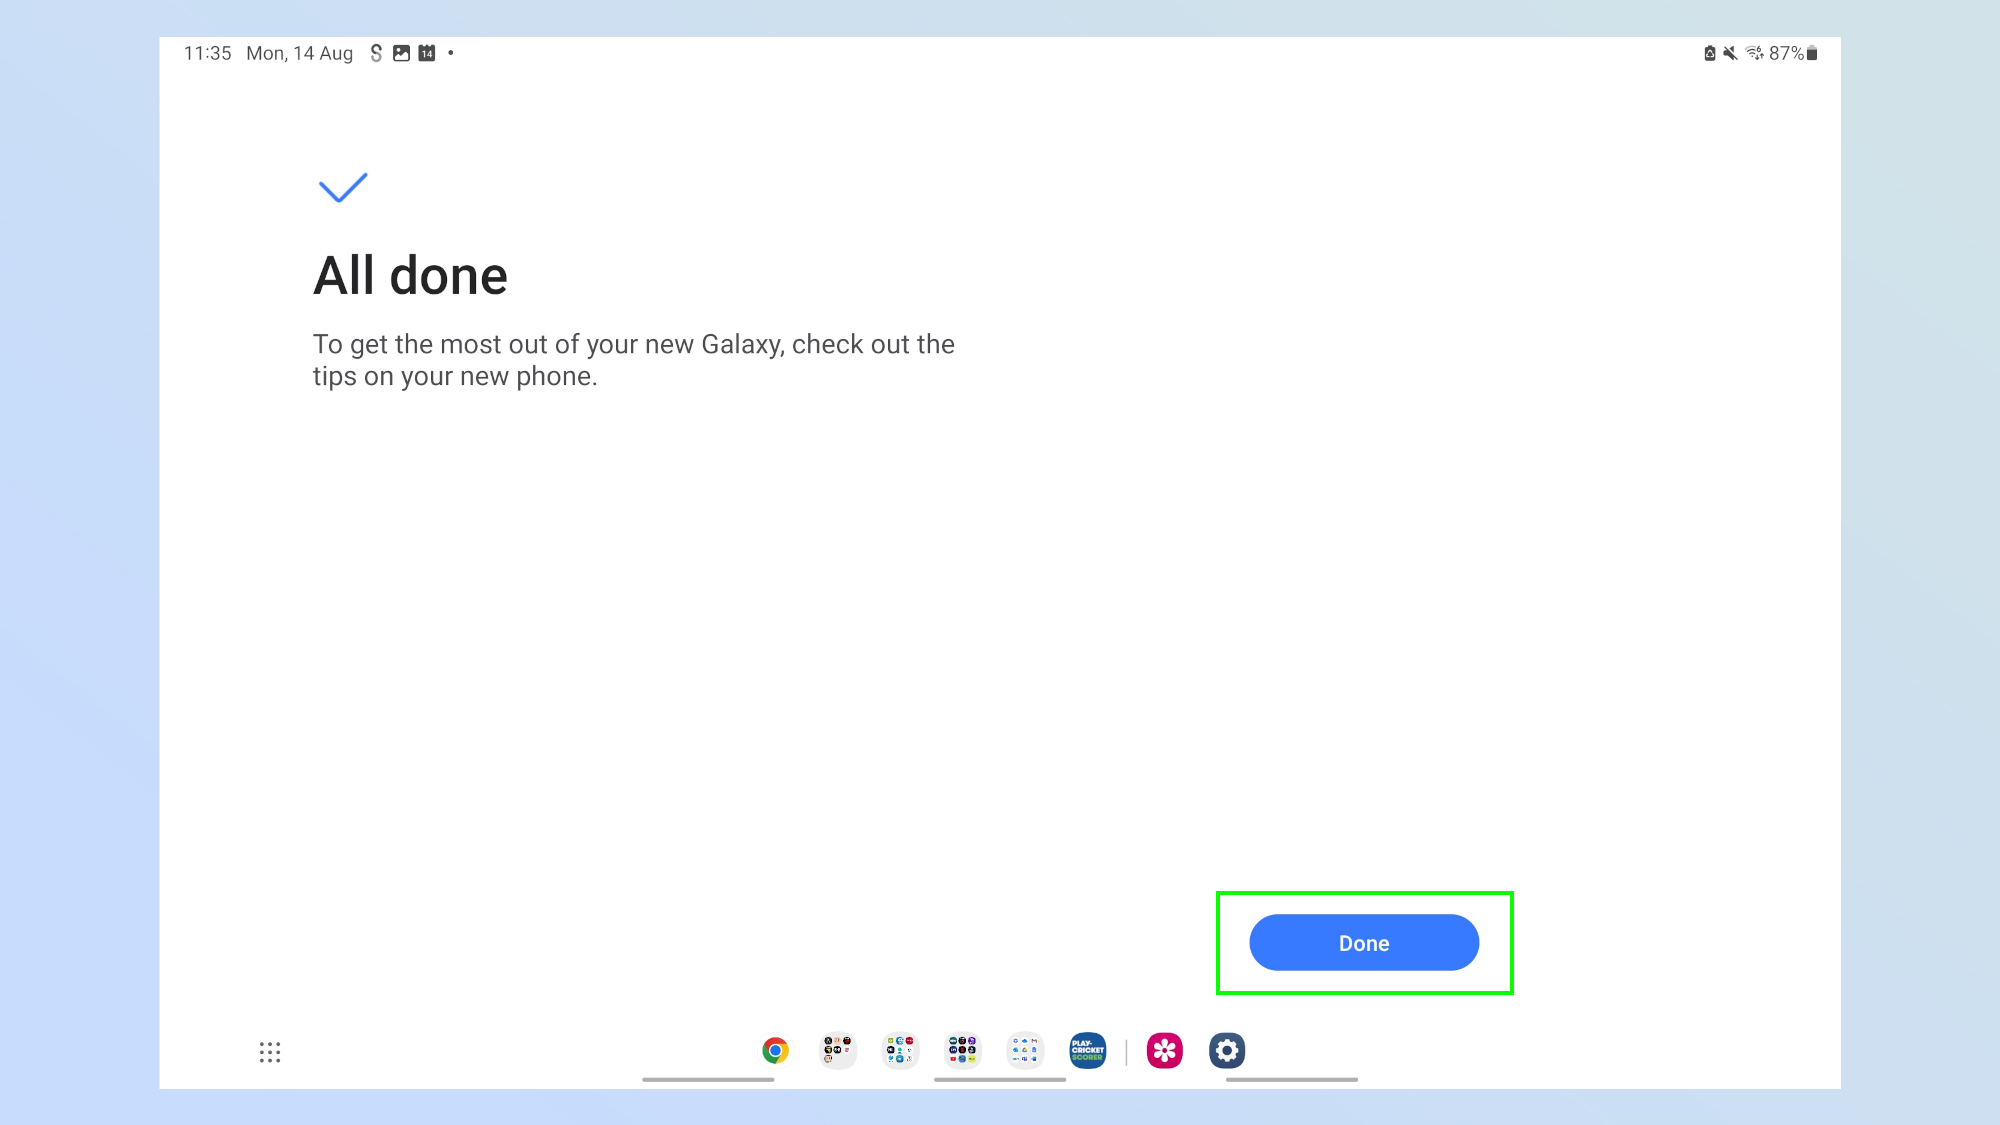
Once the transfer is complete you'll be presented with this screen, all there is to do now is tap Done.
How to import data with a cable using Smart Switch
Now let's look at how to transfer data the old fashioned way, using a cable.
1. Select 'Galaxy/Android'
At the start of your journey you will be offered the choice between transferring data from a Galaxy device or an iPhone or iPad. Tap on Galaxy.
2. Select Cable
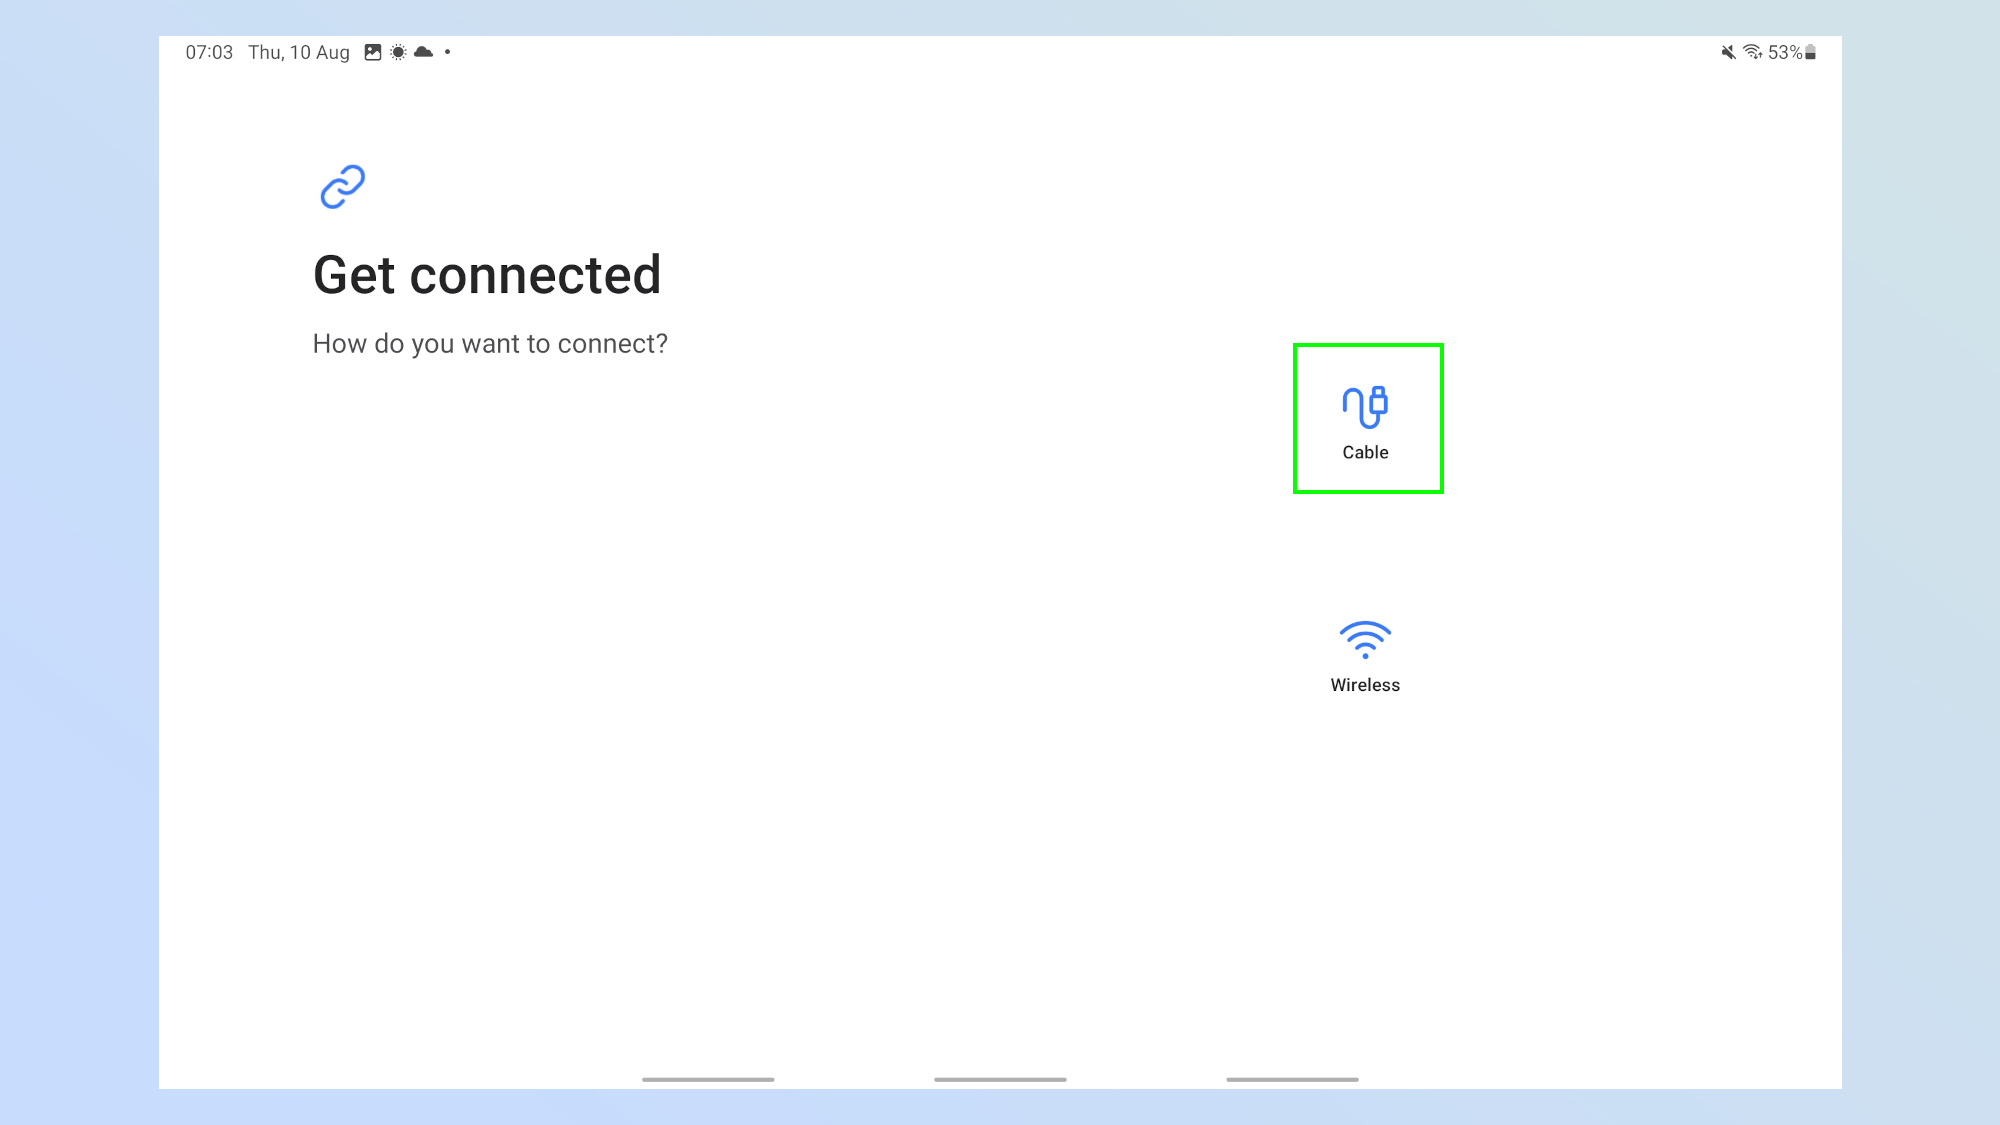
Next you'll be presented with the option to connect to your old device with a Cable, or with a Wireless signal. Tap Cable.
3. Connect your devices together
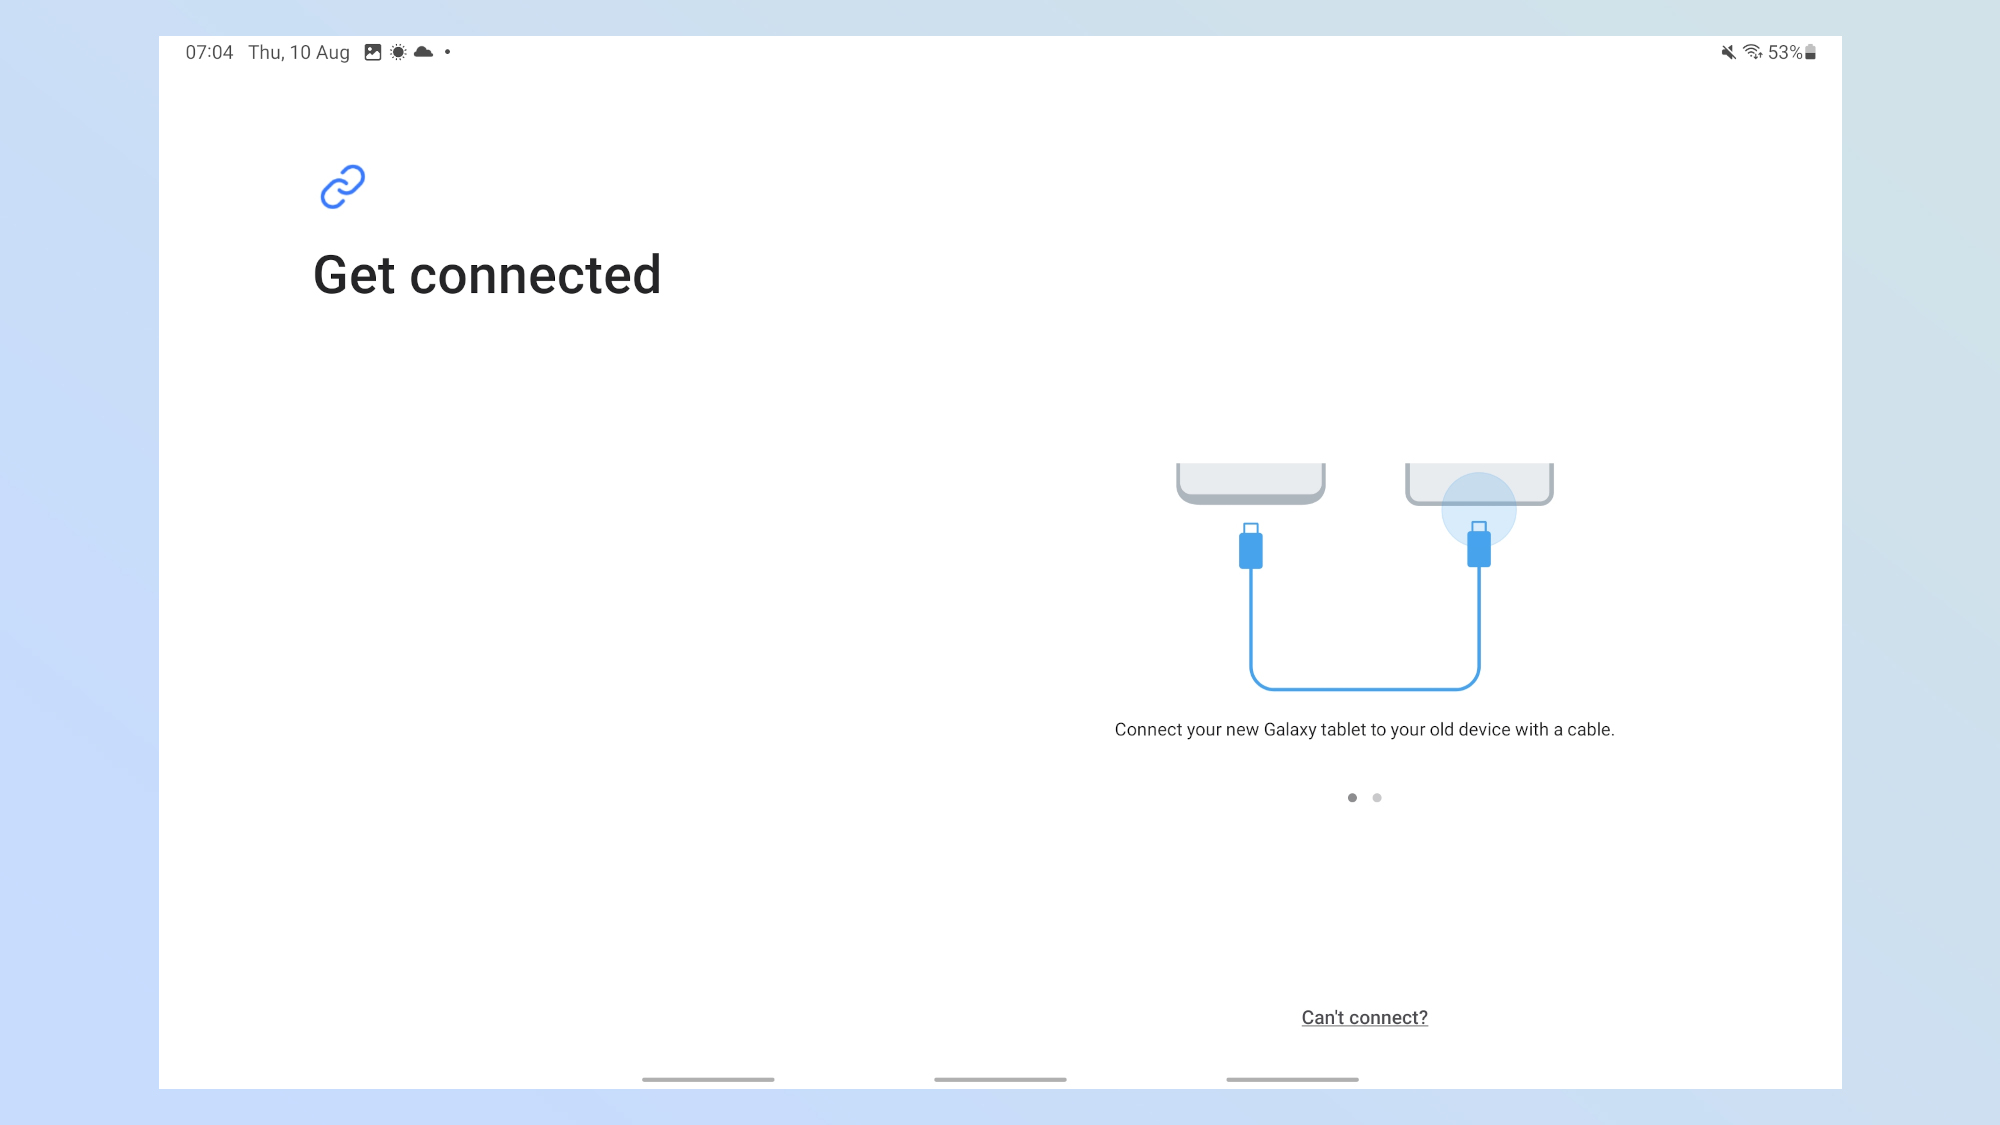
Now it's time to connect the devices. Usually the charging cable will work, especially if the cable is USB C to USB C. Plug each end into your devices.
4. Allow access on your old device
Once you're connected you'll get a prompt to allow the Smart Switch App on your new device access to the data on your old device. Tap OK.
5. Wait for your new device to scan your old device
Now you'll be presented with a scanning screen. Simply wait for it to complete — this shouldn't take long. If you want it to stop you can always tap Stop at the bottom of the screen.
6. Choose what to transfer
After the scan, you'll be presented with the option to transfer everything, which transfers everything on your old device including settings and applications. Alternatively you can choose to transfer just accounts, calls, contacts, and messages. You can tap on any of these options and be brought to step 8, but we are going to wee what happens when we tap Custom.
7. Select the data
Now you can select the type of data you want to transfer. Once you've done that tap Transfer.
8. Wait for the transfer to complete
All there is to do now is wait. How long you have to wait depends on how much data you are transferring over.
9. Hit Done
Once the transfer is complete you'll be presented with this screen, all there is to do now is tap Done.
And that's all there is to it! If you'd like to read more Samsung Galaxy tutorials to help you use your new device, we have you covered. Check out our guide to the hidden Samsung Galaxy features everyone needs to know. Don't want to pick up the phone? Learn how to auto answer phone calls on Samsung Galaxy devices. And why not find out how to change your Samsung Galaxy phone's side button?