RAM is a vital component that ensures a system's proper operation. In simple terms, RAM functions as short-term memory, where your system temporarily stores information while working on a task. Therefore, faulty memory can severely impact your work. Usually, RAM lasts longer than most other internal components, unless you're upgrading from an older standard to a newer one, like DDR4 to DDR5. While RAM failure is rare, it can happen. Like any computer part, even the best RAM will eventually fail, so it's important to know what to do when that time comes.
RAM typically doesn't stop working suddenly without warning. Usually, there are early indicators of a failing or faulty DIMM. However, receiving DOA (dead on arrival) RAM isn't unusual, just like any other PC component. Common signs of bad RAM include random blue screens of death (BSOD), system crashes or restarts, operating system freezes, and missing memory. In severe cases, your system might not even post and could produce multiple beeps.
Before running any diagnostics on your RAM, ensure it's operating at the stock frequency. Many users run Intel XMP 3.0 or AMD EXPO memory kits, so it's important to distinguish between an unstable overclock and a defective DIMM or DIMMs. An unstable overclock can produce symptoms similar to faulty RAM. Therefore, the first step in diagnosing faulty memory is to reset your system to its default settings. You can do this by resetting the firmware to default in your motherboard's BIOS or by pressing the dedicated "Clear CMOS" button on the rear panel of some motherboards.
In modern times, we don't expect anyone to have just a single DIMM in their system. Most likely, they use at least a dual-channel setup. When there are multiple DIMMs, it's easier to diagnose each one separately. Otherwise, you won't know which DIMM is the faulty one, even if the software reports an error — it becomes a process of elimination. To our knowledge, only one piece of software on the market can accurately identify which specific DIMM has faulty integrated circuits (ICs), which we'll discuss later.
The best software for identifying defective RAM varies depending on who you ask. From our experience, testing your RAM with at least two different programs should be enough. The chance that one program won't detect a faulty DIMM exists, but it's unlikely to fool two different testers. Of course, if your results are negative but you still strongly suspect a bad DIMM, it wouldn't hurt to get a third opinion. All the software we've gathered is free. Payment unlocks extra options, but the basic version is more than sufficient for diagnosing bad DIMMs. There are other options available as well. Interestingly, software for detecting faulty DIMMs is also popular among overclockers assessing memory stability. Although we're using DDR5 for this guide, it remains applicable to older formats like DDR4 and earlier.
How To Test RAM With HCI Memtest
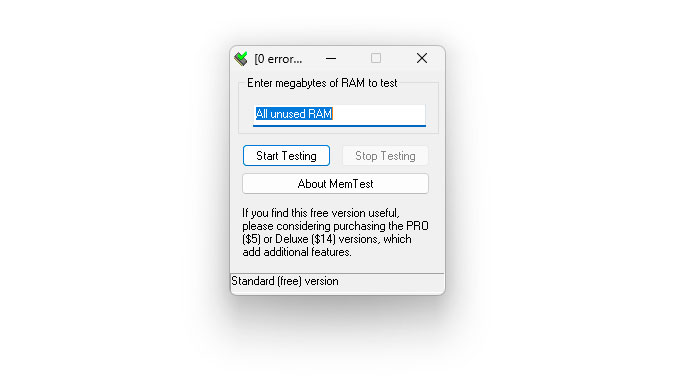
HCI Memtest is one of the simplest and easiest programs for detecting RAM errors. Unfortunately, the basic version has only one user-modifiable section where you input the amount of RAM to test, and the software handles the rest. One of its limitations is that it can only test between 2GB and 3.5GB of RAM per instance, which can be problematic when testing large amounts of RAM or a processor with many threads.
For optimal testing, it's best to measure the total amount of RAM distributed across all processor threads. This involves opening one Memtest instance per thread. Admittedly, testing RAM with processors that have many threads can become a hassle. However, the Pro version of HCI Memtest costs just $5 and automates the entire process. Additionally, some wrapper tools can perform a similar job with the free version if you search for them online.
1. Download HCI Memtest and extract its contents from the ZIP file.
2. Run memtest.exe. It's the only executable in the folder, so you're unlikely to make a mistake.
3. Open Windows Task Manager and note the amount of free RAM available.
4. Divide the free RAM by the total number of processor threads.
5. Launch the same number of Memtest instances as your processor's threads and enter the result from the previous step into each one.
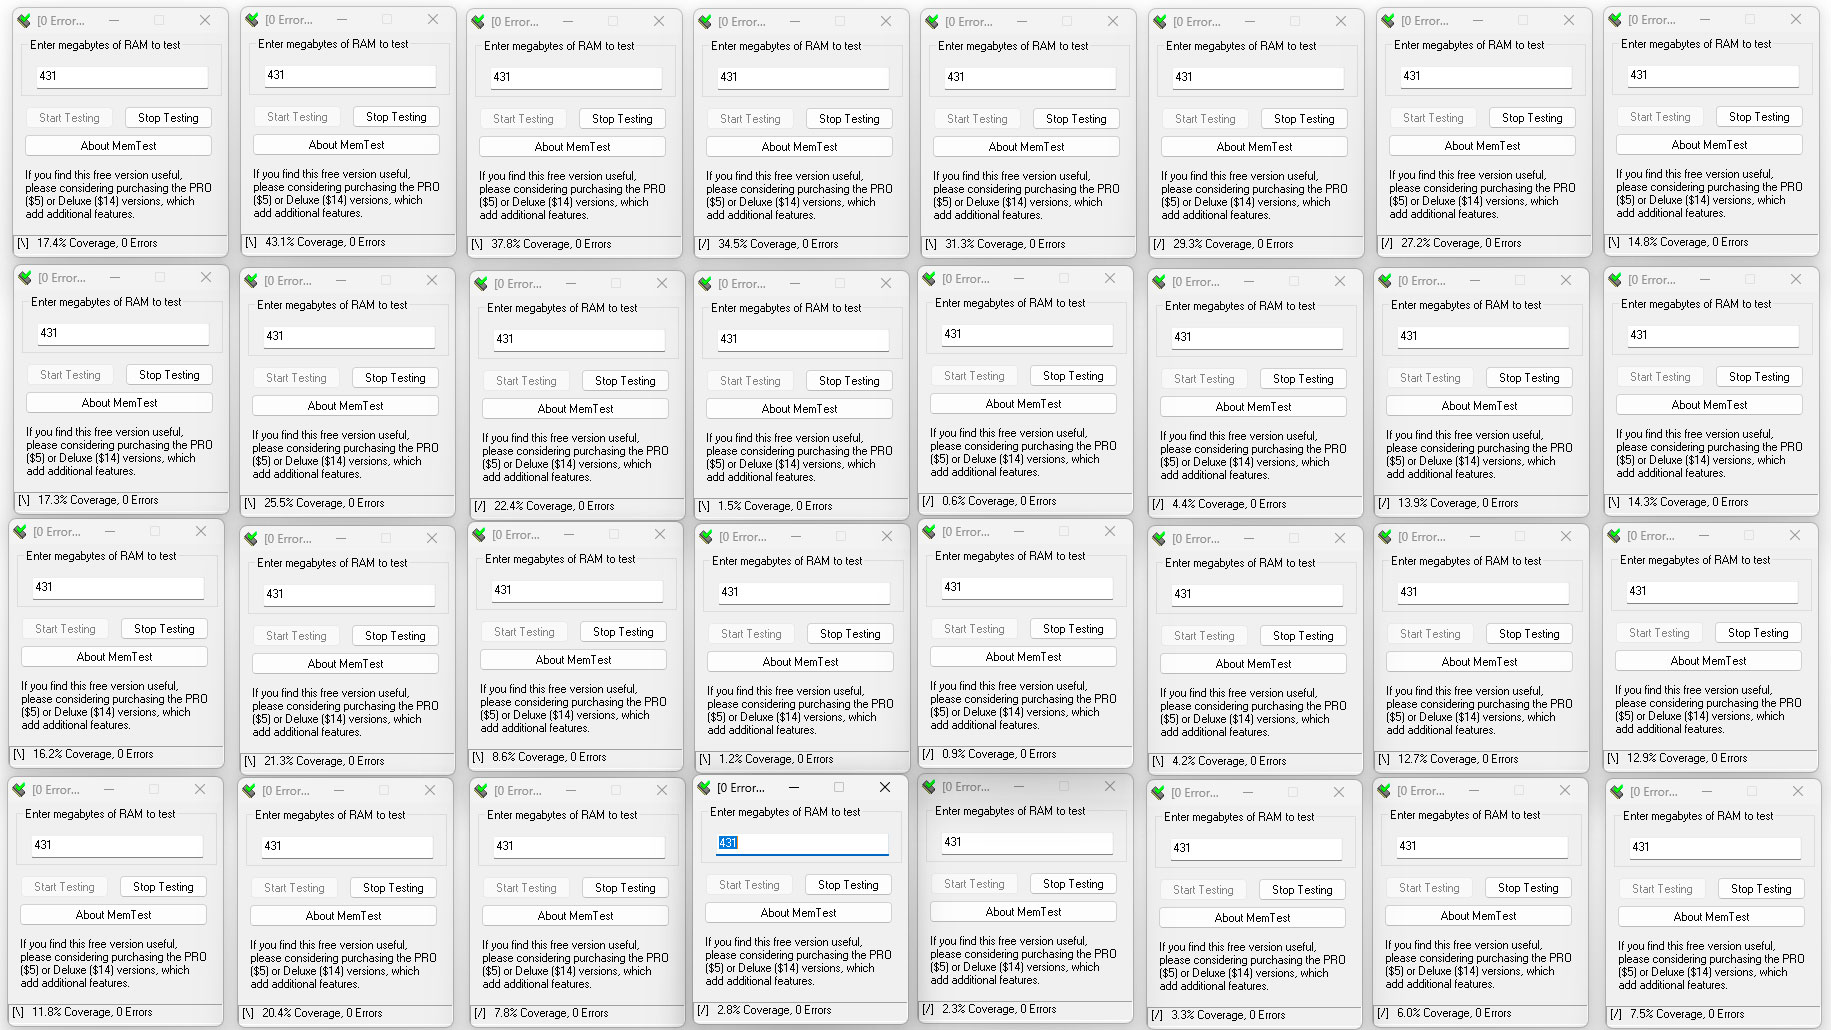
For example, we're testing 16GB of memory on our Core i9-13900K system. The processor has 32 threads, so we ran 32 instances of Memtest. We had approximately 13.79GB free, which translates to 431 MB per instance. Depending on your processor and memory amount, a complete pass takes roughly an hour. However, one or two passes should be enough to identify faulty RAM.
How To Test RAM With TestMem 5
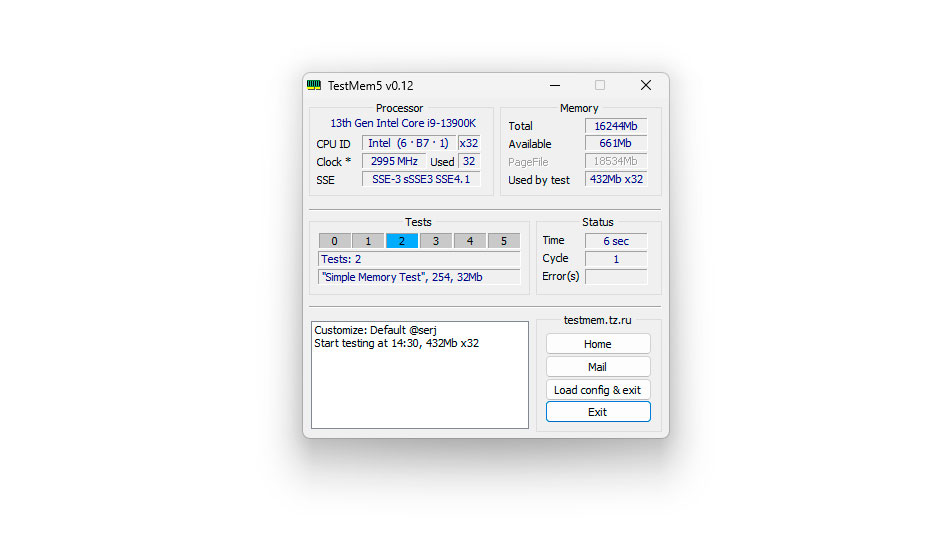
TestMem has been around since the DOS era. Launched in 1998, it has undergone significant evolution over the years and is now in its fifth version. TestMem 5 offers 16 tests, which users can customize extensively. The software is lightweight and features a simple, beginner-friendly interface.
Unlike HCI Memtest, TestMem 5 is entirely free of charge. It supports custom user configurations, providing endless testing options. Among enthusiasts and overclockers, the Extreme and Absolut presets from user Anta777 are particularly popular.
1. Download TestMem 5 and extract the ZIP file to your desktop.
2. Right-click the "TM5" executable file and run it with administrator privileges.
3. Click the "Load config & exit" button to load your preset. You can download different user presets from the MemTestHelper GitHub page.
4. After the preset loads, TestMem 5 will close. Rerun it with administrator privileges, and the new preset will take effect.
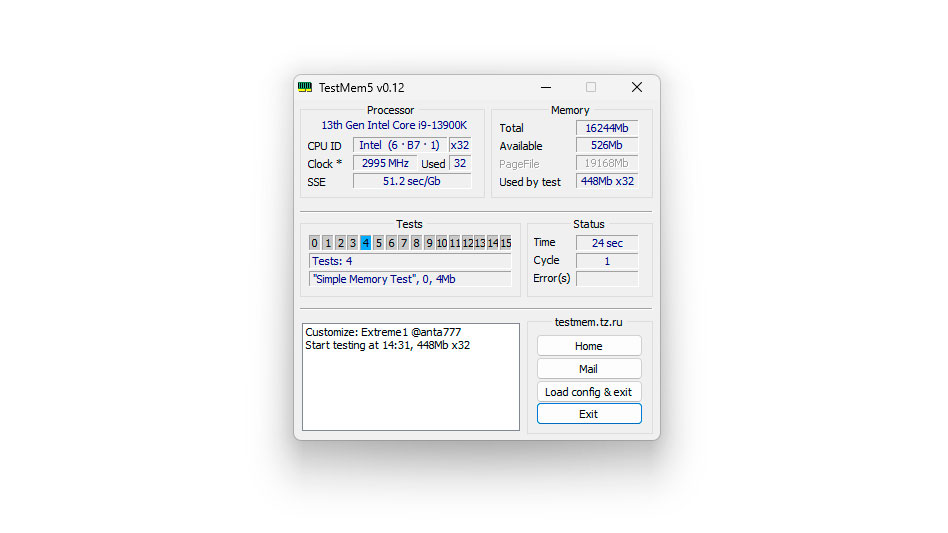
TestMem 5 takes about 25 to 30 minutes to complete one cycle on 16GB of RAM. The widely accepted standard is three cycles, which totals about an hour and a half to two hours of operation.
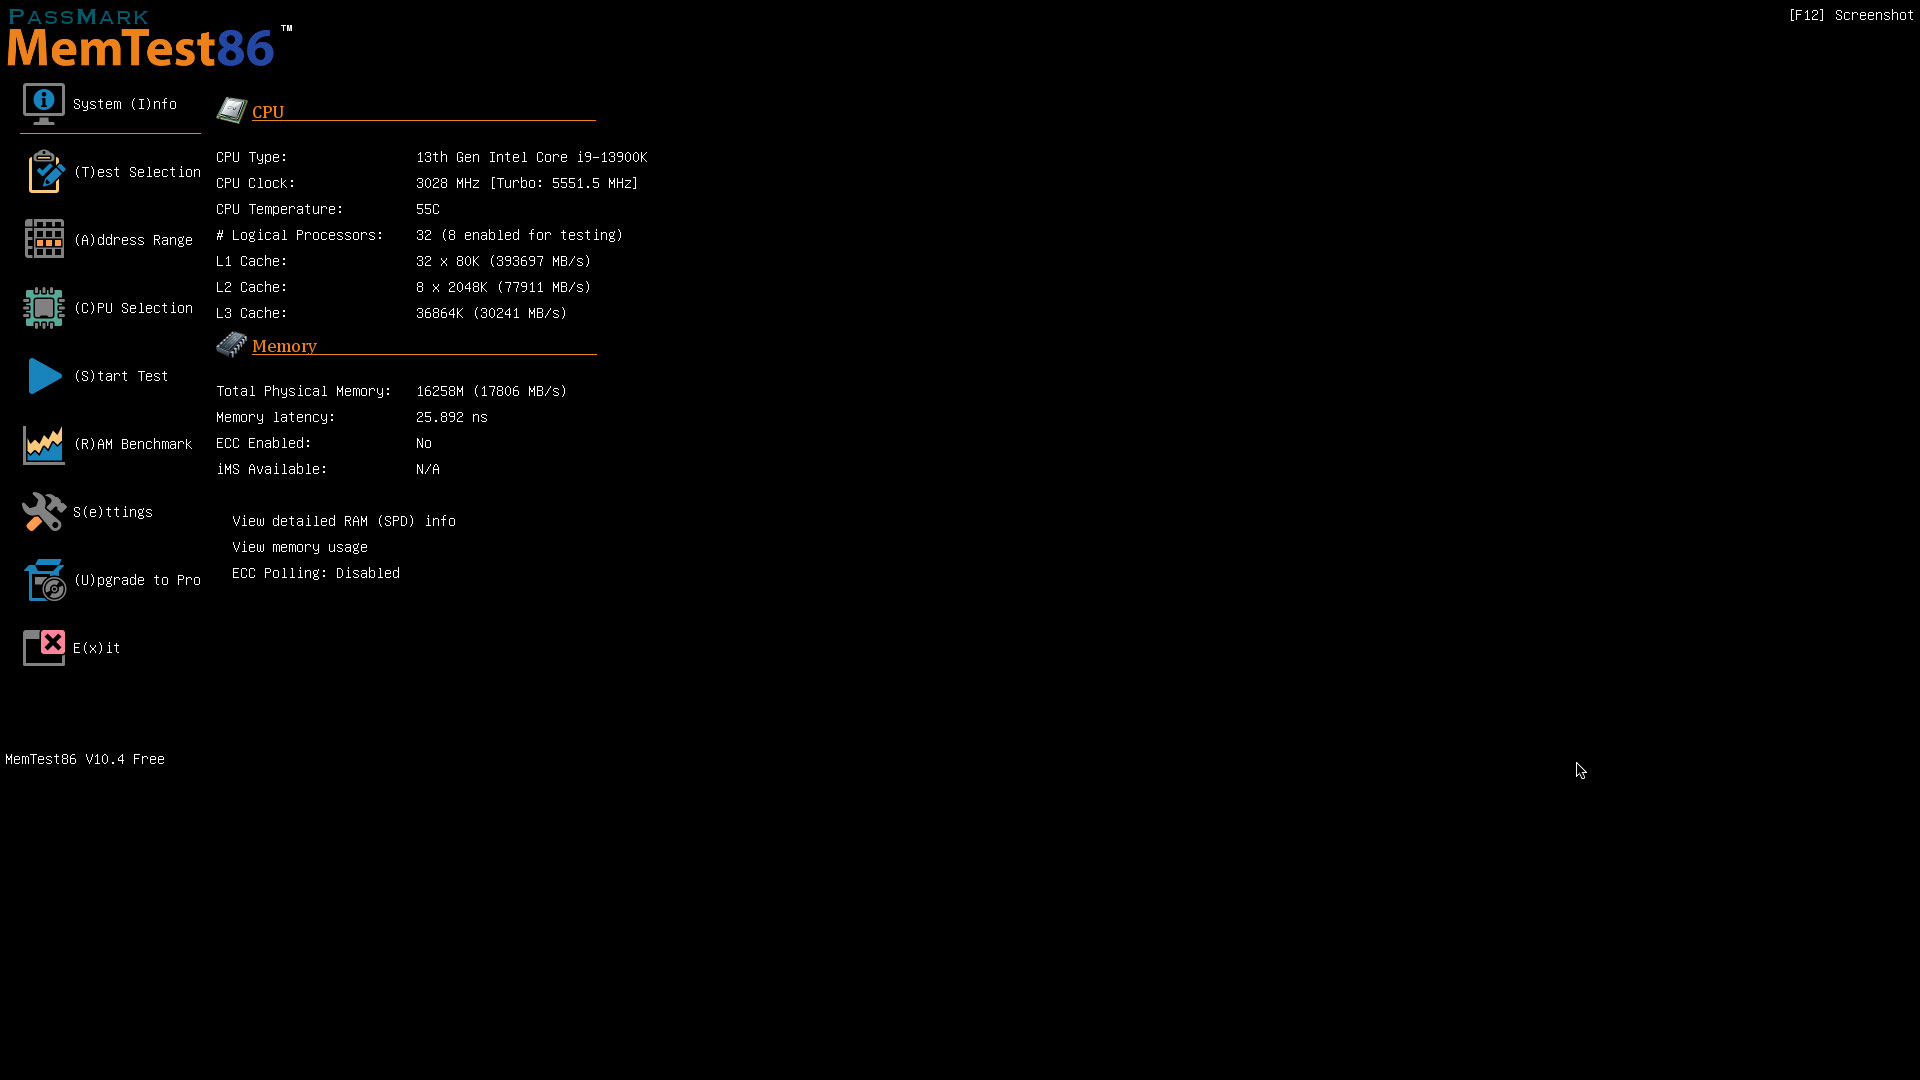
How to Test RAM With Passmark MemTest86
PassMark's MemTest86 is a dependable tool for testing memory, requiring no operating system, making it compatible with both Windows and Linux computers. It runs from a bootable USB drive, and although it might seem complex, it is very easy to use.
MemTest86 is currently the only software capable of identifying the faulty DIMM or DIMMs, even when all memory slots are filled. However, this feature requires payment. Currently, it only supports select platforms with DDR5 memory.
1. Download PassMark MemTest86.
2. Extract the files into a folder on your desktop.
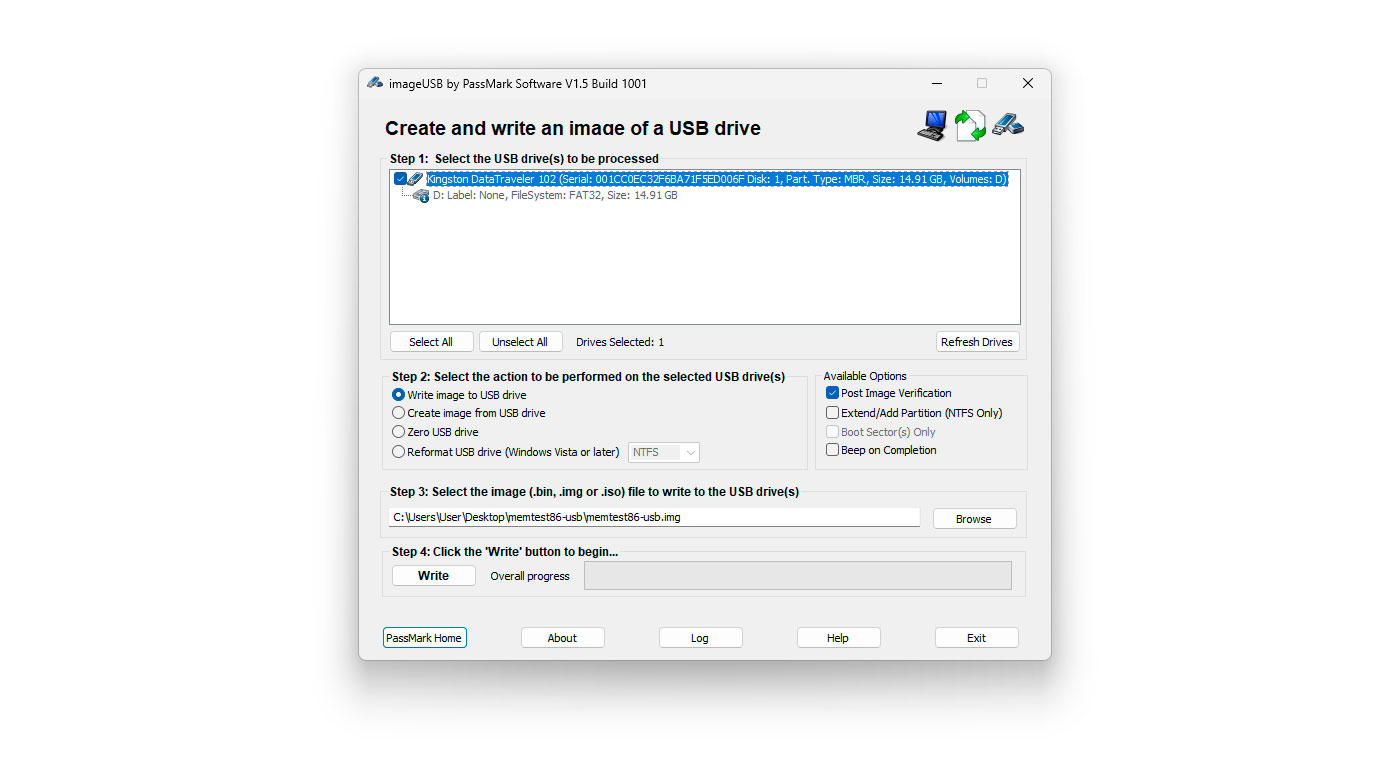
3. Insert a USB drive into your PC. Back up any data on it, since PassMark's tool will format the USB.
4. Run the "imageUSB" executable.
5. Choose the correct USB drive at the top, then click the "Write" button.
6. Restart your computer and enter the boot menu by pressing F2, Del, F8, F10, or whichever key your system uses. It will be displayed on your POST screen.
7. Boot from the USB stick.
8. Use your keyboard or mouse to select the "Config" button on the right side.
9. Choose the "(S)tart Test" option on the Memtest86 home screen to begin testing.
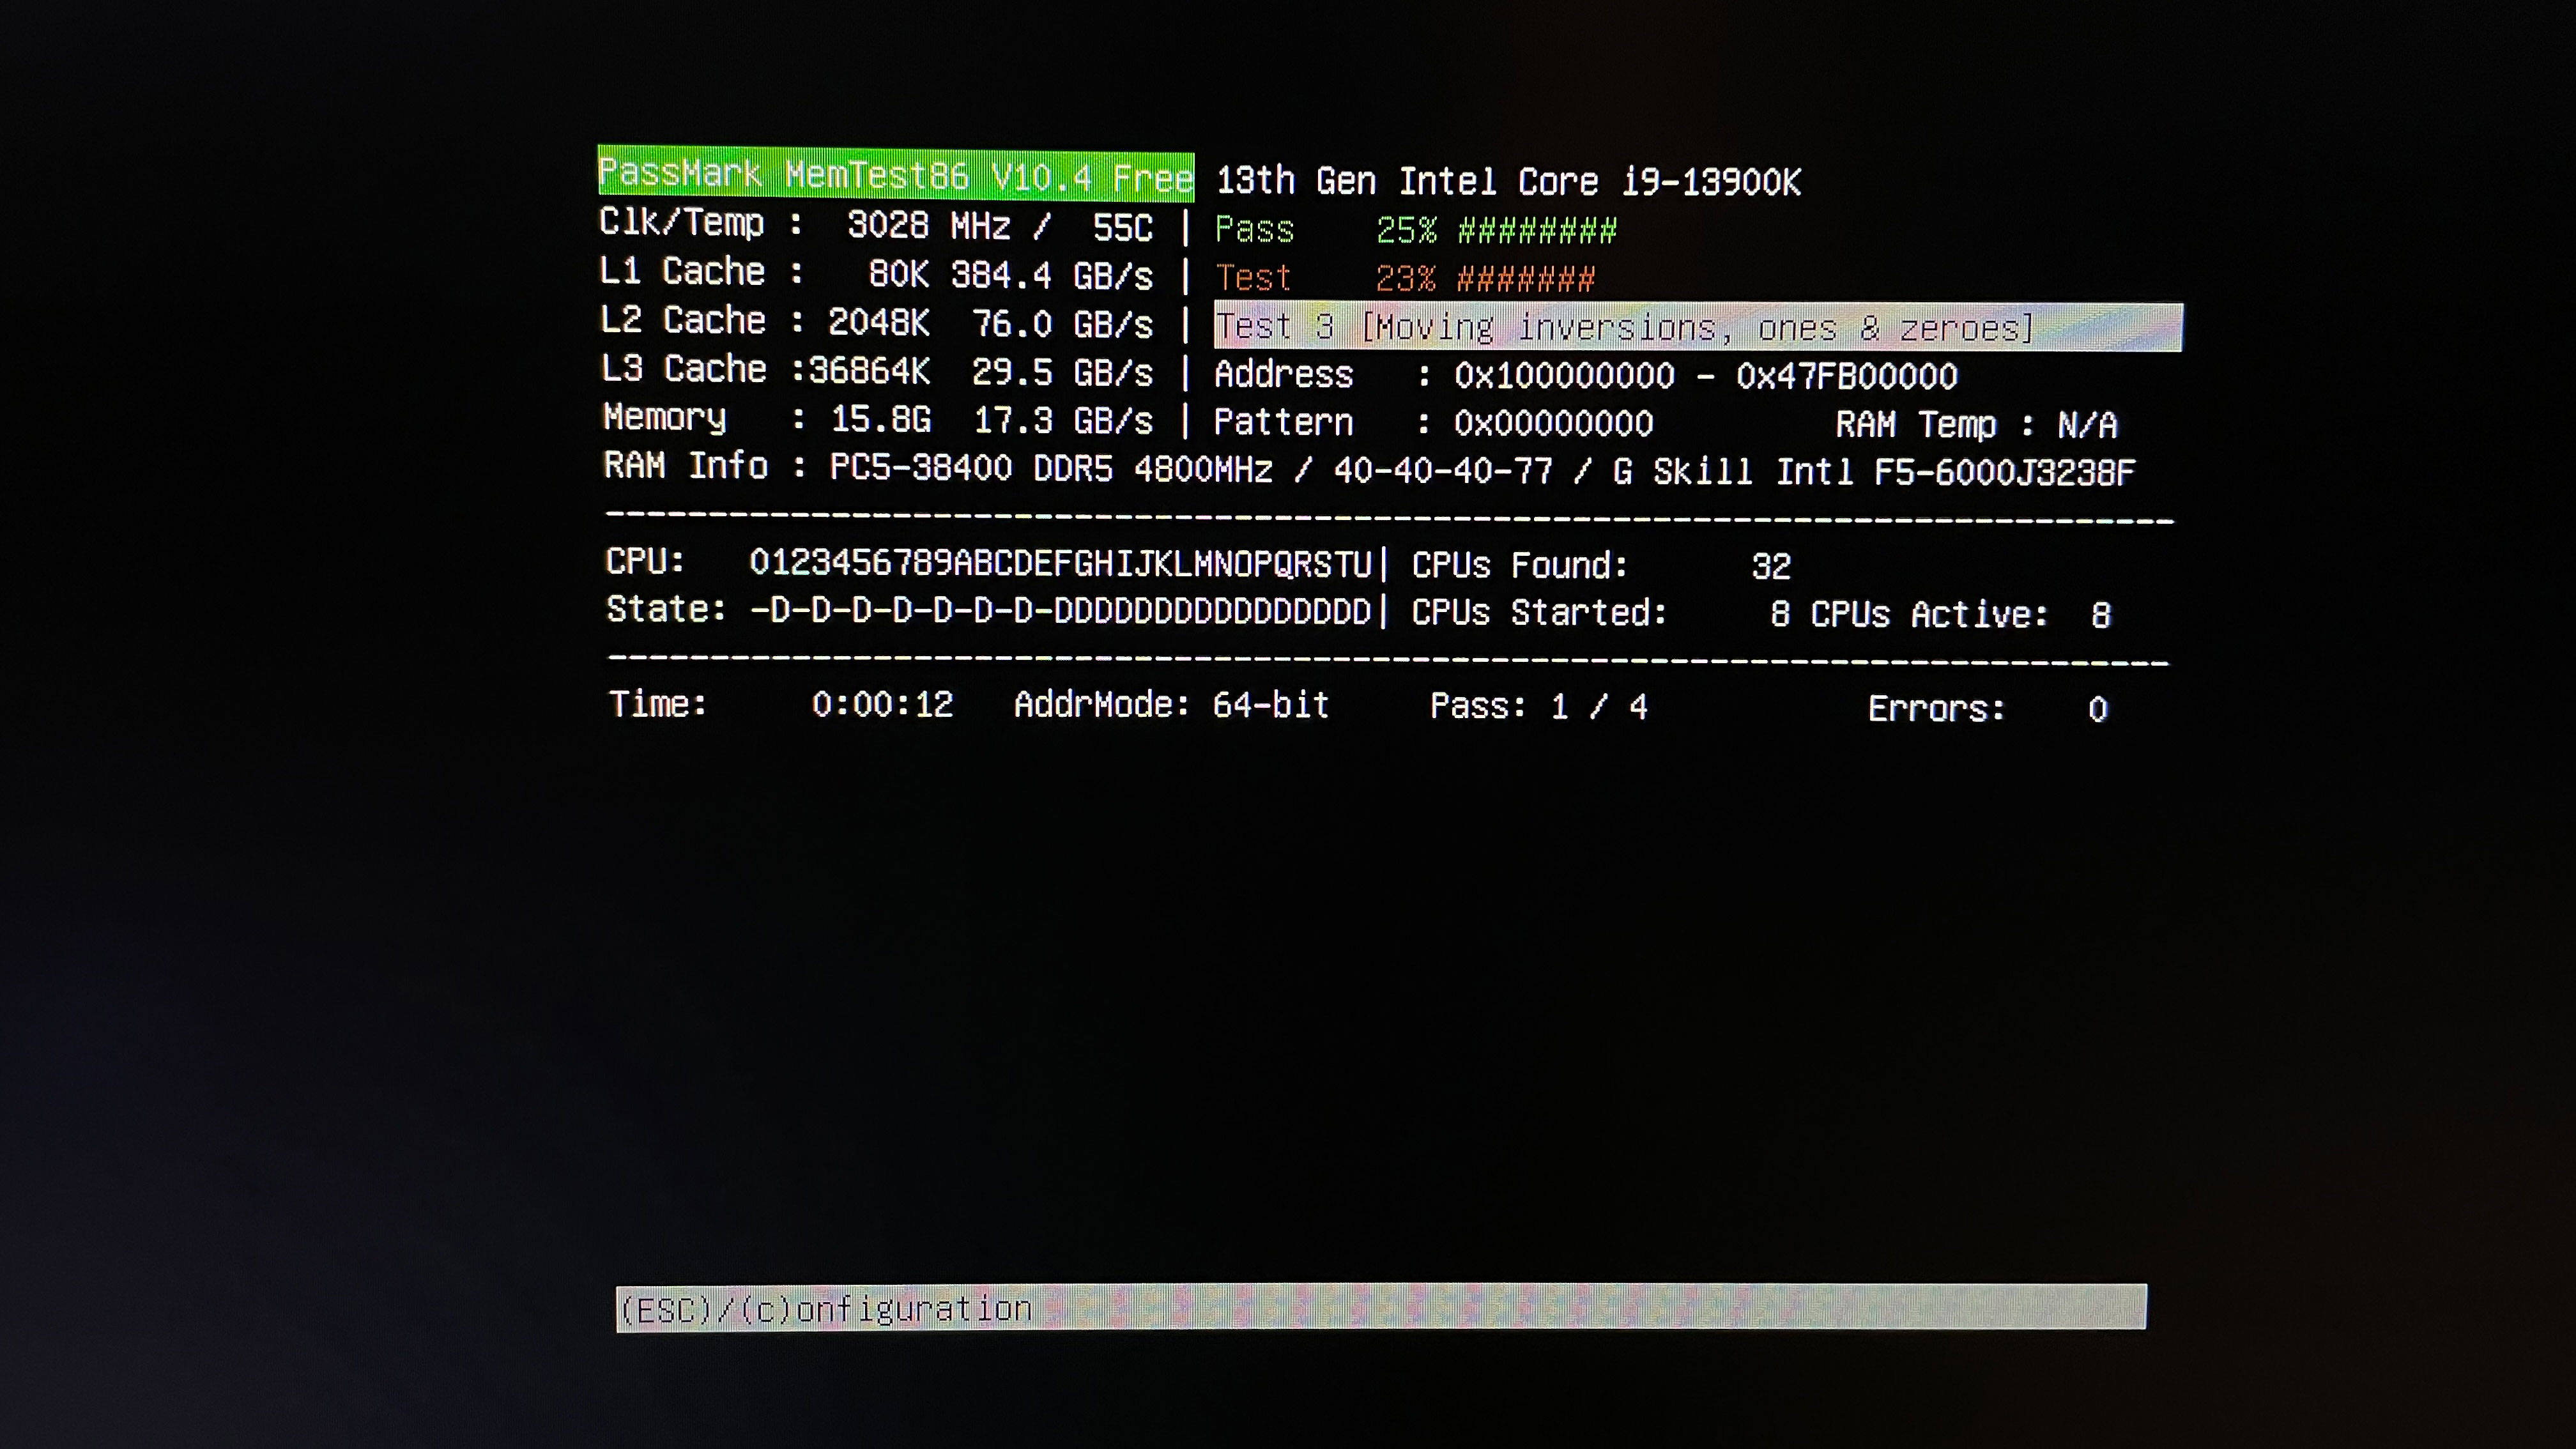
Let the application run the test until it finishes or until errors occur. You can watch the progress at the top of the screen. Testing can take from 20 minutes to several hours, depending on your DIMM's capacity. If errors appear, there is no point in continuing the test.
How To Test RAM With Google Stressful Application Test (GSAT)
For Linux users, the Google Stressful Application Test (GSAT) is an excellent tool for diagnosing memory errors. Alternatively, you can run GSAT in Windows using the Windows Subsystem for Linux (WSL). However, it doesn't have the same effect, which is why we recommend using GSAT in its native environment.
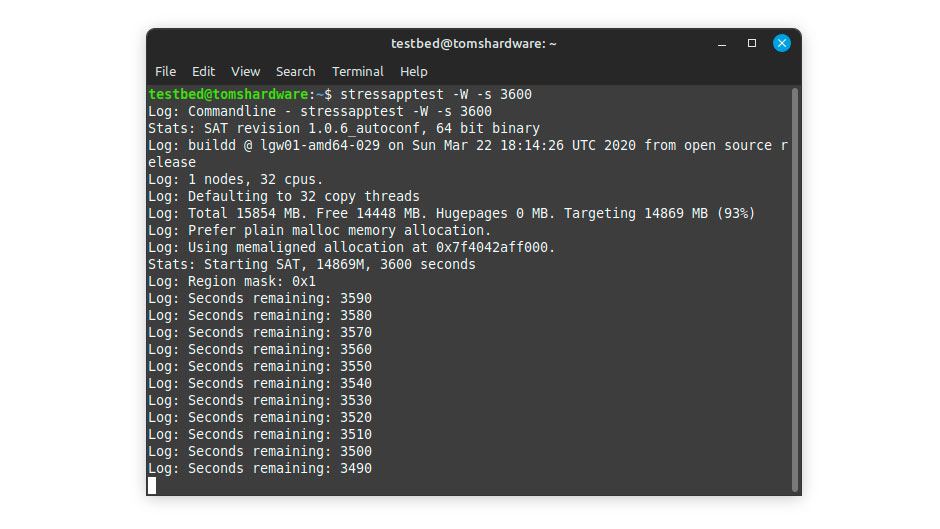
1. Open a terminal and run the following command to download and install GSAT: sudo apt-get install stressapptest
2. After installation, start GSAT with this command: stressapptest -W -s 3600.
The -W argument instructs GSAT to perform a more stressful memory copy for the processor. Meanwhile, the -s argument specifies the number of seconds to run the tool. Unlike other software that depends on passes or cycles, GSAT runs based on the time you set. Typically, one to two hours is sufficient to determine if you have a bad DIMM.
What If My RAM Is Bad?
If you didn't encounter any errors: congratulations. Your memory is functioning correctly. However, if BSODs and other issues persist, the problem lies elsewhere. The only solution for a faulty DIMM is to replace it with a working one. Technically, you could repair DIMMs by swapping out the defective ICs for new ones, but this isn't a task for the average consumer. Fortunately, most, if not all, RAM comes with a limited lifetime warranty. Therefore, your first step should be to contact the manufacturer and request an RMA.
The RMA should process smoothly if you've been using your RAM within the vendor's specifications. If, for any reason, your RMA is denied and you need to buy a replacement out of pocket, we maintain an updated RAM benchmark hierarchy of the fastest DDR4 and DDR5 memory kits compatible with the latest Intel and AMD processors.