
Ecommerce is one of the fastest growing industries globally, predicted to have been worth a staggering $6.3 trillion in 2024, according to Shopify. With explosive growth comes ample opportunities and if you’re planning on taking advantage of these opportunities you will need to find the best ecommerce platform for you.
This is where Squarespace’s website builder shines brightly. It doesn’t just help you build a super personalized, stunning website from scratch but also offers many features to help you start selling your products instantly. Using Squarespace’s advanced ecommerce features you can add your products, create custom merchandise, build invoices and proposals, and a lot more.
Like most of the best website builders Squarespace is notoriously simple to use. But if you’ve run into challenges or the idea of getting your store online is a little daunting, we have created this guide to walk you through everything you need to know when building an online store with Squarespace.
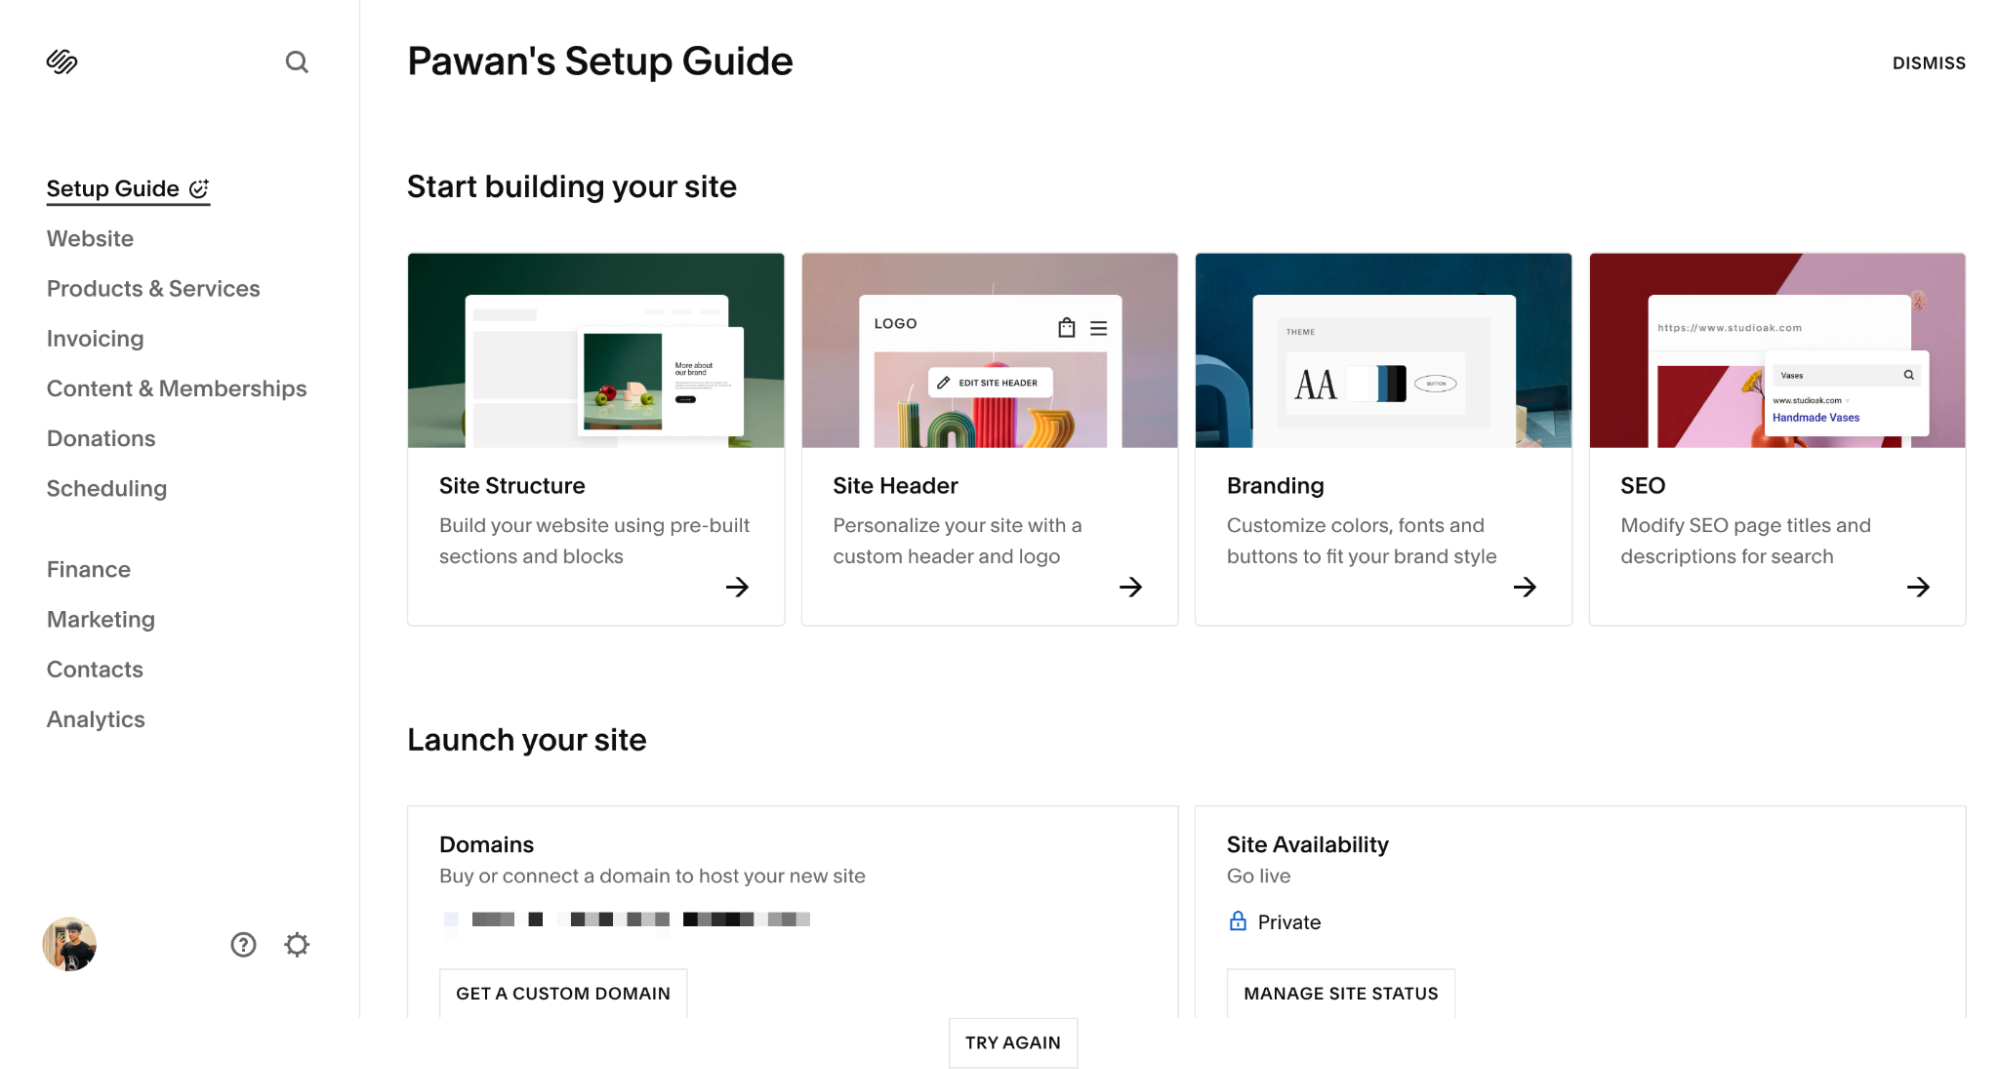
If you still haven’t created the basic website by completing the initial site setup, read our guide to do that first. Once done, hop on in, and let’s start with our online store.
Considering Squarespace? Get the best price on your subscription with our top Squarespace promo codes.
Setting up the initial products & services
1. Once you’ve completed the initial setup and you land on Squarespace’s editor, go to Products & Services.

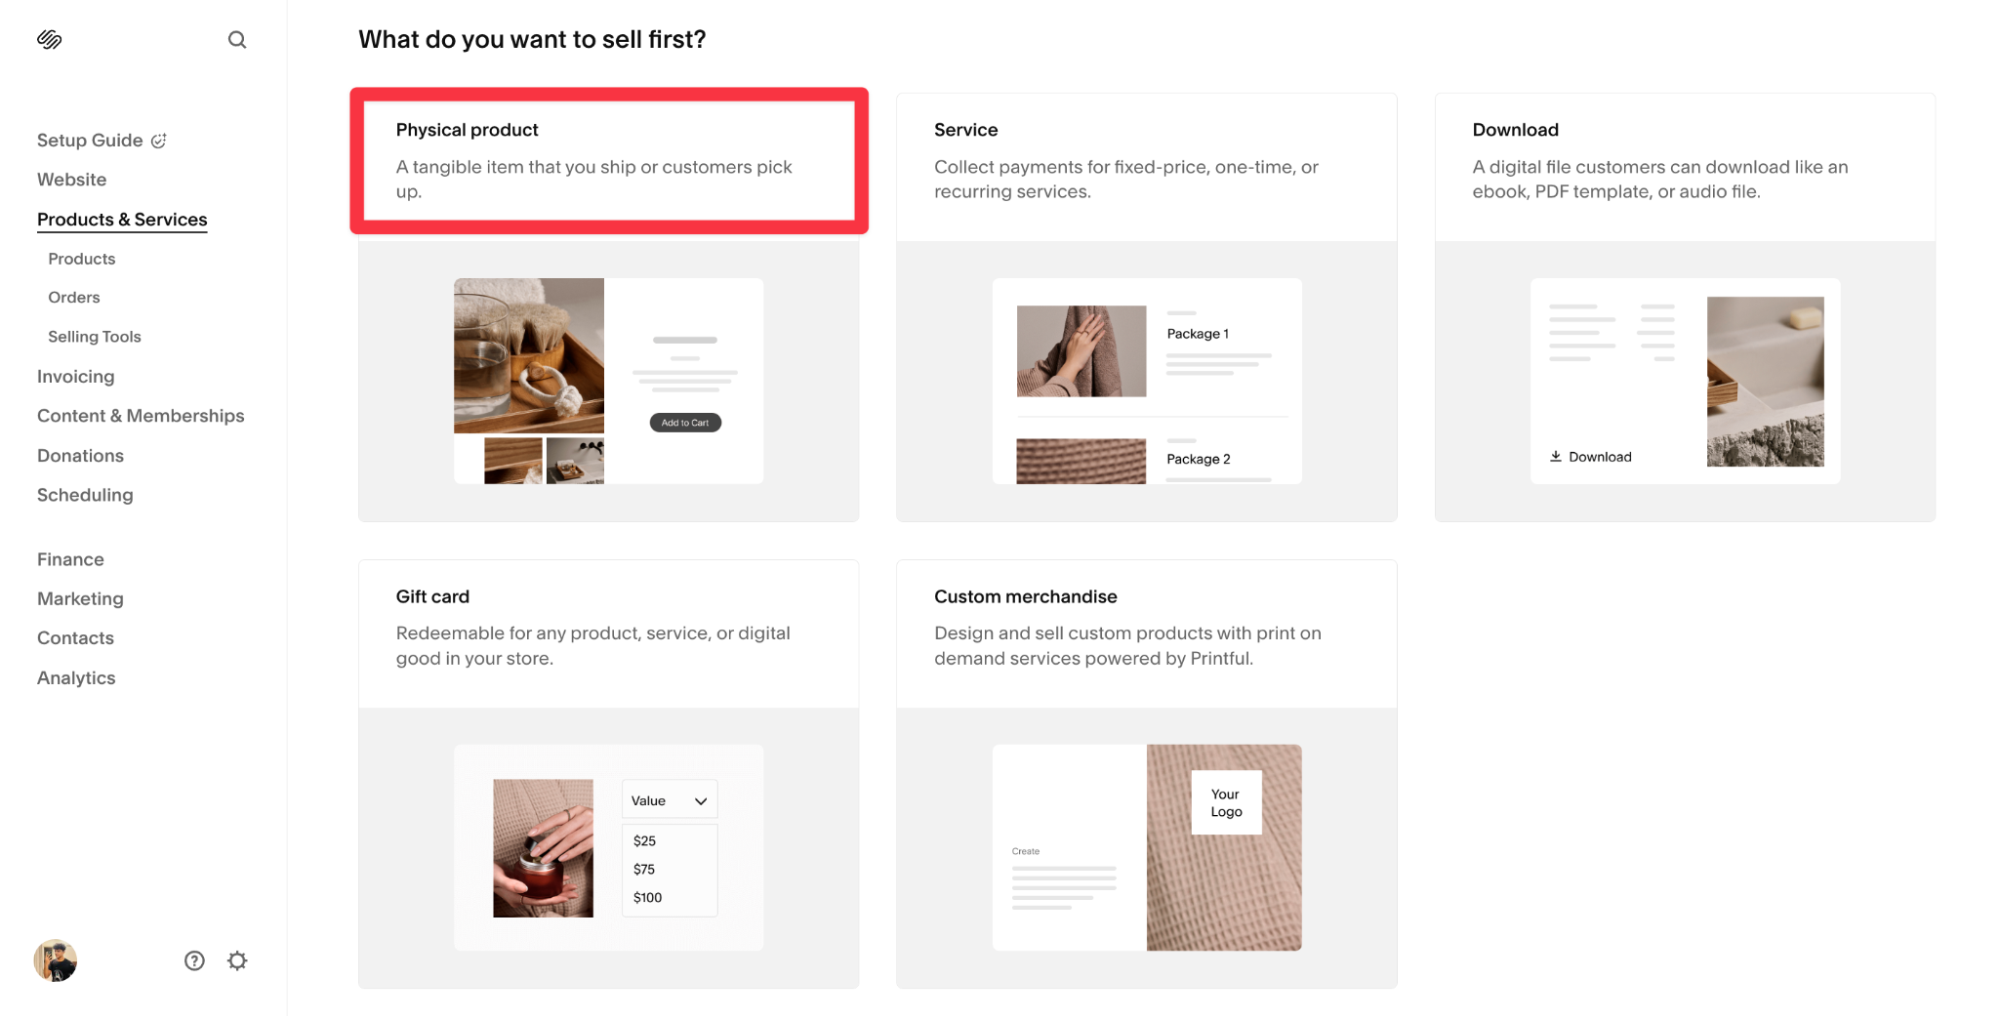
2. Here, you can choose what you’ll be selling on the website. We’ll be setting up an online store that can sell physical products so we’ll choose that in this step.
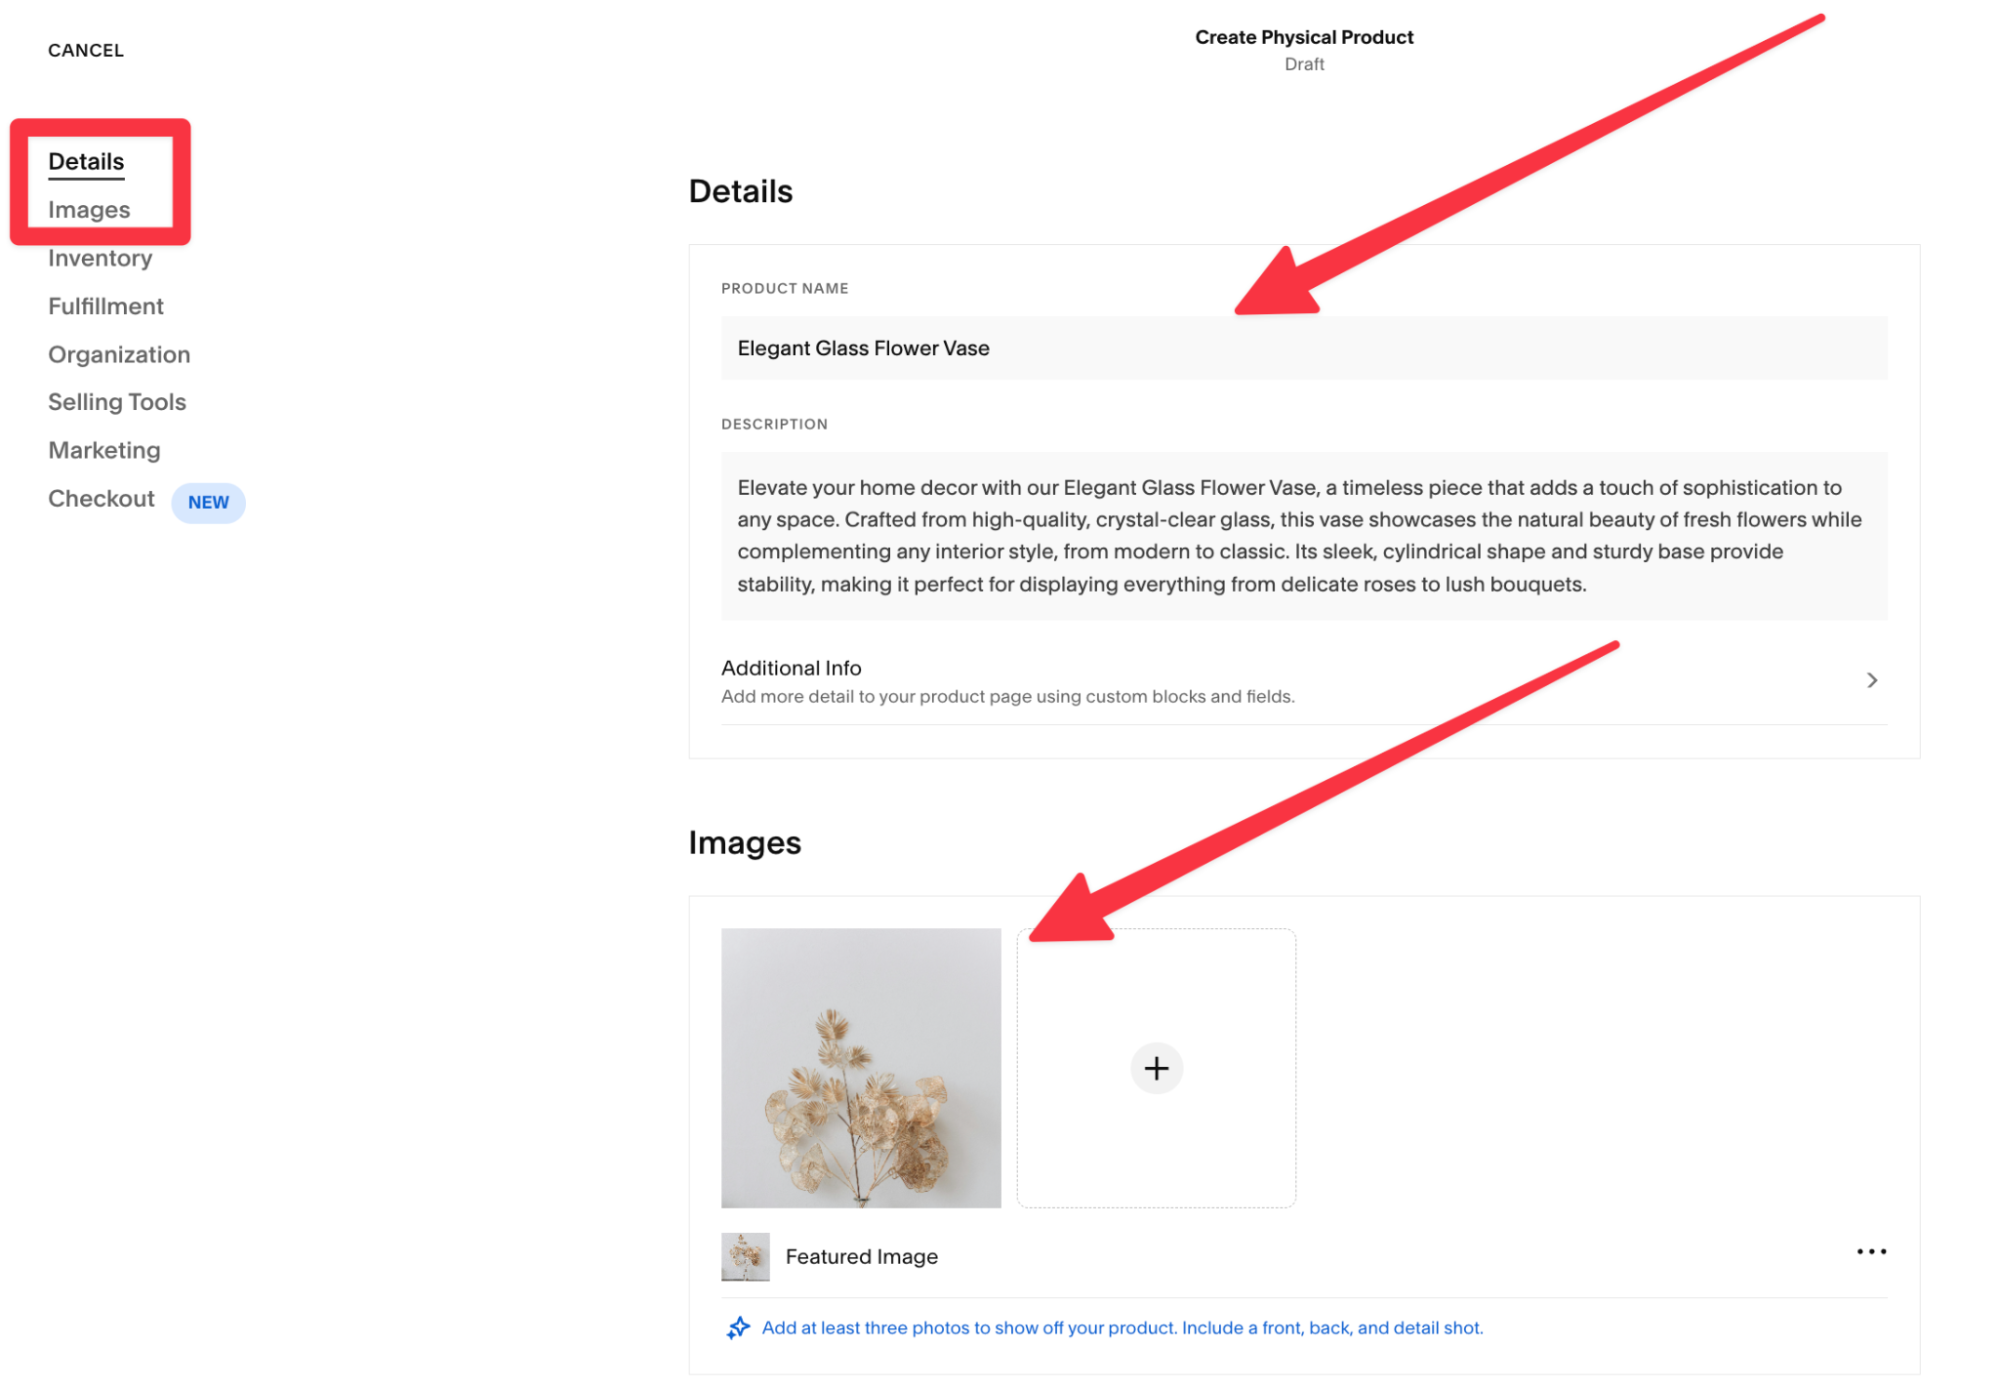
3. Next, you’ll feed all the information about your product to the platform. Start with the details and enter the relevant product name, description, and images for the same, just like we did below.
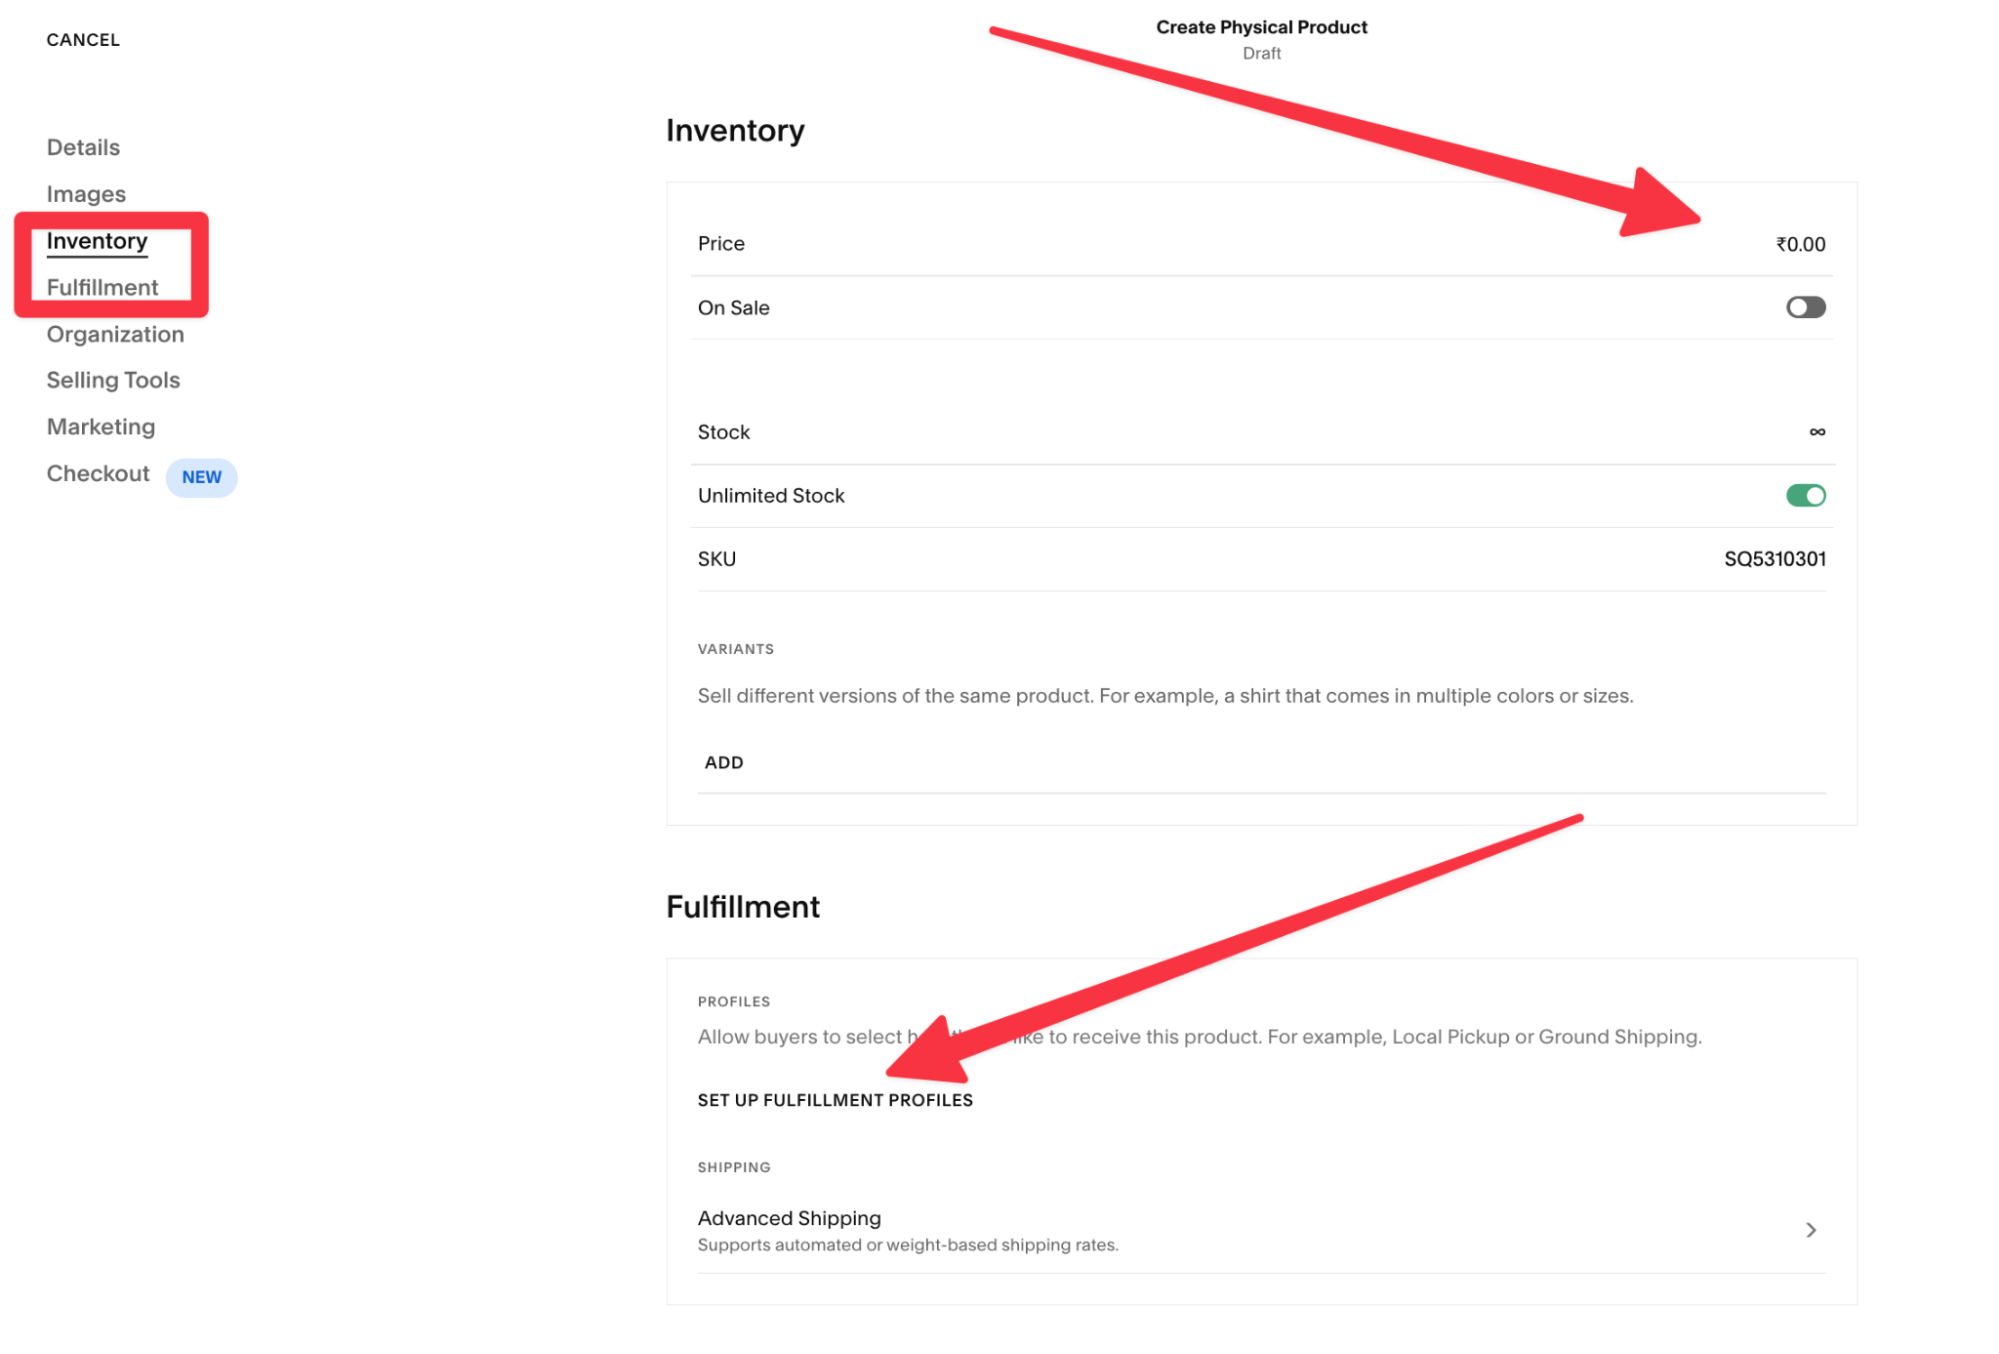
4. Once you’re done with the initial description of the product, you’ll now enter the inventory and fulfilment details of the product, like the price of the product, sale details, SKUs, etc.
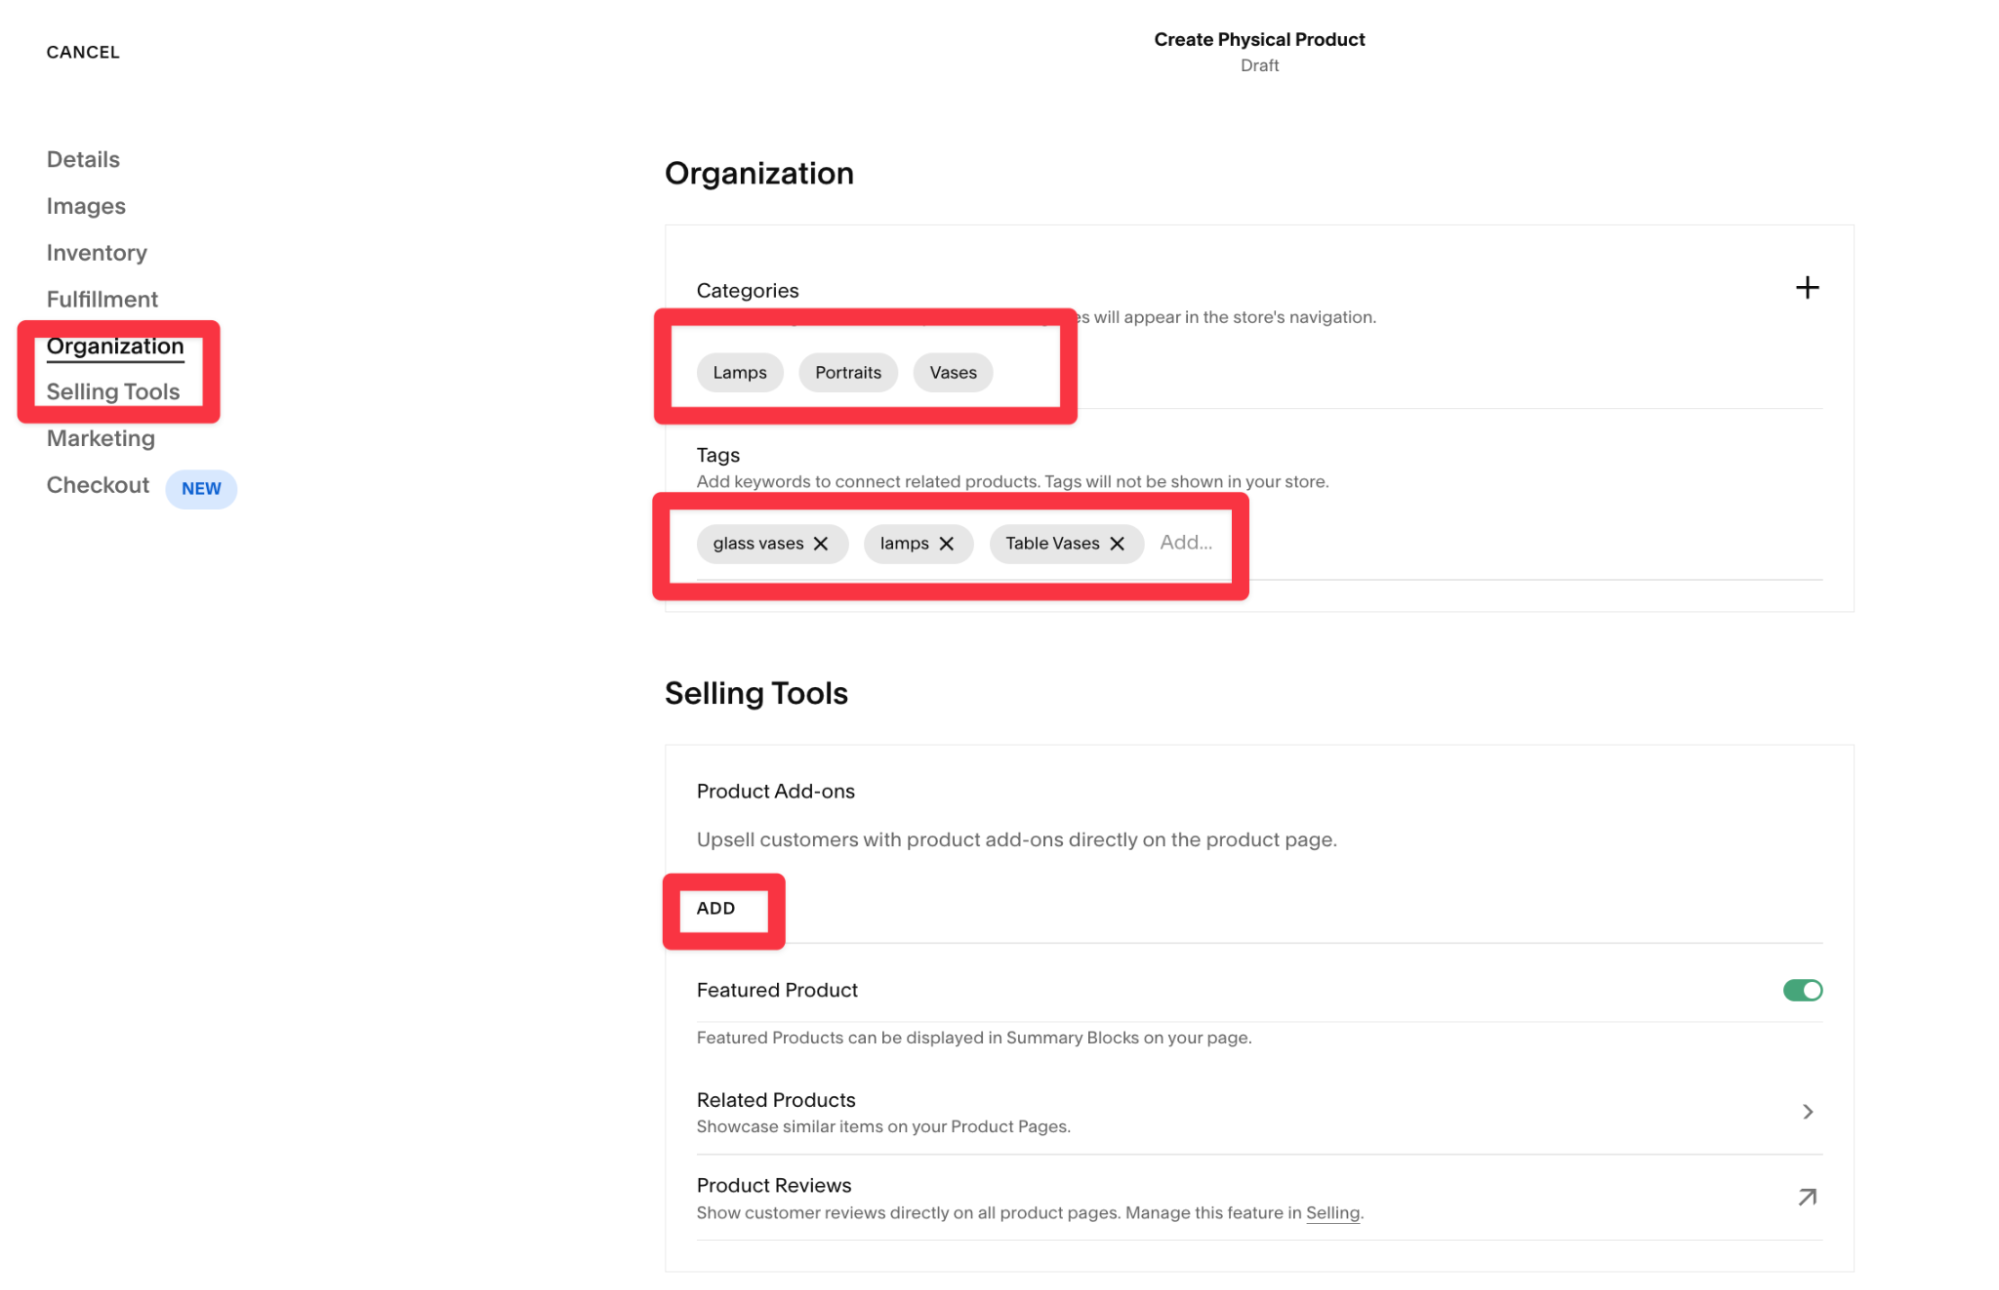
5. Moving ahead, you can enter your store details such as the categories, tags, product add-ons, and more. Scroll down once you’ve entered all the required details.
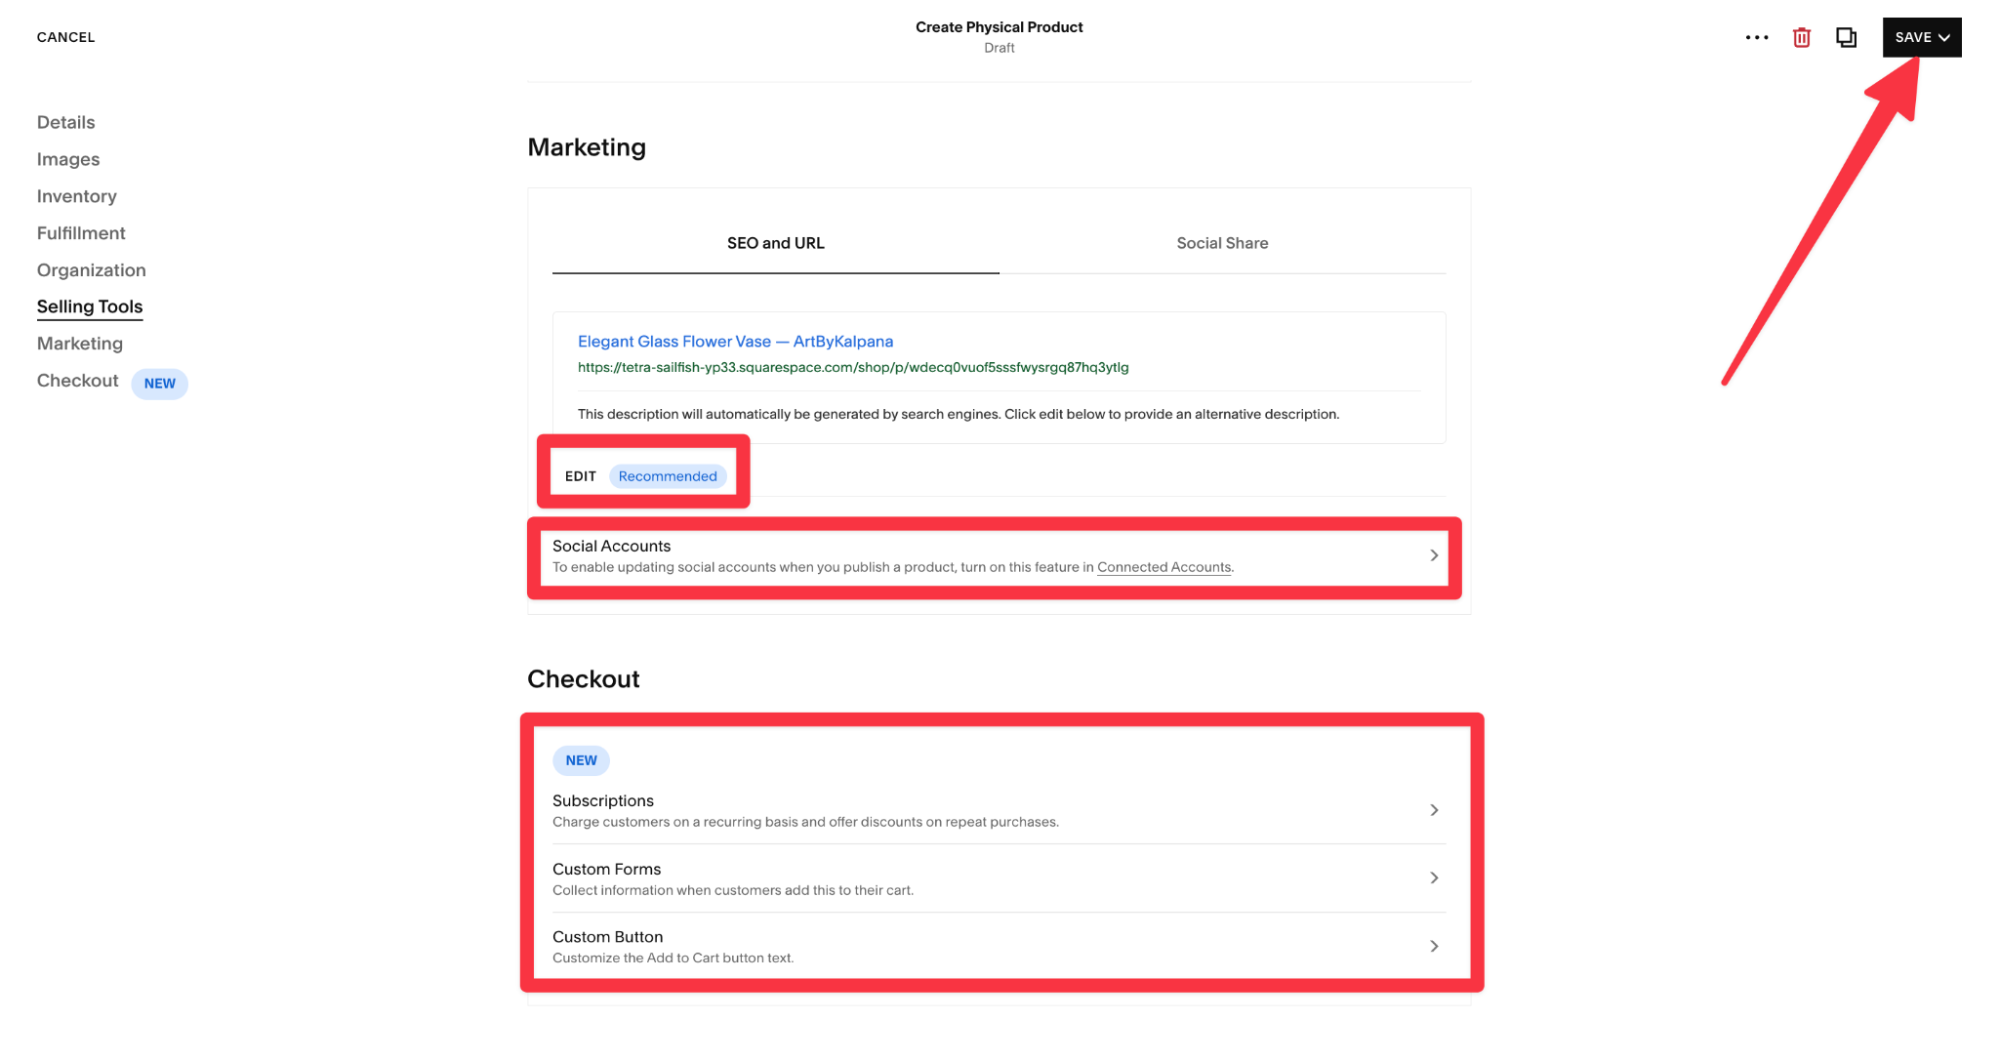
6. The next step is to enter the relevant marketing details. This is a very critical step as, most of the time, this is how your customers will find your online store Here you change the URL, connect your social accounts, add subscriptions, forms, or any buttons to the Checkout section, and then click Save to confirm all changes.
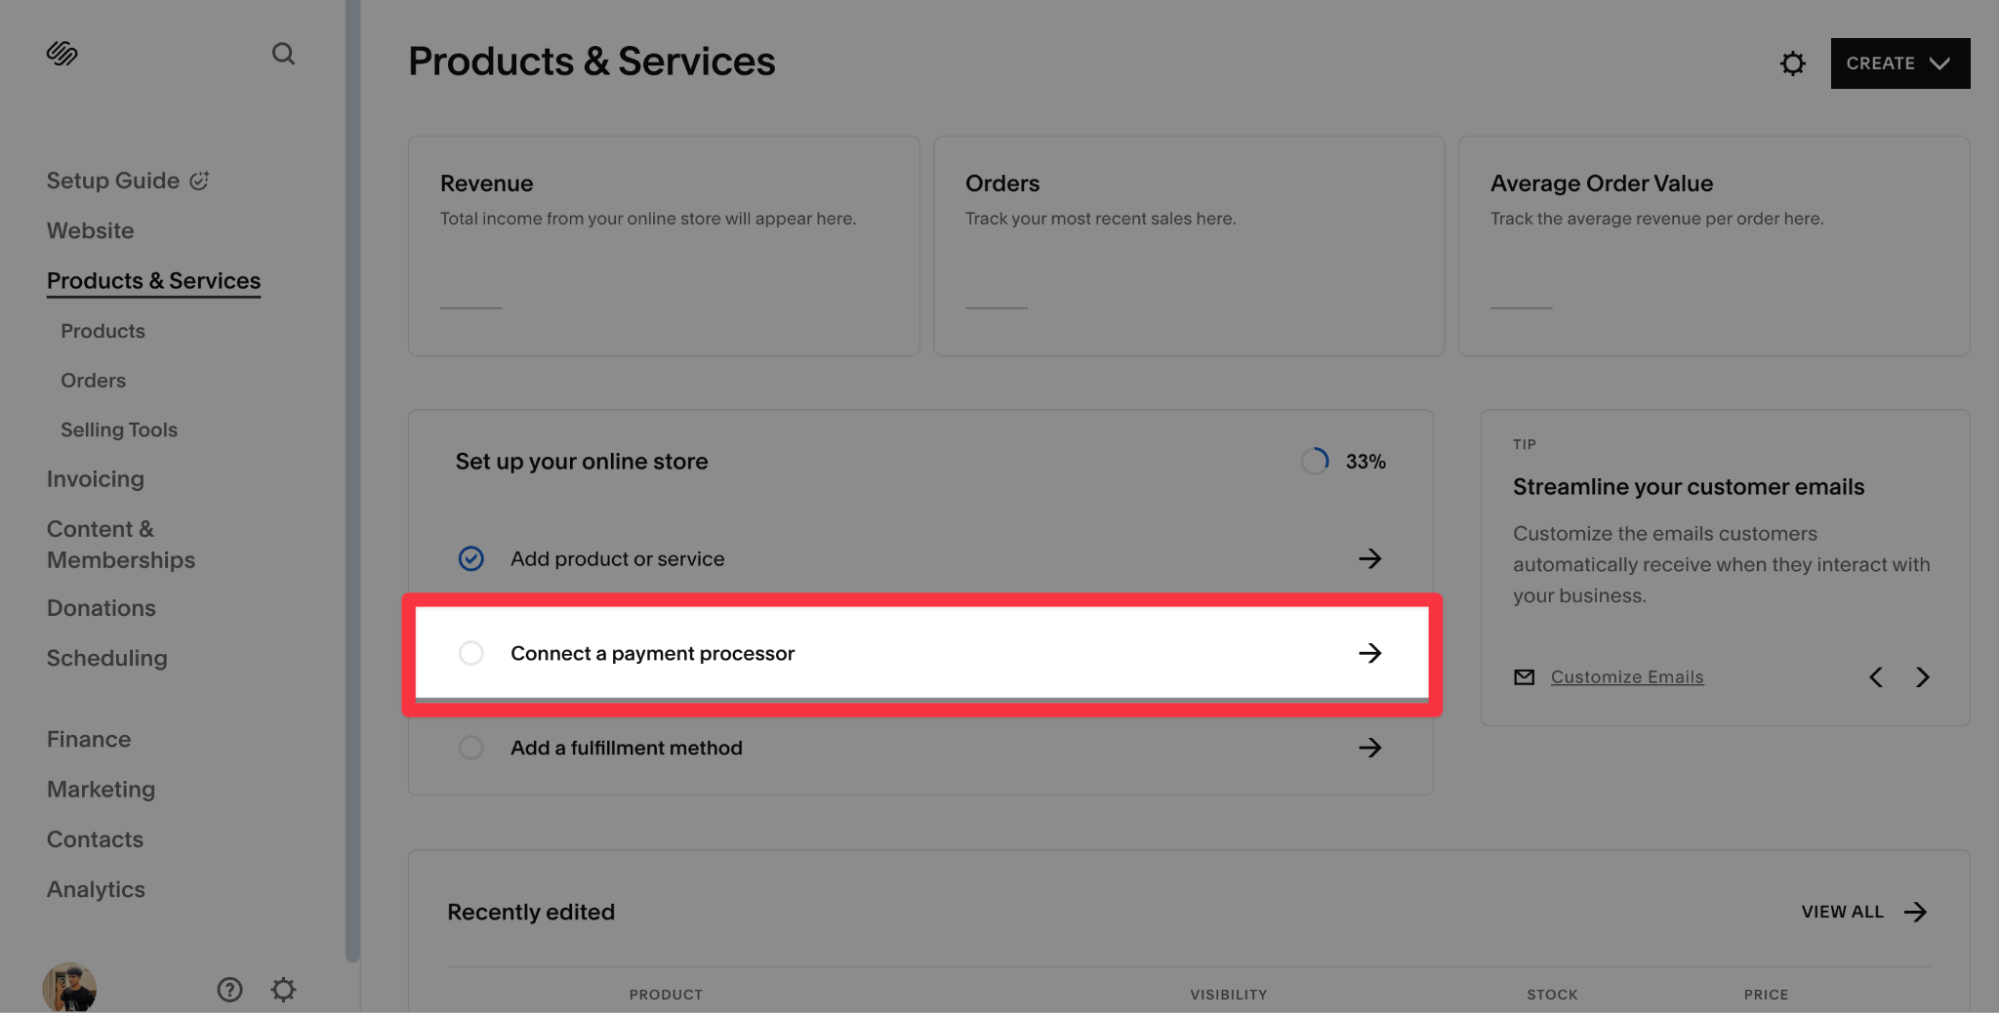
7. You’ve now successfully added your products to the site - great work. Now it is time to connect a payment processor so customers can pay for their products. Tap Connect a payment processor, to start this step.
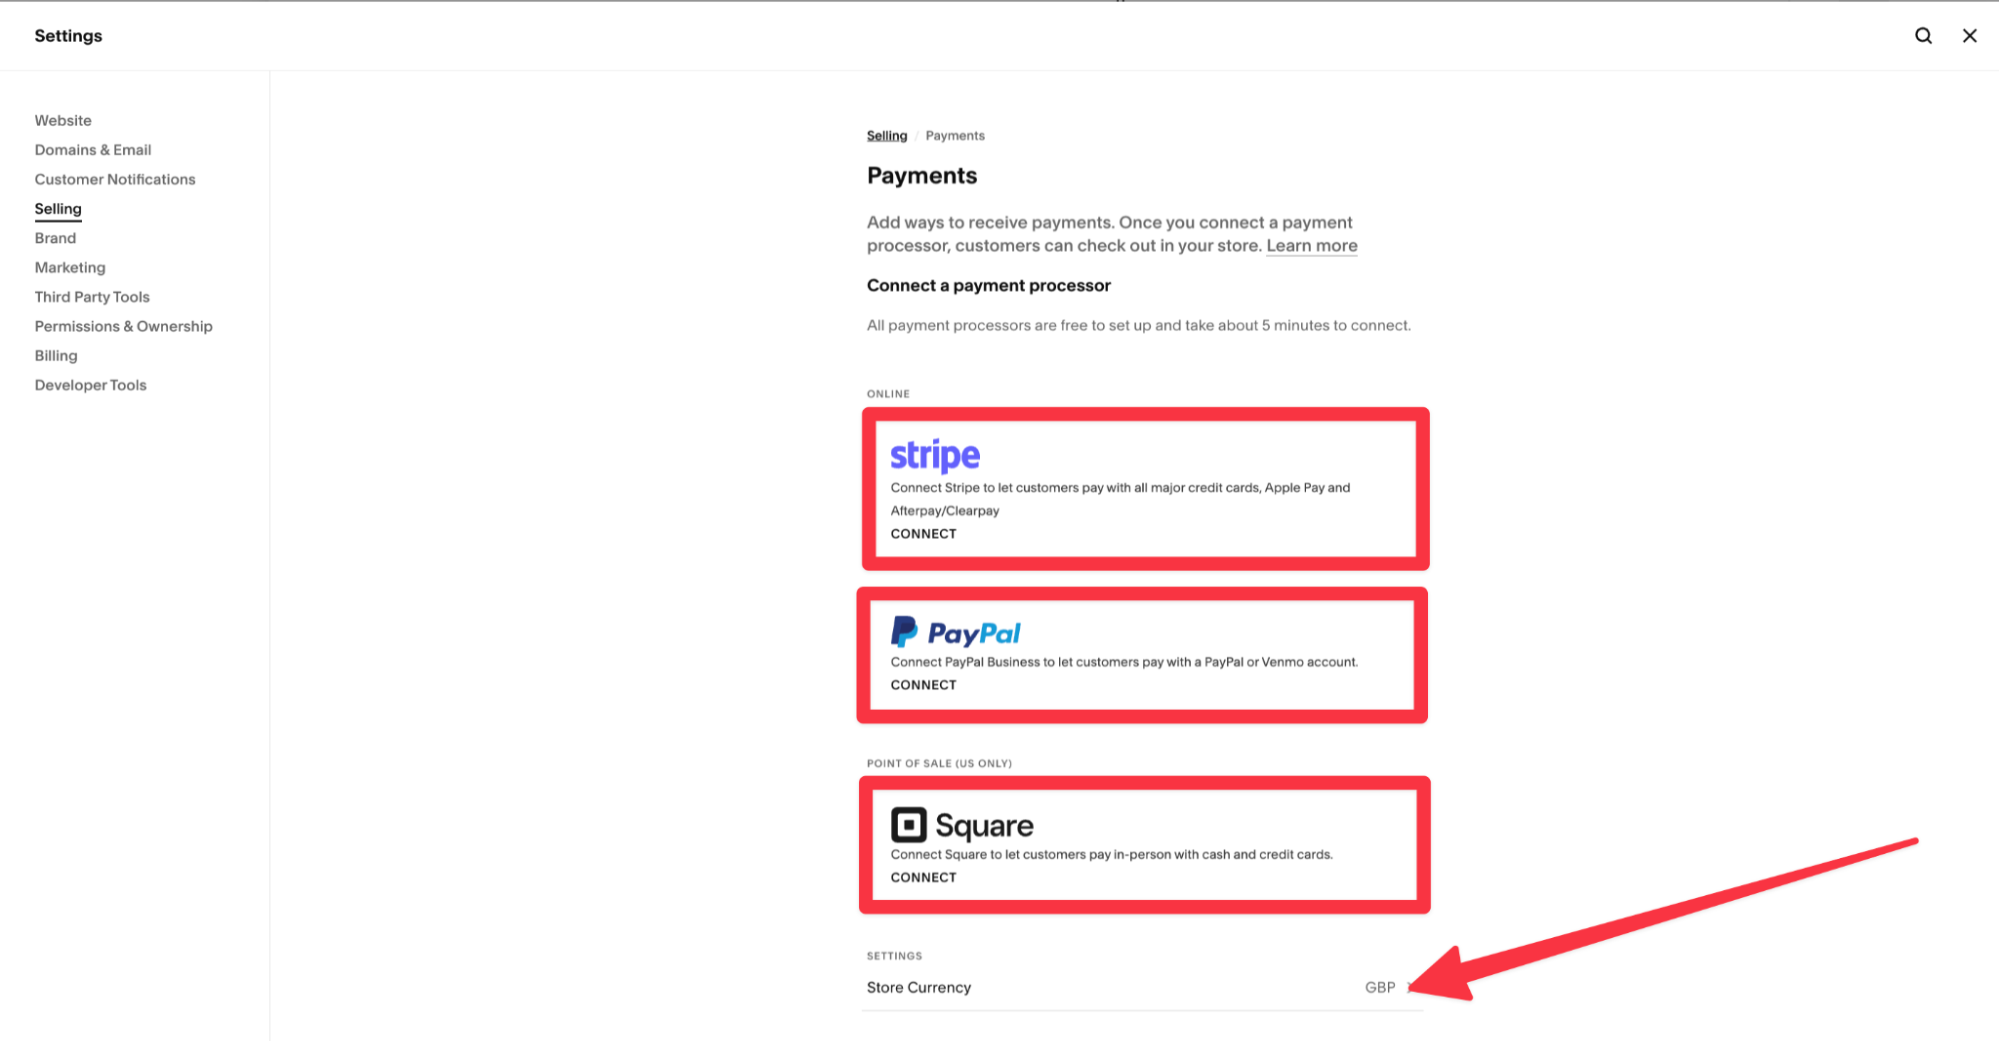
8. Squarespace offers Stripe and PayPal for global audiences and Square for US customers. You can connect with these payment processors for free. Once you’re done, confirm the currency unit and complete the payment process.
Managing your online store with Squarespace
Once you’ve completed your initial setup, you’ll be directed to your online store dashboard. This lets you take full control of your website. Here’s what it offers and how to utilize these tools for your business:
Customizing products & services
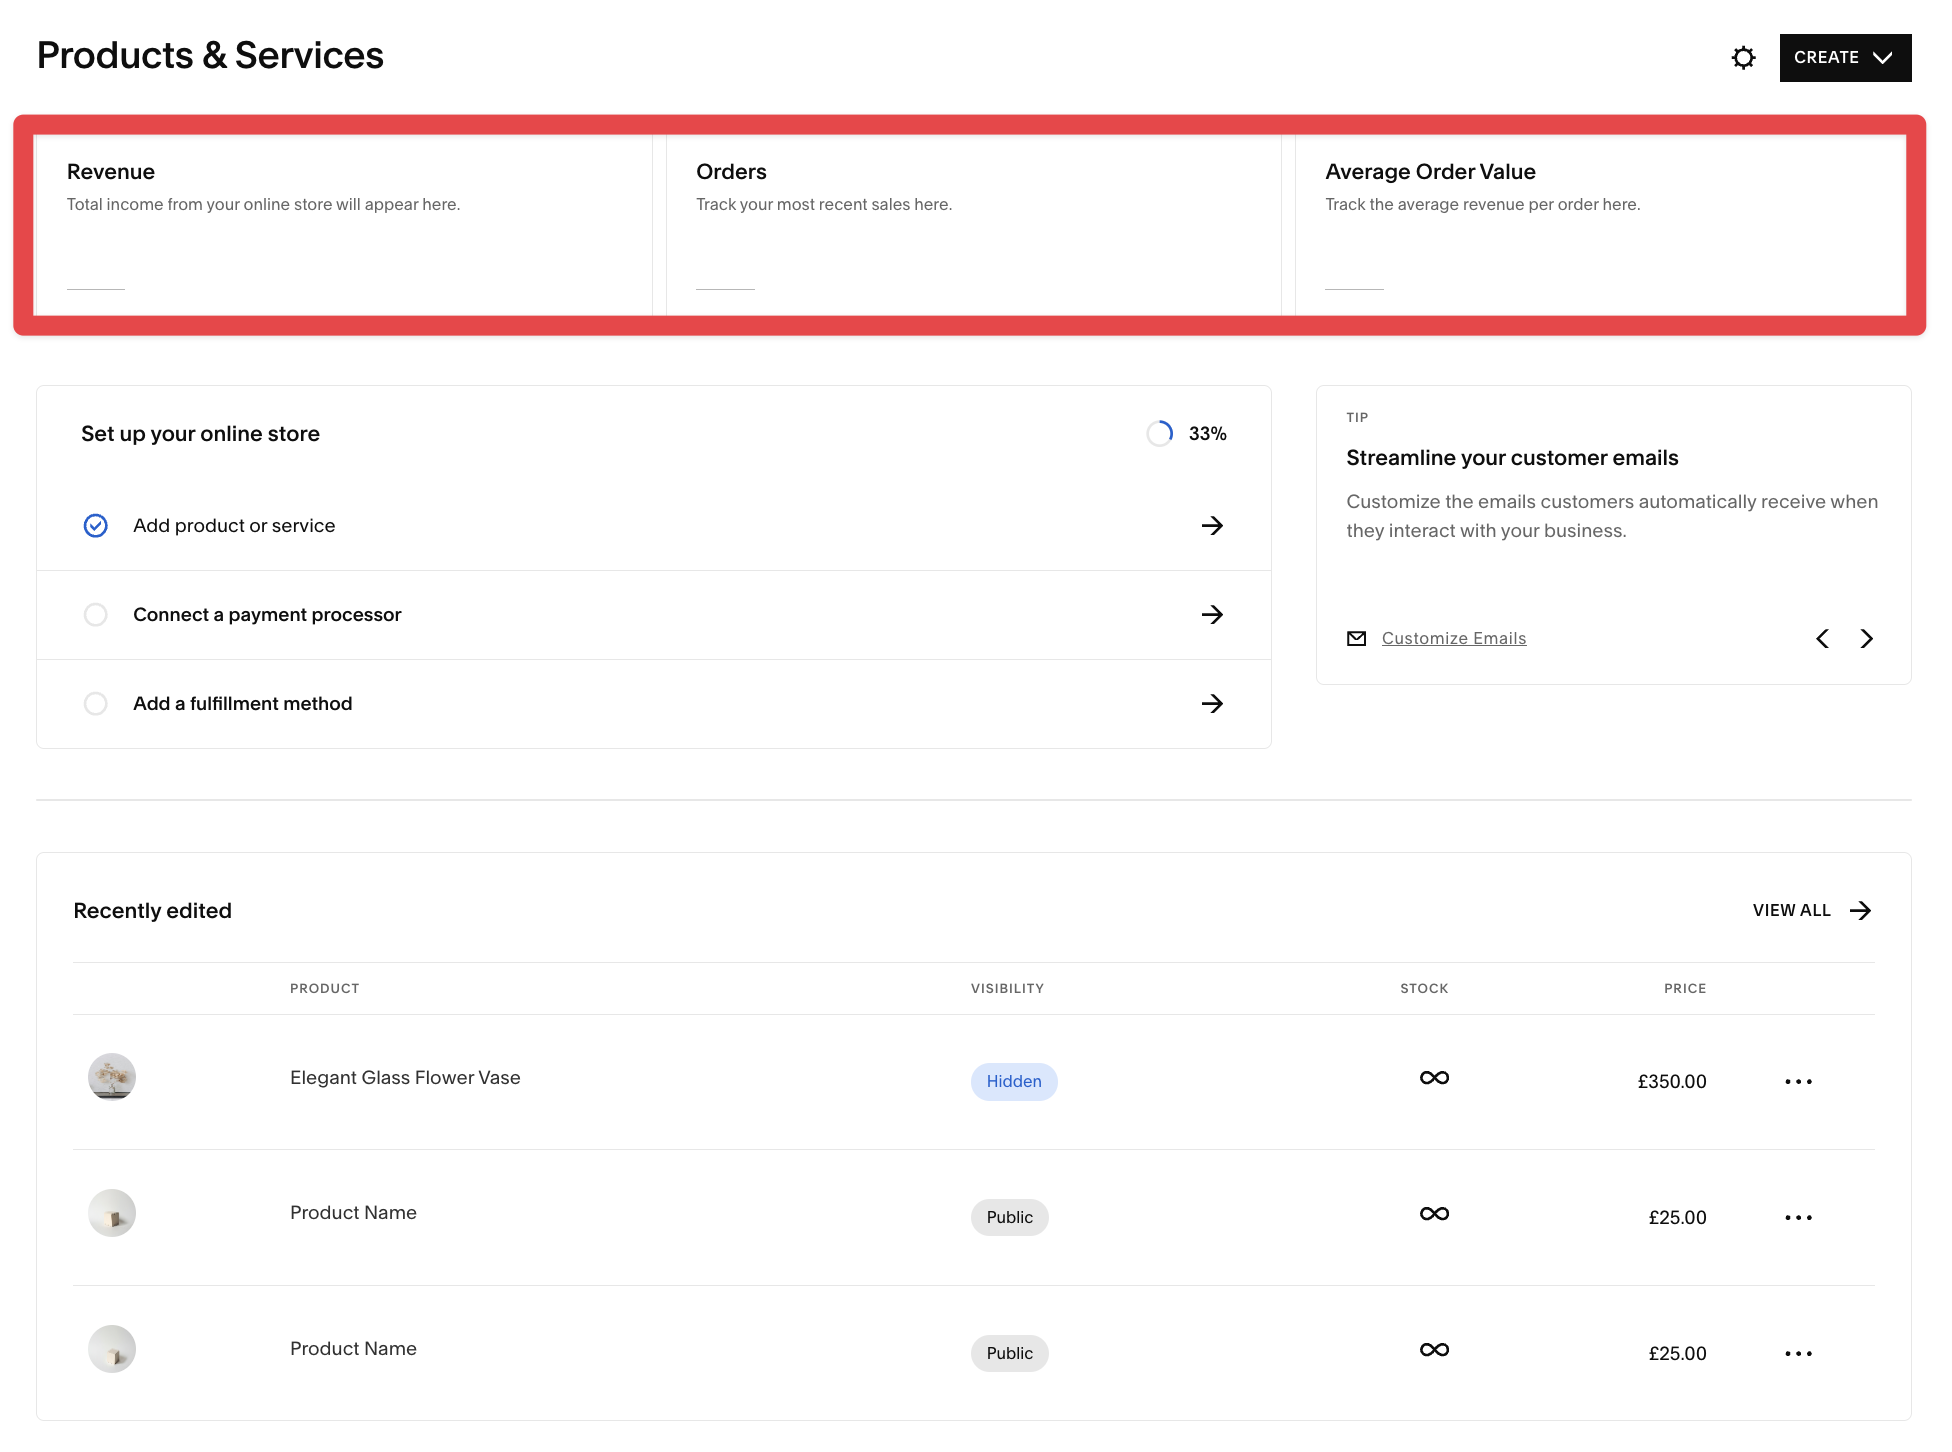
1. The dashboard starts with a summary of your online store’s sales and revenue. You can track the total income from the sale of your products, recent orders, and even the average revenue per order.
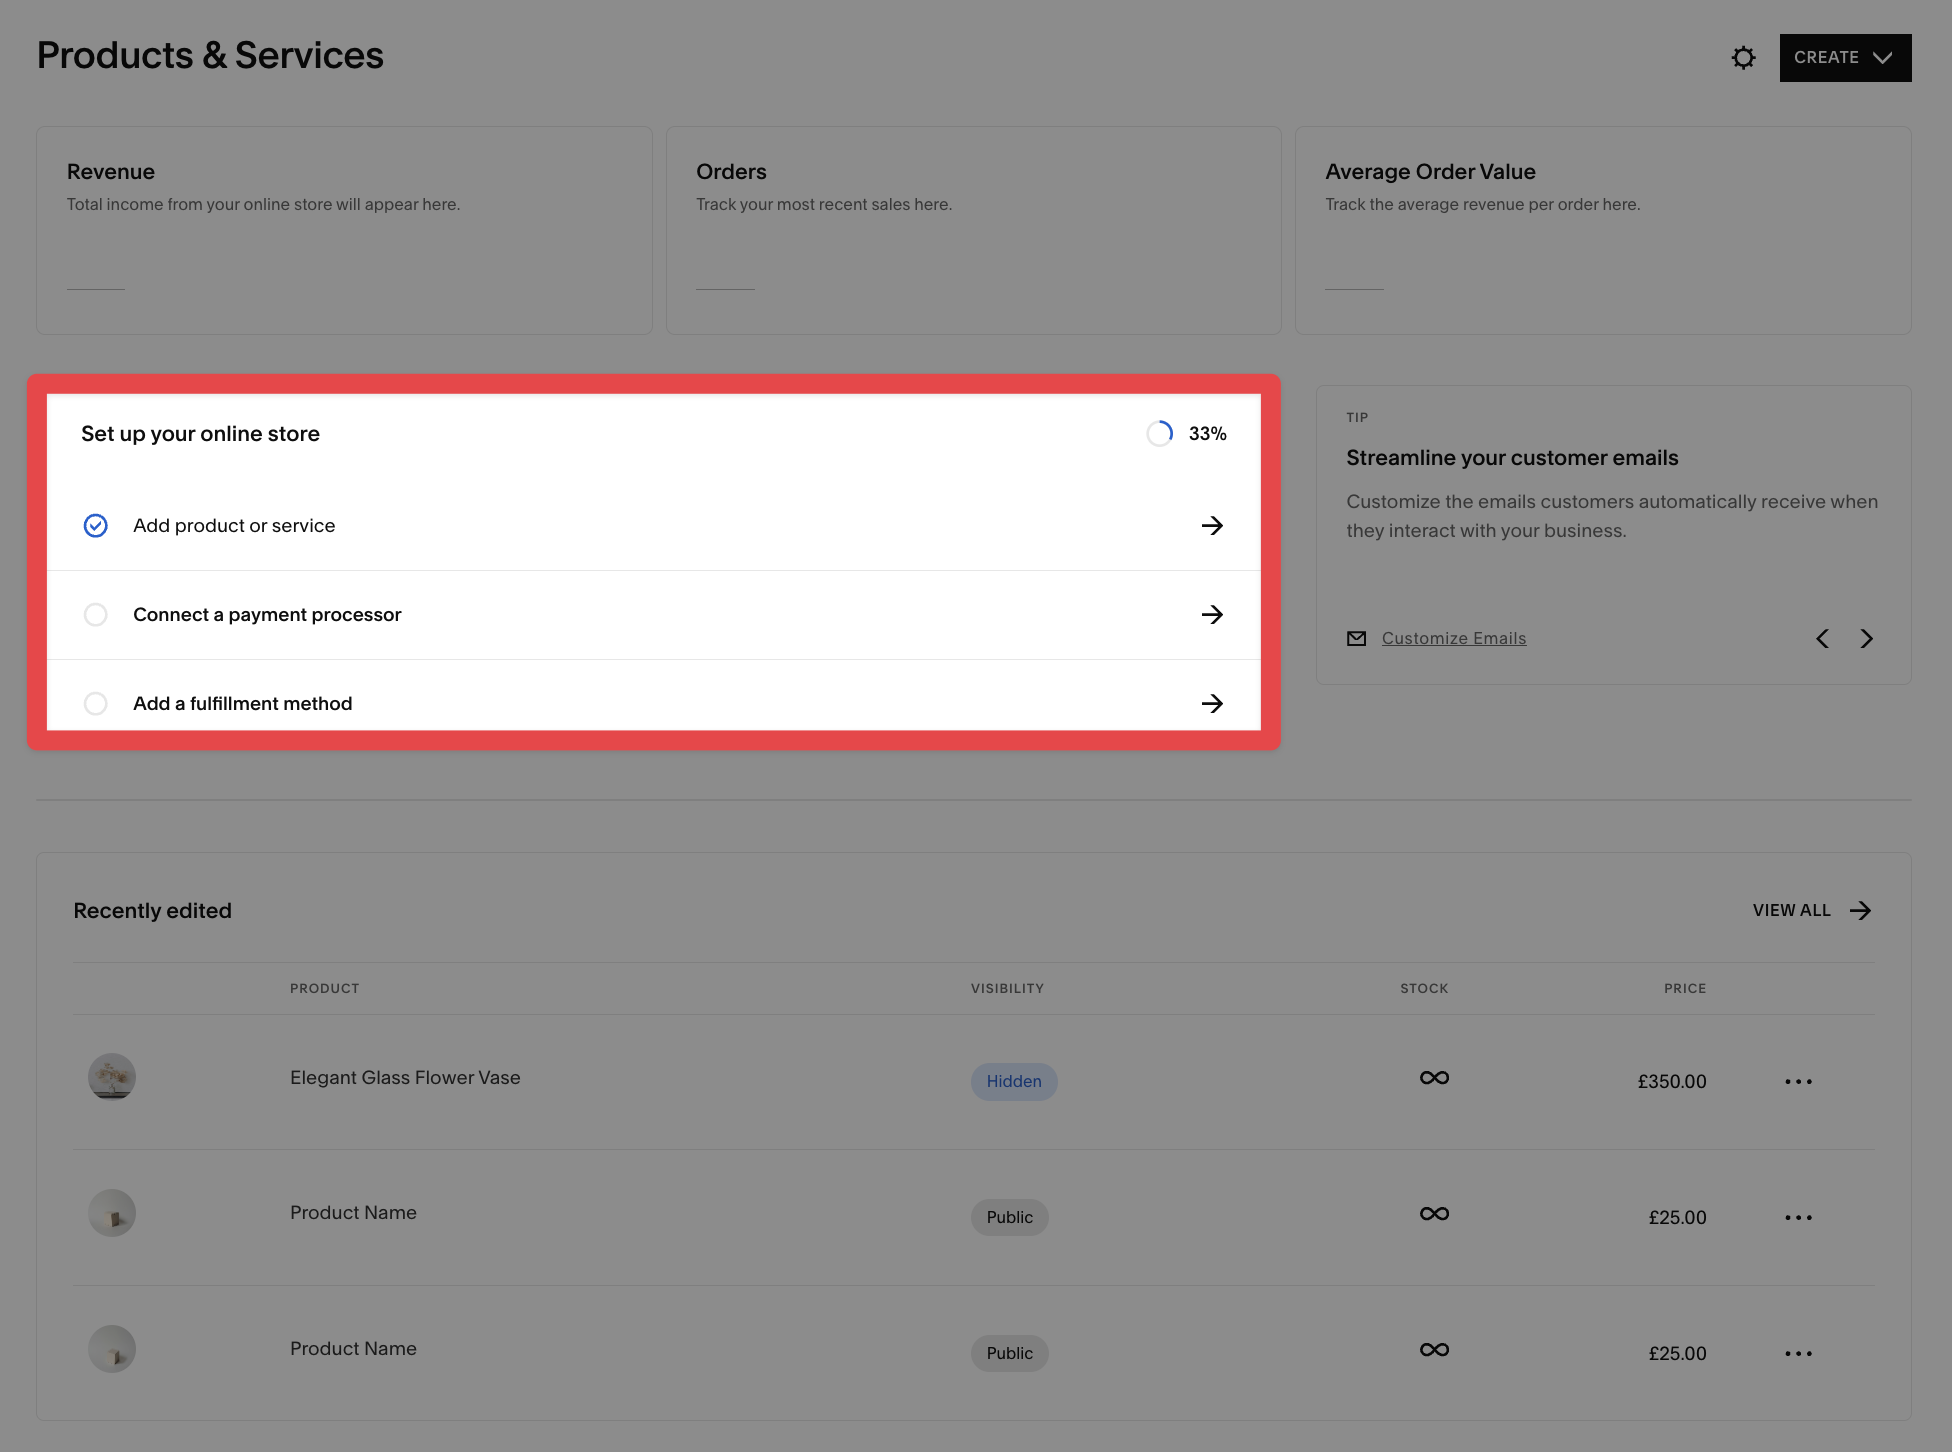
2. If you haven’t completed the mandatory steps like adding the payment processors or the fulfillment methods, you can add them up directly from the dashboard. Simply tap on them and input your information.
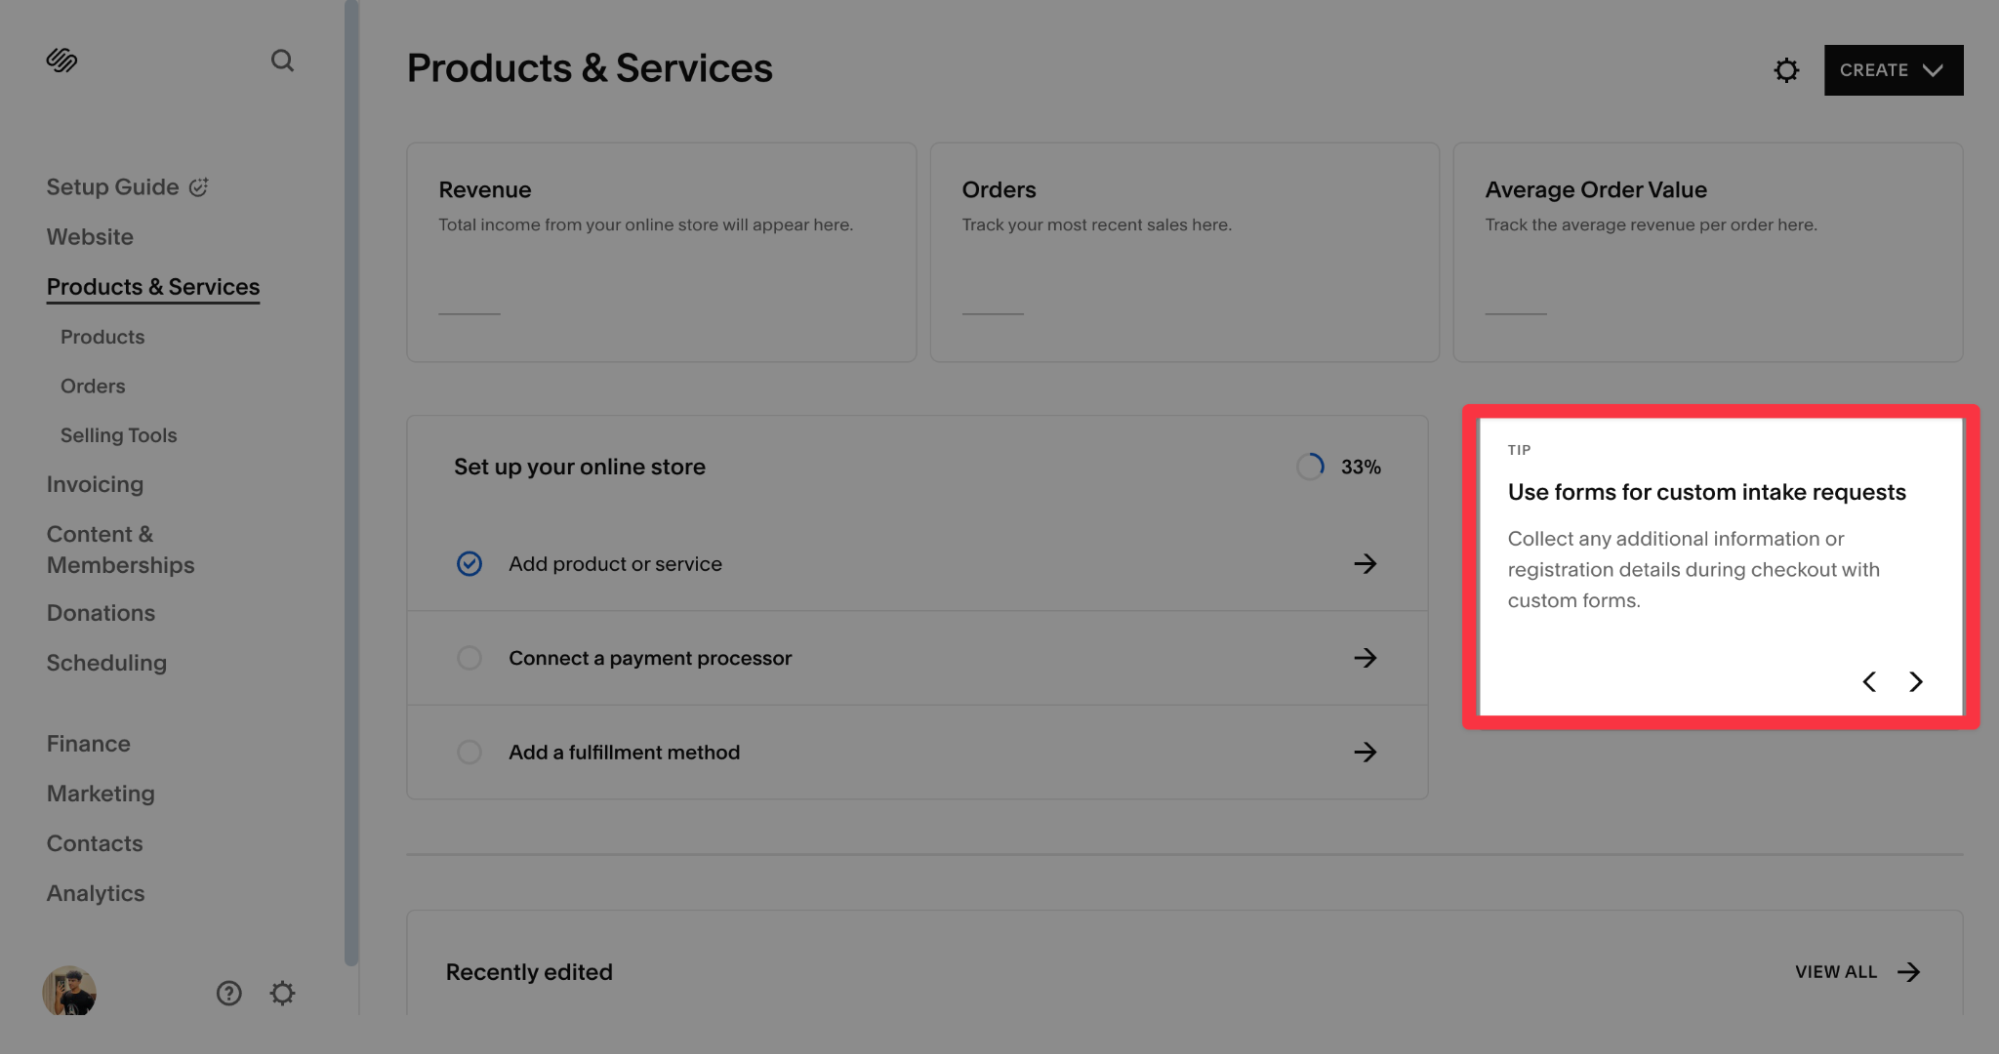
3. As you’re just starting out with your online store, there’s a high chance that you might miss out on completing some of the most important steps. Squarespace helps you tackle them by presenting a Tips section where it suggests useful upgrades to your store. You can tap on the arrow buttons to see various tips on your dashboard.
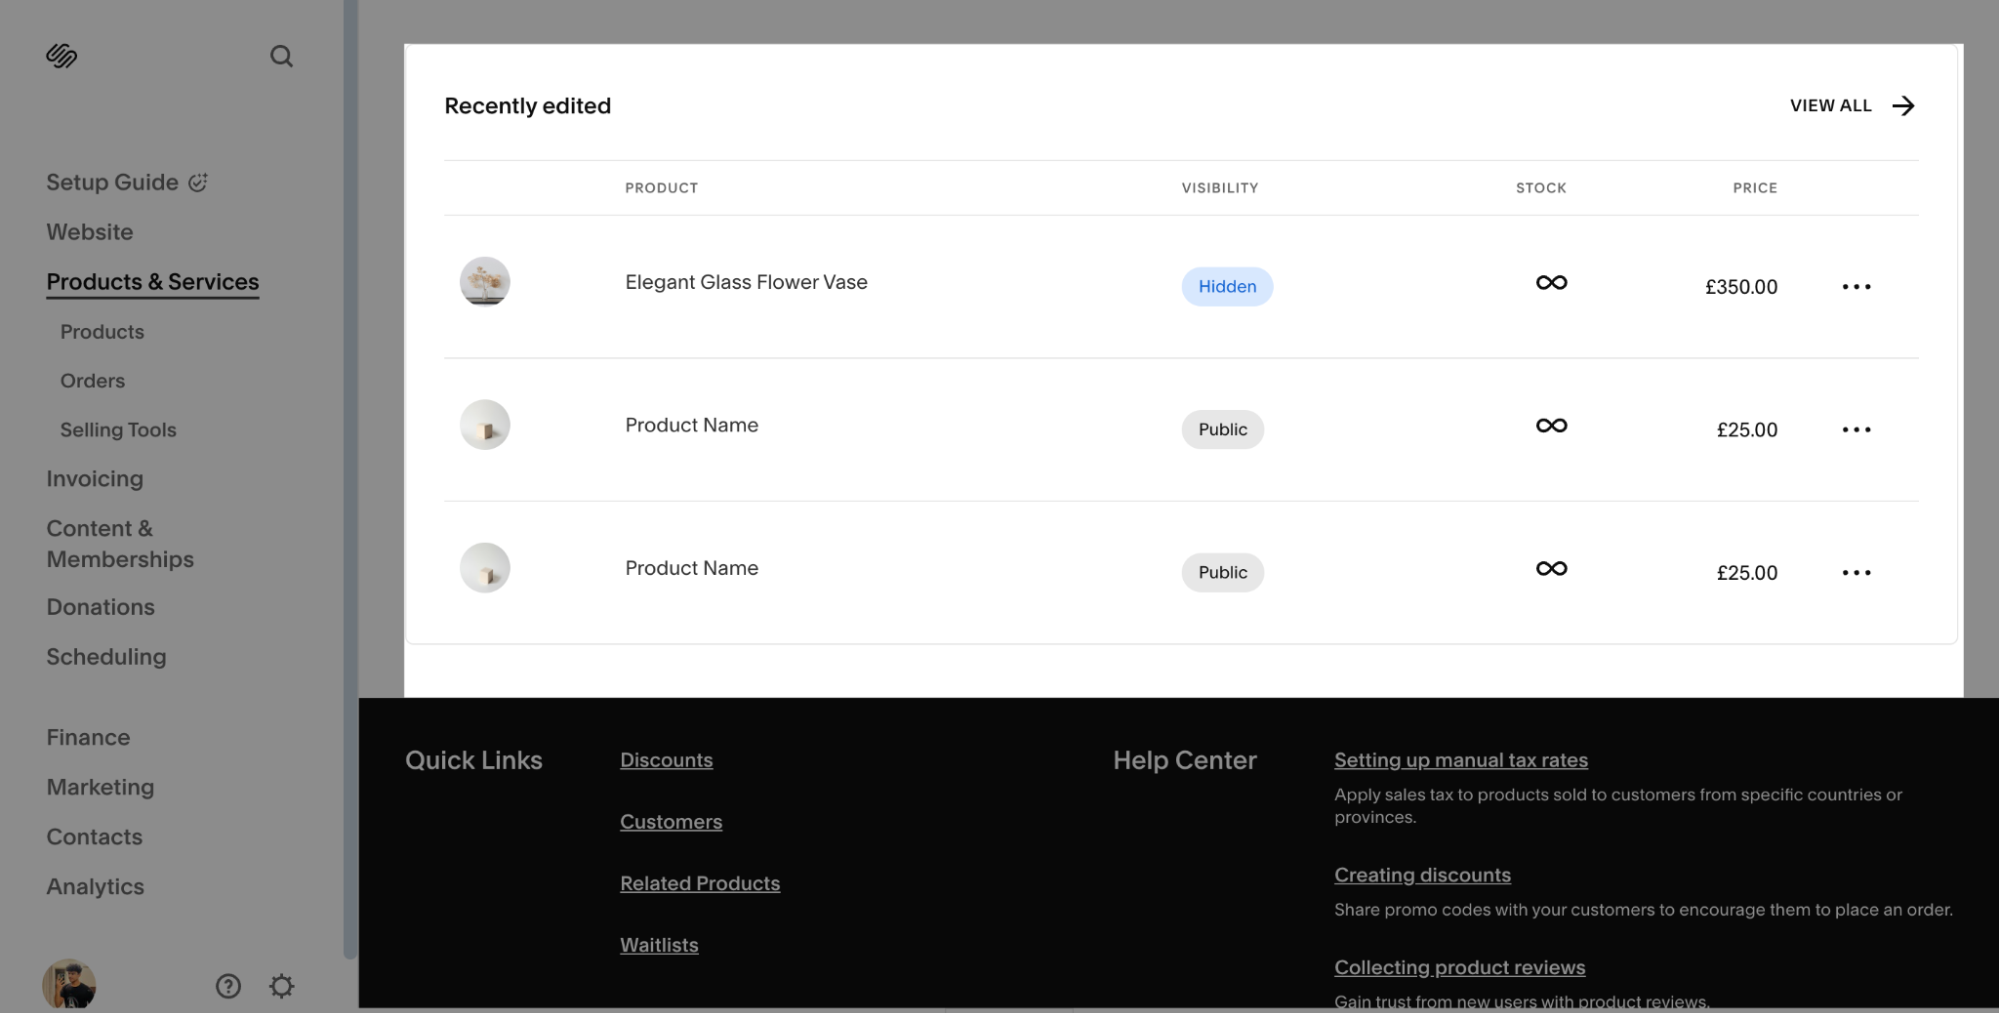
4. Lastly, you can also track the recent edits that you’ve made to the site. Here, you can alter the product details and add more info if needed.
Setting up selling tools
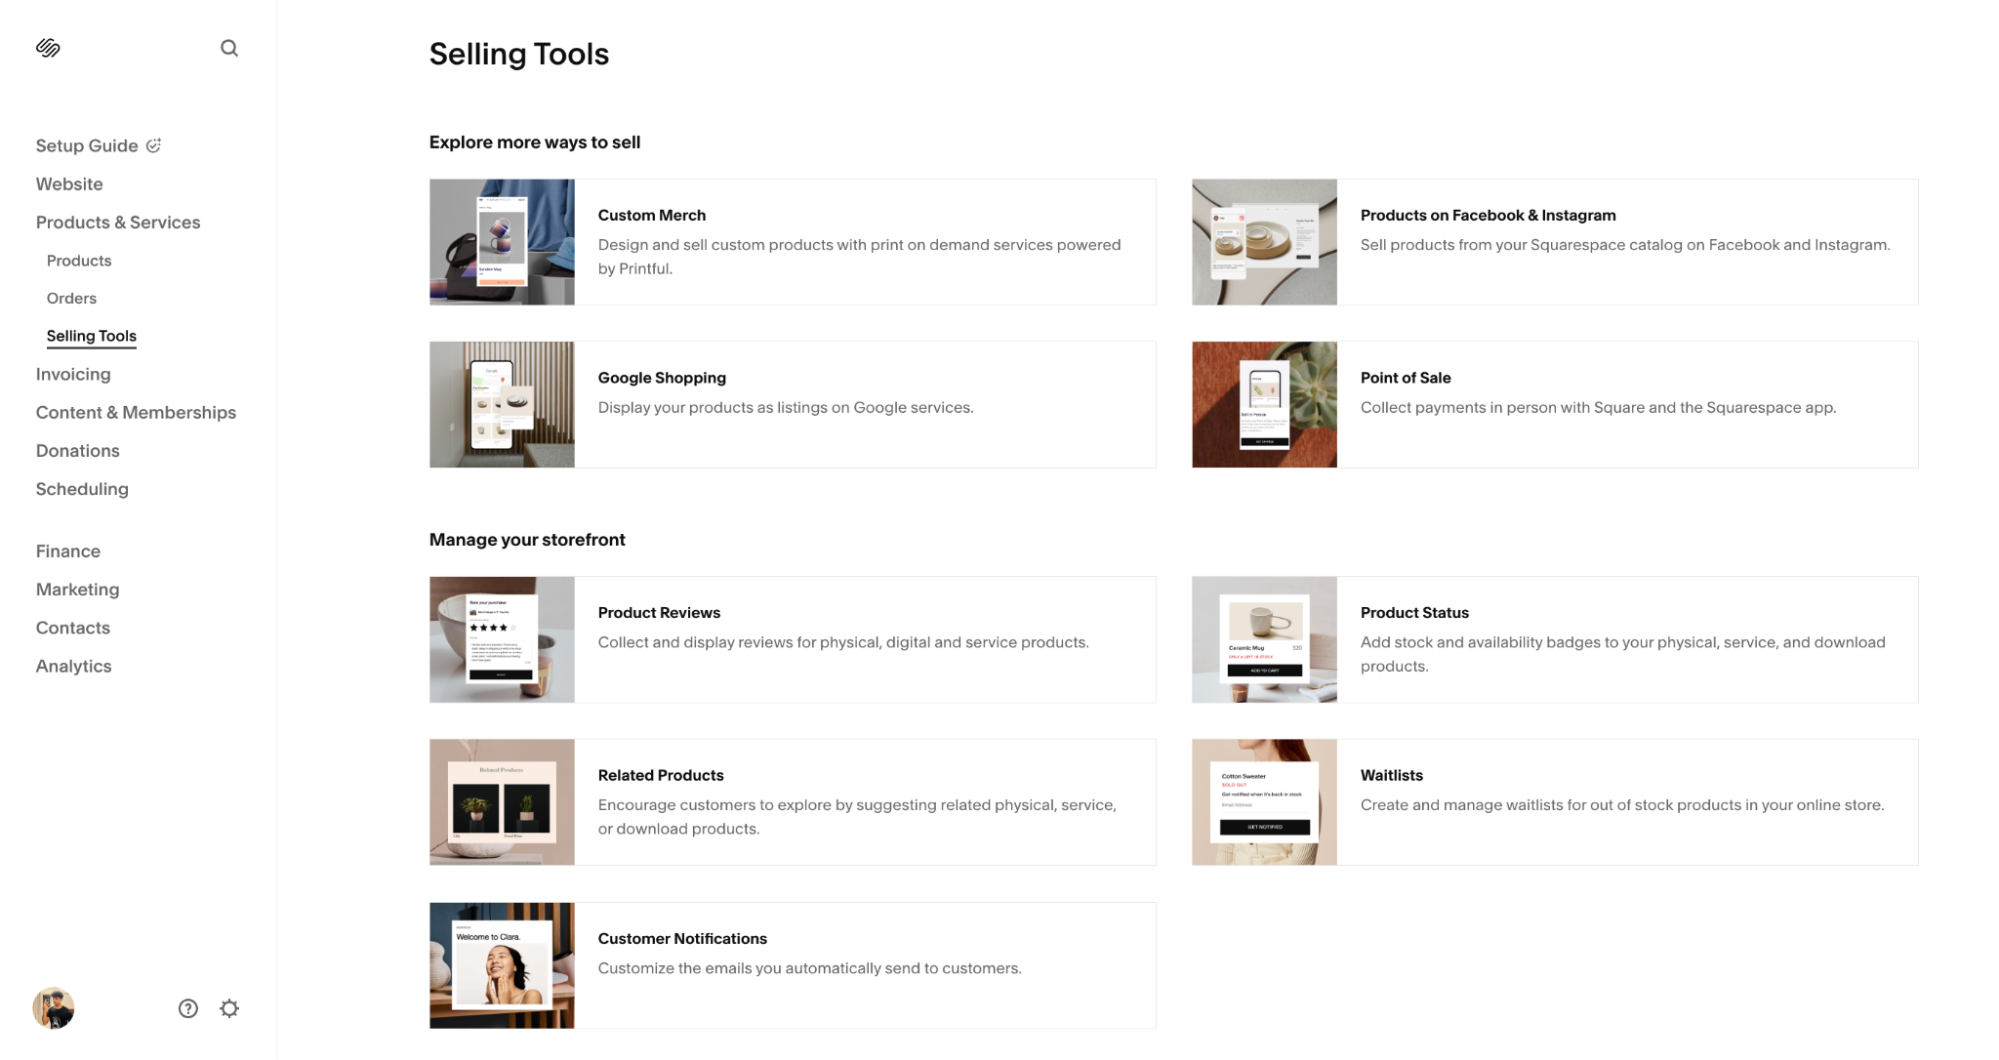
Squarespace offers a bunch of selling tools to assist you in managing your online store seamlessly. You can add custom merchandise, product reviews, notifications, and more through this section. Follow these steps to add them to your store:
Adding custom merch with Printful
1. Go to Selling Tools and tap Custom Merch to design and sell custom-made products with on-demand print services powered by Printful.
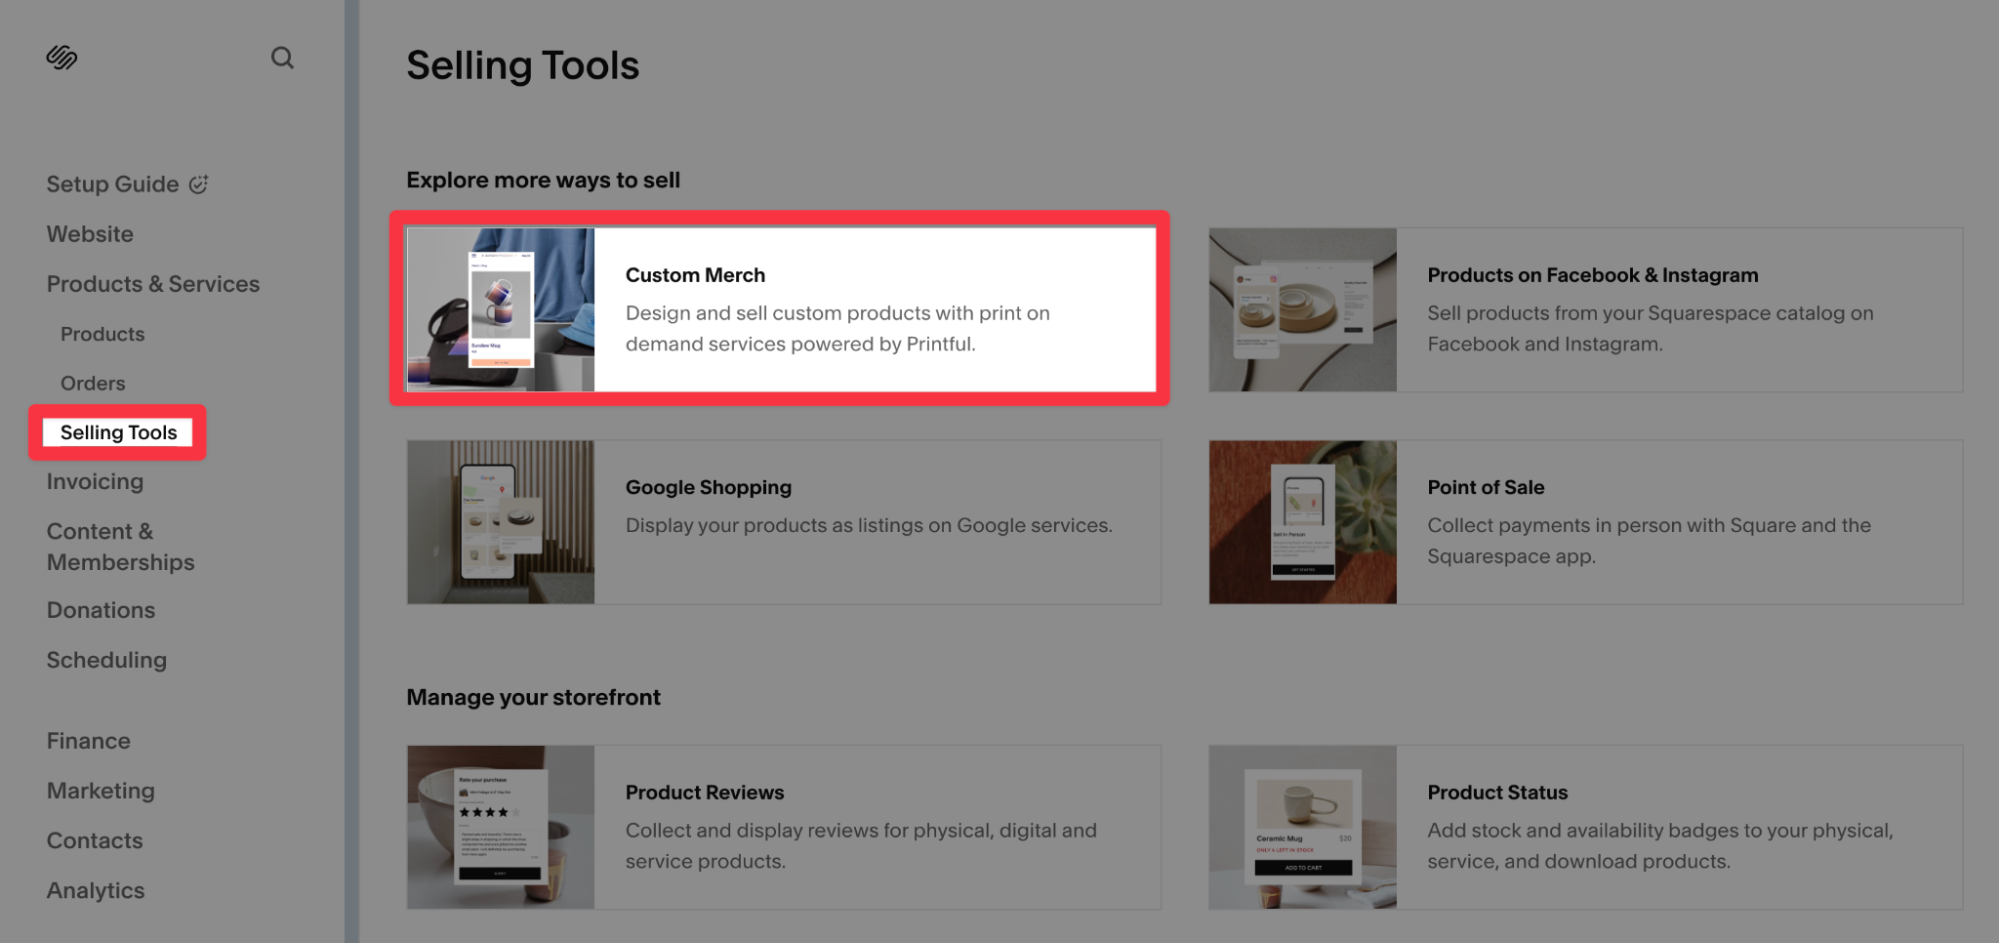
2. In this step, tap Connect to add a Printful account with your Squarespace account and start designing your product.
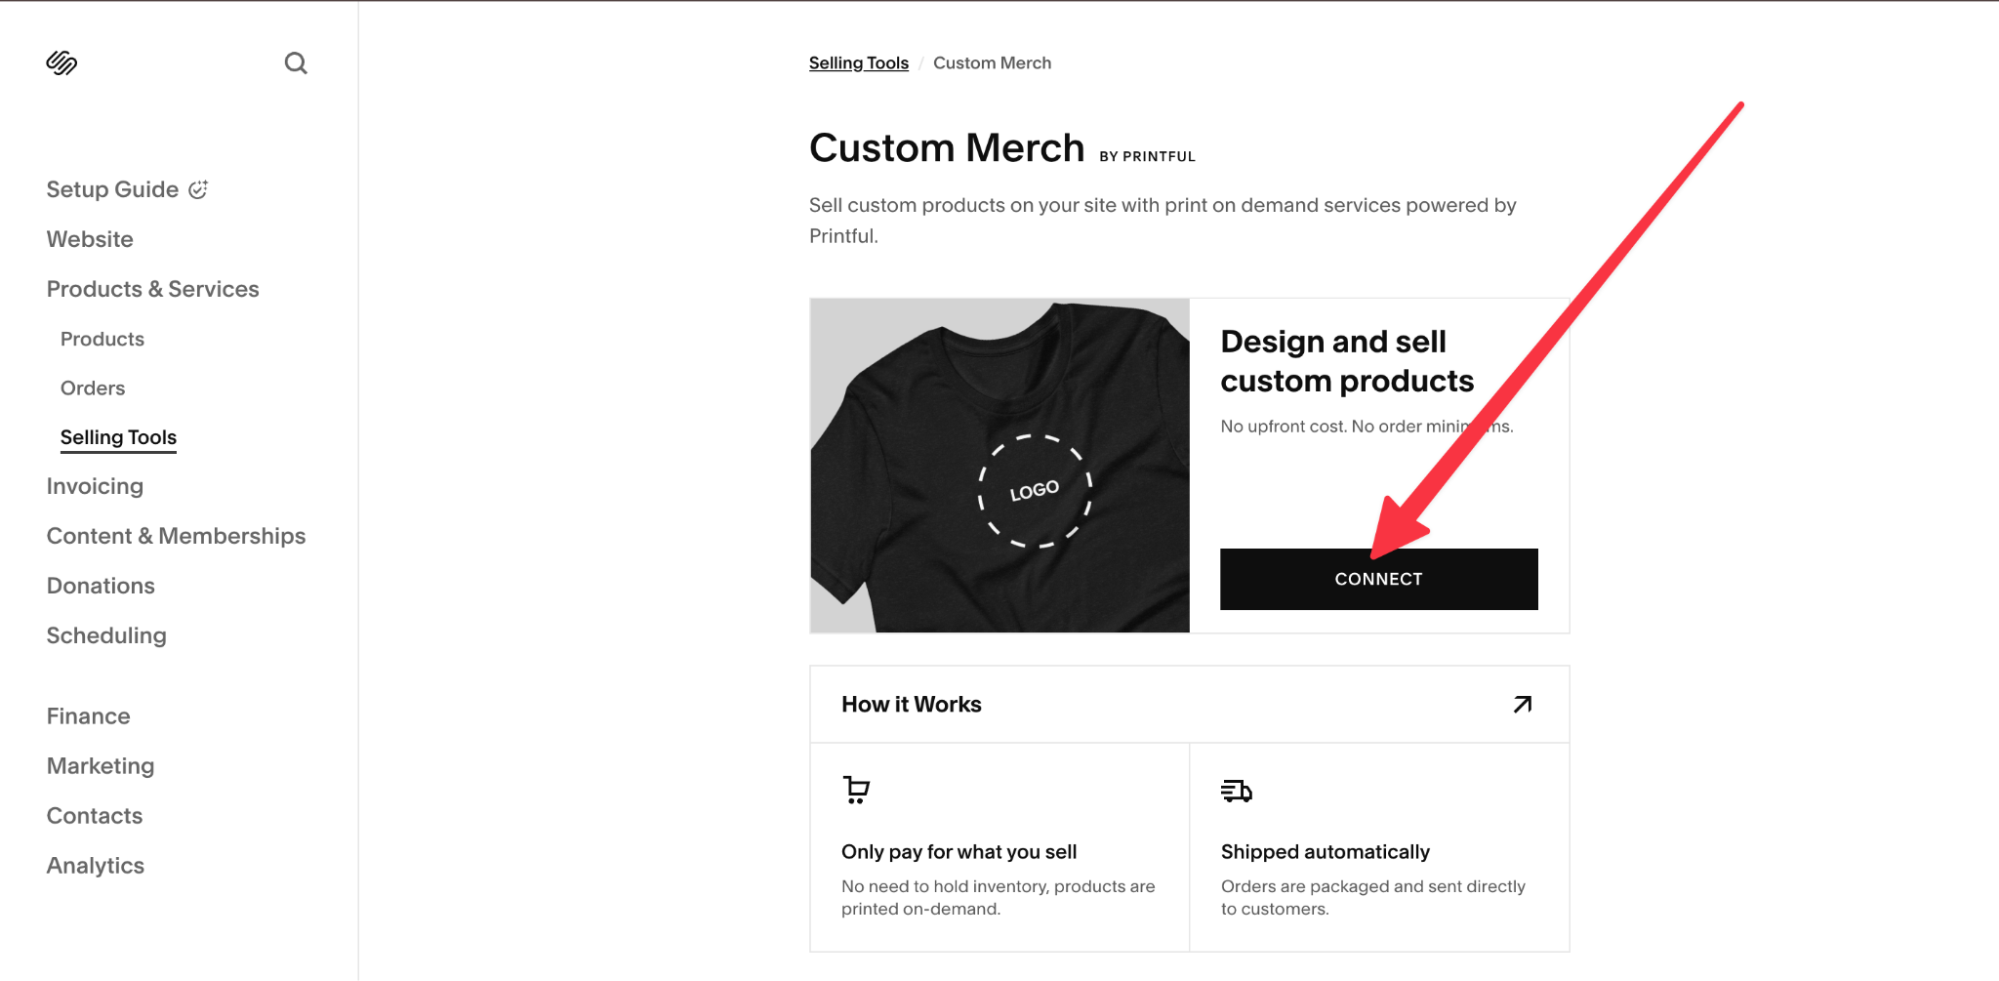
3. Once you accept the confirmation popup, you’ll land on Printful’s sign-up page. TIP: It will make your life easier if you sign up to Printful with the same account you use for Squarespace.
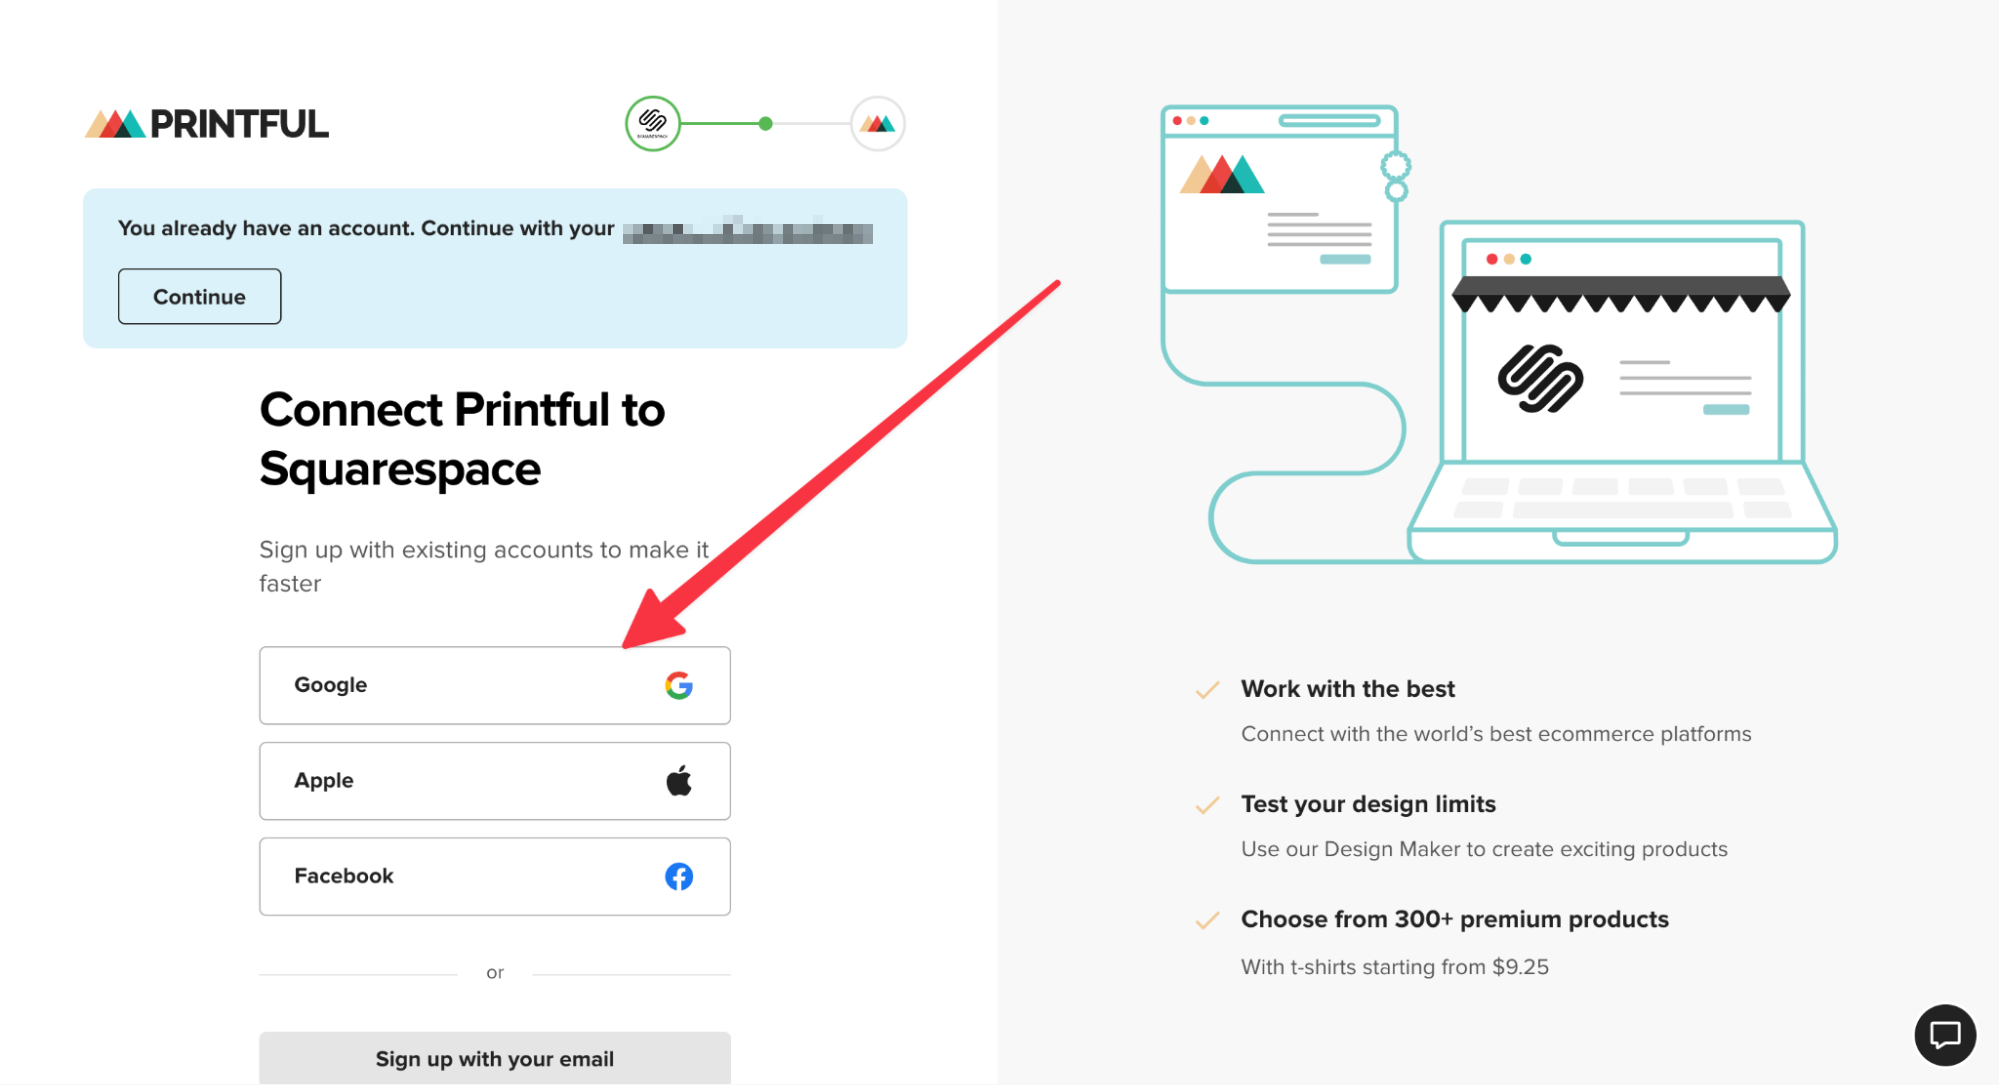
4. After connecting your account, add your name and email for further info. Tap Sign Up to complete the signing up process.
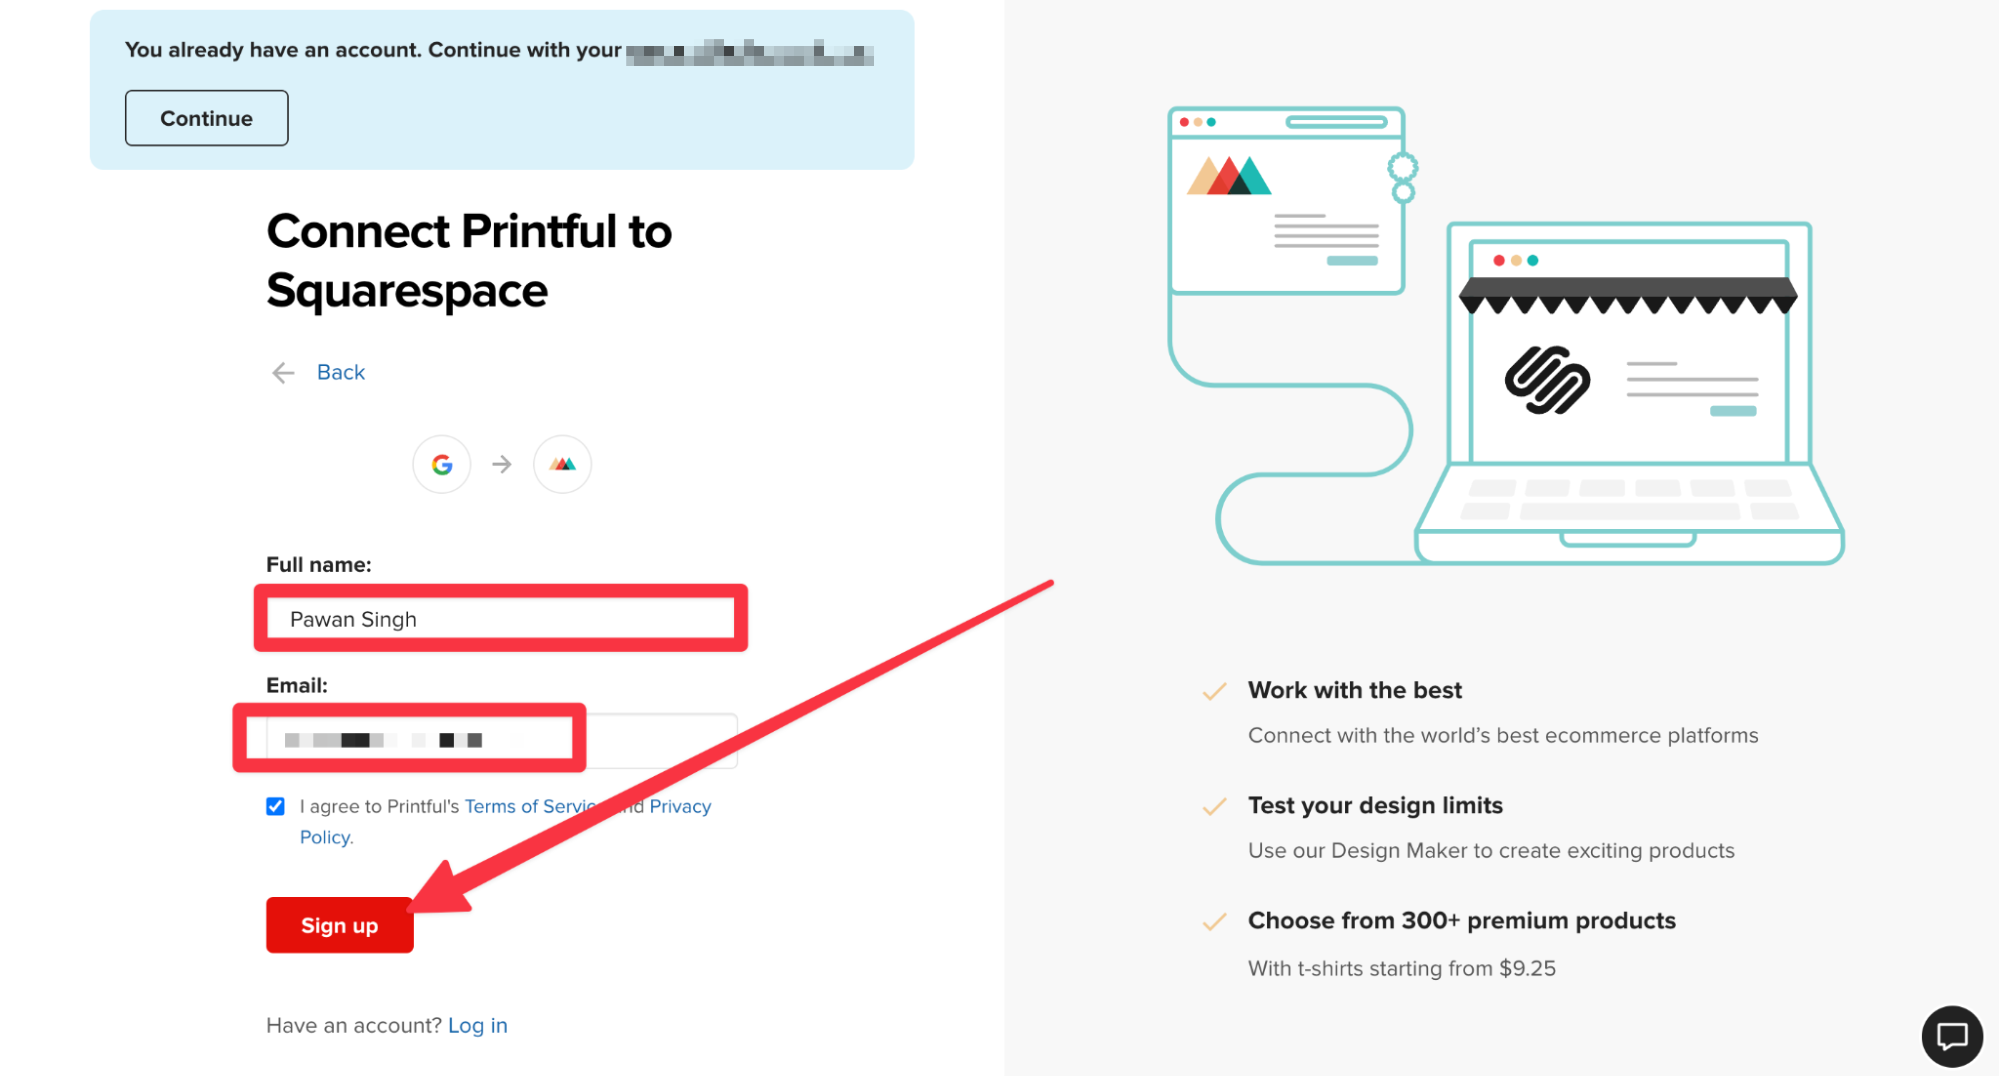
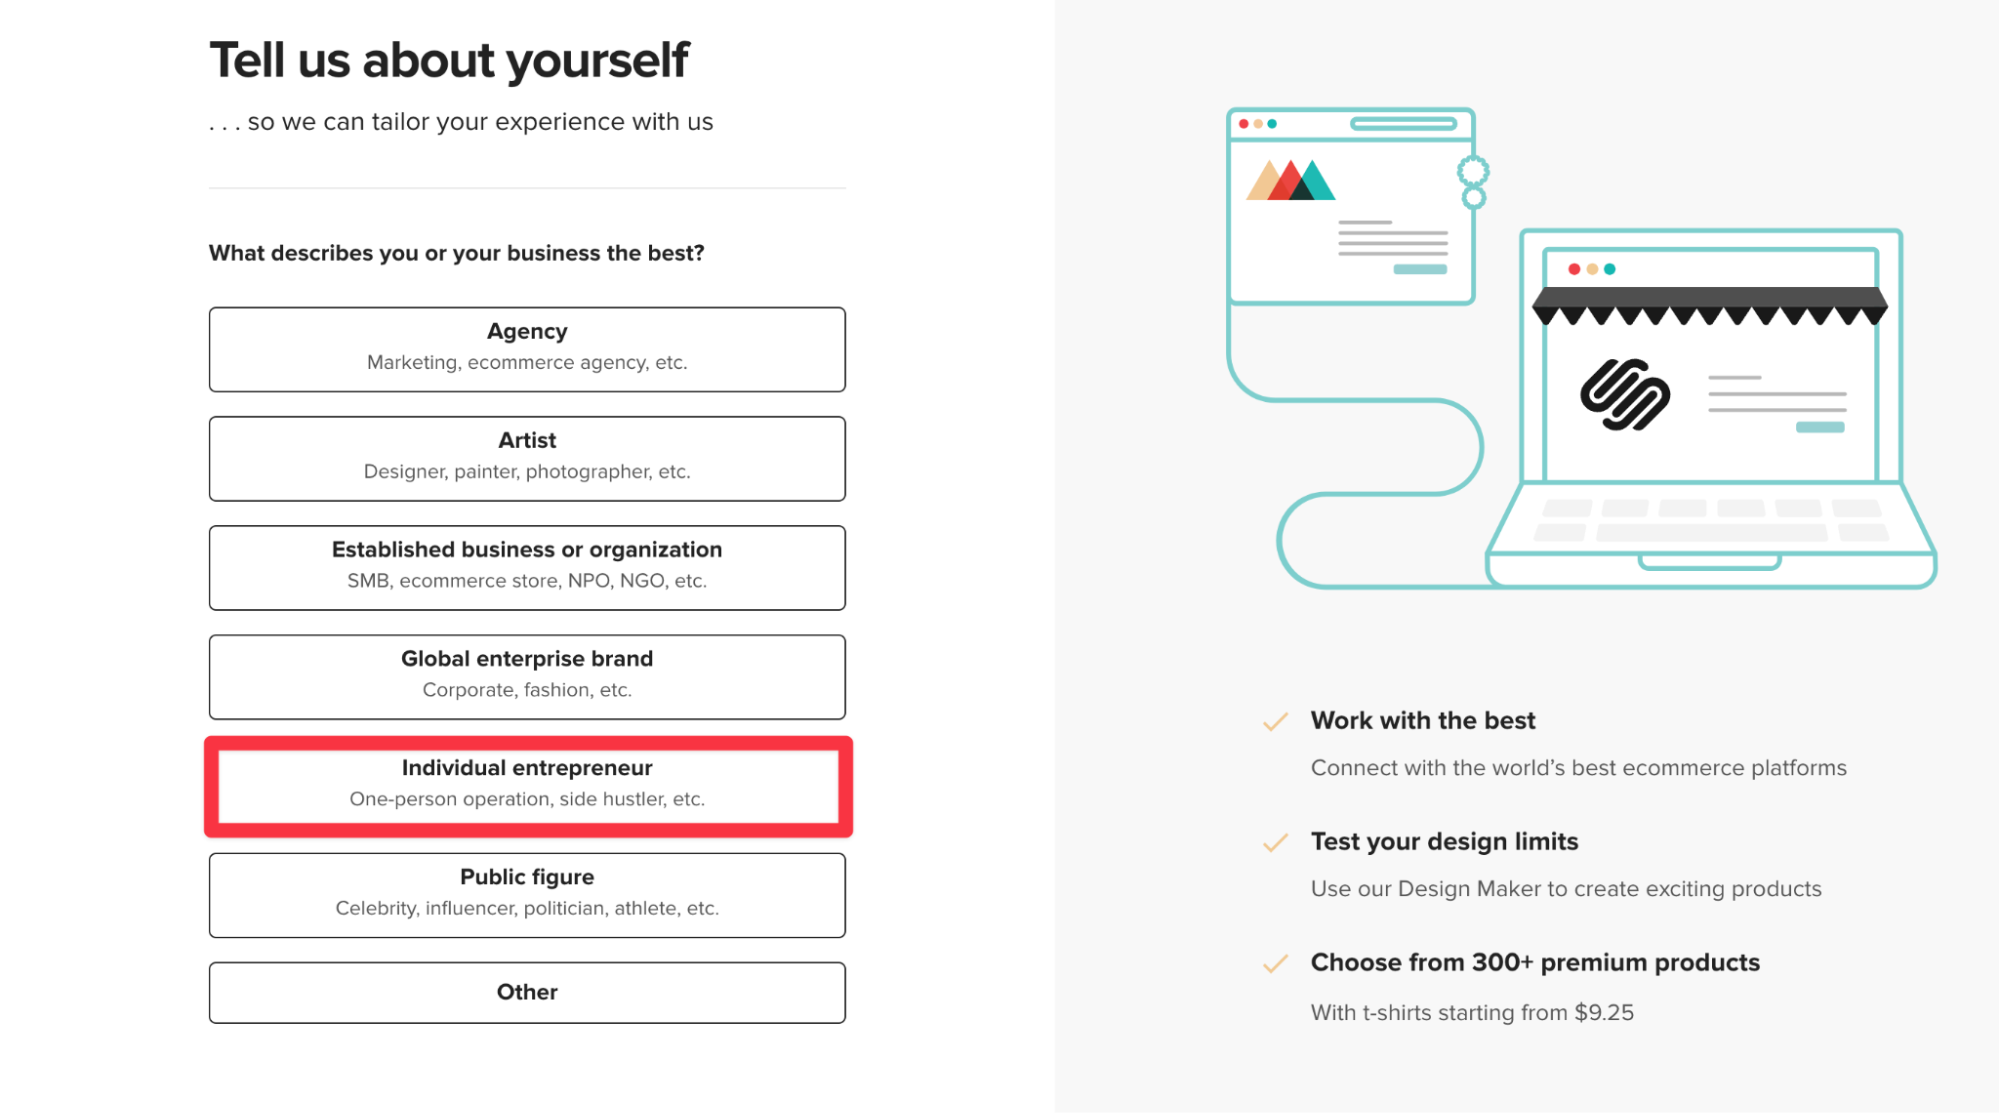
5. Here, you’ll start describing more about your business. First, select the type of business you own.
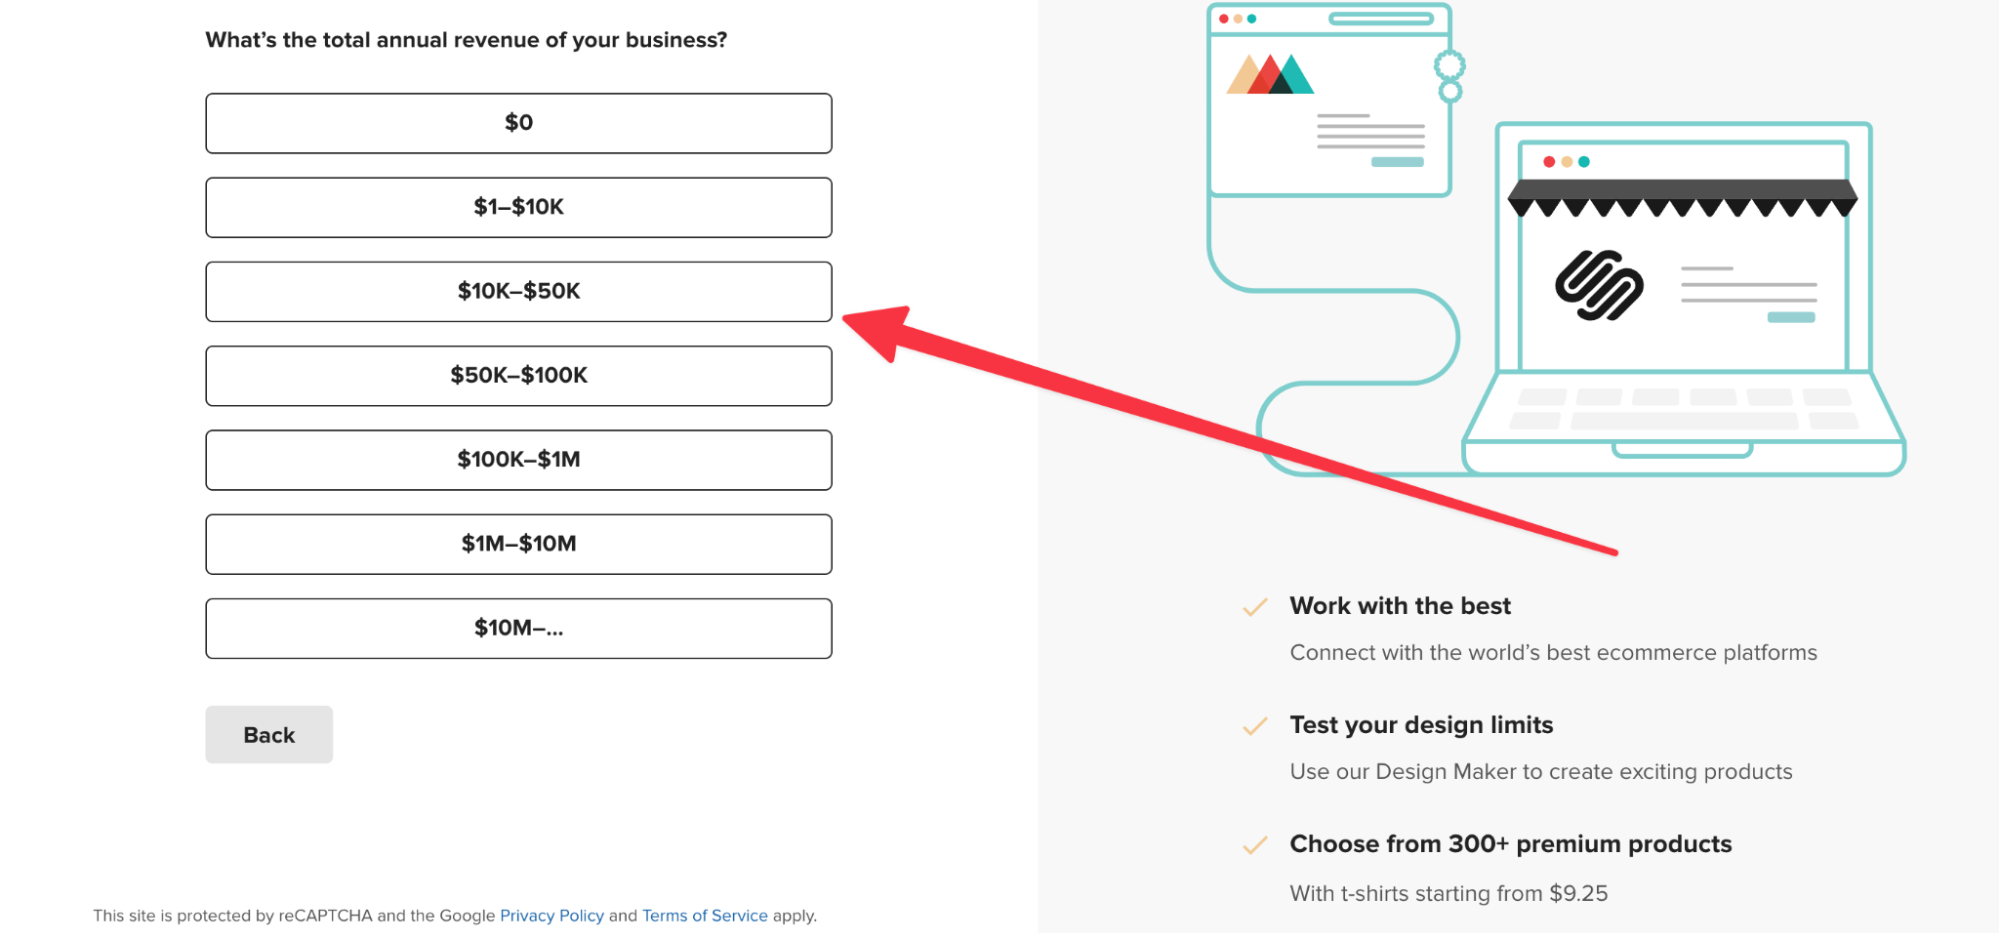
6. Now, select the broad range of your business’s annual revenue. All this info helps Printful to be more precise for your designs.
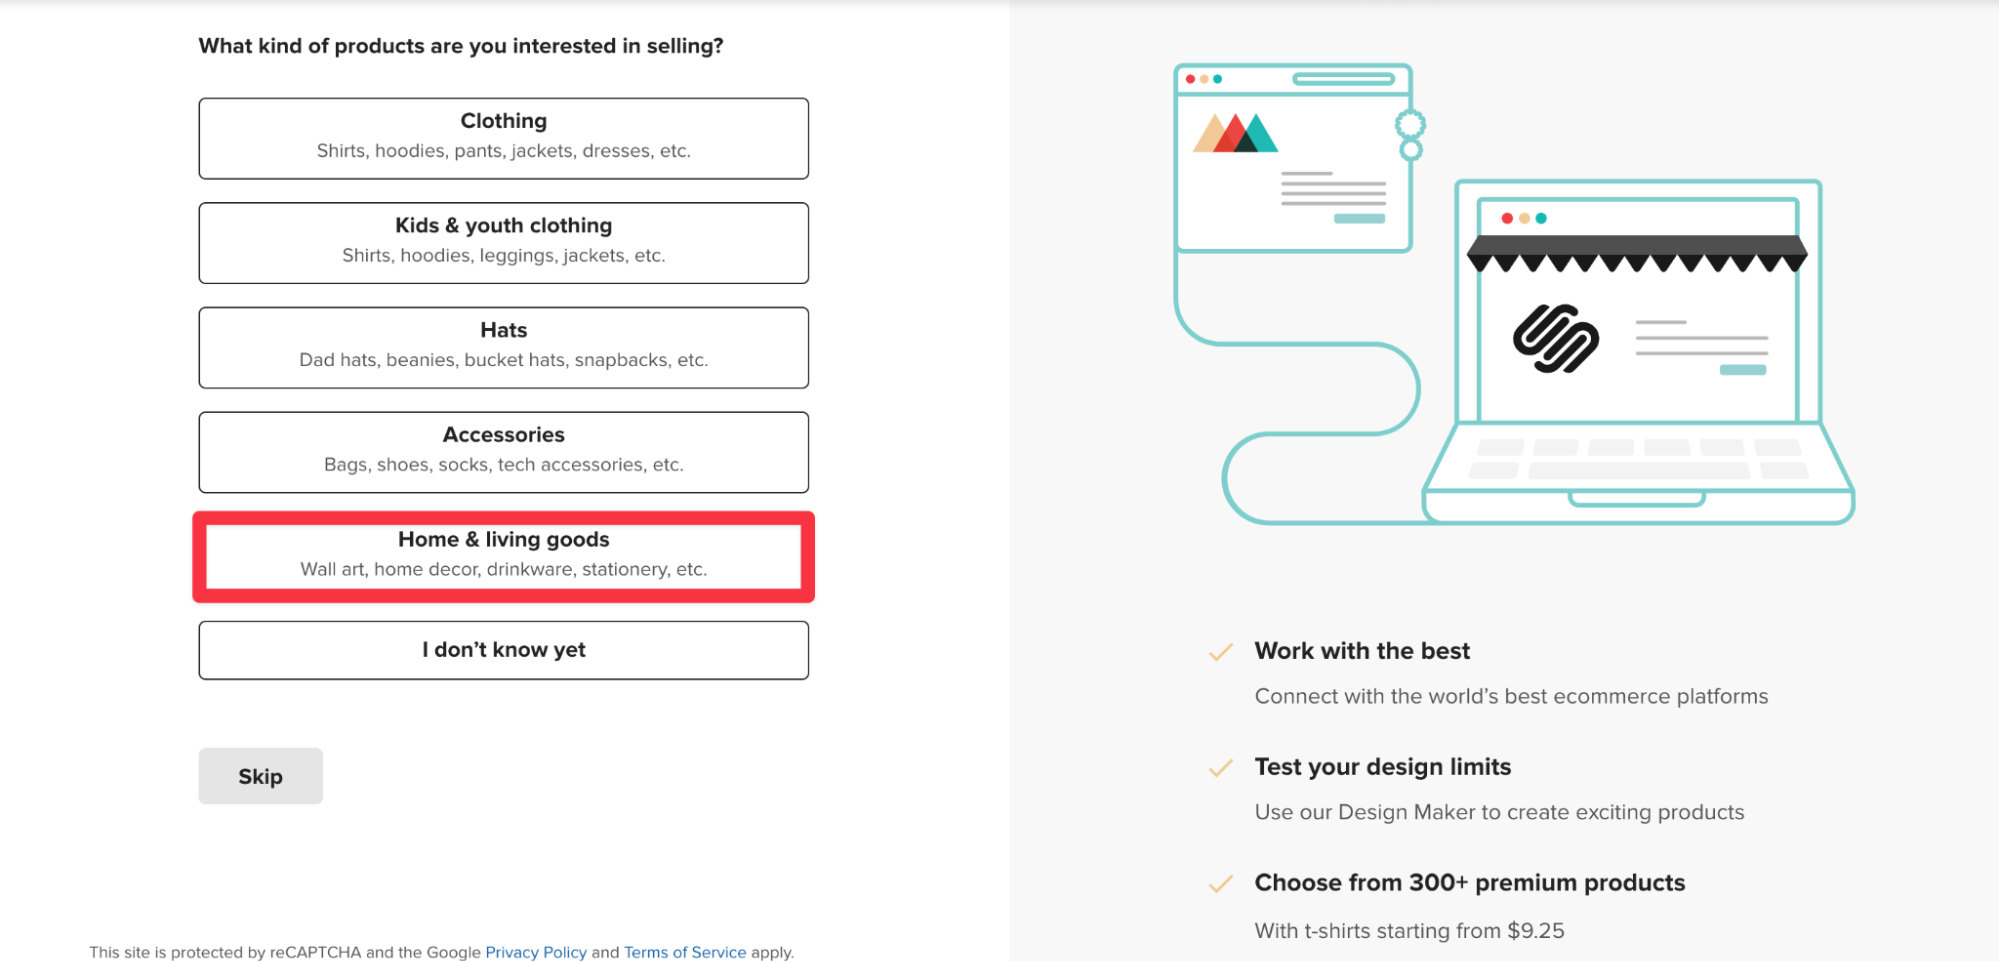
7. Next, from the list of product options, choose the one that best describes your products. As we're making a site for selling home decor products, we’ll pick that option from this list.
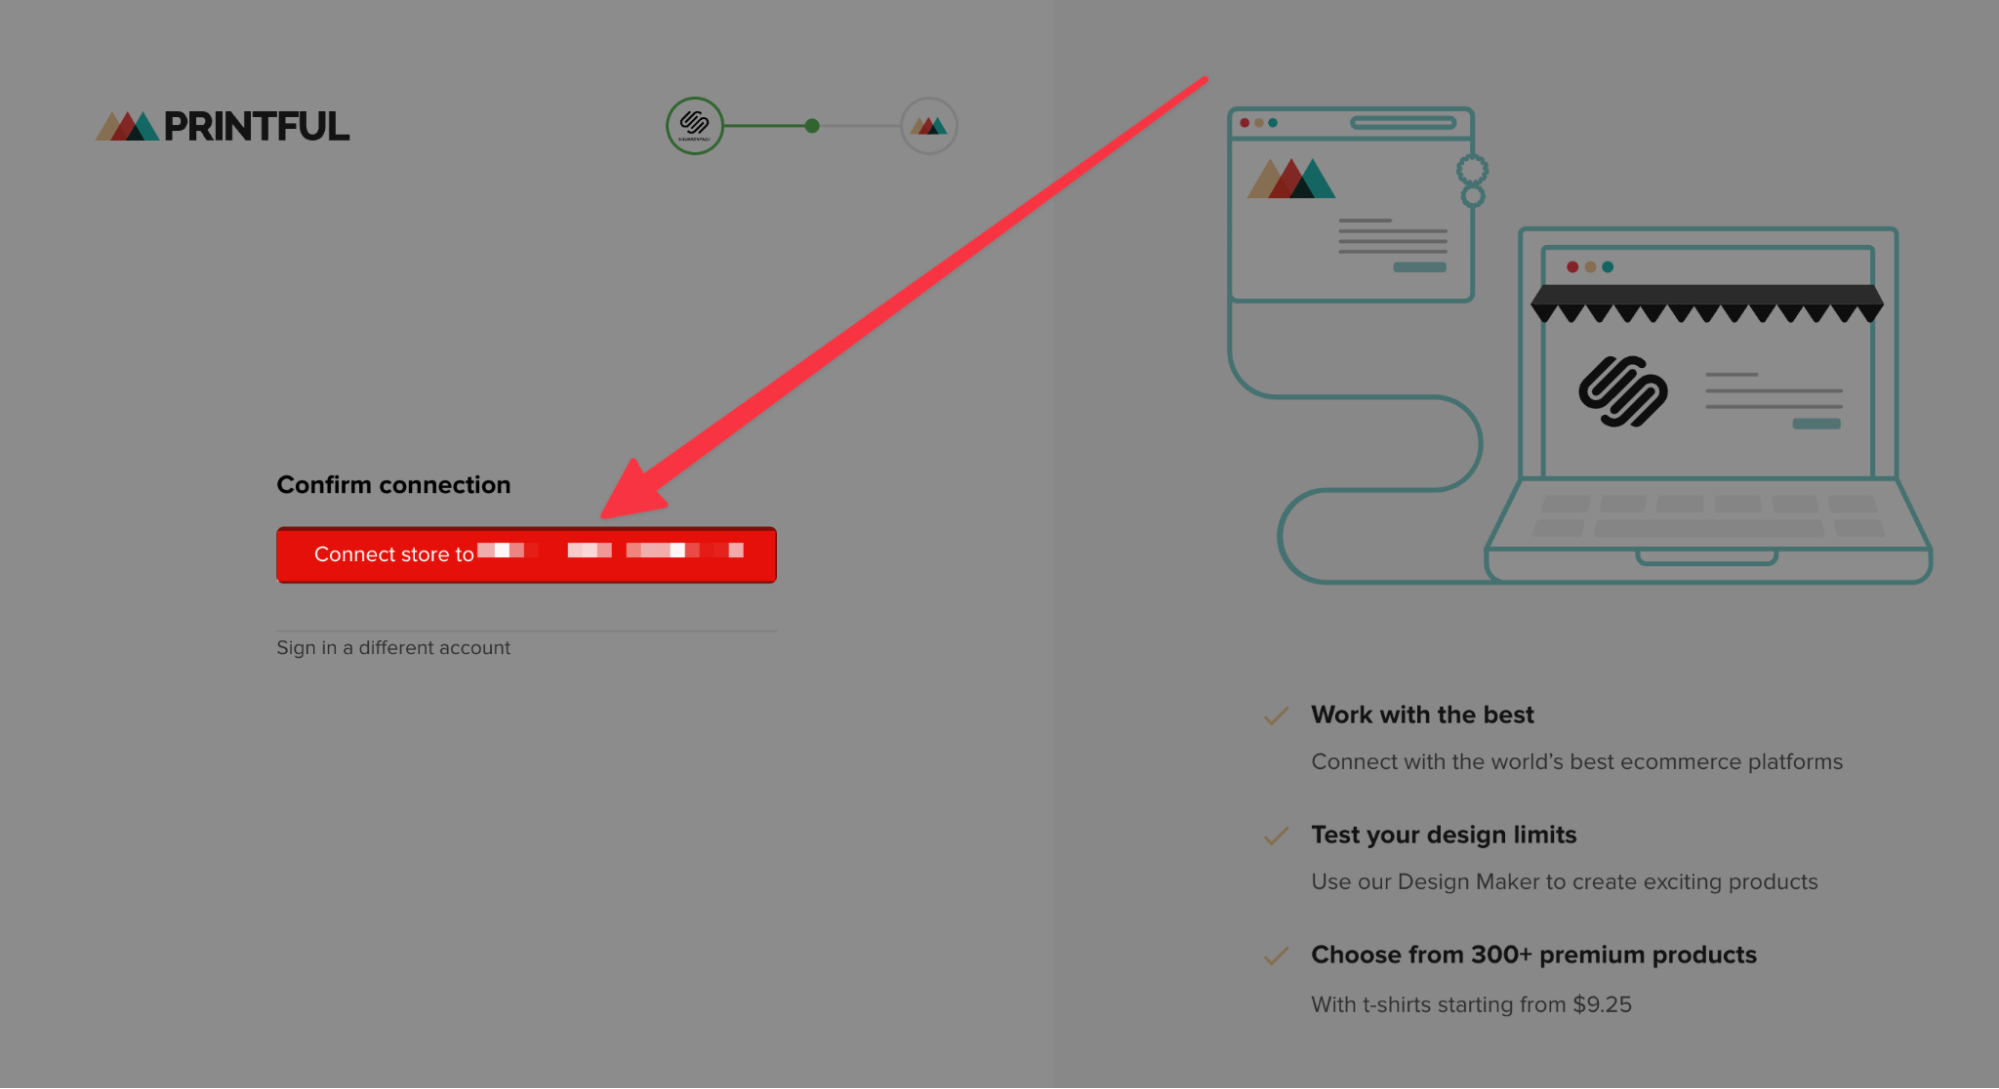
8. Click Connect store to “your email address” to complete the onboarding process. Now, you can use Printful to create your custom products for your online store and directly integrate with Squarespace to sell them to your customers.
Customizing emails
Once your store goes live, you’ll need to find a way of keeping in touch with your customers. Email marketing can be a great solution. To edit and personalize them, follow these steps:
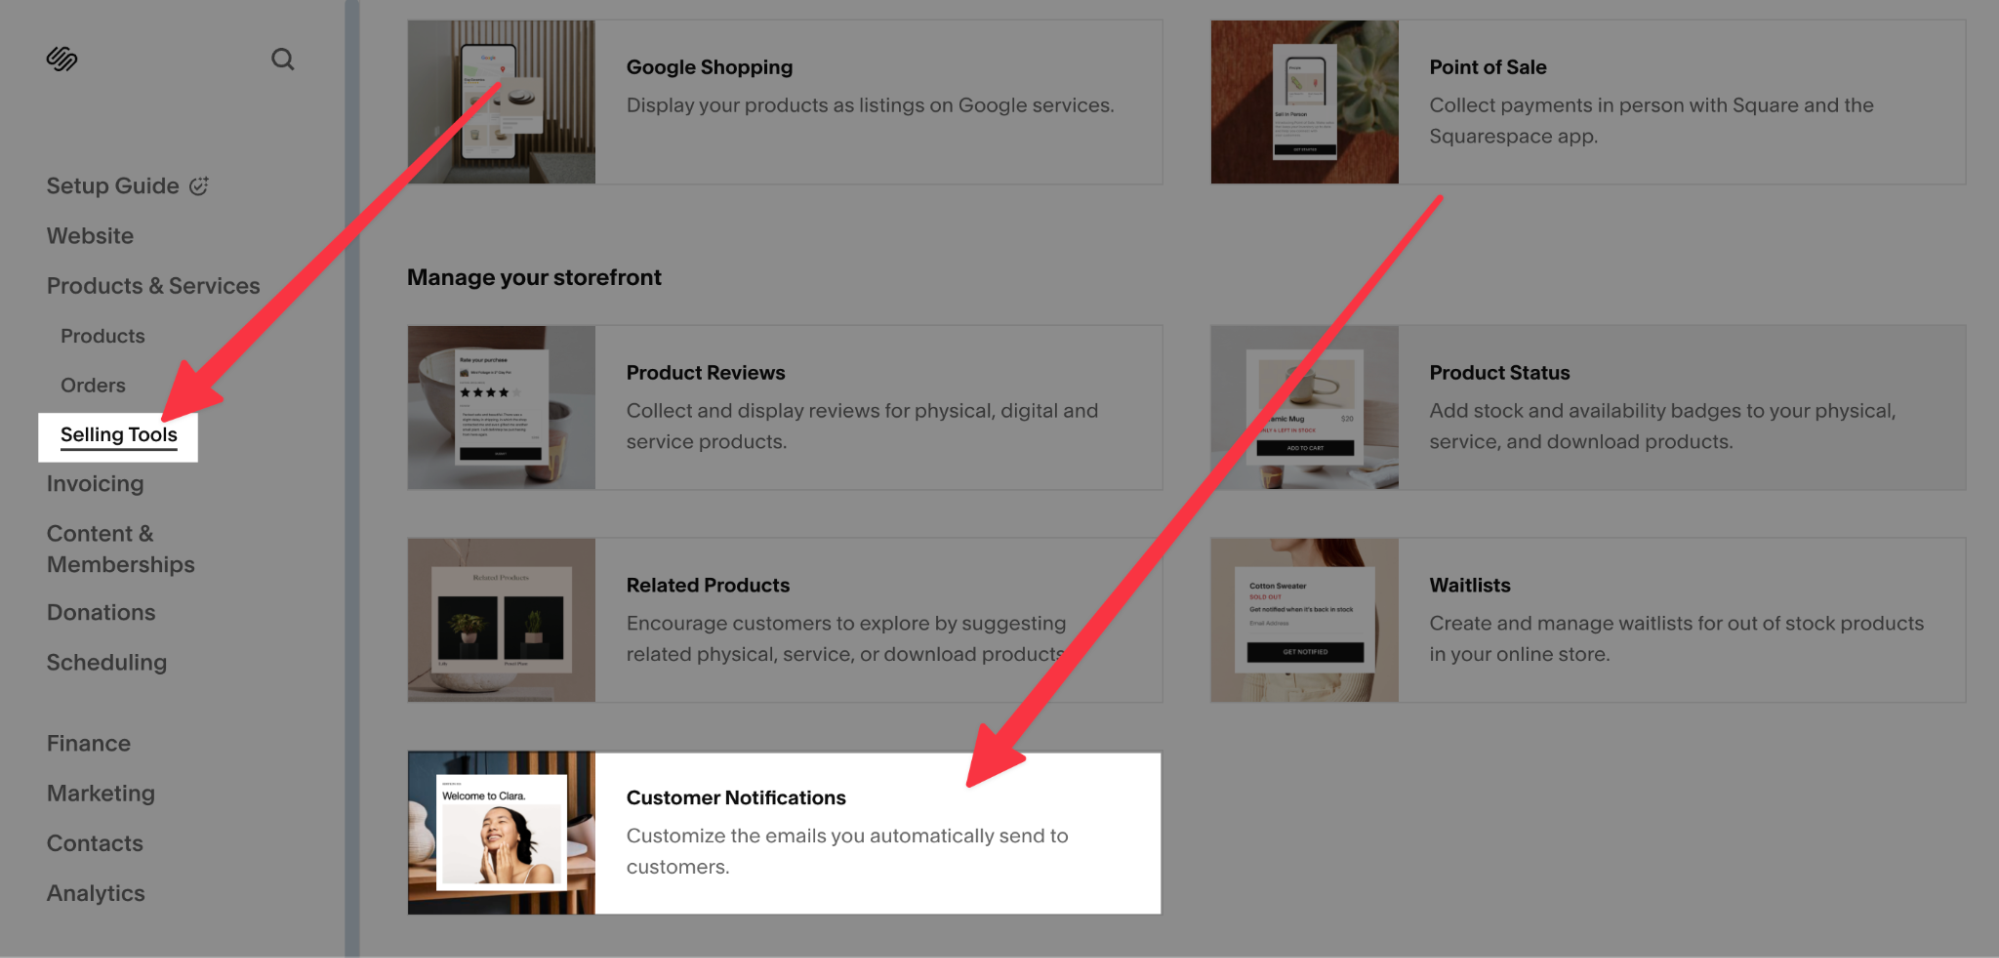
1. Open your Squarespace dashboard, navigate to Selling Tools, scroll down, and tap Customer Notifications.
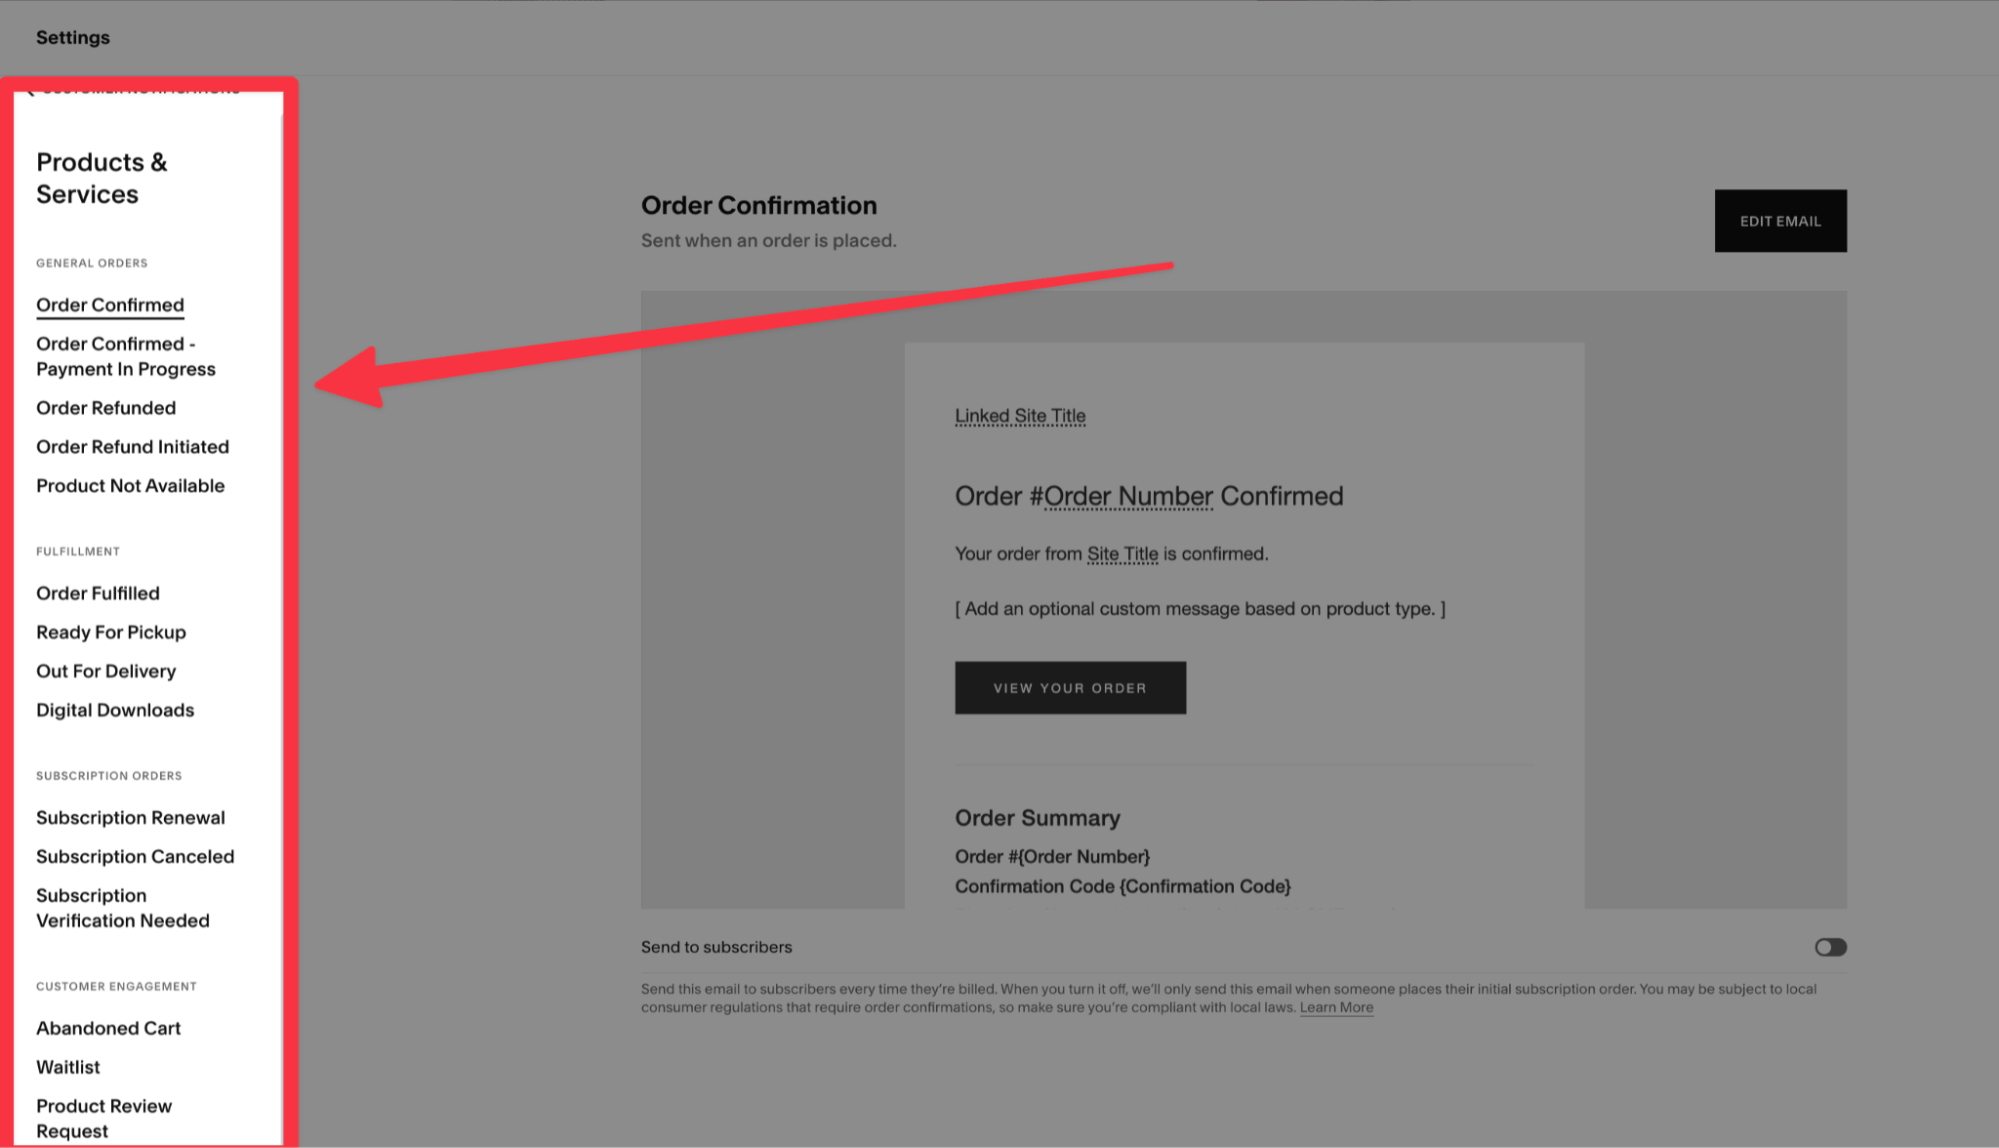
2. On the left side of the screen, you’ll see different categories of notifications you can send. You can edit any of them by clicking on them. For now, we’ll try editing the email for Order Confirmation that your customers will receive after successfully placing the order at your site.
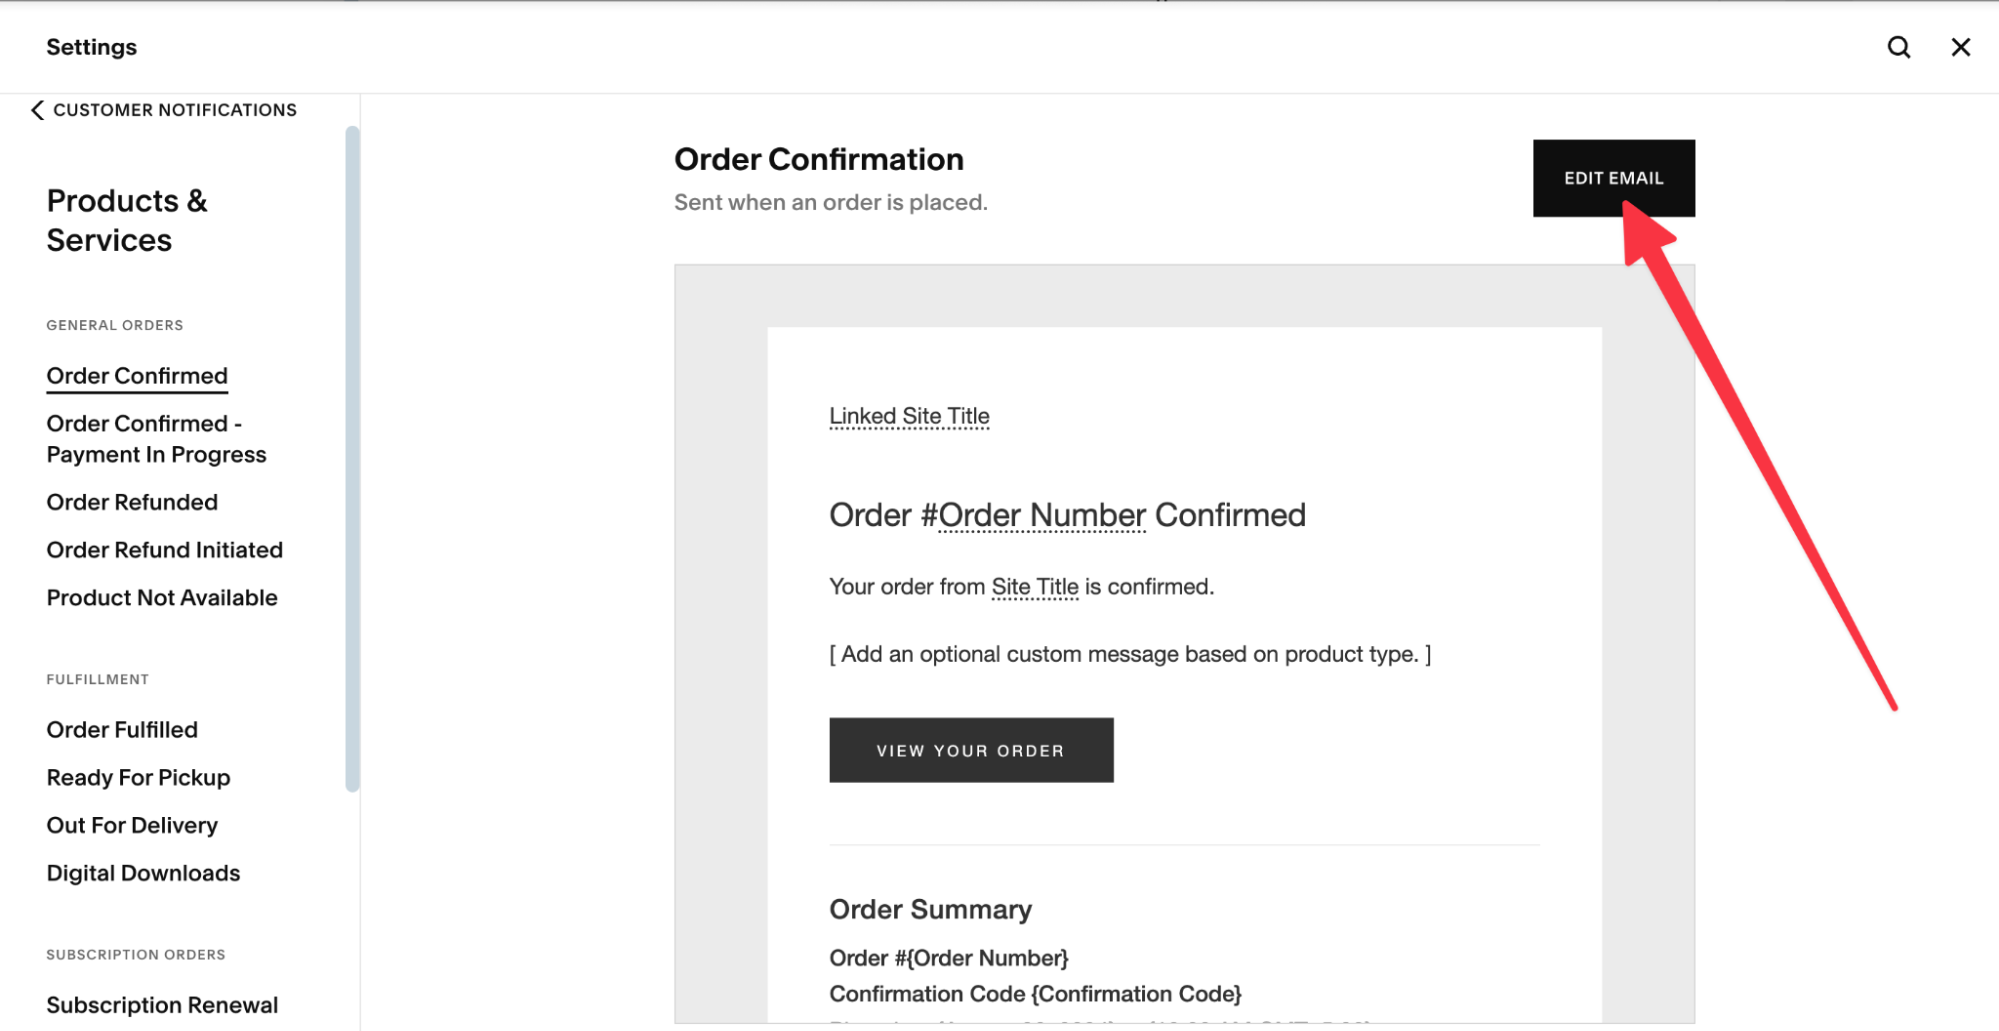
3. Tap on Edit Email to start the customization.
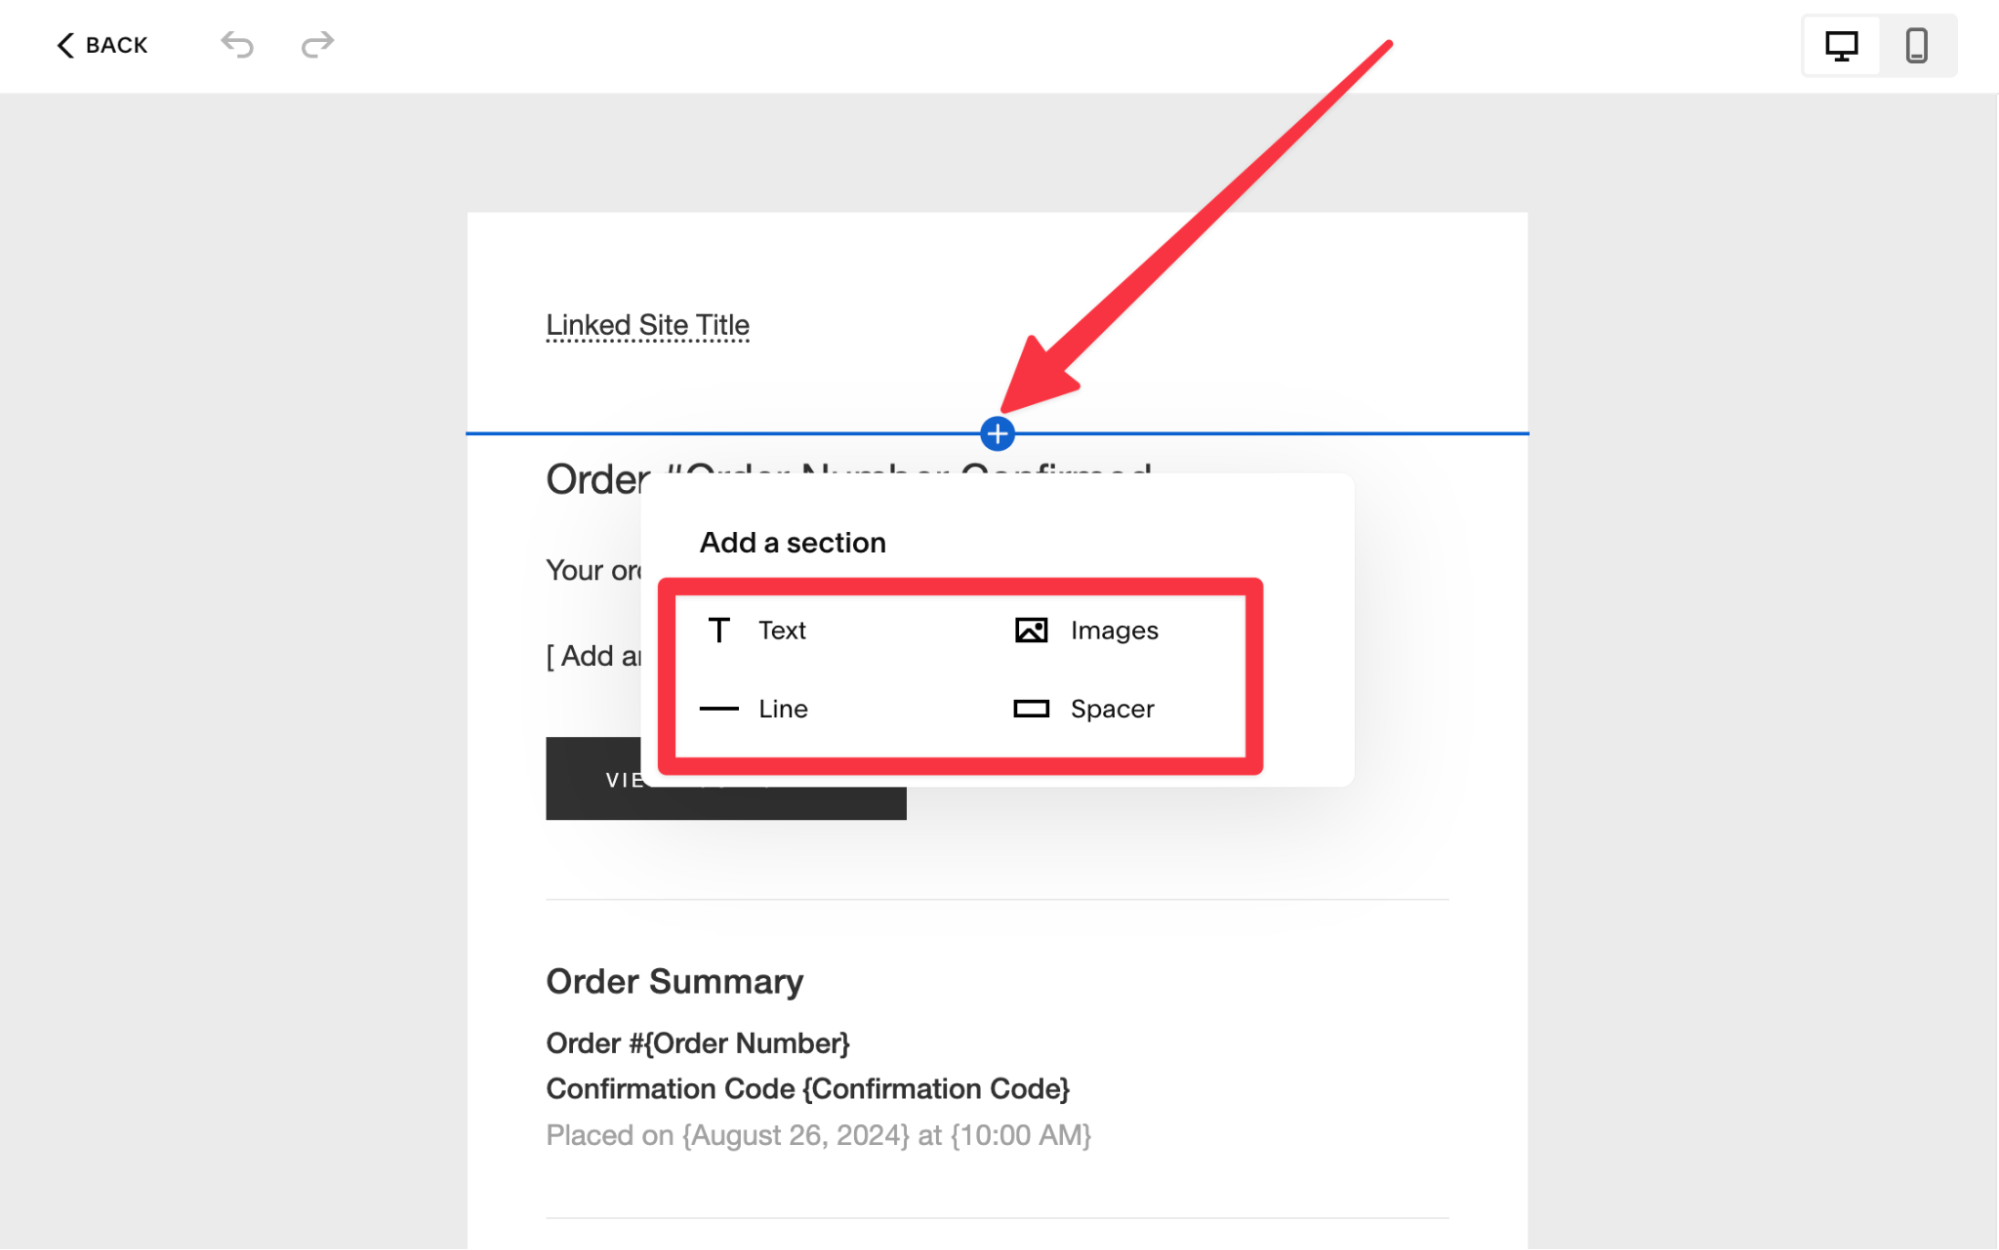
4. To add a new section, tap the + icon and add the relevant text/images/line/spacer to your text. We’ll add a greeting message in this step as an example.
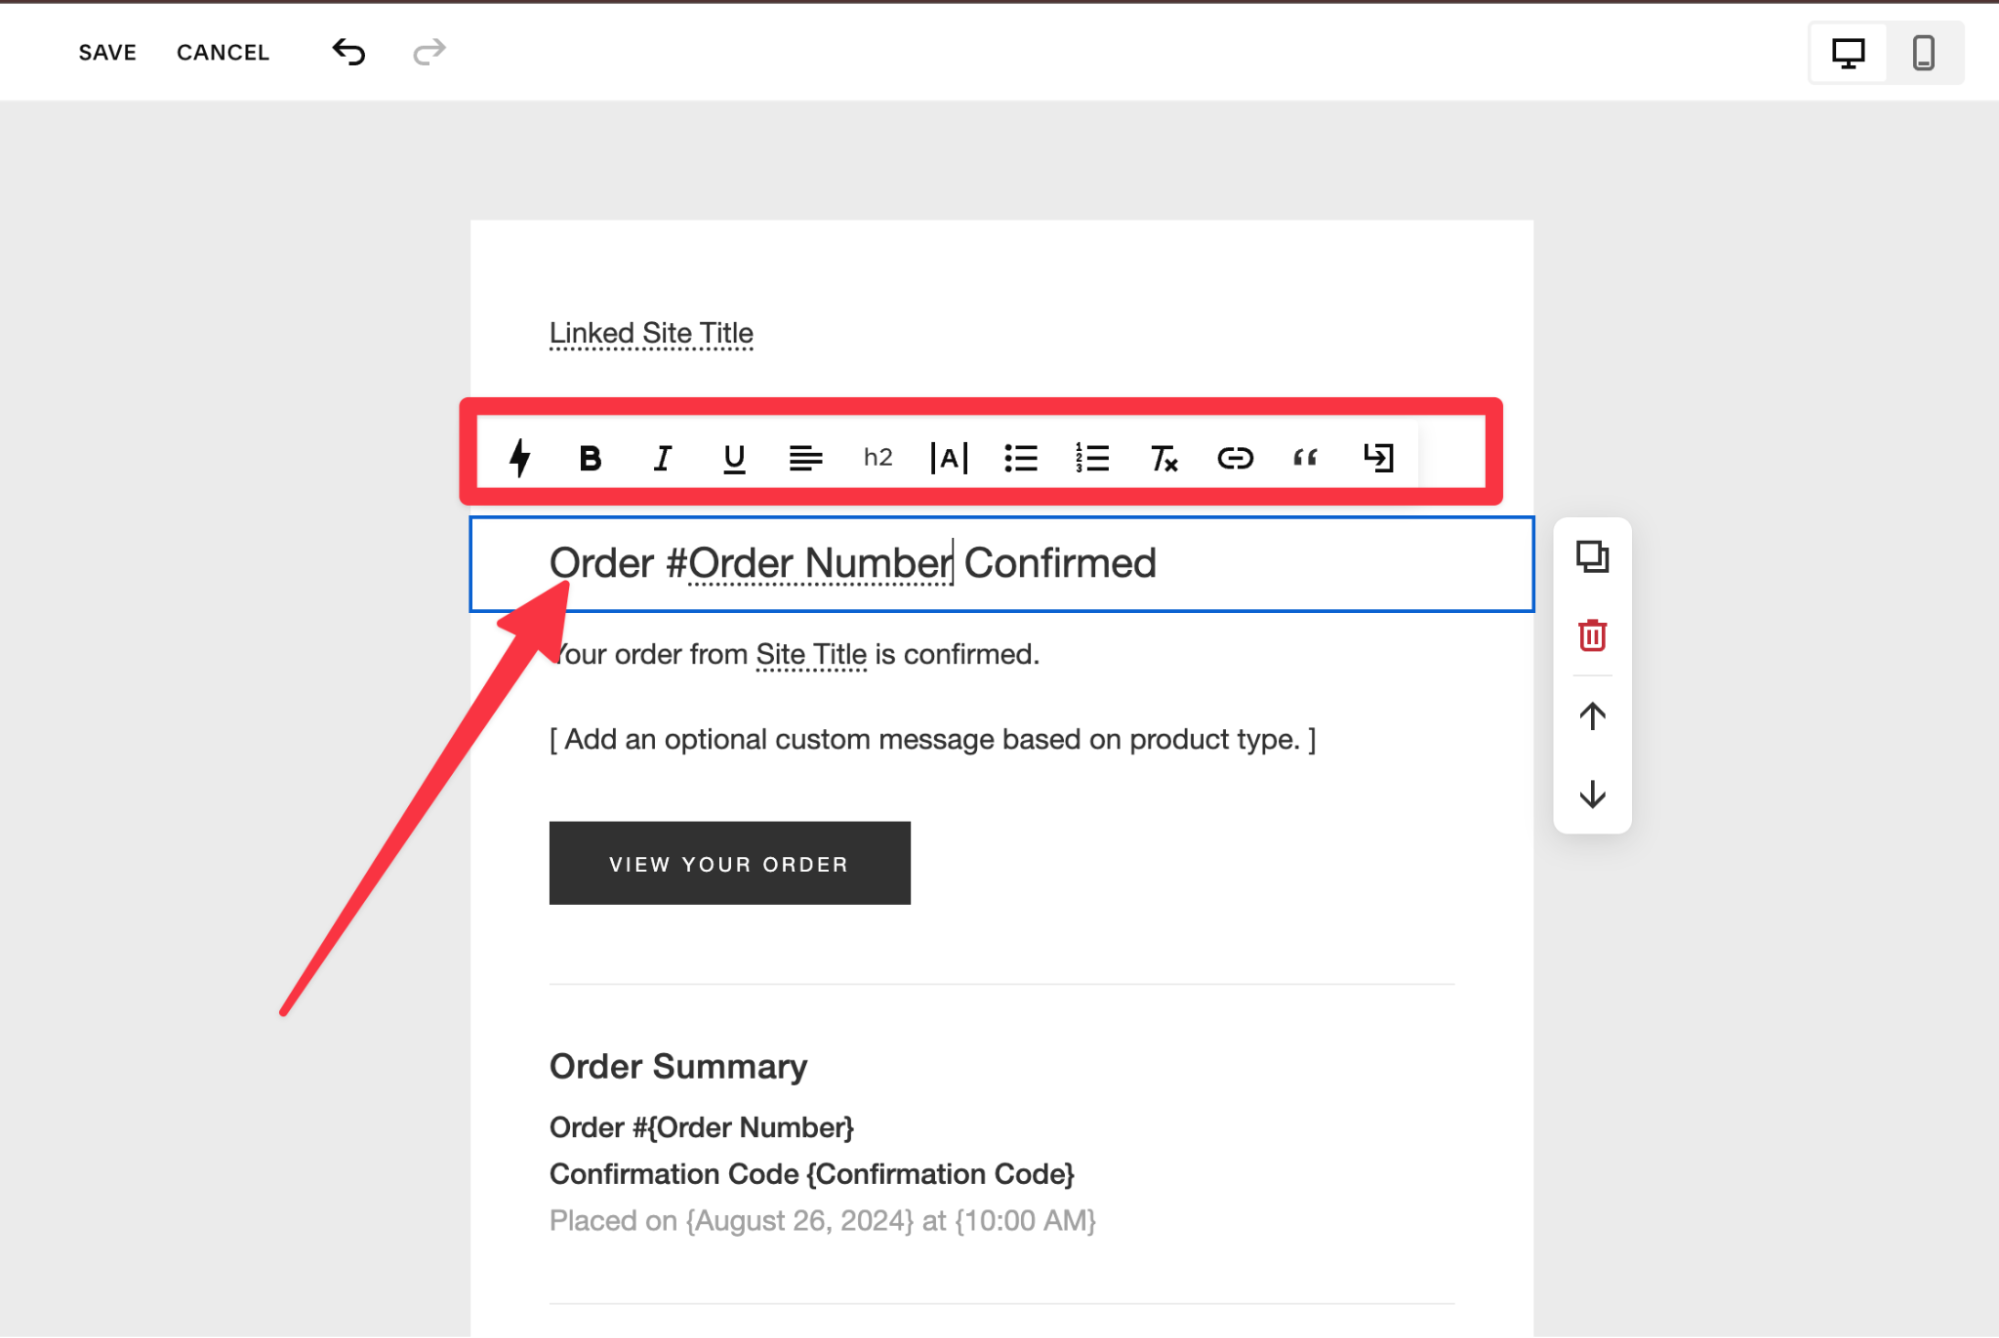
5. To edit a text, simply tap on it and choose what you need to add/edit from the list of options. For instance, you can add text and make it bold, italic, underlined, and a lot more from the available options.
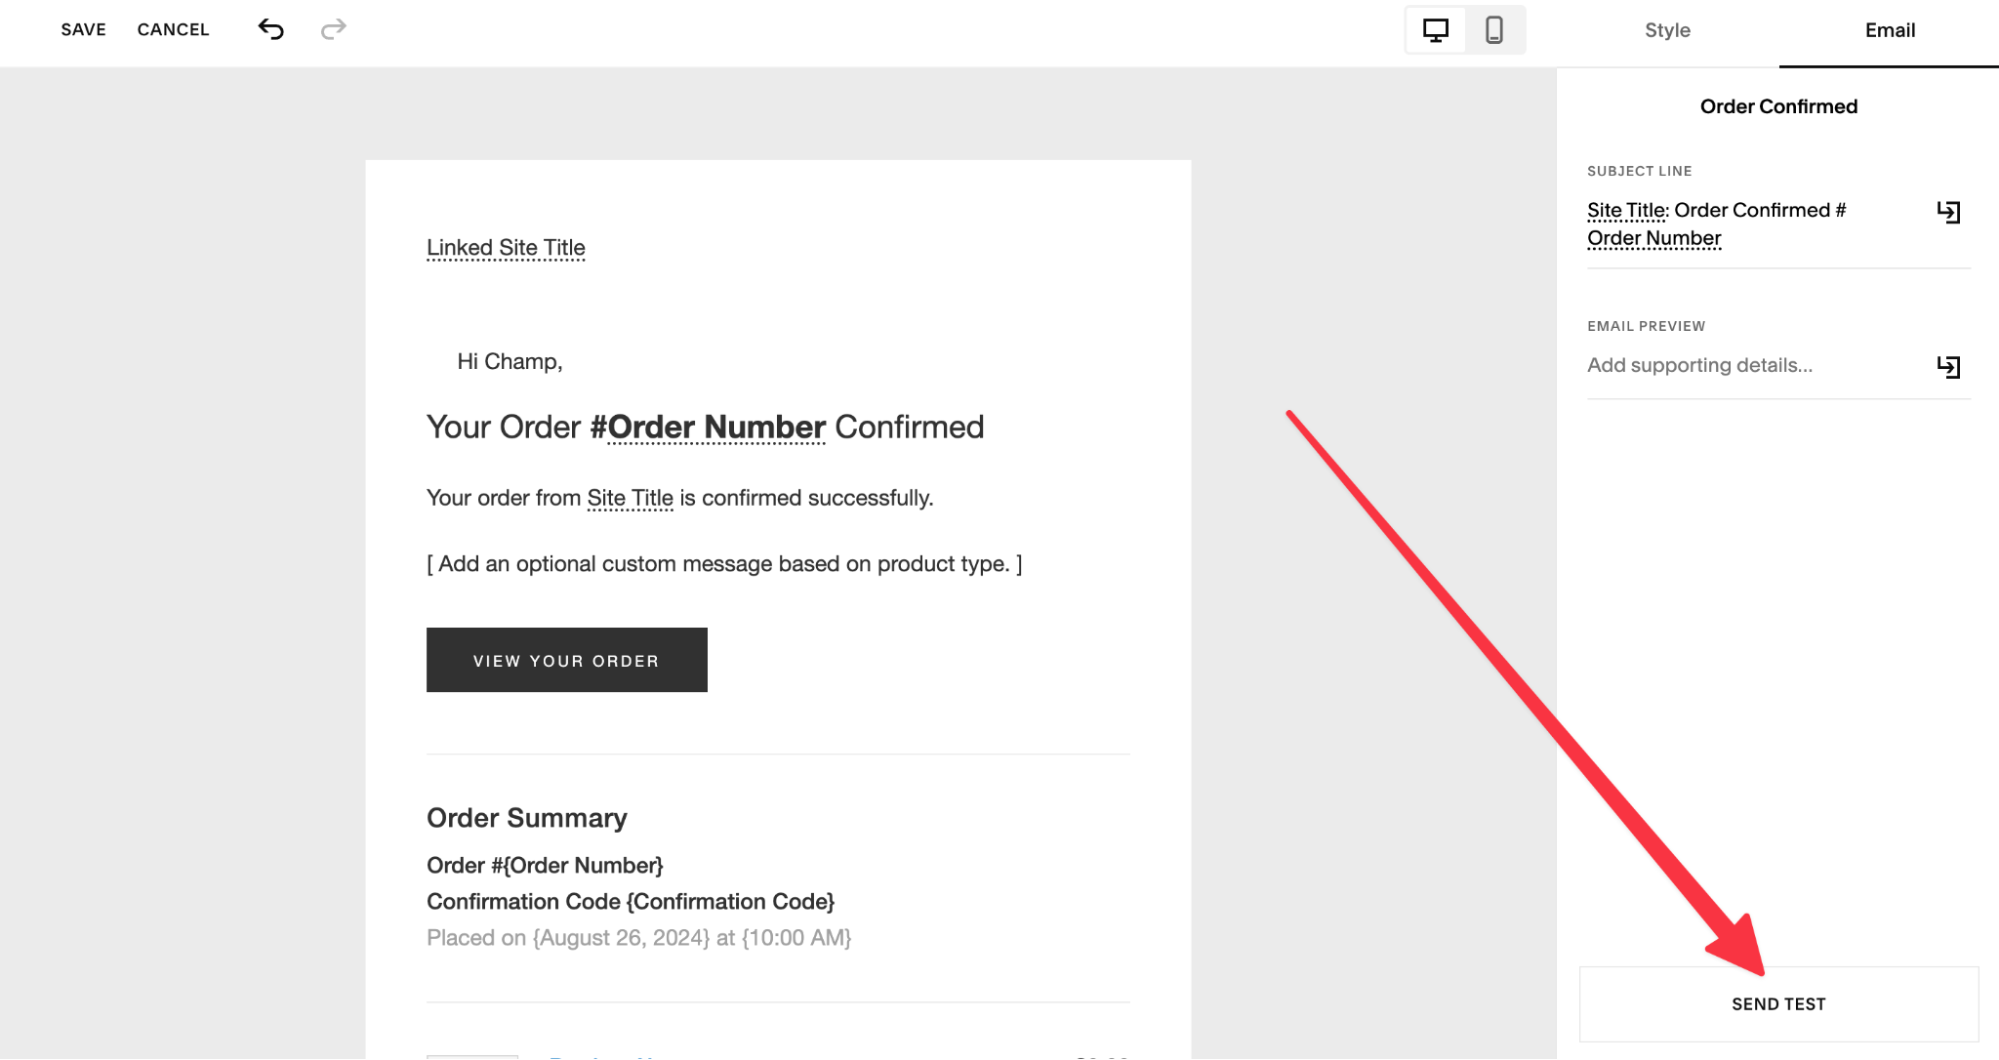
6. Once you’re done, tap Send Test for a dry run of your email.
7. Enter a single email address or up to five different addresses separated by commas where you want to send this email. You can also turn on various Product Types here. Once selected, tap Send to share it.
Selling on Squarespace: My verdict
Squarespace’s website builder gives you complete freedom to manage your online store. With its AI assistance, you can generate a pretty stunning website with personalized product descriptions in minutes. Plus, it comes with an in-person sales option that uses a Square Card reader to take in-person cash or card payments integrated with the online store in the United States.
Comparing it with Shopify, a dedicated ecommerce platform, we feel Squarespace lacks in some places but also shines in other domains. For instance, if you consider different ecommerce categories, like POS, customer assistance, and useful SEO tools, Shopify is far ahead of Squarespace. However, if you’re a beginner who wants a general yet great-looking website for your online store, with various features for selling your products, Squarespace will live up to your expectations.
In the end, it boils down to your exact needs and what your expectations are from an ecommerce platform. In our opinion, Squarespace is a great way to start an ecommerce business for both beginners and seasoned individuals.


