
When you have vast amounts of data to monitor on a spreadsheet, sorting that information can be an efficient way for analysis or interpretation. A jumble of data can be organized through sorting and help to provide an orderly presentation.
How to sort data
Data can be sorted by letters or numbers or a combination of both, either in ascending or descending order. In Google Sheets, data is arranged by rows and columns, with the columns typically providing the header information and the series listed by row.
With your Google account, type sheets.new into a new window on your browser. Upload your data onto Google Sheets. Google Sheets automatically selects a column with multiple rows for primary sorting, and this works ideally if you need to sort only one column of data. On the menu bar, select “Data,” and that will drop down to “Sort sheet,” and that will pick the column under which the cell appears for sorting the entire spreadsheet. Data (either by letter or number, or combination of both) can be sorted by A to Z, which refers to ascending order, and Z to A for descending order.
Related: How to use conditional formatting in Google Sheets: Ranges, formulas & more
If there are two or more columns of data, the data will be sorted by the column by where the pointed cell appears, and the spreadsheet will be sorted based on that column, either in ascending or descending order.
For specific data within the spreadsheet, highlight the range of cells and under “Data,” and click on “Sort range.” The selection defaults to the column where the pointed cell appears. But selecting “Advanced range sorting options” opens to a window within the spreadsheet, that allows you to sort by a specific column, by “A to Z” or “Z to A.”
If the data has a header row that shouldn't be sorted, click on the box for that selection. Additional columns can also be sorted after the primary column has been picked by clicking on the “Add another sort column” button within the window. That is particularly helpful if the preceding selection of column has two or more sets of data that are the same, and the entire set of data can be further sorted by an additional column.
The spreadsheet version of this tutorial can be downloaded here. Make a copy of the worksheet by selecting "Make a copy" from the drop-down in the File menu.
Example of data sorting
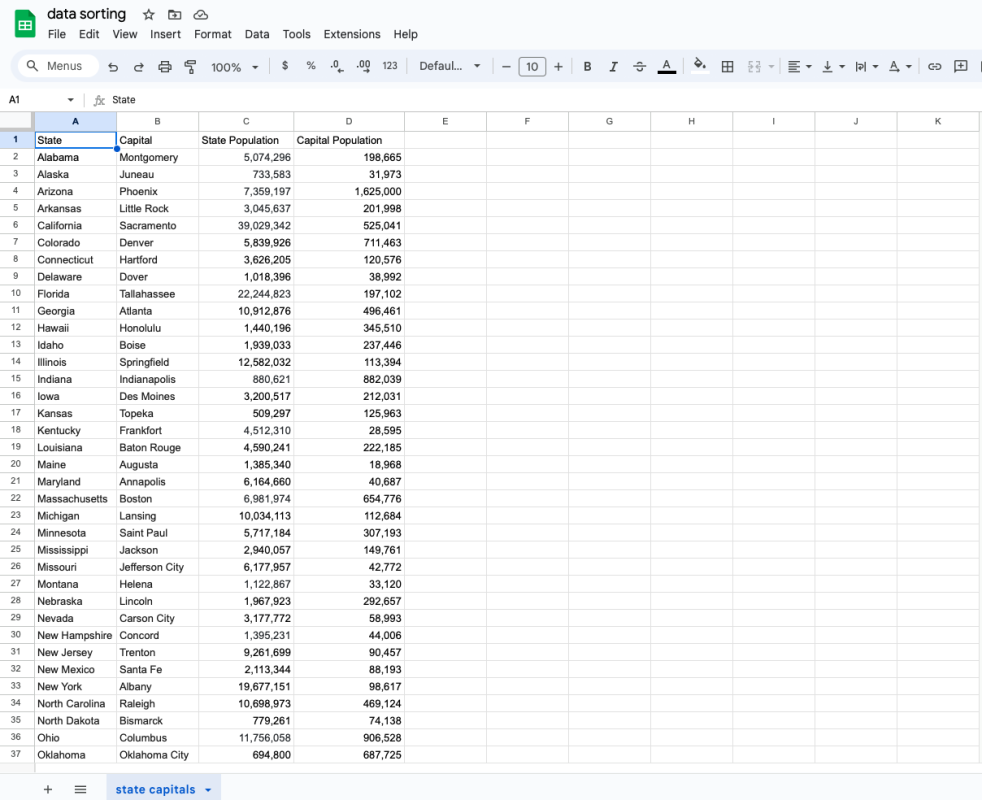
In the accompanied spreadsheet titled “data sorting,” a table lists U.S. states alphabetically, with their capitals, as well as columns for population for the state and its capital. The header rows show “State” for column A, “Capital” for column B, “State Population” for column C, and “Capital Population” for column D.
Select the range of cells from A1 to D51, and click on “Sort range” under “Data” in the menu bar. Pick “Advanced range sorting options,” and choose which column to sort by in either ascending or descending order. But don’t forget to click on “Data has header row” since the four columns have headers, before hitting the “Sort” button.
If sorting “A to Z” by “State Population,” the range of data will sort numerically in ascending order, and Kansas, which has the fewest residents, will appear in row 2, and goes all the way to row 51 with California, which has the highest number of people. Sorting by “Z to A” would reverse the order to descending, and California would be at the top of the list and Kansas at the bottom.
The same applies to any of the other three columns. However, selecting an additional column for sorting after first picking “State Population” won’t change the order because each number is unique.
Ultimately, sorting can be an ideal way to present data into user-friendly information.
Again, the spreadsheet version of this tutorial can be downloaded here. Make a copy of the worksheet by selecting "Make a copy" from the drop-down in the File menu.
Watch to learn exactly how to sort data in Google Sheets
This is just one of many articles about easy to use tools in Google Sheets. Let us know what you'd like to see next. Email us here: tools@thearenagroup.net