So you've taken the leap into the world of true cinematic sound? Congratulations! You're about to experience true surround sound that even the best soundbars can't quite match.
However, if this is your first rodeo, then be prepared; setting up an AVR is a bit more involved than plugging in a soundbar.
If you're mystified by the endless connections on the back of your new amp, or perhaps you're befuddled by the calibration process, then don't panic.
We've set up more AVRs than we count, and have come across our fair share of pitfalls. So, we've compiled a guide to help you through the process and help you dodge the same hurdles that we've encountered.
We're covering everything from which AVR you should buy to some key tips and tricks to ensure you get the best possible performance out of your new home cinema amplifier.
Choosing and buying your AV receiver
AV receivers may look complicated, but it can be easier to pin down requirements for buying your new amp than most other hi-fi or AV kit. They all look the same, after all – a sturdy rectangular box – so at least you don’t have to make many aesthetic choices beyond perhaps black or silver.
You mainly need three things on your checklist: how many speakers do you have, how many HDMI inputs will you need, and what’s your budget?
Since you’ve (presumably) already made the big decision of having a surround sound system in your home, you probably already know how many speakers you can fit in – from a basic 5.1 to an all-out Dolby Atmos extravaganza. So your choice of amplifier will largely be dictated by this.
If you’re only ever going to have room/space for five speakers and a subwoofer (the minimum for a proper surround system), then you don’t have to look further than a five-channel AV receiver. If, however, you’re toying with the idea of expanding – adding some surround back channels say, or maybe you want an Atmos system at some point – it’s worth investing in a nine or 11-channel amplifier so you’re future-proofed.
Thinking about installing an Atmos system from the start? Firstly, we envy you. Secondly, double-check your AV amp supports Atmos soundtracks – most amps at £500 / $500 / AU$700 and above should do as standard by now. Fair warning, amplifiers around this price don't tend to deliver supreme sound quality; for instance, the Denon AVR-S670H proved to be somewhat lacklustre.
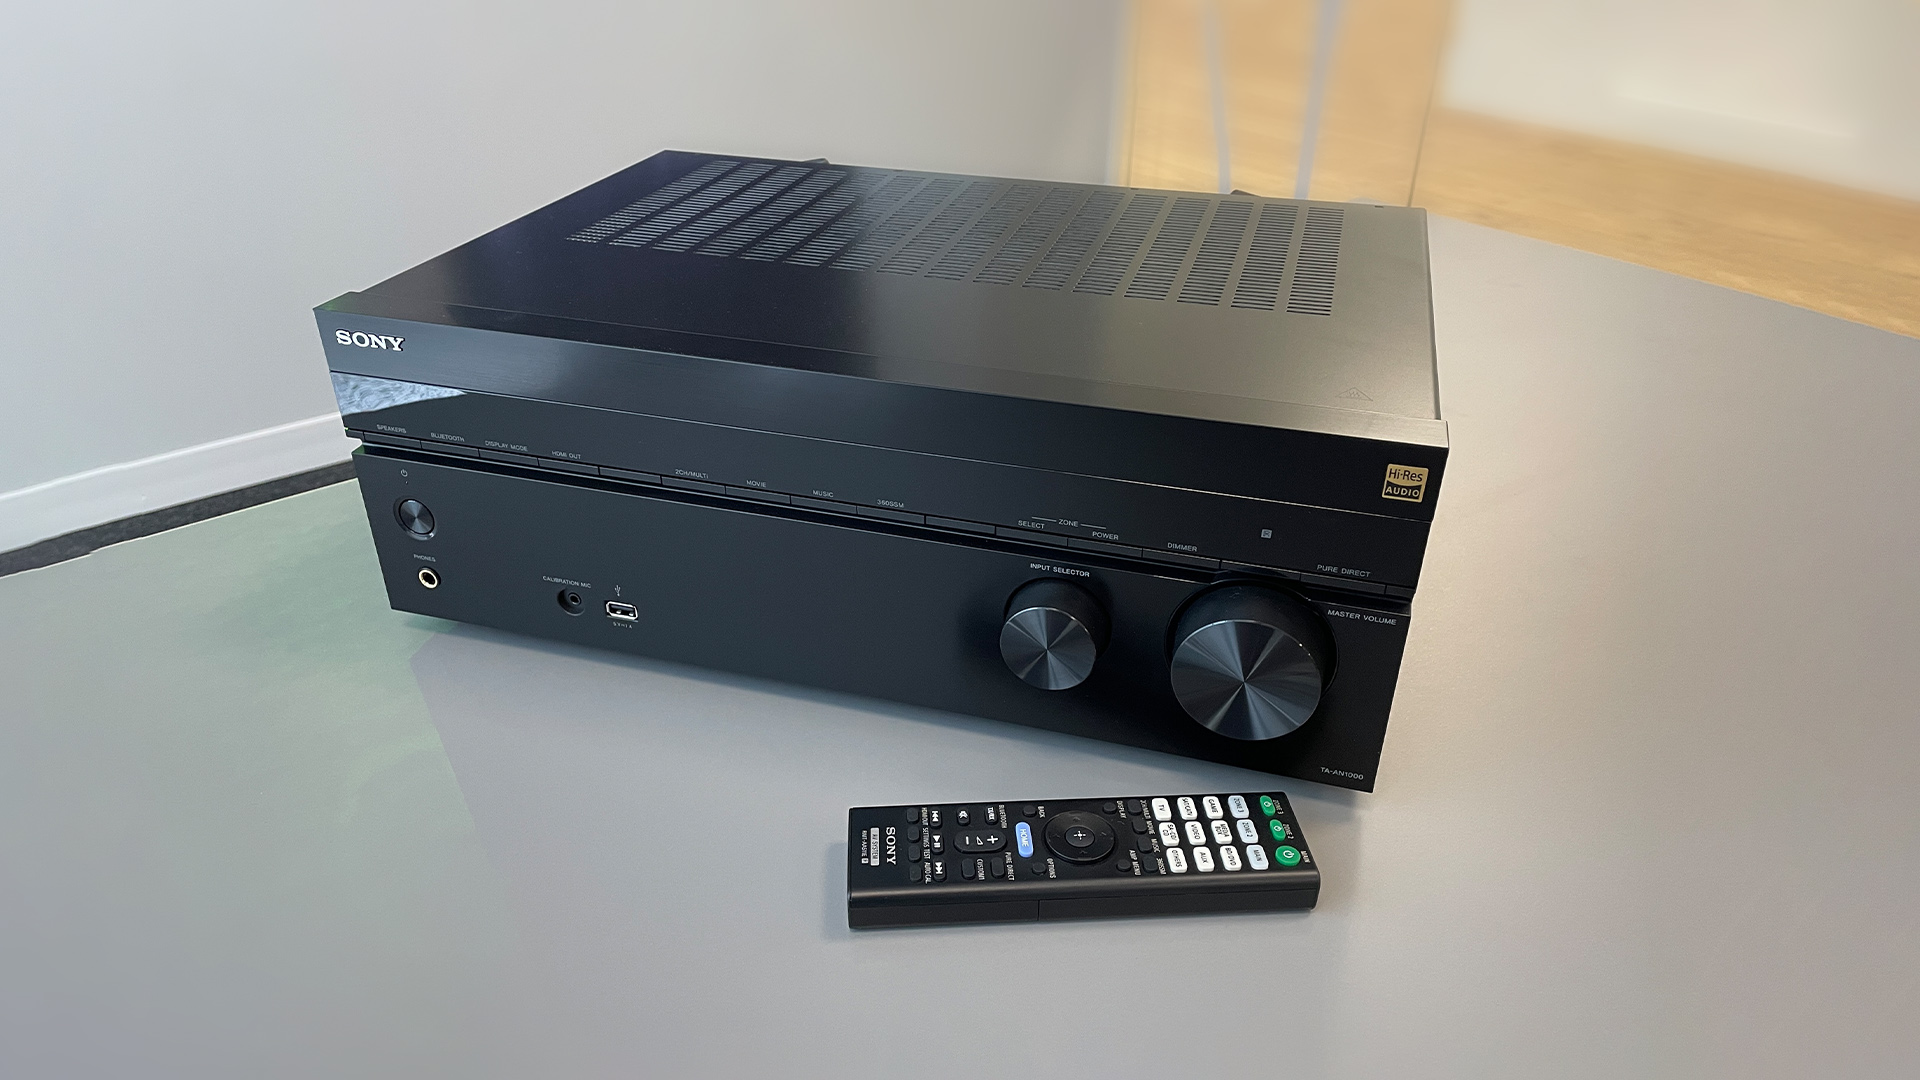
We’d also recommend looking for an amp that lets you accommodate four Atmos speakers (a 5.1.4 or 7.1.4 configuration), not two (5.1.2 or 7.1.2, for instance, which you’ll find in many low to mid-range amplifiers). There are some great amplifiers in this price range, such as the Award-winning Sony TA-AN1000 (£1000 / $1240 approx / AU$1850 approx)
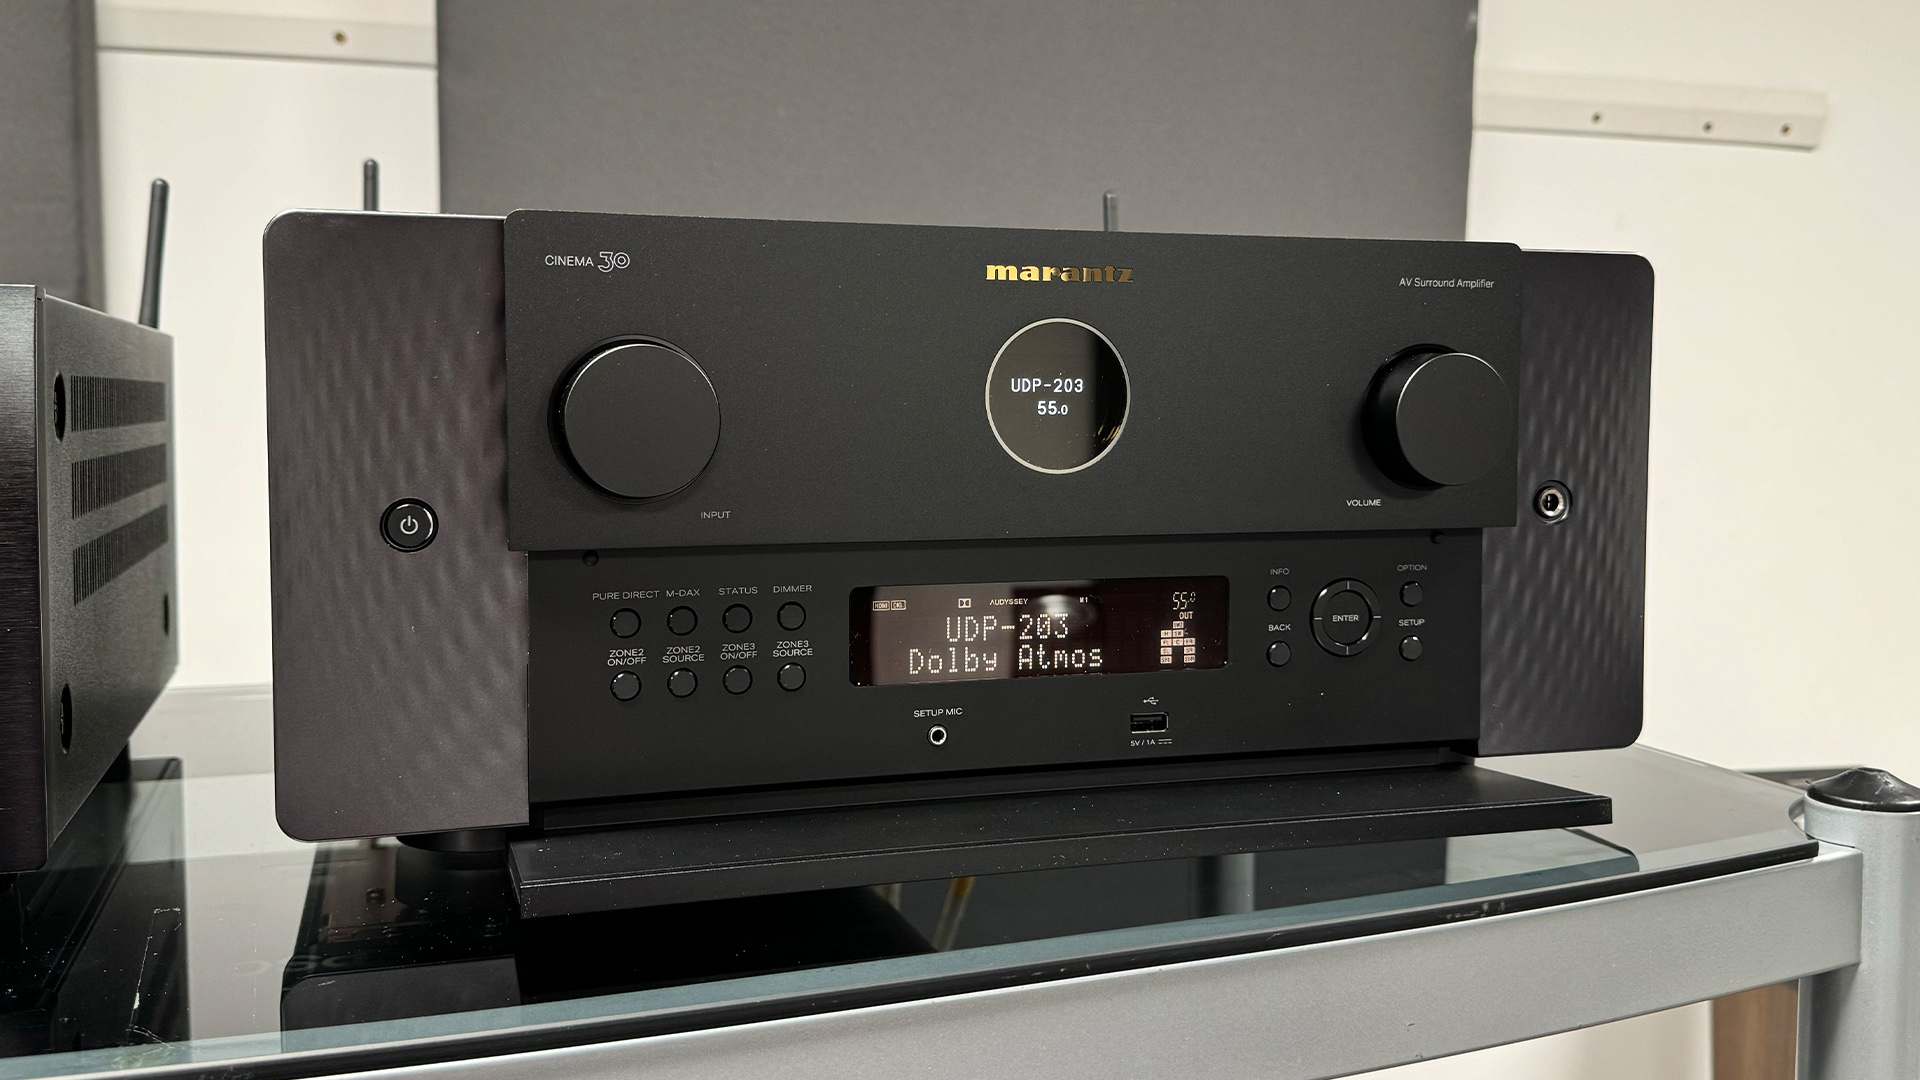
If you are set on the full Dolby Atmos package, and want an all-in-one solution, then you’ll be looking at amplifiers in the upper-mid range to high-end region. Take a look at the Denon AVC-X6800H (£2999 / $3500 / AU$5999) or the Product of the Year winning Marantz Cinema 30 (£4000 / $4500 / AU$7900) if you're after the best sound performance and feature sets.
These models aren't cheap, but they are worth it. Why? We don’t find two Atmos speakers enough for a genuine Atmos effect, so if you’re serious about getting immersive, overhead, 3D sound: go for four. Just take a passing glance at Dolby's speaker set-up guides to ensure your room will work for it.
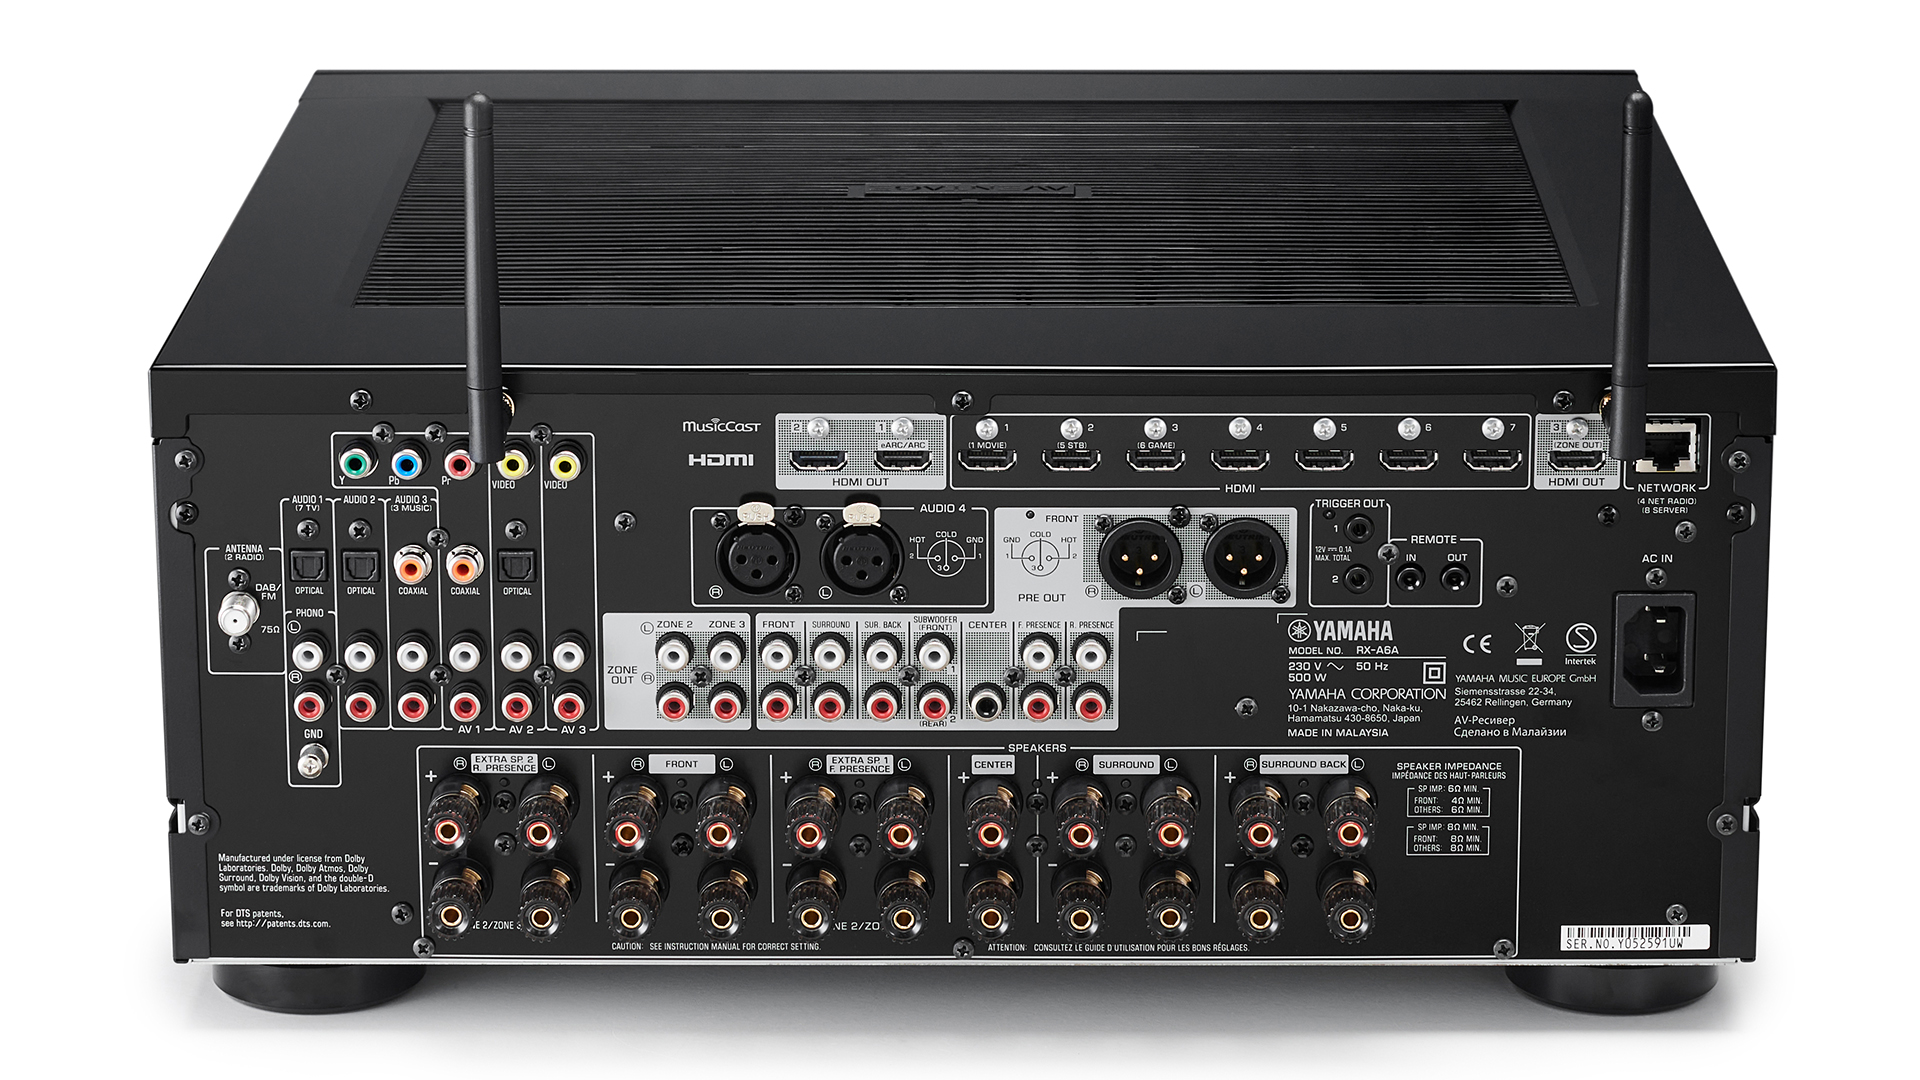
Next to consider is connections. You’ll want to make sure you have enough HDMI inputs if you’ve got multiple sources – Blu-ray player, games console, set-top box – and that they support the latest 8K and HDR specifications to allow a degree of future-proofing.
Most amps will come with some legacy analogue connections too – great if you’ve got kit that pre-dates HDMI, like a VHS player.
Price is obviously a big factor, too. You can only buy what your budget dictates, after all, and that does simplify matters somewhat.
As a general rule of thumb: if the amp is below £500 / $500 / AU$900, you’ll get basic 5.1, a handful of HDMI inputs, and probably no internet.
Move up to the sweet spot of around £700 / $700 / AU$1400 and you get every single cutting-edge AV feature – wi-fi, Dolby Atmos, DTS:X, 4K HDR passthrough, multiple HDMI inputs, all music streaming features – thrown in.
If you've got £1000 / $1000 / $1900 to spend or more, then expect everything above, but more power, bigger scale of sound, more speaker terminals, more fine-tuned audio calibrations and more features.
How much should you spend in a given system? As a rough guide, if you have a £1000-£1500 (around $1250-$1850 / AU$1950-AU$3000) speaker package at home, you should aim for a £500-750 (around $750 / AU$1180) AV receiver. Similarly, if you have your sights on a £2000 (around $2500 / AU$4000) amp, your speaker package should be in the £4000-£5000 (around $5500 / AU$8900) region – essentially, double the amplifier’s worth (and add a bit more).
How to connect your kit to an AV receiver
You’ve bought your amp, congratulations! Now it’s time to plug everything in.
The sheer number of connections on the back of any amp can be daunting, but take your time to get it all set up properly in one go and you’ll never have to do it again.
We’d recommend keeping the amp powered off when you’re plugging in your speakers, subwoofer and sources. That will stop any pops, shorting of circuits or any other possible damage to your system.
Most, if not all, amps have everything clearly labelled. Some, such as Denon’s amps, helpfully colour code the speaker terminals to make plugging in five (or more) pairs of speakers easier. Surround backs, height or front width speaker terminals can double up as those for Dolby Atmos speakers, too: these might be labelled as “assignable”, “5.1.2ch” or “Extra SP”.
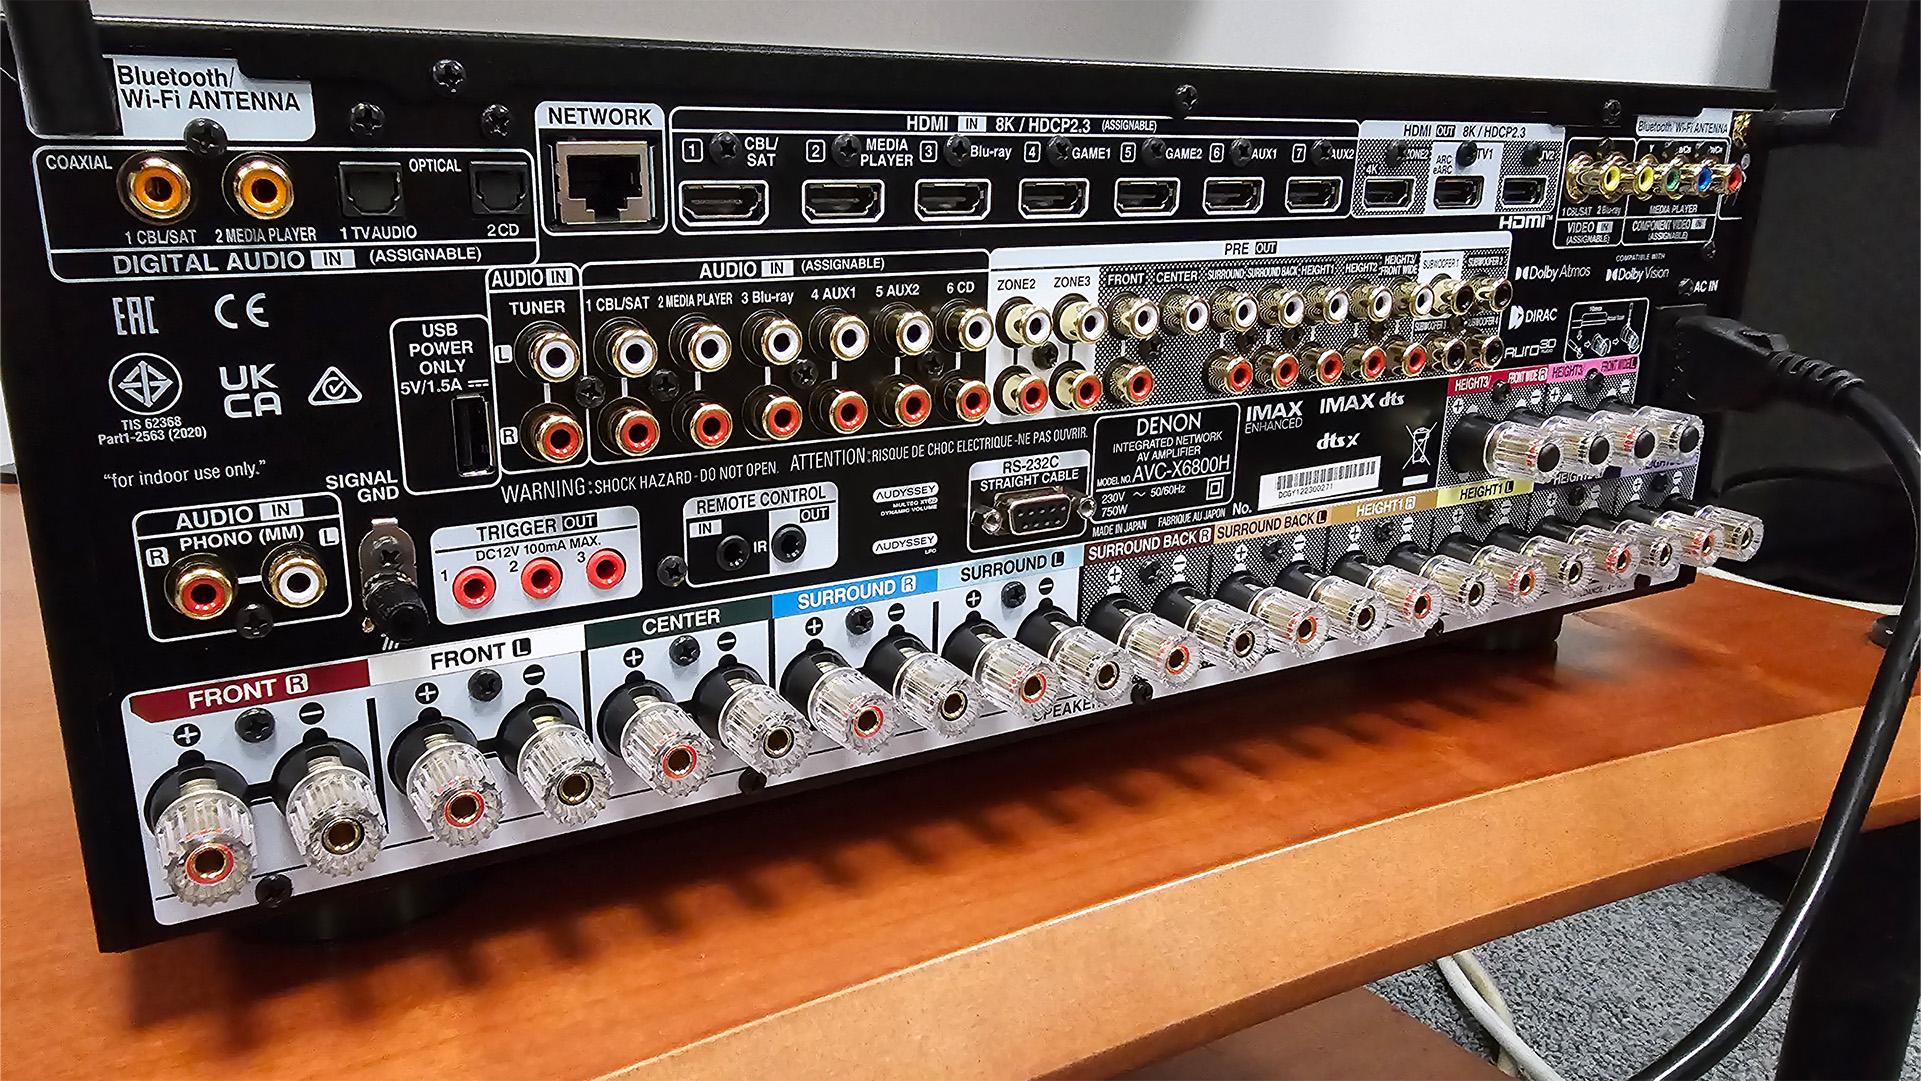
If you’ll be playing 4K HDR content, look out for the “HDCP2.2” label above the HDMI inputs. In some cases, only a couple of HDMI inputs will be HDCP2.2 certified – make sure you plug your 4K Blu-ray player into these.
You’ll also notice that each HDMI input has a source assigned to it: Blu-ray, DVD, CD, Game, CBL/SAT, media player and so on. This isn’t just friendly guidance. This means the manufacturer has taken care to optimise these inputs for those particular sources. The Blu-ray input, for example, might offer the shortest signal path to the processor and so delivers the best performance.
Two more connections worth talking about: we’d recommend using the wired ethernet connection if you can, as it’s more stable and reliable than wi-fi.
And the USB port in front? It’ll play media files off a USB stick, but we find it useful for charging our smartphones too (if the amp allows it).
Calibrating your AV receiver

Here comes the lengthiest, fiddliest part of setting up your AV receiver.
Most AV receivers come with a set-up mic. Plug that in and run the auto-calibration when prompted – it will measure your speakers and your room, set the speakers’ distances and levels and, in the case of fancier (read: pricier) amplifiers’ calibration systems, optimise the speaker package's performance to match its surroundings.
We recommend running the auto-calibration right after plugging everything in – get that fuss out of way in the very beginning, then the sooner you can start listening to your new home cinema.
Also, the system won’t sound right until the calibration is done. Once the mic is plugged in, simply follow the on-screen instructions to the letter and let the calibration run its course. Some take only a handful of seconds, while others can take more than five minutes because they take multiple measurements. We tend to go off and make a cup of tea for the longer ones.
If you have Dolby Atmos speakers installed, you need to tell the amp so before calibrating.
Head into the manual speaker settings (you may have to delve into subfolders in the menu) to tell the amp if they’re upward-firing Atmos-enabled speakers (such as the KEF R50s) or installed in the ceiling – then it can calibrate accordingly. The amp will ask for your room’s ceiling height, so keep a tape measure handy.
You’ll also need to tell the amp if you’re using one or two subwoofers. Set the subwoofer's built-in volume control about halfway, run the calibration and then adjust accordingly if it sounds too bassy (or not bassy enough) when playing a film clip.
If the calibration flags up a fault with one of the speakers during measurement (or doesn’t recognise it when it’s there), double-check it’s plugged into the right terminal – sometimes it flags up when a speaker is out of phase.
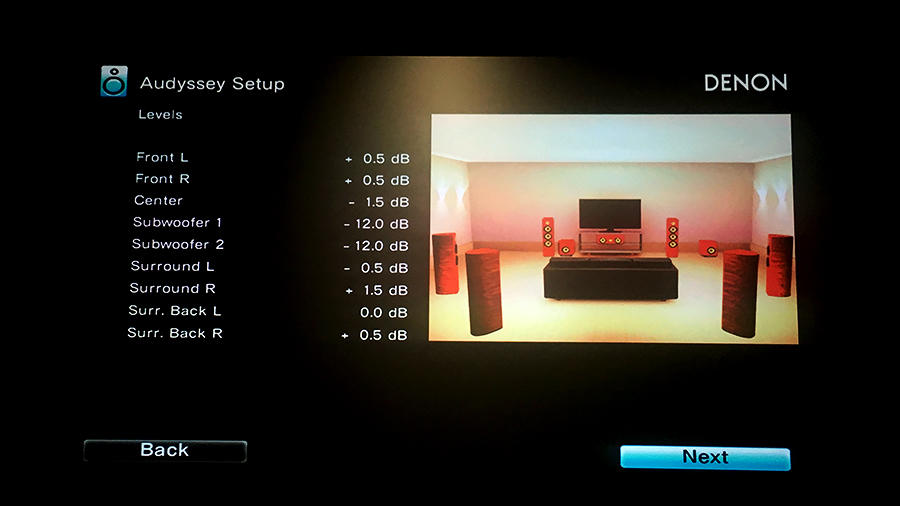
Most calibration systems these days are largely accurate, but it’s always worth delving into the manual speaker settings to double-check the distances and levels, and tweak the results where needed. Trust your ears: if it sounds wrong, it probably is, so adjust away.
The main thing you’ll need to change is when the amplifier hasn’t recognised whether your speakers are large or small (this happens a lot).
You can even get nerdy like us and adjust the speaker levels using a sound pressure meter level (or use the equivalent smartphone app – they genuinely work).
It’s worth noting if you ever change your speaker package, change its position or move furniture around in the room, you’ll need to run the whole calibration again. So don’t lose that set-up mic.
We'd also suggest going back into the menus and manually turning off any dynamic range compression (sometimes referred to as DRC) in the menus. This reduces the dynamic range of the amp and is really for late-night listening so any huge bangs and crashes don't annoy the neighbours. If you're going to be mainly watching movies at more sociable hours, then you'll want to hear the soundtrack in all its glory, right?
Surround sound modes and DSPs
Just as you’re coasting the post-calibration high and are ready to hit play on your 4K Blu-ray, you might notice another couple of options: surround sound modes and DSPs.
DSP (digital sound processing) can vary from Dolby or DTS processing modes to specific Drama/Sci-Fi/Adventure/Game modes that boost certain aspects of the sound. You may even enjoy more fanciful effects that simulate the acoustics of a cathedral, a concert hall, an NYC jazz club or LA’s Roxy Theatre.
This last group can be enormous fun to play around with. Yamaha has some of the best sound programs for invoking a specific environment and delivering a subtle yet convincing effect.
But since we prefer not to colour the sound signal too much (if at all), we’re going to focus on just a handful of sound modes that put sound quality at the fore. Look out for the ‘straight’, ‘direct’ or ‘pure direct’ modes on your amplifier – these tend to offer the purest signal from source to output.
The modes vary with each manufacturer, but they generally switch off any part of the circuitry that isn’t needed, thereby reducing distortion and getting rid of any interferences – all in the name of keeping the signal path as pure as possible.
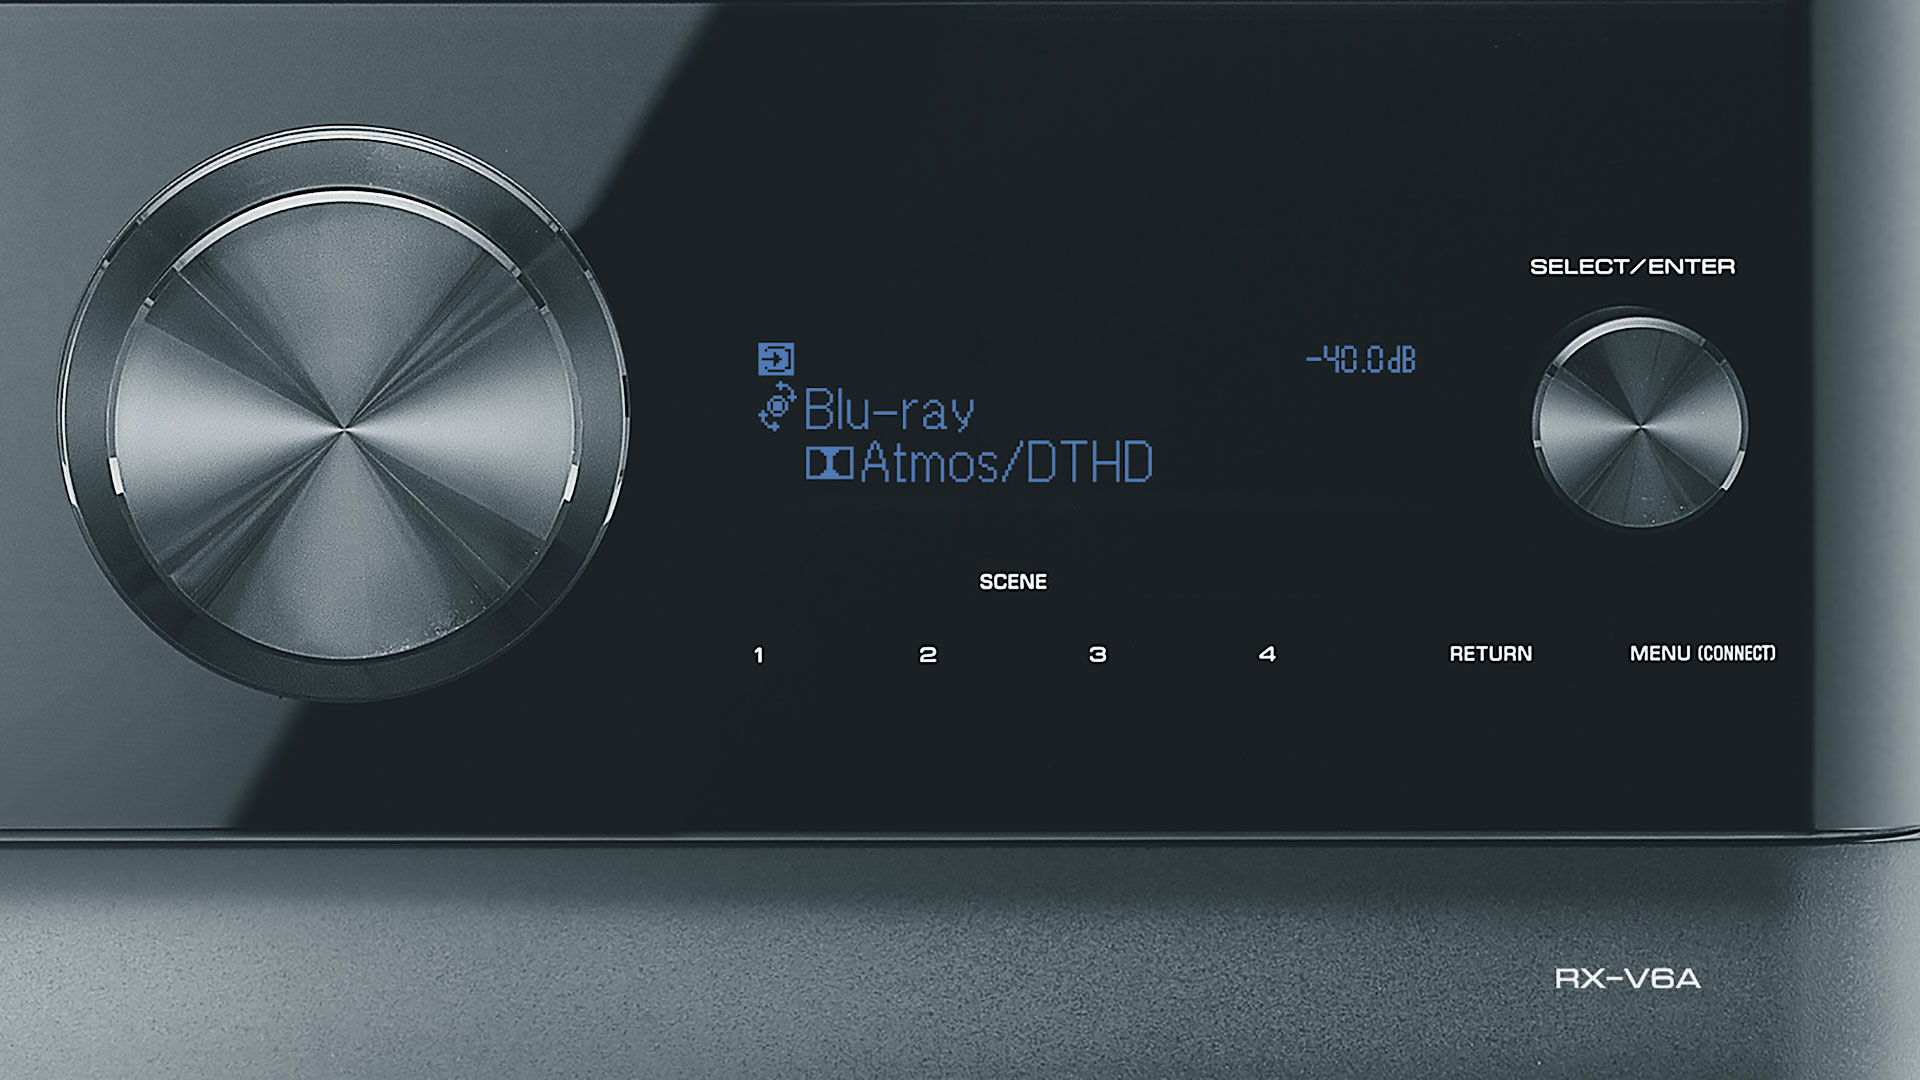
On the other hand, you might find you need a specific mode or setting to play Dolby Atmos or DTS:X soundtracks (which are layered on top of the standard 5.1 or 7.1 soundtrack on Blu-ray discs).
For example, when you select Movie Mode on the Denon AVR-X1800H, you also get a sub-menu to choose the surround mode you want the soundtrack to be played in – i this case Dolby Atmos/Surround.
One more thing: if you’ll be watching/listening to a variety of content – films, sports, video games, stereo music – through your amp, it’s worth setting up shortcuts with bespoke settings for each type of content you watch. A particular movie mode for films, two-channel stereo mode for music only, another DSP for games – it’ll save you from having to change the sound settings all the time.
When we test an AV receiver, we let it ‘run in’ (i.e. keep it playing for a day or two) to get it sounding its best before any critical listening. Since you’ll be living with your amp, you’ll find that it sounds better the more you use it.
So what are you waiting for? Pop in your favourite film, grab some snacks, and enjoy your new, perfectly set up home cinema system.
AV receiver tips and tricks
- AV receivers are big and heavy objects, so give your amp enough space on your AV rack.
- Make sure it has plenty of ventilation, too, as it can run hot during playback.
- Keep the display turned off for a boost in sound quality.
- Smartphone apps can be nice, but we prefer a trusty physical remote control. Bonus points if the remote is backlit.
- Go look through every single folder and subfolder in the amp’s menu – you’ll find loads of useful settings tucked away.
- Use quality speaker cables and HDMI cables to get the best out of your system.
- Try to keep all the speaker cables from tangling with each other too much, to reduce any interference.
- Check for software updates regularly, and switch on automatic updates if you can.
- Try to match your AVR to your speaker system. Have a leaner-sounding speaker package? Try to find an AVR with a richer and fuller sound, such as a Denon or Marantz, to balance it out.
- Ignore the power ratings stated by the manufacturer. Every manufacturer measures them in a different way, so the results can be misleading. It may be tempting to go for the largest number (e.g. 200W per channel), but the power ratings on an AV receiver don’t accurately represent the performance.
- Top tip: before you sit down to enjoy film night, turn on the AV receiver about half an hour earlier to let it warm up – it’ll sound considerably better than if you start playing it when it's cold.
MORE:
5.1 vs 7.2 surround sound: which is better?
The best Dolby Atmos movies of the decade (so far) to test your home cinema
13 of the best movie scores to test your system
Our pick of the best surround sound systems you can buy