Apple’s iPads are one of the highest-selling products globally, and recently many parents have started buying them for their children. With this, there has been a significant surge in many younger people using iPads. However, this also means that they’re getting exposed to all the right and wrong things going on the internet in this digital age.
So, how do you safeguard your little ones while giving them the best of the technology? Well, Apple’s robust parental controls can provide a strong barrier to your child’s safe experience on the internet. That’s why, in this guide, we’ll break down the entire process of setting up parental controls on your child’s iPad. After going through this article, you can set up various parental controls, including screen time limitations, putting up content & privacy restrictions, preventing iTunes purchases, and much more.
How to Set Parental Controls on iPad
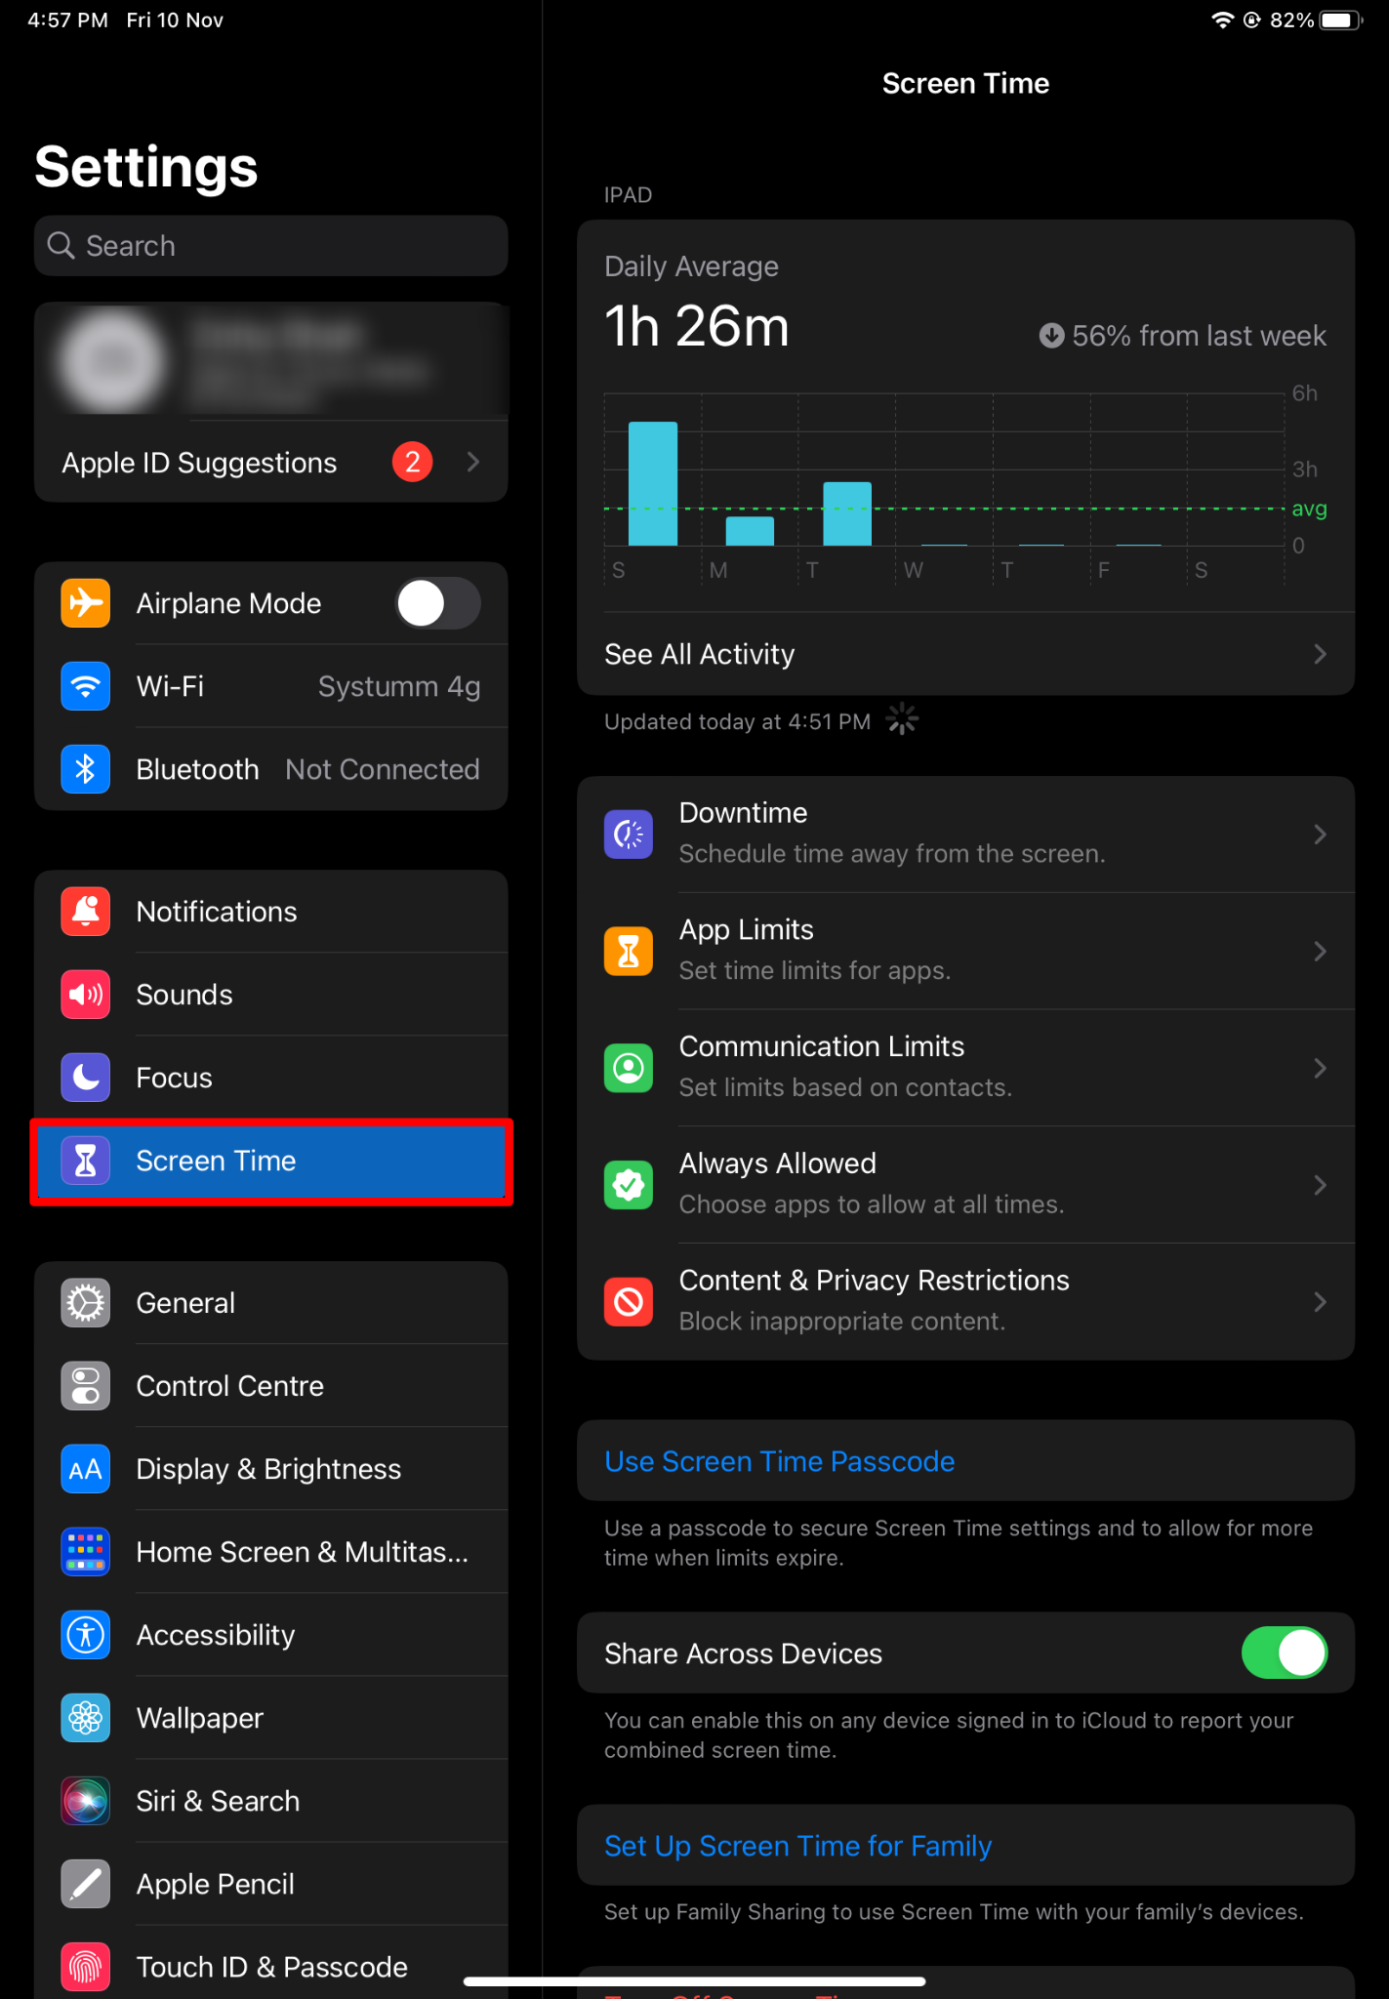
For setting up parental controls on an iPad, you first need to set up Screen Time as almost all the parental control features are present in this section.
1. Setting Up Screen Time
Screen Time gives you access to various controls, including app limits, content restrictions, usage limits, and much more. Once you set this up on your child’s iPad, you can easily control most of their activities and even prevent them from exploring inappropriate content online.
Here is how you can set it up.
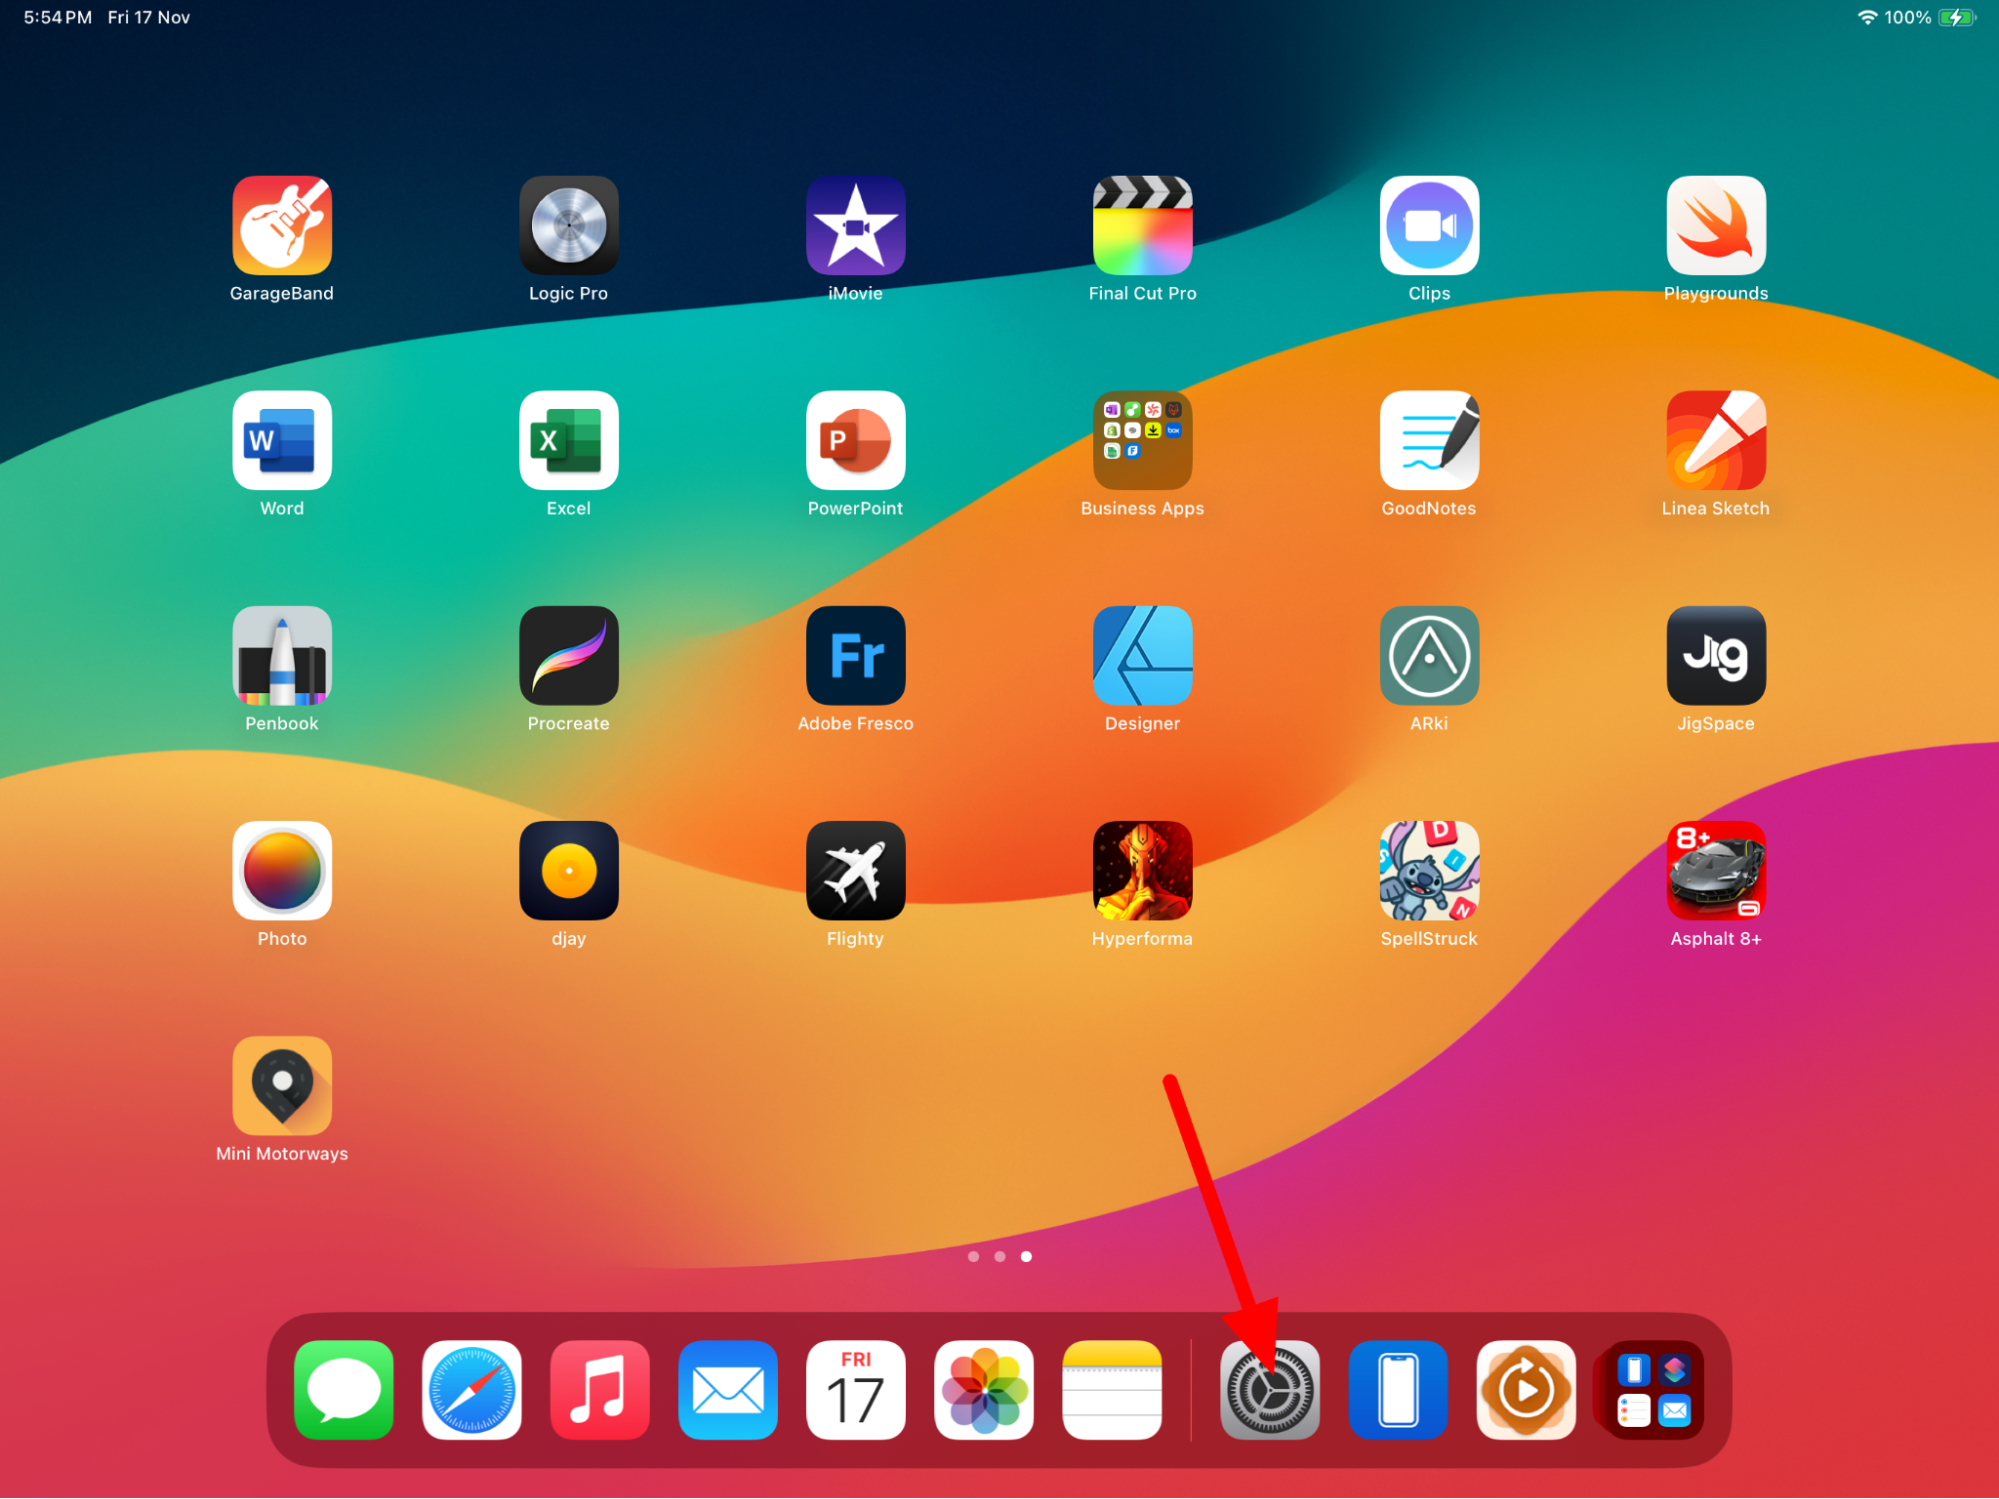
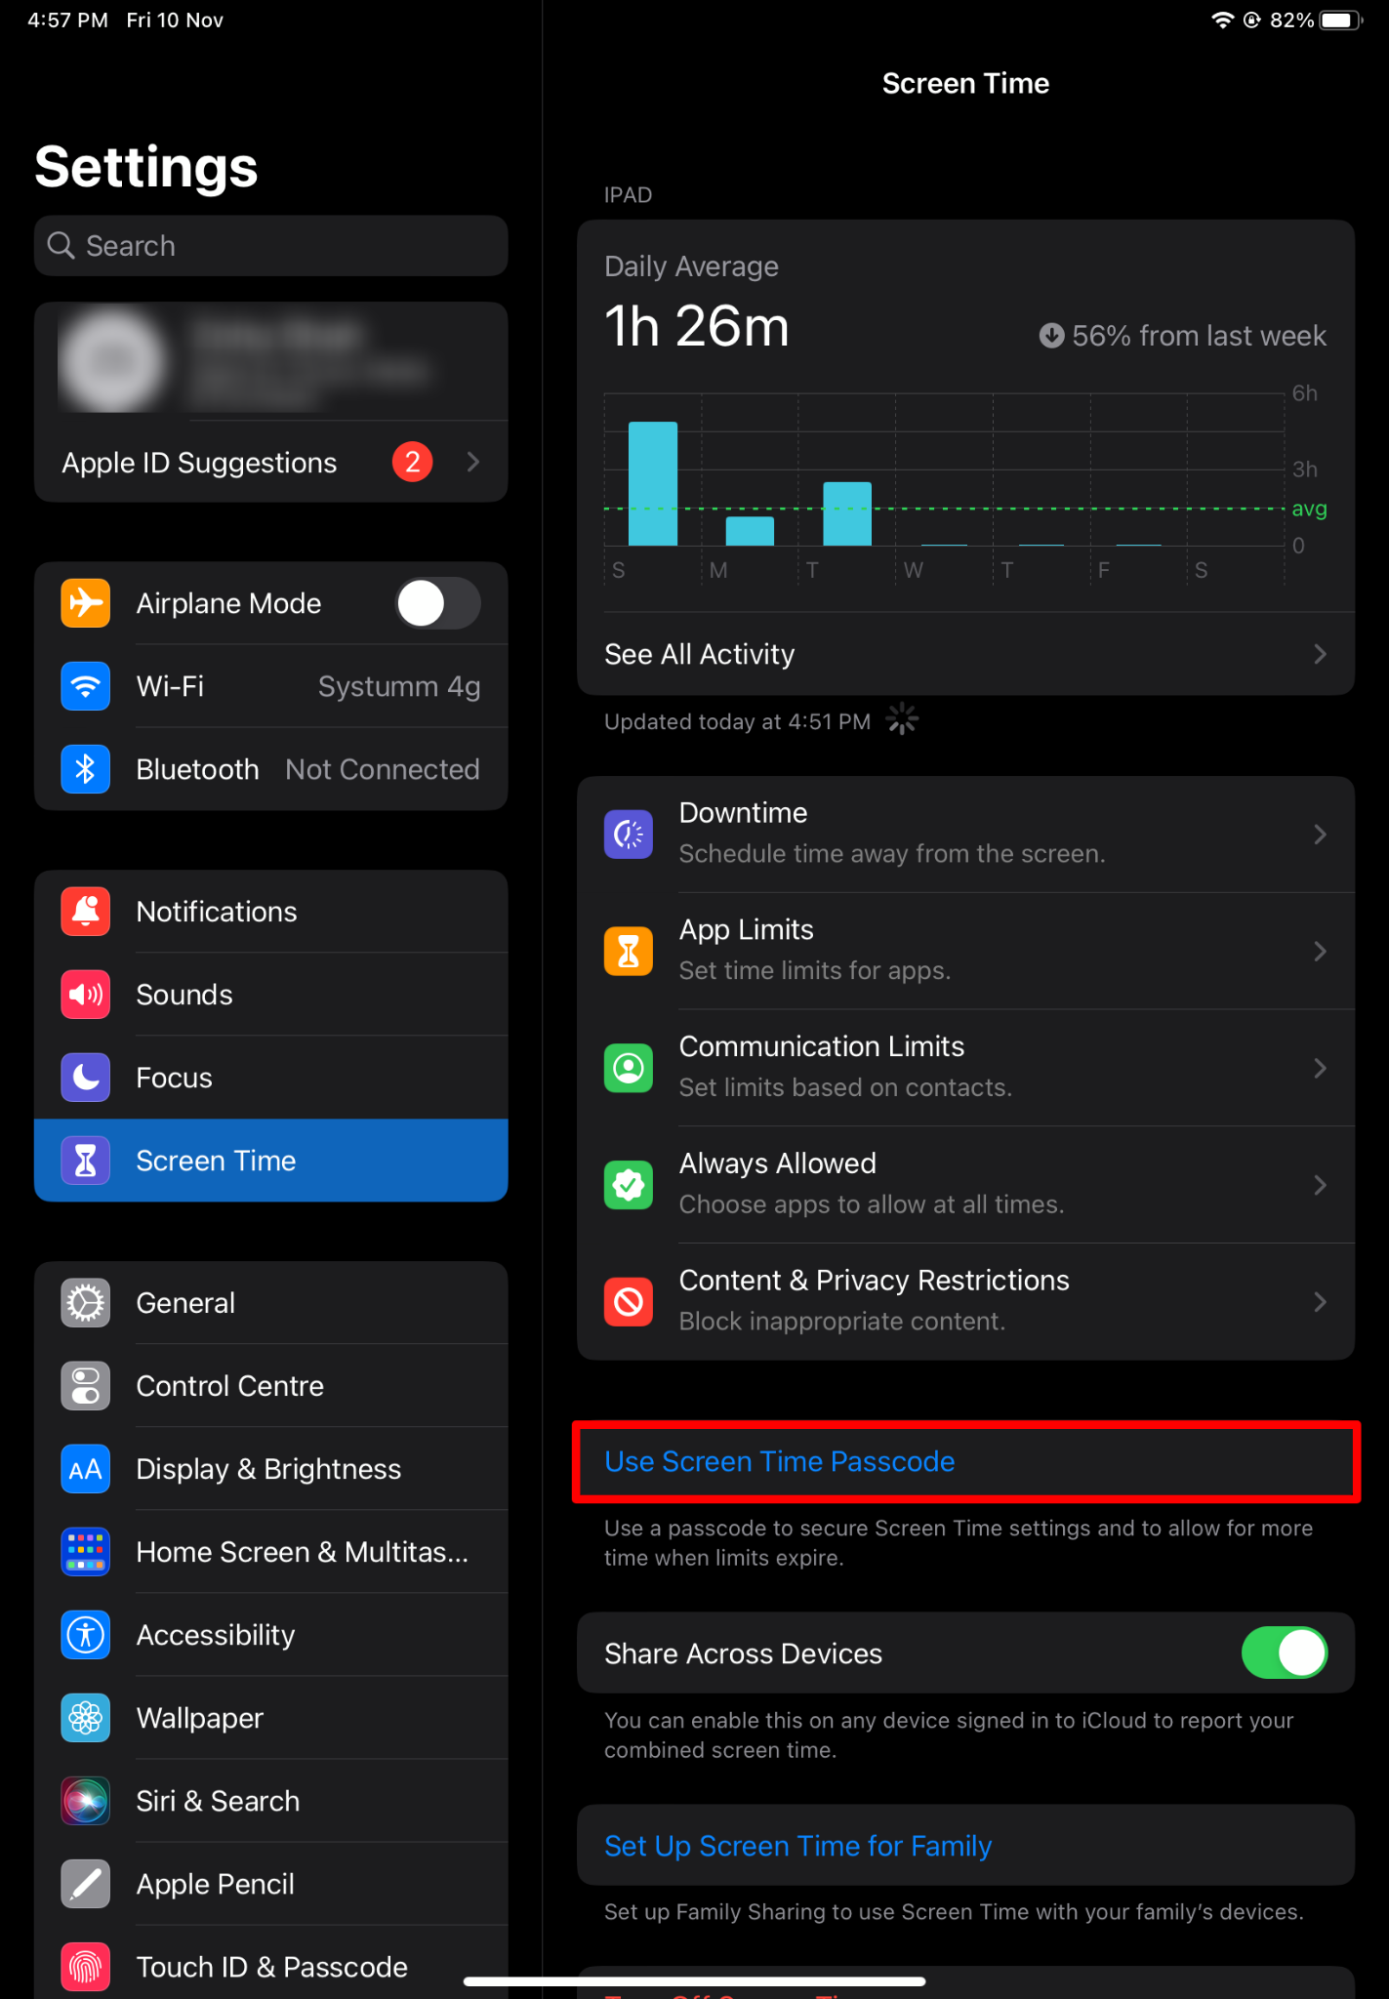
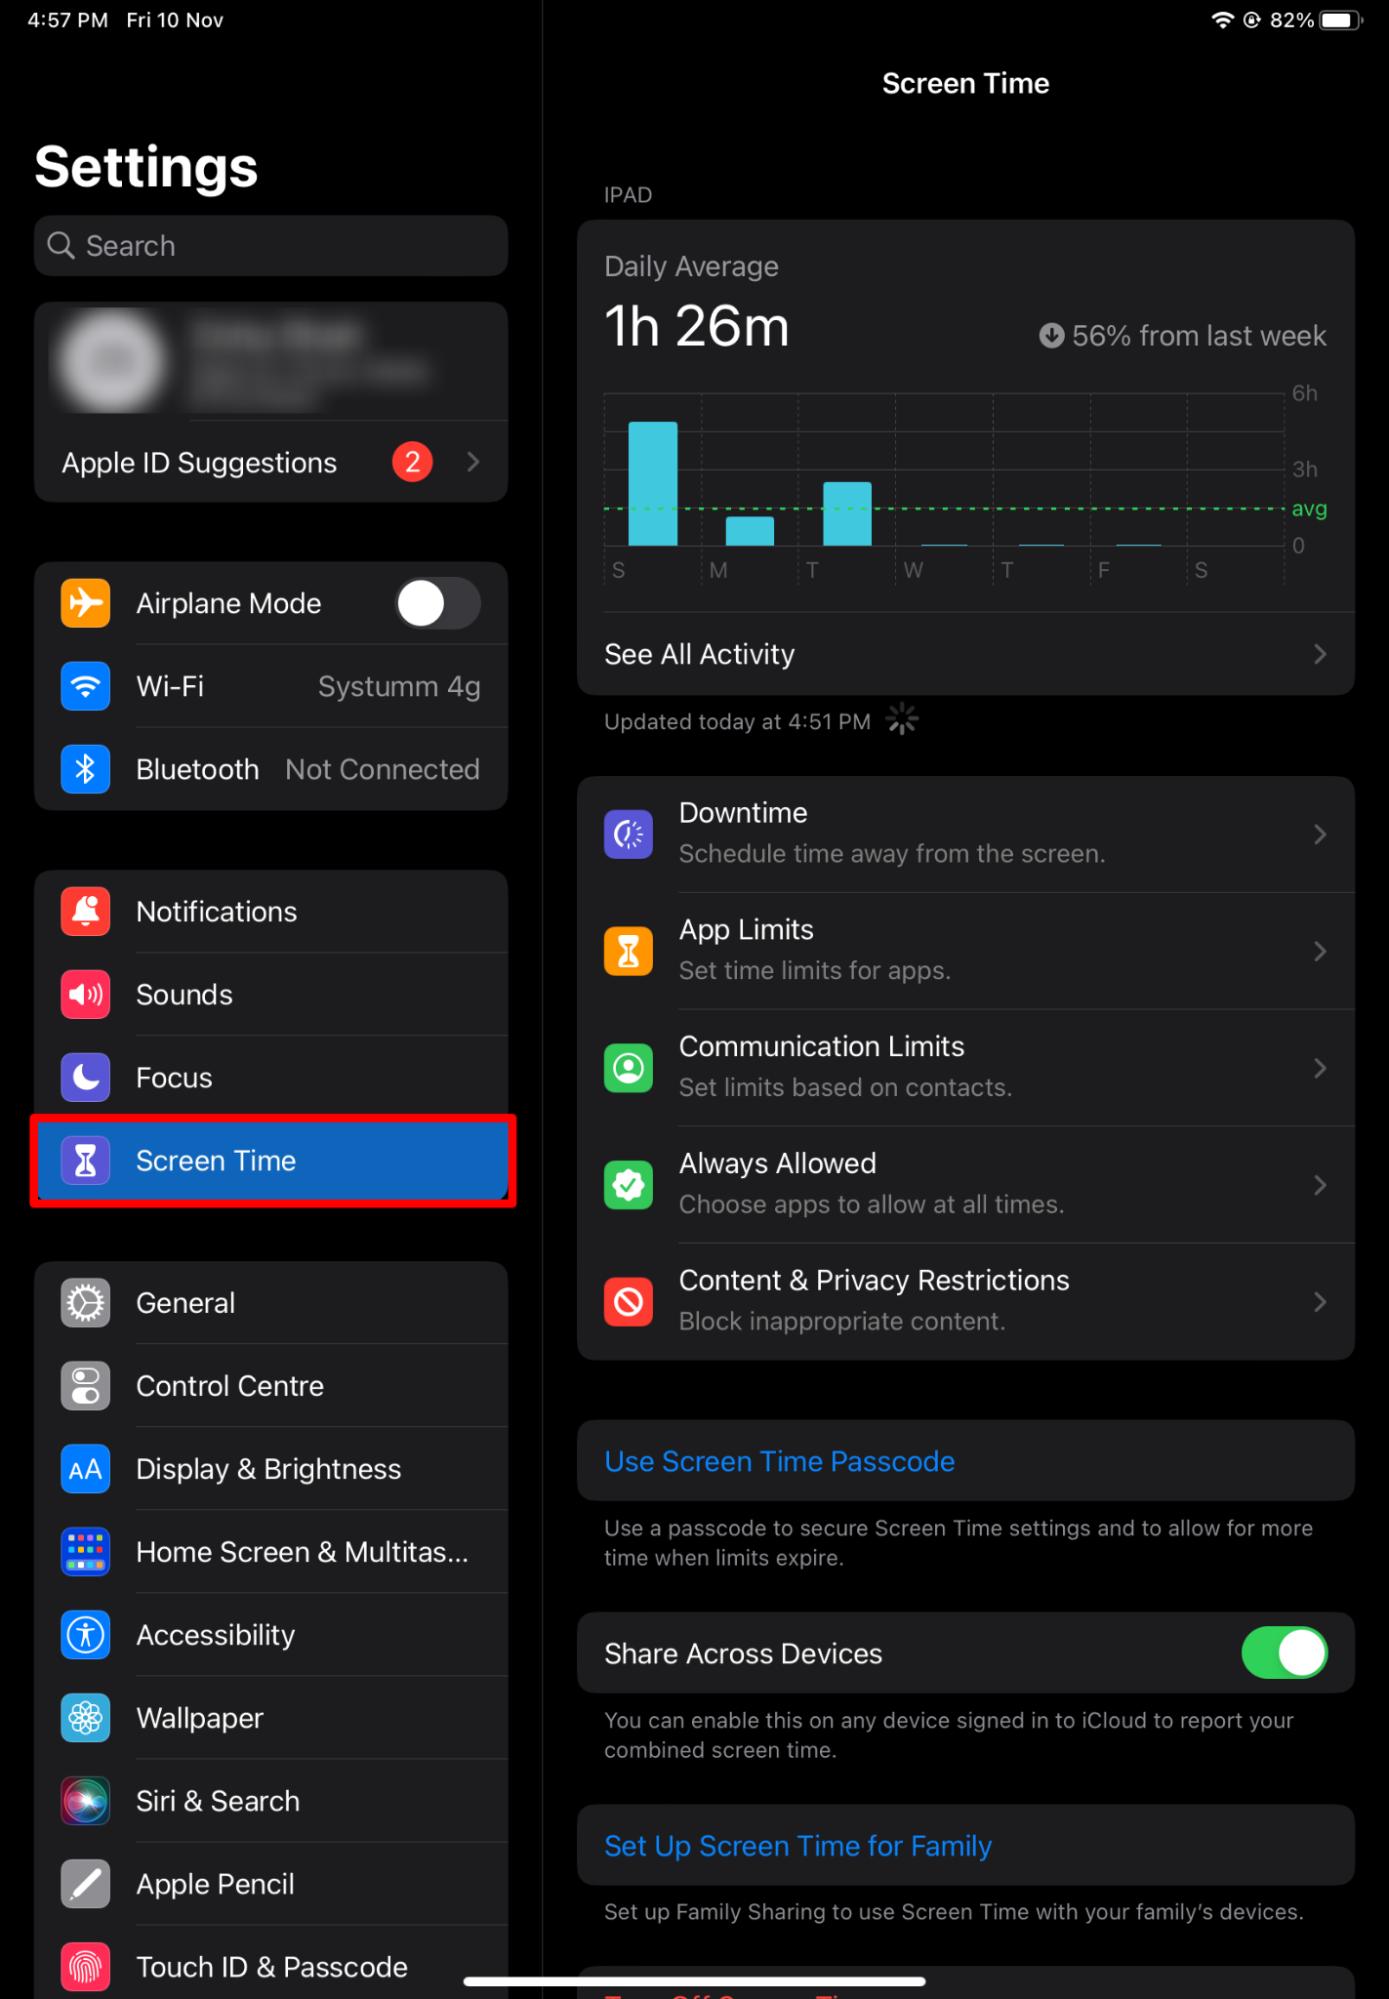
1. On your child’s iPad, open Settings and tap on Screen Time.

2. Now, tap Turn on Screen Time & press Continue to confirm.
3. You will now see a pop-up with two options, This is my iPad/ This is my Child’s iPad. Press on the later option to move ahead.
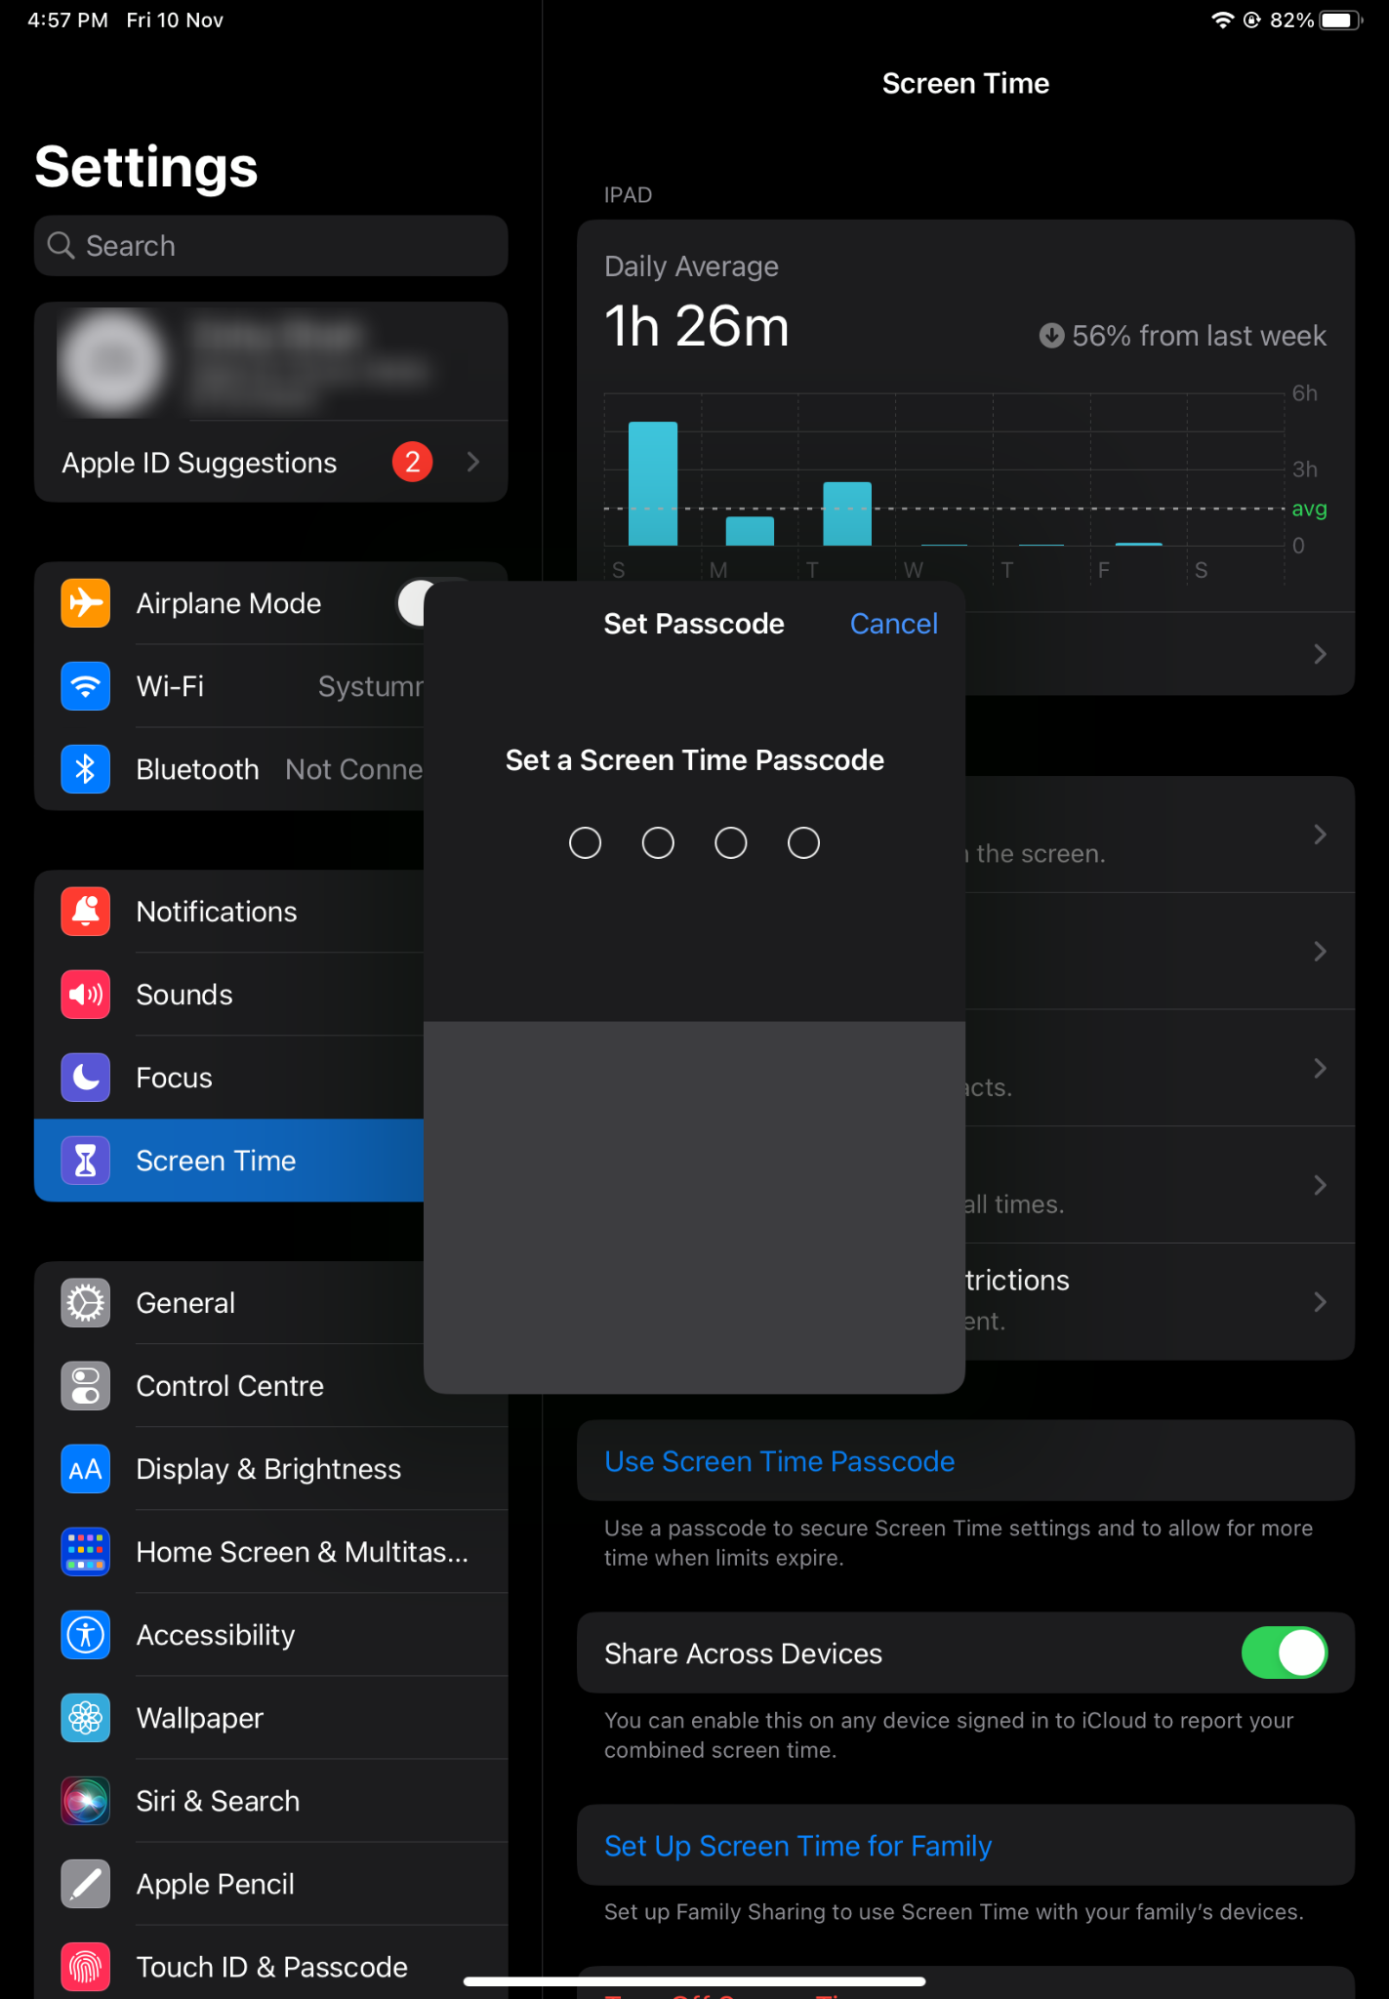
4. Now, click on Use Screen Time Passcode and set a passcode to prevent your child from changing your settings on Screen Time.
5. And that’s it. You’ve successfully activated the Screen Time settings on your child’s iPad.
2. Setting Up Downtime on iPad
Downtime on an iPad gives a structured approach to managing your child's screen time. When enabled, it restricts access to most apps and mutes notifications during scheduled hours. The feature allows only pre-selected apps and contacts under 'Always Allowed', ensuring that the iPad remains a productive tool rather than a distraction. This is particularly useful during homework time or bedtime, helping your child stay focused and develop better tech habits.
Follow these steps to set it up on your child’s iPad.
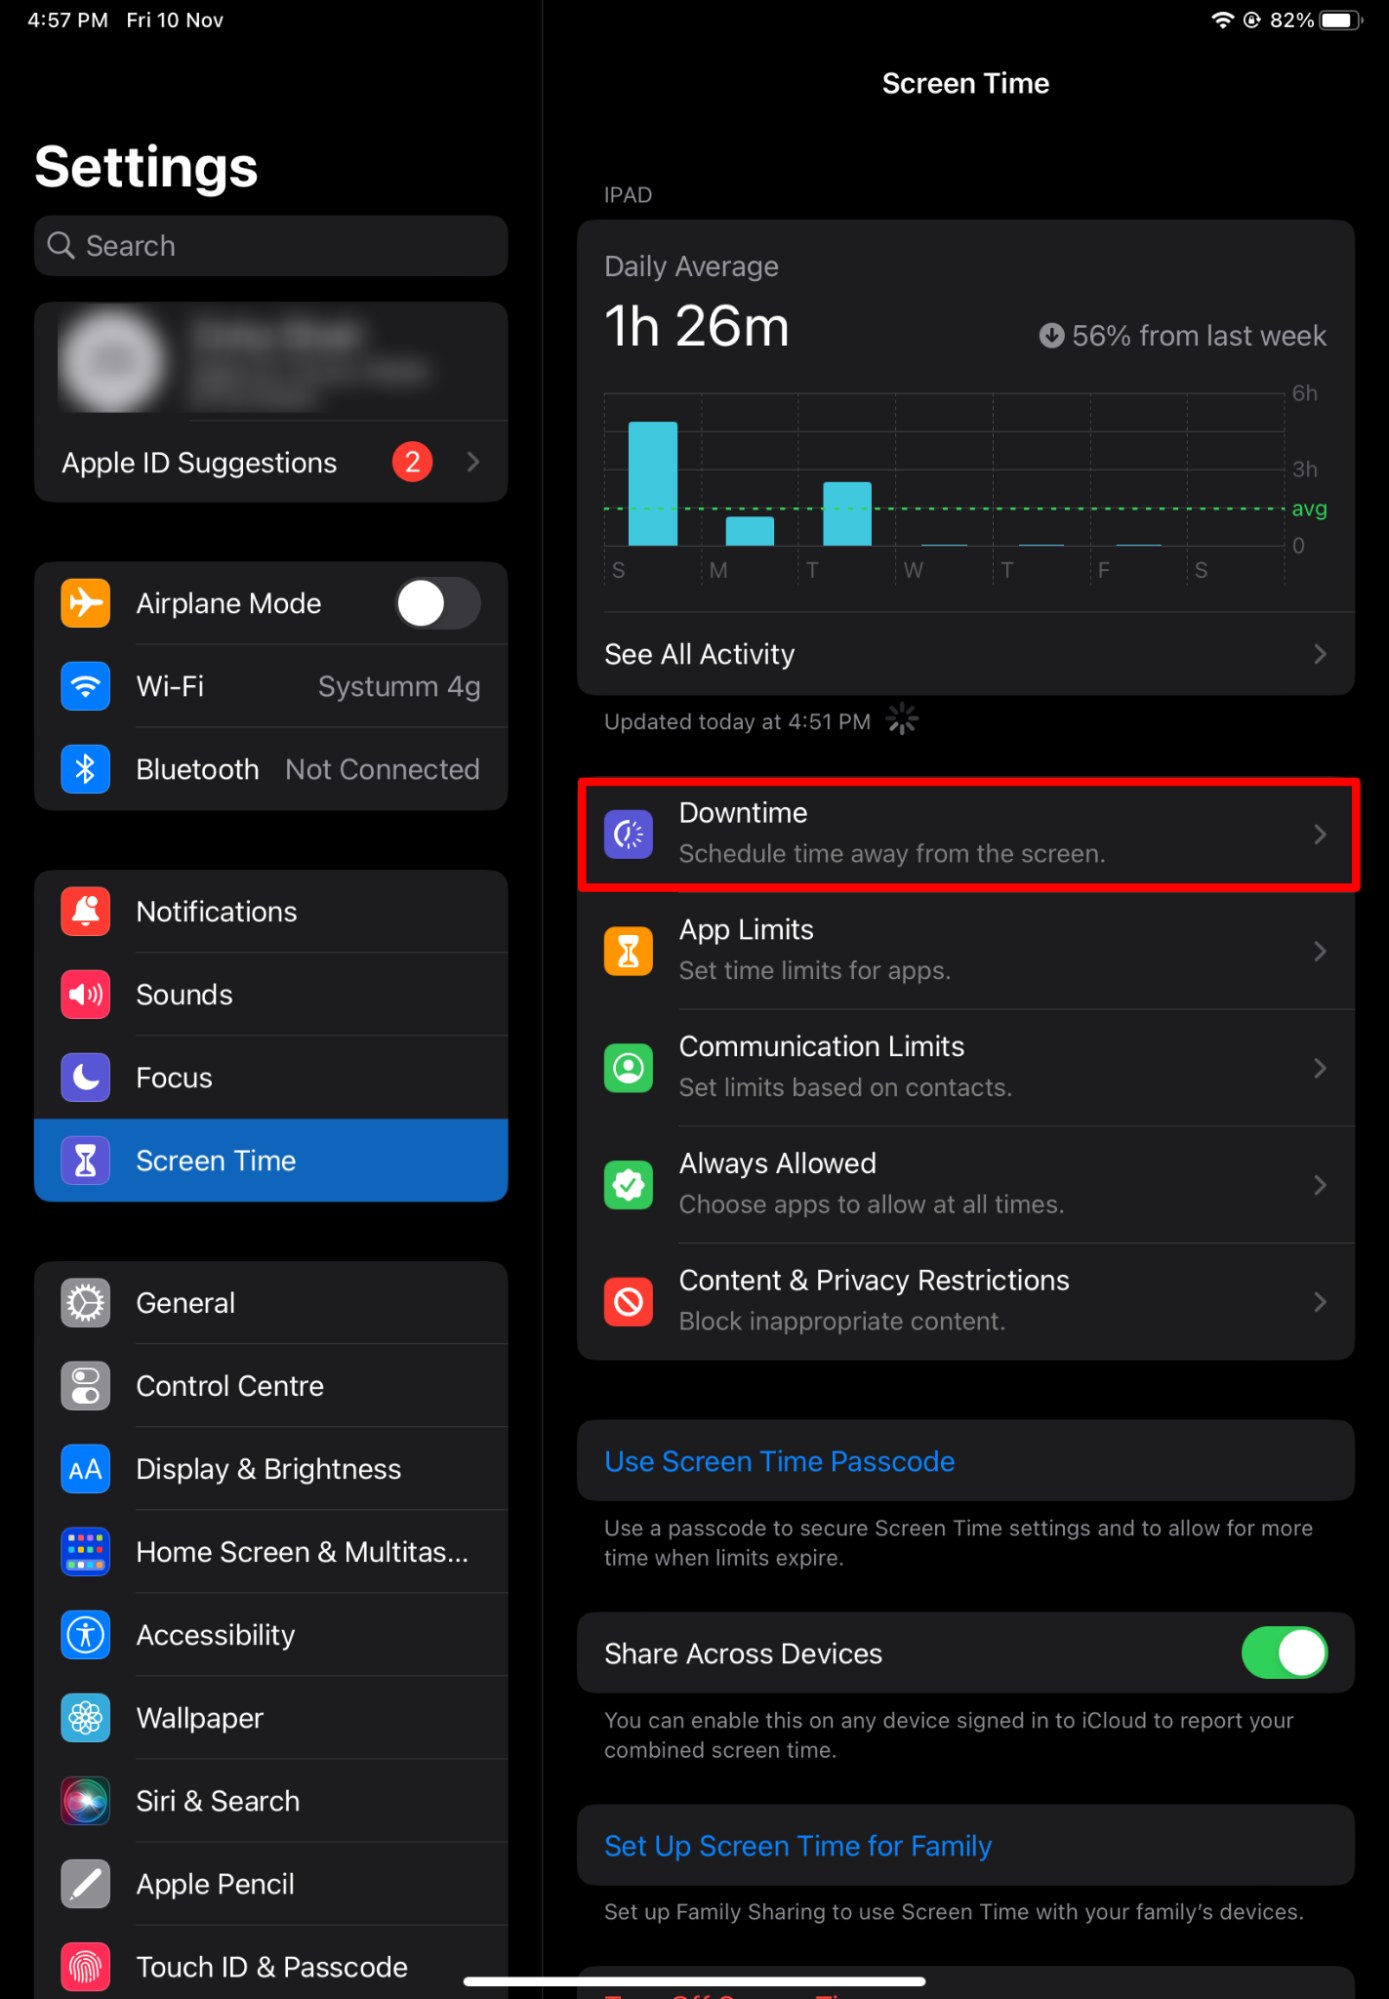
1. Open Settings and tap Screen Time on your child’s iPad.

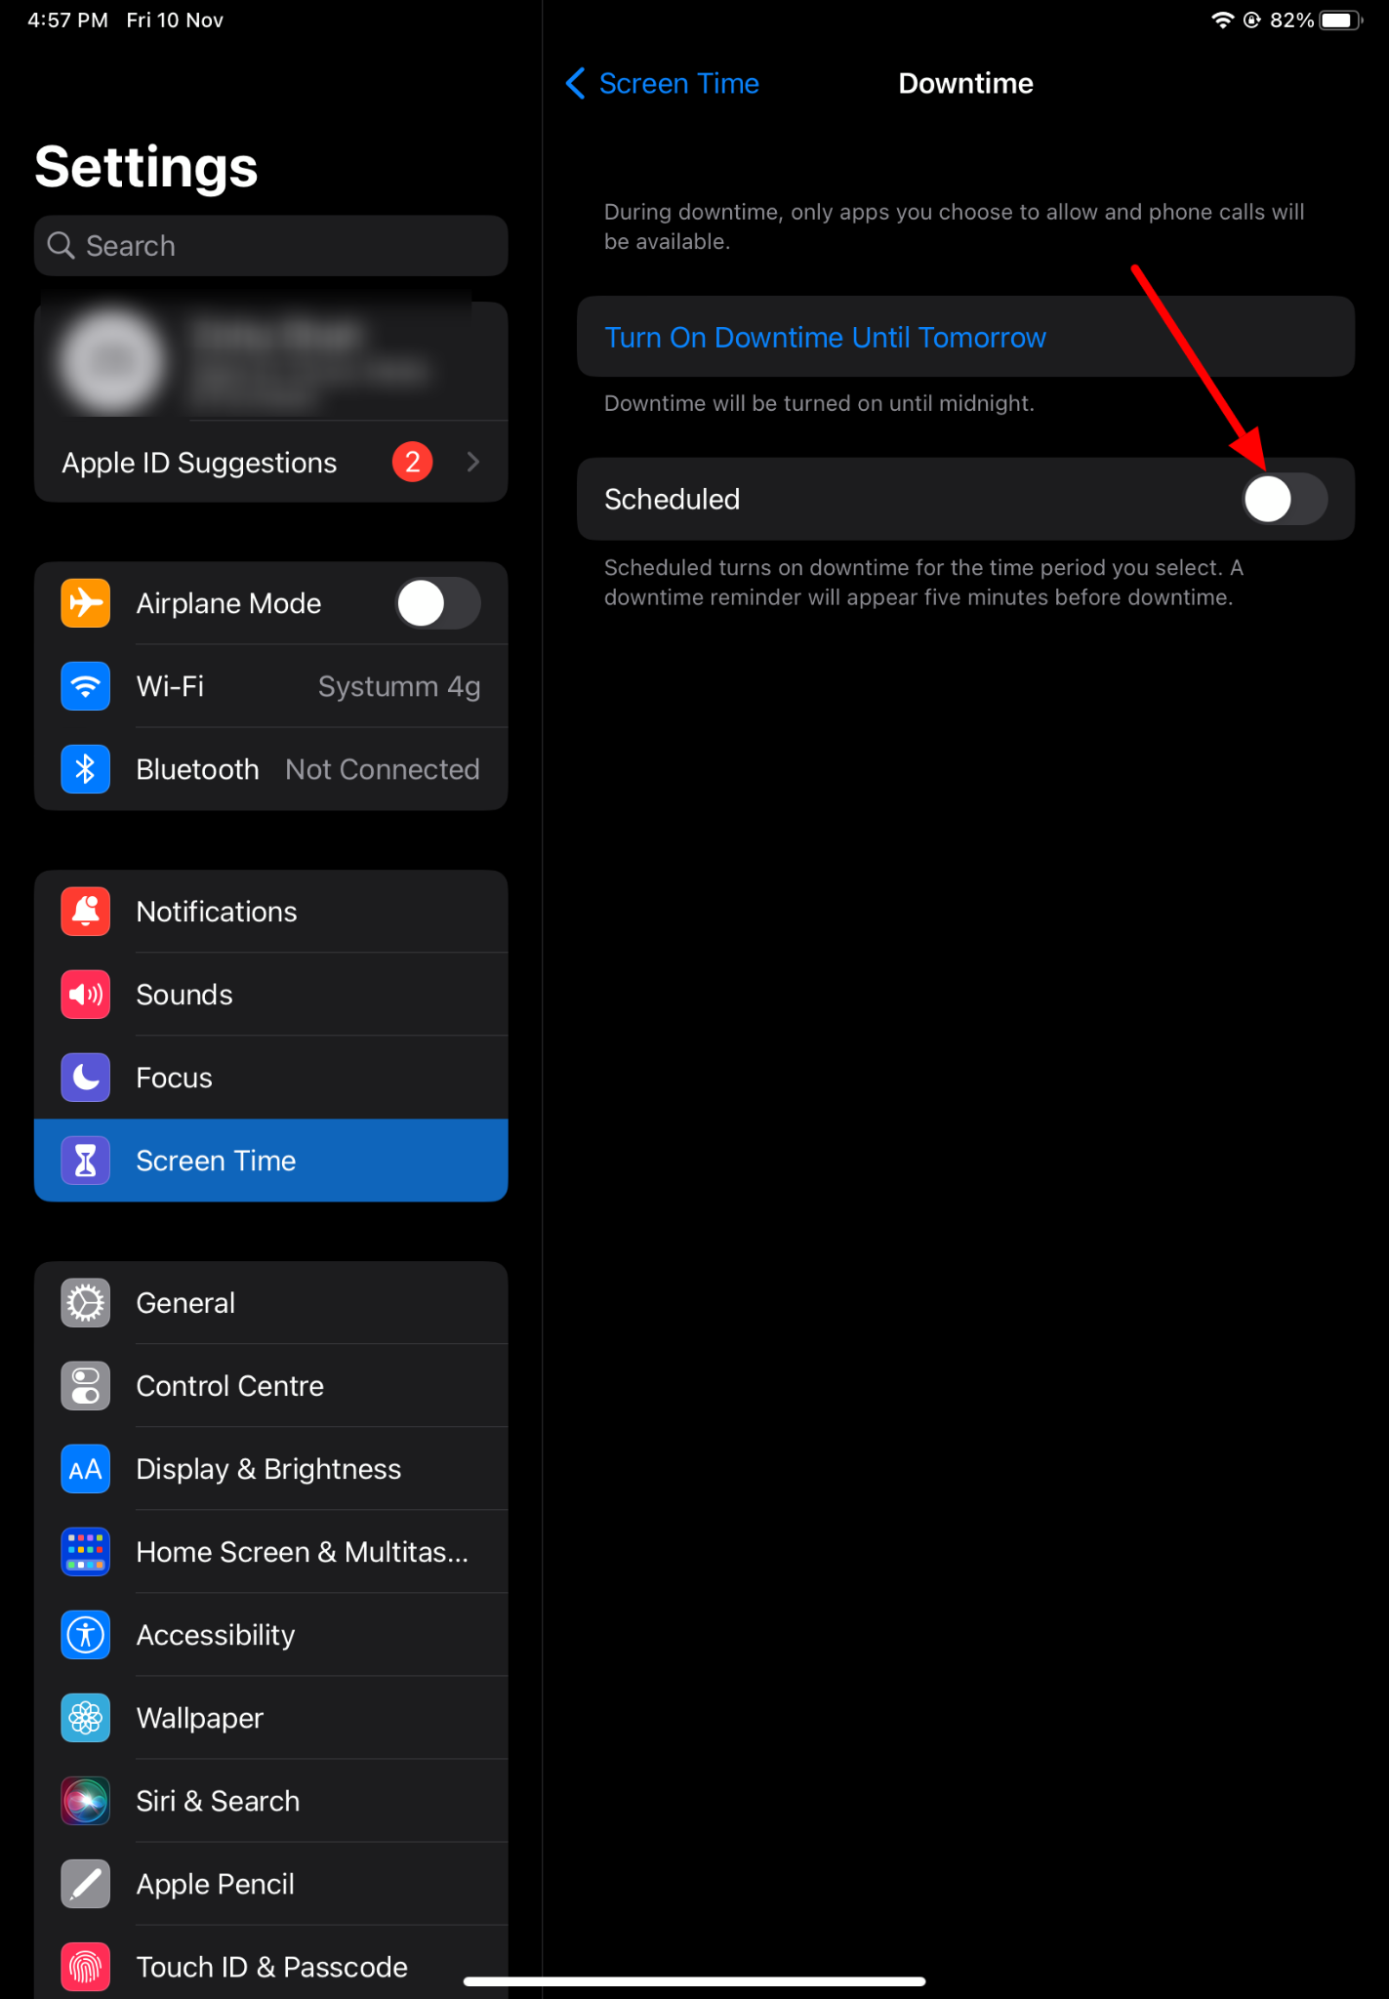
2. Now, open Downtime where you can play with different settings and set limits on the device.
3. Once you’re in, you can either turn on Downtime Until Tomorrow or Schedule it accordingly.
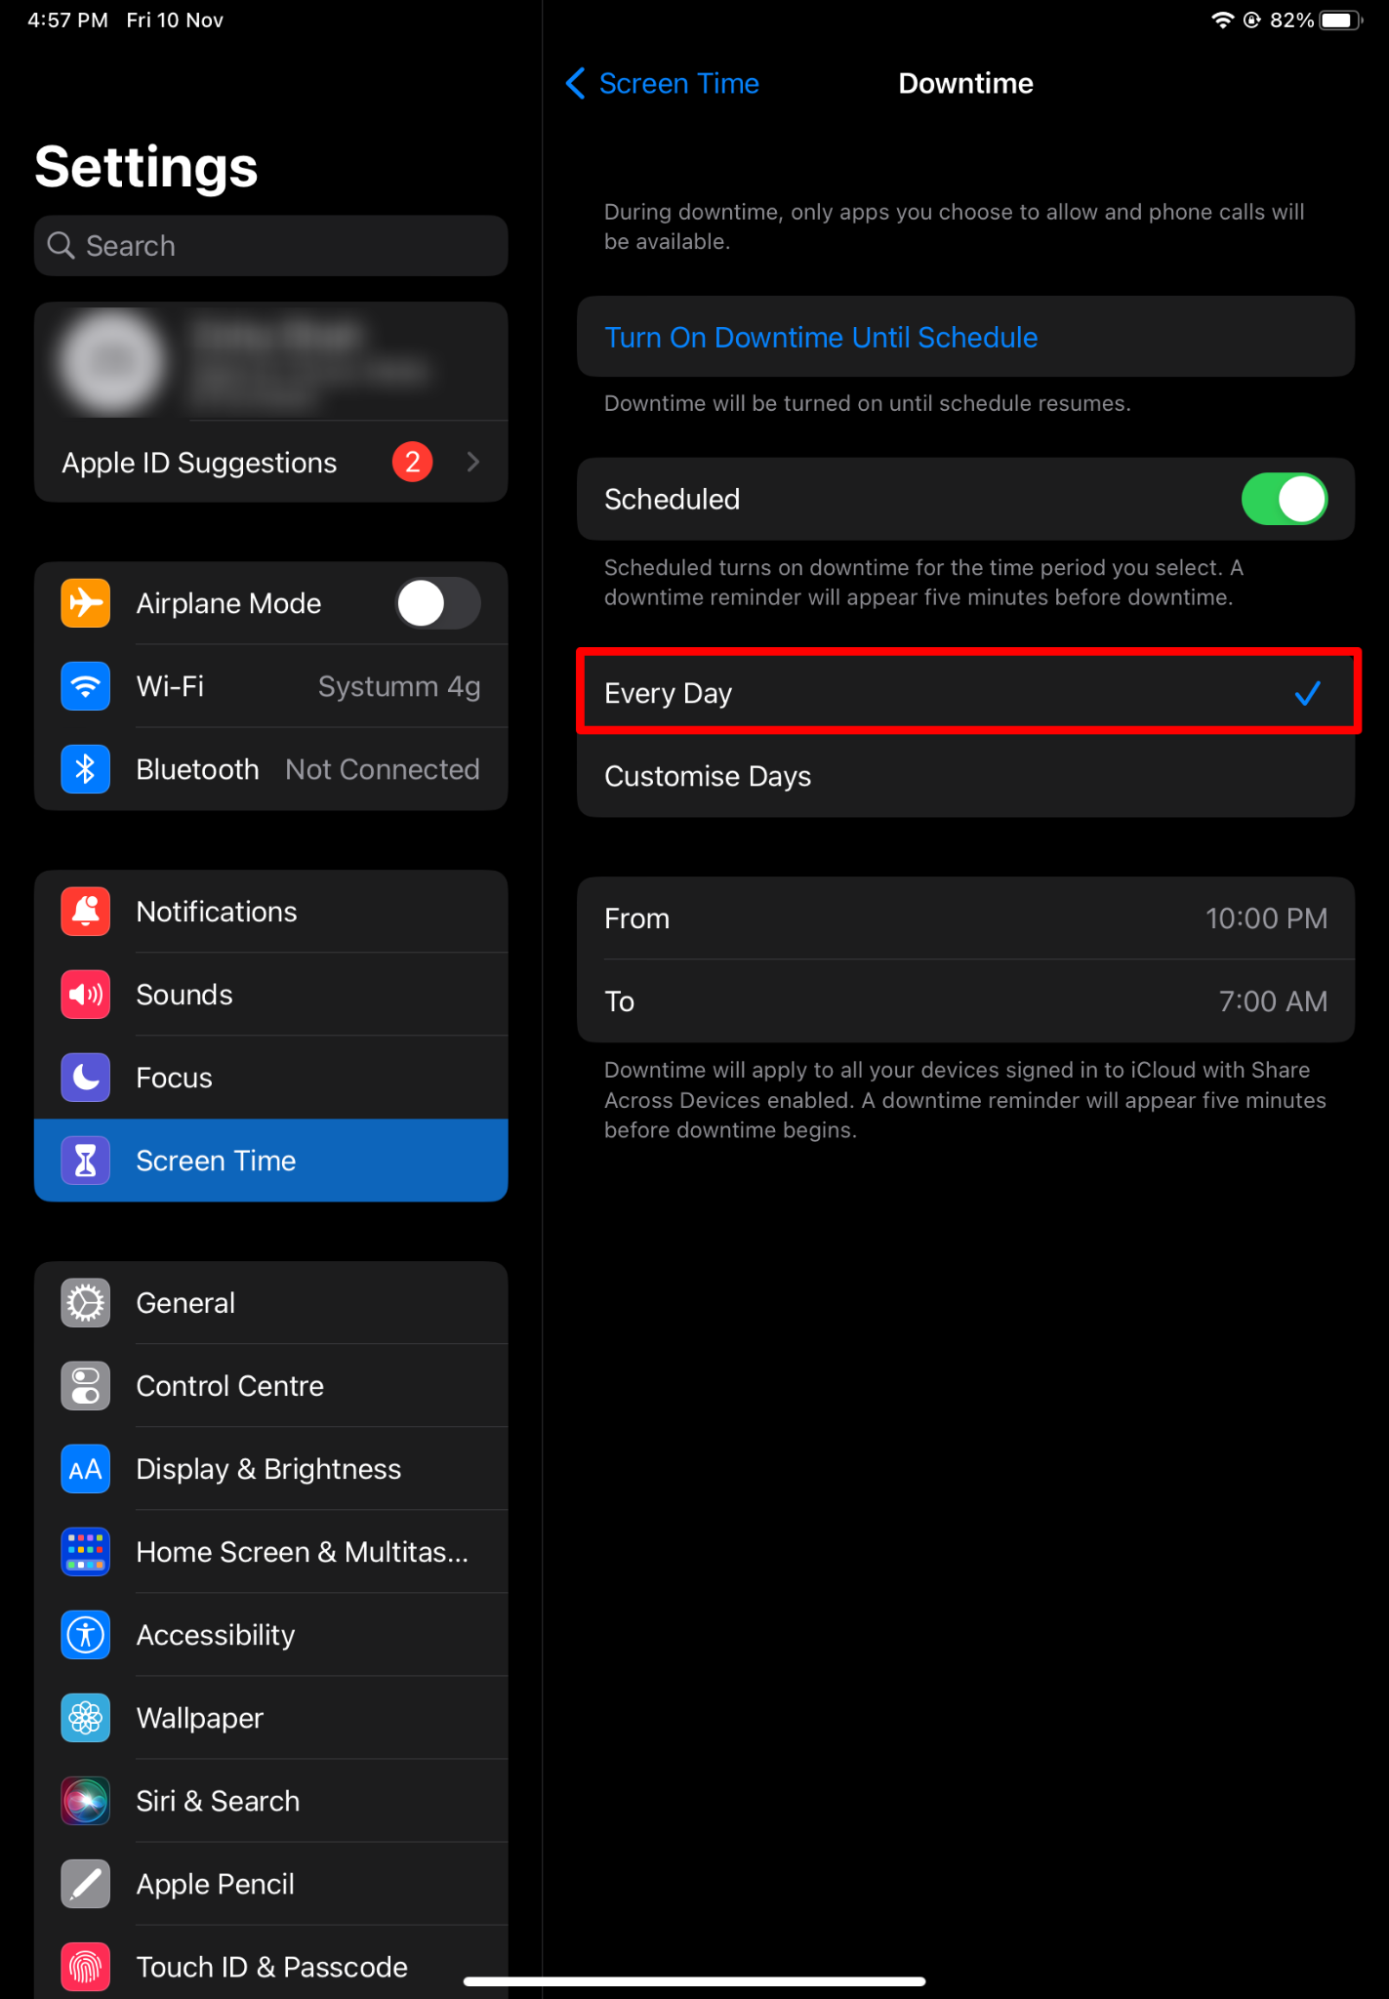
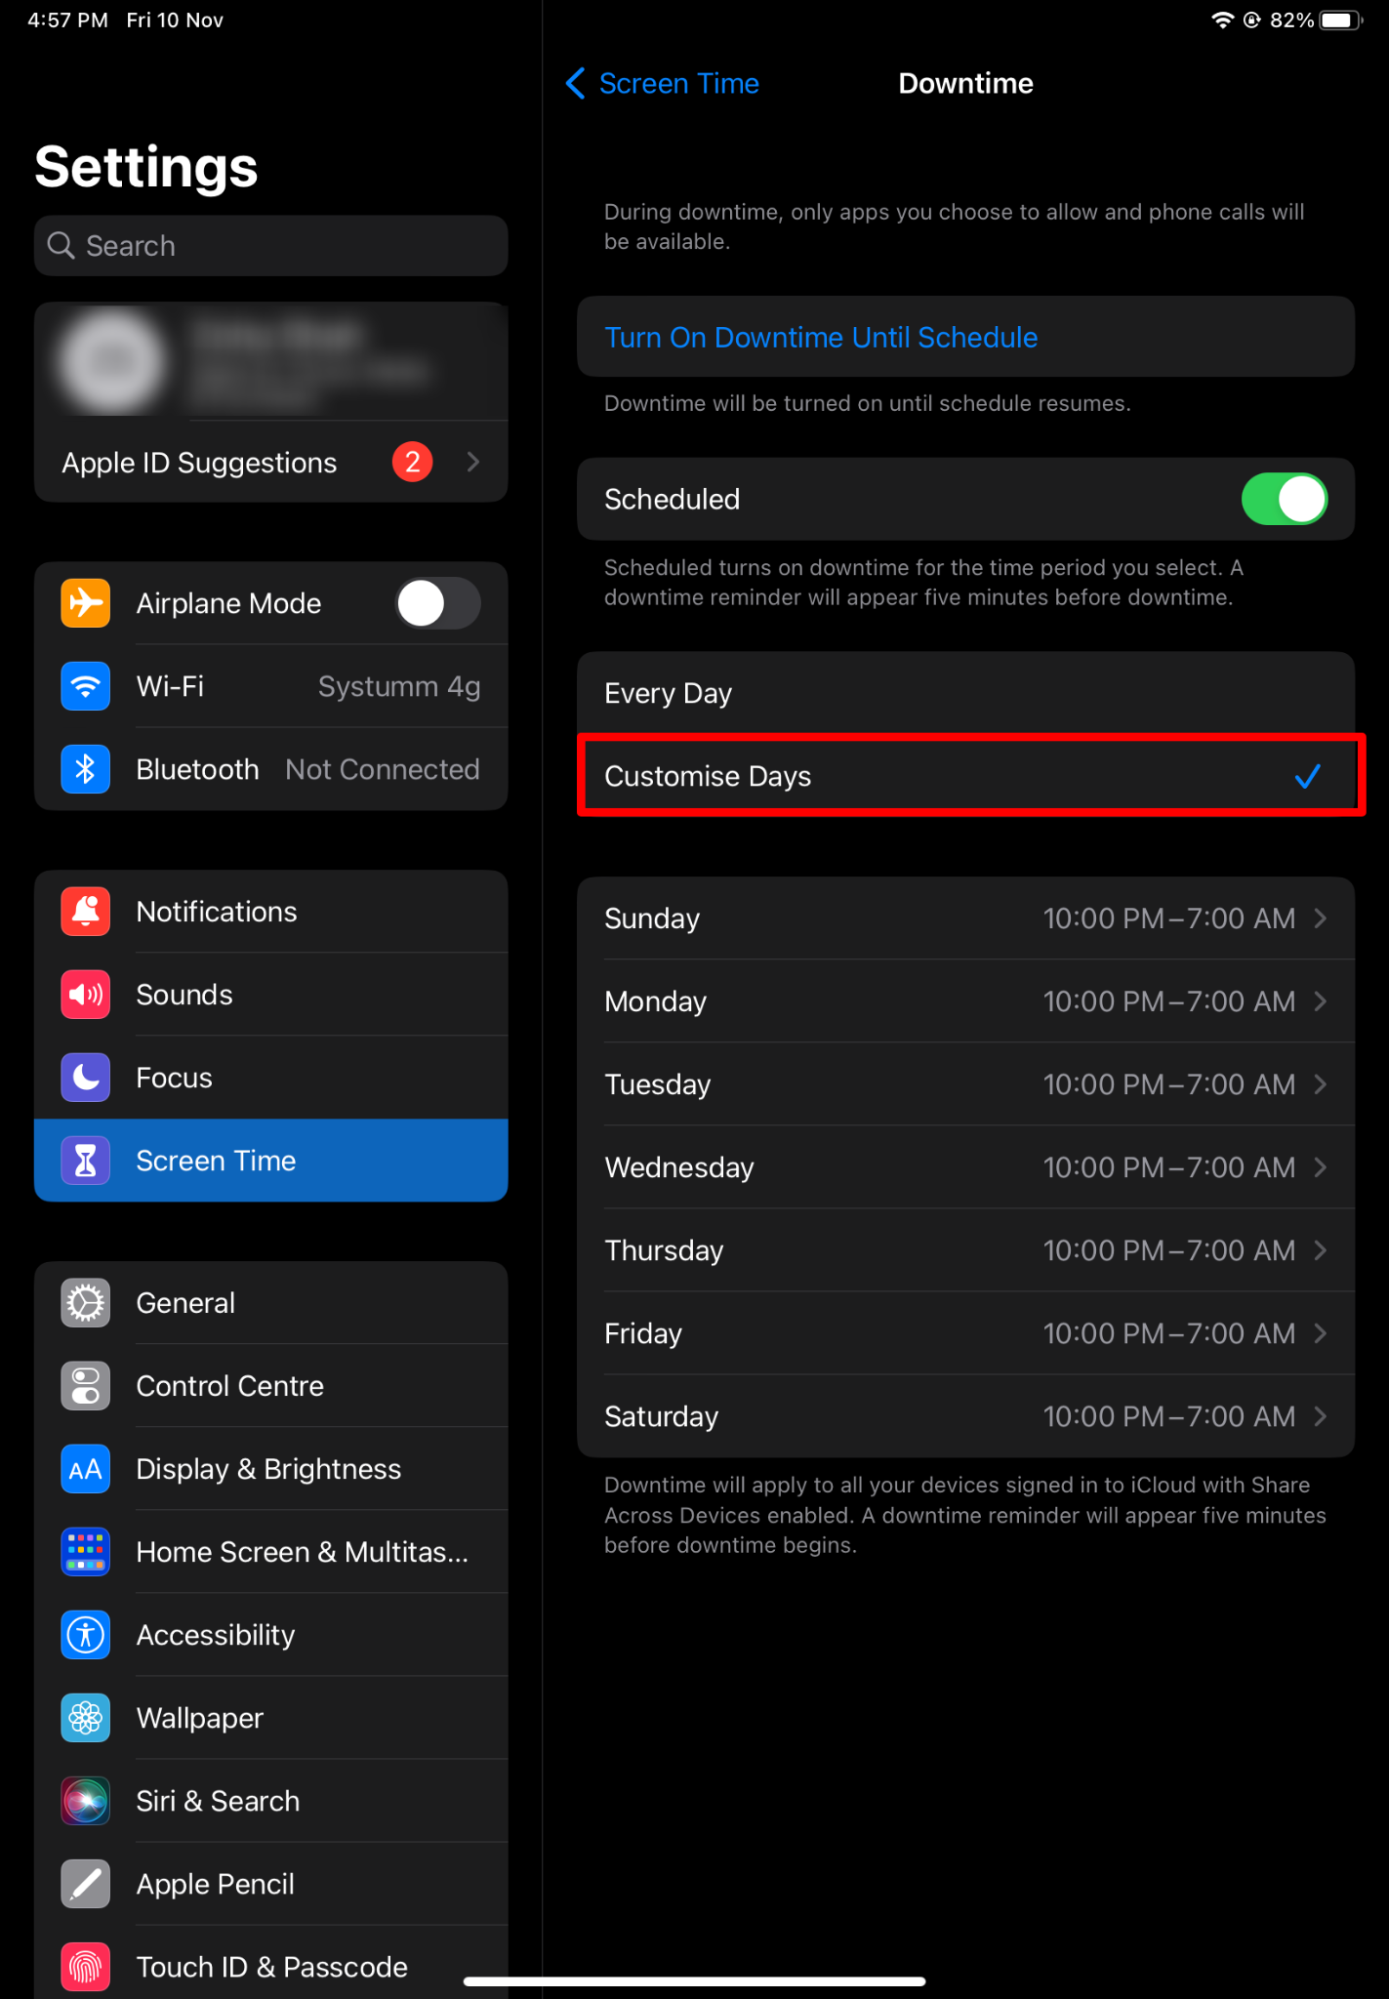
4. While scheduling it, you can either set a fixed time for everyday or you can even have different schedules for each day. Set them up as per your preference.
3. Setting Up App Limits
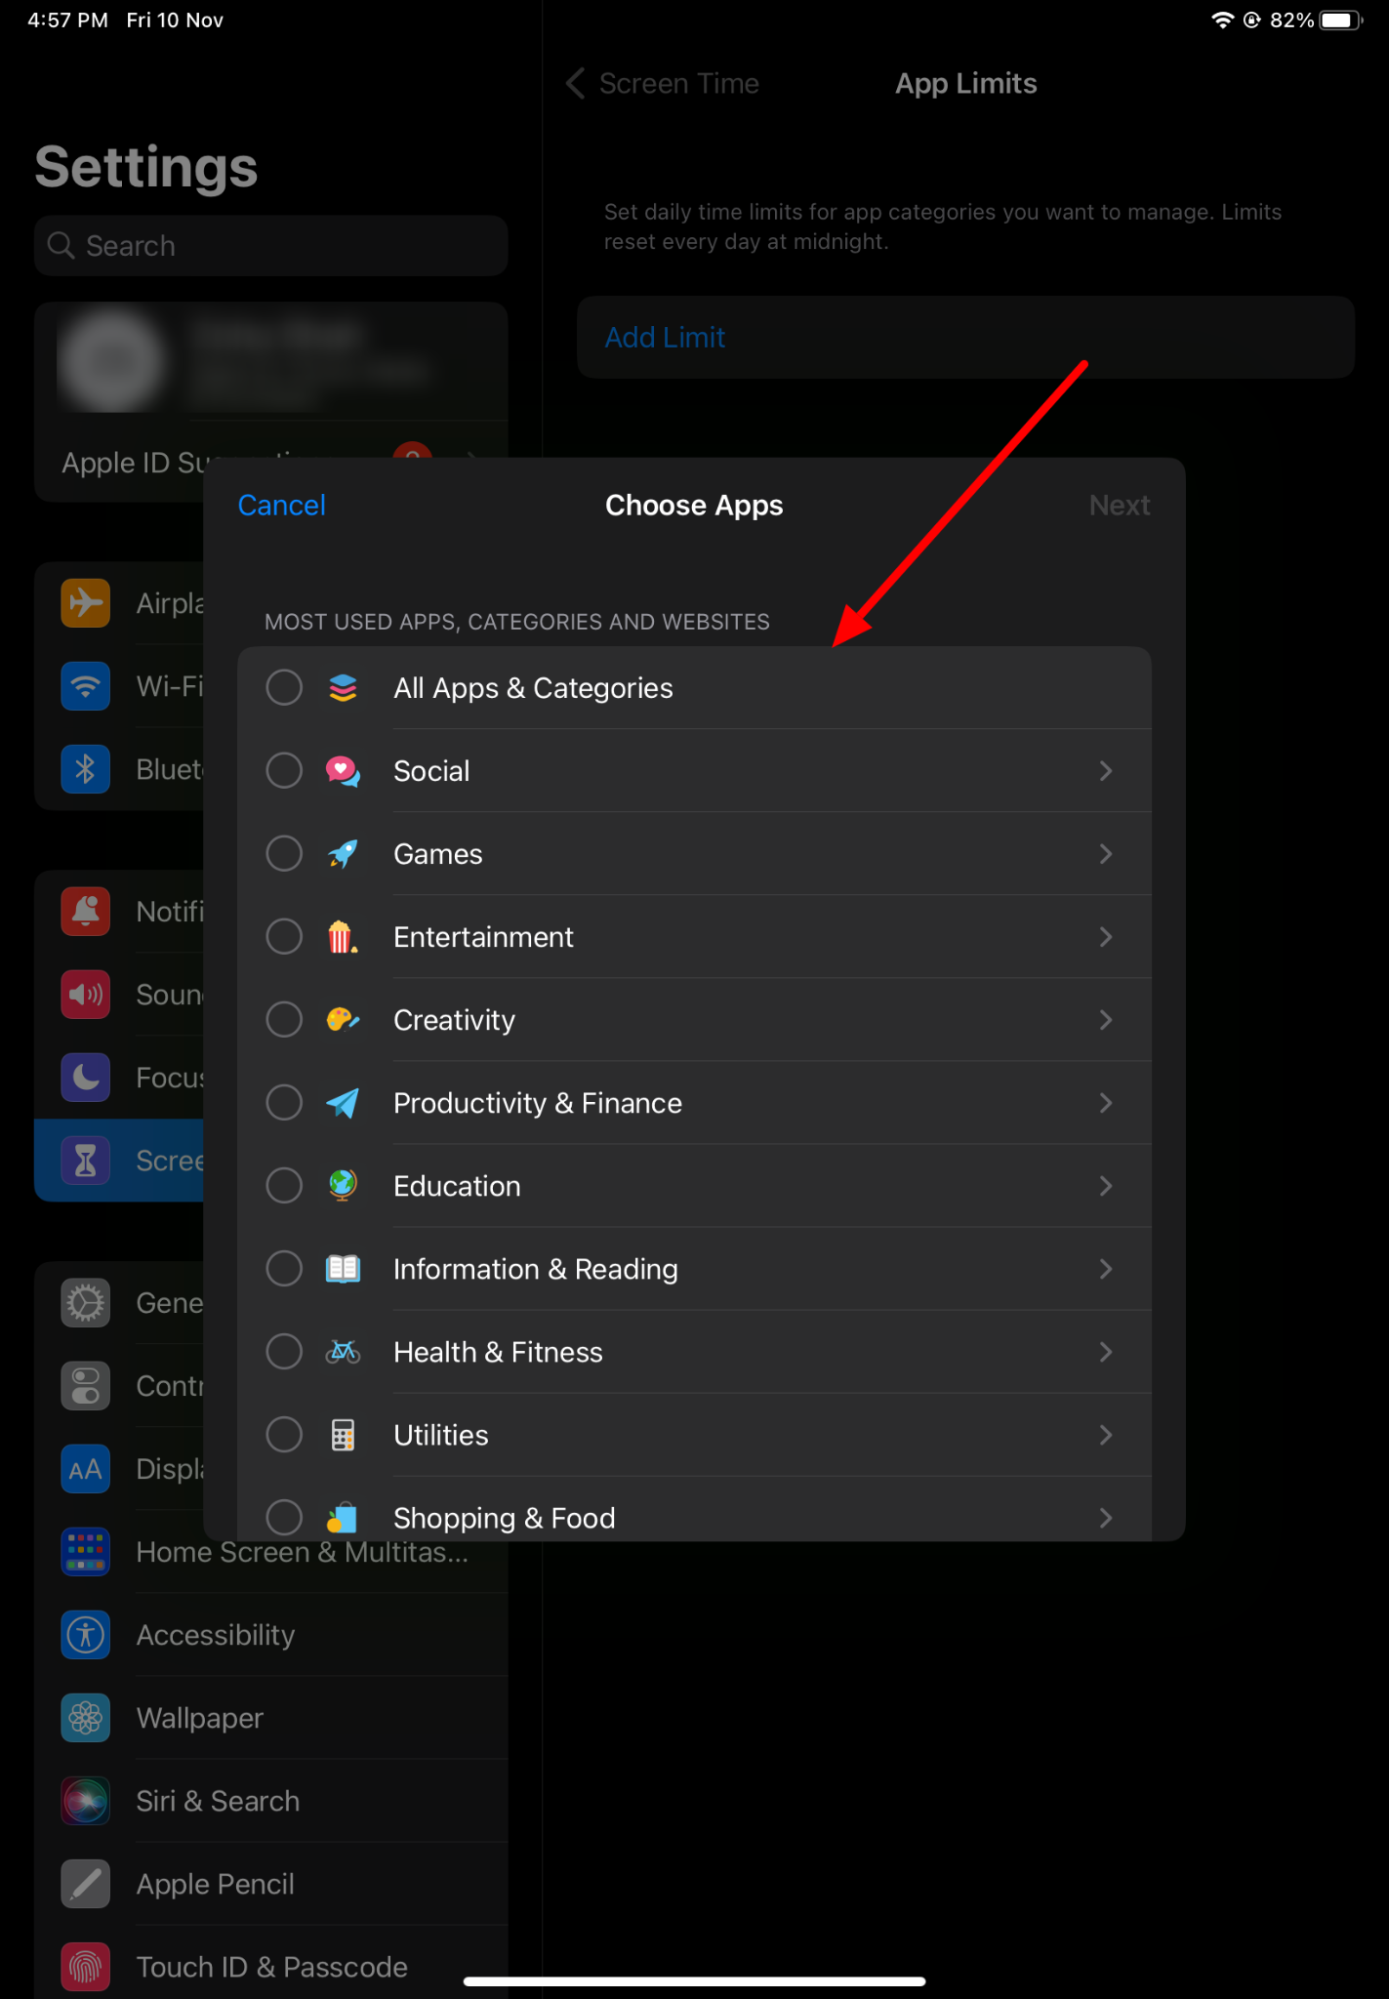
App Limits on an iPad gives a proactive approach to managing your child's app usage. This feature allows you to set daily time limits for specific apps or app categories. Once the limit is reached, the app is temporarily unavailable, helping to enforce healthy usage patterns.
For instance, you can set a limit for social media or gaming apps, encouraging your child to focus on more productive activities. Educational apps can be excluded from these limits to promote learning. The App Limits feature is customizable, so you can tailor the limits based on your child’s age, the nature of the apps, and your family’s schedule. It also includes the option to require a passcode to extend time limits, giving parents additional control over their child’s iPad usage.
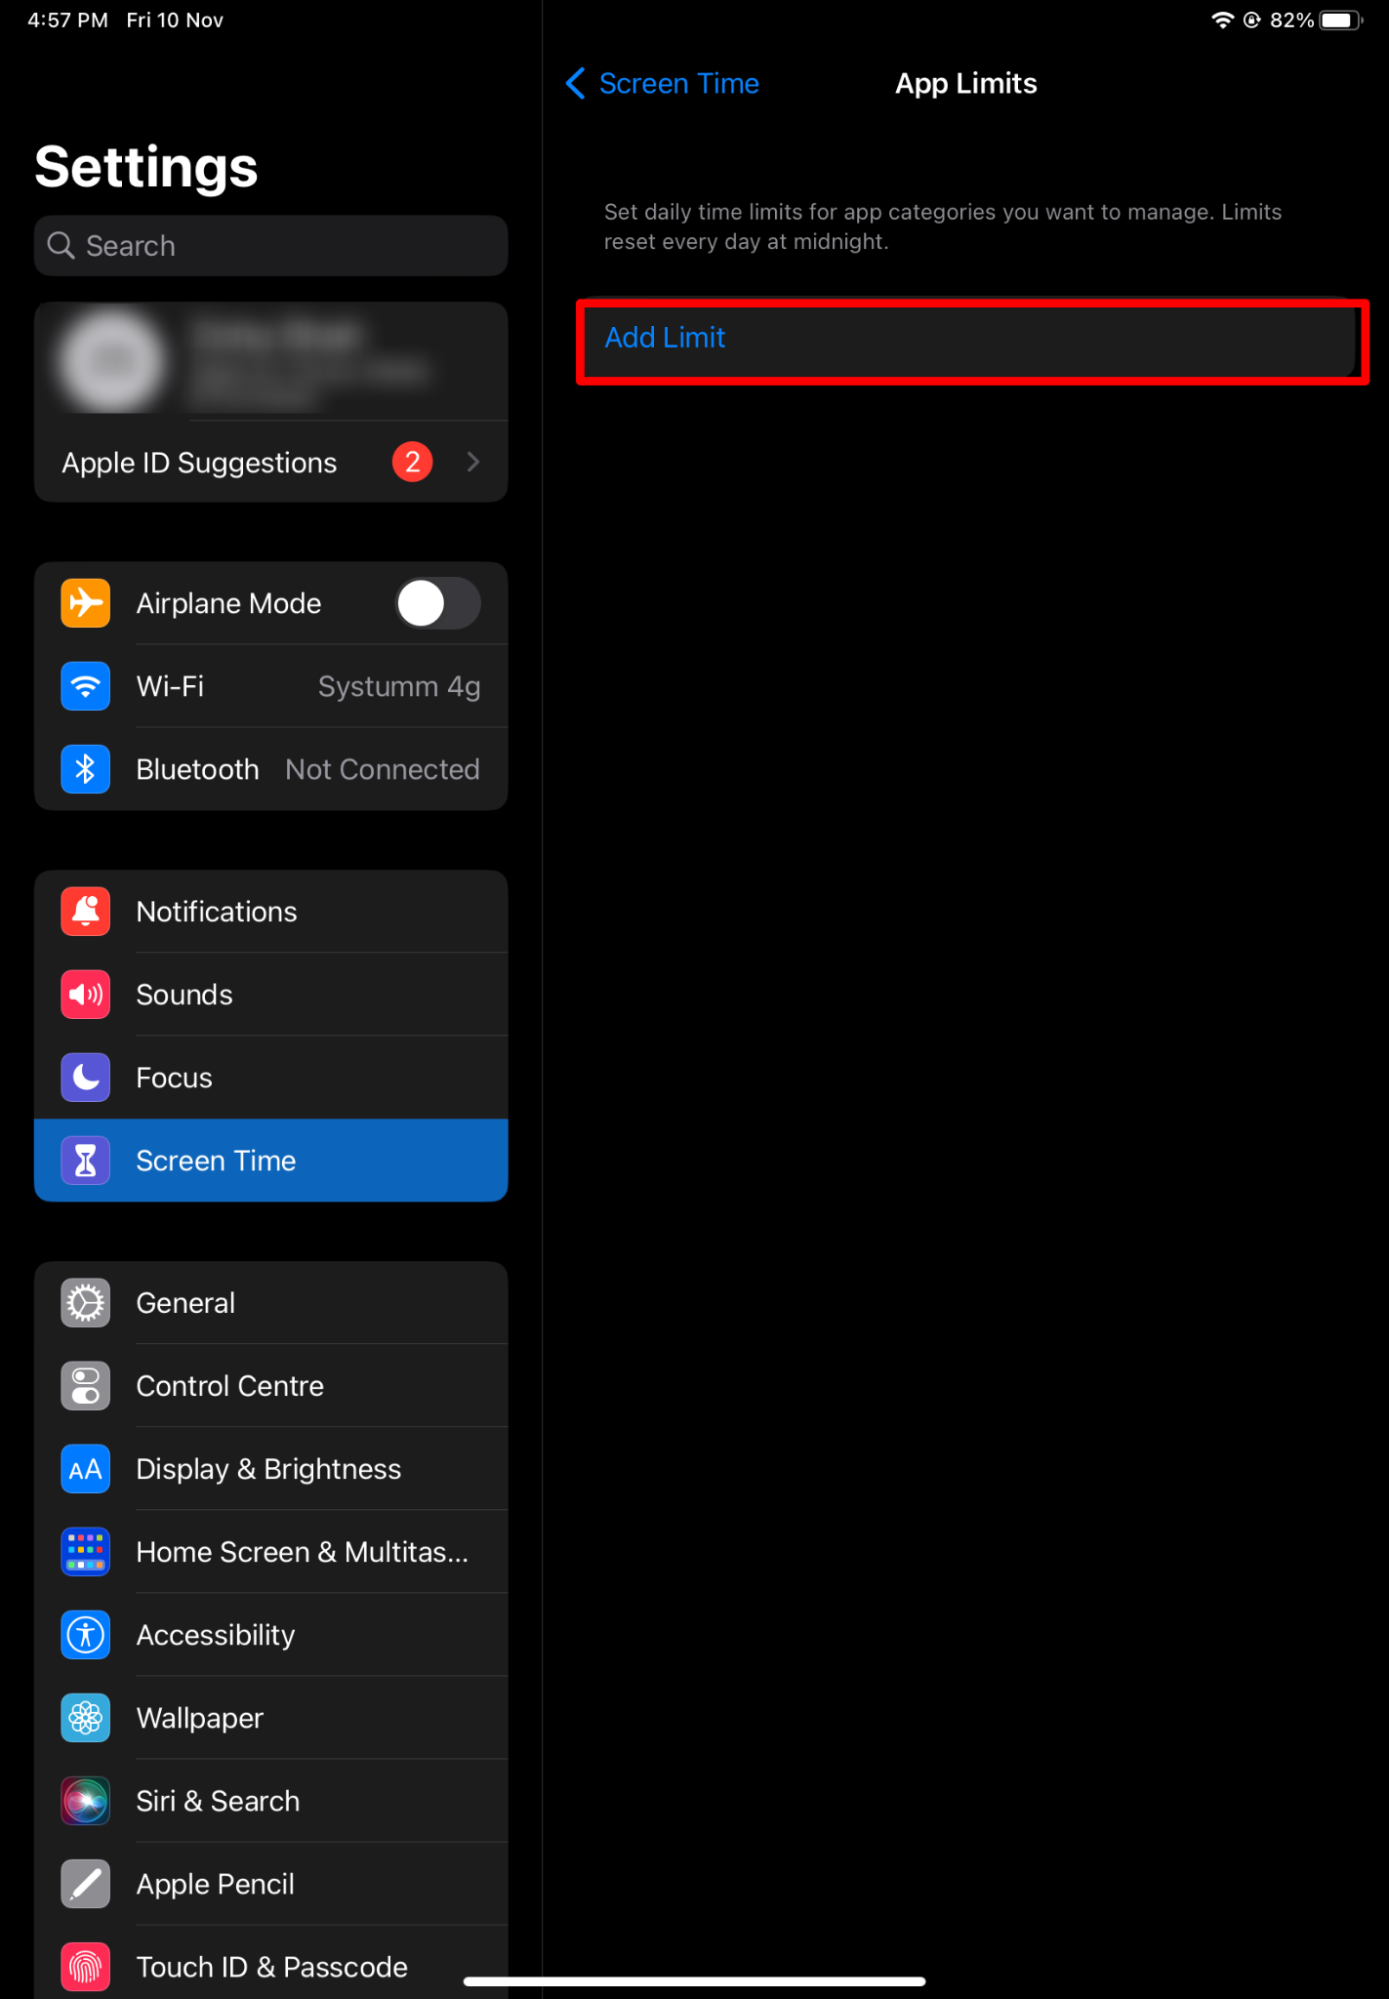
If you want to set up app limits on an iPad, follow these steps.
1. On your child’s iPad, open Settings and select Screen Time.

2. Now, navigate to App Limits.
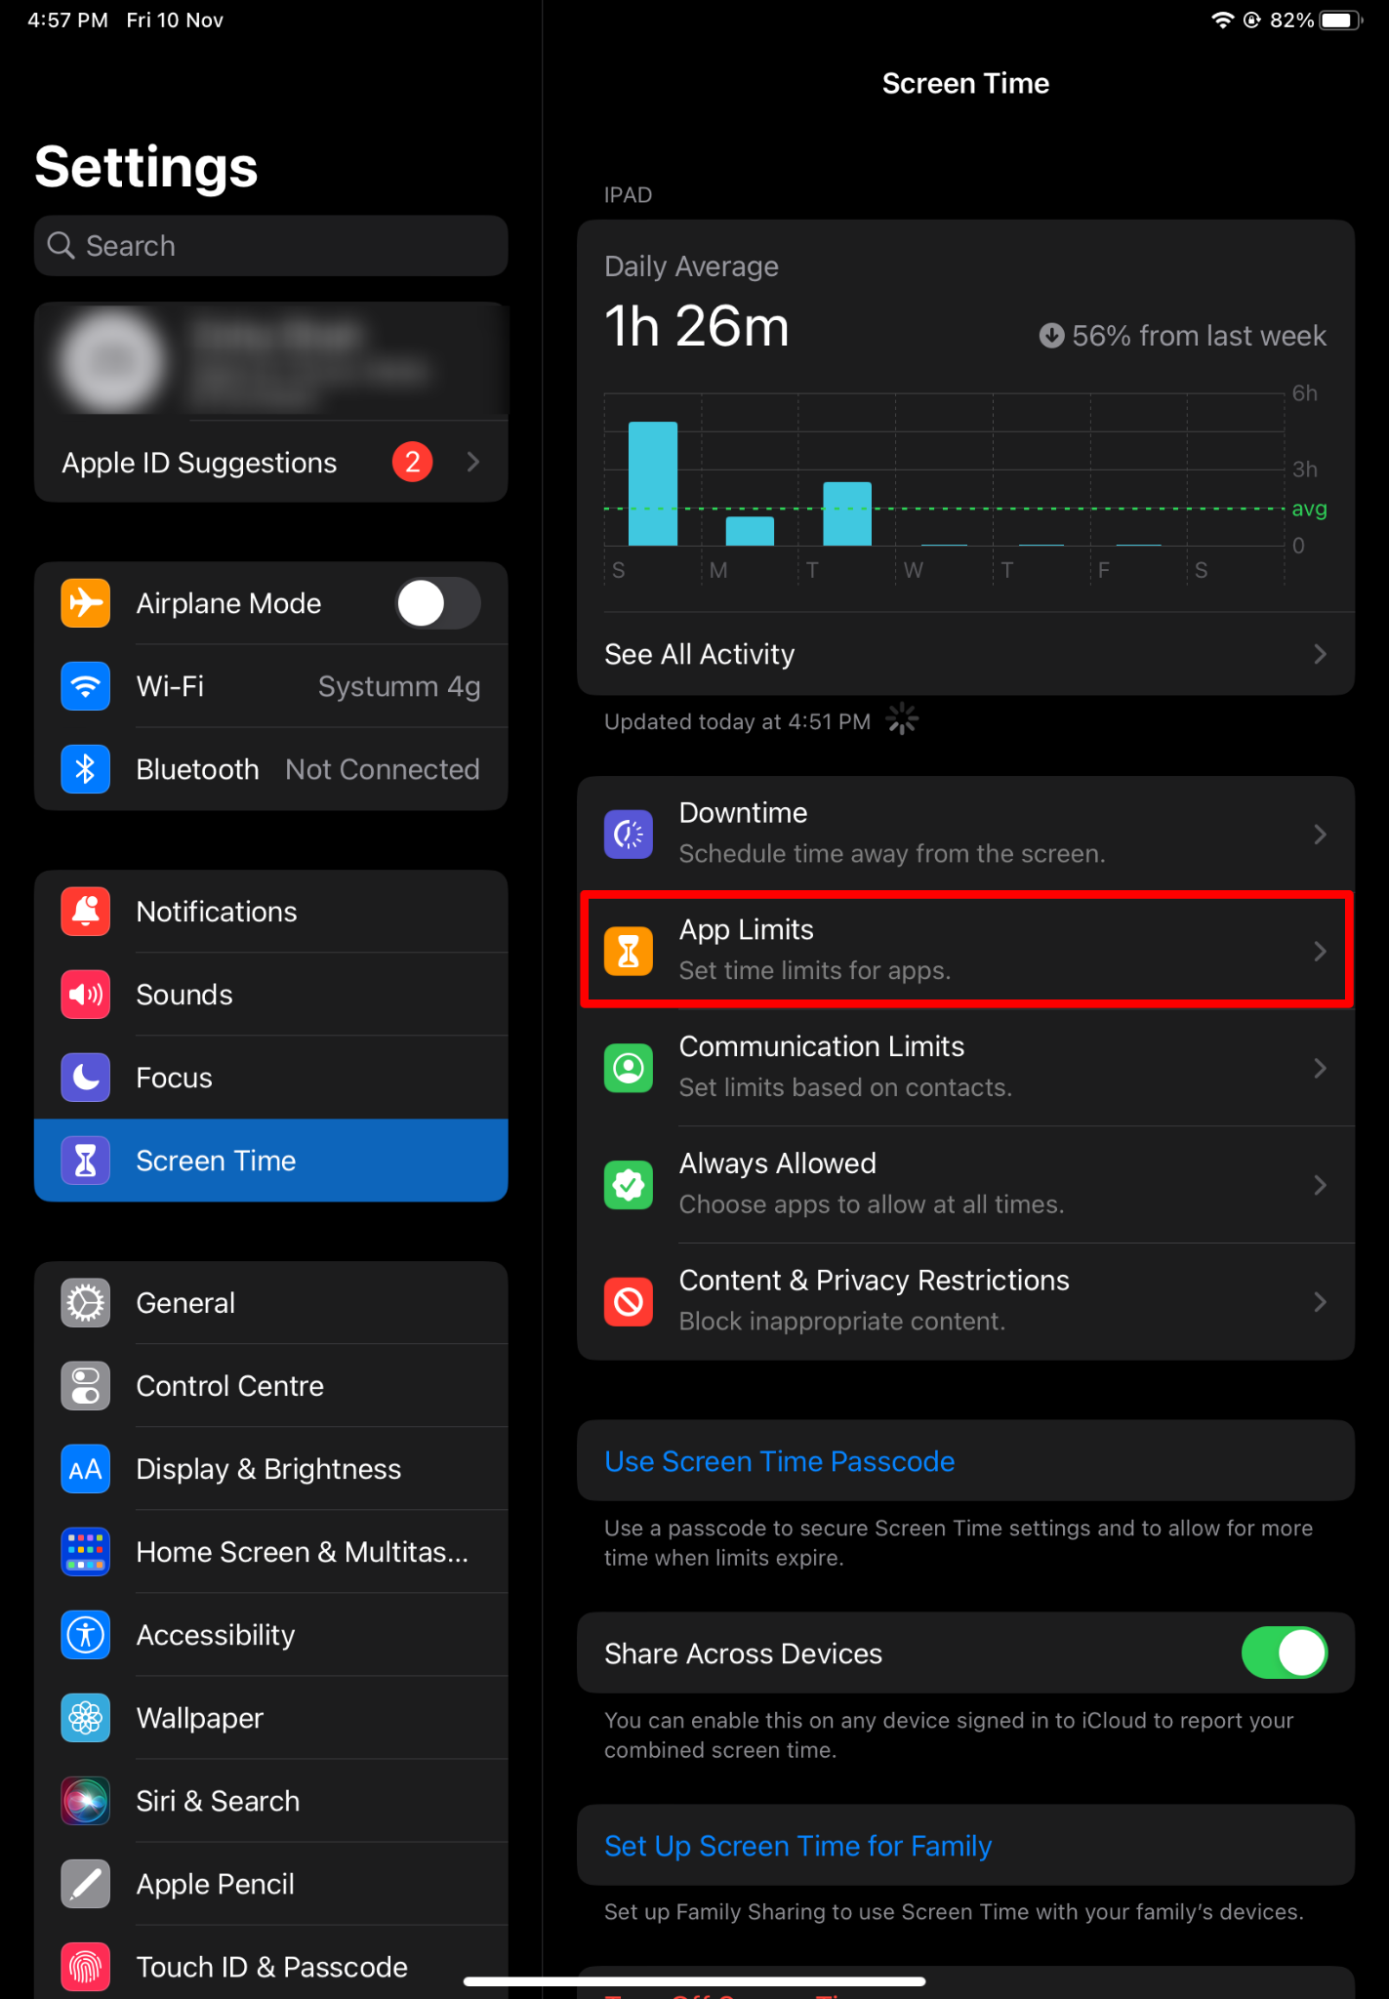
3. Once in, you can tap Set Limit and choose either a category or a specific app to set various limits for your child.
4. Setting Up Content Restrictions
Content Restrictions add a barrier between your child and the inappropriate content on the internet. You can set up many restrictions for your child under this setting and can even alter them as and when needed.
Follow these steps to set it up.
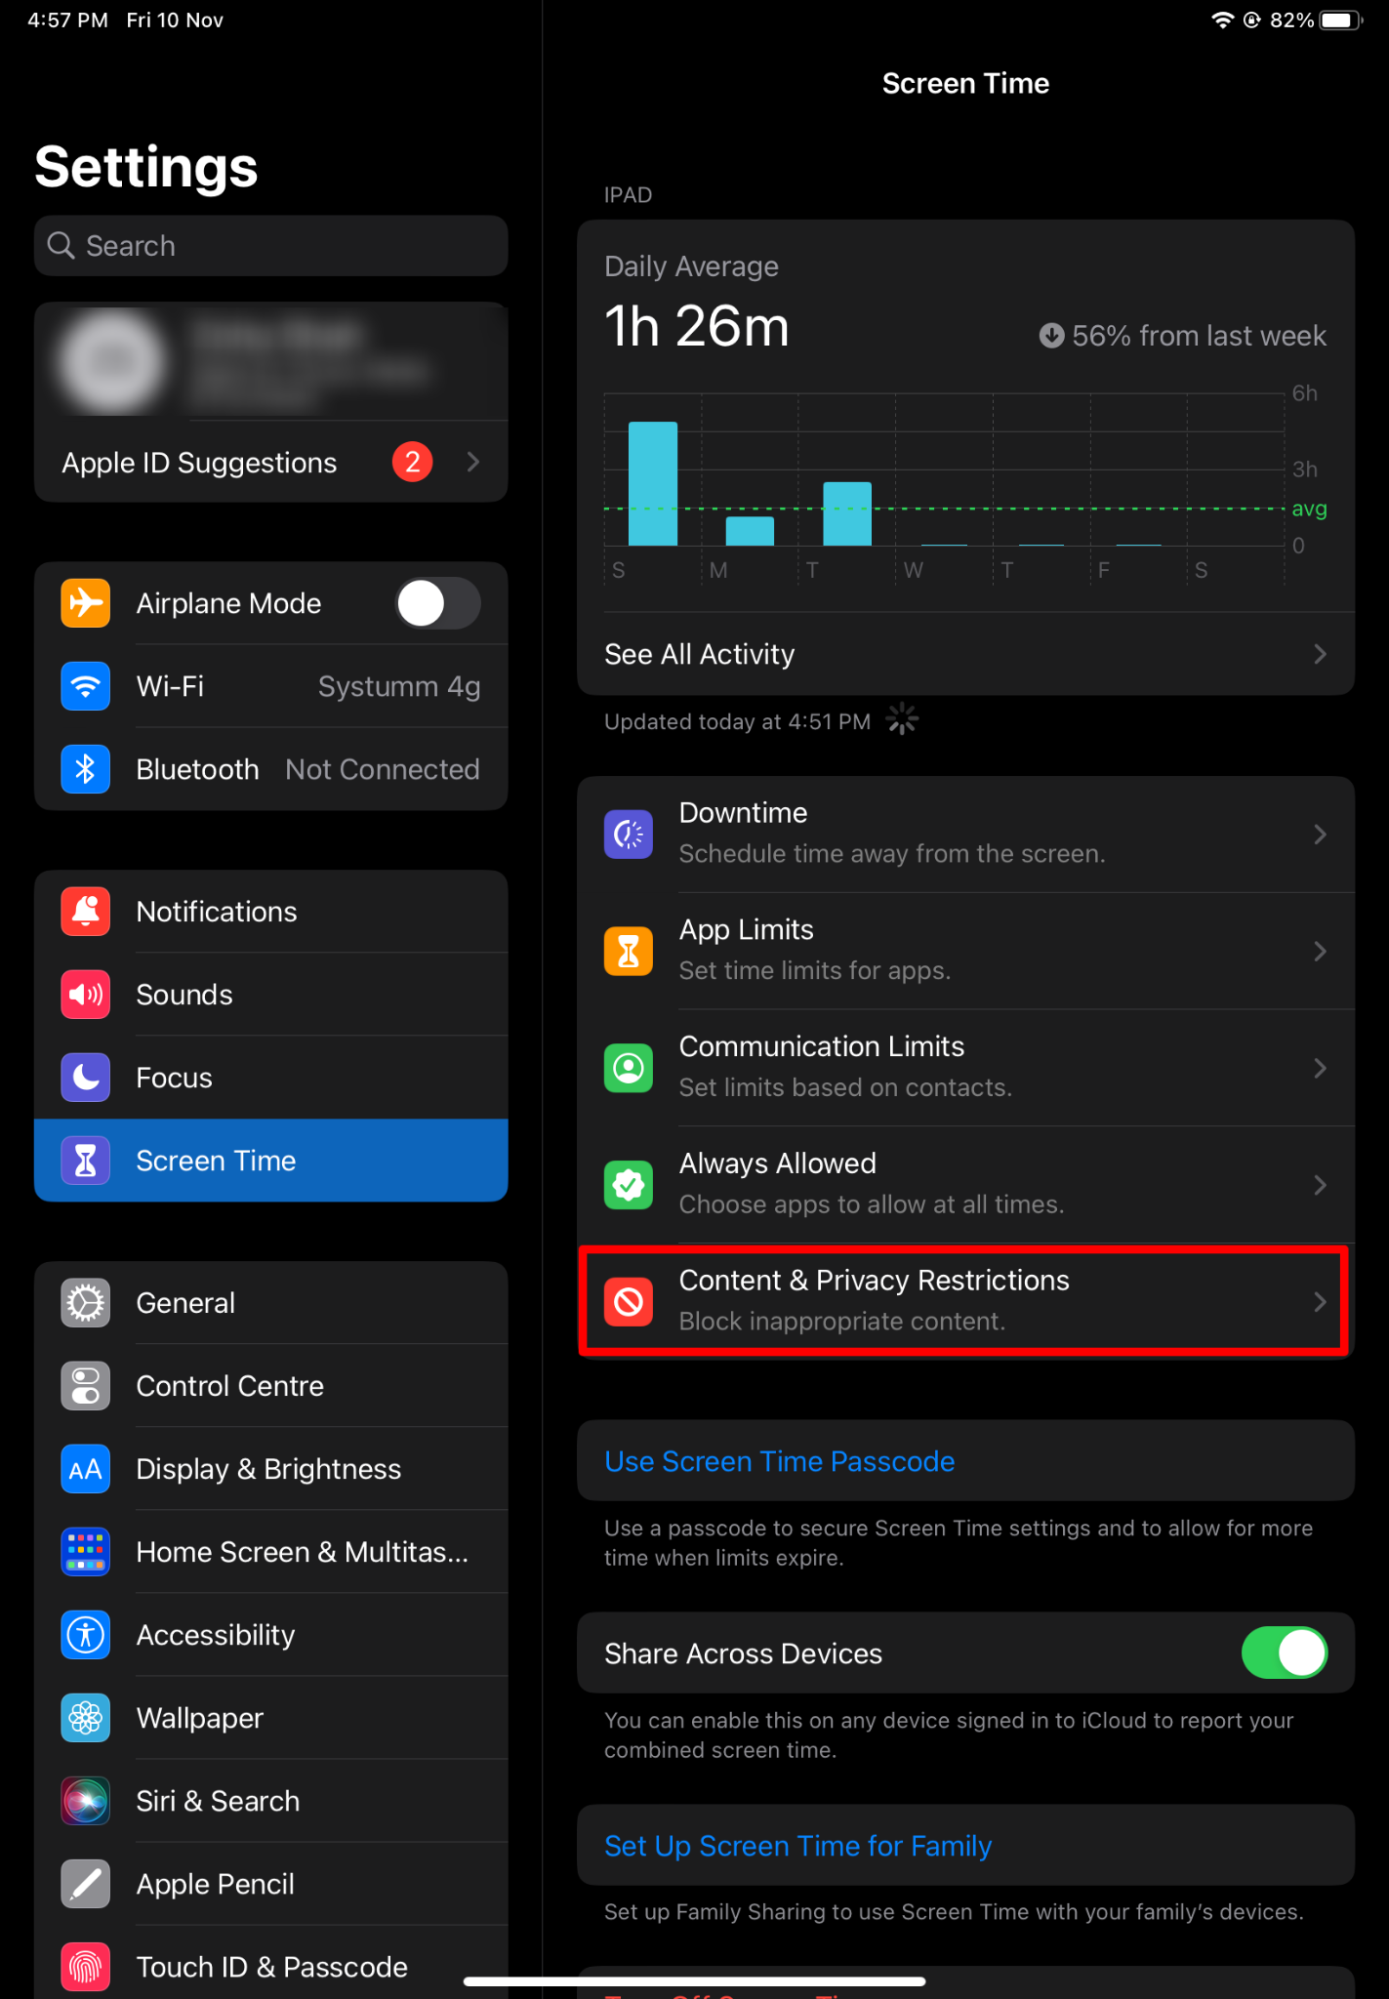
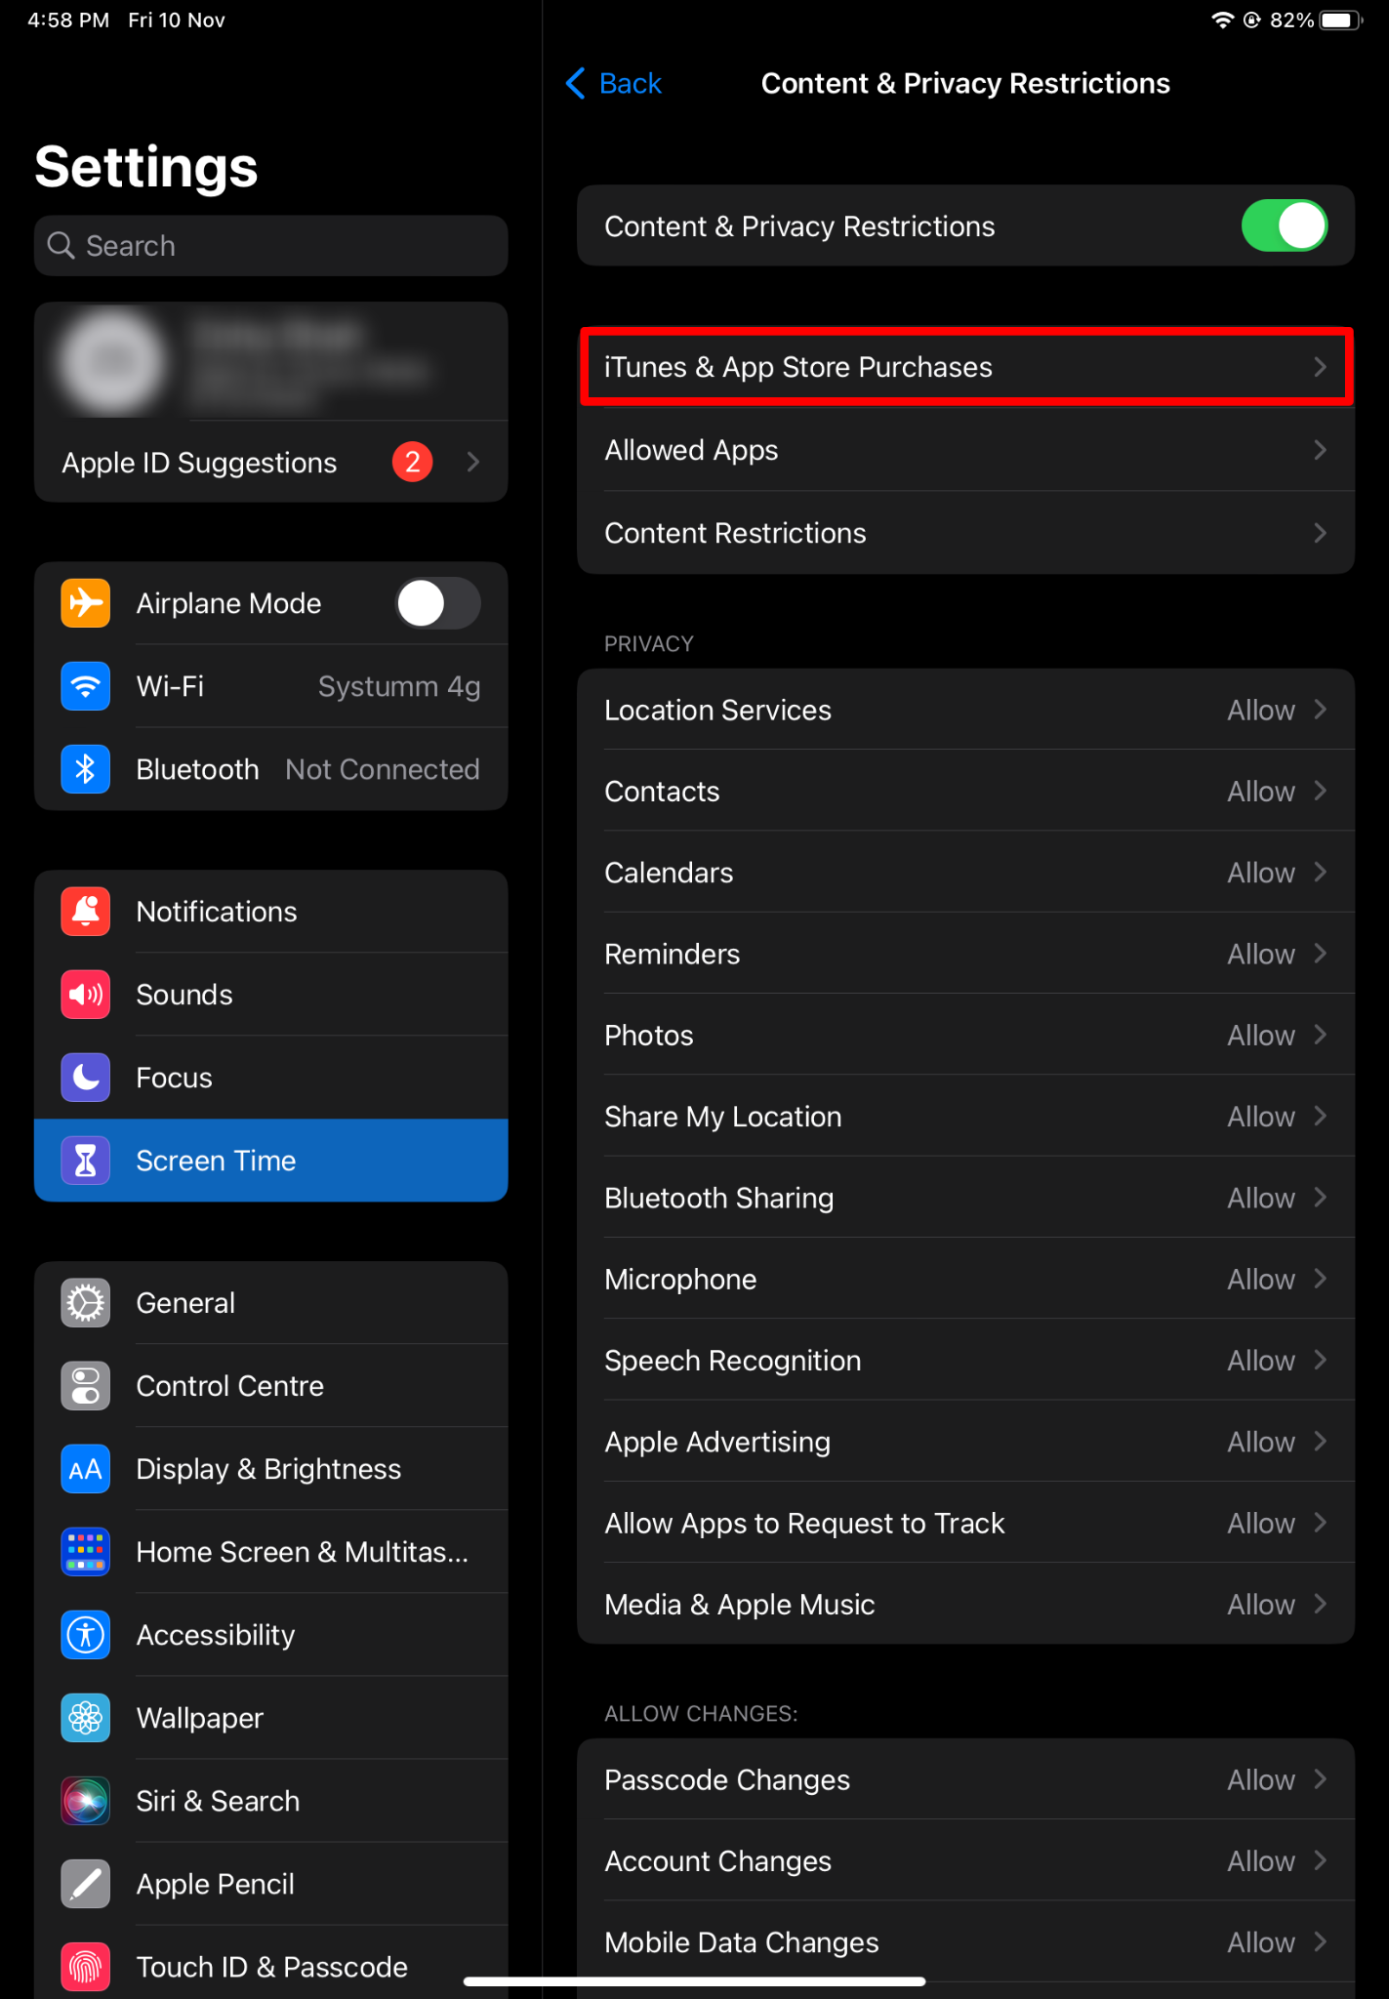
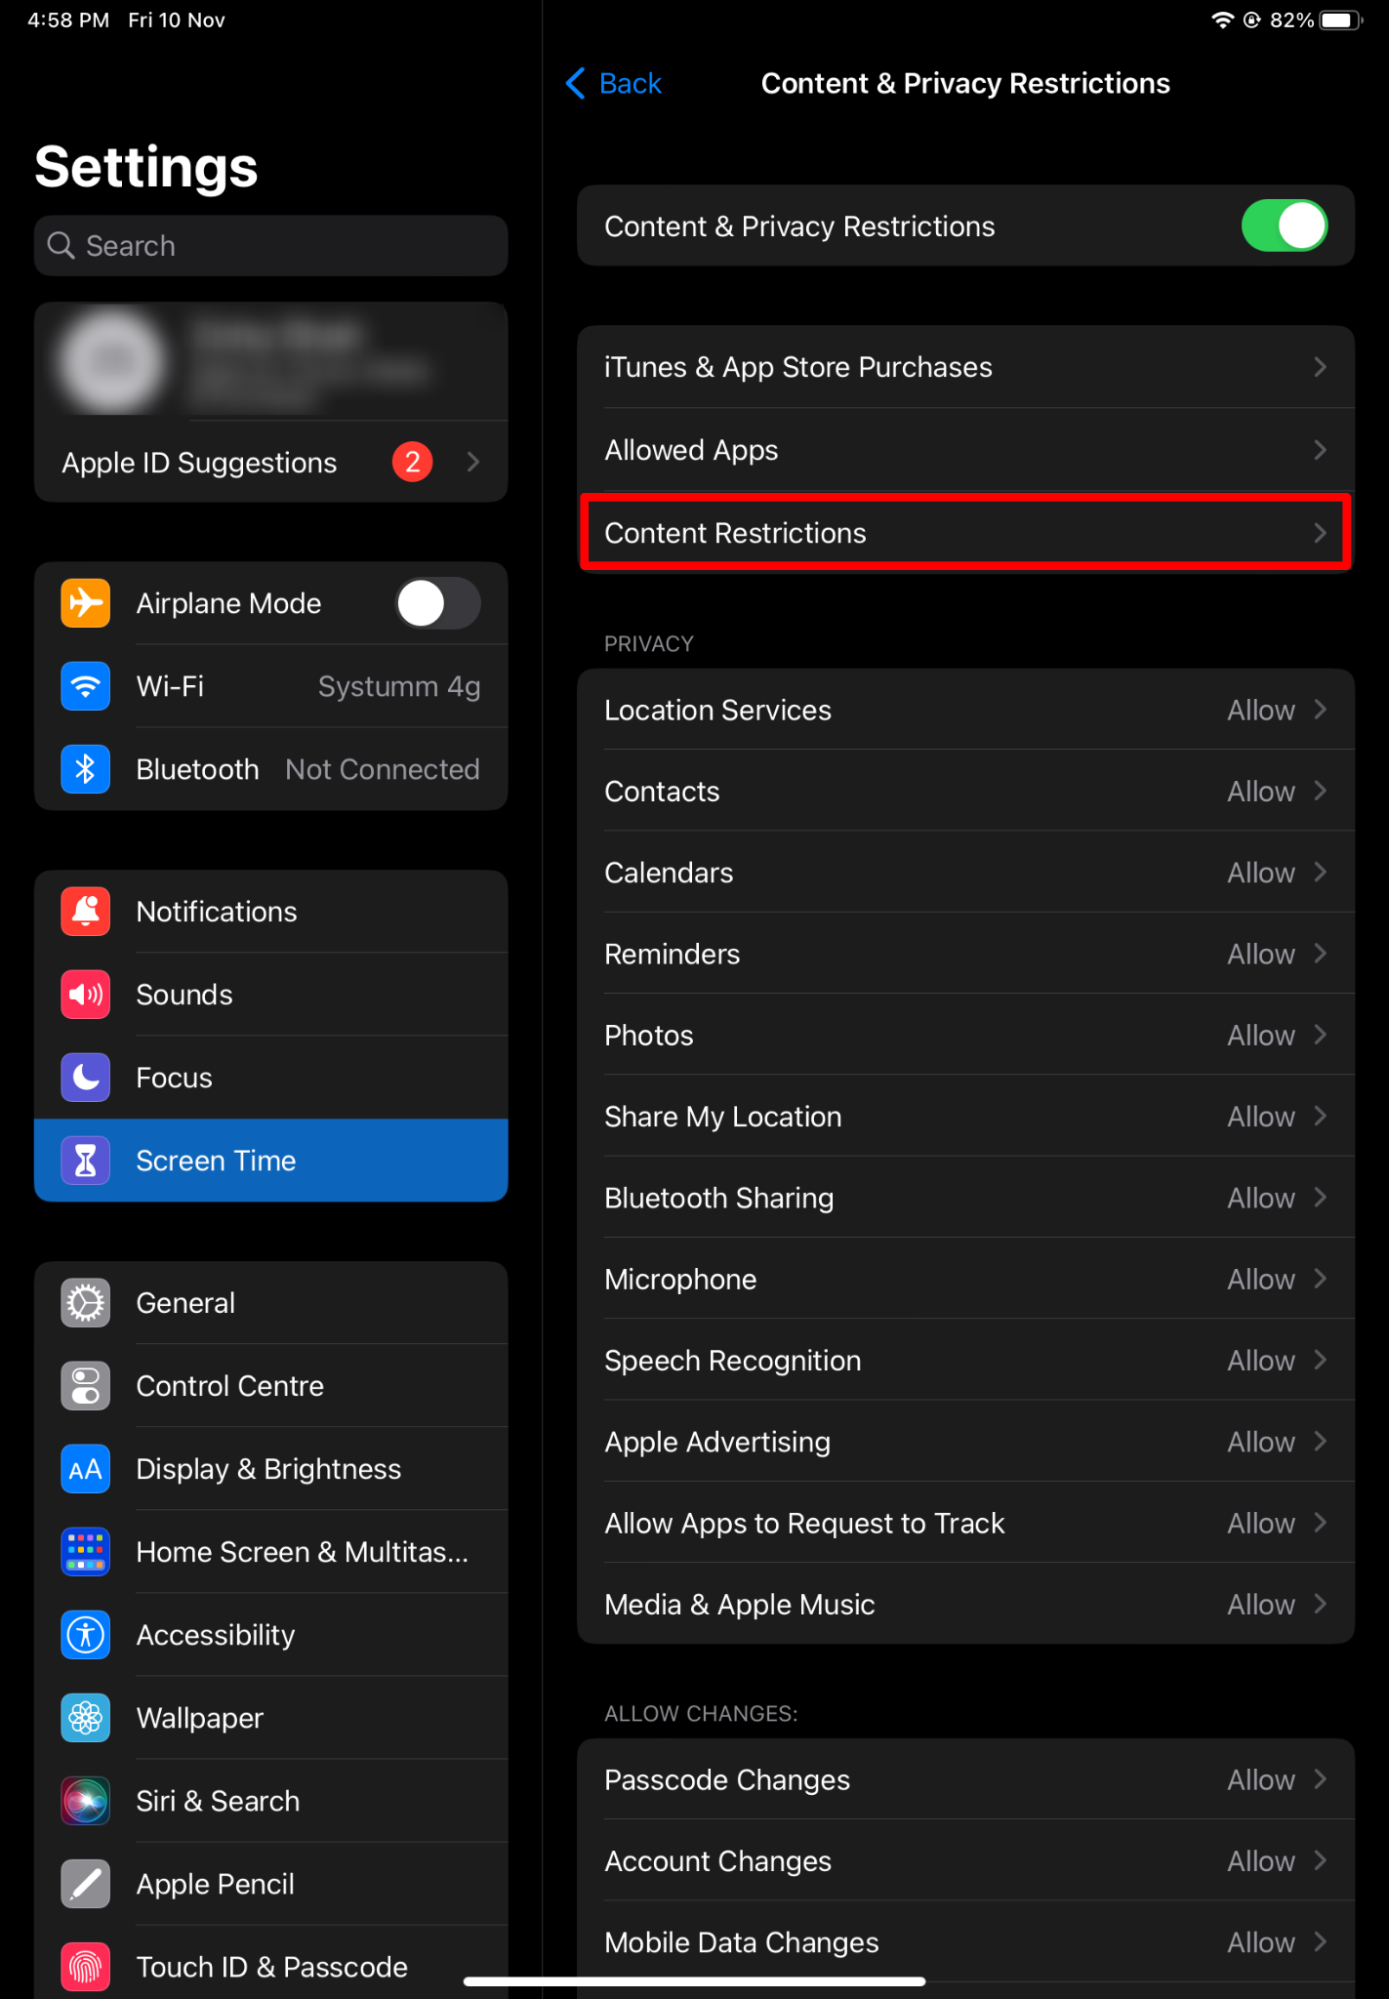
1. Open Settings and navigate to Screen Time.

2. Next, tap on Content Restrictions & Privacy and toggle on the switch.
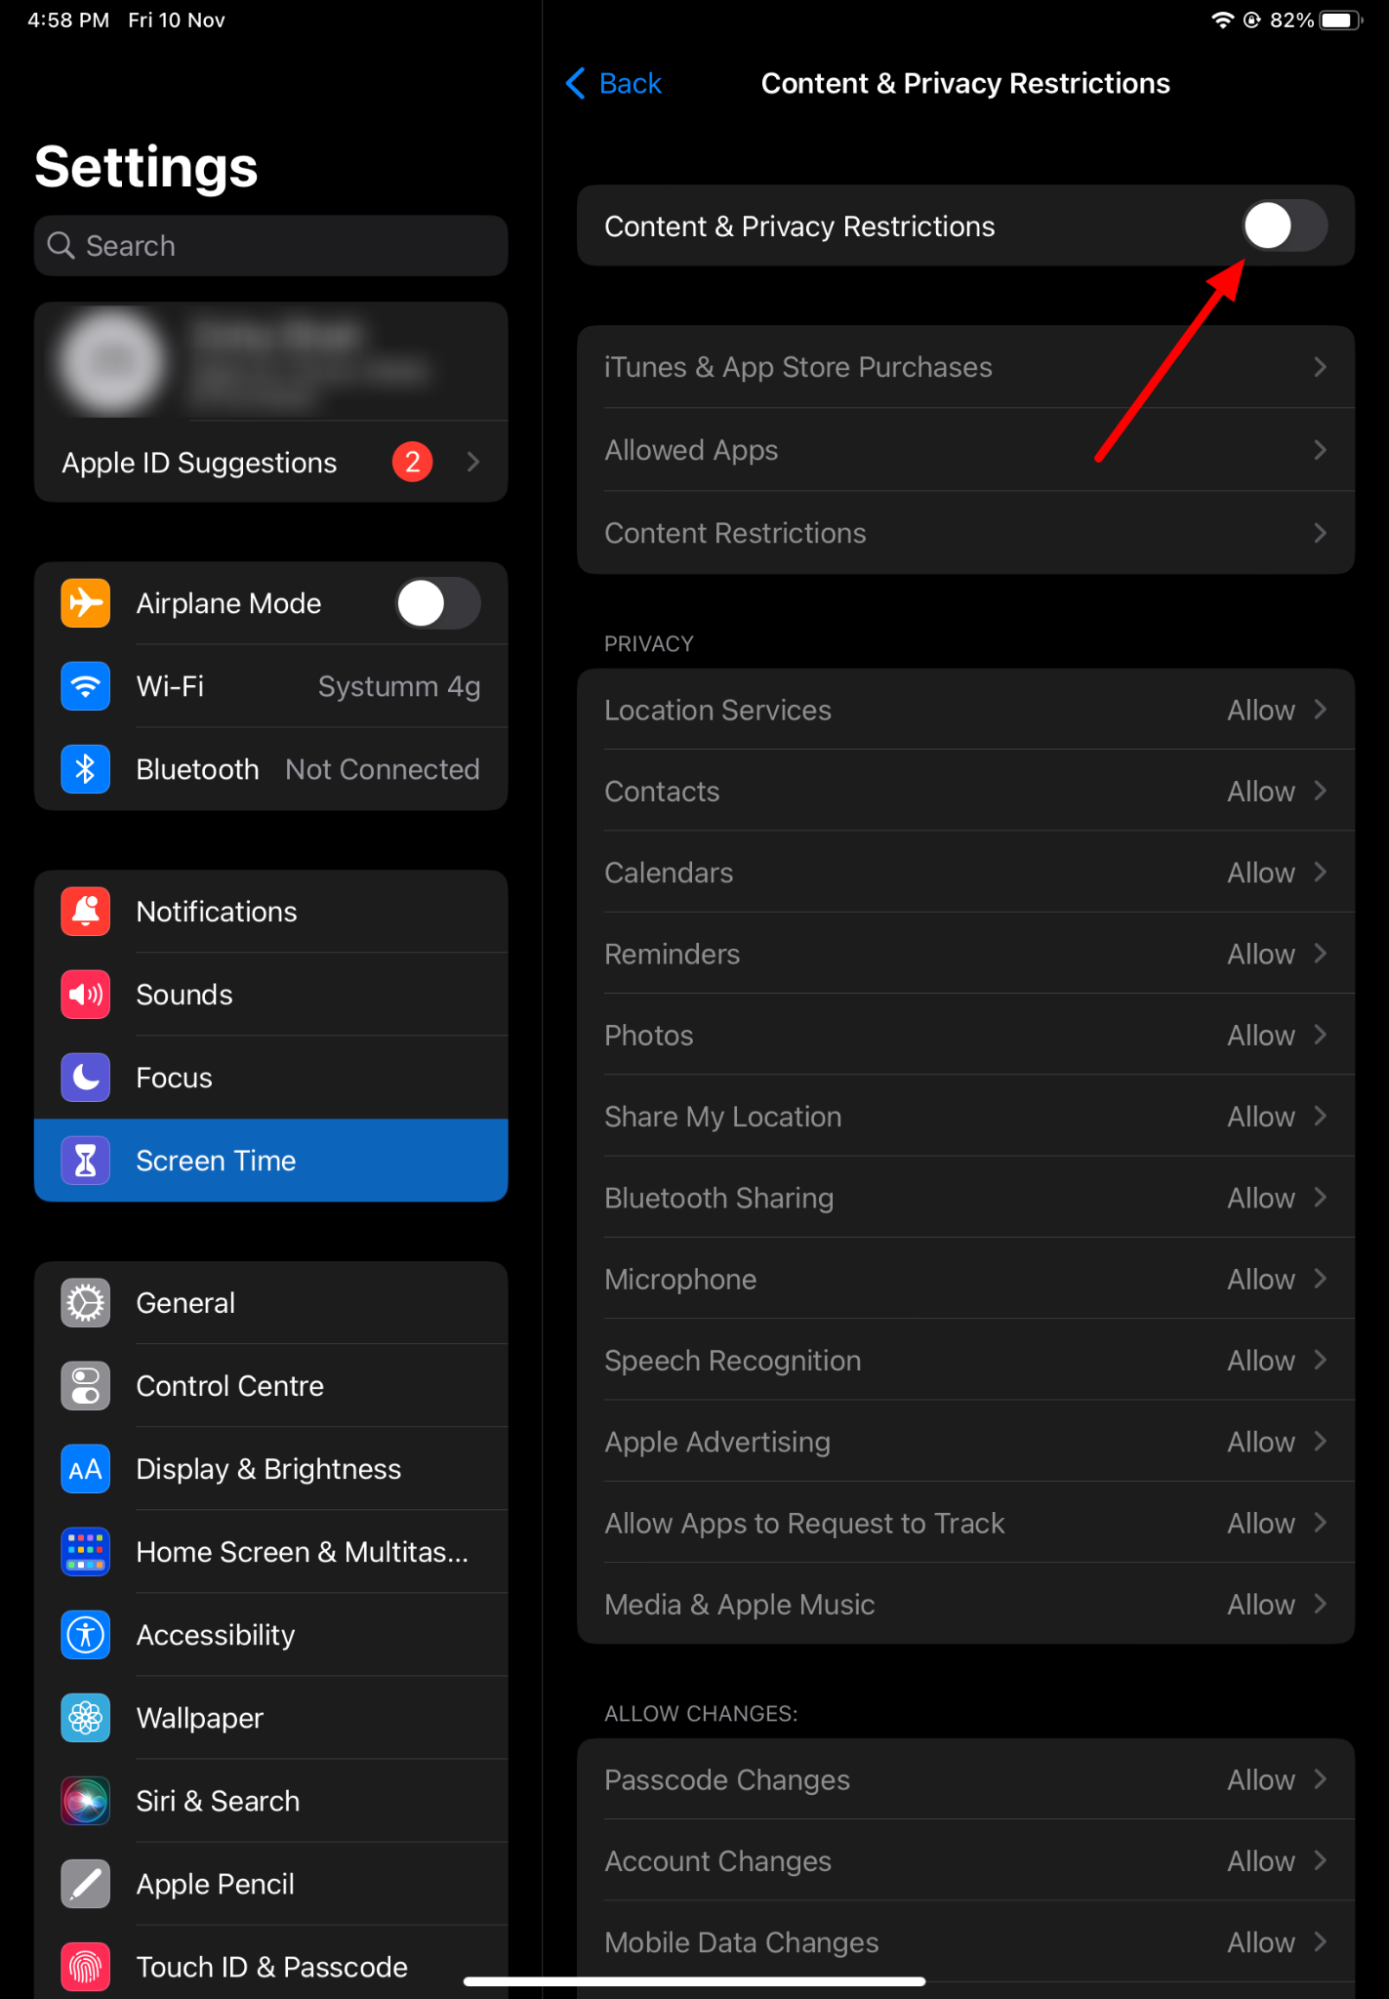
3. Finally, select Content Restrictions to tweak the settings according to your child’s age and your preference.

4. Once in, you can find out all the different restrictions available to alter on the iPad.
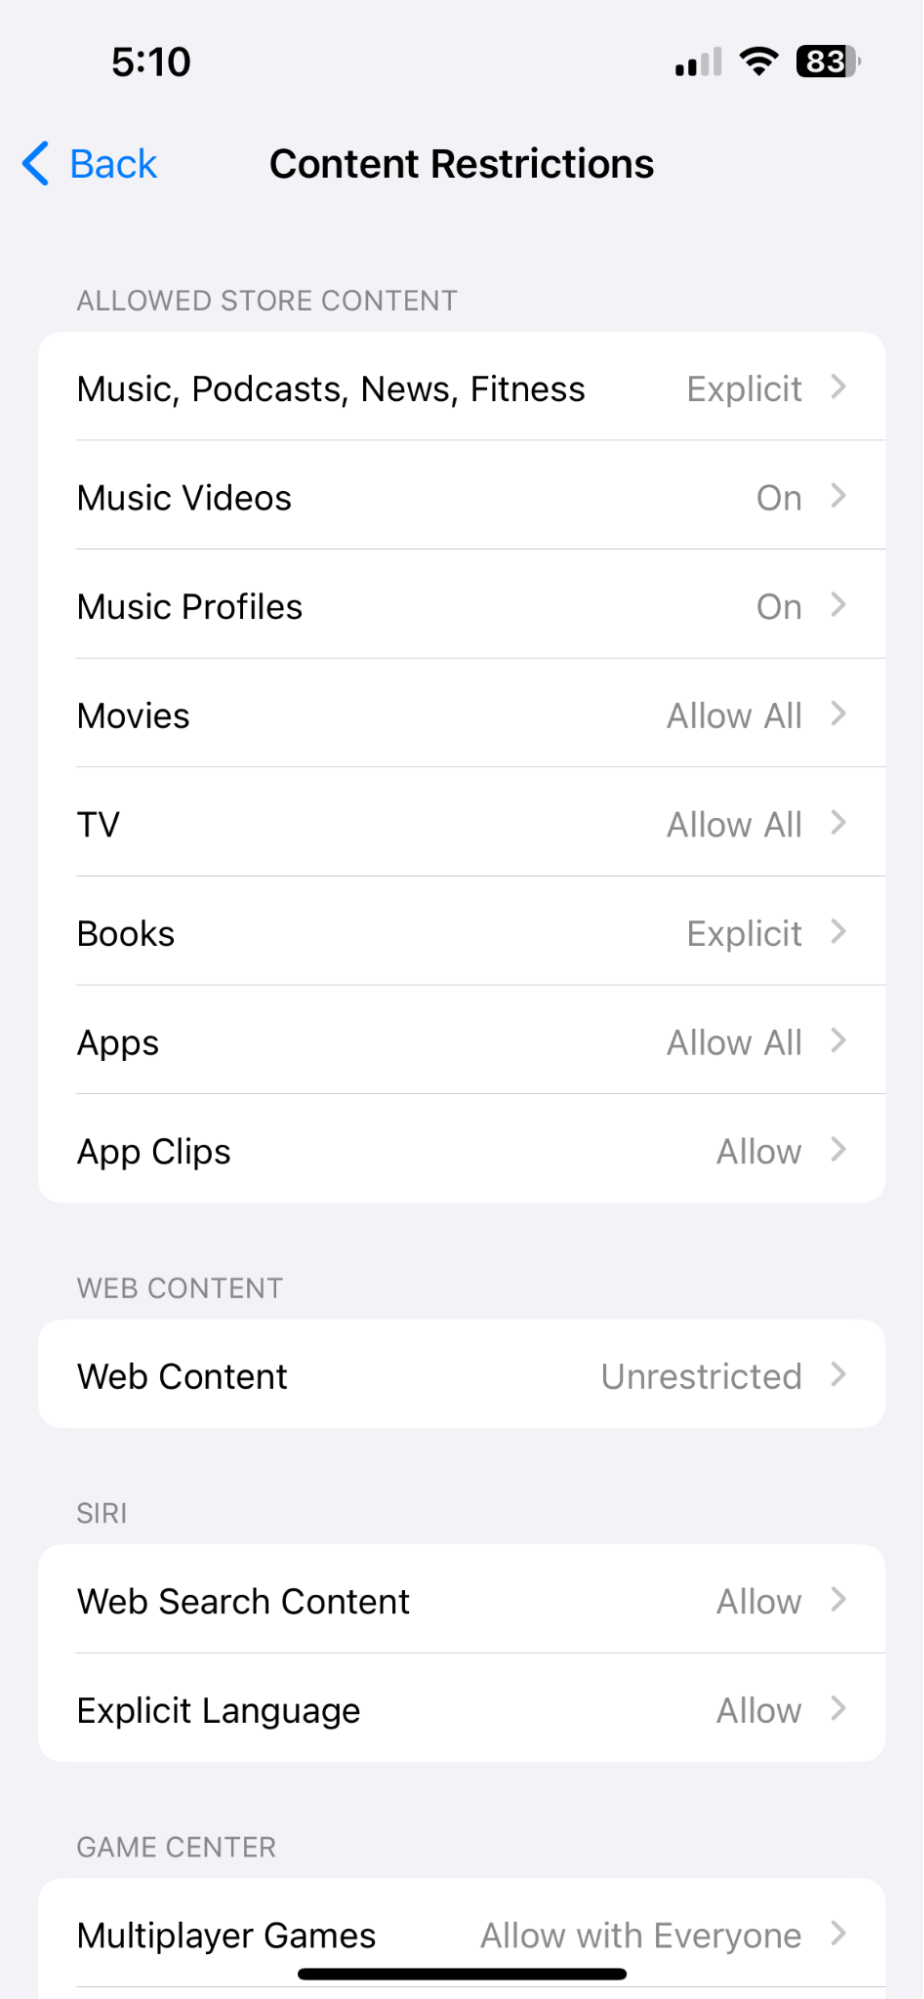
5. Here you can set different restrictions for your child like Music Videos, Movies, TV, Apps, etc., and set them according to your kid’s age and your personal preference.

5. Preventing iTunes & App-Store Purchases
Many times, children knowingly or unknowingly make unwanted purchases through iTunes and third-party apps that can put a burden on your pocket. That’s why putting restrictions on such purchases becomes vital for every parent. Thankfully, Apple has certain restrictions that you could remotely set on your child’s device to prevent this.
Follow these steps to set them up and safeguard your child from making these monetary mistakes.
1. On your kid’s iPad, open Settings & navigate to Screen Time.
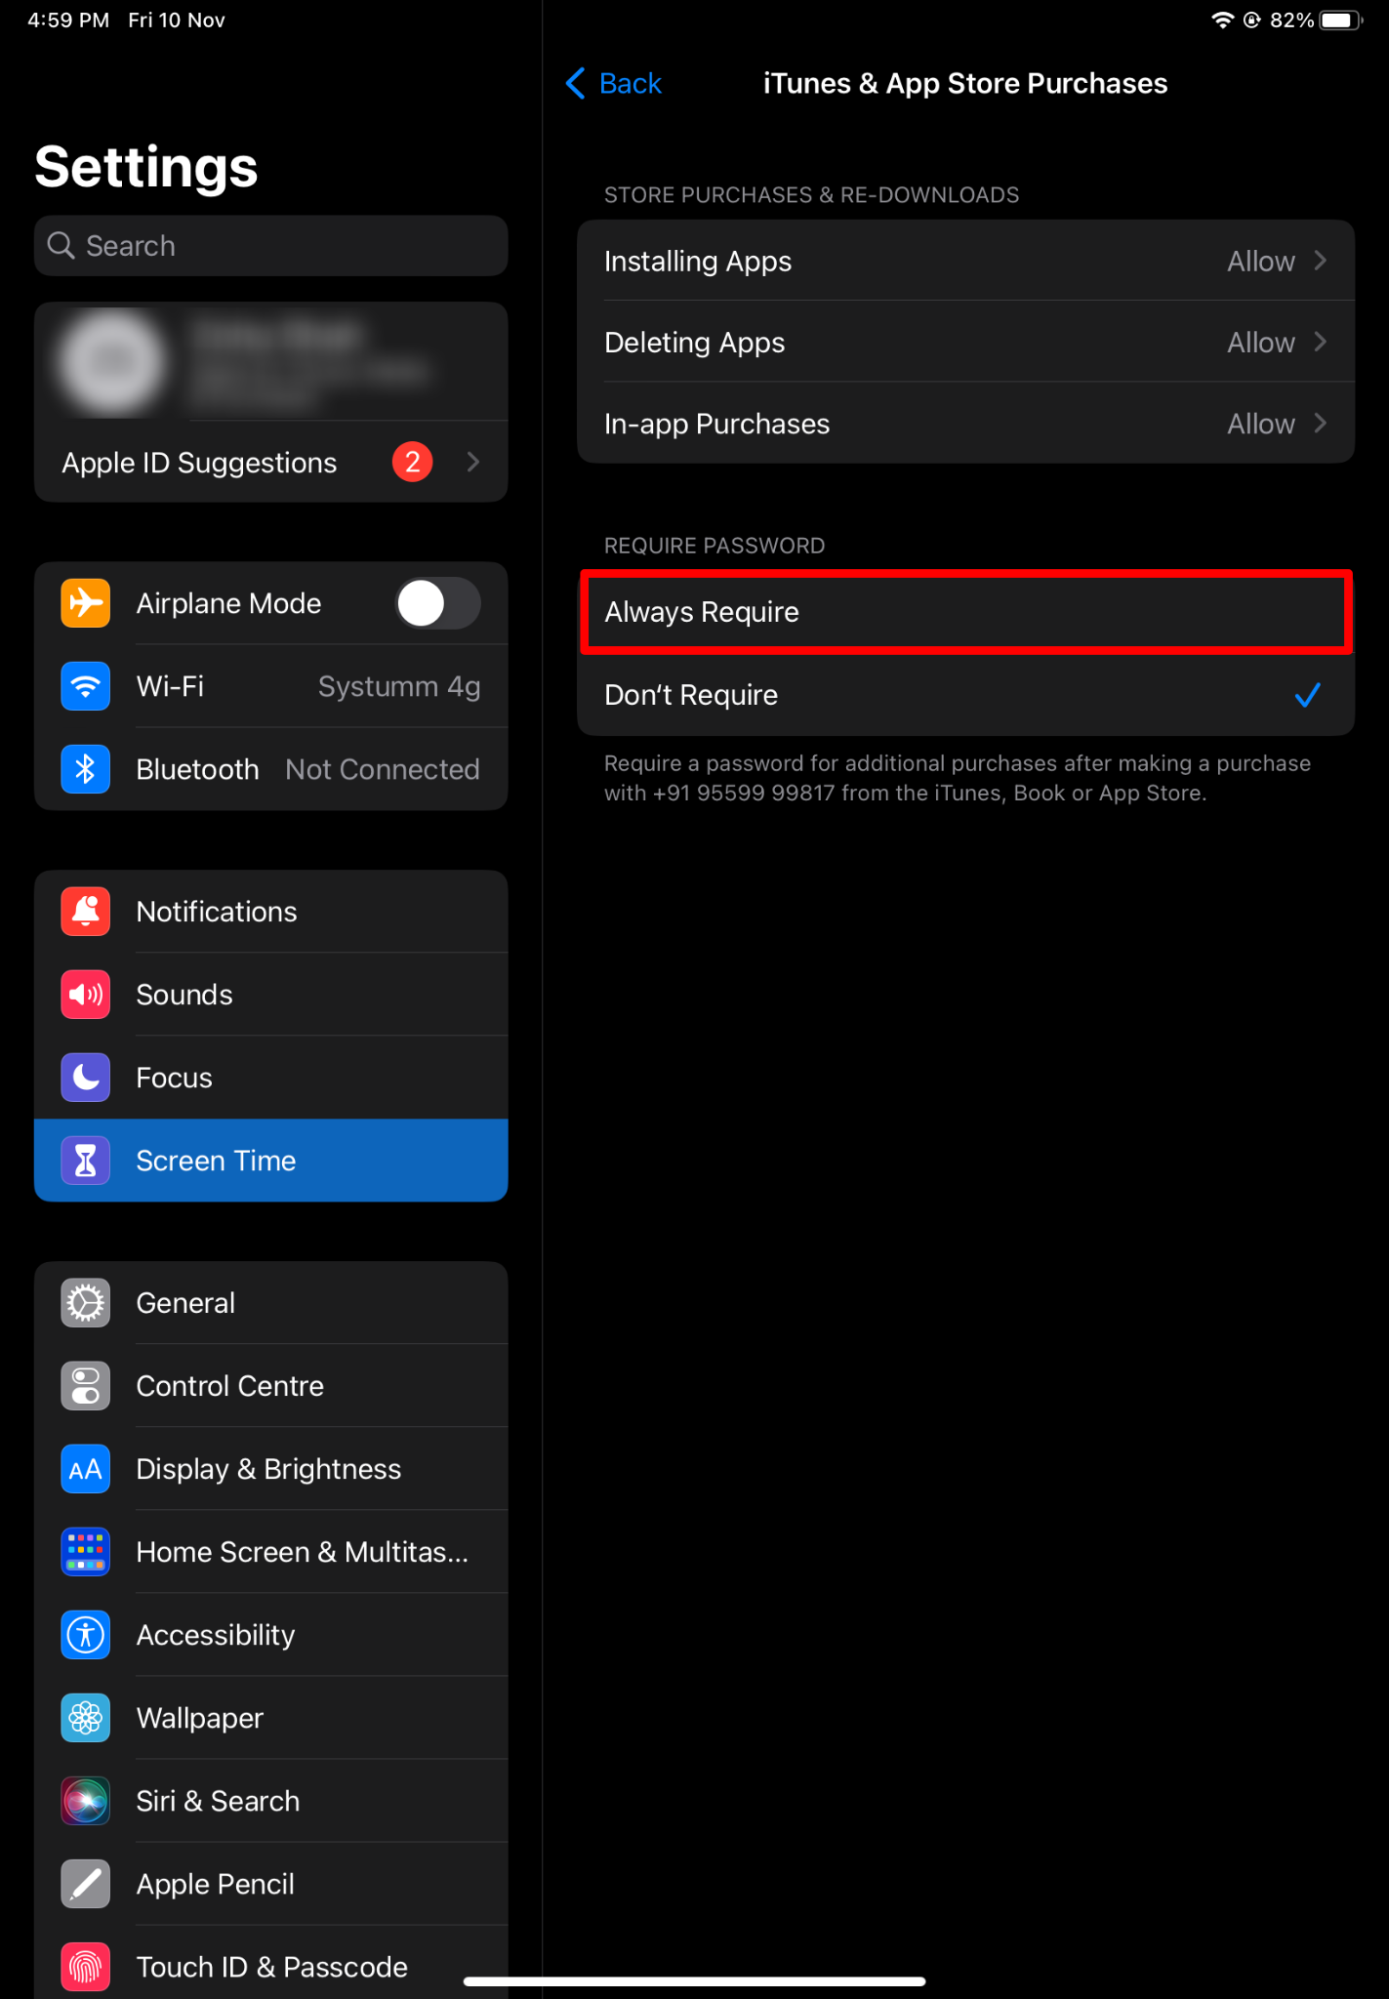
2. Next, open Content & Privacy Restrictions and navigate to iTunes & App Store Purchases.

3. Now, under In-App Purchases, switch the toggle to Don’t Allow.
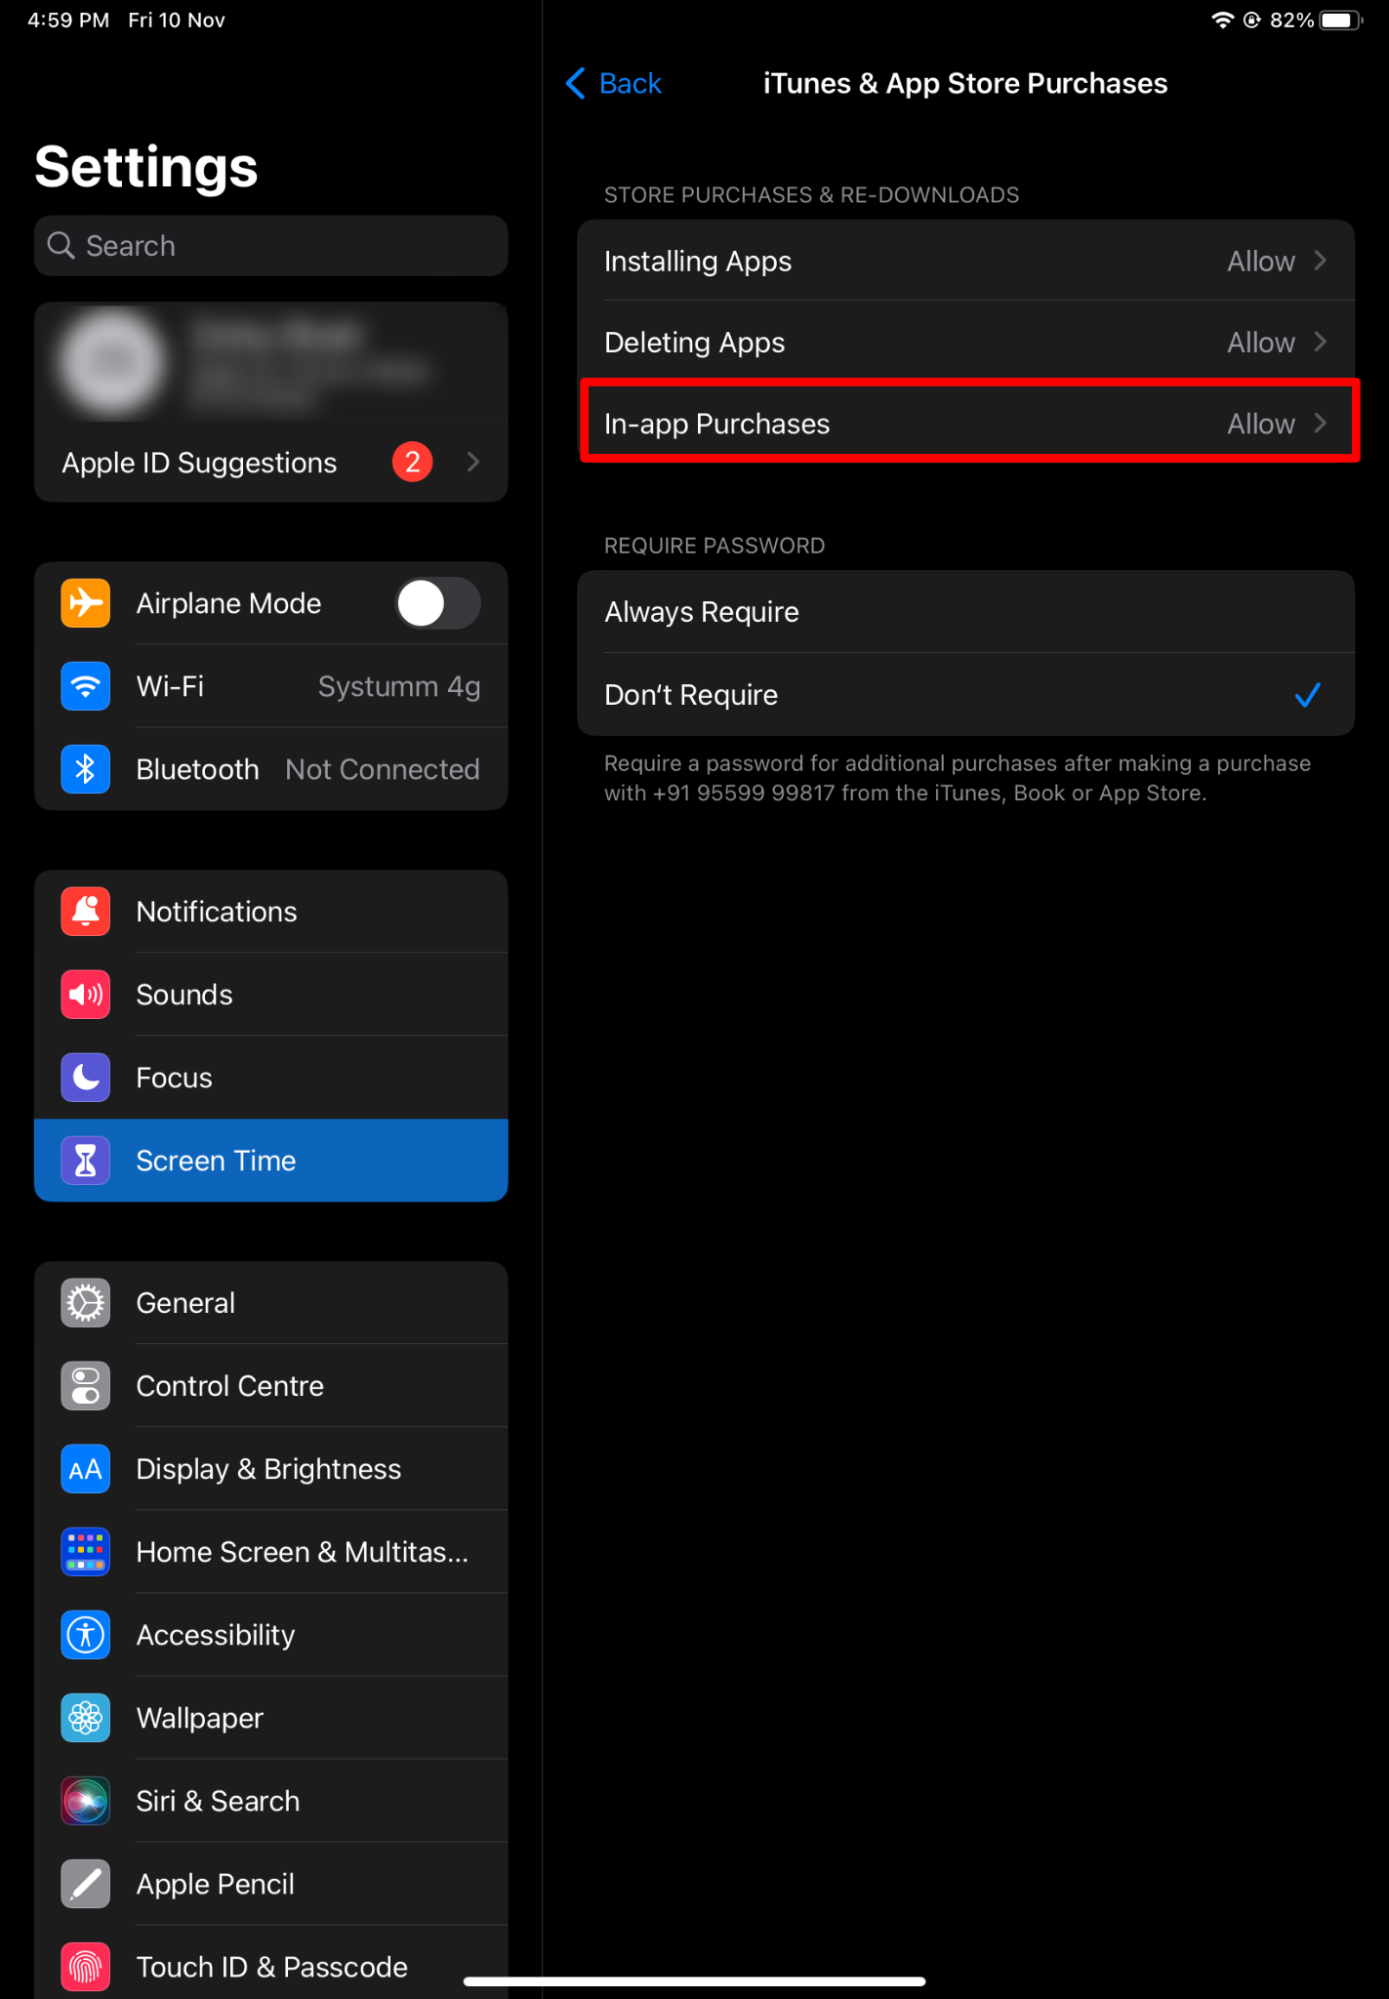
4. Additionally, if you want to allow in-app purchases for your child, but want to give a green flag whenever they are purchasing something, you can simply turn on the password for this setting. With this, they can only make a transaction with your approval.
6. Setting Up Web Content
Web browsing is probably the most vulnerable place for a child to be exposed to a plethora of inappropriate content. This makes it a no-brainer to put certain restrictions on the application. And with Apple’s parental controls, you can put a stop to this by restricting any content that is not appropriate for a child. To do this, follow these steps.
1. On your child’s iPad, open Settings and navigate to Screen Time.

2. Next, scroll down and tap Content & Privacy Restrictions and then open Content Restrictions.

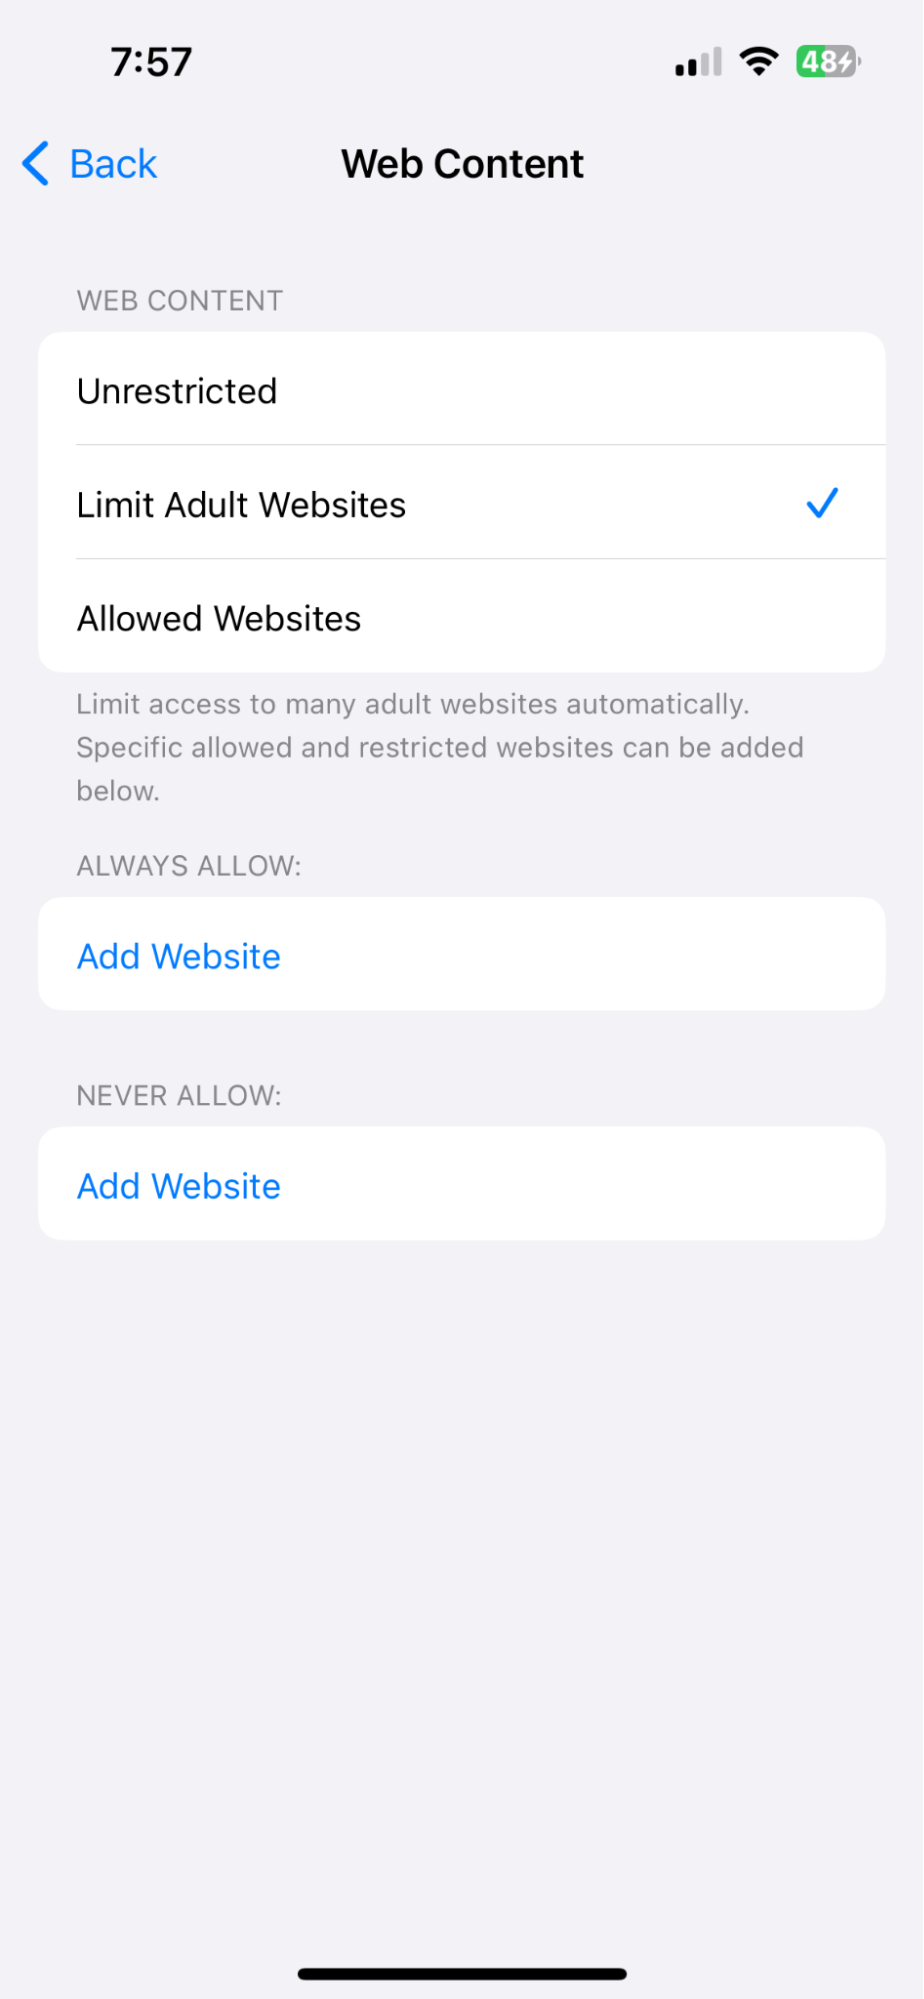
3. As you get into this section, you’ll have to tap on Web Content.
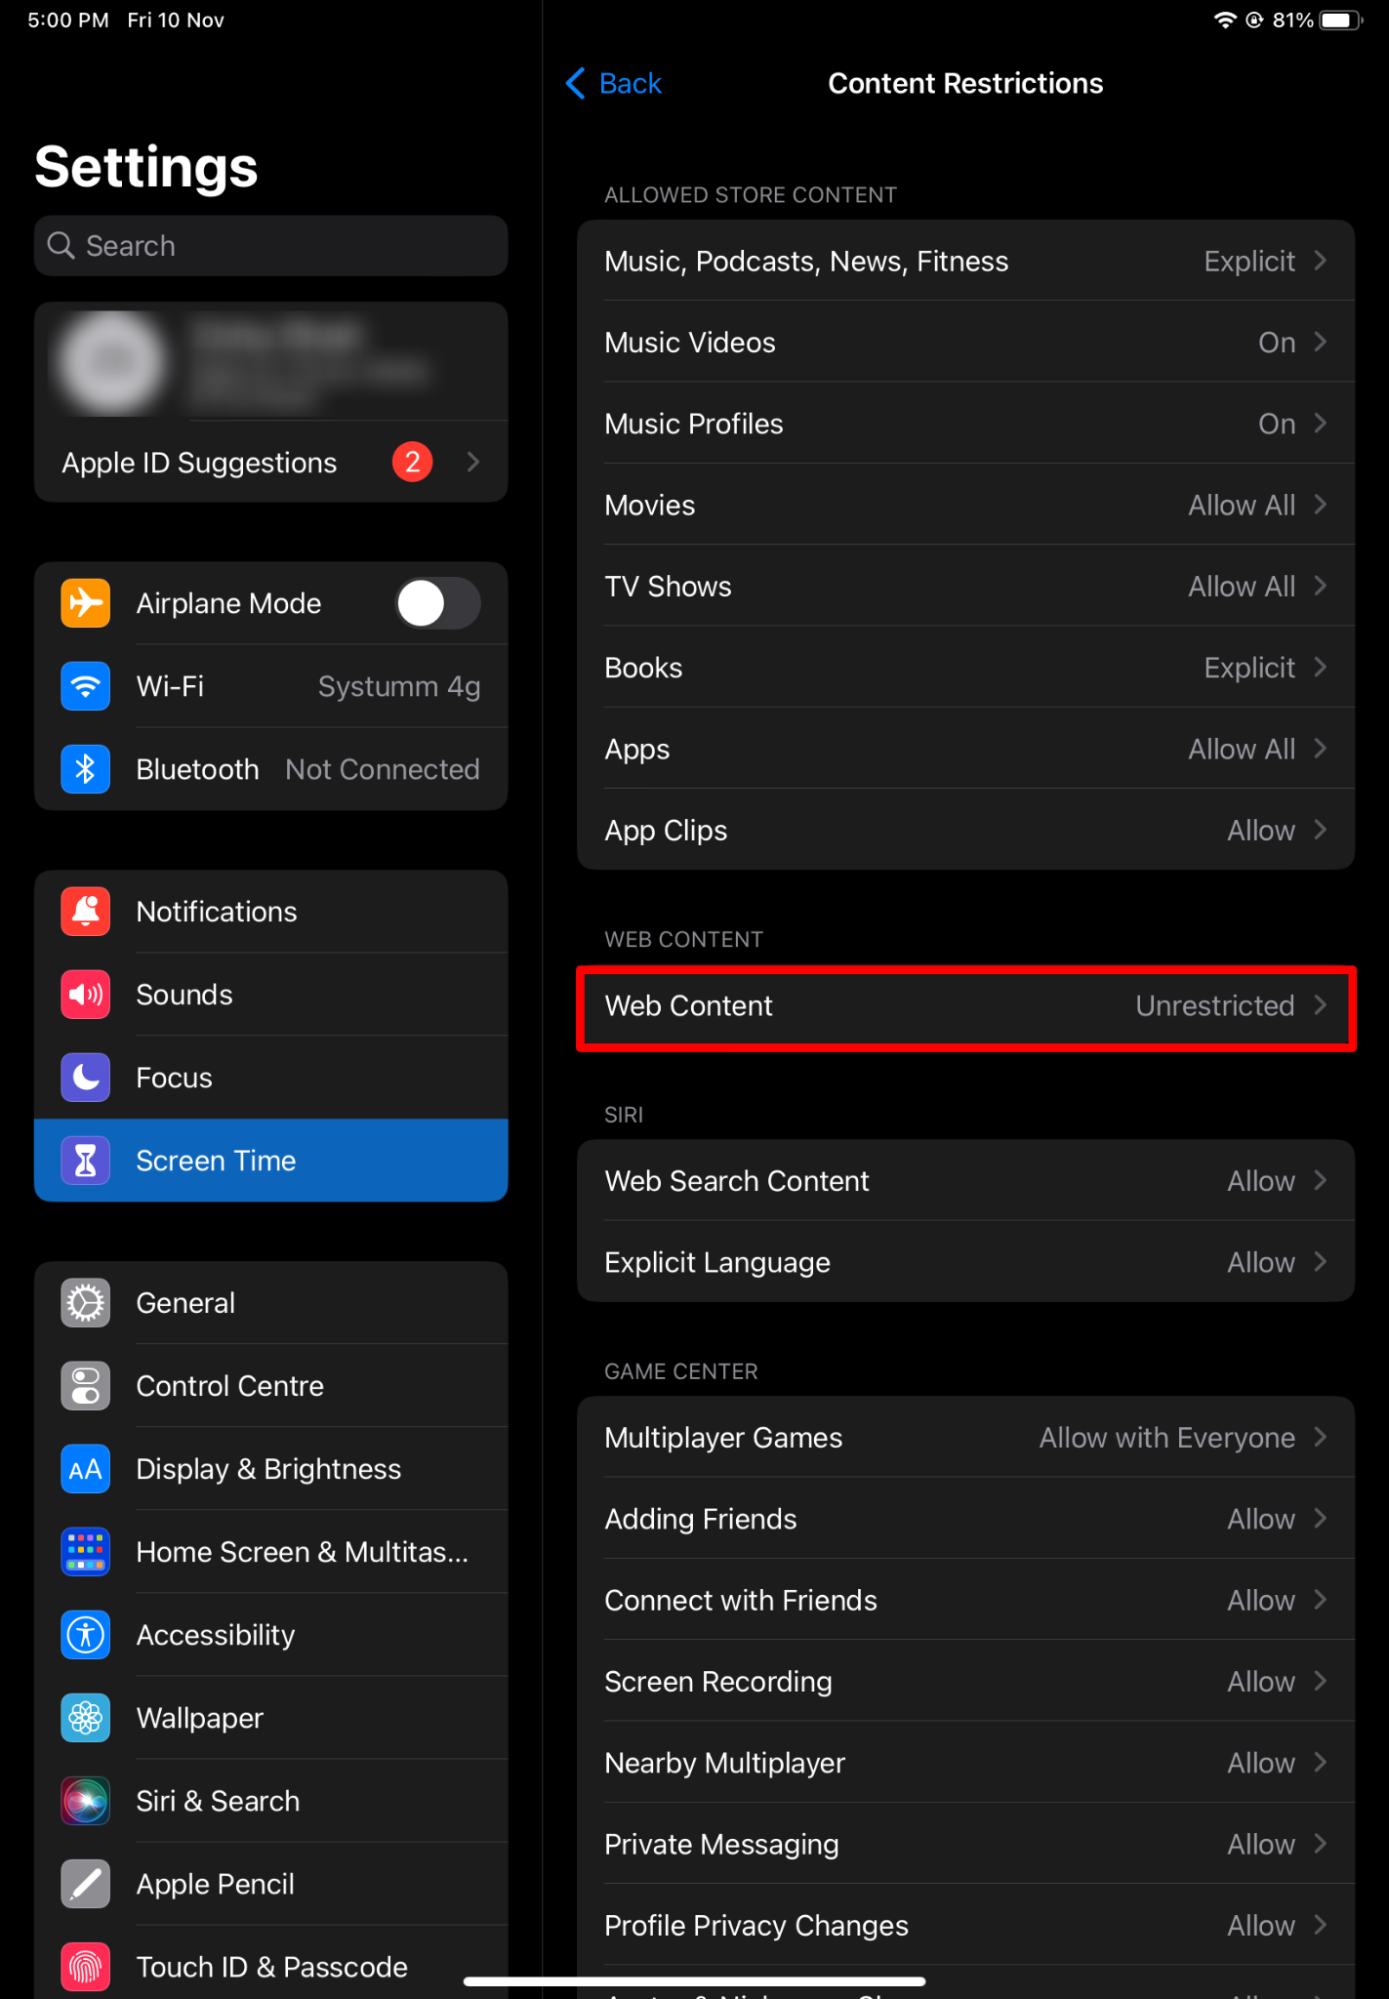
4. Now, you can pick any of the available options as suitable. You can either go ahead and limit all the adult websites or you could even manually enter certain websites that you think are not good for your little ones.
7. Allowed Changes
If you don’t want your children to tweak the settings set by you, then you must put certain restrictions under the Allowed Changes section on your child’s iPad. Preferably, you should set Don’t Allow for settings like Passcode Changes, Account Changes, and Cellular Data Changes. However, you can leave Do Not Disturb While Driving, Volume Limit, or Background App Activities if your child drives and is not too young. Once done, they could only access those features that are not harmful for them and you will eventually have a firm control over their device. Here’s how you can do that.
1. Open Settings and navigate to Screen Time on your child’s iPad.
2. Now, open Content & Privacy Restrictions and scroll down to Allow Changes.

3. Here, you can change the permission from Allow to Don’t Allow for all the available options.
Apple’s Parental Controls vs Third-Party Parental Control Apps
Let’s see whether you should opt for Apple’s in-built parental controls for your child’s iPad or use a third-party tool.
1. Integration and Compatibility
Apple's Parental Controls are seamlessly integrated into Apple devices, offering native support without additional installations, ideal for families using solely Apple products. However, Third-Party Parental Control Apps offer broader compatibility, functioning across various platforms, including non-Apple devices, making them suitable for families with a diverse range of devices, though they may require a more complex setup.
2. Features and Customization
Apple provides essential features like Screen Time limits and content filtering with straightforward customization, catering to basic needs. In contrast, Third-Party Parental Control Apps often offer more advanced features like detailed web filters and geofencing, allowing for more tailored usage rules and monitoring, which can be particularly beneficial for specific parental concerns.
3. User Experience
Apple's Parental Controls are known for their intuitive and user-friendly interface, with settings easily syncing across devices. On the other hand, the user experience with Third-Party Parental Control Apps can vary significantly, with some offering equally intuitive interfaces, while others might be more complex or less polished.
4. Security and Privacy
Apple's built-in parental controls provide high-level security being less vulnerable to hacking. Whereas, the security of Third-Party Parental Control Apps can vary, and while many are secure, they can be more susceptible to vulnerabilities, necessitating thorough research from parents on data privacy and security.
5. Cost and Subscription Models
Apple's Parental Controls are free with Apple devices, offering a cost-effective solution for Apple users. Conversely, many Third-Party Parental Control Apps have free versions with basic features, but advanced features often require a subscription fee, which can be a consideration for long-term budgeting.
6. Reporting and Monitoring
Apple offers basic activity reports and location sharing, which can suffice for general monitoring needs. In contrast, Third-Party Parental Control Apps often provide more comprehensive activity reports and detailed internet usage statistics, which can be valuable for parents seeking in-depth monitoring.
7. Cross-Platform Management
Apple's solution is limited to managing Apple devices, which can be restrictive for families with various types of devices. On the other hand, many Third-Party Parental Control Apps allow cross-platform management, enabling parents to monitor and control a range of devices from different manufacturers through a single app.
8. Ease of Setup and Maintenance
Apple's Parental Controls are generally easier to set up for those already within the Apple ecosystem, requiring minimal maintenance. However, the setup and maintenance of Third-Party Parental Control Apps can vary, with some offering more flexibility in managing diverse devices but may require more regular updates or maintenance.
FAQs
1. Are Apple’s parental controls effective?
Yes, Apple’s parental controls are quite effective when it comes to setting certain restrictions on app limits and screen time limits. Your child won’t be able to access their device once they cross the limits set by you on their iPads. However, when it comes to restricting web content or app downloads on the App Store, it fails to deliver sometimes as there are many third-party tools that breach this security and give a lot of freedom to the users.
2. How can I control my kid’s iPad?
To control your kid's iPad, use the Screen Time feature in Settings. Here, you can set daily time limits for apps, schedule downtime, restrict explicit content, and manage privacy settings. You can also approve downloads and purchases from the App Store and set up Family Sharing to monitor your child's iPad usage from your device.
3. Does restricting web content work on third-party web browsers on an iPad?
Yes, restricting web content through Screen Time settings on an iPad also applies to most third-party web browsers. This includes limiting access to adult websites and the ability to add specific websites to an "allowed" or "restricted" list. However, it's always a good idea to check each browser's compliance with Apple's restrictions, as there might be variations.
4. What is the best iPad for a kid?
The best iPad for a kid depends on their age and your budget. For younger children, the iPad Mini or the basic iPad model are great choices due to their size, durability, and affordability. For older kids or for educational purposes, consider the iPad Air for its enhanced performance and features.
5. Are there any parental control apps for iPads?
Yes, there are several parental control apps available for the iPad. These apps offer additional features to Apple's Screen Time, such as more detailed activity reports, location tracking, and the ability to set time limits for individual apps. Some popular parental control apps include Qustodio, OurPact, and Norton Family. Remember to research and choose one that best fits your family's needs.