If you want to know how to screenshot on a Google Pixel phone then you're in luck - because there are multiple ways to do it.
We've found five distinct ways to take a screenshot on a Pixel phone, and all are worth knowing about. Some use physical buttons, some involve gestures and you can even do it via voice. And in addition to those options, there's a way to capture a scrolling screenshot that works great for long web pages.
Each of these methods should work on the Google Pixel 6, Pixel 6 Pro, Pixel 6a, Pixel 7 and Pixel 7 Pro; we tested on a 6. For older models, they may or may not work depending on the model you're using. But being on Android 12 will help, as some are built in to the OS.
So, read on and we'll show you how to screenshot on Google Pixel phones in a simple step-by-step format for each method.
How to screenshot on a Google Pixel using physical buttons
1. Press the power and volume down keys
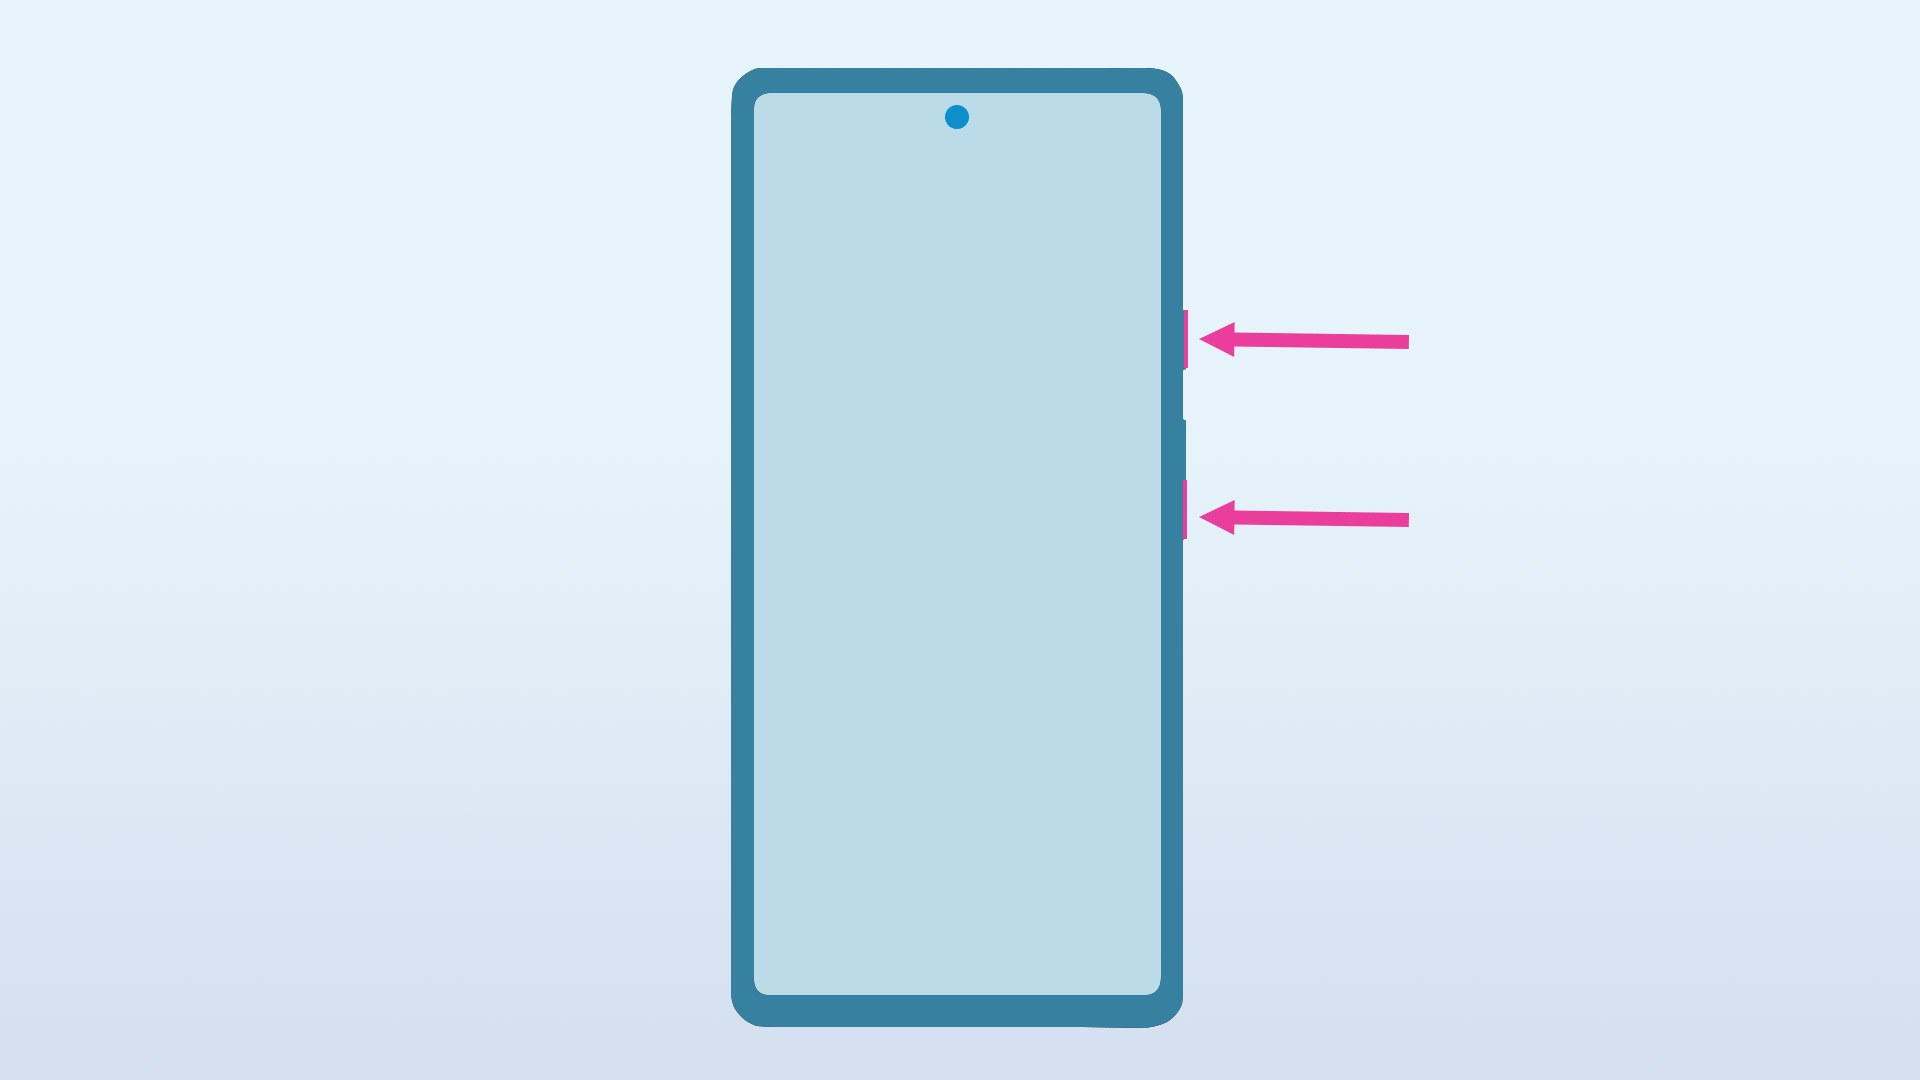
This is the most obvious way to take a screenshot on a Google Pixel, because it's a method that works on most Android phones. (Just to be different, taking a screenshot on an iPhone instead requires you to press power and volume up, not down.)
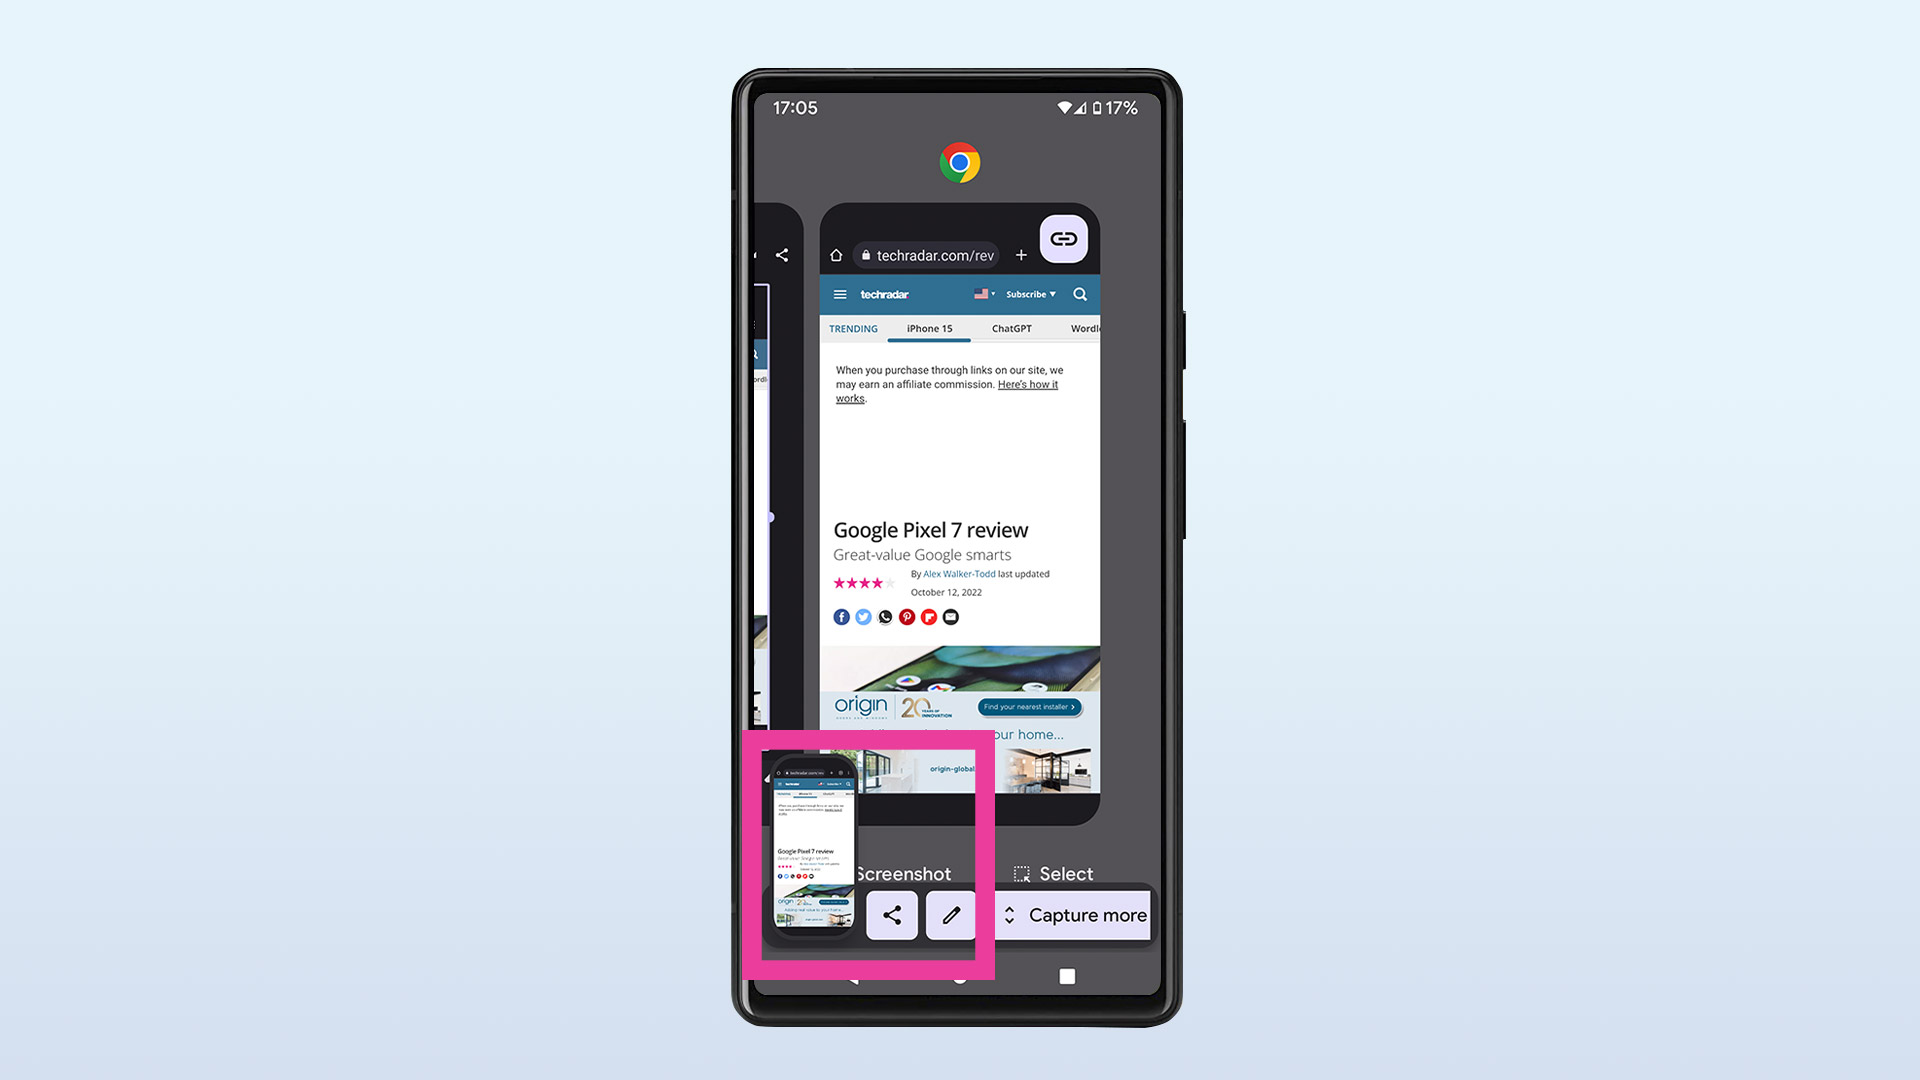
Simply press the power and volume down keys at the same time, then release both and you'll hear a camera shutter click. This will show you a thumbnail of your screenshot in the bottom-left corner of the screen, together with options to share and edit the screenshot. If you're screenshotting something that extends beyond the bottom of the screen, you'll also get the option to capture more. This will let you grab a scrolling screenshot (see below for full details).
How to screenshot on a Google Pixel using gestures
Pixel phones (and indeed, most Androids) give you two ways to navigate your screens: swipes or a 'classic' three-button method.
Both essentially do the same thing, with the only difference being how you access the feature. Here are the instructions for the gesture-based approach.
1. Open the Settings menu
If you want to use Gestures, start by going to your settings menu.
2. Scroll down to System
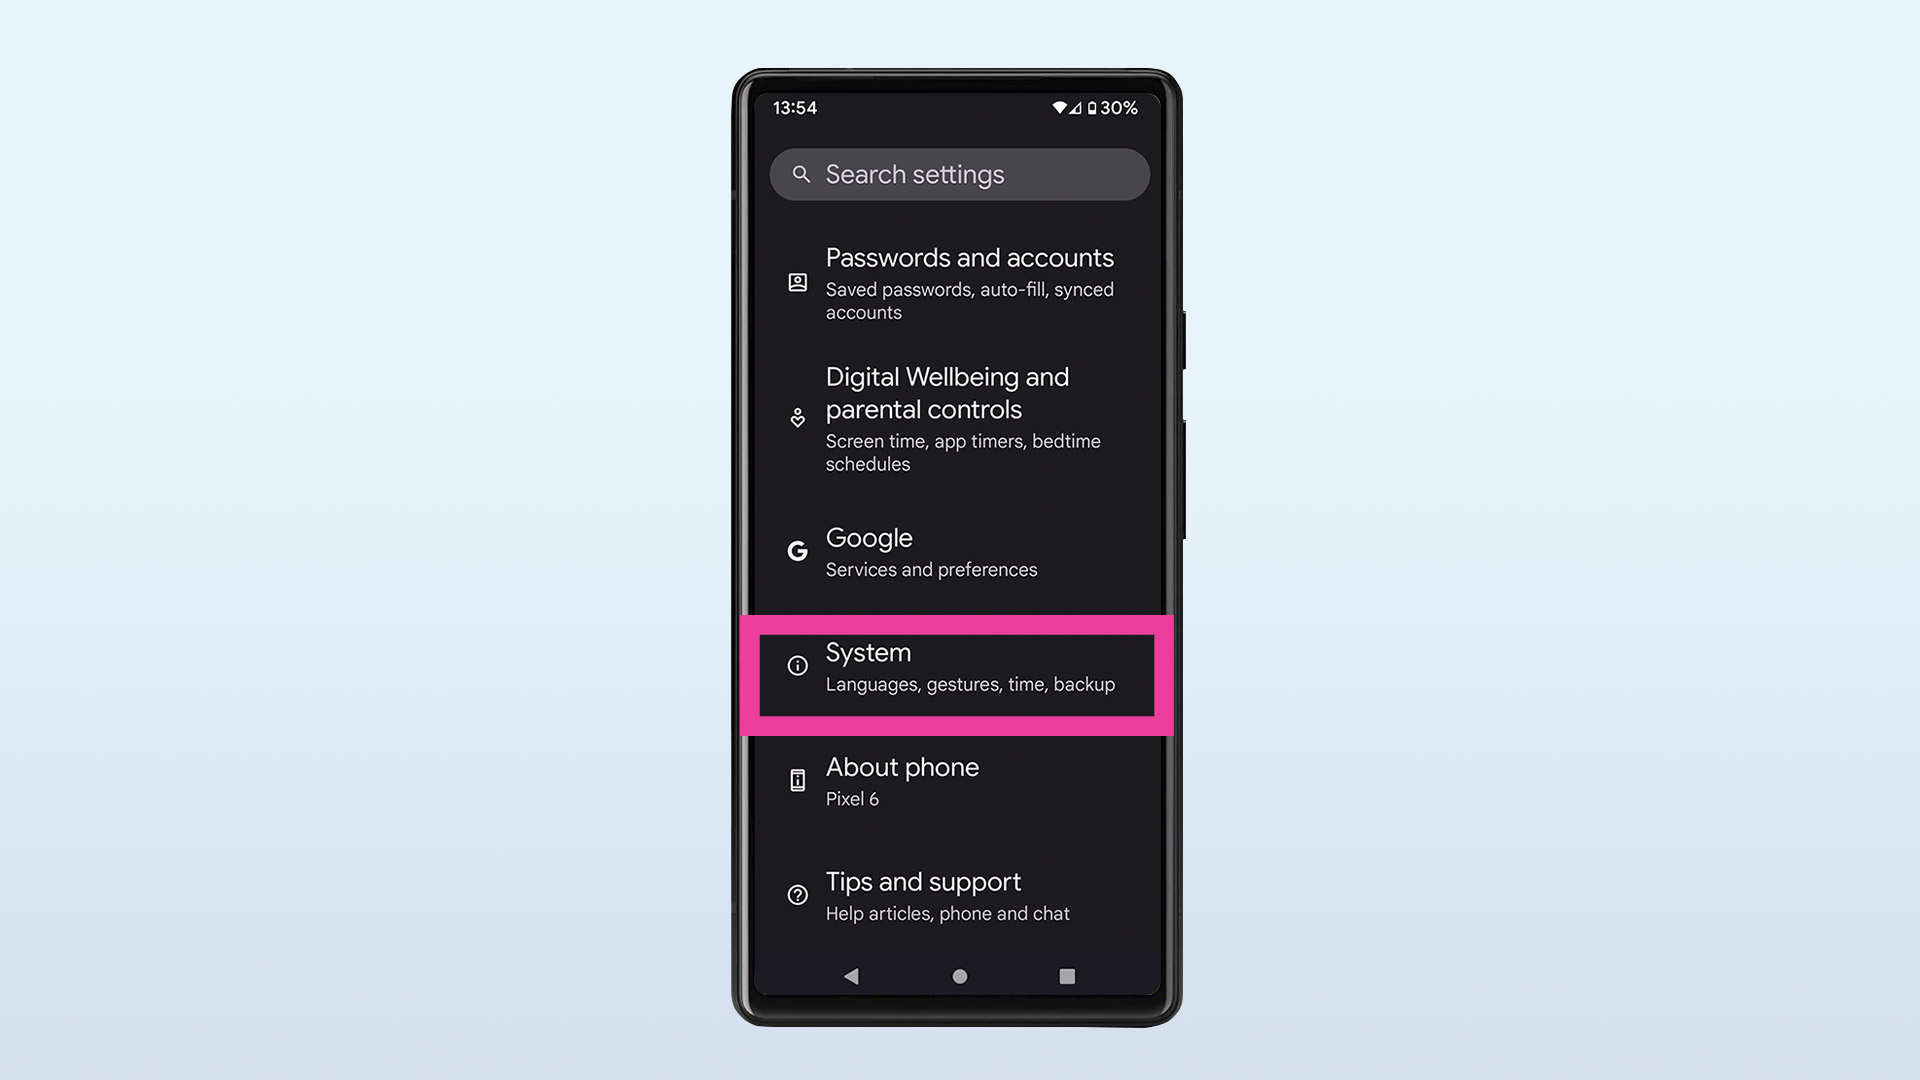
You'll find System near the bottom of the Settings menu, below Google and above About Phone.
3. Select Gestures in the System menu
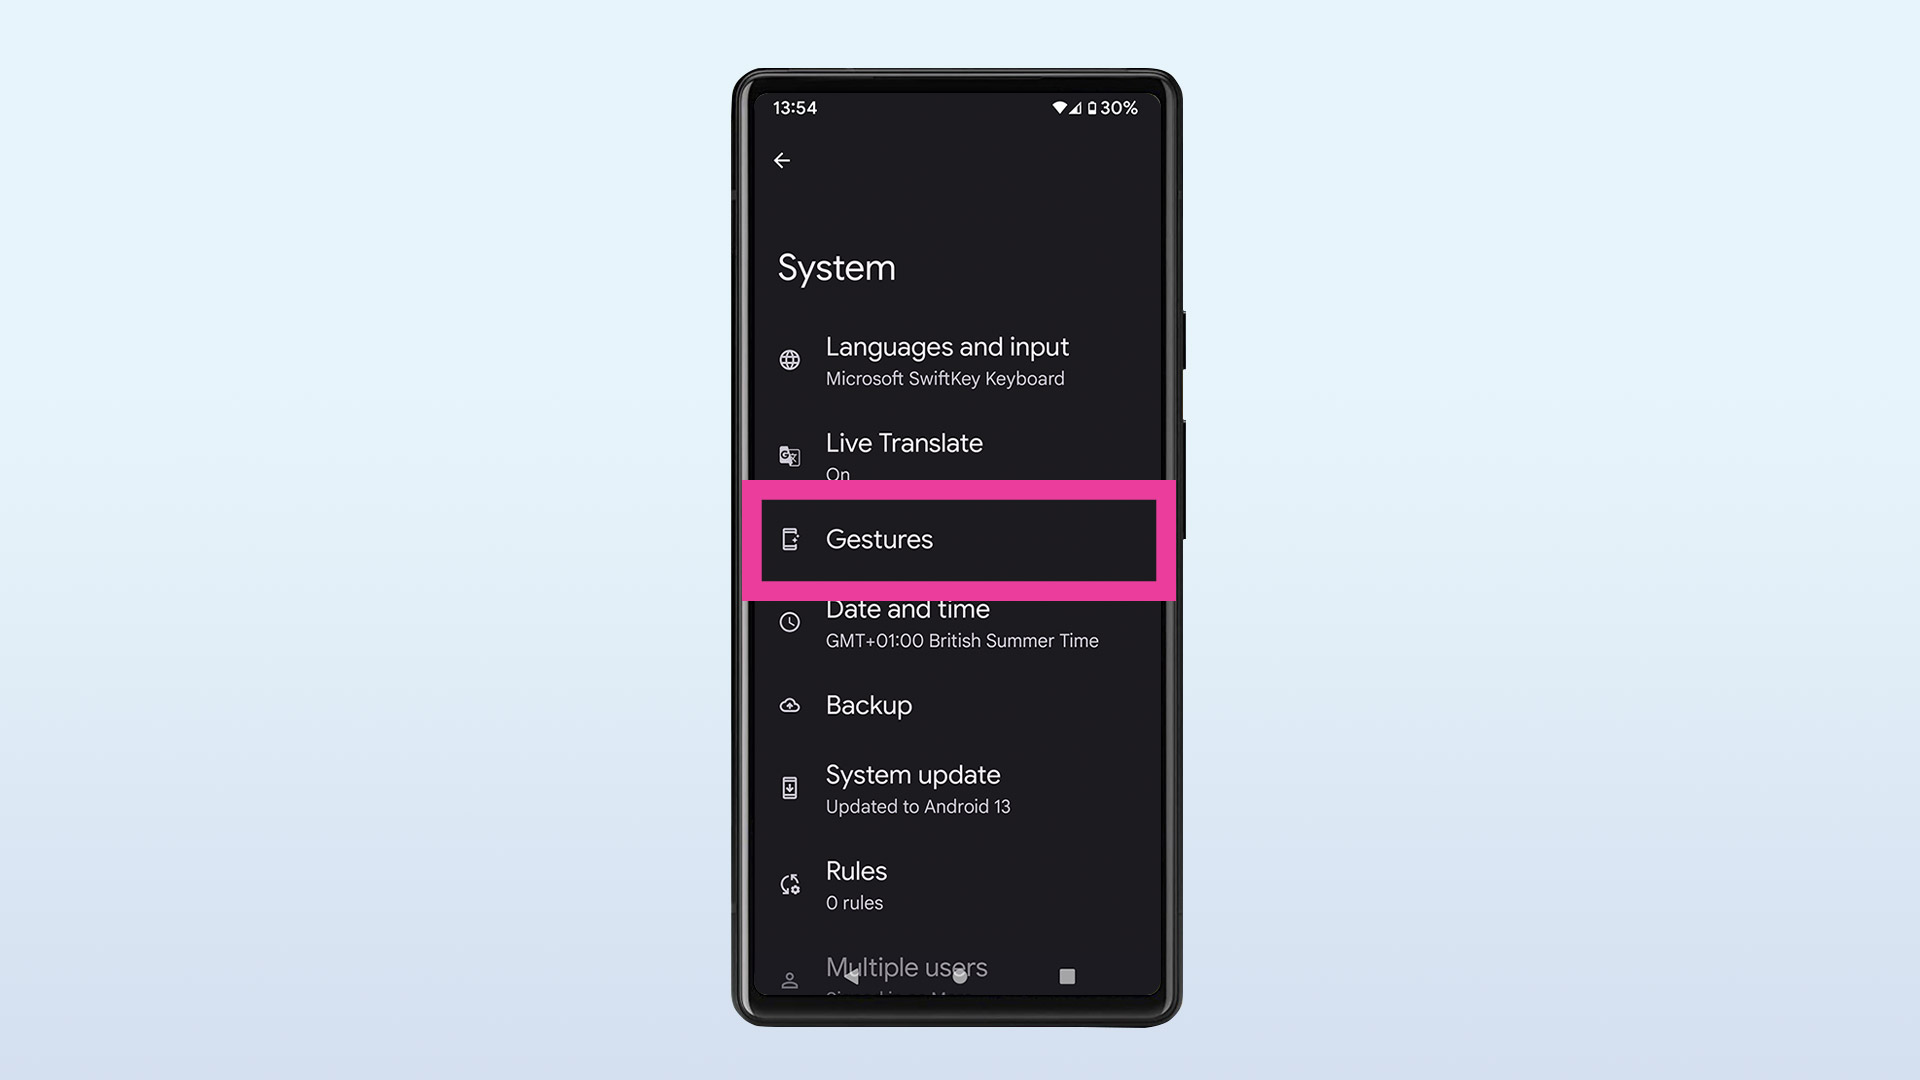
This is the third option down and also contains a bunch of other useful settings.
4. Choose System Navigation
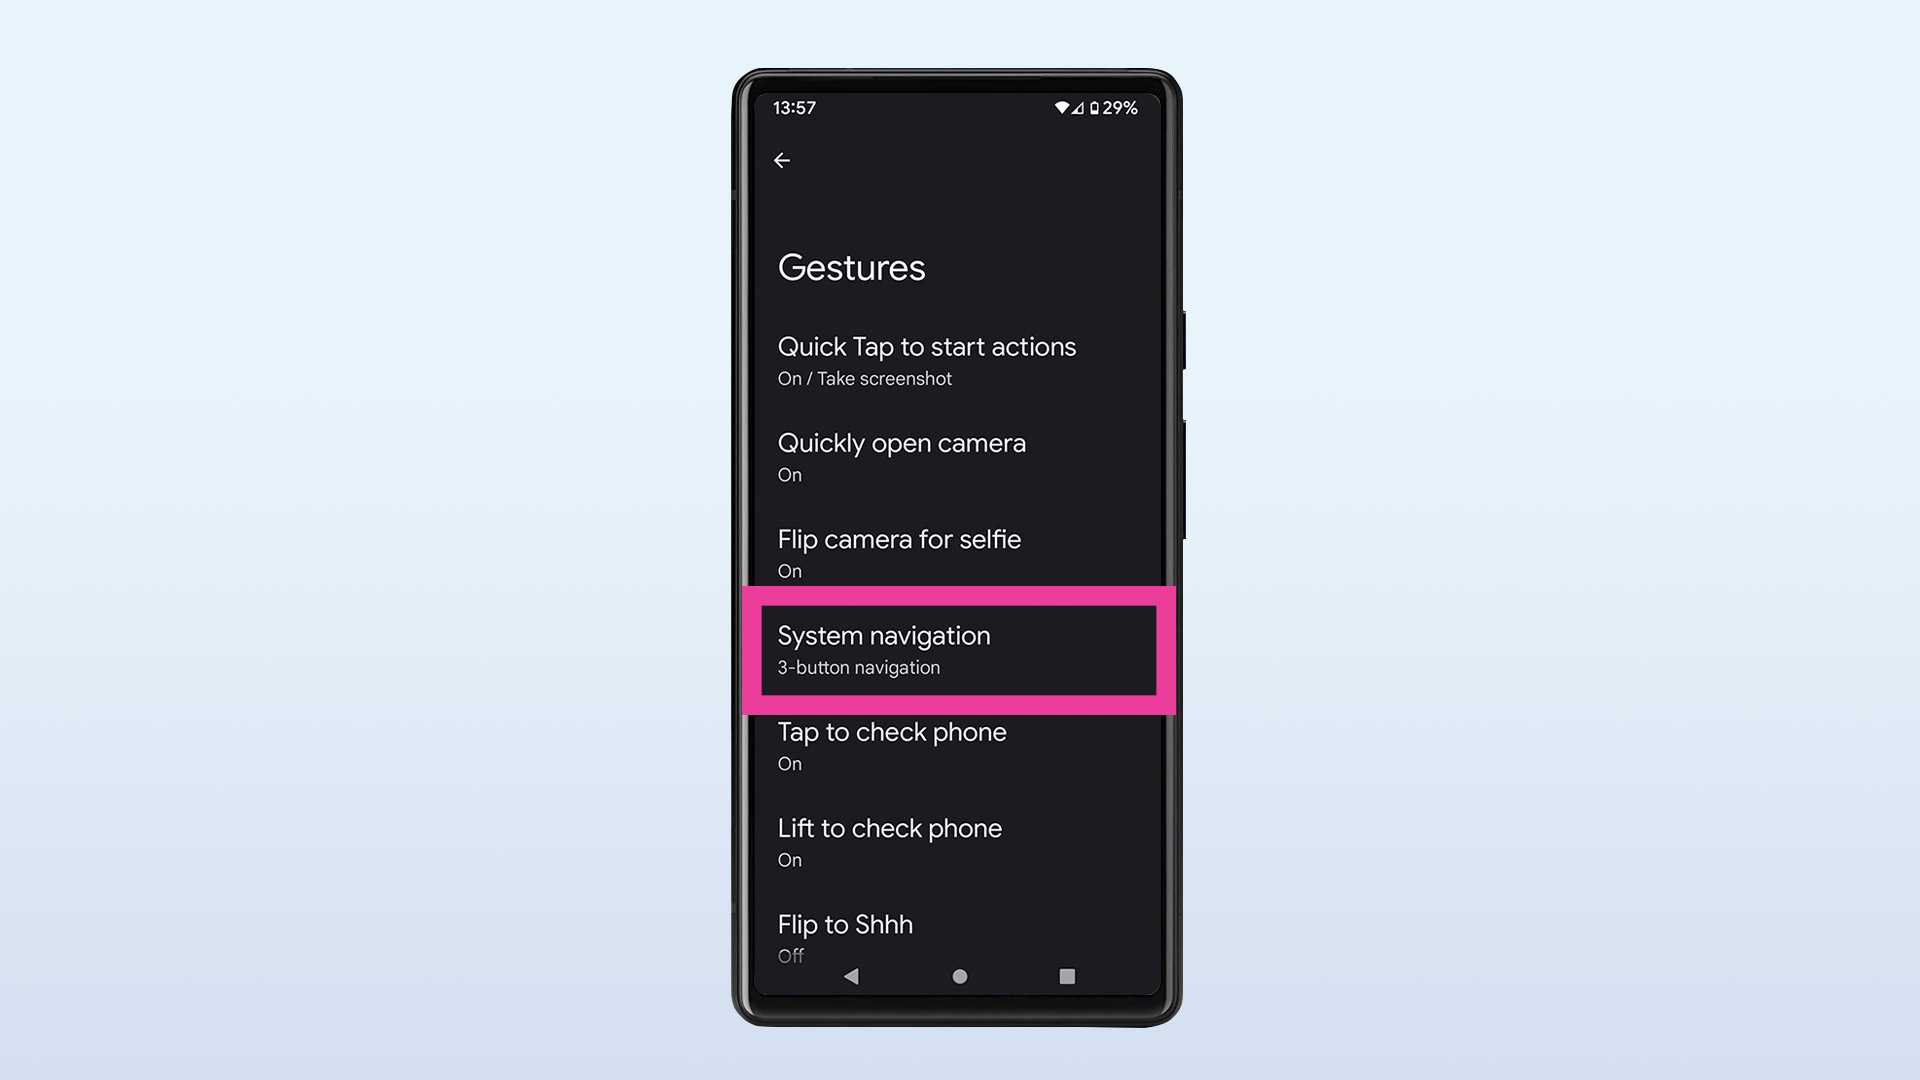
This is the fourth option down. You'll be able to see at a glance which of the two control methods you currently have selected.
5. Select Gesture Navigation
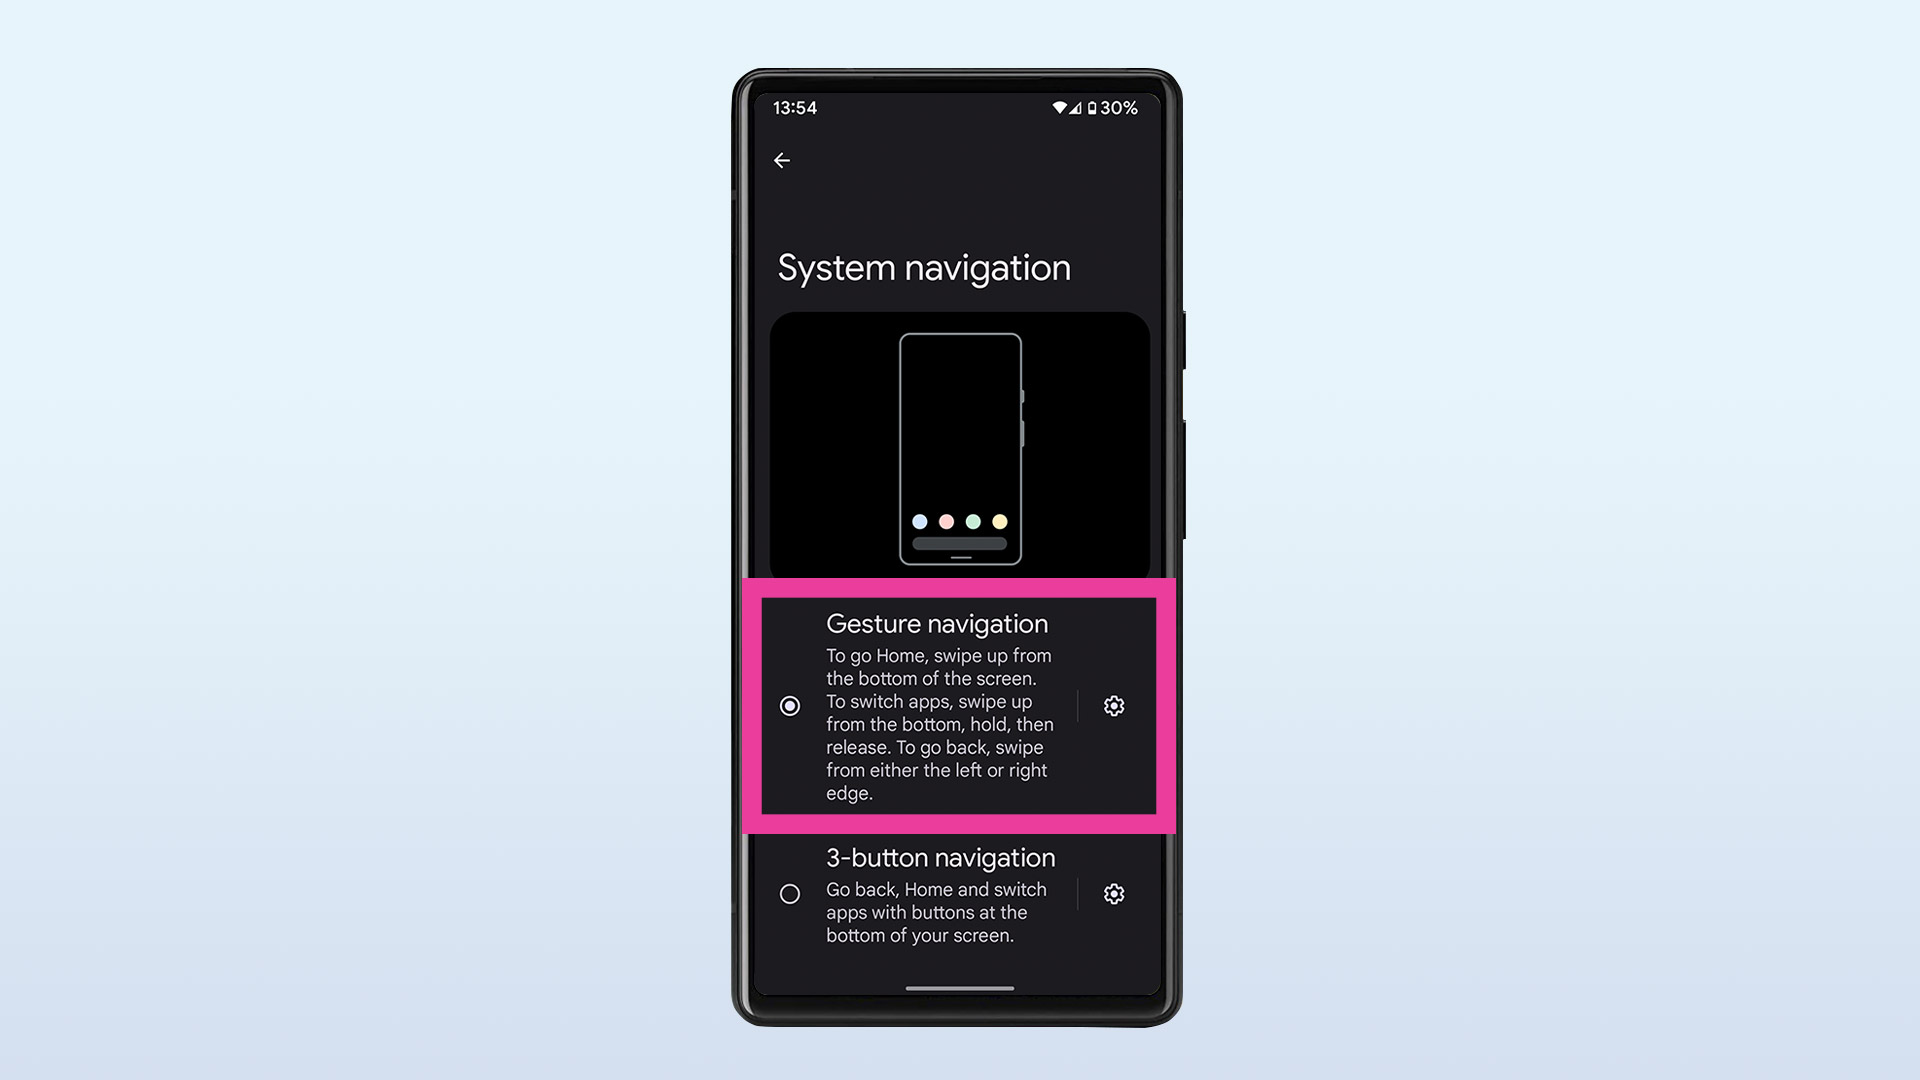
Once you choose Gesture Navigation you will be able to use swipes for certain actions. For instance, swiping up from the bottom of the screen will take you to Home.
6. Swipe up to open an app
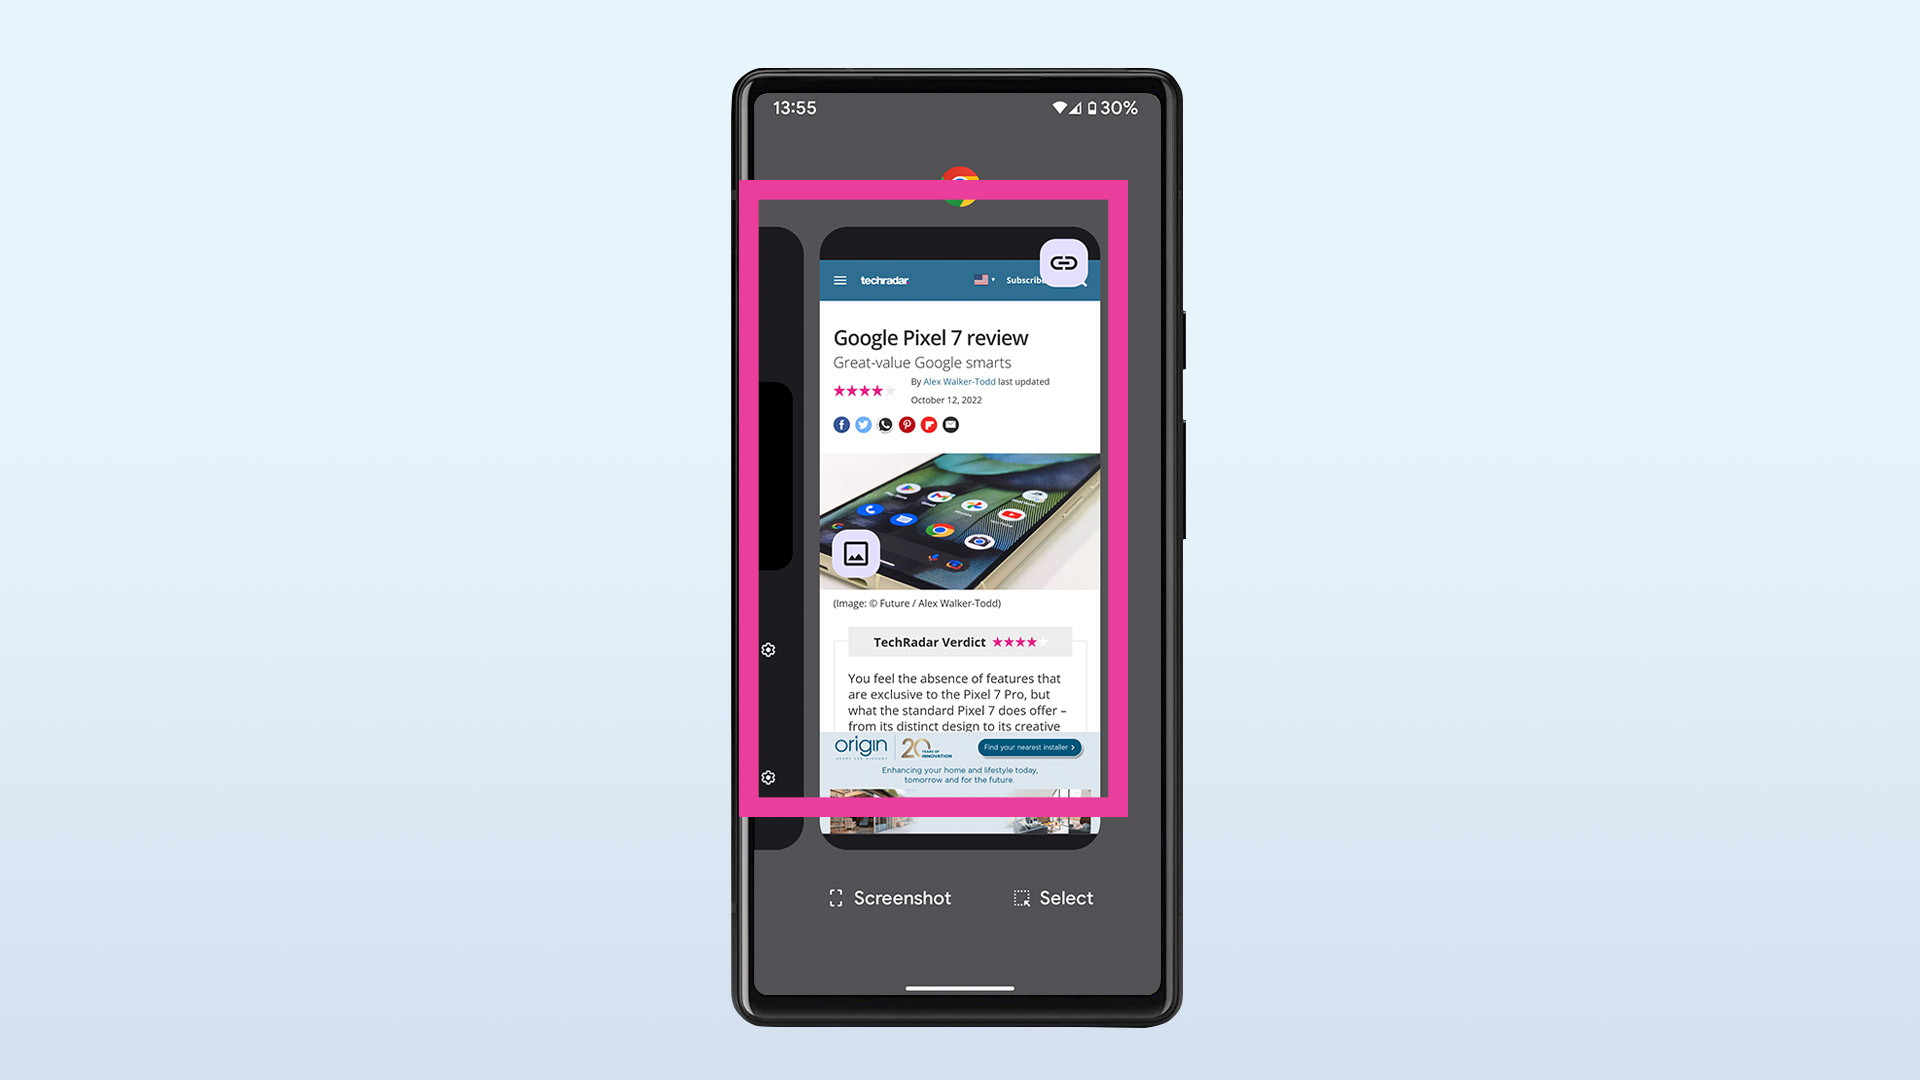
Finally, you're now in a position to use gestures to take a screenshot. Simply swipe up from bottom of the screen and hold, then release. This will show your most recently opened apps carousel.
7. Take your screenshot!
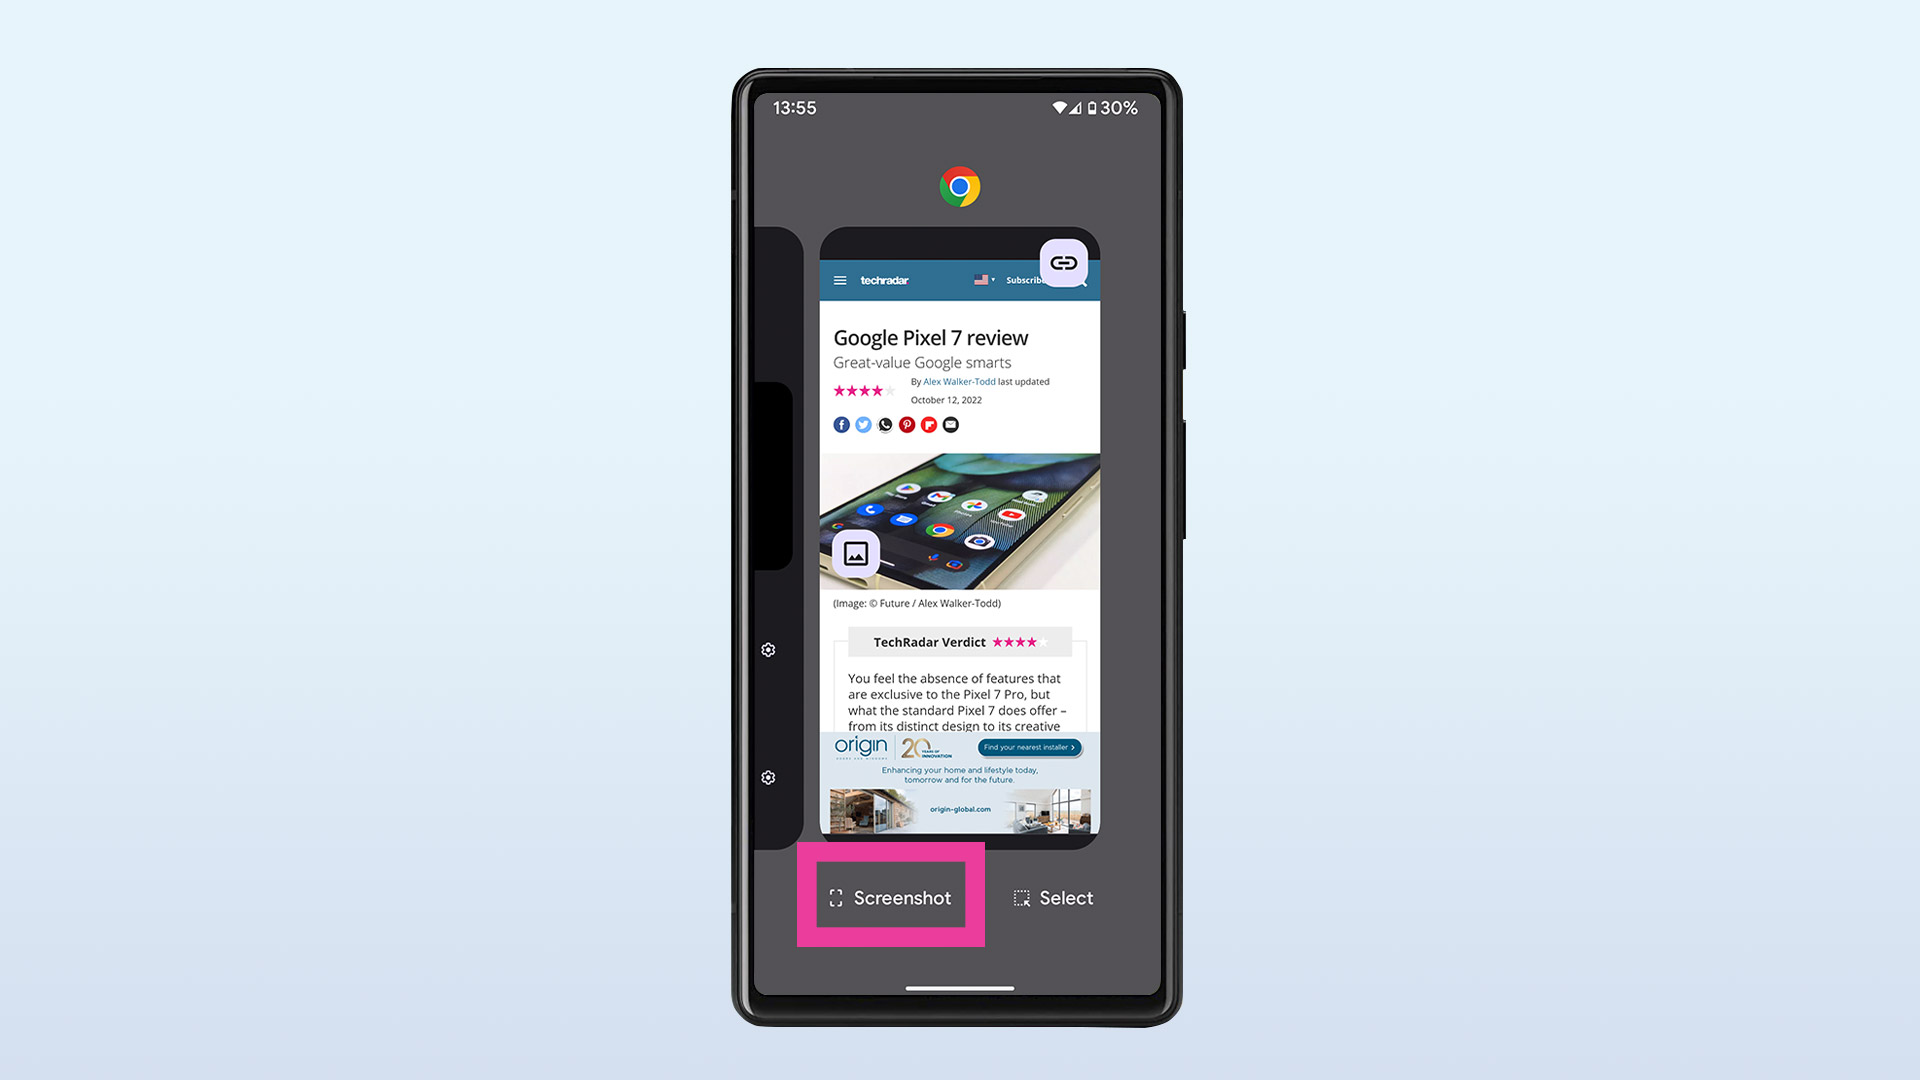
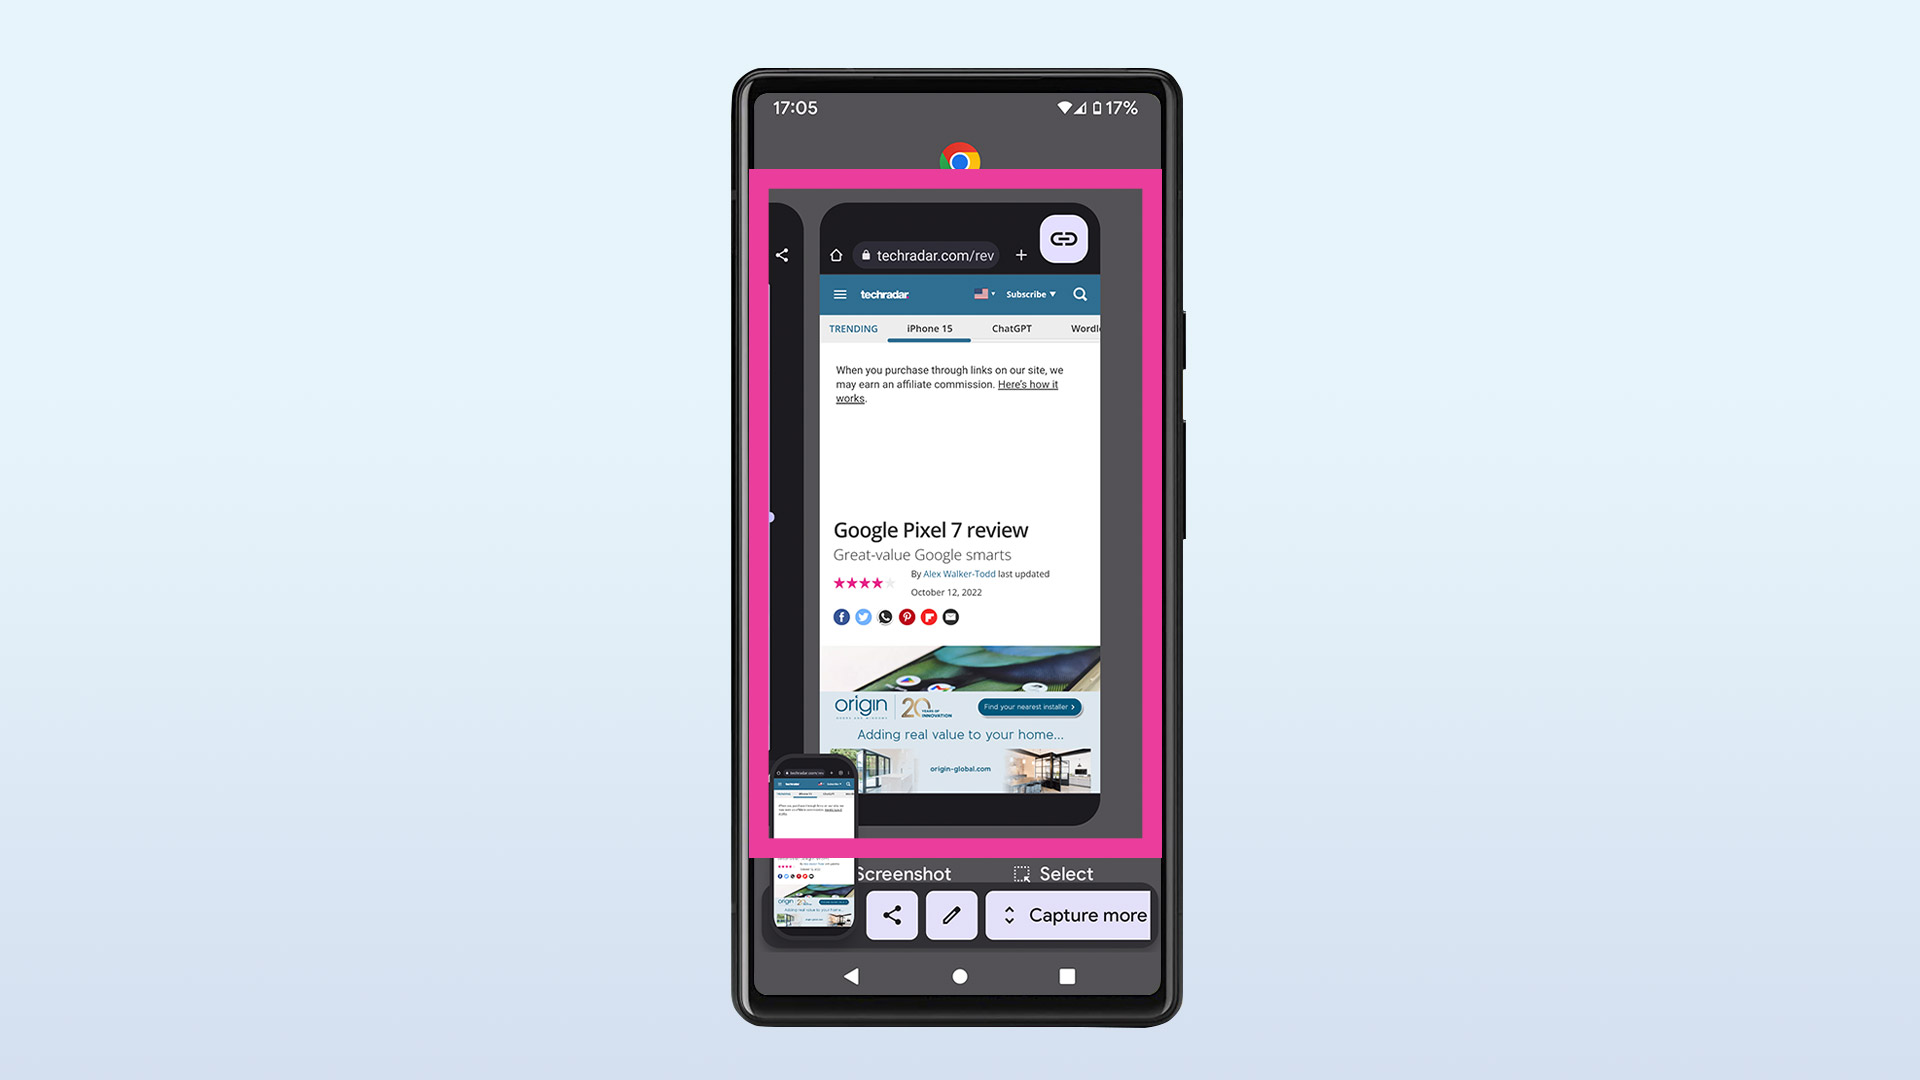
At the bottom of the screen, you'll see a Screenshot prompt. Simply swipe right until you get to the app you want to capture, then click Screenshot.
Note that you will only be able to screenshot one of your open windows in this way. If, for instance, you have multiple Chrome tabs open, this method will only screenshot whichever one you were last looking at.
How to screenshot on a Google Pixel using 3-button navigation
This is essentially the same as using Gestures, other than the very last bit, but we'll go through it step by step again anyway.
1. Open the Settings menu
If you want to use Three-button navigation, start by going to your settings menu.
2. Scroll down to System
3. Select Gestures in the System menu
4. Choose System Navigation
5. Select 3-button Navigation
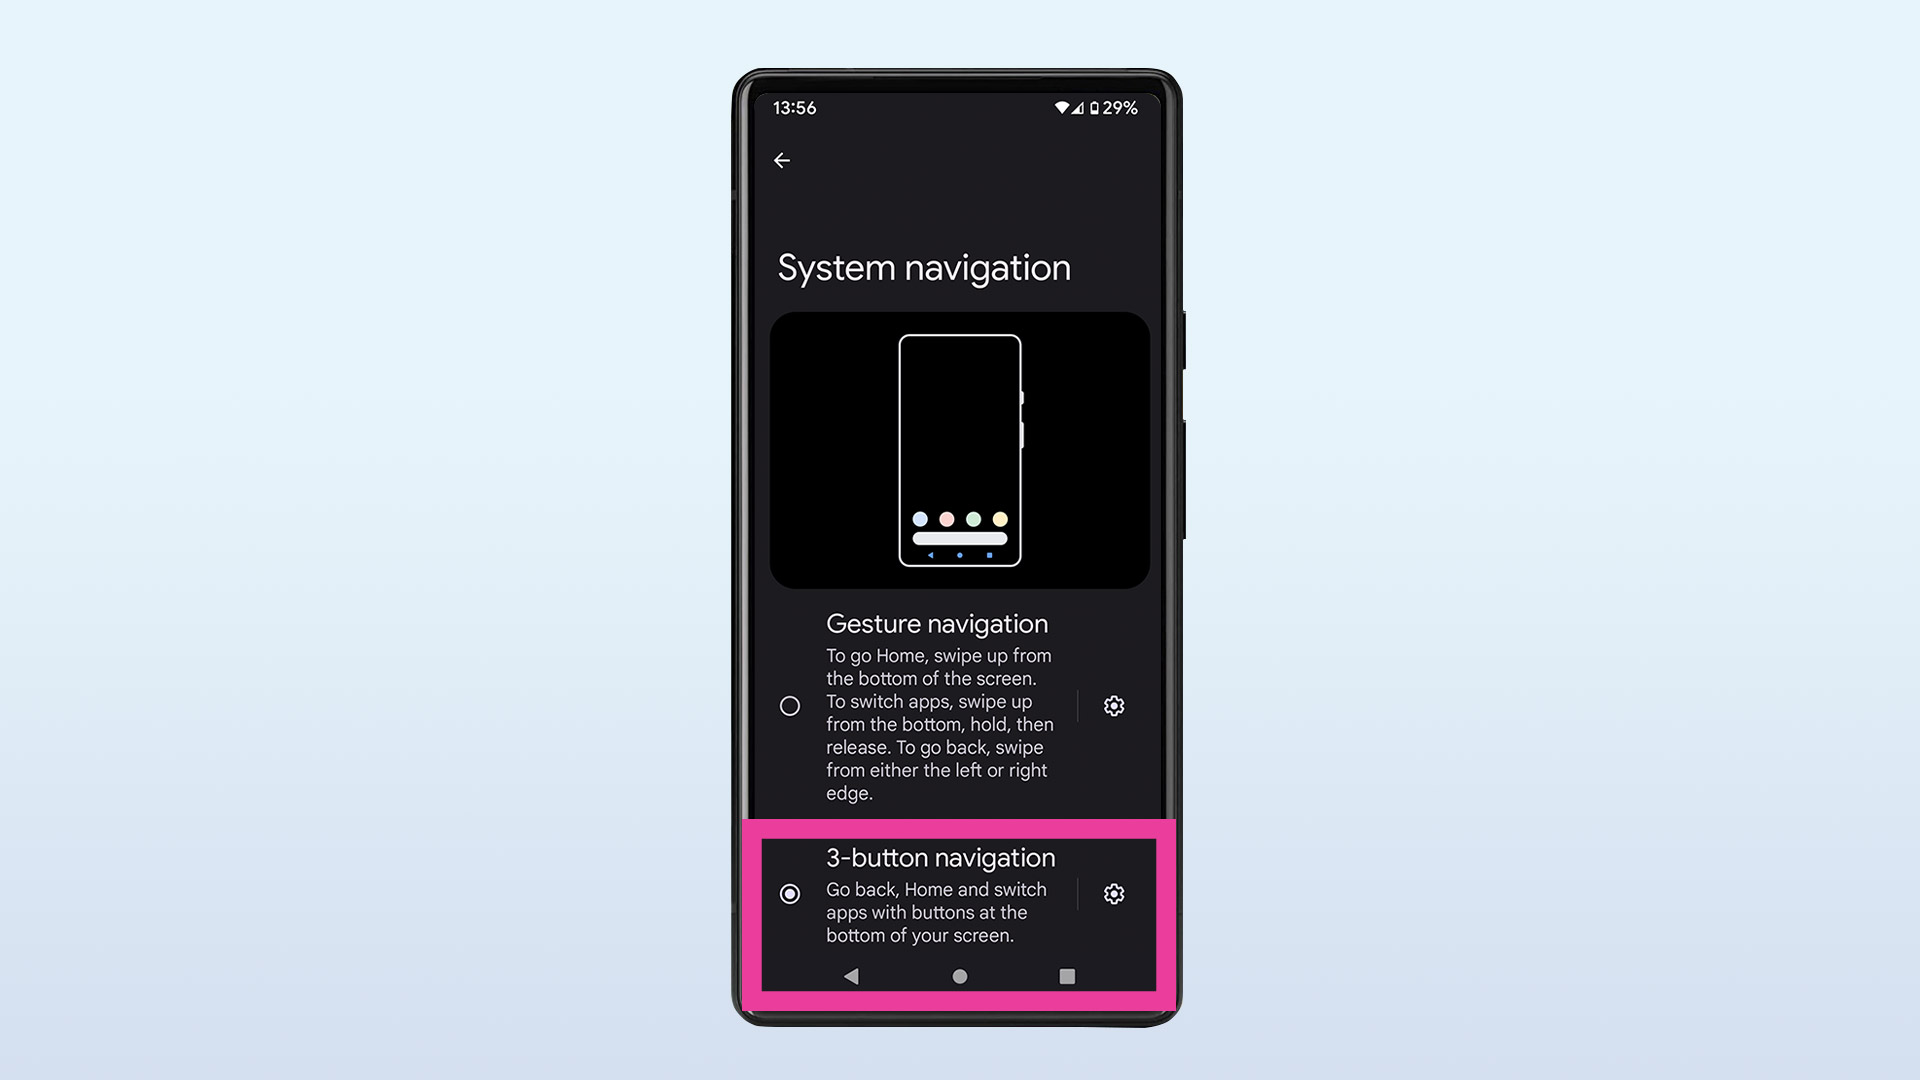
This time, rather than choosing Gestures, go for the other option, 3-button Navigation.
6. Click the Overview button to open an app
The 3-button navigation method gives you a triangle in the bottom left of the phone screen (the back button), circle in the center (Home) and a square in the bottom right (Overview). The latter shows your recently used apps.
Press the square once to use it.
7. Take your screenshot!
As with the Swipe method, you then simply select the app you want to capture, then click Screenshot at the bottom of the screen.
Again, you'll be able to Share, Edit or Capture more once you've taken it.
How to screenshot on a Google Pixel using the back-tap method
Google Pixels include a back-tap feature, which allows you to carry out certain commands by tapping twice on the rear of the phone. There are multiple commands you can assign to it, with screenshot being one of them.
1. Open the Settings menu and scroll down to System
2. Select Gestures
3. Select Quick Tap to start actions
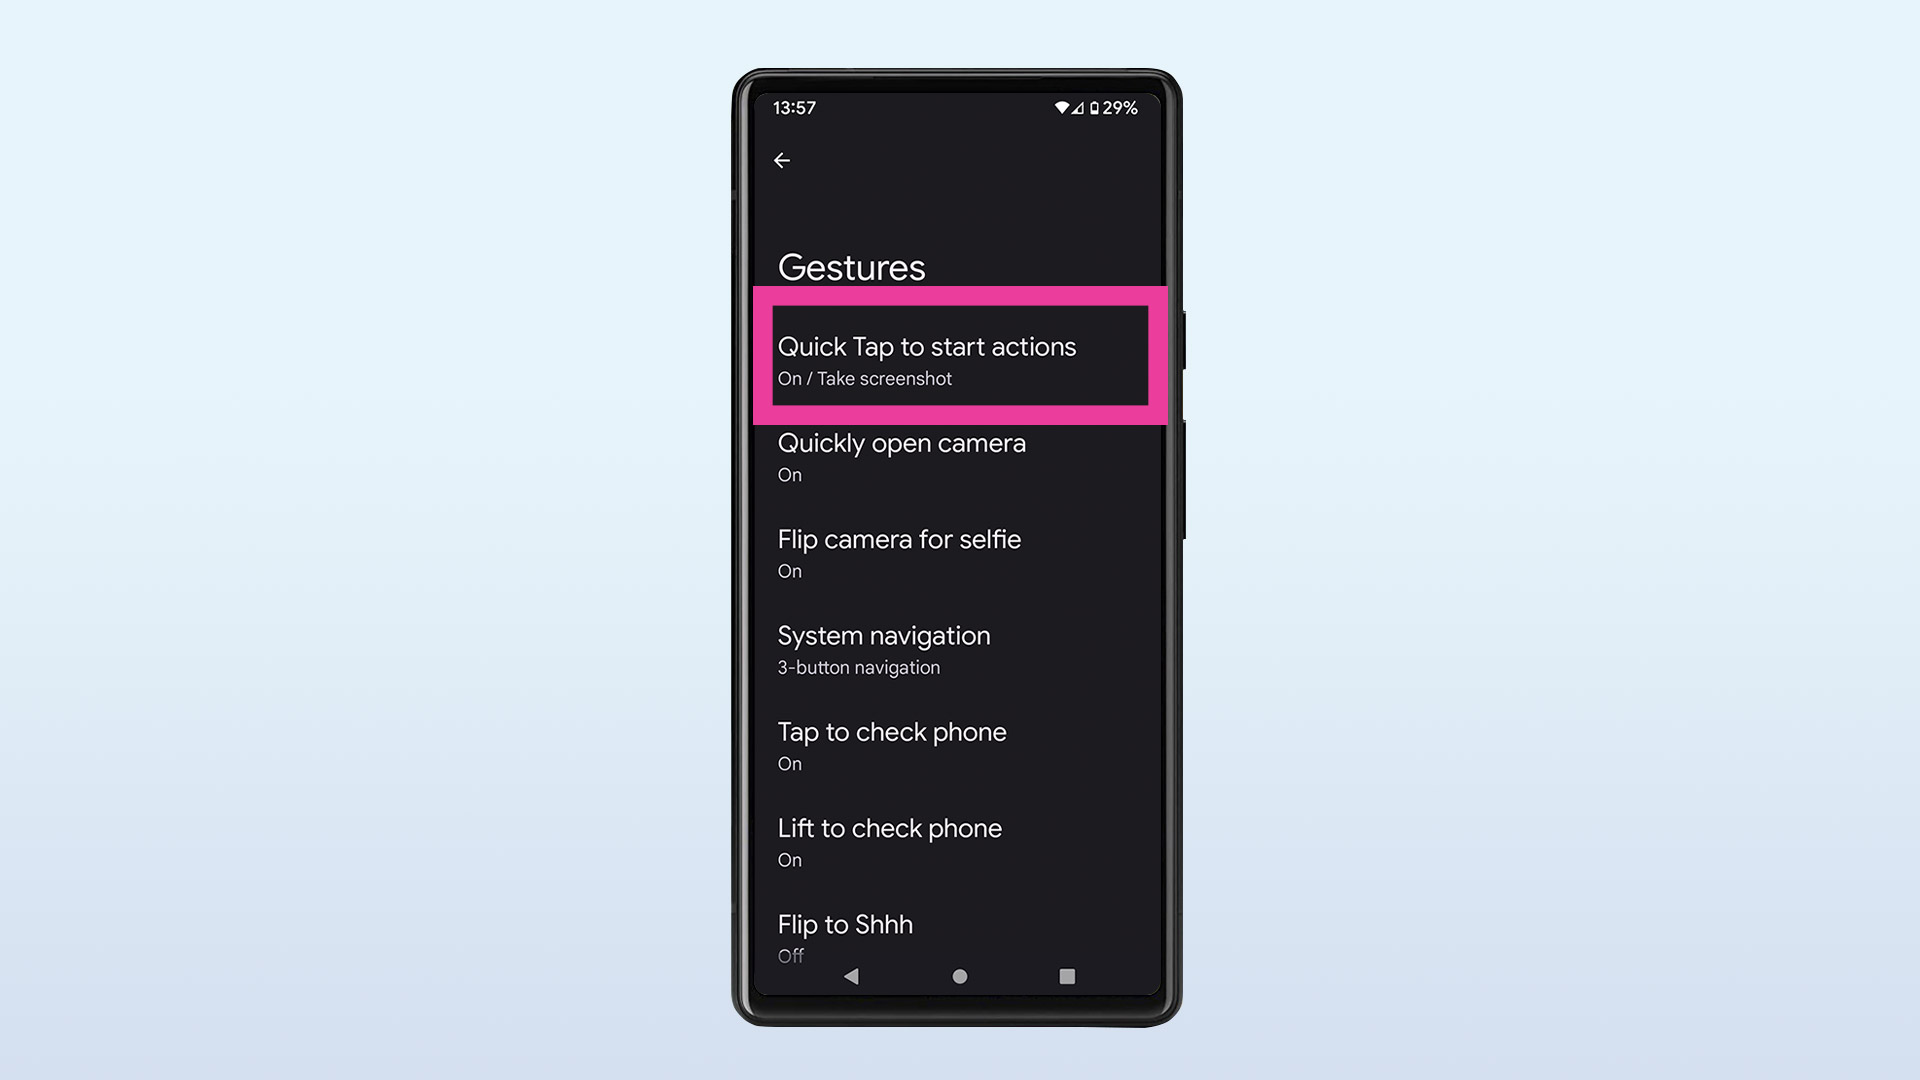
4. Select Use Quick Tap
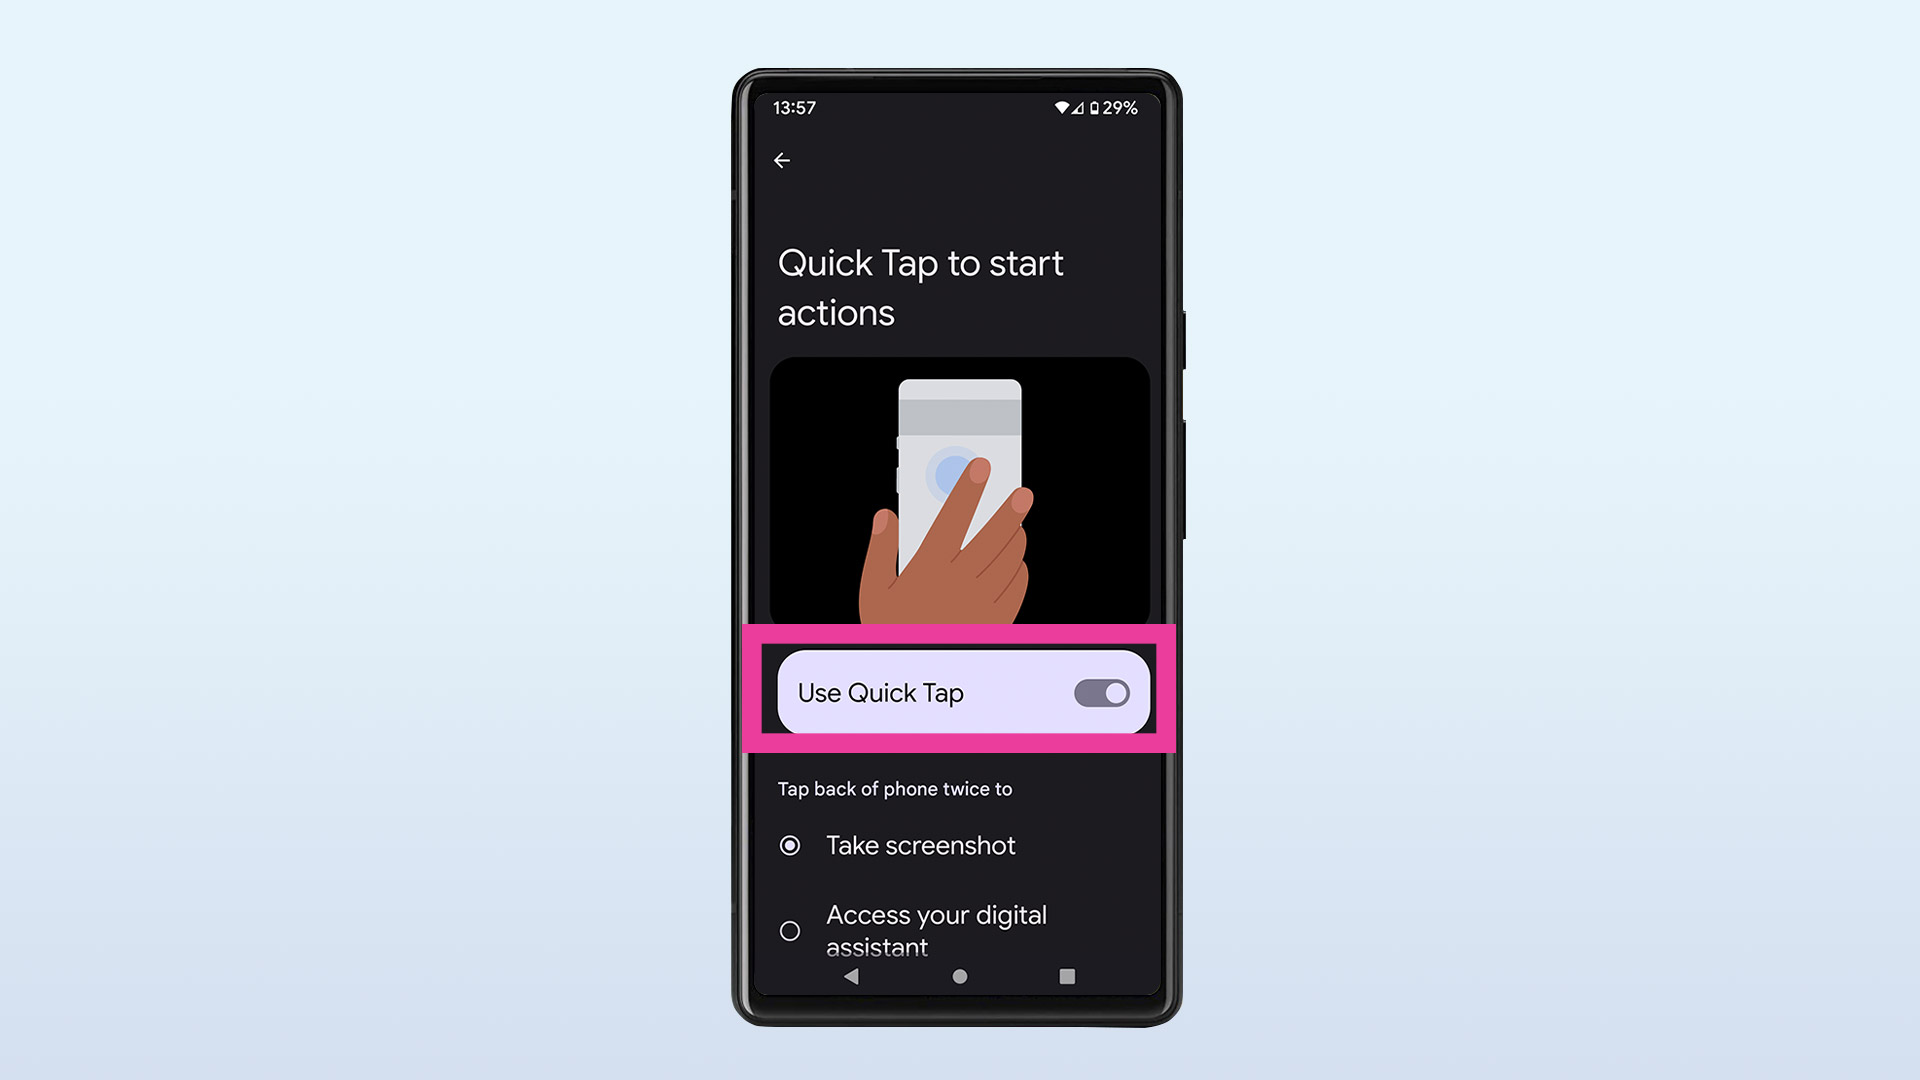
If you don't select Use Quick Tap at the top of the screen the options below will all be grayed out.
5. Choose screenshot
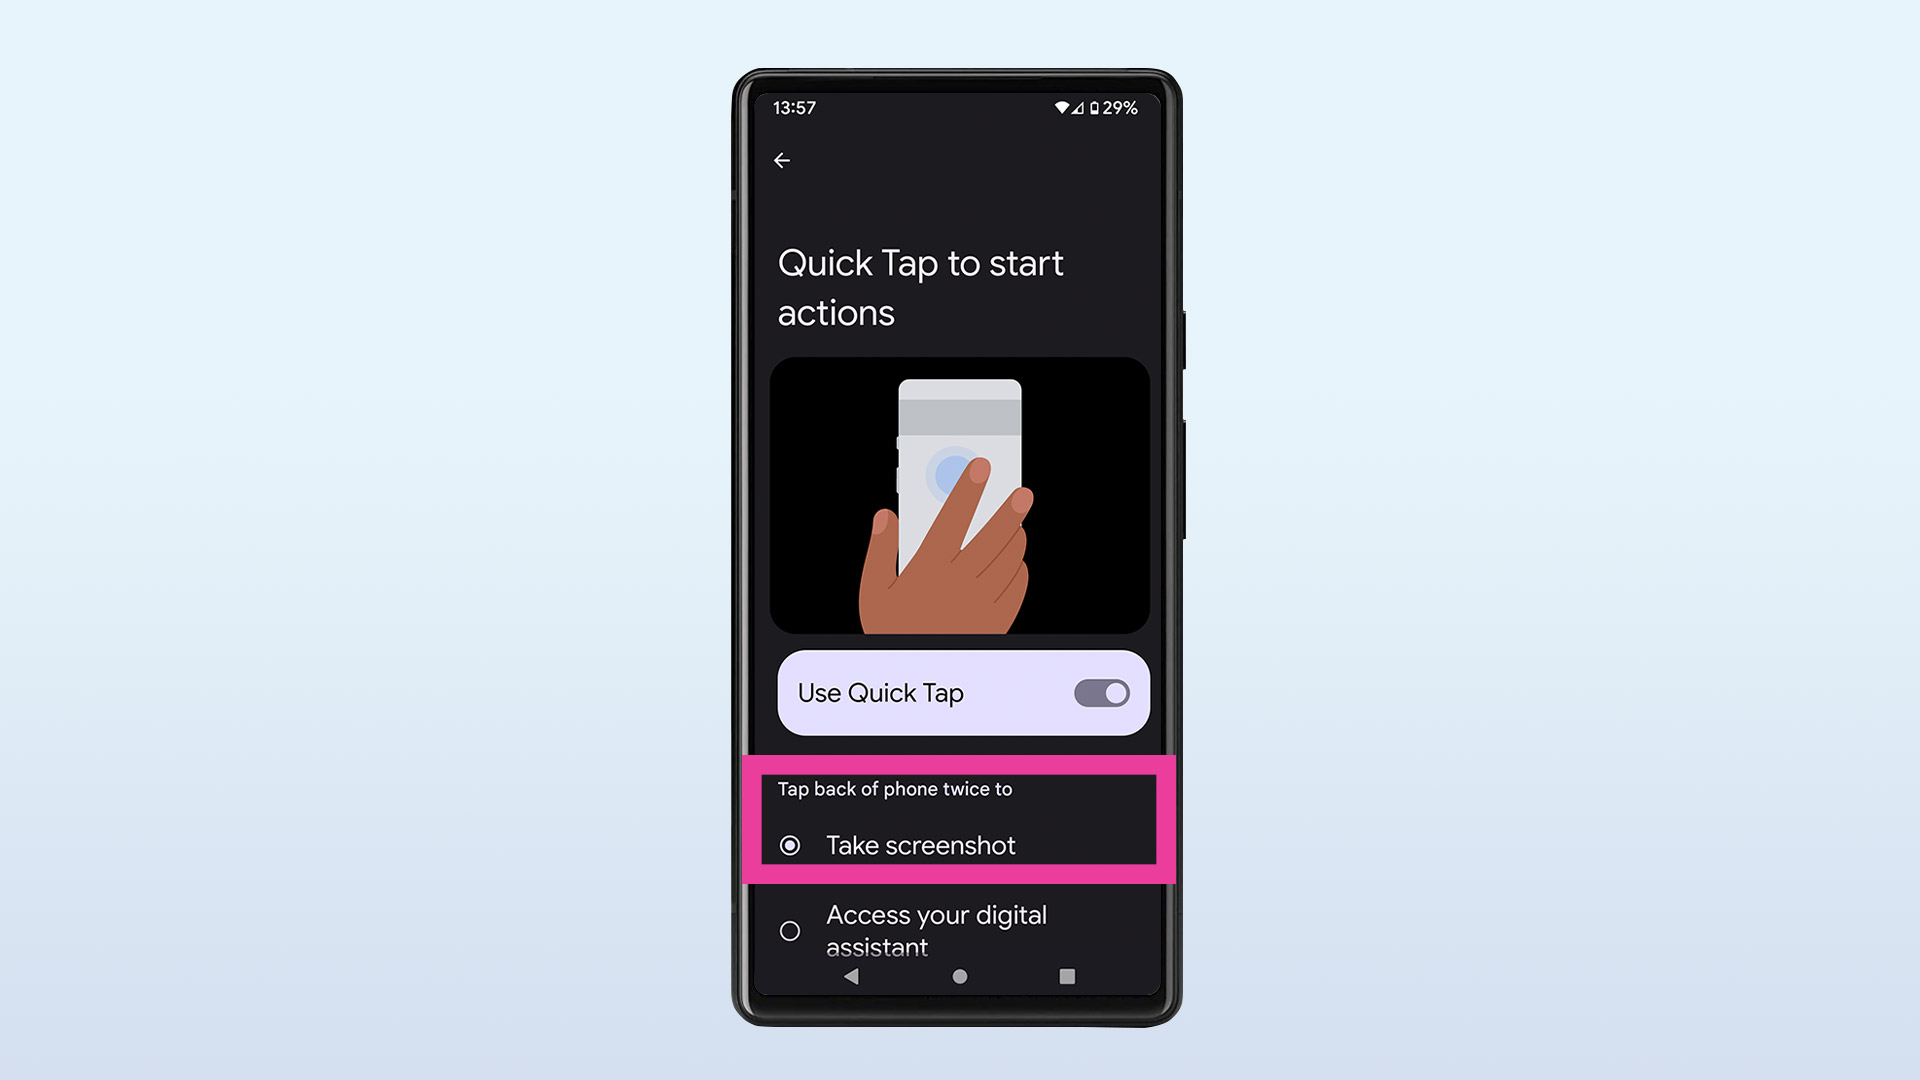
This is the first option in the list, helpfully.
6. Tap the back of your Pixel phone twice in quick succession
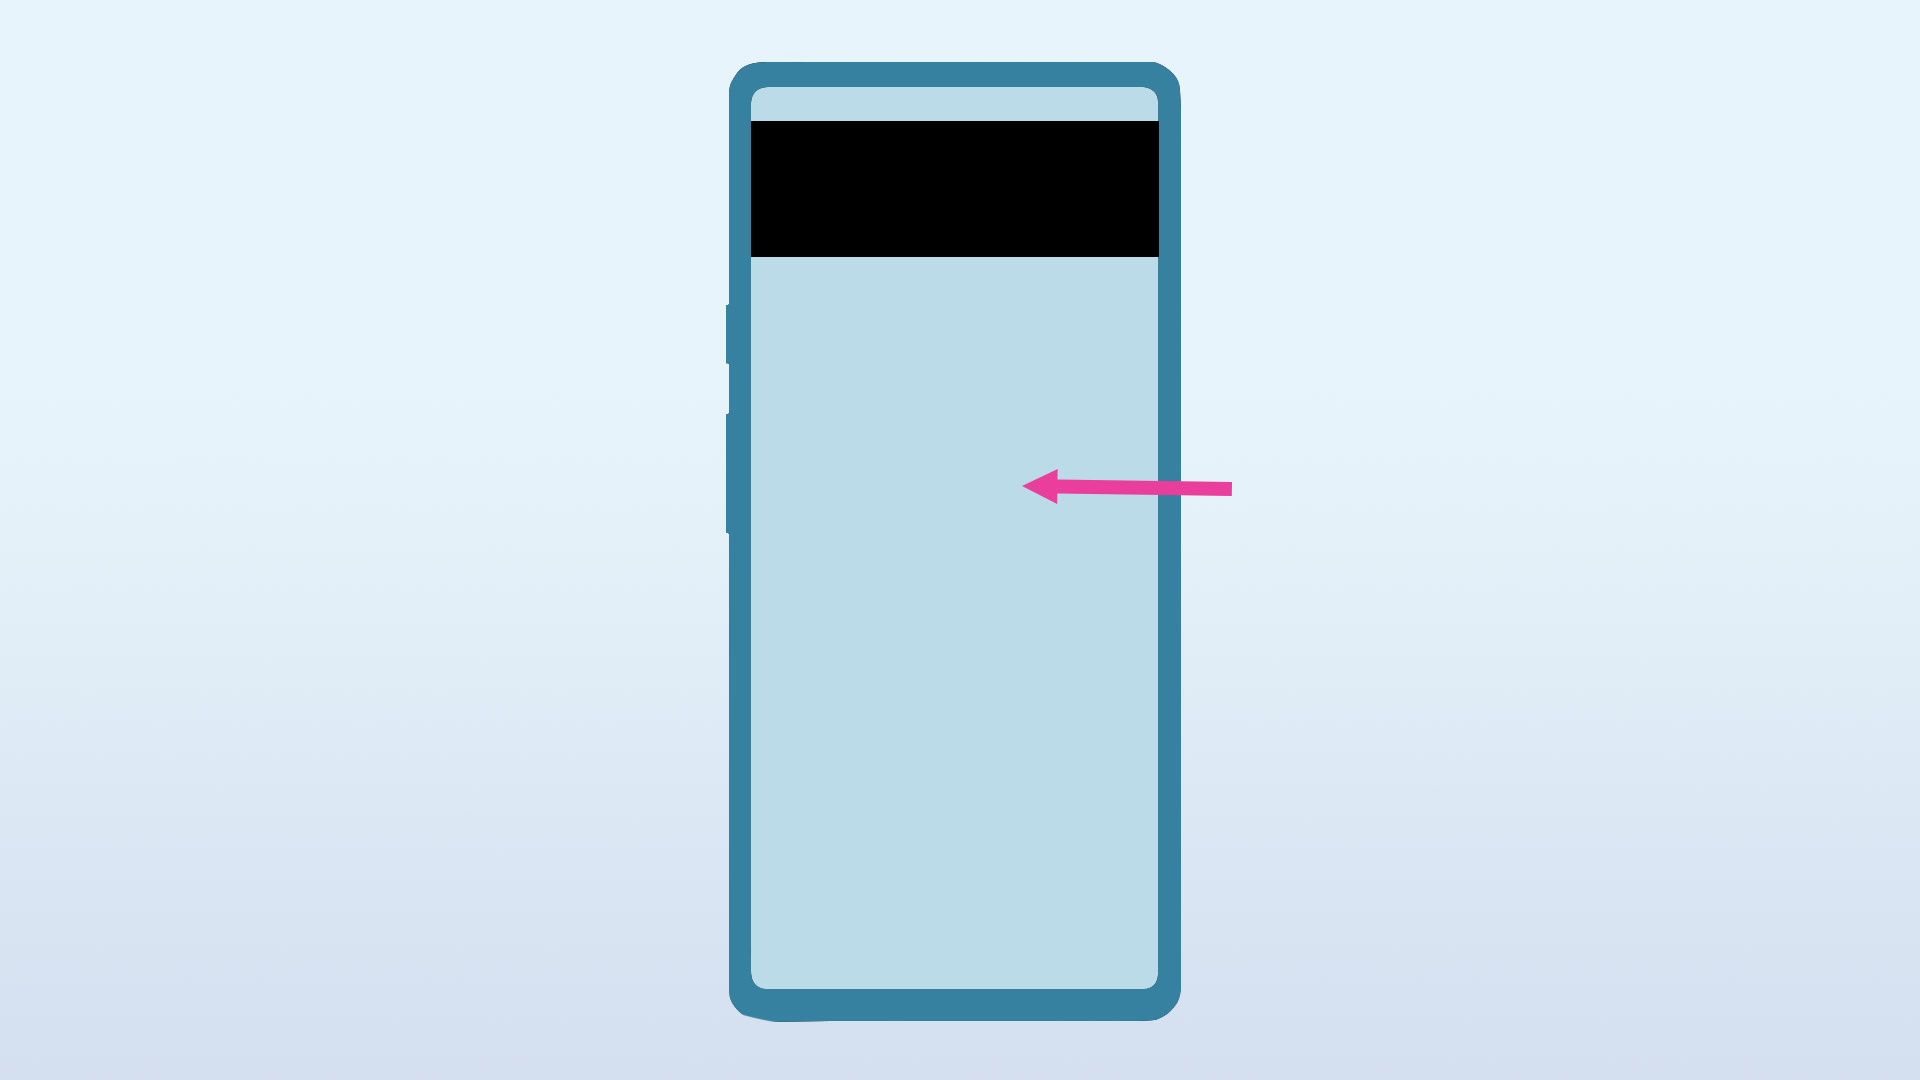
Simply tap the rear of the phone twice, quickly. This generally works pretty smoothly. If you find it's too easy to trigger, though, there is an option down the bottom of this menu to Require stronger taps.
Once again, carrying out this option will create a thumbnail of the screenshot and enable you to Share, Edit or Capture More as you desire.
How to screenshot on a Google Pixel using voice commands
Google Assistant might not be the most obvious tool to use for screenshots, but it does the job quickly and slickly. Here's how you do it.
1. Fire up Google Assistant
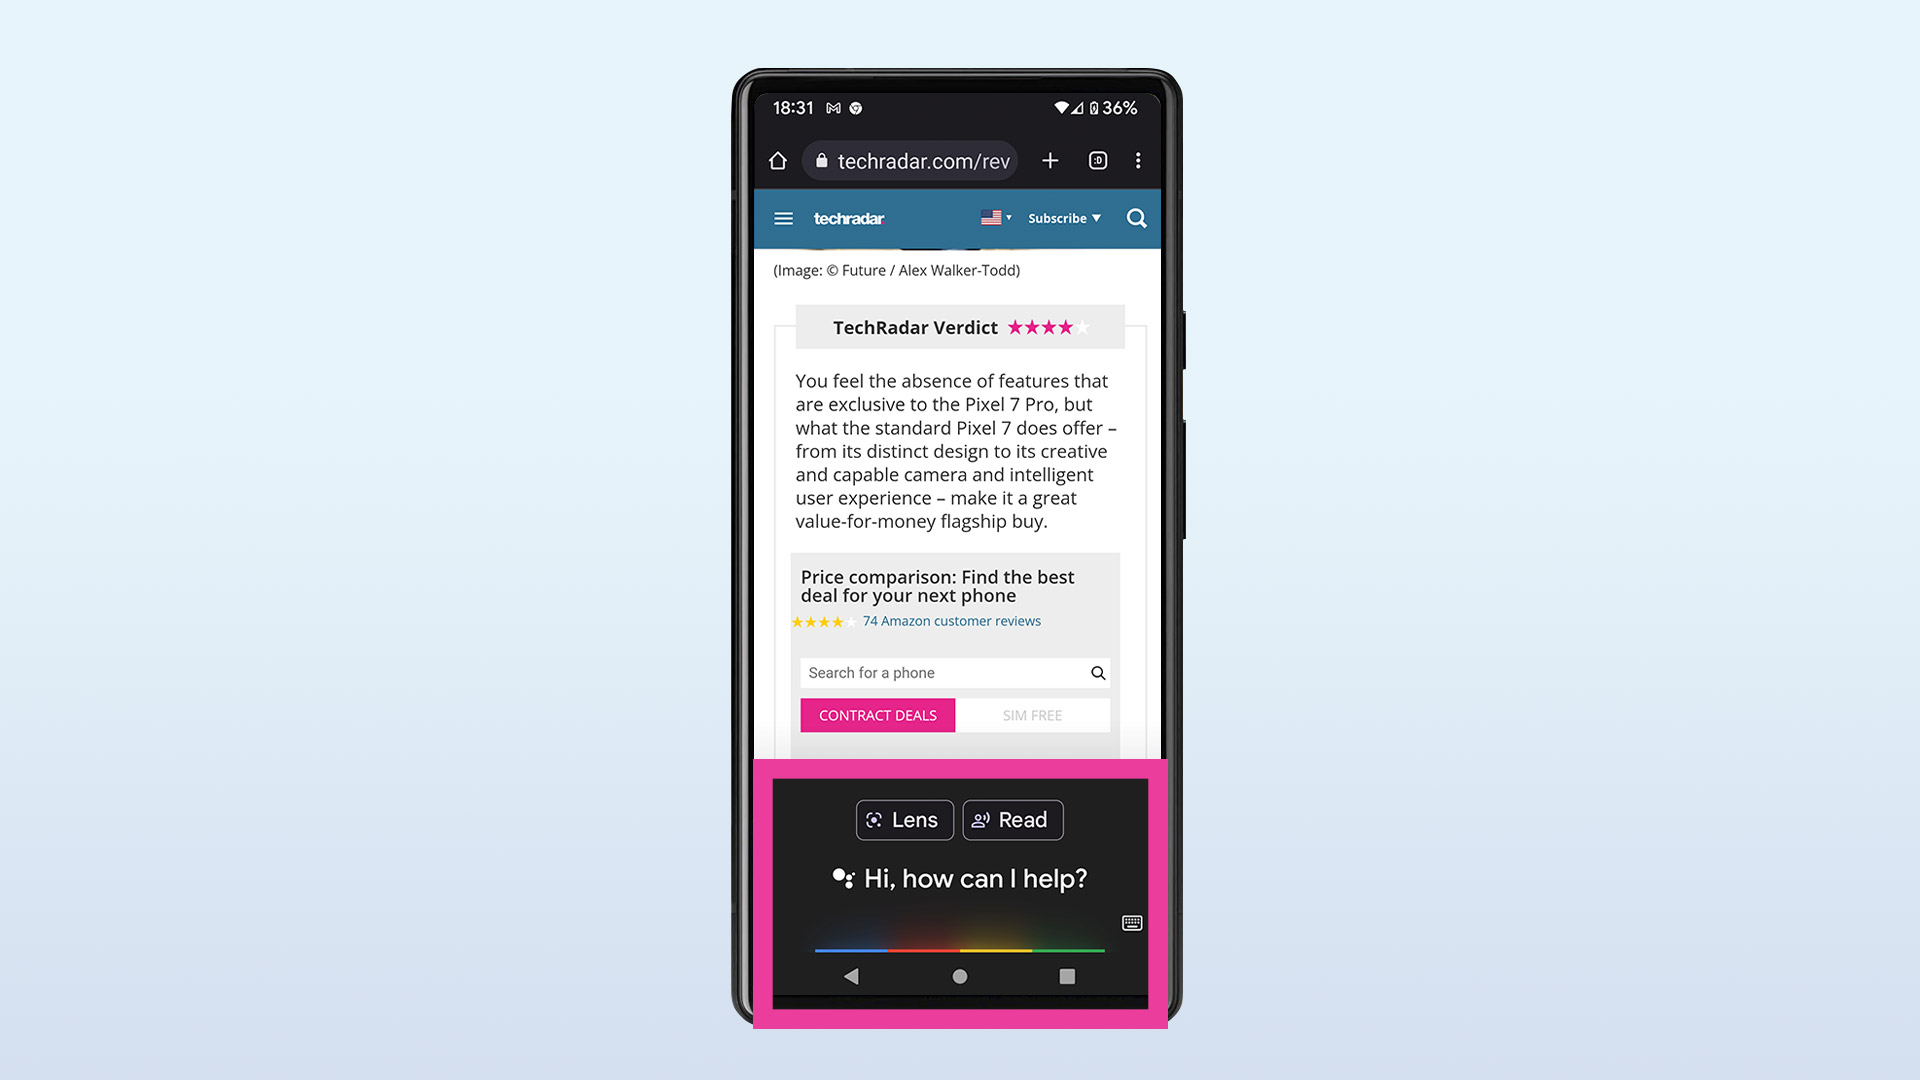
Exactly how you do this will depend on what method you have set. You can do it via the back-tap approach, for instance, or via the power button, or by saying "Hey Google" or a different wake phrase.
2. Ask Assistant to take a screenshot
It really is that simple. And no, we're not going to tell you how to speak; you probably have that bit figured out.
Your screenshots will be saved, as with all of the other methods, into the screenshots folder within the Images folder in the Files app. They can also be accessed from within Google Photos, if you've set it to auto-save to that app.
How to take a scrolling screenshot on a Google Pixel
Some of the above methods also enable you to select a longer-than-usual screenshot if you're viewing something that takes up more than one screen length.
1. Take your screenshot
All of the above methods will work other than Google Assistant, which doesn't appear to offer this option. The only caveat is that you have to be on an app that is compatible with it, such as Google Chrome.
2. Click Capture more

This will appear in the bottom right of the screen after you have taken your screenshot.
3. Move the crosshairs to highlight the area of the page that you wish to capture.
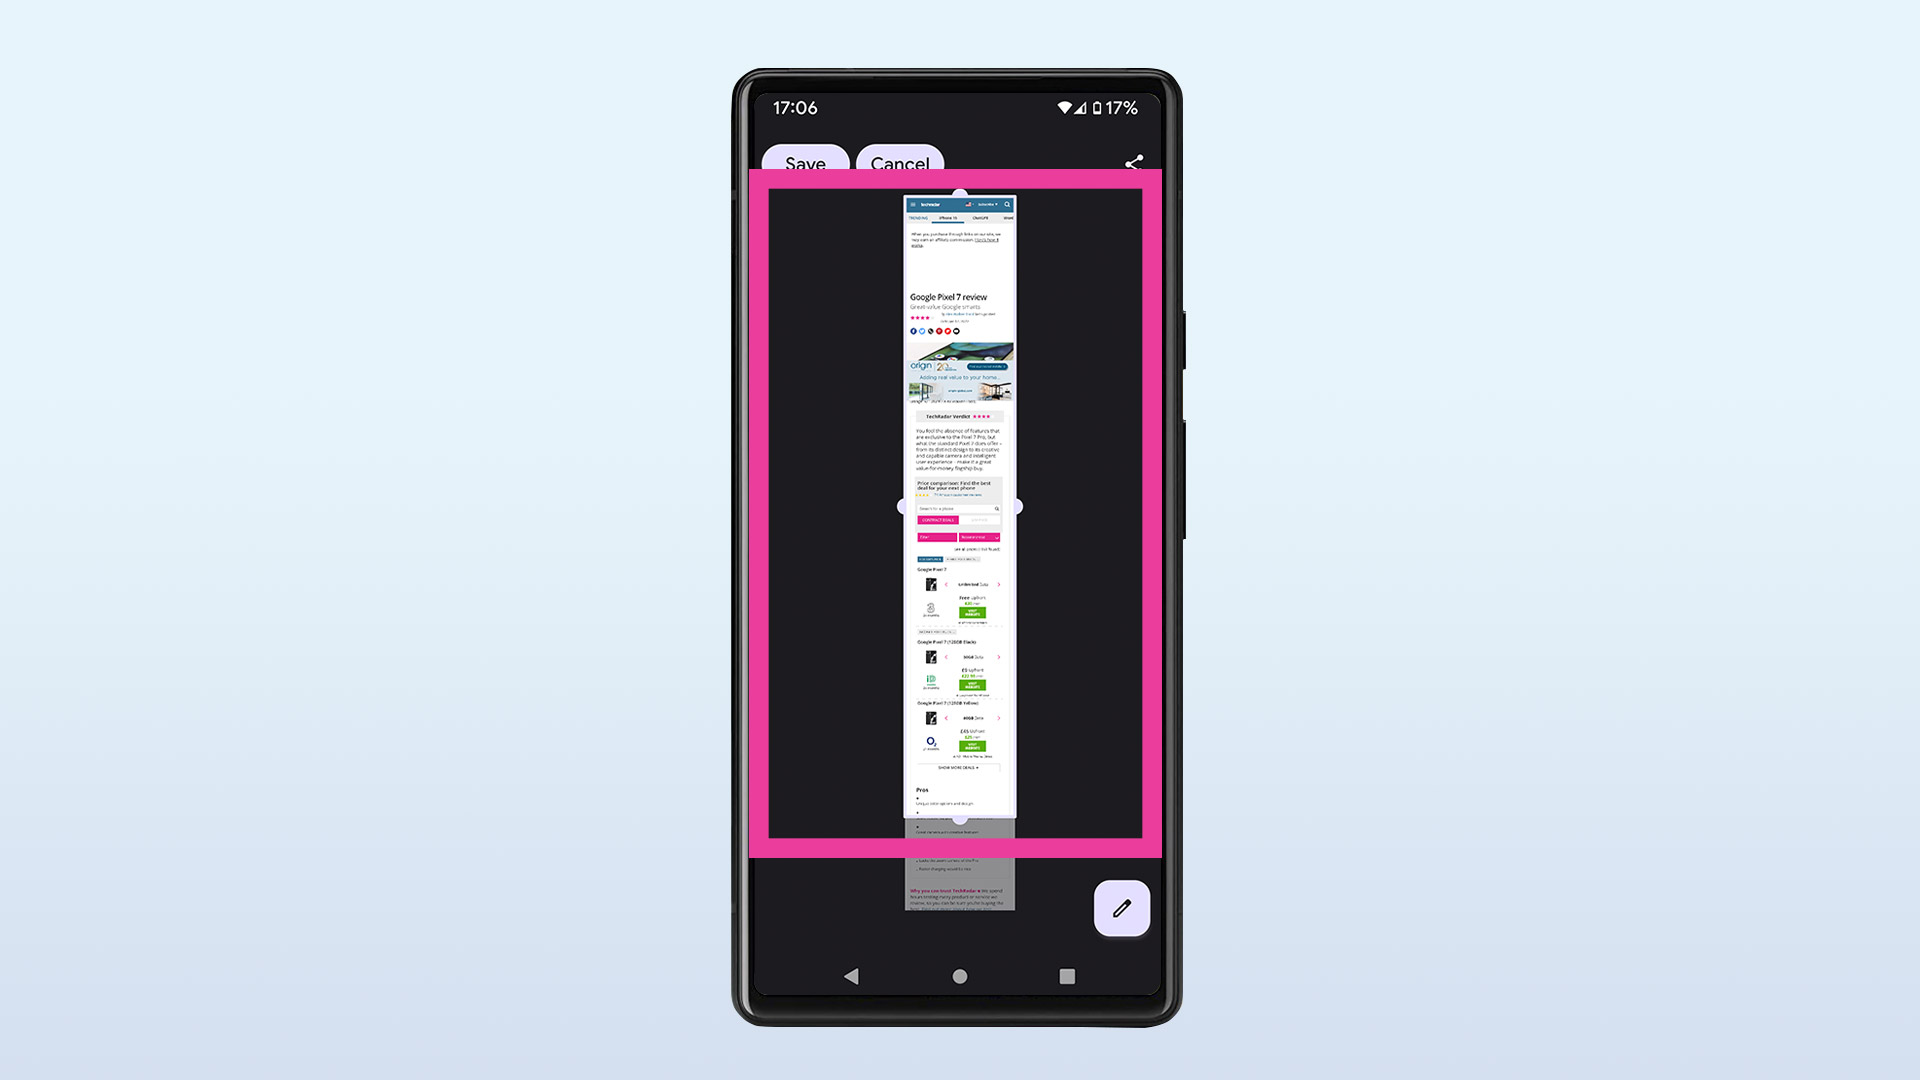
Simply drag your finger down the screen to increase the size of the screenshot.
4. Click Save
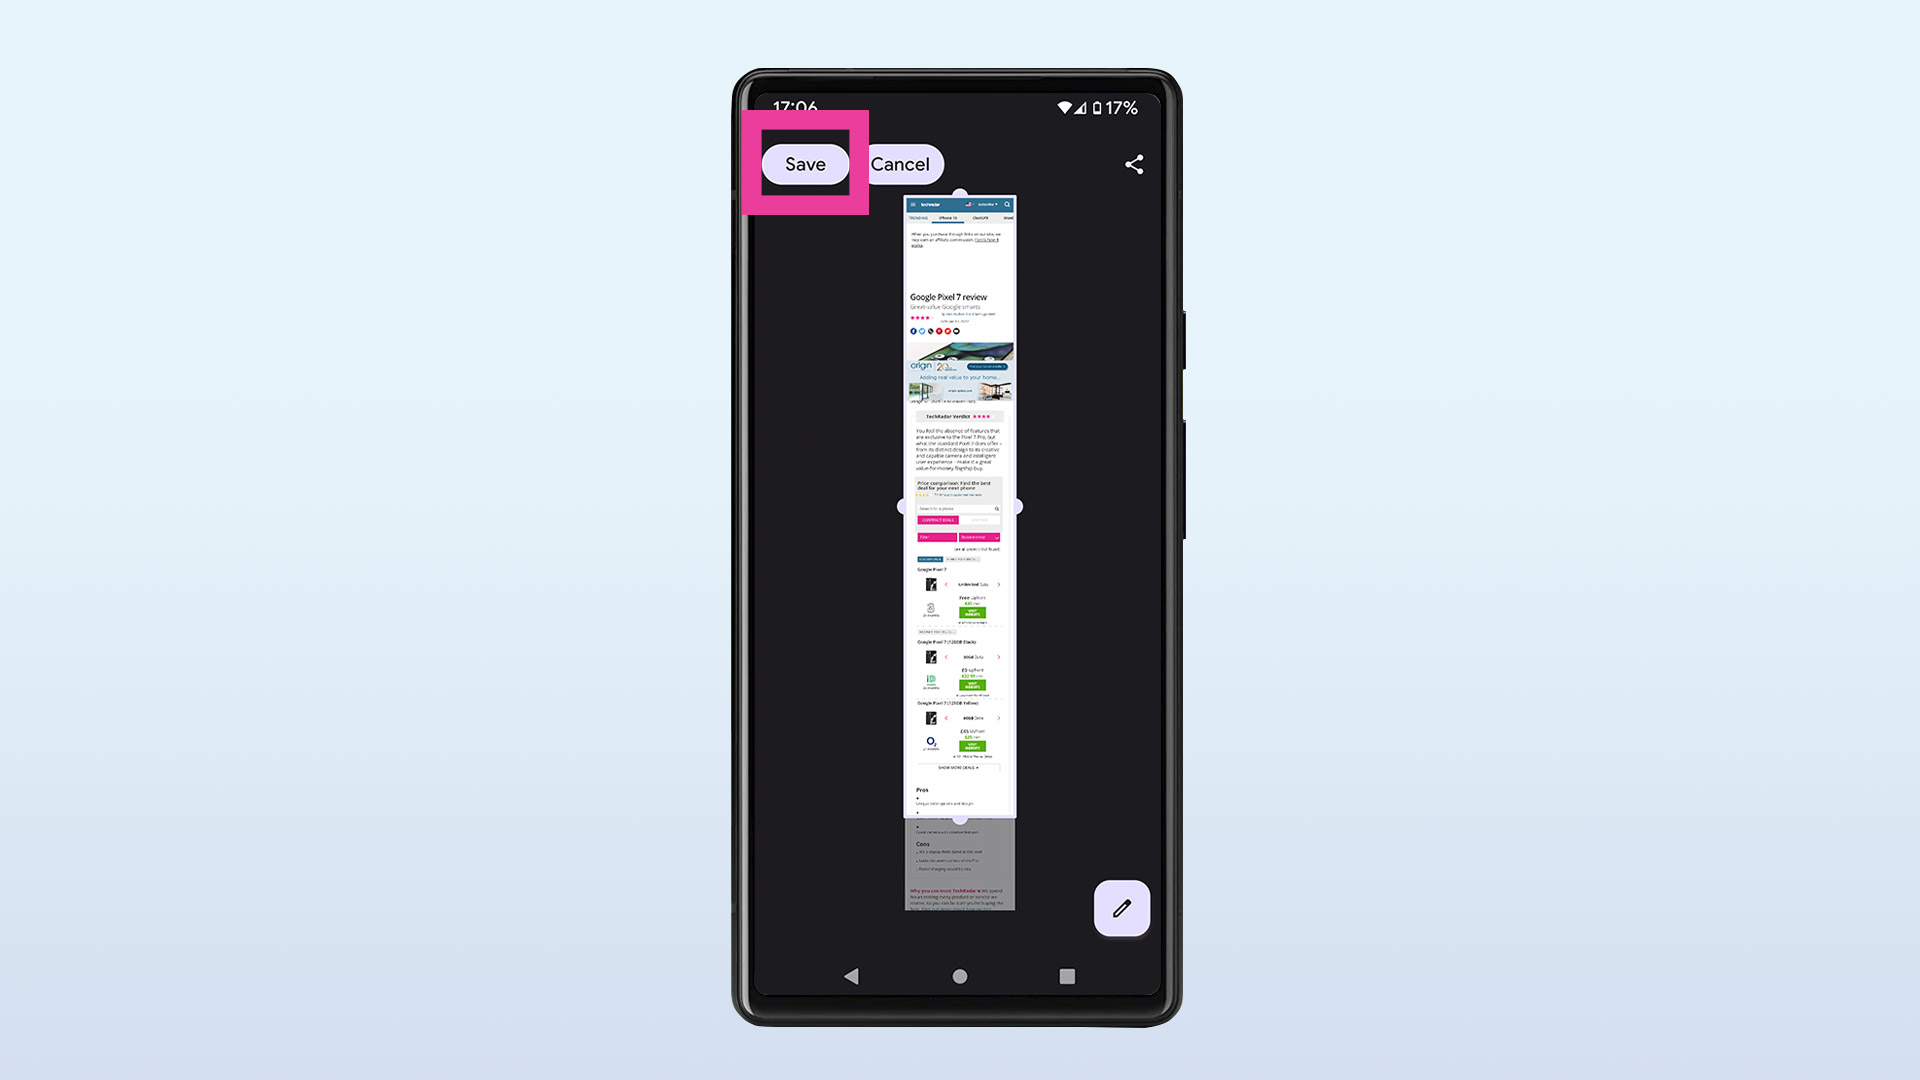
And you're done. The scrolling screenshot can now be shared and edited as a standard one can.
Want more mobile tips? Find out how to how to clear your Android phone’s cache, how to clean a phone charging port and how to block a number on Android, and if you're due an upgrade then check out our list of the best android phones.