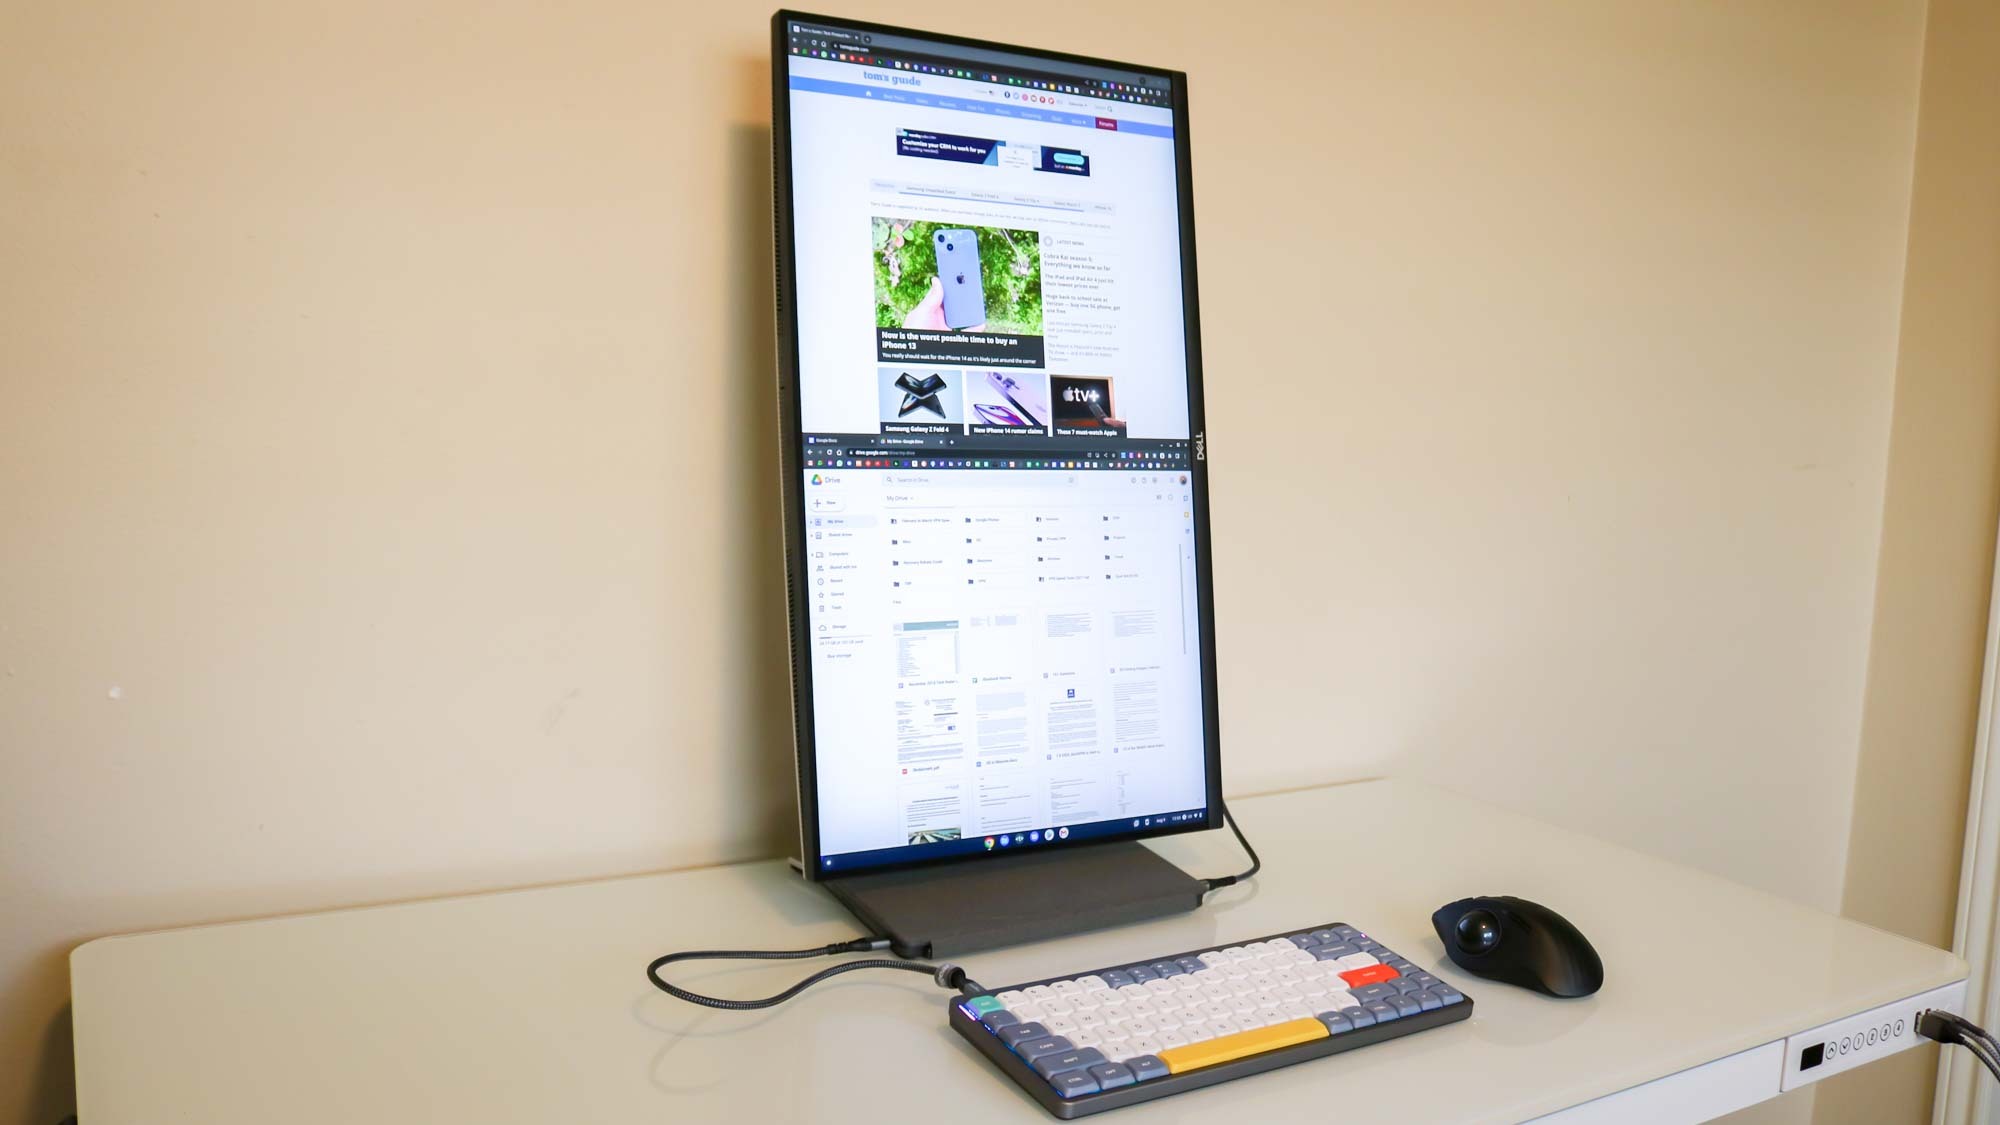
Whether you're dealing with a creative project or need a unique display set up for work, learning how to rotate the screen in Windows 11 will come in handy.
Screen rotation isn't just about aesthetics, it caters to diverse user needs. While a horizontal display is convenient for multitasking, many people prefer a vertical display for work, as it requires less vertical scrolling.
In this guide, we’ll show you how to rotate your Windows 11 screen in under a minute. And to unlock greater productivity, make sure to check out these 7 hidden Windows 11 features that will make you more productive.
How to rotate the screen in Windows 11
Follow these steps to rotate your Windows 11 screen.
1. Access Display settings

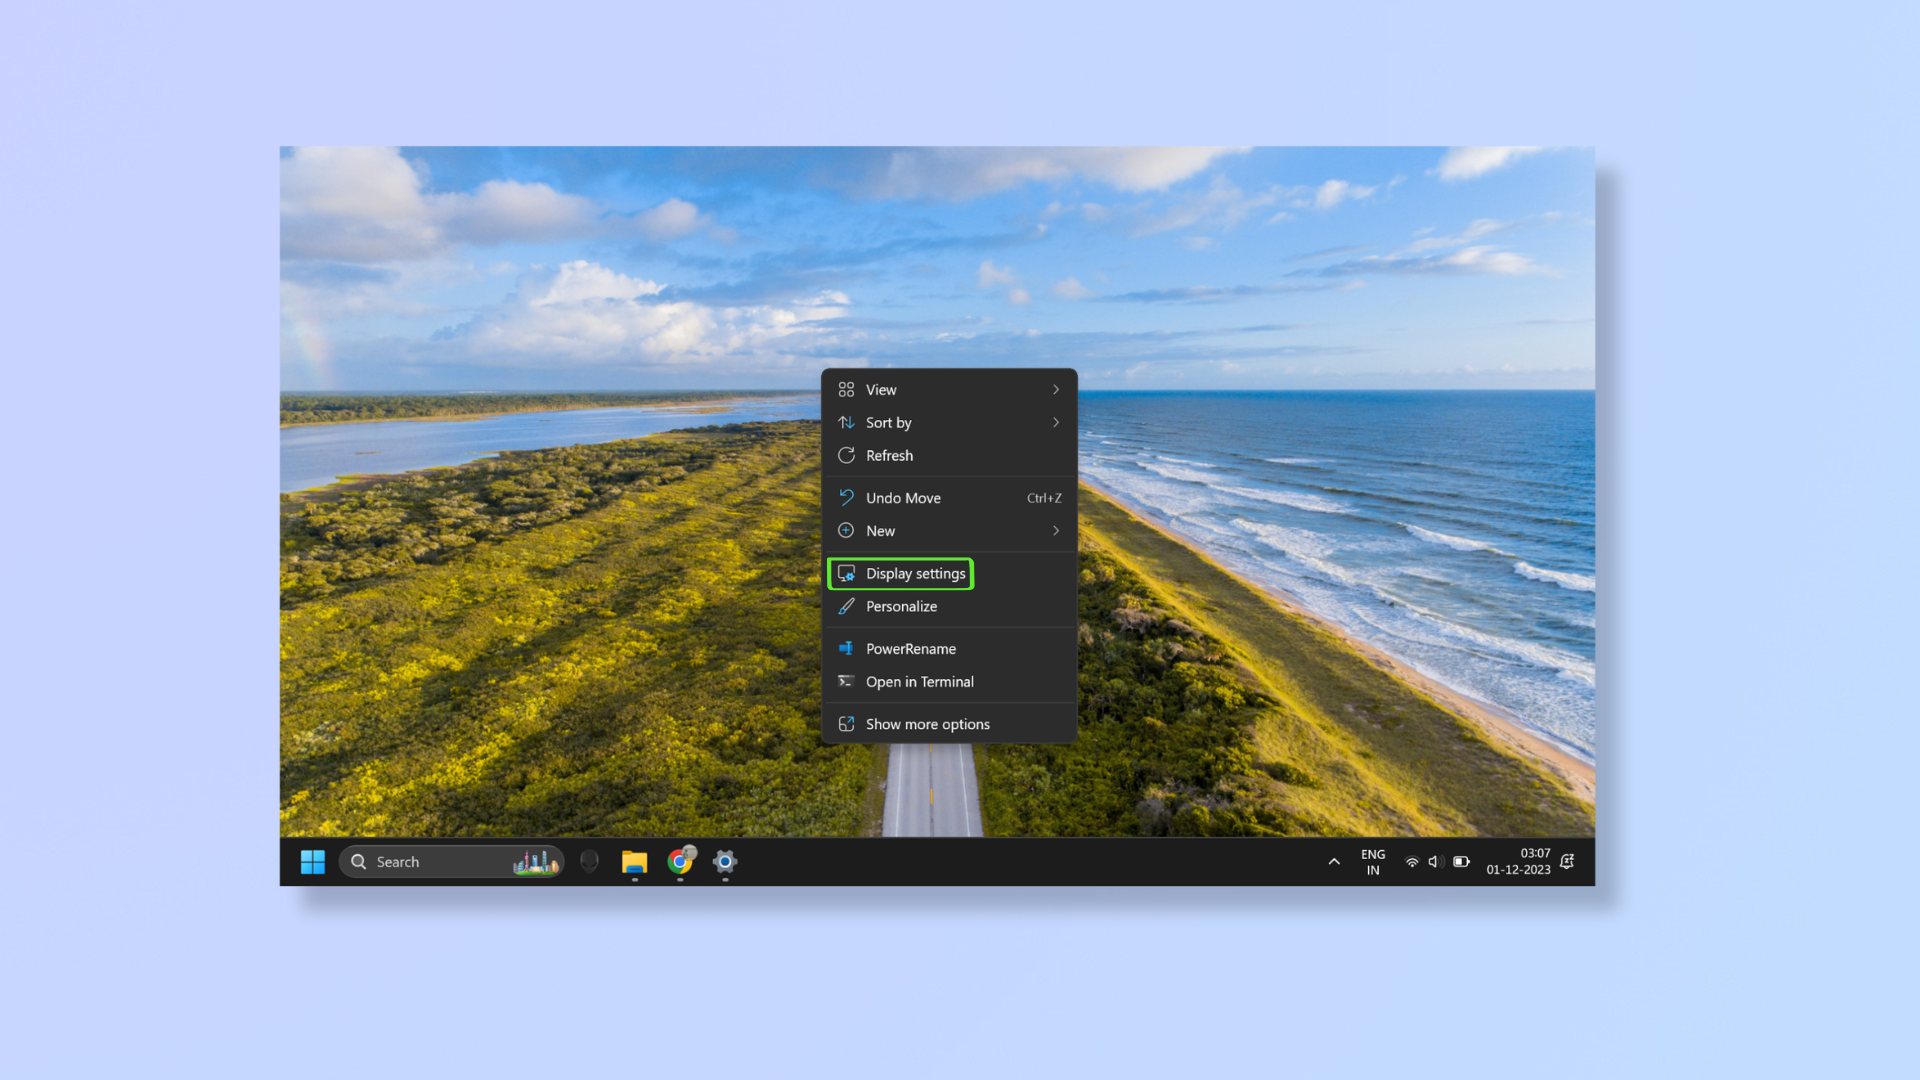
Go to the Desktop and right-click. Now select Display settings.
2. Select an orientation

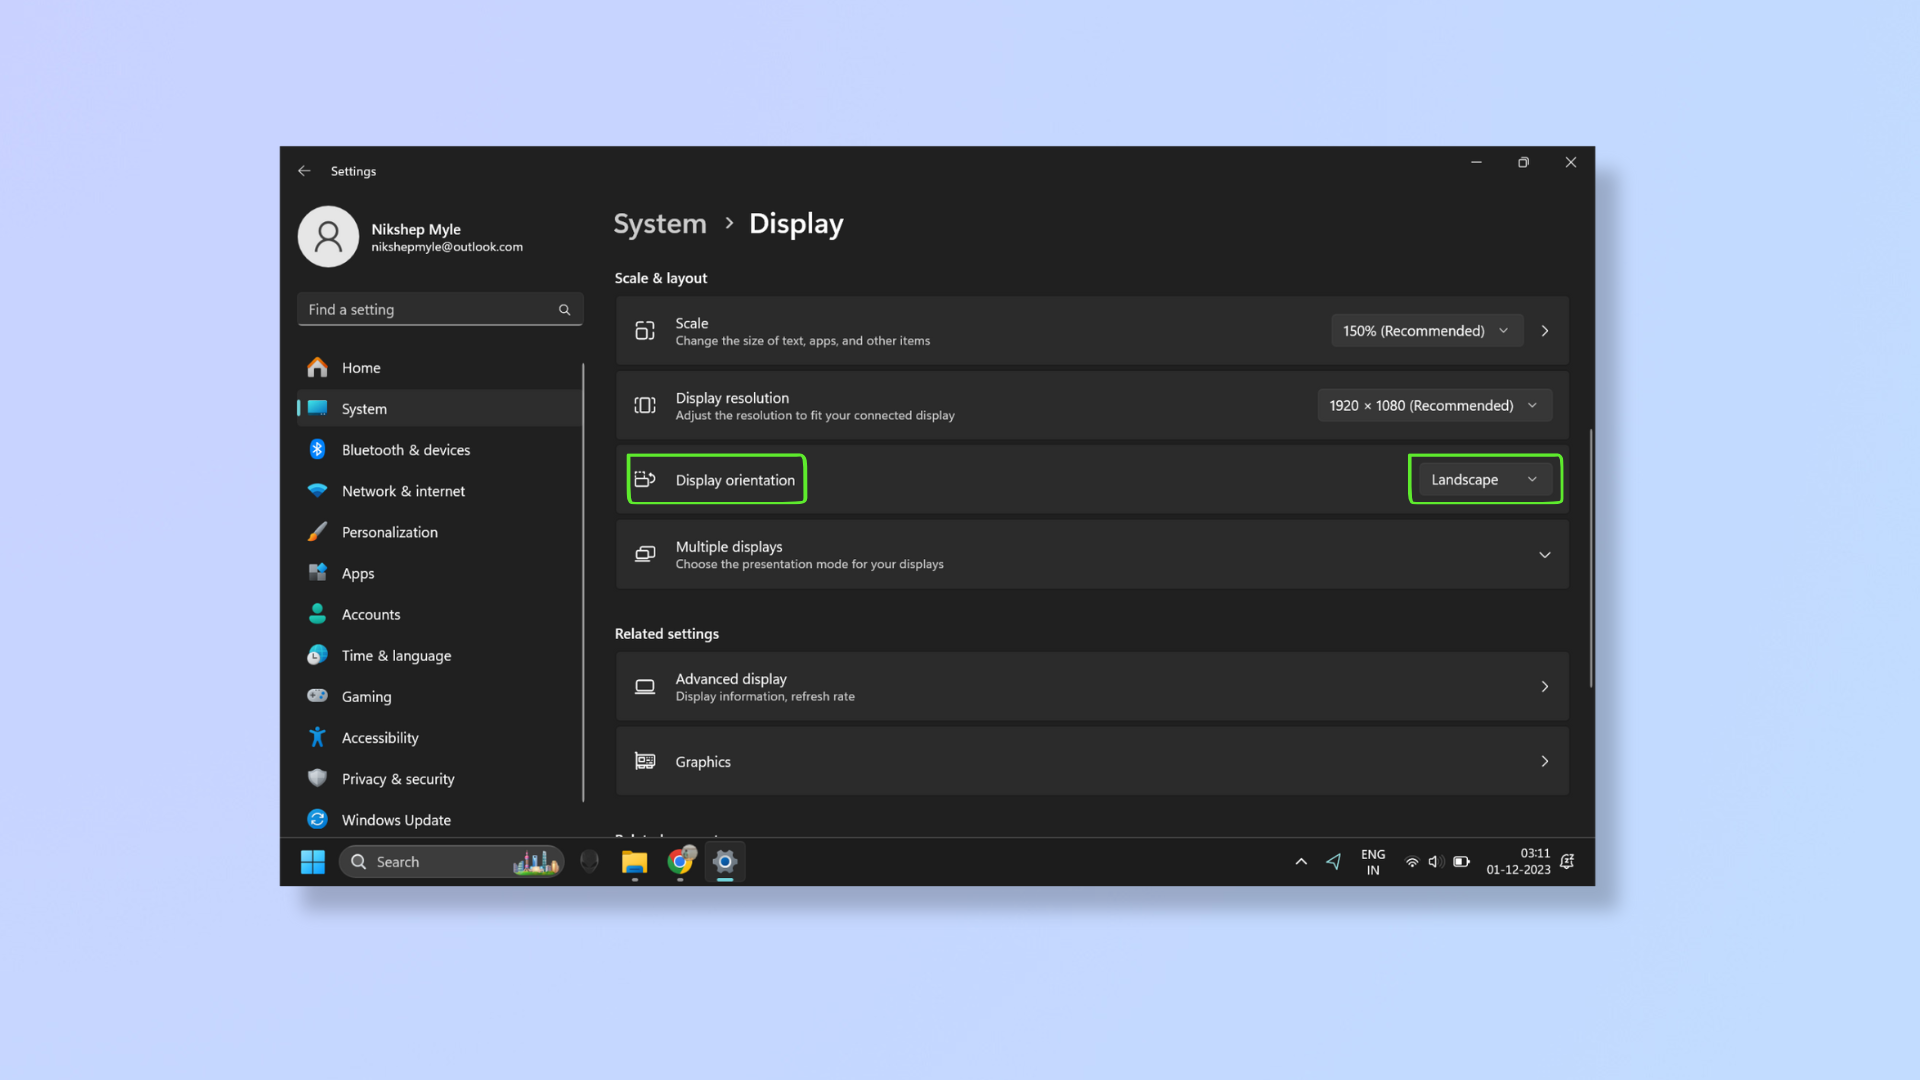
Scroll down to Scale & layout and find Display orientation. Click the dropdown and choose from one of the four options: Landscape, Portrait, Landscape (flipped), and Portrait (flipped).
3. Click Keep changes

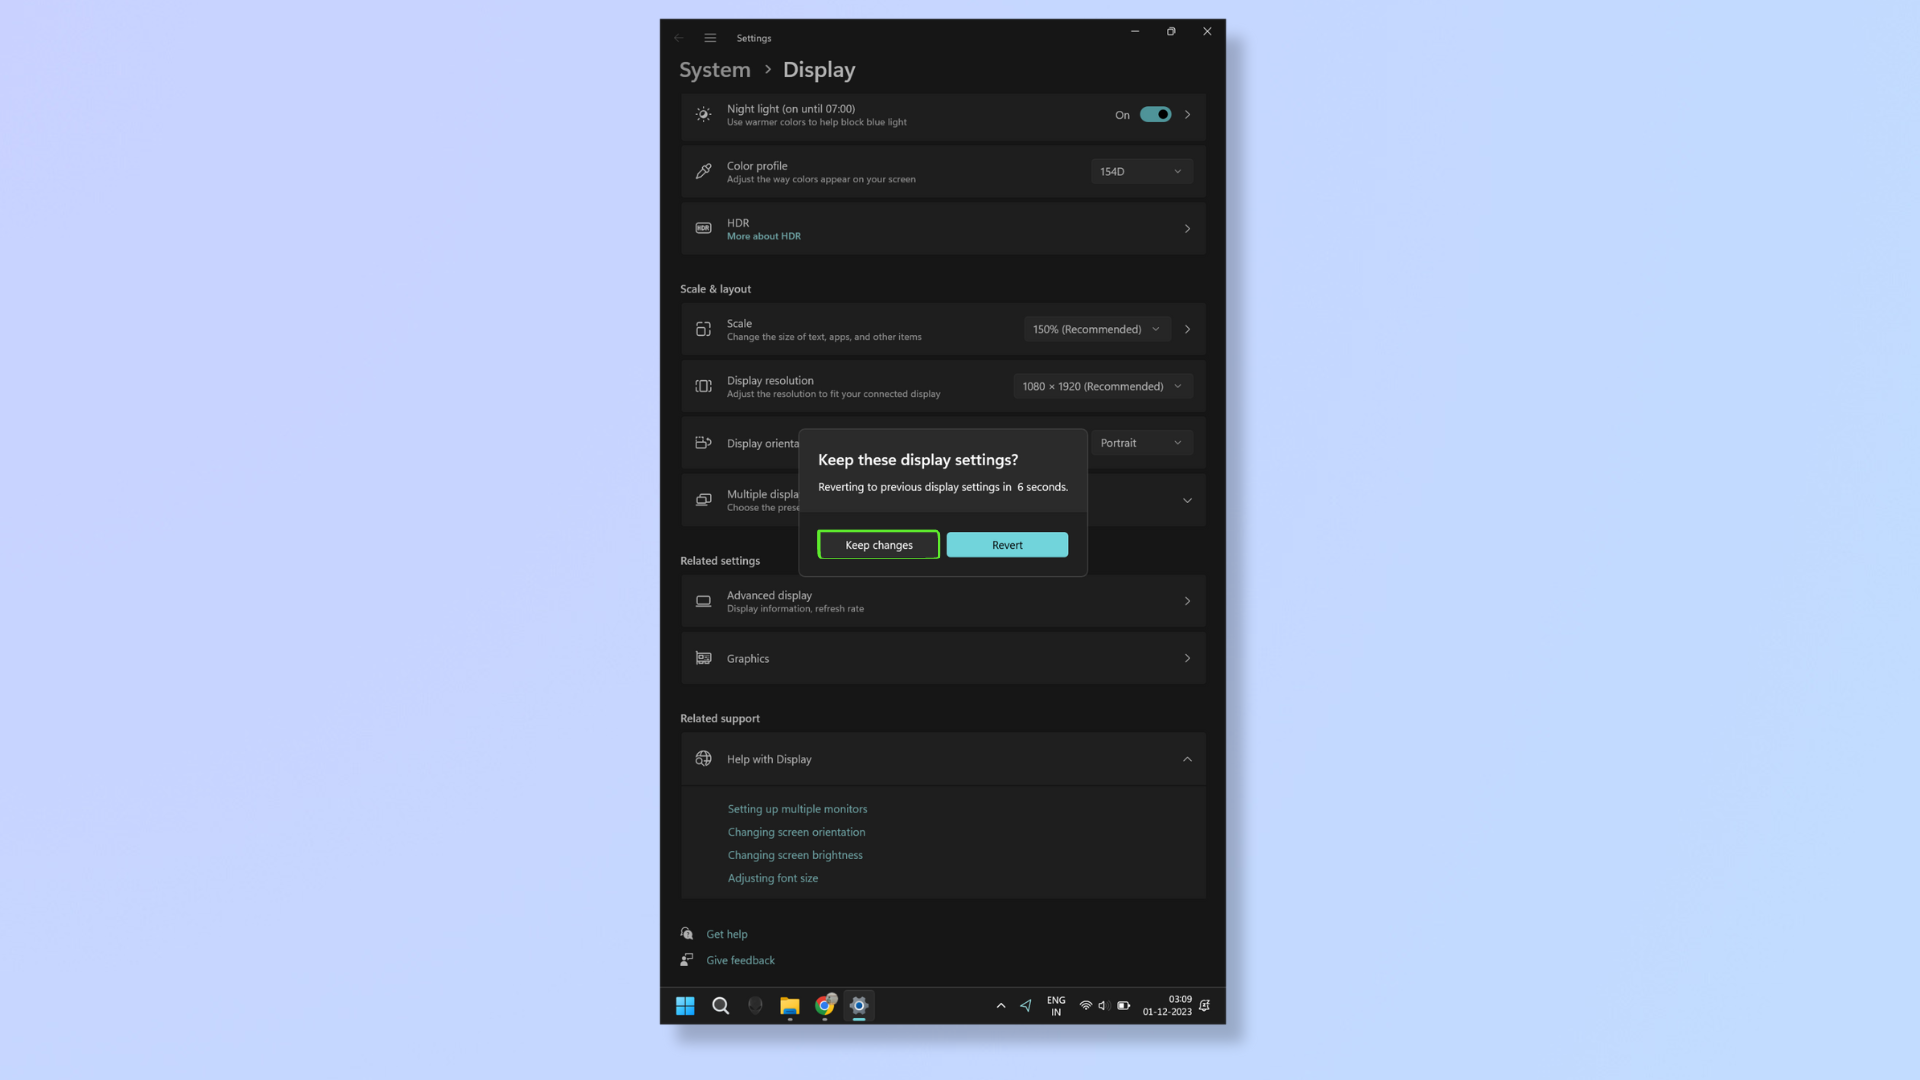
After selecting your desired orientation, click Keep changes.
What are the uses of the different screen orientations?
The four screen orientations offer varied benefits:
a. Landscape: This is the default orientation and it’s apt for multitasking and media consumption.
b. Portrait: This is for reading documents, scrolling through social media feeds, coding and programming, and engaging in art and design.
c. Landscape (flipped): This is suitable when a display is mounted on the ceiling (upside down).
d. Portrait (flipped): This is useful in installations where a flipped portrait orientation is necessary, like during an artistic presentation.
Rotating the screen in Windows 11 is swift, taking just a few seconds to personalize your computing experience.
For more Windows 11 tips and tricks, delve into our guides on how to update Windows 11, how to use Windows 11's new screen recorder, how to customize the Windows 11 Start menu, and how to speed up Windows 11.


