The “Deployment Image Servicing and Management” tool (DISM) is a helpful, but advanced tool to scan, alter, and repair any Windows 11 system issues. A lot of OS problems such as poor performance, boot-up issues or specific crashes can come down to a corrupted system file, and this Command Tool implementation is capable of fixing them.
Now, I know a lot of you probably saw me use the phrase “Command Tool” and freaked out a little. In all honesty, I did too at first, but breathe — this is a lot easier than you might think. All it takes is copying and pasting the commands below and you’re off to the races.
How to fix Windows 11 Image problems with DISM
The DISM tool is perfect for scanning all the system files for any corrupted/missing data, and fixing them. If you’re having OS setup troubles, that’s where SFC comes into play.
1. Open Command Prompt as administrator
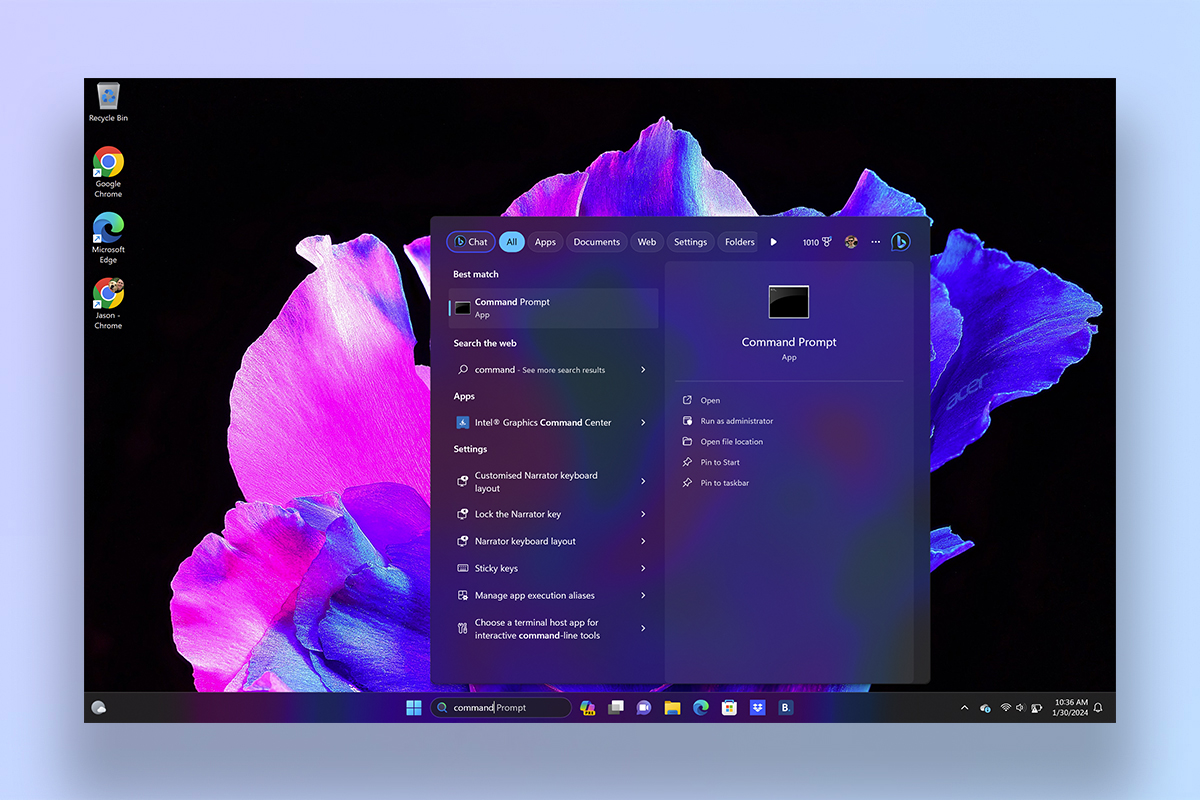
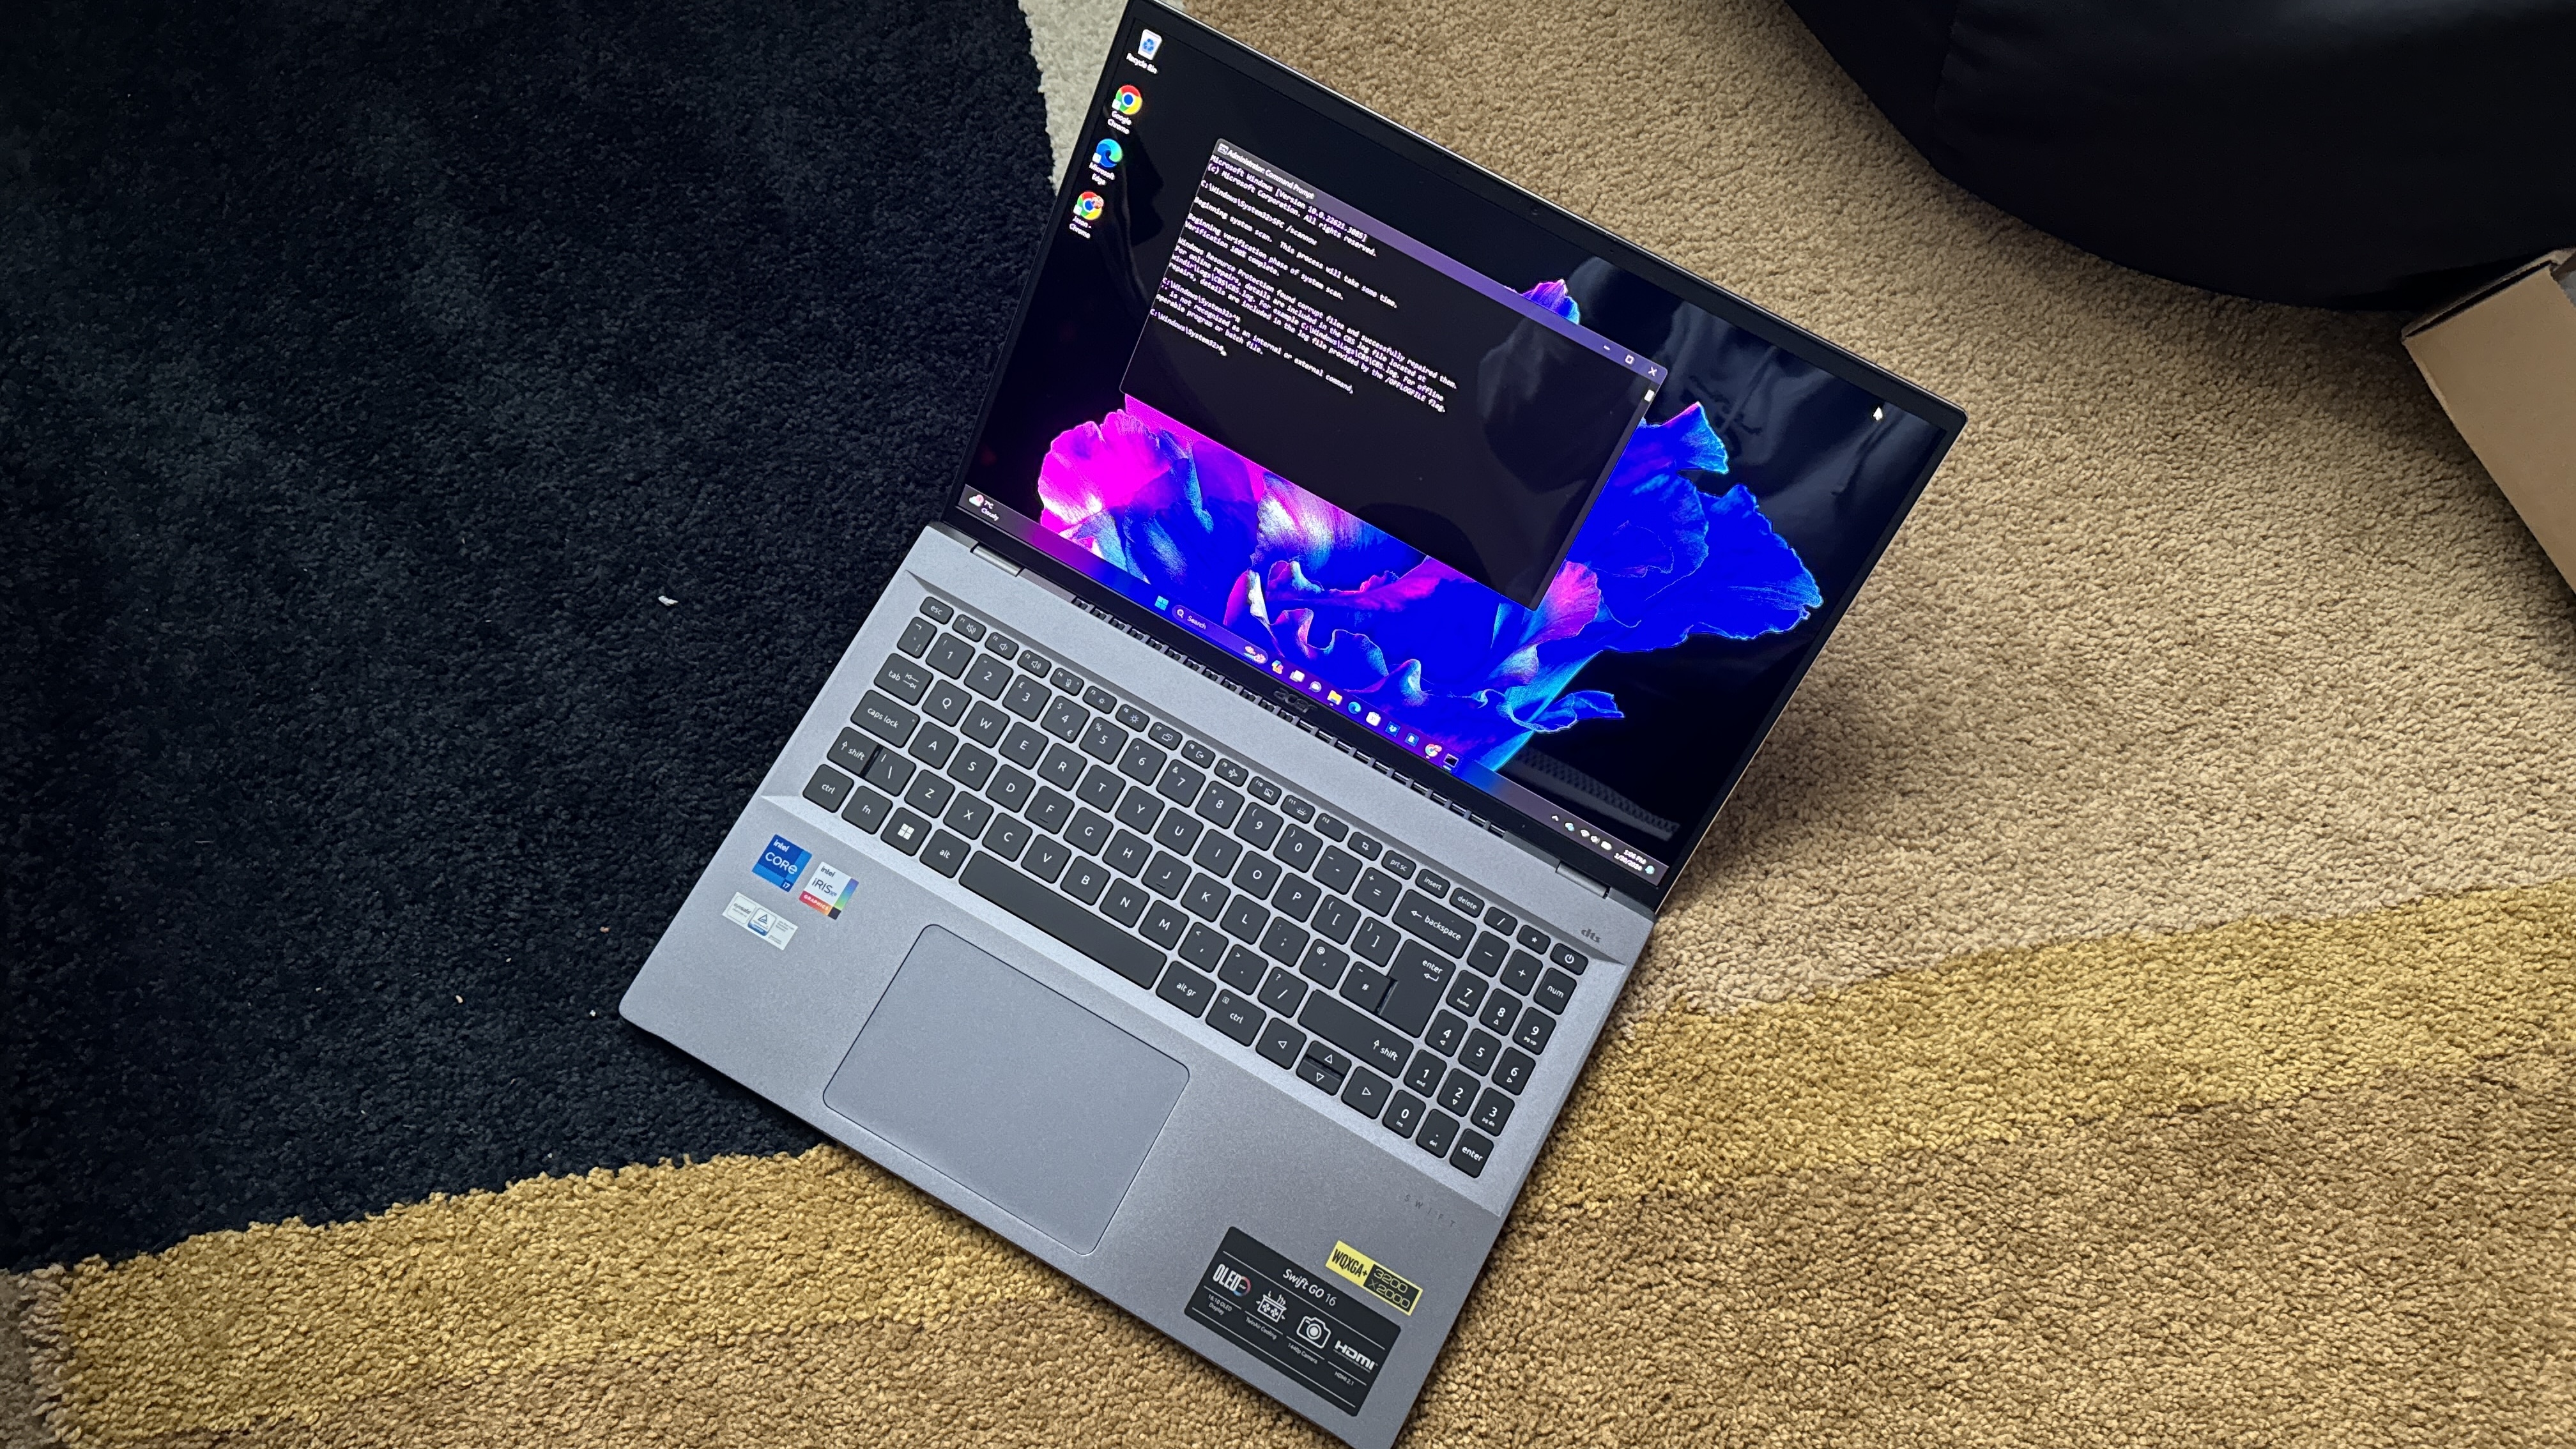
Hit the Start button and search for Command Prompt. Right-click it, and select Run as administrator. You will need to do this for all the DISM and SFC processes you see below.
2. Check the system health
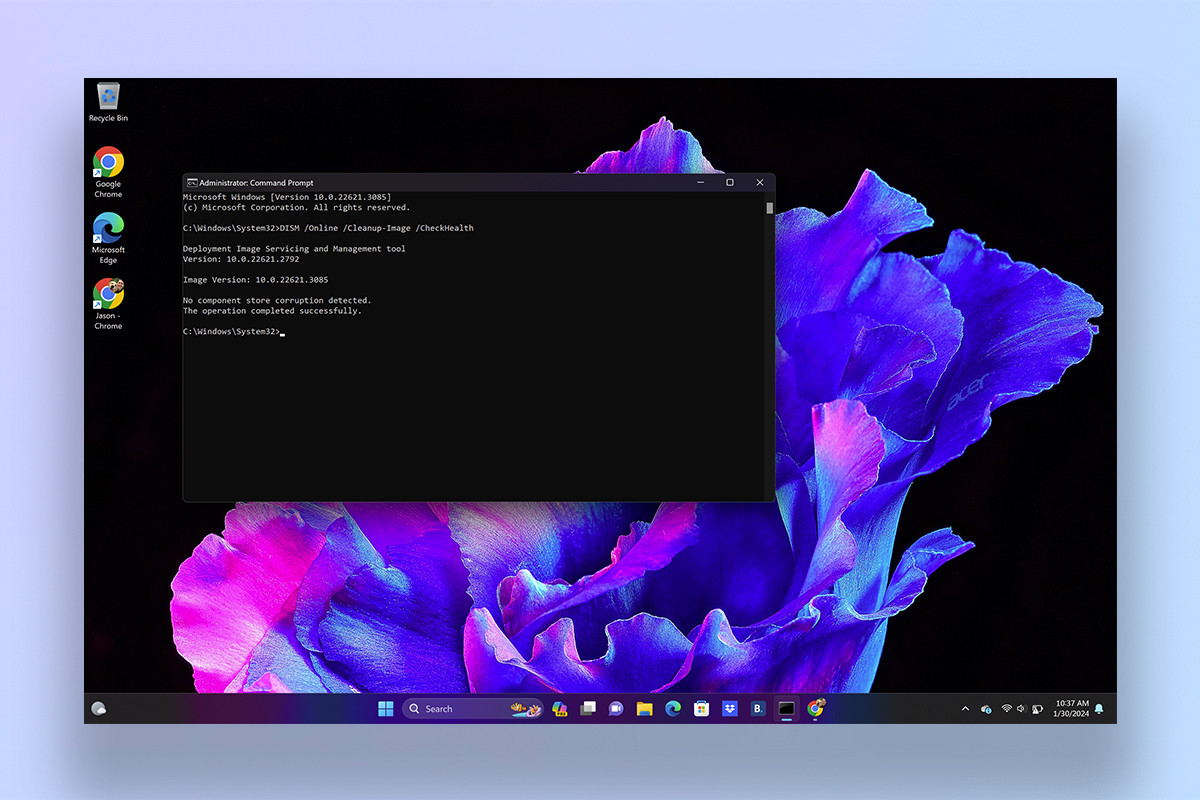
Enter the following prompt: “DISM /Online /Cleanup-Image /CheckHealth” and press Enter. This will command the DISM tool to do a quick sweep of the system and verify any corrupted data.
3. Need a more in depth scan?

This is where ScanHealth comes in. Use “DISM /Online /Cleanup-Image /ScanHealth” and hit Enter again. This will take some time, but will identify the specific file corruptions.
4. Time to fix it!
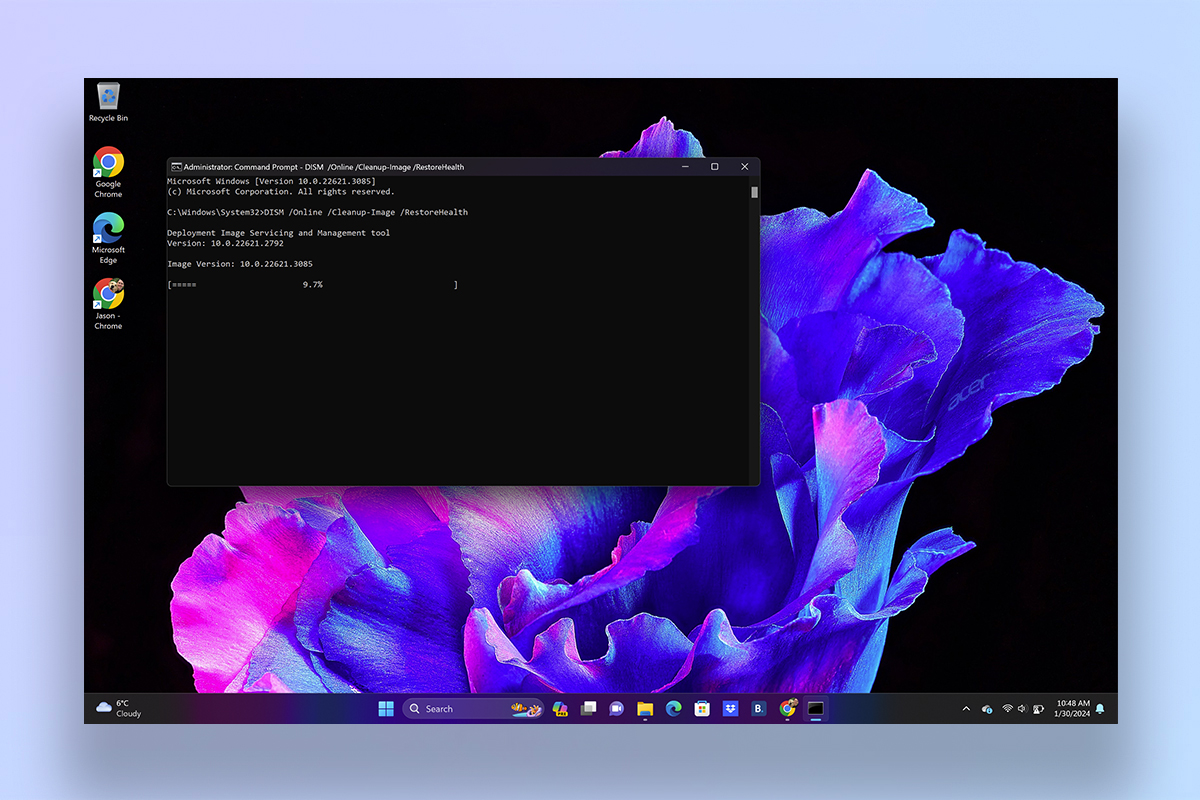
Now that you’ve found the corrupted data, it’s time to fix it. Type in “DISM /Online /Cleanup-Image /RestoreHealth” and press Enter. Just like ScanHealth, this will take some time, and it may look like it’s frozen when you see the % progress bar stop for a while. But trust the system — it’s downloading and replacing the corrupted files you find.
How to run a full system file check in Windows 11
If your issues are more about the setup of Windows itself, or if you want to double check that DISM did the trick, that’s where the System File Checker (SFC) comes in.
1. Run the scan
That’s it! Same as above, run Command Prompt as administrator, then use the prompt “SFC /scannow” and press Enter. This will do a sweep of everything and repair any system files using your (now fixed) local image files. Make sure that if any errors are found, you run it a couple more times. SFC /scannow has a bit of a reputation for not fixing much the first time around.
Check out our other Windows 11 guides, including how to get Microsoft PowerToys, how to enable God Mode in Windows and how to record your screen in Windows.