
If you've ever worked on a shared or public device, you must know how hard it is to maintain privacy. This is because anyone can access your data anytime without restrictions. And while deleting your data usually does the trick, it may be pretty tedious at times, especially if it's a lot of information.
In some instances, you might even find yourself returning to the same device and starting the process from scratch, which can significantly deter your productivity. Luckily, there's an easier way out. In this Windows 11 guide, I'll show you how to hide a folder.
Hide a folder on Windows 11
Here’s what you’ll need to do to hide a folder in a Windows PC once you’re done using it:
- Right-click on the folder you want to hide, then press the Alt + Enter keys.
- The folder’s Properties window will pop up.
- Check the box next to the Hidden option at the bottom and click OK.
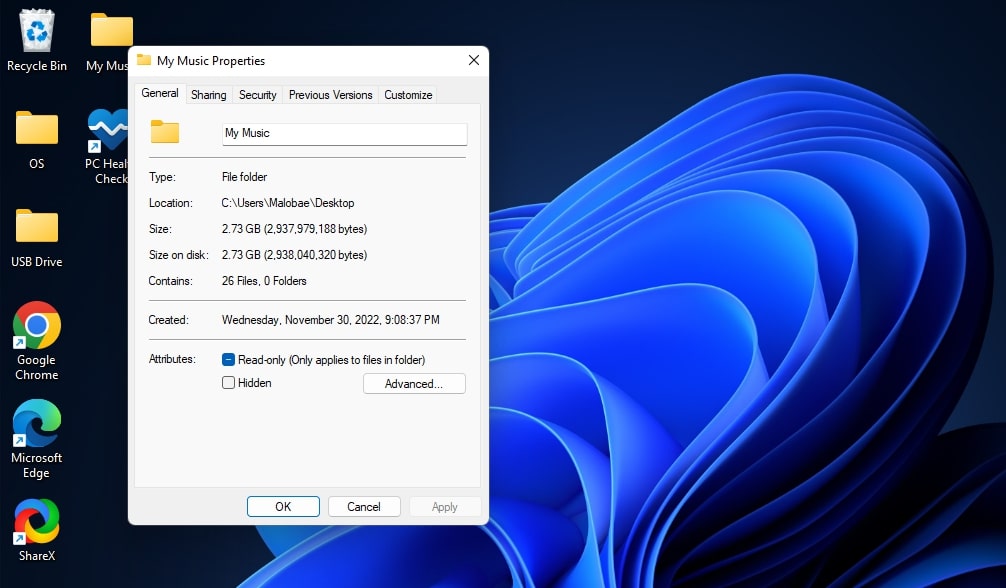
- Next, you’ll be prompted to select whether you’d like to Apply changes to the folder only or Apply changes to this folder, subfolders, and files.
- Click on OK to save the changes.
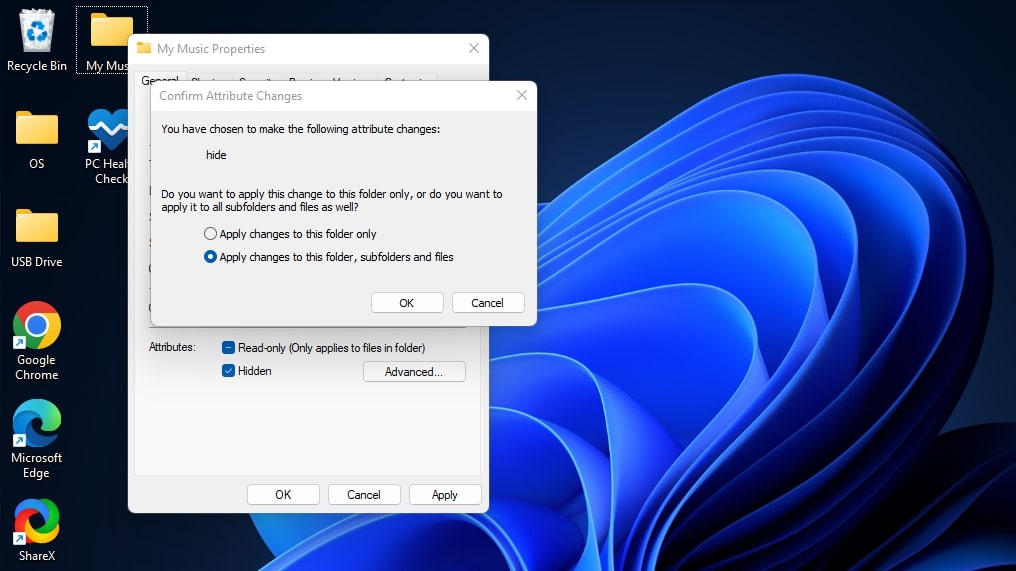
And just like that, the folder will disappear, limiting the access other users have to the data stored in it.
Access the hidden folder on Windows 11
Likewise, if you’re back on the device and would like to access the hidden folder again, here’s what you’ll need to do:
- Press the Windows + E keys to launch the File Explorer.
- Next, click on View at the top left and select the Show option in the drop-down menu.
- Finally, click on Hidden items at the bottom of the menu.
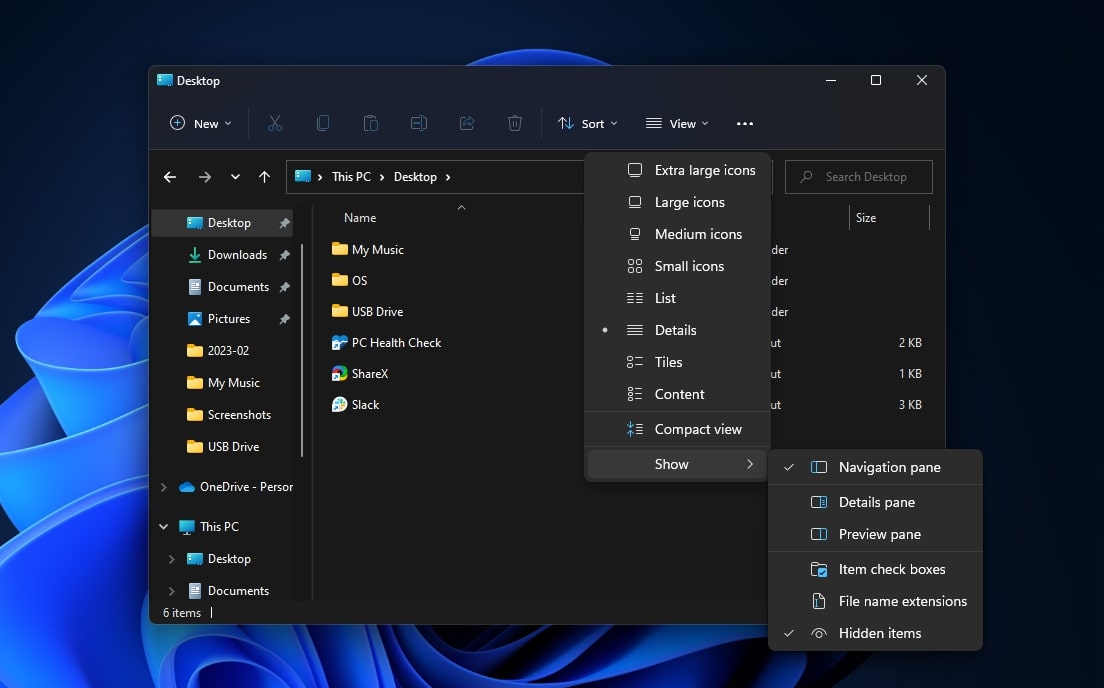
The hidden folder will now be available and accessible.
Unhide the folders on Windows 11
If you want to restore the folder to its original position and make it more accessible, here’s what you’ll need to do:
- Press the Windows + E keys to launch the File Explorer.
- Next, click on View at the top left and select the Show option in the drop-down menu.
- Click on Hidden items at the bottom of the menu.

- Right-click the folder and select Properties from the context menu.
- In the windows that pop up, uncheck the box next to the Hidden option.
- Click on OK to save the changes.
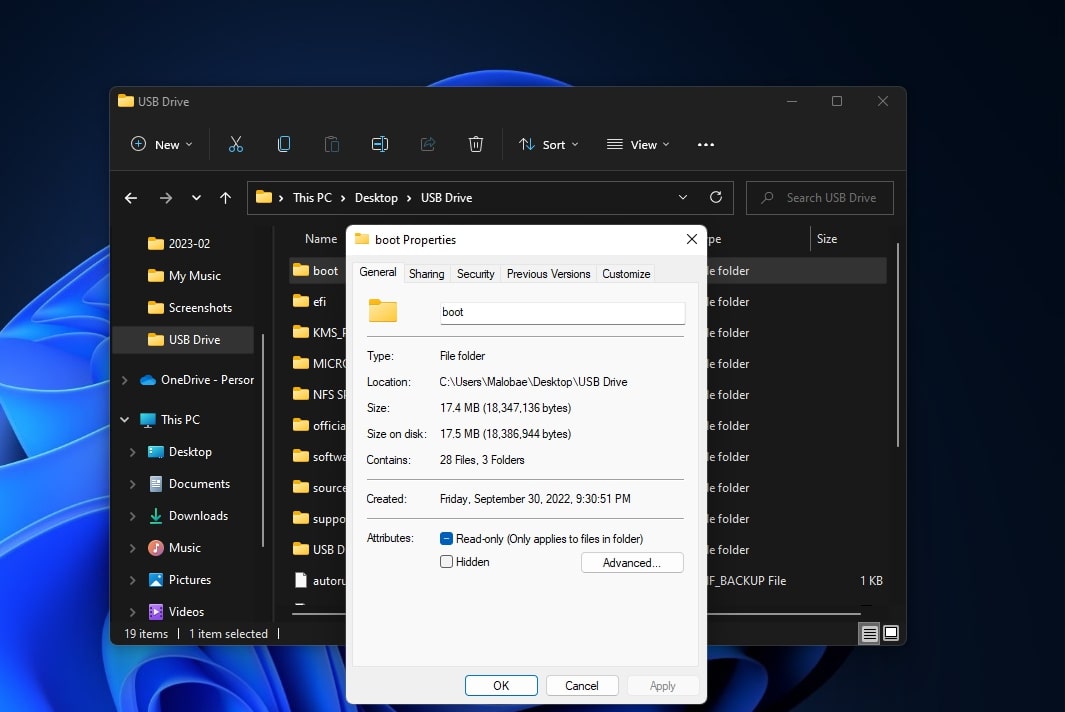
Your folder will be restored to its original position, and you’ll no longer have to navigate through the File Explorer app on Windows 11 to access it.
However, if you’re looking for a more sophisticated way to keep your data files, we invite you to check out our expert guide on how to password protect files on Windows 10.
More resources
We have plenty of helpful guides and tutorials to help you enhance your privacy on Windows. You can check them out below:


