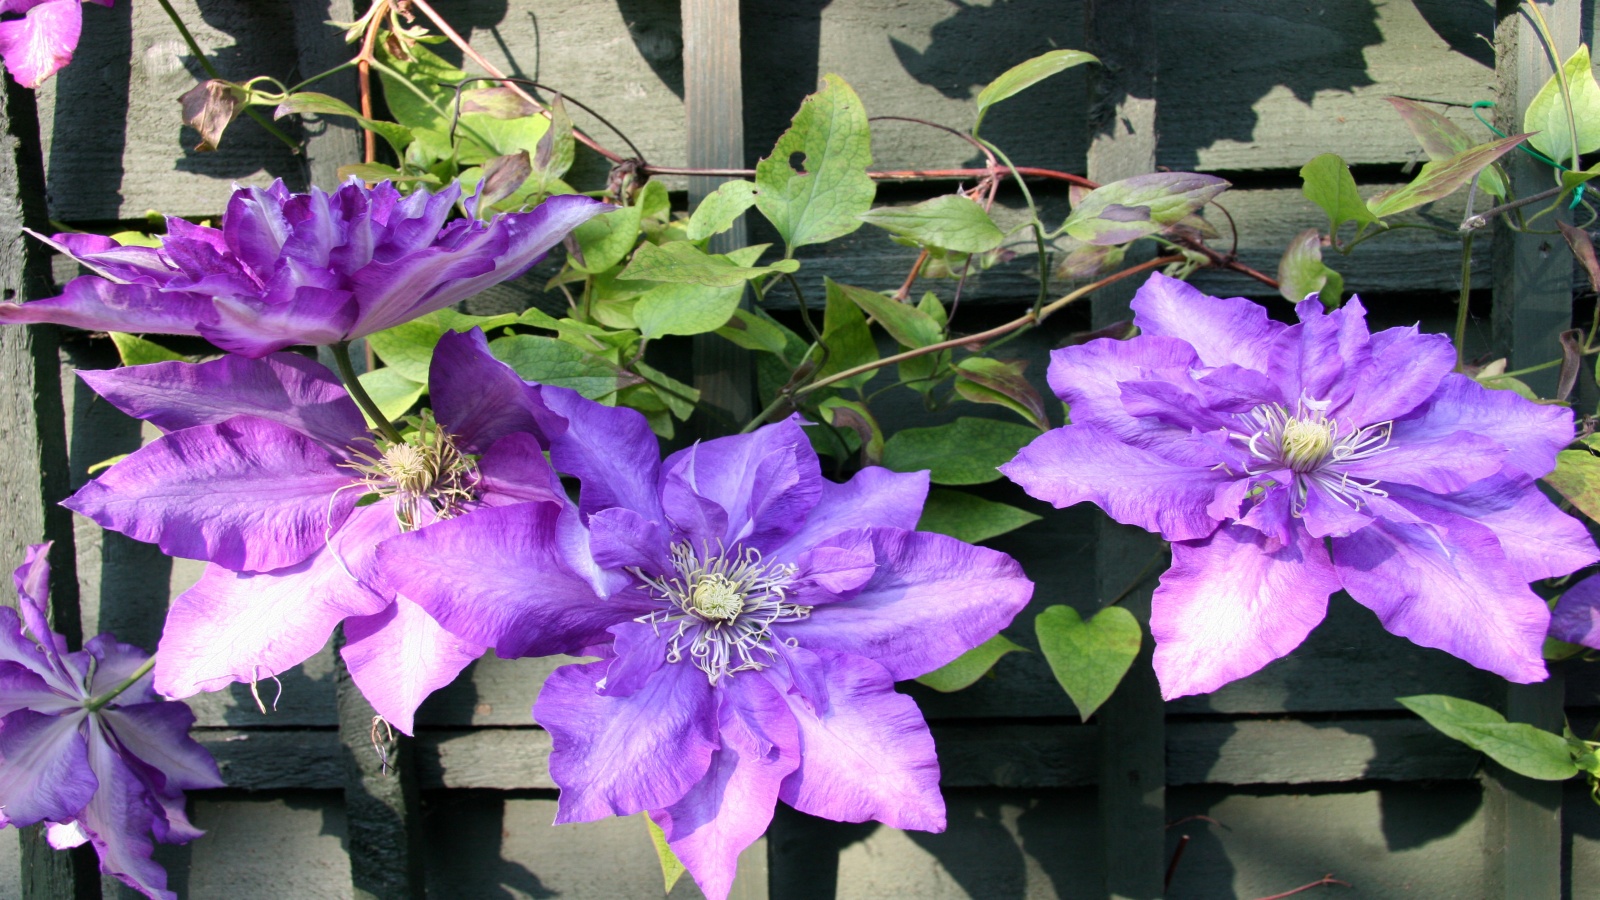
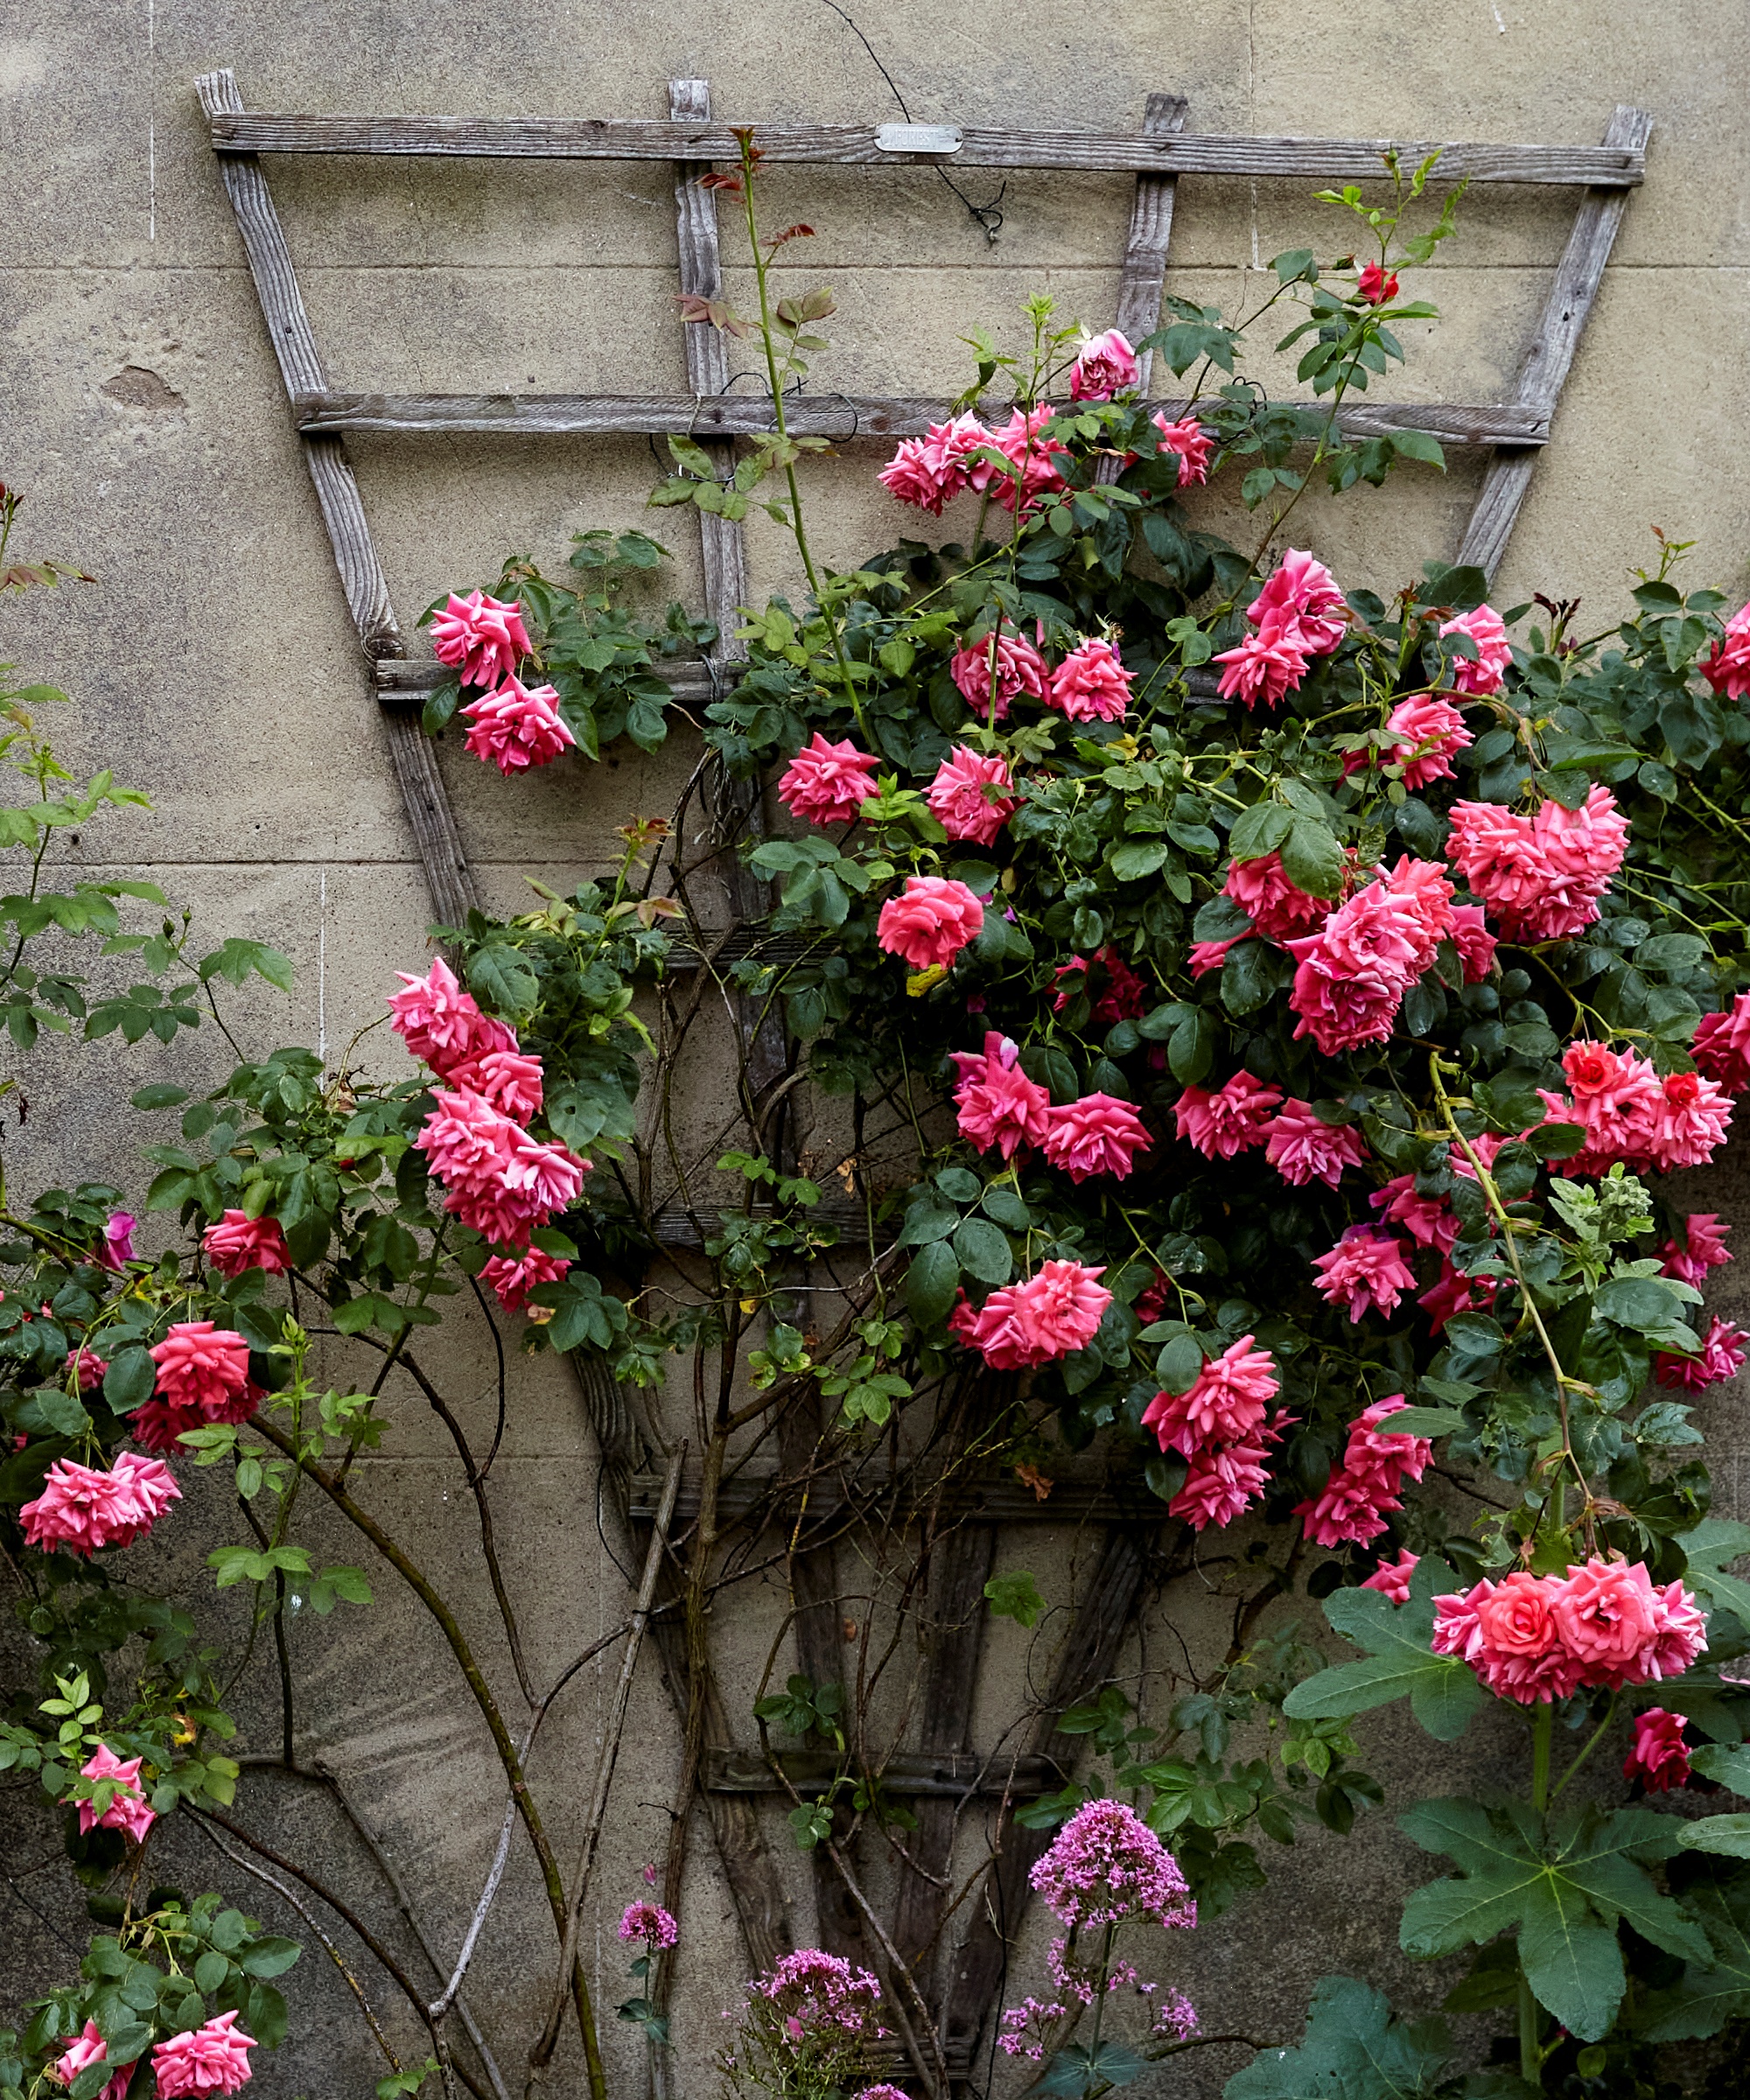
One of the most visually arresting sights in a sunny summer garden is a trellis supporting a mass of vibrant flowers. Or it might be a vegetable garden trellis, as upright gardening works well for squash, cucumbers and zucchini, as well as many fruits including grapes, tayberries and blackberries.
Vertical growing is becoming increasingly popular, as it gives small backyards the extra dimension of height, and much more scope to grow. There are lots of climbing plant support ideas, including espalier frameworks for fruit and ornamental trees, but a trellis is a favorite of mine.
Putting up a trellis correctly is one of those handiwork tasks that sounds tricky but is actually quite simple. I recently completed the job in my own garden, so know first hand that if you can recruit a helper, it's entirely possible to secure a trellis in a couple of hours and the end result should last for years. Here, I share how to to it and what I learned along the way.
How I learned to put up a secure wall trellis
I learned how to put up a garden trellis the hard way. One night the household was awoken by a loud thump from the patio - an old wire mesh trellis that was holding up a substantial Clematis armandii - one of the best clematis to grow - had buckled under the strain and flopped down over the patio, taking several large planters with it.
It made the patio impassable, so the next day we cut the clematis from the wire, giving it a hard prune to around 3ft from the ground, then attached a new trellis to the wall with fingers crossed that the climber would regenerate.
This happened towards the end of the summer two years ago. Thankfully, the plant has regenerated and this year is packed with flowers.
The tools and equipment you will need for the job
The equipment needed for securely attaching a trellis to a wall is widely available online and from hardware stores.
You will need:
- A trellis - I like this expandable wooden framework available on Amazon as it can be adjusted for the space you have
- Wooden strips (or battens) for attaching the trellis to the wall
- A spirit level to make sure the trellis is straight - this highly rated Firecore Magnetic Torpedo Level on Amazon should do the trick
- Chalk
- Exterior screw anchors and exterior screws - this 100-piece masonry set is a best-seller on Amazon.
- A screwdriver
- Electric or battery operated drill with a masonry drill bit, like this robust cordless Black and Decker drill and kit on Amazon
- Wood preservative, like this Roxil waterproofing cream on Amazon
- Protective goggles and a dust mask
How to put up a wall trellis in 5 simple steps
1. Measure the wall and angles
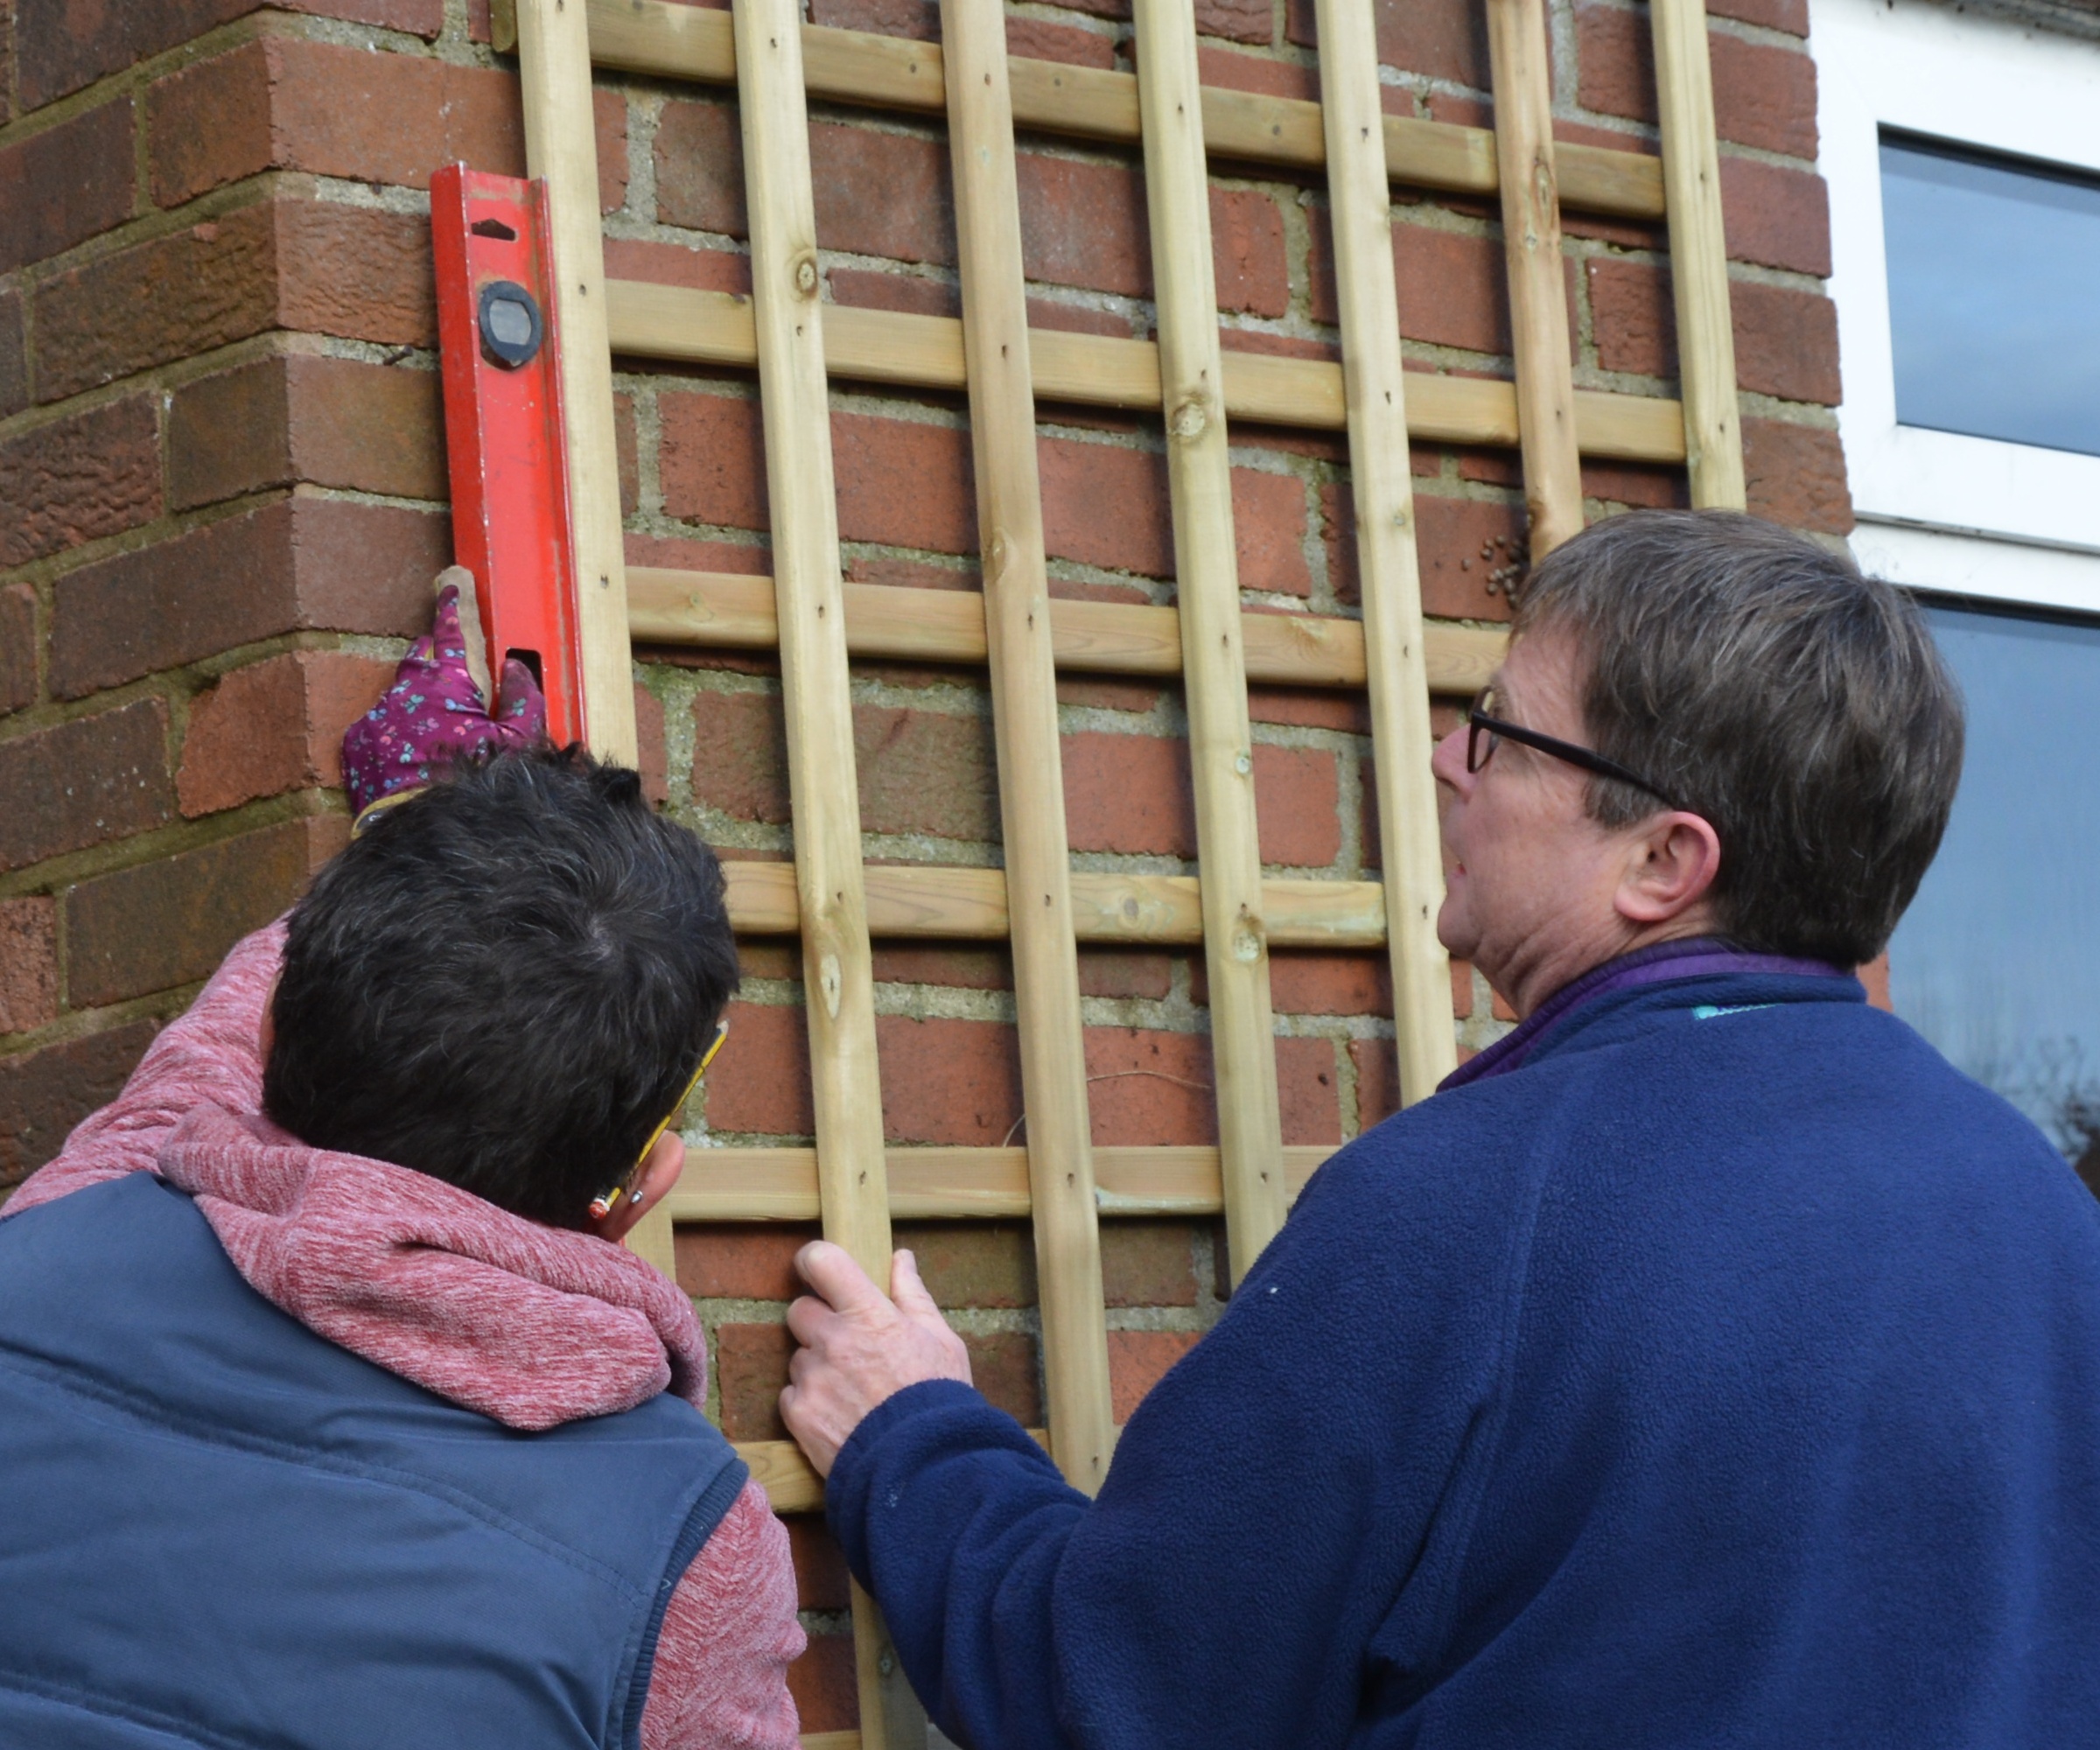
Once you have bought your trellis, hold it against the wall where it will sit and use a spirit level to make sure it is straight before marking its position on the wall with chalk.
Although it is easier to hang a trellis if you have someone to help you, if that isn’t possible, prop the trellis on bags of potting soil, or level stones or a platform to the required height.
Set the trellis around 1.5ft above the soil to reduce the risk of rotting, and also make sure it doesn’t breach the damp course of your property.
2. Prepare the wall battens
The battens are the pieces of wood that are screwed into the wall to hold the trellis in place.
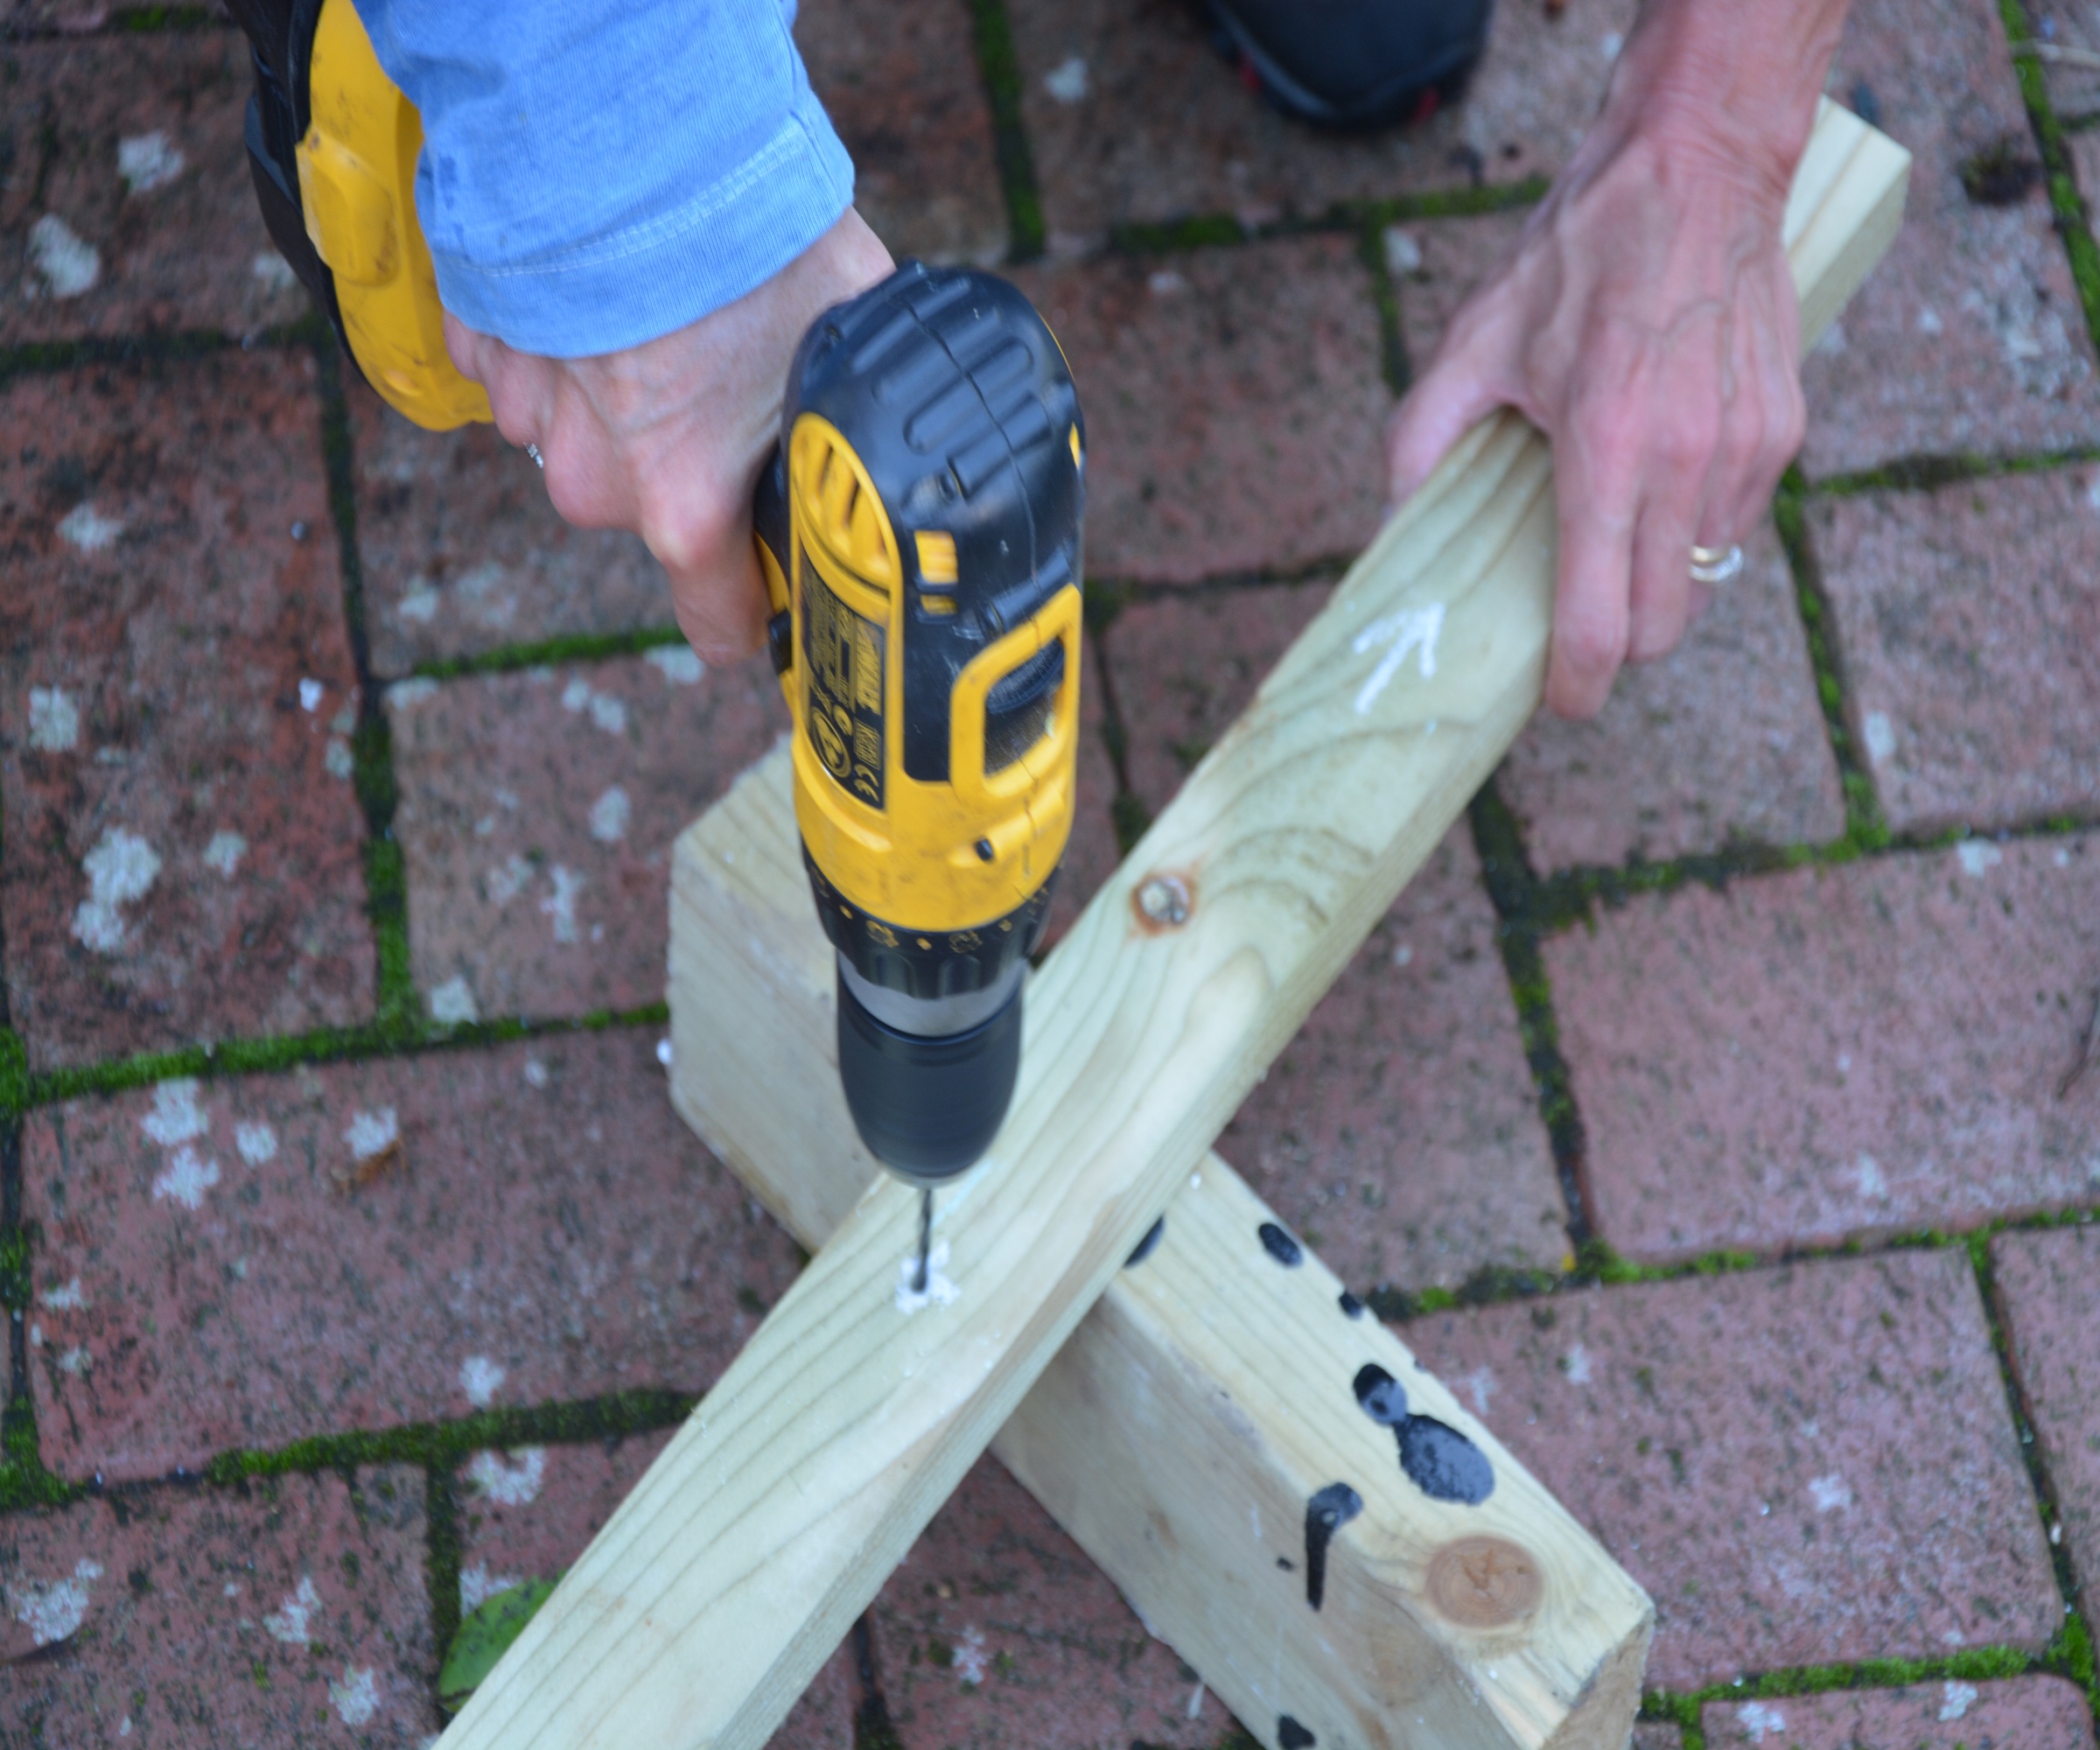
A trellis 3ft wide (or less), will need a batten at each side. Wider trellises will need one or two more in the middle to ensure it is adequately supported. The battens should be the same length as your trellis and should be attached to its outside edges so they are hidden.
Make guidance holes into each end of your batten to make it easier to drill in the screws. The initial holes should be narrower than the diameter of the screws, so they hold more securely.
Top tip: Paint a little wood preservative onto the holes to help protect the raw wood from rotting in damp conditions.
3. Drill into the wall
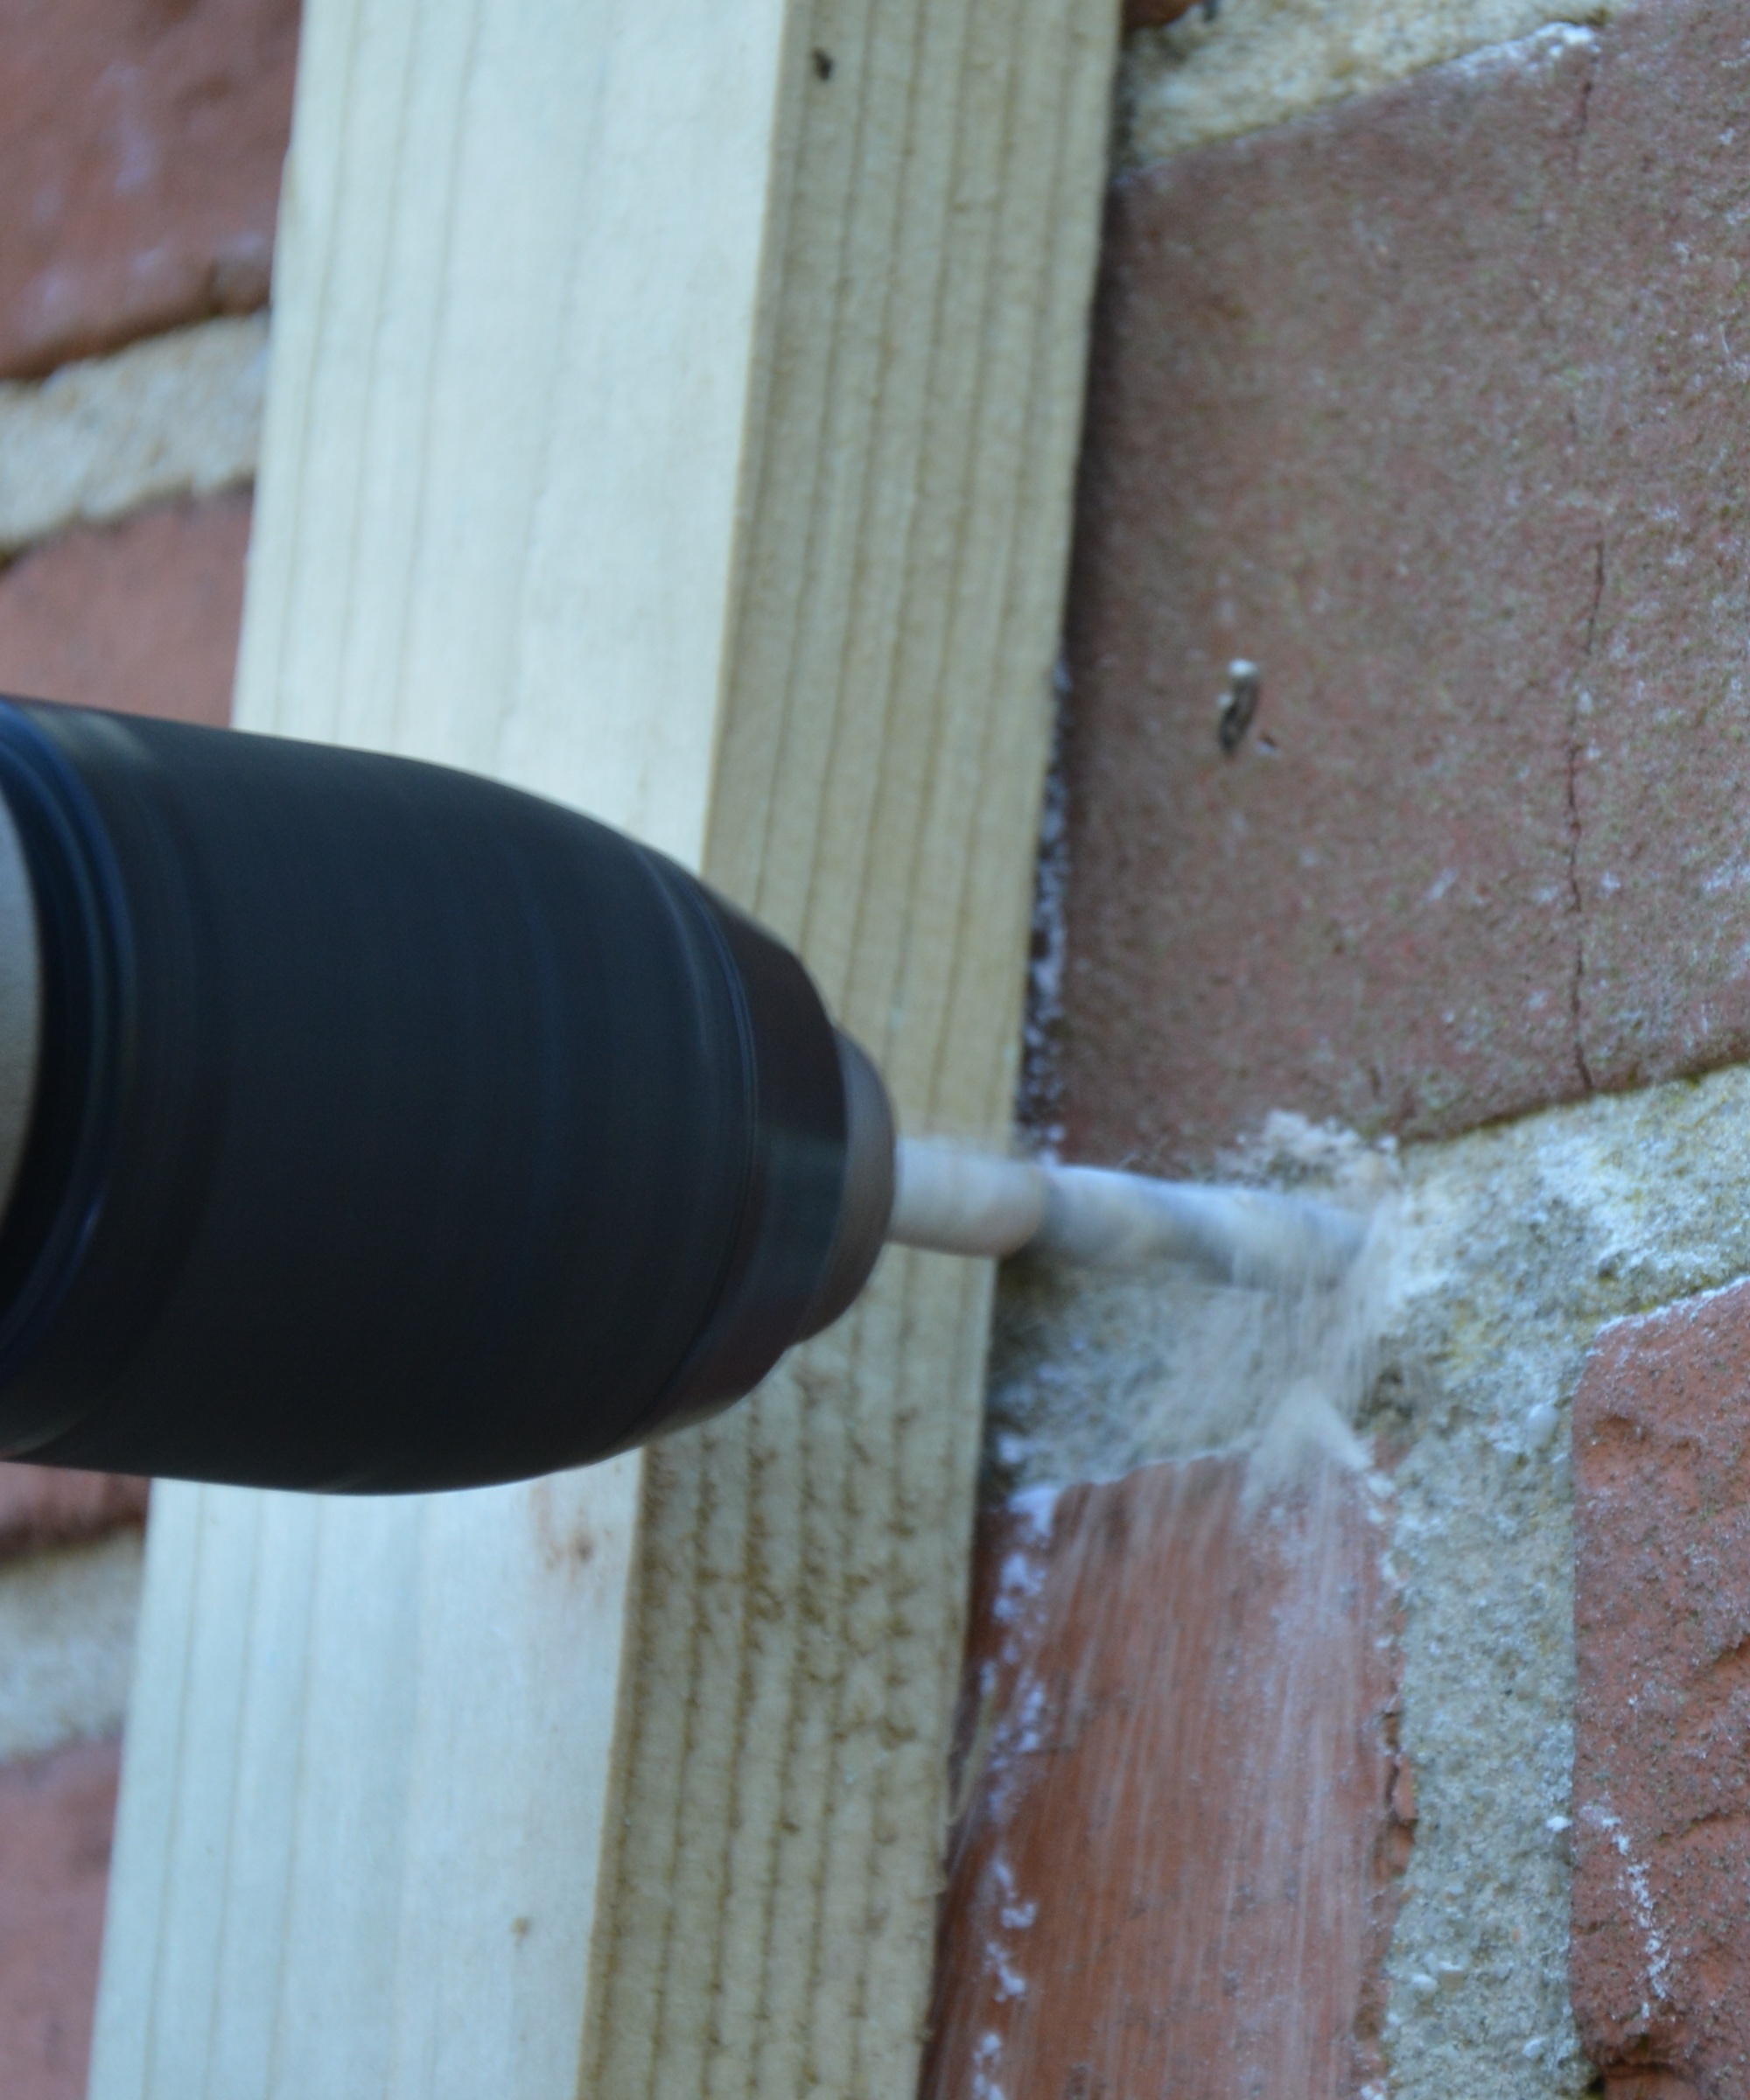
The holes for attaching your battens should be drilled into the mortar, not brick or stone, using the hammer setting on your drill.
This is because you don’t want to mark or damage the brick, and mortar is softer and easier to drill into, while offering the same levels of support.
4. Position the battens
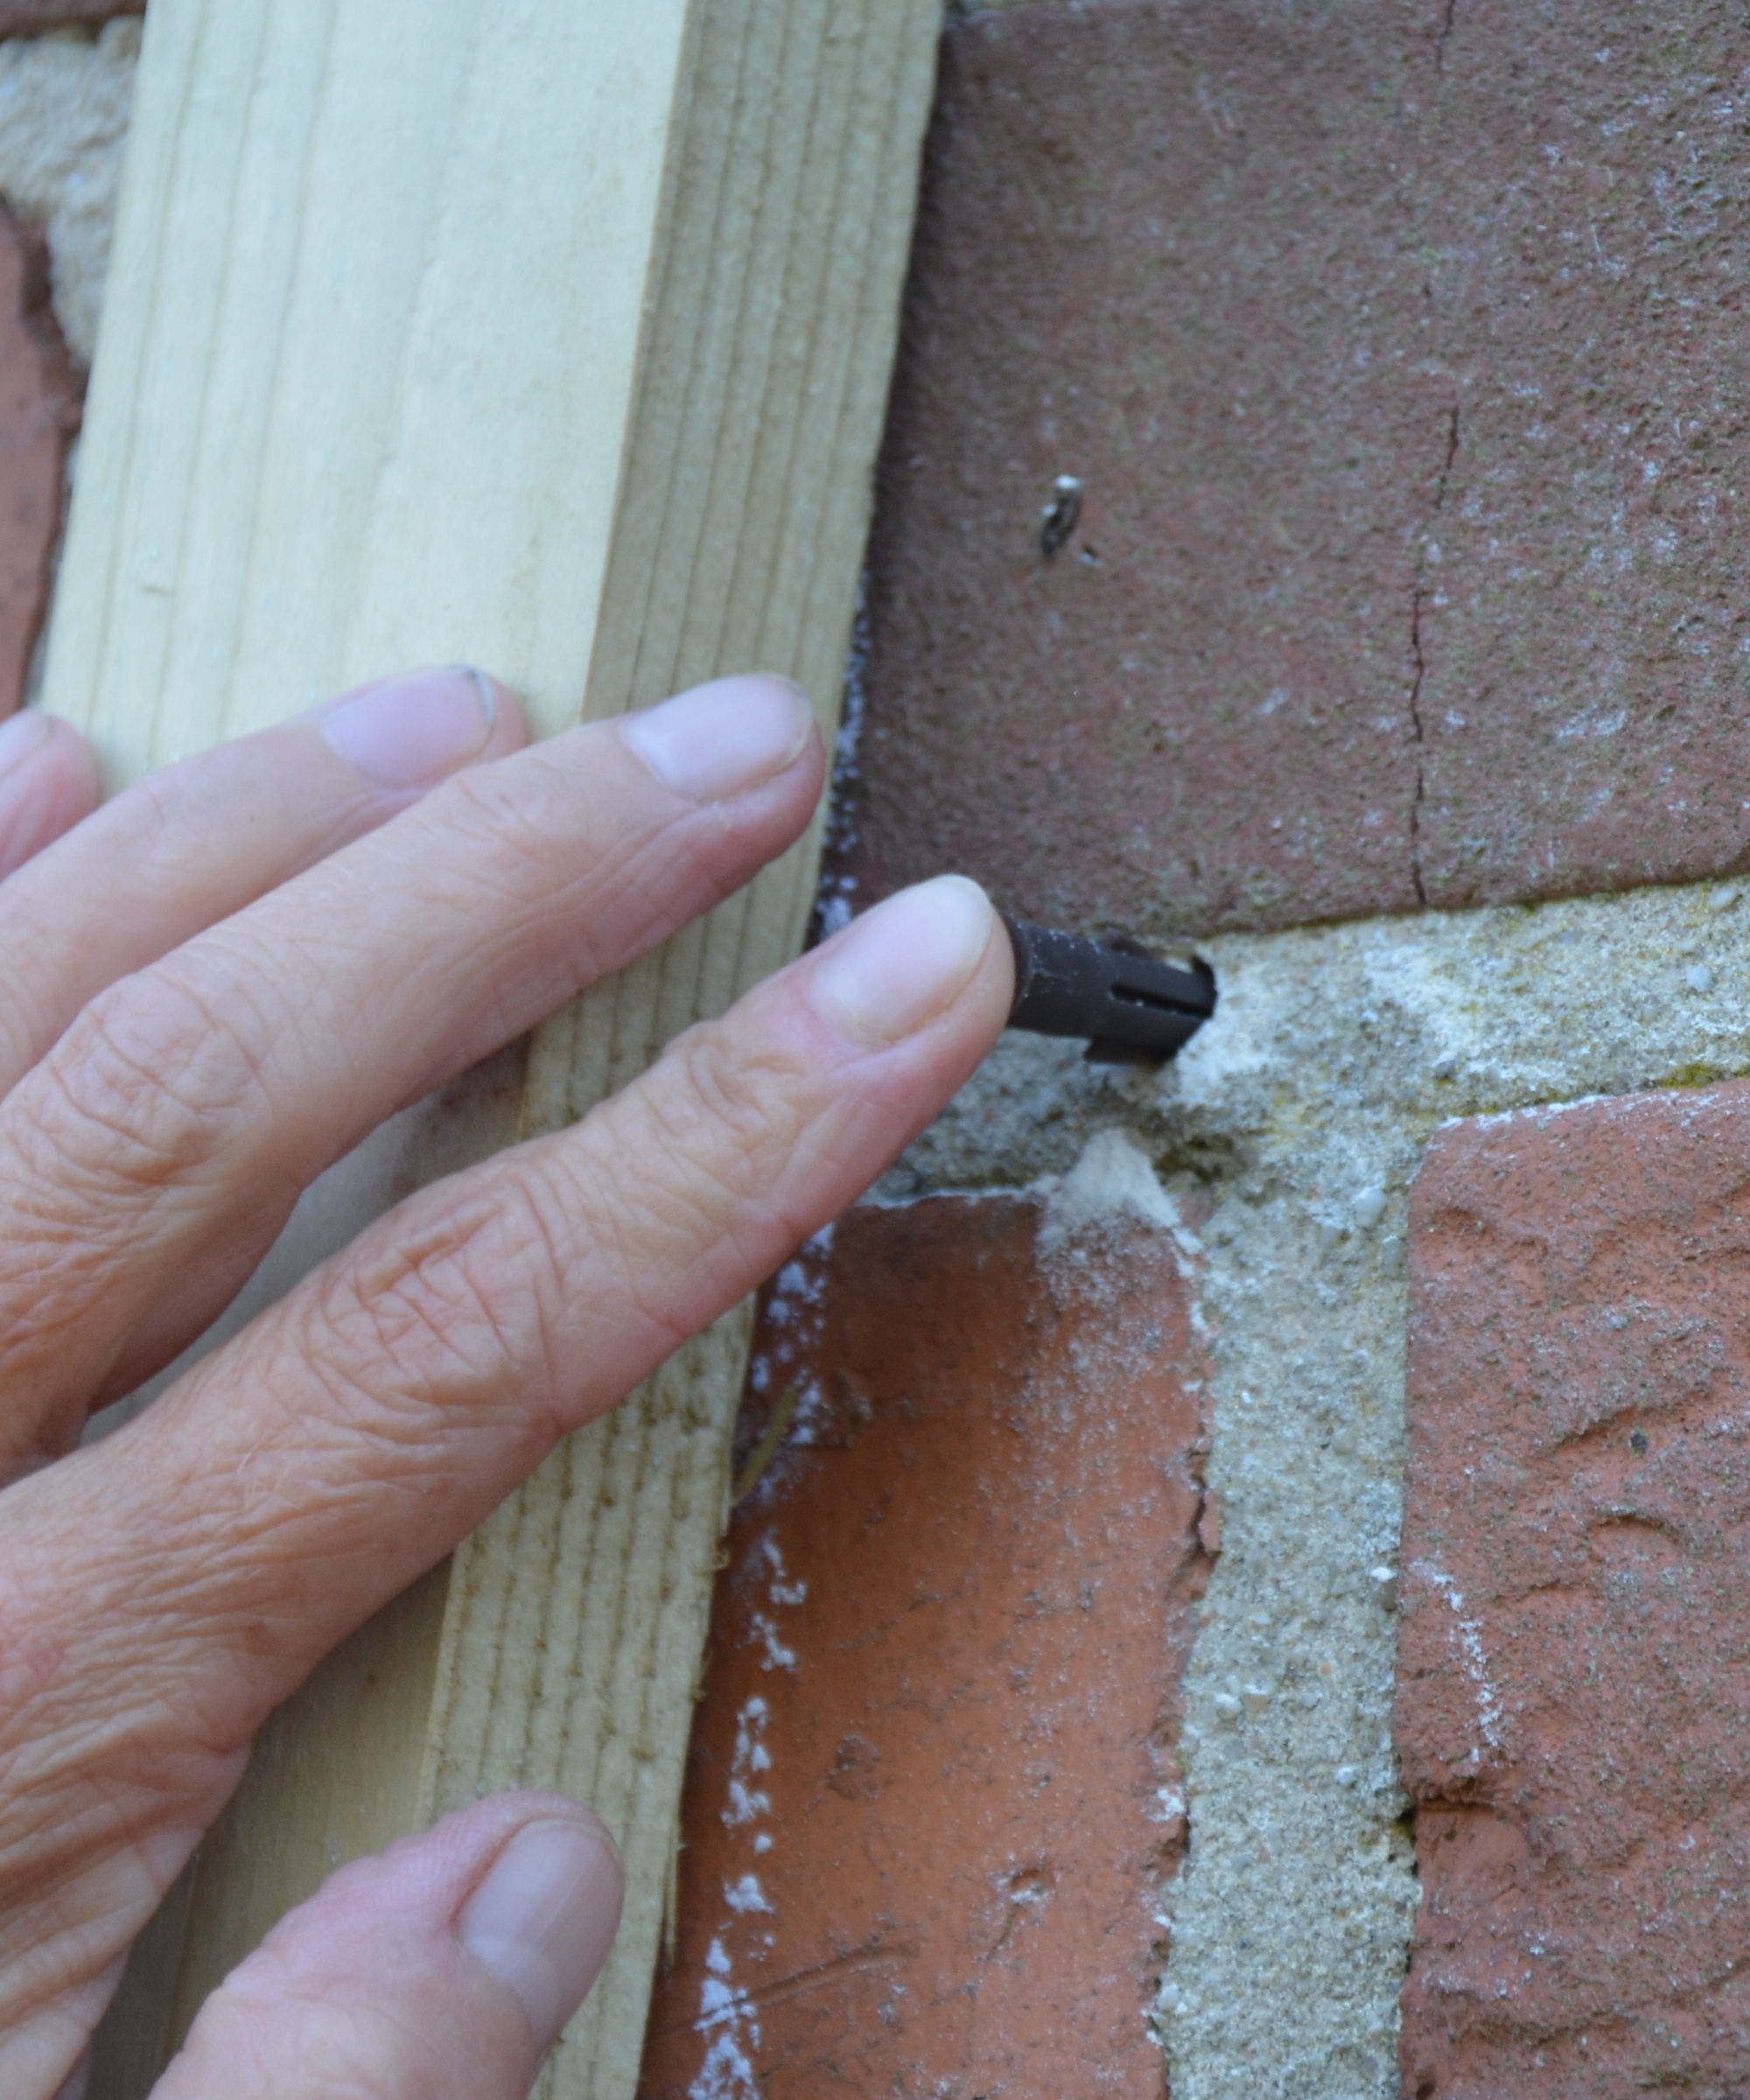
Place a batten on the wall where you want it to sit, checking it is perpendicular to the wall using a spirit level (you may need someone to hold the batten while you get it straight).
Chalk its position, then drill through the batten’s guide hole into the wall to mark the stonework. Next, remove the batten and drill into the wall before adding a screw anchor to secure the screws. Repeat this process at the top and bottom of each batten.
Wear safety goggles and a dust mask when drilling to protect your eyes and nose from mortar chips and dust.
5. Attach the battens and trellis
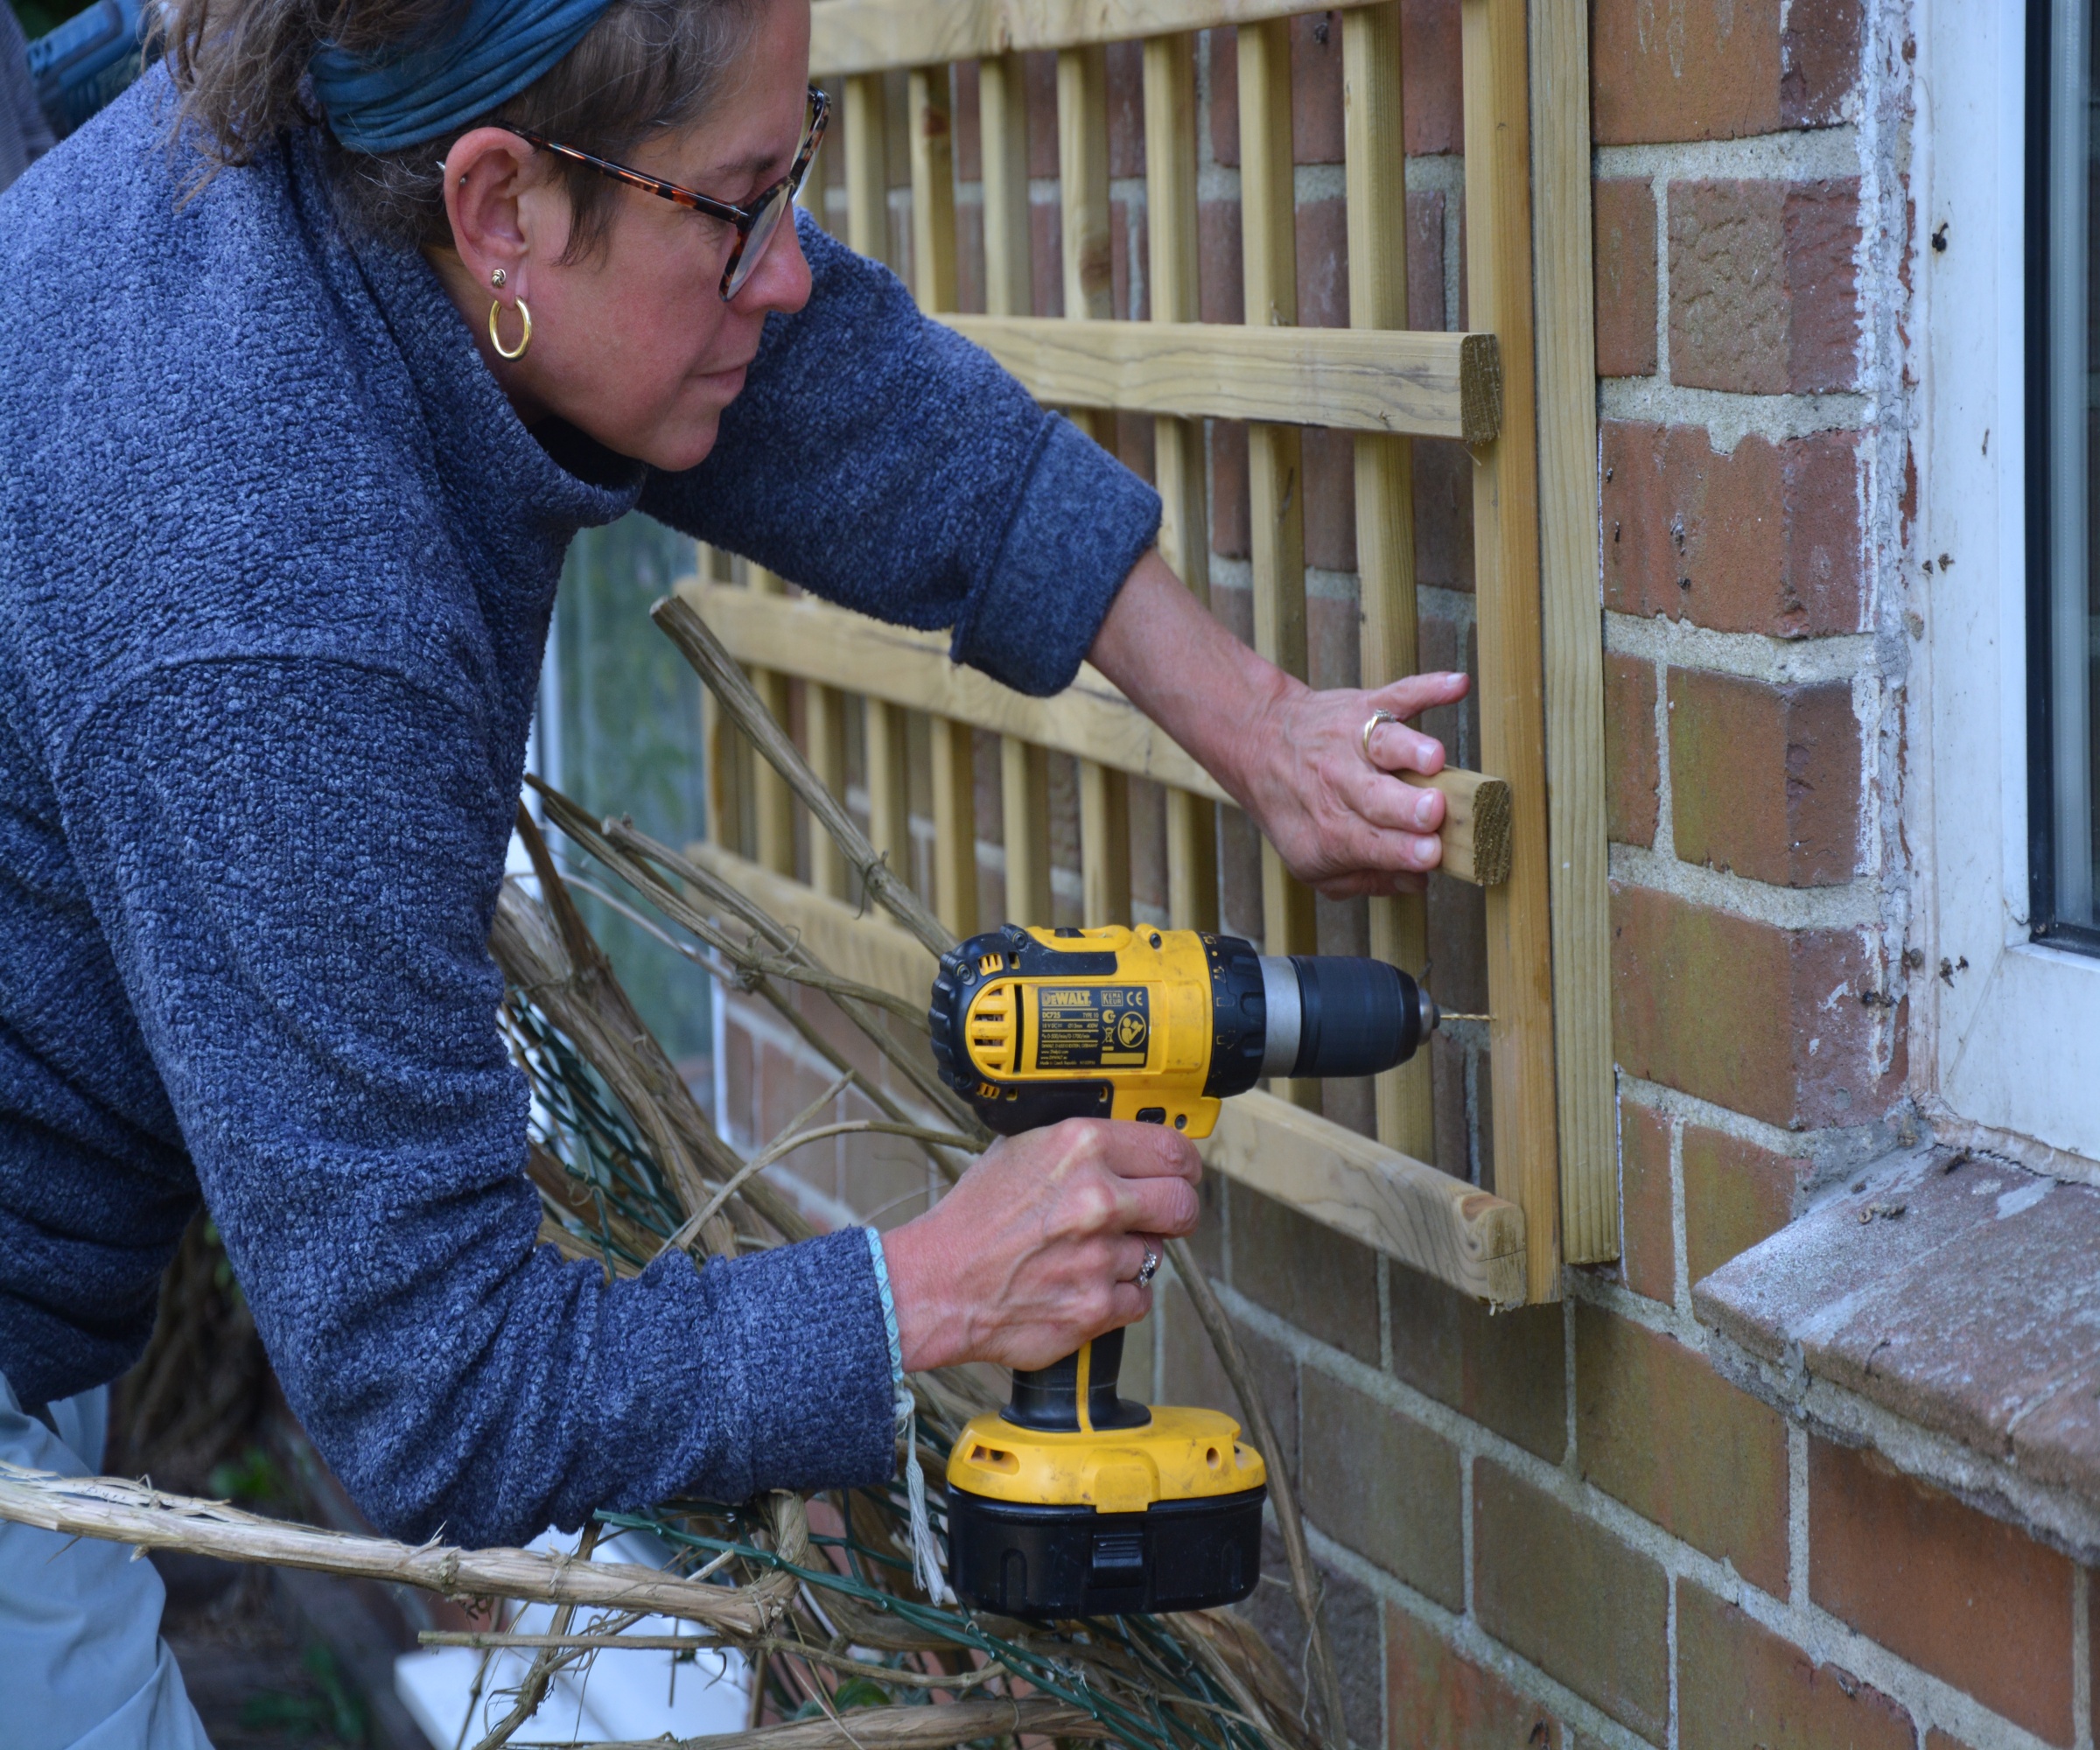
Attach each batten to the wall using weatherproof screws. It is easier to secure the top of each long batten before tackling the bottom end, and remember to paint over the top of each attached screw with wood preservative as you go.
Now drill guidance holes into the trellis - three on each side should be enough to attach it to the battens. Then using a screwdriver and weatherproof screws, attach your trellis to the battens on each side, top ends first, so the battens are hidden.
Your trellis is now ready to receive the climbing plant of your choice.
FAQs
What wood is best for a garden trellis?
Several woods are used to make trellises and all have their pros and cons. Hard woods such as oak are long-lasting but harder to work with, whereas pine is soft to drill into but won’t last as long unless it is properly preserved. Cedar and redwood are widely popular as they are attractive and resilient to weather and pests such as termites.
What are the alternatives to a wood trellis?
Bamboo is a popular alternative to wood as it is lightweight and also strong, able to support large climbers and fruiting varieties. It will last around 10 years. Metal trellises made out of iron or steel are classy, but they are also heavy to manoeuvre and attach and can be expensive.
Aluminium trellis won’t rust and will create a modern feel to your backyard. You can also buy attractive plastic trellises that are lightweight and durable, though they may not be as strong as other options. You could also source alternative supports at a recycling center for a quirky look, or have a go at making your own using the materials of your choice.
Can I paint a wooden trellis?
Yes - painted woodwork adds color and style to the garden and the paint (or varnish) will also help protect the wood. Pastel tones will create a cool effect, while bright colors will create a vivid contemporary impression. Remember to let the paint or varnish dry before you attach the trellis to the wall or tie your plants to it.
Does a trellis need to be attached to a wall or fence?
No, stand-alone trellis are widely available and are an easy way of adding height to small gardens without taking up too much space, hiding unsightly features such as compost bins, and creating 'rooms' in larger yards.
Some come attached to containers for growing climbers and others, like this ingenious multi-planter design by Outsunny on Amazon, comes with five attached troughs for varied growing.
Although most trellises are designed to be sturdy enough to hold large perennial climbing plants, for a quick fix consider planting sweet peas, morning glory or for swift results, any of these fast-growing climbers that will soon cover your wall with color.