Rosemary, or Salvia rosmarinus, is a popular evergreen shrub known for its aromatic leaves and its small, lilac-colored flowers that appear in early spring.
As a Mediterranean native plant, rosemary adores full sun and drought-like conditions, but it is also super hardy and will survive in poor soil. Knowing how to grow rosemary from cuttings will result in many more of these easy-going, not to mention useful, herbs for your yard.
If you know someone with a rosemary plant, or already have one in your yard and want to multiply your collection, June is the perfect time to take cuttings and create new plants for free. We have put together a step-by-step guide on how to propagate rosemary from cuttings, resulting in a constant supply of this delicious herb throughout the year.

5 steps to propagating rosemary from cuttings
Before you propagate your rosemary, you need to gather a few supplies, including:
- A healthy, mature rosemary plant
- Clean pruners or sharp scissors
- Small jar of fresh water (a clean jam or spice jar would work well) to propagate in water
- Small plant pot filled with fresh potting soil
- Pencil or dibber
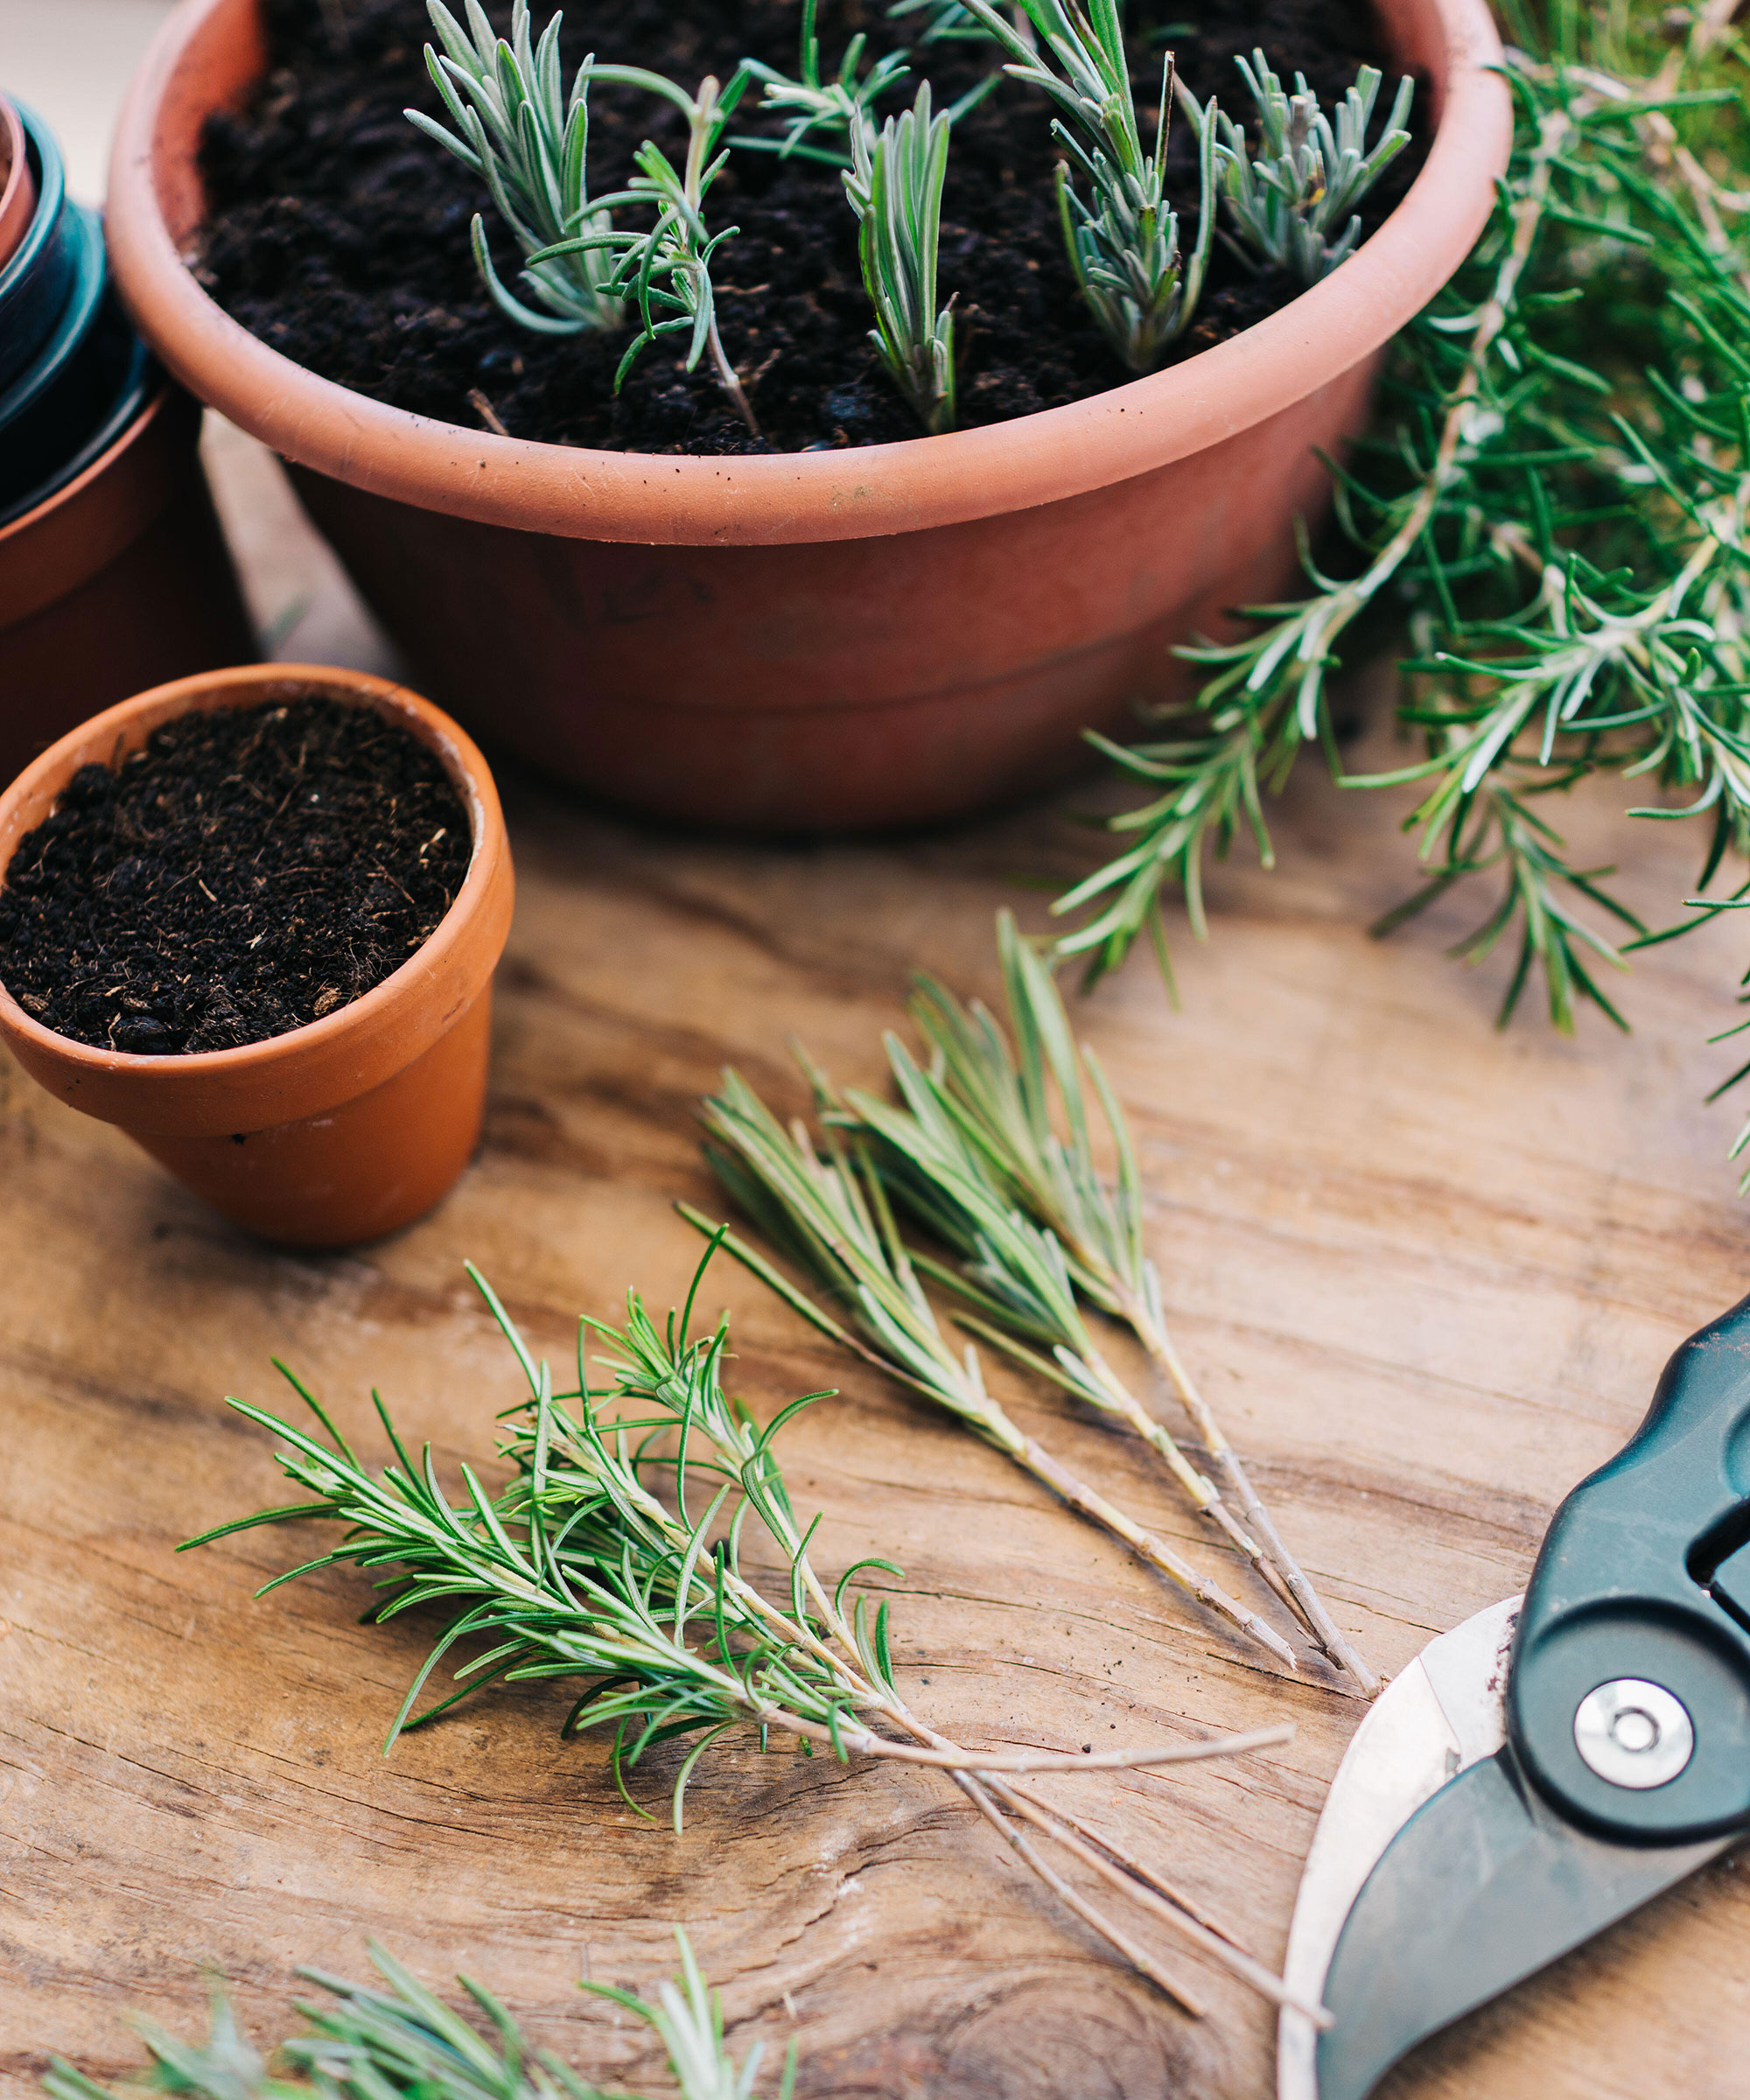
Step 1: Cutting a stem
Use a clean pair of gardening scissors - these snips from Walmart are ideal and snip off a stem at a 45-degree angle. It should be about 4-6 inches long.
Make sure you’re taking from the younger growth at the top part of the plant rather than the woody stems near the base, because those will root more easily. You can cut multiple stems if you want to ensure successful propagation and create several new plants at once.
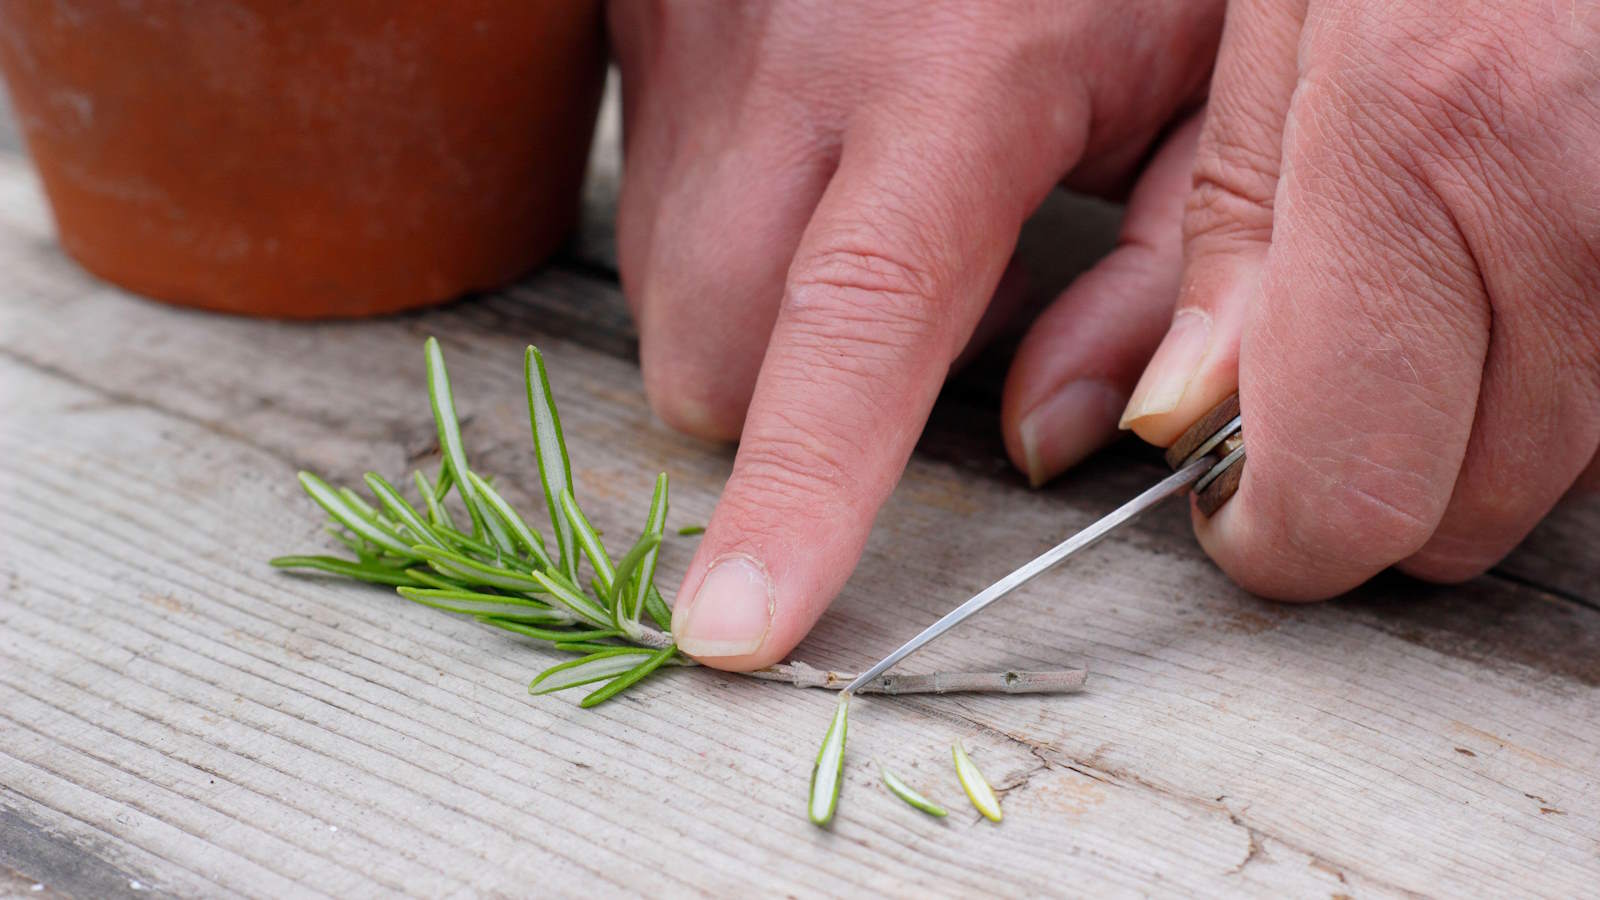
Step 2: Preparing the stem
‘Before you place the rosemary stem in water, remove the leaves on the stem about 1-2 inches from the bottom up,’ says plant expert Autumn Hilliard-Knapp.
You don’t want to let any leaves sit in water because this can cause bacteria to build up. 'Next, take a knife or scissors and very gently shave away the outer layer at the bottom up to 1 inch until you see the white inner part of the stem.'
What you’re doing here is taking away a layer of protection that will help your cutting to root, because the plant will send energy and nutrients down to the bottom to help it recover - this means it will form roots more quickly.
Step 3: Rooting in water
A popular way of propagating rosemary is by rooting the new cutting in water - or hydroponically. Simply fill a clear cup or glass jar with water and place your cutting into it, making sure no leaves are submerged.
Filtered, rain or distilled water from Walmart is better than tap water, if it's possible to use an alternative.
Some people prefer using water because it's easier to see when the cutting has grown roots. You will need to wait approximately five days to see the first signs of roots emerging from the main stem. Allow these to develop into longer, bushier roots over the course of a few weeks, changing the water every four days or so to give the cutting a fresh drink.
Step 4: Plant The New Cutting
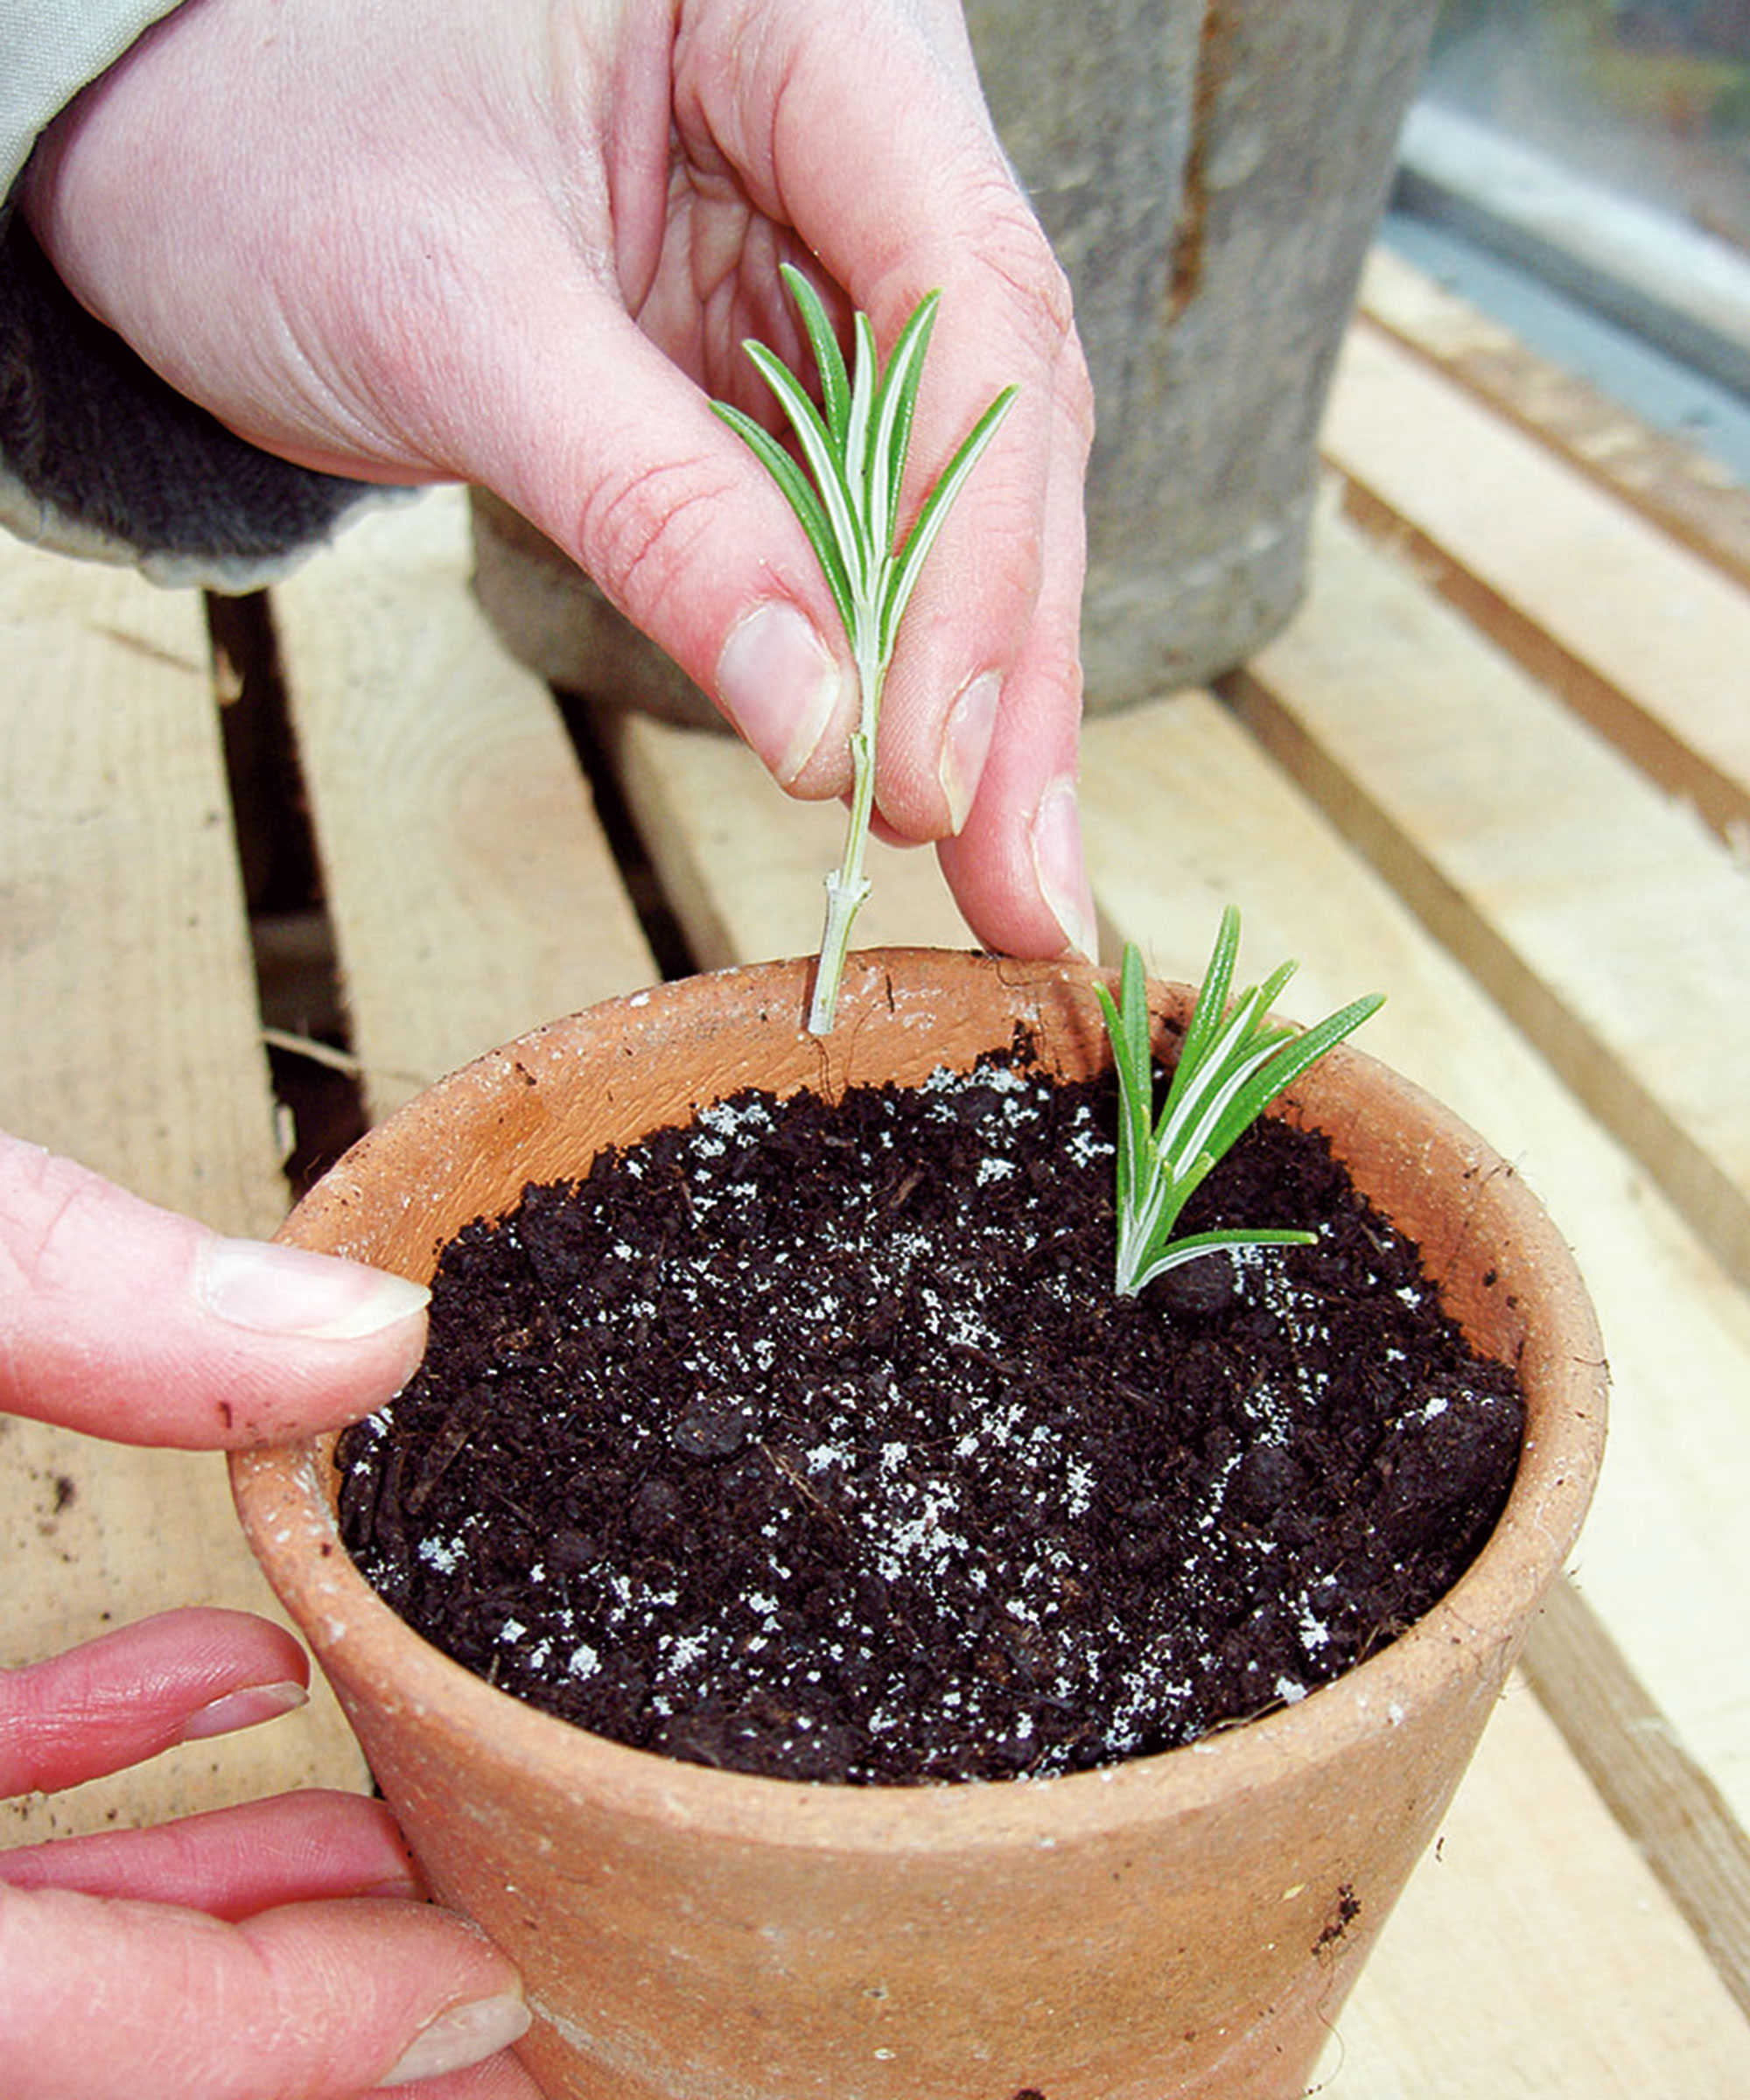
Now it’s time to plant your rosemary cutting. Once it has a few decent roots coming of the stem, it's a good idea to plant it up in a small pot so it can develop a little more before transferring to a bed outside.
Fill your container or pot with potting soil, making sure it has drainage holes and place your rosemary cuttings along the inner perimeter of the pot - this way you can plant up several in the same pot. It’s important to use a good, well-draining potting mix, such as this soil from Amazon because rosemary prefers to be on the drier side.
You can use a dibber or a pencil to create a small hole in the soil, in which to place your cutting. Add a little more soil to the top of the pot now, and press down gently to secure your rosemary cuttings in place.
Step 5: Monitor your potted cuttings and watch for new growth to appear
‘For the first two weeks after planting, keep an eye on your cuttings to make sure the soil is moist but not soaked,’ says Julie Bawden Davis, indoor plant expert at Healthy Houseplants.
Since rosemary likes to be on the dry side, it’s safer to water a little bit less because you can always add more if you notice it drying out. Rosemary much prefers to be drier than for it's roots to be sitting in soggy, dense soil.
Place your rosemary in a location that receives 6-8 hours of sun a day - this could be indoors or outdoors. Then, once you see a good amount of new growth appearing above the soil you can transfer your baby plants to their permanent home.
If you're planning a kitchen garden, or don't have any outside space, you can find everything you need to know about growing rosemary indoors in our expert guide.