EDITOR’S NOTE: An earlier version of this article included a quote from a purported expert whose credentials we have not been able to verify. The quote has been removed. We regret this lapse in our verification process and have updated our internal protocols to reduce the risk of recurrence.
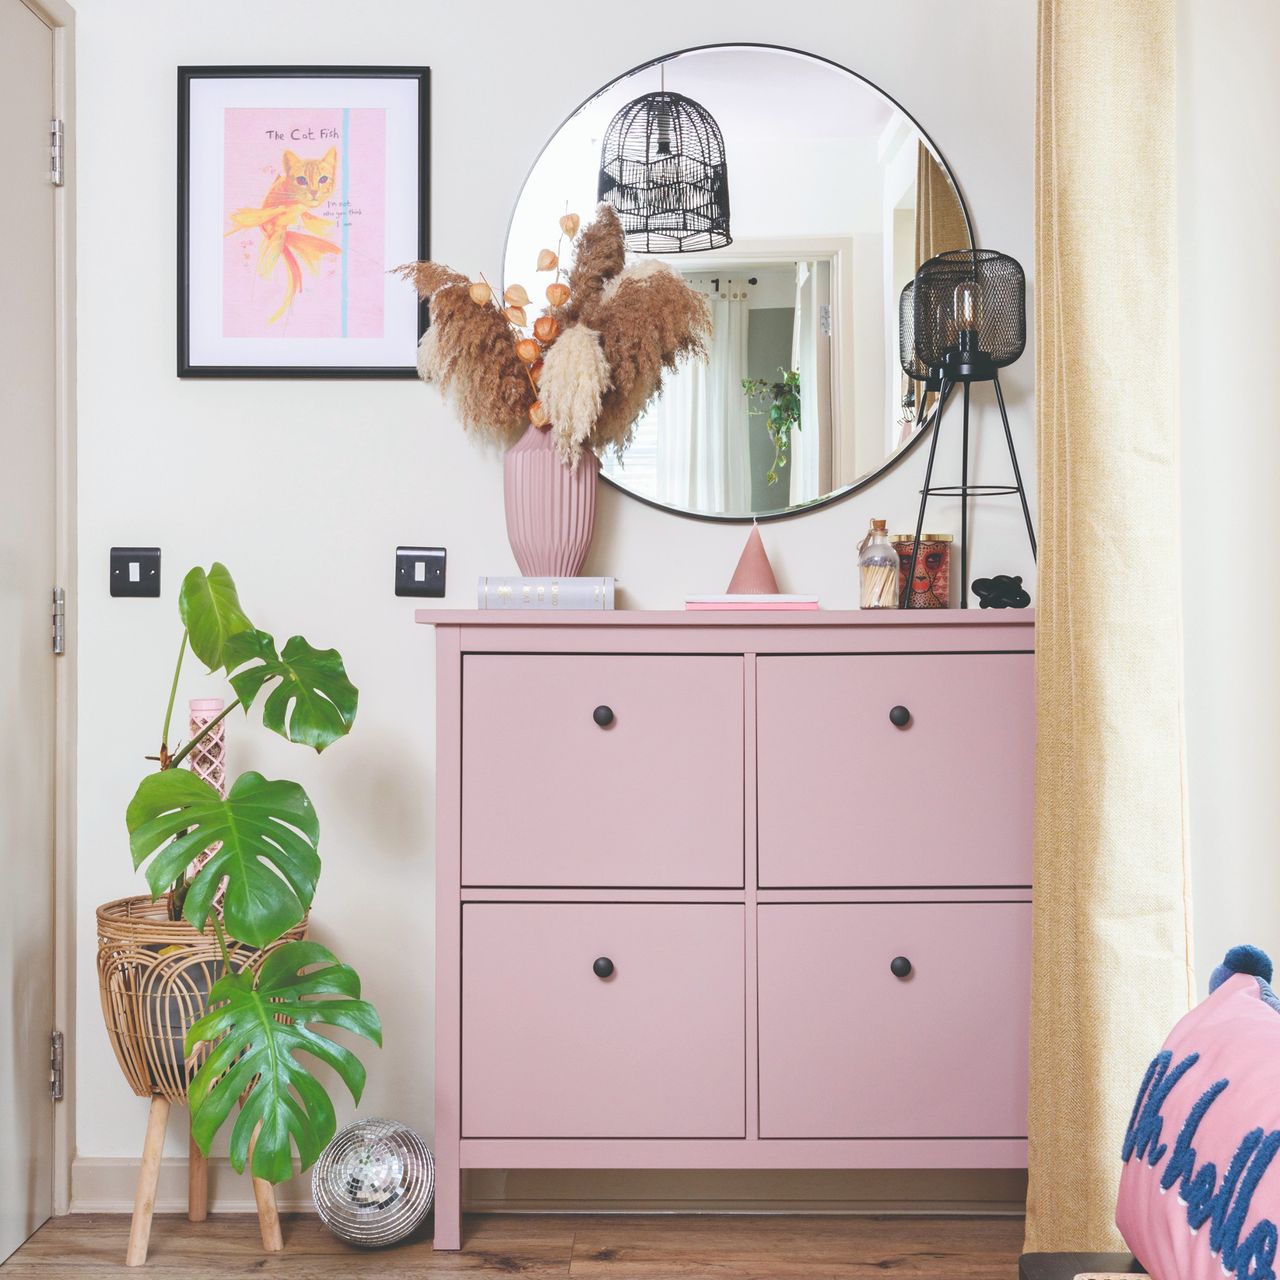
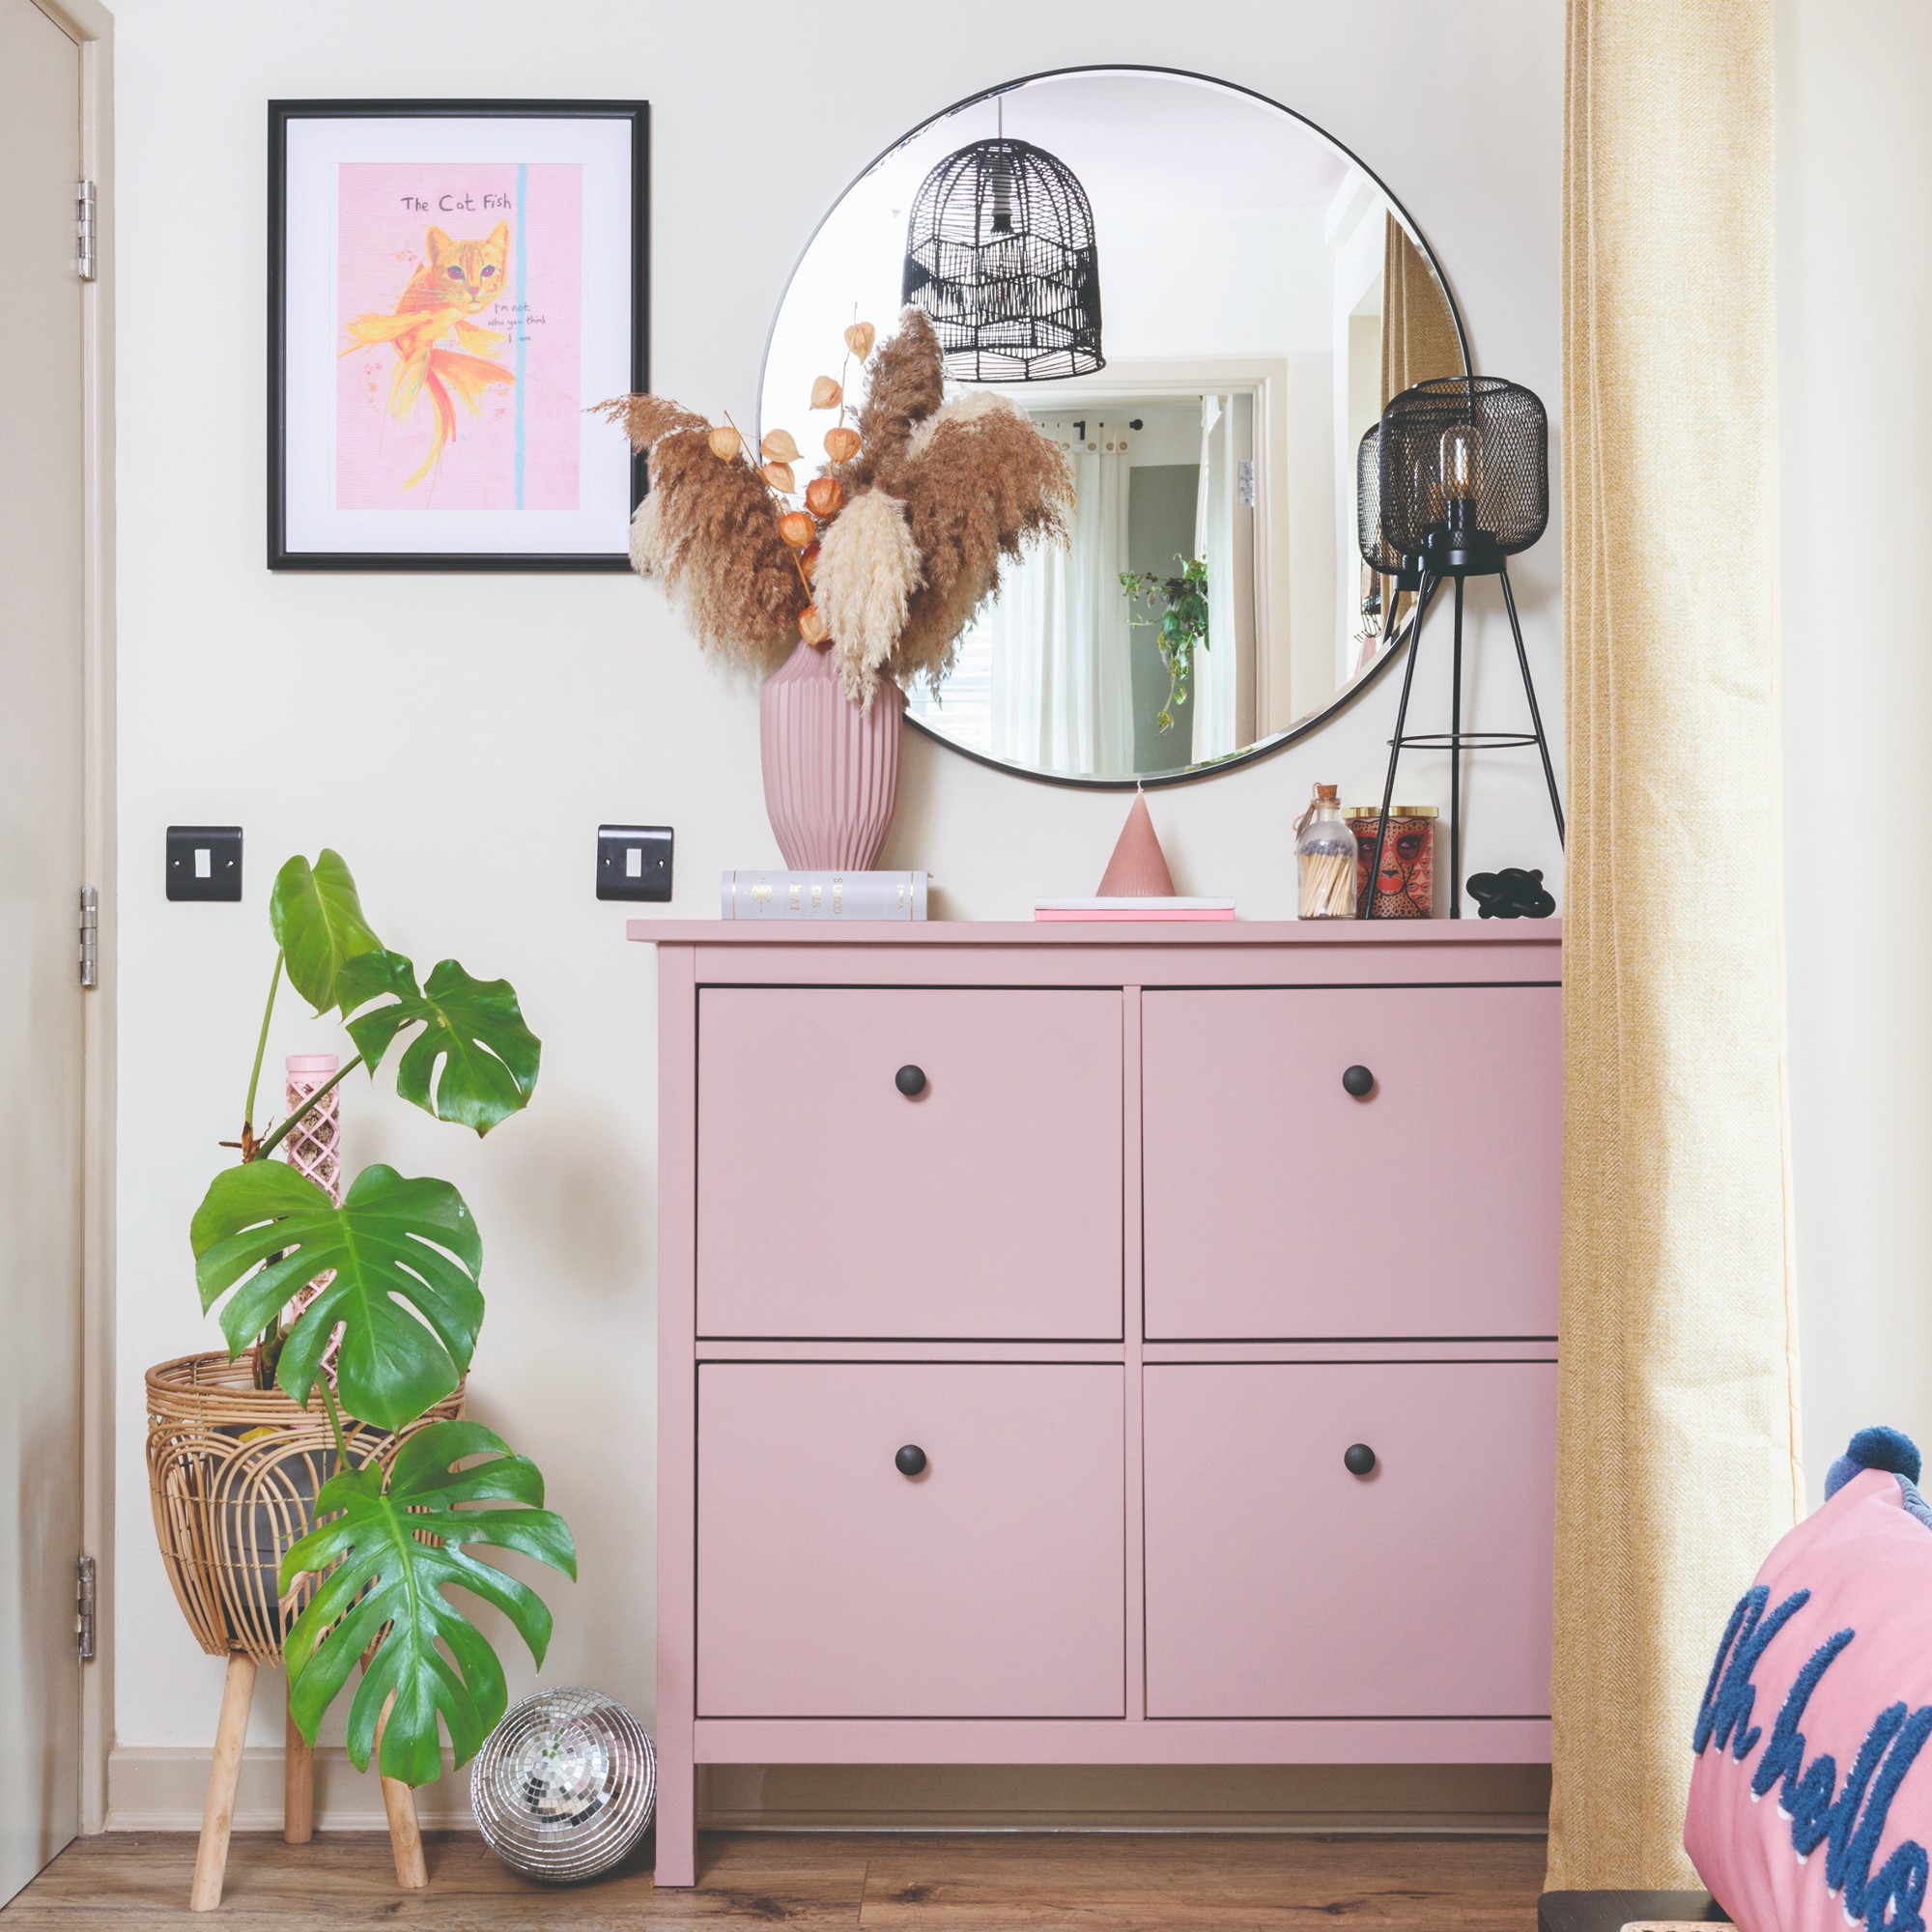
Pretty much all of us have at least one piece of IKEA furniture in our homes. The Swedish retailer is popular for its budget-friendly and versatile designs – but without customising these blank canvases, IKEA furniture can seem a little bland, not to mention you end up having the same piece of furniture as almost everyone else. Not if you know how to paint IKEA furniture though.
Pretty much every IKEA hack incorporates painting the IKEA piece in question. And sometimes transforming one of the brand’s flatpack pieces beyond recognition truly just requires a coat of paint in a fun or stylish new colour. But given the particular material that most IKEA furniture is made of, there is a specific process and a set of essentials that are needed to paint it. But don’t worry, it’s still a super easy DIY project to take on.
‘Painting IKEA furniture is a bit different from painting other pieces,’ says Michael Rolland, paint expert and managing director at The Paint Shed. ‘A lot of IKEA products are made from laminate, which you’ll need to prime before painting – it’s not the same as working with vintage wood or solid oak. That means it takes a bit more planning and prep, and it’s important to use the right paints so they actually stick to the surface.’
How to paint IKEA furniture
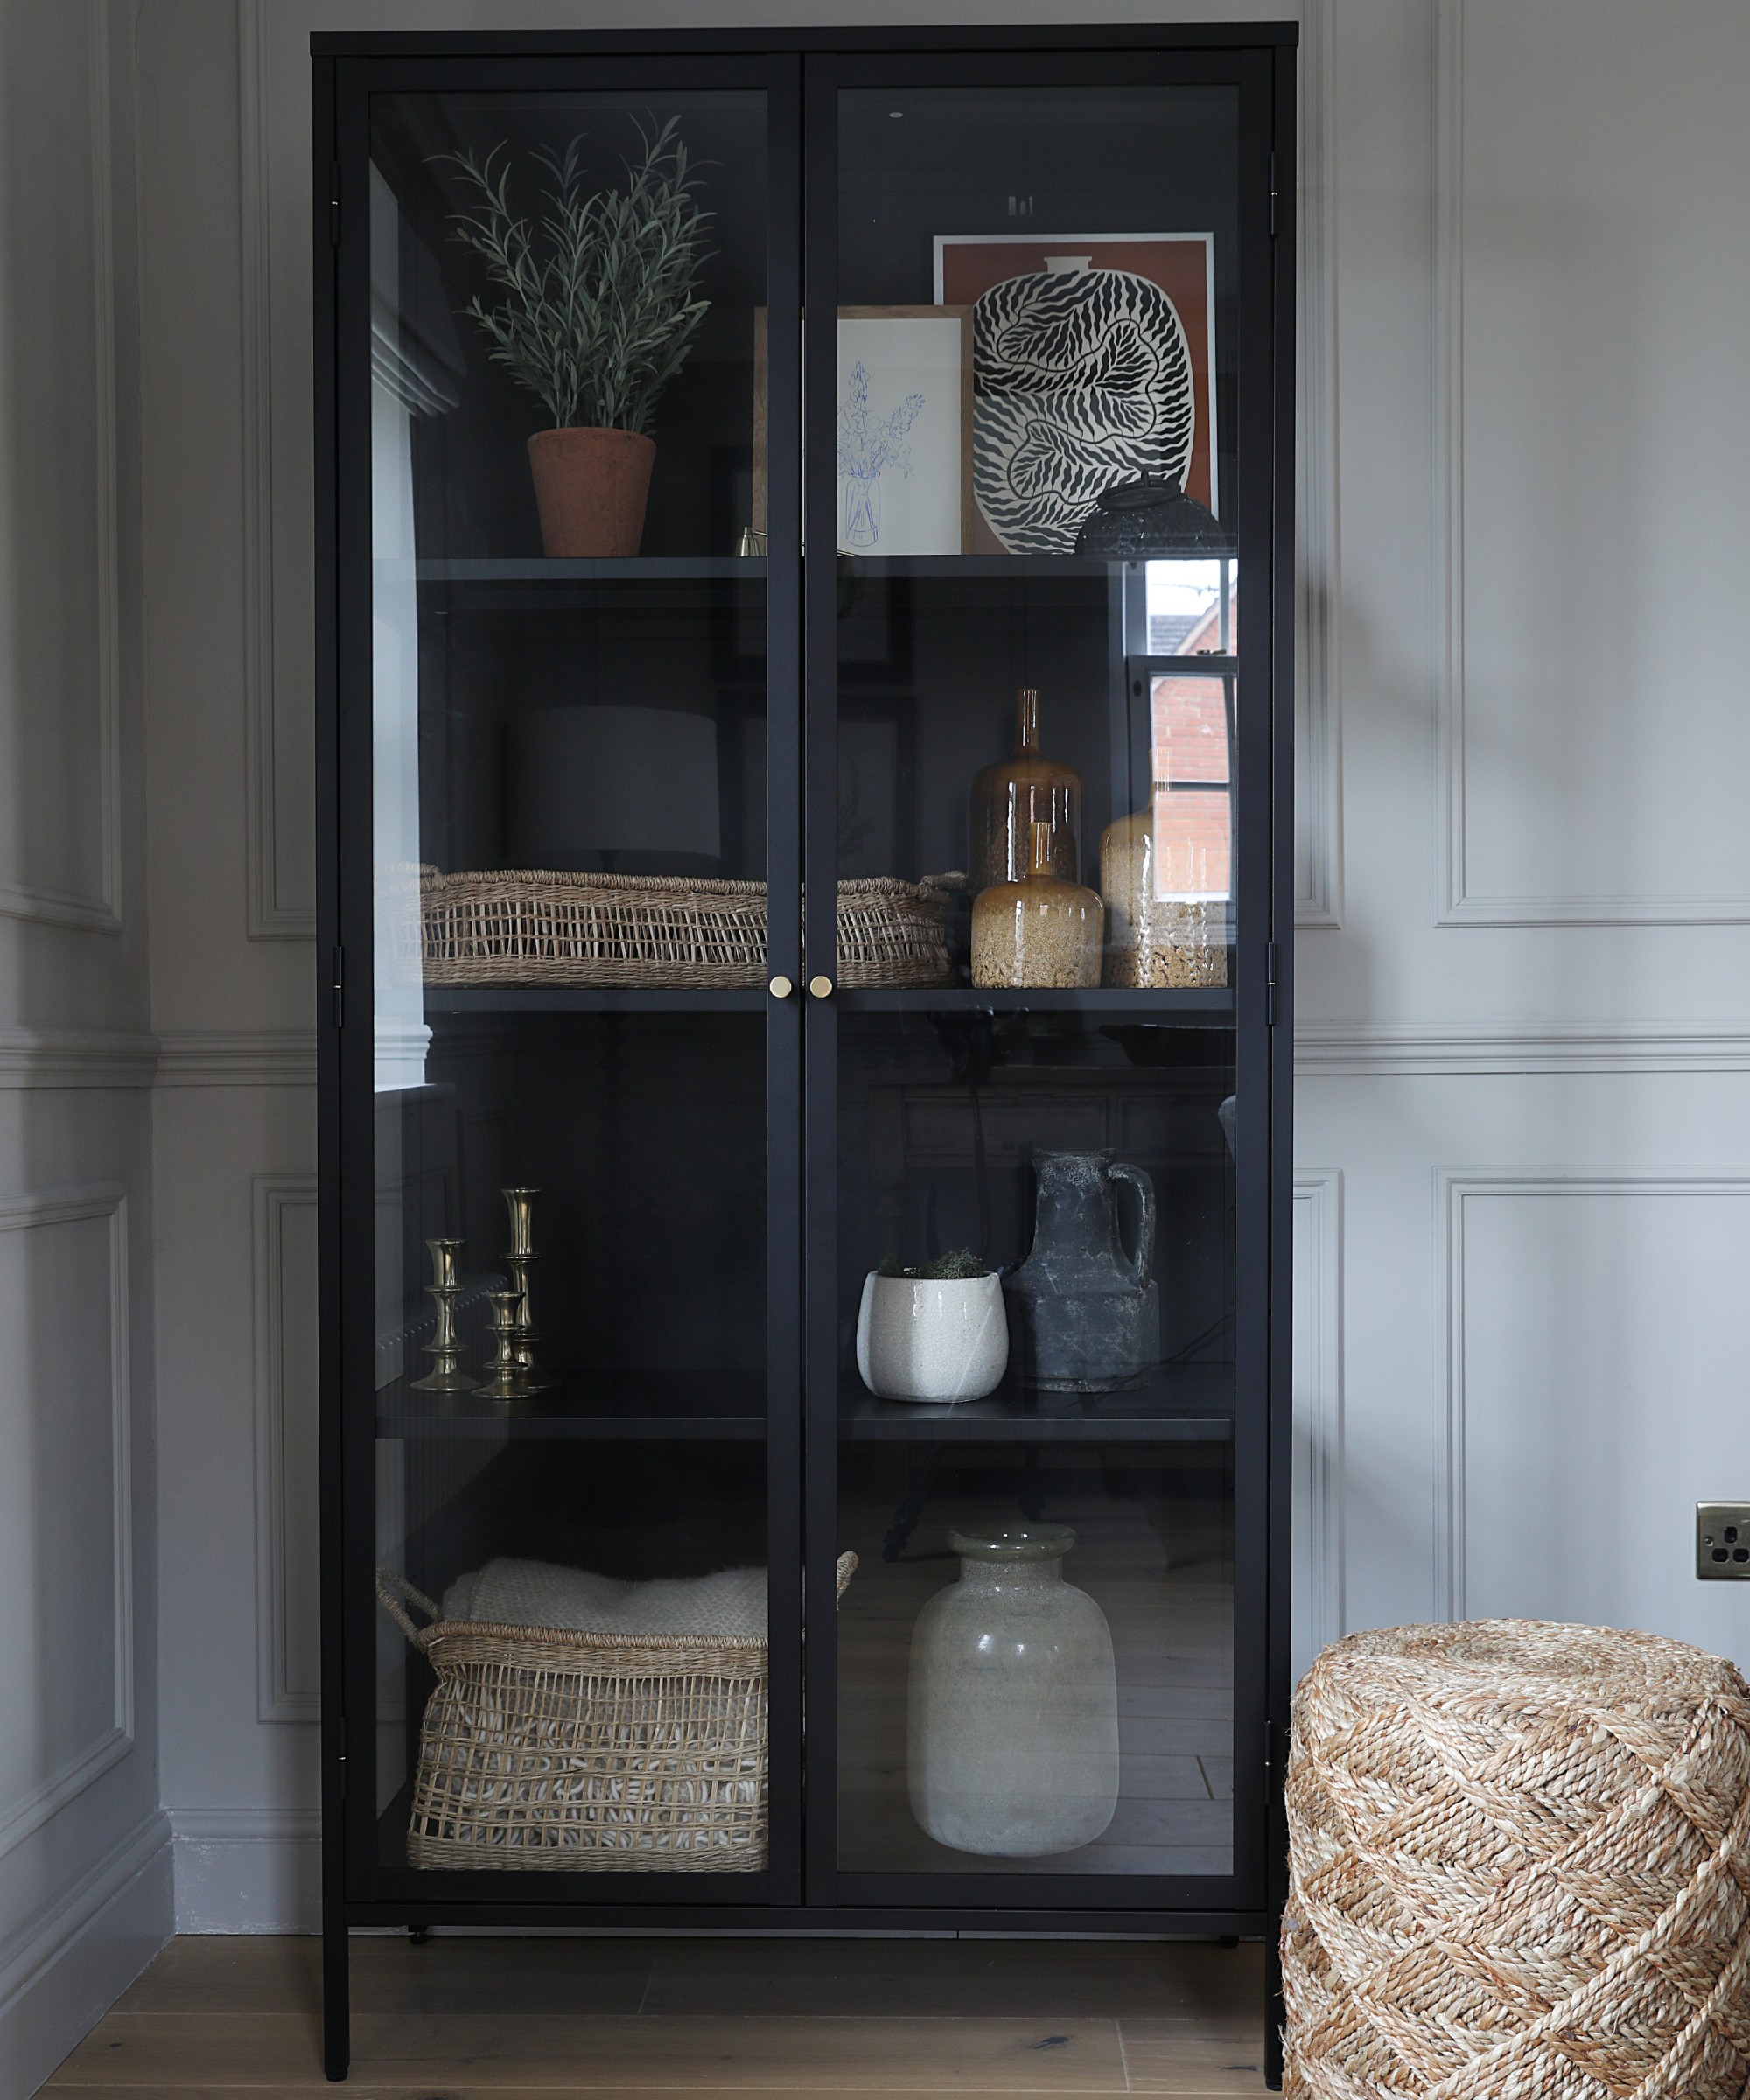
'IKEA furniture is a great starting point for a lot of people. It's an affordable option that still provides some interesting designs. But you'll find a lot of the same staple pieces across millions of homes. In fact, IKEA estimates that one of their BILLY bookcases is sold every 5 seconds. This is why painting Ikea furniture is so popular. You can take something simple that works well, and you make it your own,' Michael at The Paint Shed says.
Painting IKEA furniture still qualifies as easy upcycling for beginners which anyone can do without having much previous experience.
'Painting your IKEA furniture a different colour can breathe life and personality into a standard piece,' says Sara D’Souza, content strategist and creator at Frenchic Paint. 'You’ll be surprised at how much it can transform your room. It’s so popular as it’s a quick, easy way to give a tired or plain piece of furniture a personal twist and a professional finish.'
What you'll need
- Sandpaper – medium and fine grade sheets like these from Amazon
- Dust sheet like this Lick Tools one from B&Q – or any other floor protection such as bin bags or newspapers
- Dust mask and safety goggles like this set from Amazon if you’re sanding indoors
- Sugar soap like this spray one from ASDA or washing-up liquid
- Sponge or soft cloth
- Masking tape such as Multi Surface Frog Tape from Amazon
- Shellac-based primer – the Zinsser B-I-N Primer available at B&Q is the most widely recommended
- Your choice of paint – 'Matt, eggshell or gloss are the most suitable paints,' Michael at The Paint Shed says.
- Mini paint roller and brush - we recommend an all-encompassing set like this one from Amazon
- Clear top coat or lacquer suitable for the paint you’ve used – for a chalk paint, Rust-Oleum’s Furniture Lacquer available at Amazon is one of the most recommended

Step-by-step guide
1. Protect your surroundings
Whether you are painting your IKEA furniture inside the house or out in the garden, you'll still need to protect the floor and everything around you from wayward flicks of paint. So, pop down some newspaper or a couple of dust sheets and place the furniture on top of it. If you're inside, open a window or two to help with the dust (from sanding) and the smell (from your paint).
2. Prep your furniture
Next up, prep your chosen piece of furniture, ready to be painted. If you haven't yet put your IKEA furniture together, aim to paint your IKEA furniture before you assemble it. But even if you're painting an already put-together piece of furniture, it's recommended to take it apart.
'It’s always best to paint an IKEA furniture piece when it’s disassembled because it makes the process faster and easier,' says Lucy Fernando, Fantastic Handyman's home improvement and painting expert. 'It also allows you to be more precise in your work.'
This is also the time to remove or protect any handles or hinges, 'Frog Tape helps protect handles, metal fittings, or any parts that should remain unpainted,' Michael at The Paint Shed explains.
Of course, we know that disassembling your IKEA piece or removing the hardware isn't always the option, so don’t worry if you can’t. Simply cover up any features and areas you don't want to get paint on with masking tape. But it's best to do this only after you've cleaned the piece with either sugar soap or washing-up liquid.

3. Sand down and clean the surface
In order to get rid of that overly smooth and glossy surface and paint the laminate furniture, you'll need to roughen it up a little with some sand paper.
'Sand the surface of the furniture piece lightly. When you’re painting a smooth surface such as laminate, you’ll need to de-gloss or slightly roughen it up to allow the primer to adhere to it. For that, use a fine grit sanding paper,' Lucy at Fantastic Handyman says.
But to make sure those particles don't mix with the paint and make the finish rough and uneven, give your IKEA piece a good clean. 'Preparation of the surface is essential. Wash it with a soda-based or sugar soap (alkaline) cleaner,' says Richard Bradley, UK head of marketing for V33 paint.
4. Apply a primer undercoat
Now that you're prepped your surface, the next step is largely what sets painting IKEA furniture apart from painting any other piece of furniture. And that's applying primer.
'Prime the furniture surface. It’s very important to use the right primer for this task. A shellac primer is best if your furniture piece will be located in a high-traffic area,' Lucy at Fantastic Handyman says.
Primer is essentially used to ensure that your chosen paint colour will stick to the surface of your furniture. So, while it adds a couple of steps to your upcycled furniture project, it’s worth the extra effort.
5. Apply your chosen paint
Next, it’s time to apply your paint. If you're painting something like a bookcase, cabinet or wardrobe that has lots of large, flat surfaces, a small roller will be your friend and will give a professional finish. For smaller, more fiddly areas, a good quality paintbrush will allow you to get into every nook and cranny.
If your paint is water-based, opt for a synthetic bristled brush, as natural bristles can sometimes soak up too much of the paint and leave a streaky look.
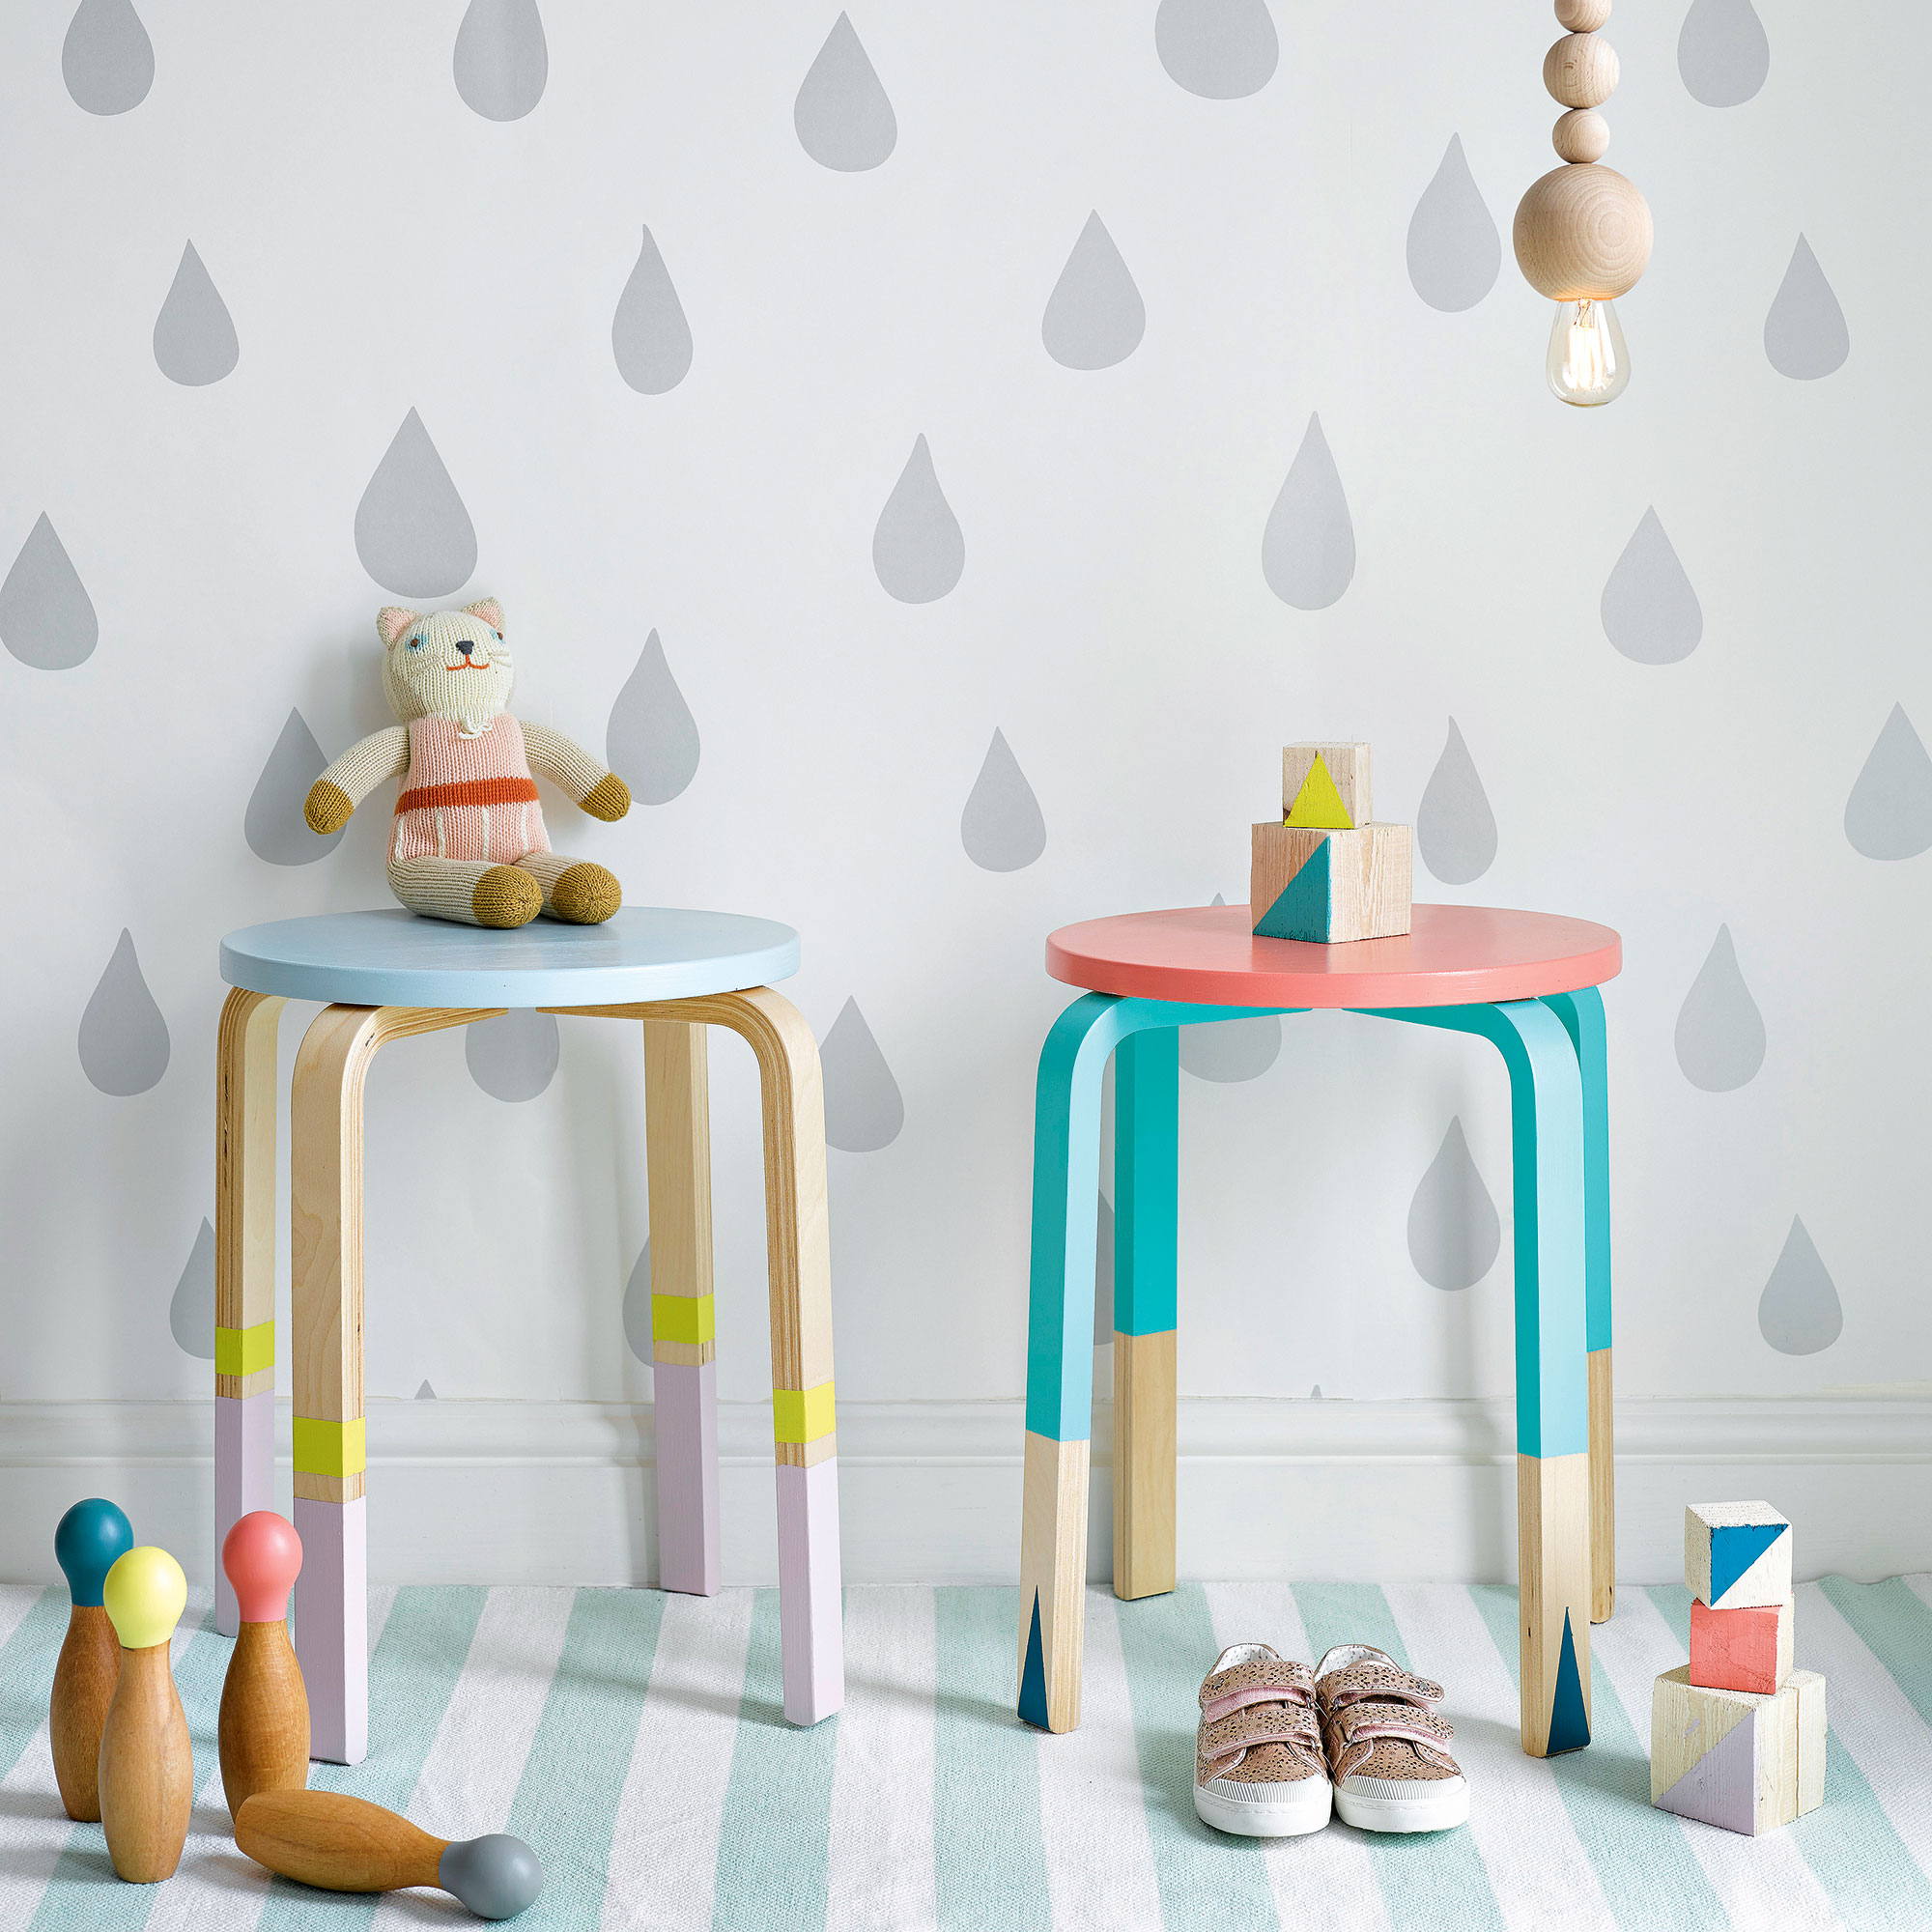
Apply the paint in long, smooth strokes, catching any drips as you go and, where possible, in the same direction as any wood grains. And aim for two coats.
'Paint the furniture surface with at least two coats. Apply the first layer of the paint you’ve selected to the surfaces of your furniture piece. You can use the same paint roller or paintbrush for this as the one you used for the primer. Keep the layer thin as it’s always better to apply two thin coats than a thick one. This will provide a more complete and even coverage. When your first layer has dried a little bit, apply the second coat,' Lucy at Fantastic Handyman advises.
6. Finish with a top coat
To make the final result more long-lasting and hardwearing, applying a suitable top coat is highly recommended by paint experts once the paint dries.
'For the best results, use a topcoat for a smooth, durable finish,' Michael at The Paint Shed confirms.
FAQs
Can IKEA furniture be painted?
Yes, IKEA furniture can be painted. The Swedish flat-pack furniture brand lends itself extremely well to painting, as many pieces are untreated when they are sold. And while you could paint straight onto IKEA furniture, the proper process is a little more detailed.
To do this, you’ll need to sand down the surfaces - especially if the IKEA furniture is laminated or already painted. When you’ve done this, you can then focus on applying a coat or two of primer before painting in your desired colour.
However, if you’re looking for a way to update your IKEA furniture without painting it, interior and product designer Siobhan Murphy has offered another option.
‘The best way to add a bespoke and stylish look to IKEA furniture is through clever use of moulding. Using something fresh like a bobbin or bamboo-shaped moulding can instantly transform relatively generic pieces into something really expensive looking. I recommend using dec wood moulding for the best finish.’
What type of paint is good for IKEA furniture?
This will depend entirely on the surface that you are painting. Chalk paint is great for painting onto lots of surfaces. Frenchic Paint is one of our favourite affordable chalk paints for painting furniture and for other DIY projects.
When using chalk paint, it is worth noting that you might need to finish your IKEA furniture with a wax or varnish to protect it from knocks and scratches.
A normal wood and metal paint is great to use, too, and this is preferable over using an emulsion intended for walls and ceilings. That said, if you're looking to upcycle your piece by using up leftover emulsion from a previous project or want to colour-match your furniture perfectly to your walls, the emulsion will do the job nicely.
Can you paint IKEA furniture without sanding?
If you want to do the job right and you want to admire a professional finish at the end of your DIY project, you should always sand your IKEA furniture before painting it. While it will obviously add more steps to the process, it will make a big difference.
After all, if you try to paint a surface that has no 'key' (a rough surface), the paint has nothing to cling to and will either not apply to the surface, or it will dry and immediately peel off. To create a key, use fine sandpaper and wipe down the piece of furniture as if it were a cloth.
Alternatively, use a sanding sponge or even an electric sander to make the whole process even easier.
While there are extra couple steps involved in painting IKEA furniture, we'd say it's still a fairly easy project – do you agree?