On Windows 10, when your hard drive starts running out of space, the usual solution is to add another drive. While this works, over time, you could end up with a cluttered list of drives, making data management less efficient.
Instead of relying on solutions like Storage Spaces or RAID (Redundant Array of Independent Disks) to merge multiple drives into a single volume, Windows 10 offers a simpler, more organized alternative, which includes mounting a hard drive to a folder instead of assigning it a drive letter. This method not only reduces the number of drive letters but also improves storage organization.
This approach is especially useful when sharing a folder over a network and running low on space. Rather than creating a new network share, you can mount an additional hard drive within the existing shared folder, instantly expanding its storage without disrupting access.
In this how-to guide, I'll explain two ways to mount a hard drive as a folder on your device using the Disk Management console.
How to assign folder path mount-point to drive with data on Windows 10
To mount a drive with data as a folder with Disk Management, use these steps:
- Open File Explorer.
- Open the folder location where you want the mount point to appear.
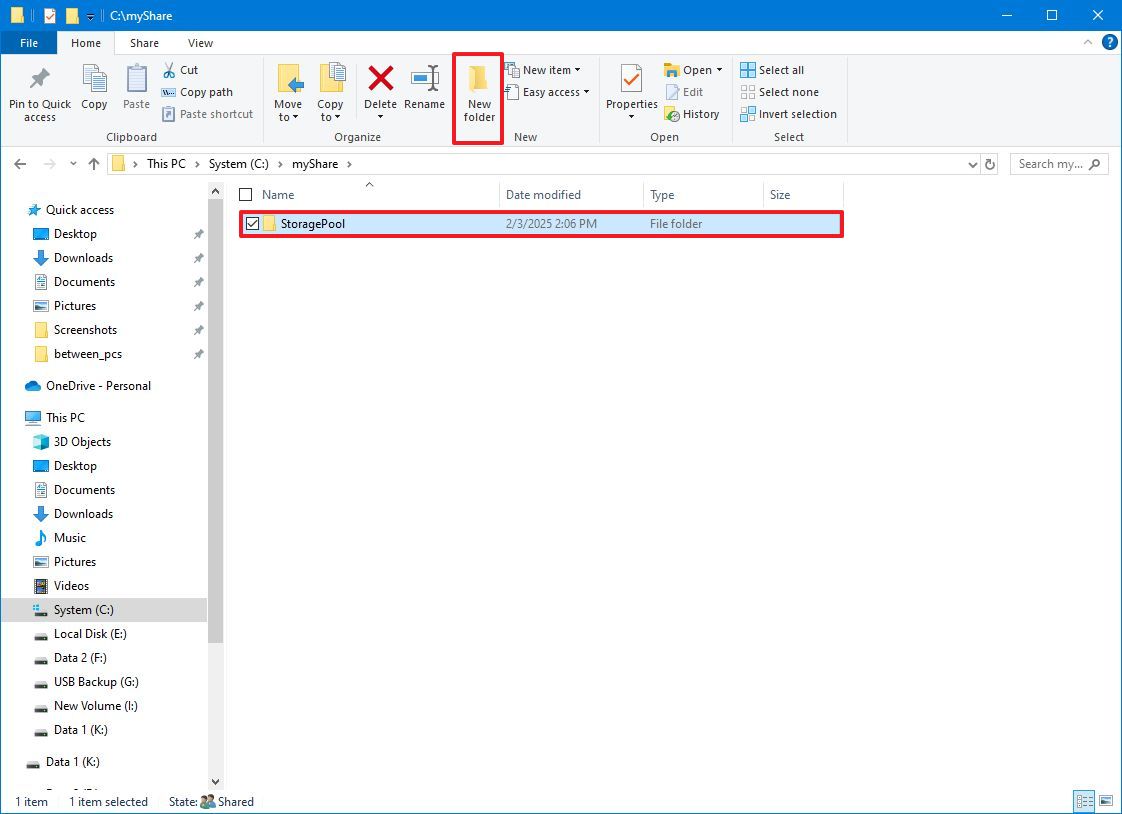
- Click the New folder button on the "Home" tab.
- Confirm a name for the folder, such as "StoragePool."
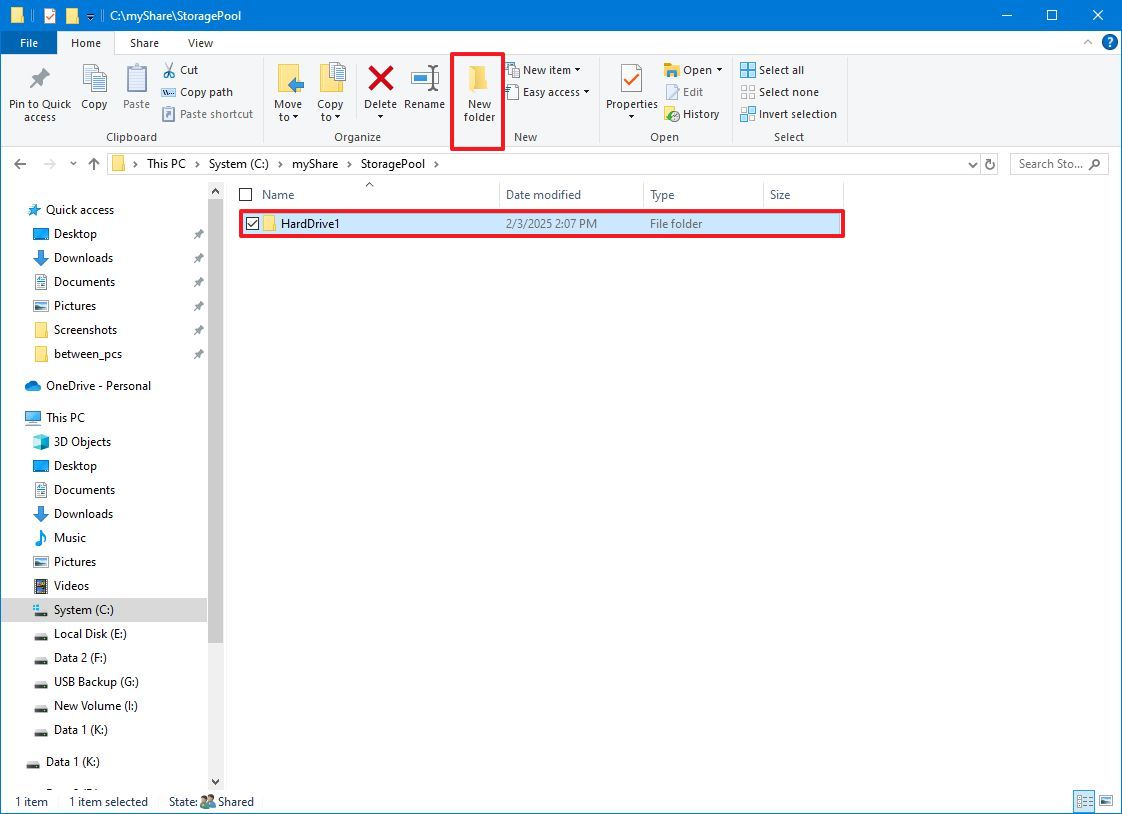
- Open the newly created folder.
- Click the New folder button on the "Home" tab to create a folder to mount the drive, such as HardDrive1.
- (Optional) Repeat step 6 to create an additional folder depending on the number of hard drives you want to mount as folders.
- Open Start.
- Search for Disk Management and click the top result to open the console.
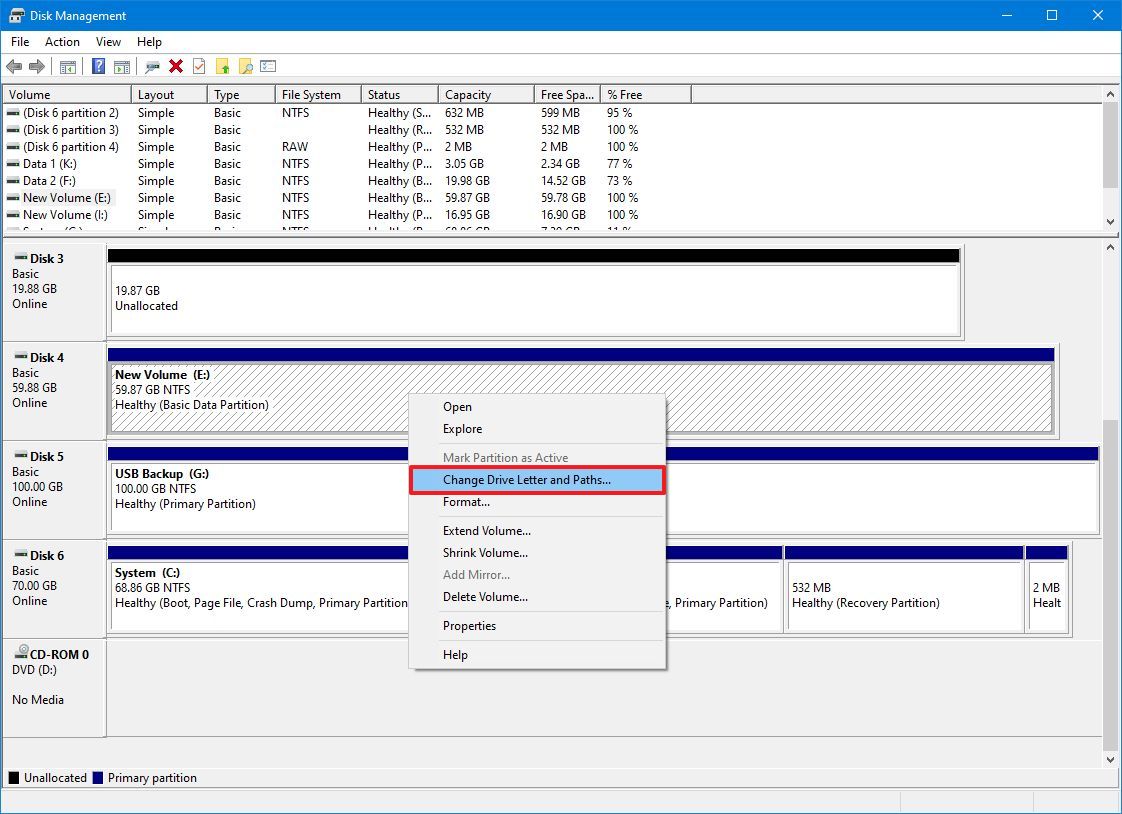
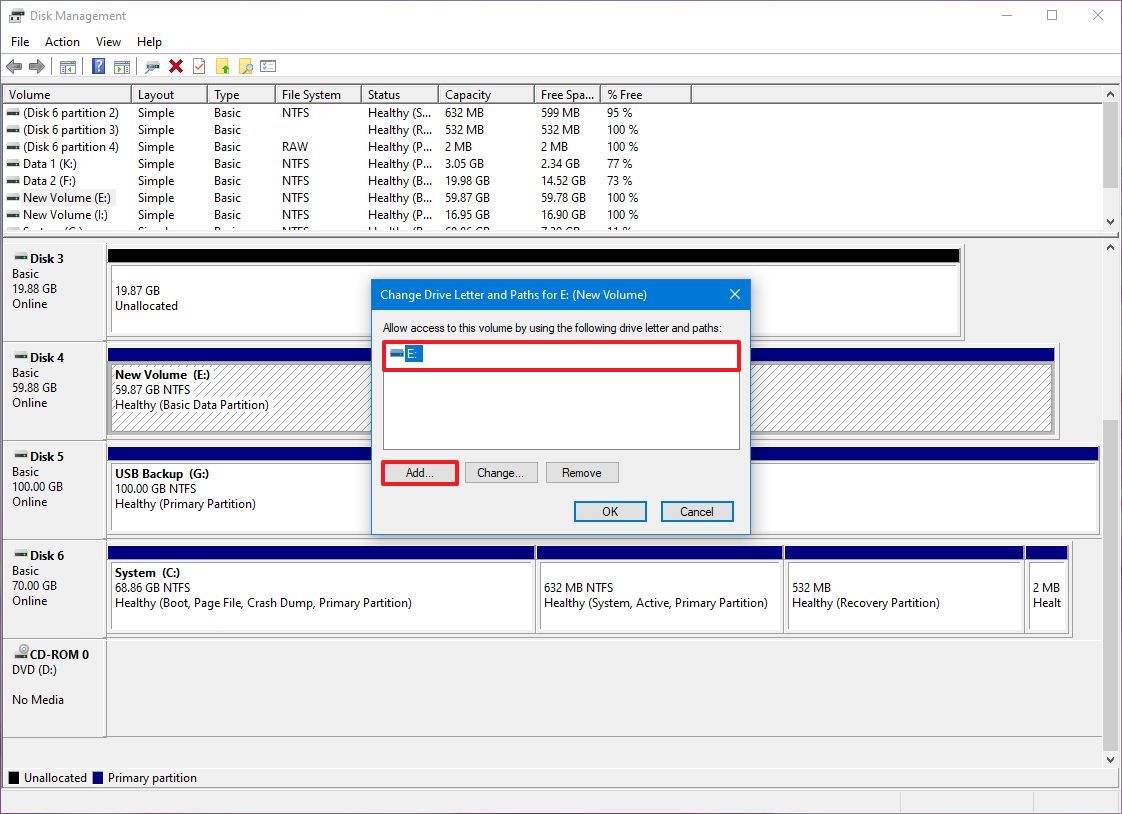
- Right-click the drive you want to mount and select the "Change Drive Letter and Paths" option.
- Click the Add button.
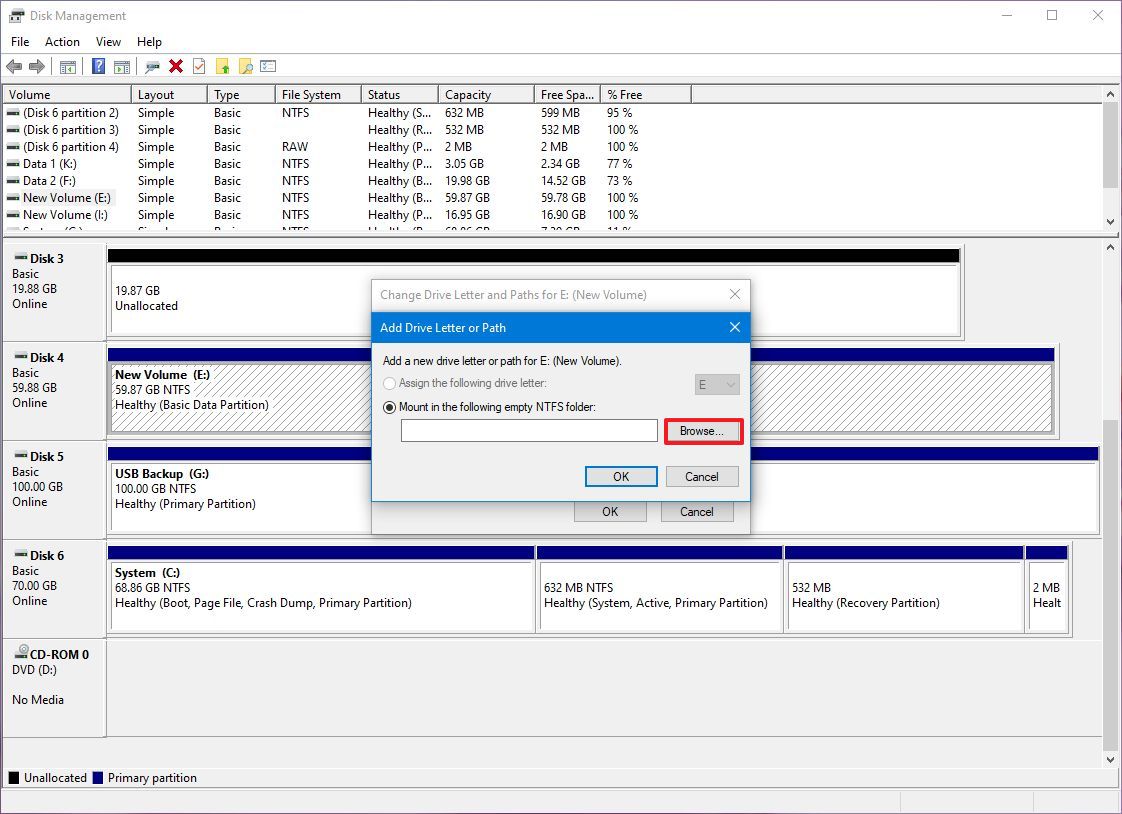
- Select the "Mount in the following empty NTFS folder" option.
- Click the Browse button.
- Select the folder you created on step 6.
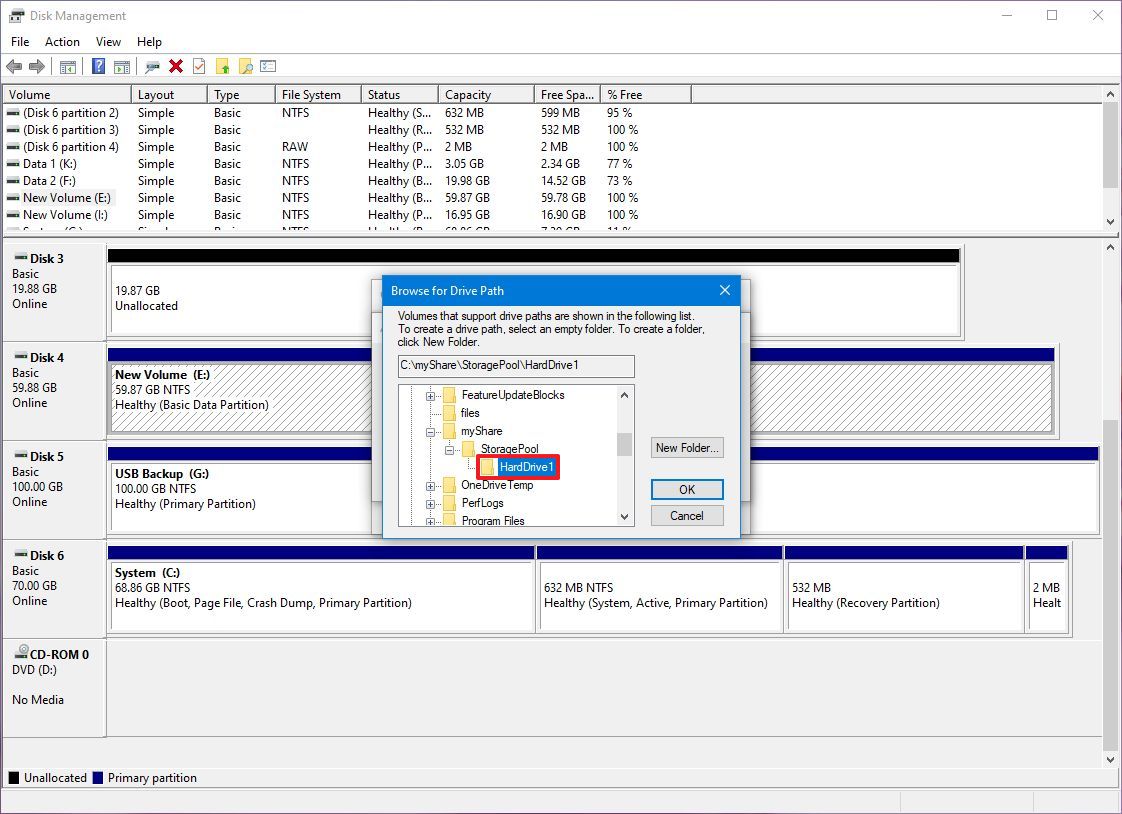
- Click the OK button.
- Click the OK button again.
- (Optional) Right-click the drive again and select the "Change Drive Letter and Paths" option.
- Select the current drive letter (not the mount point).
- Click the Remove button.
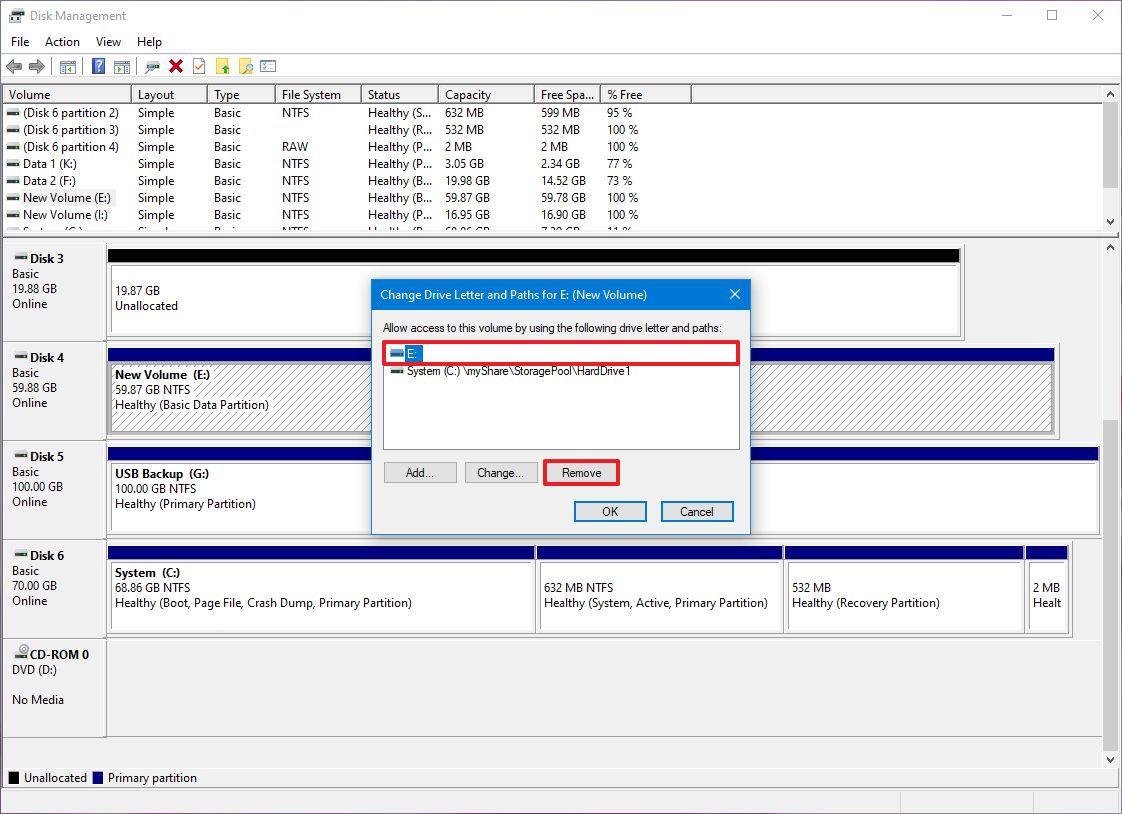
- Click the Yes button.
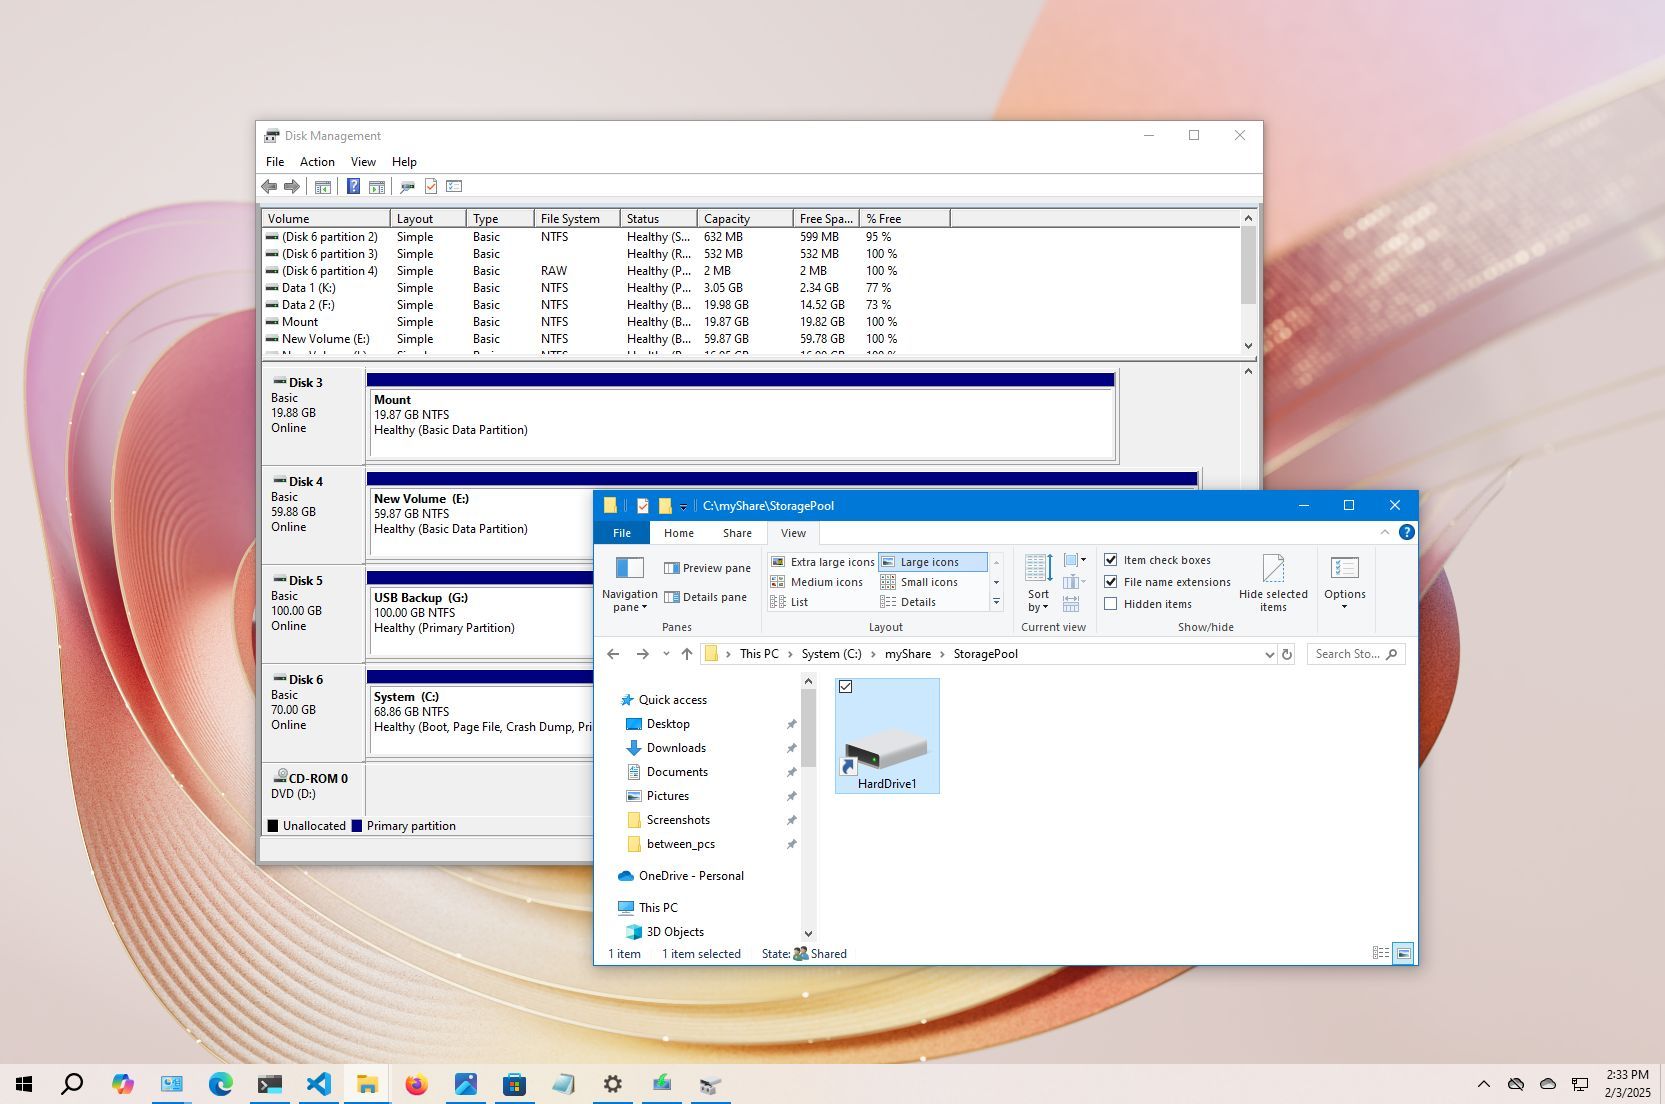
Once you complete the steps, the secondary hard drive will now be accessible from the folder location you created.
How to assign folder path mount-point to drive without data on Windows 10
To mount an empty drive as a folder with Disk Management, use these steps:
- Open File Explorer.
- Open the folder location where you want the mount point to appear.
- Click the New folder button on the "Home" tab.
- Confirm a name for the folder, such as StoragePool.
- Open the newly created folder.
- Click the New folder button on the "Home" tab to create a folder to mount the drive, such as HardDrive1.
- (Optional) Repeat step 6 to create an additional folder depending on the number of hard drives you want to mount as folders.
- Open Start.
- Search for Disk Management and click the top result to open the console.
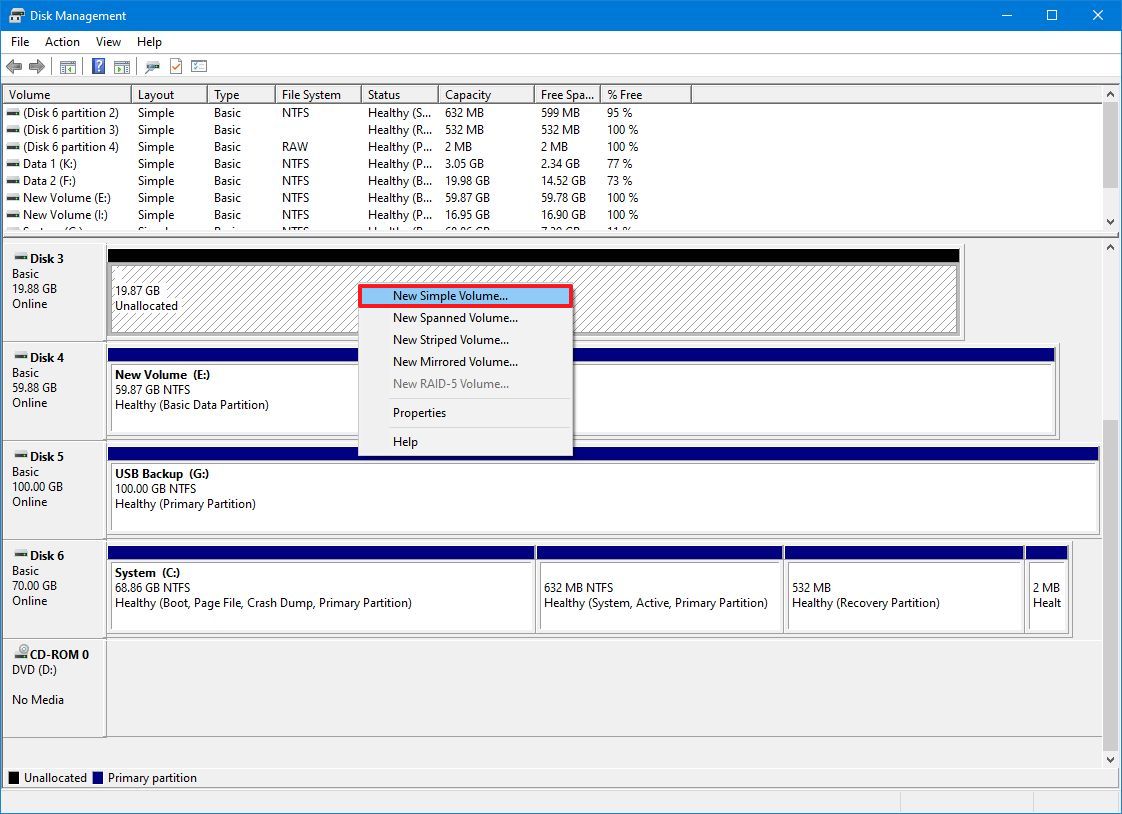
- Right-click the empty drive you want to mount as a folder and select the "New Simple Volume" option.
- Click the Next button.
- Click the Next button again.
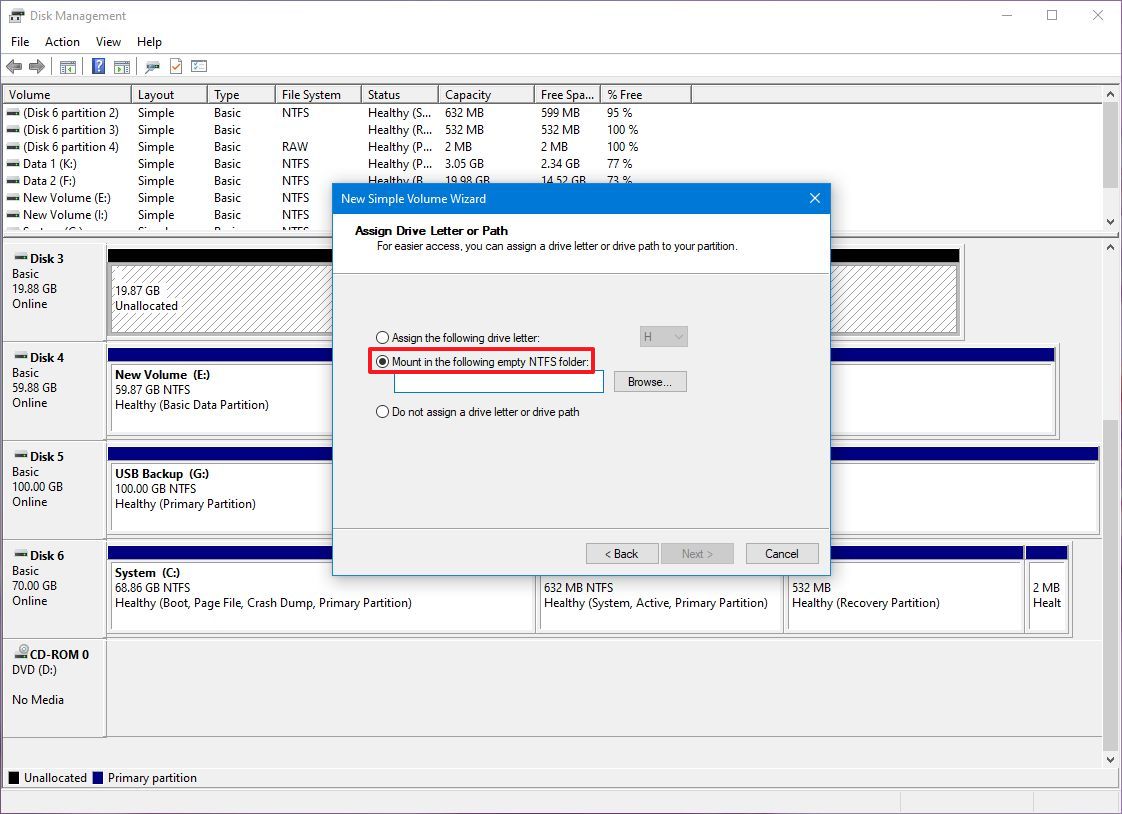
- Select the "Mount in the following empty NTFS folder" option.
- Click the Browse button.
- Select the folder you created in step 6.
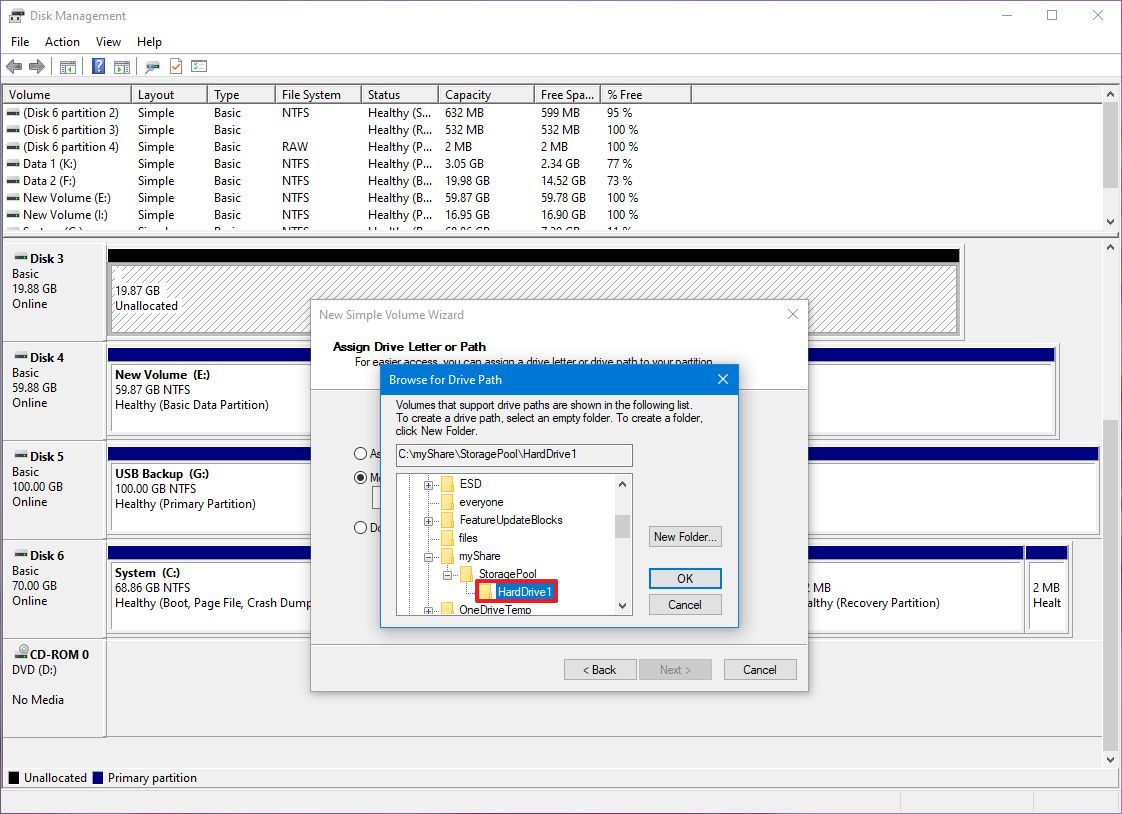
- Click the OK button.
- Click the Next button again.
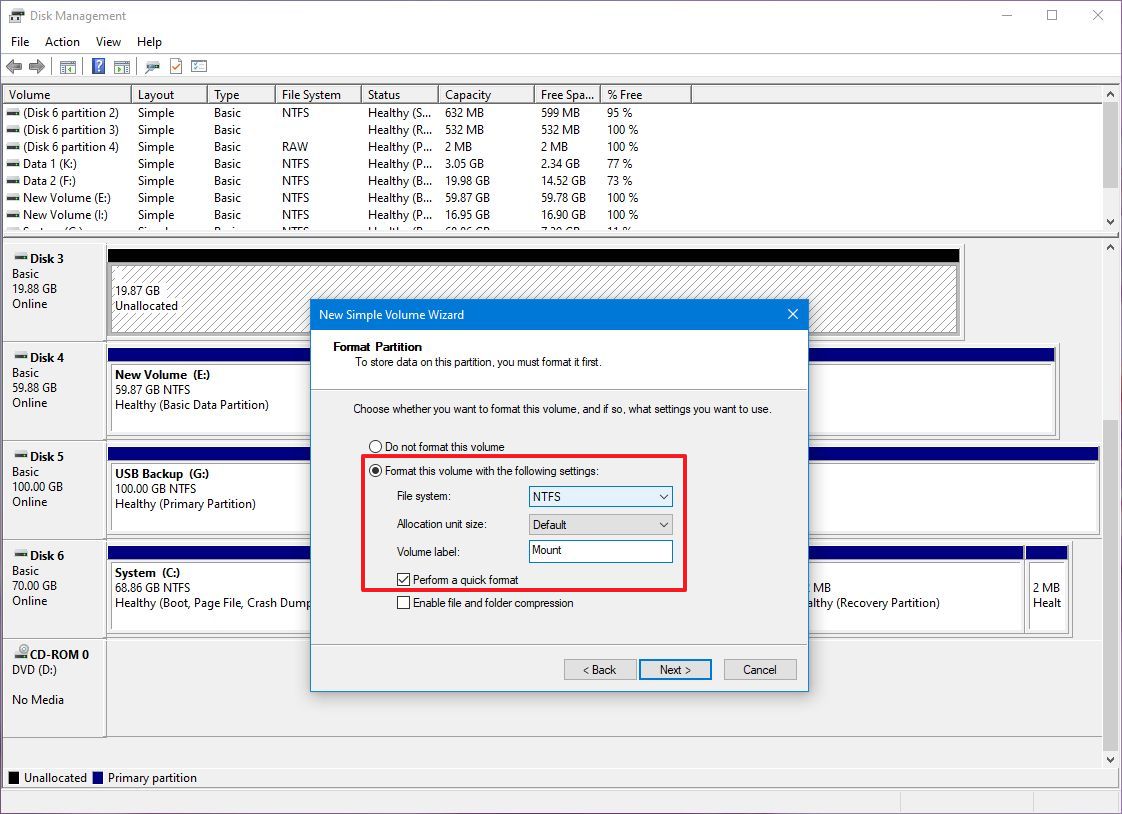
- Select the "Format this volume with the following settings" option.
- Use the default settings for "file system," "allocation unit size," and "volume label" options.
- Check the "Perform a quick format" option.
- Click the Next button.
- Click the Finish button.
After you complete the steps, the new drive will be formatted and mounted as a folder from the specified folder.
When using this solution, each drive will continue to work independently without redundancy, which means that if a drive fails, you will lose the data on that drive but not on the others. If you have important data, it is always recommended to periodically create a backup.
More resources
Find in-depth guides, troubleshooting tips, and the latest updates on Windows 11 and 10 here: