A popular sound in techno today is a hybrid of modern production techniques and the rave sound of the ’90s. In this fusion, faster tempos, detuned synths, melodies and acid basslines are combined with modern techno sounds.
A multitude of music production techniques were born in the rave scene in the late 1980s and early 1990s, the emphasis for producers from this era was firmly on inventiveness and experimentation.
Plugins and software synths can allow us to creatively recreate sounds that bear resemblance to sounds from the rave era. In this tutorial, we’ll look at how to create rave-style techno, including building an atmospheric synth and trance synth using Ableton’s Operator.
To lay the foundations for your track, program in a kick drum with a strong transient, and sub bass. Use closed and open high hats and a clap from a 909 drum kit (NI’s Battery, or D16’s Drumazon are good choices). Rolling basslines come next, and then it’s time to start thinking synths…
Building an atmospheric rave-style techno track
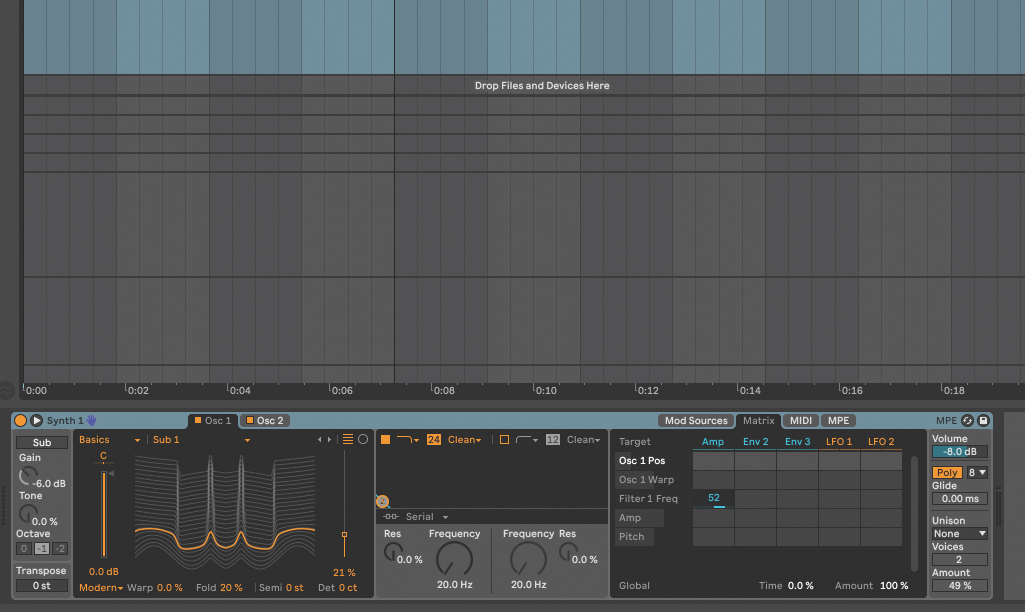
Open Ableton Live and an instance of Operator. In Osc 1, choose Sub 1 and set Osc position to 21% and Fold to 20%. On Osc 2, choose Harmonic Series and set it to 71%. In the Filter section, set the Low Pass Filter’s Resonance to 0 and Frequency to 20Hz. Drag the Frequency knob to the Matrix to assign it to the Amp with a value of 52.
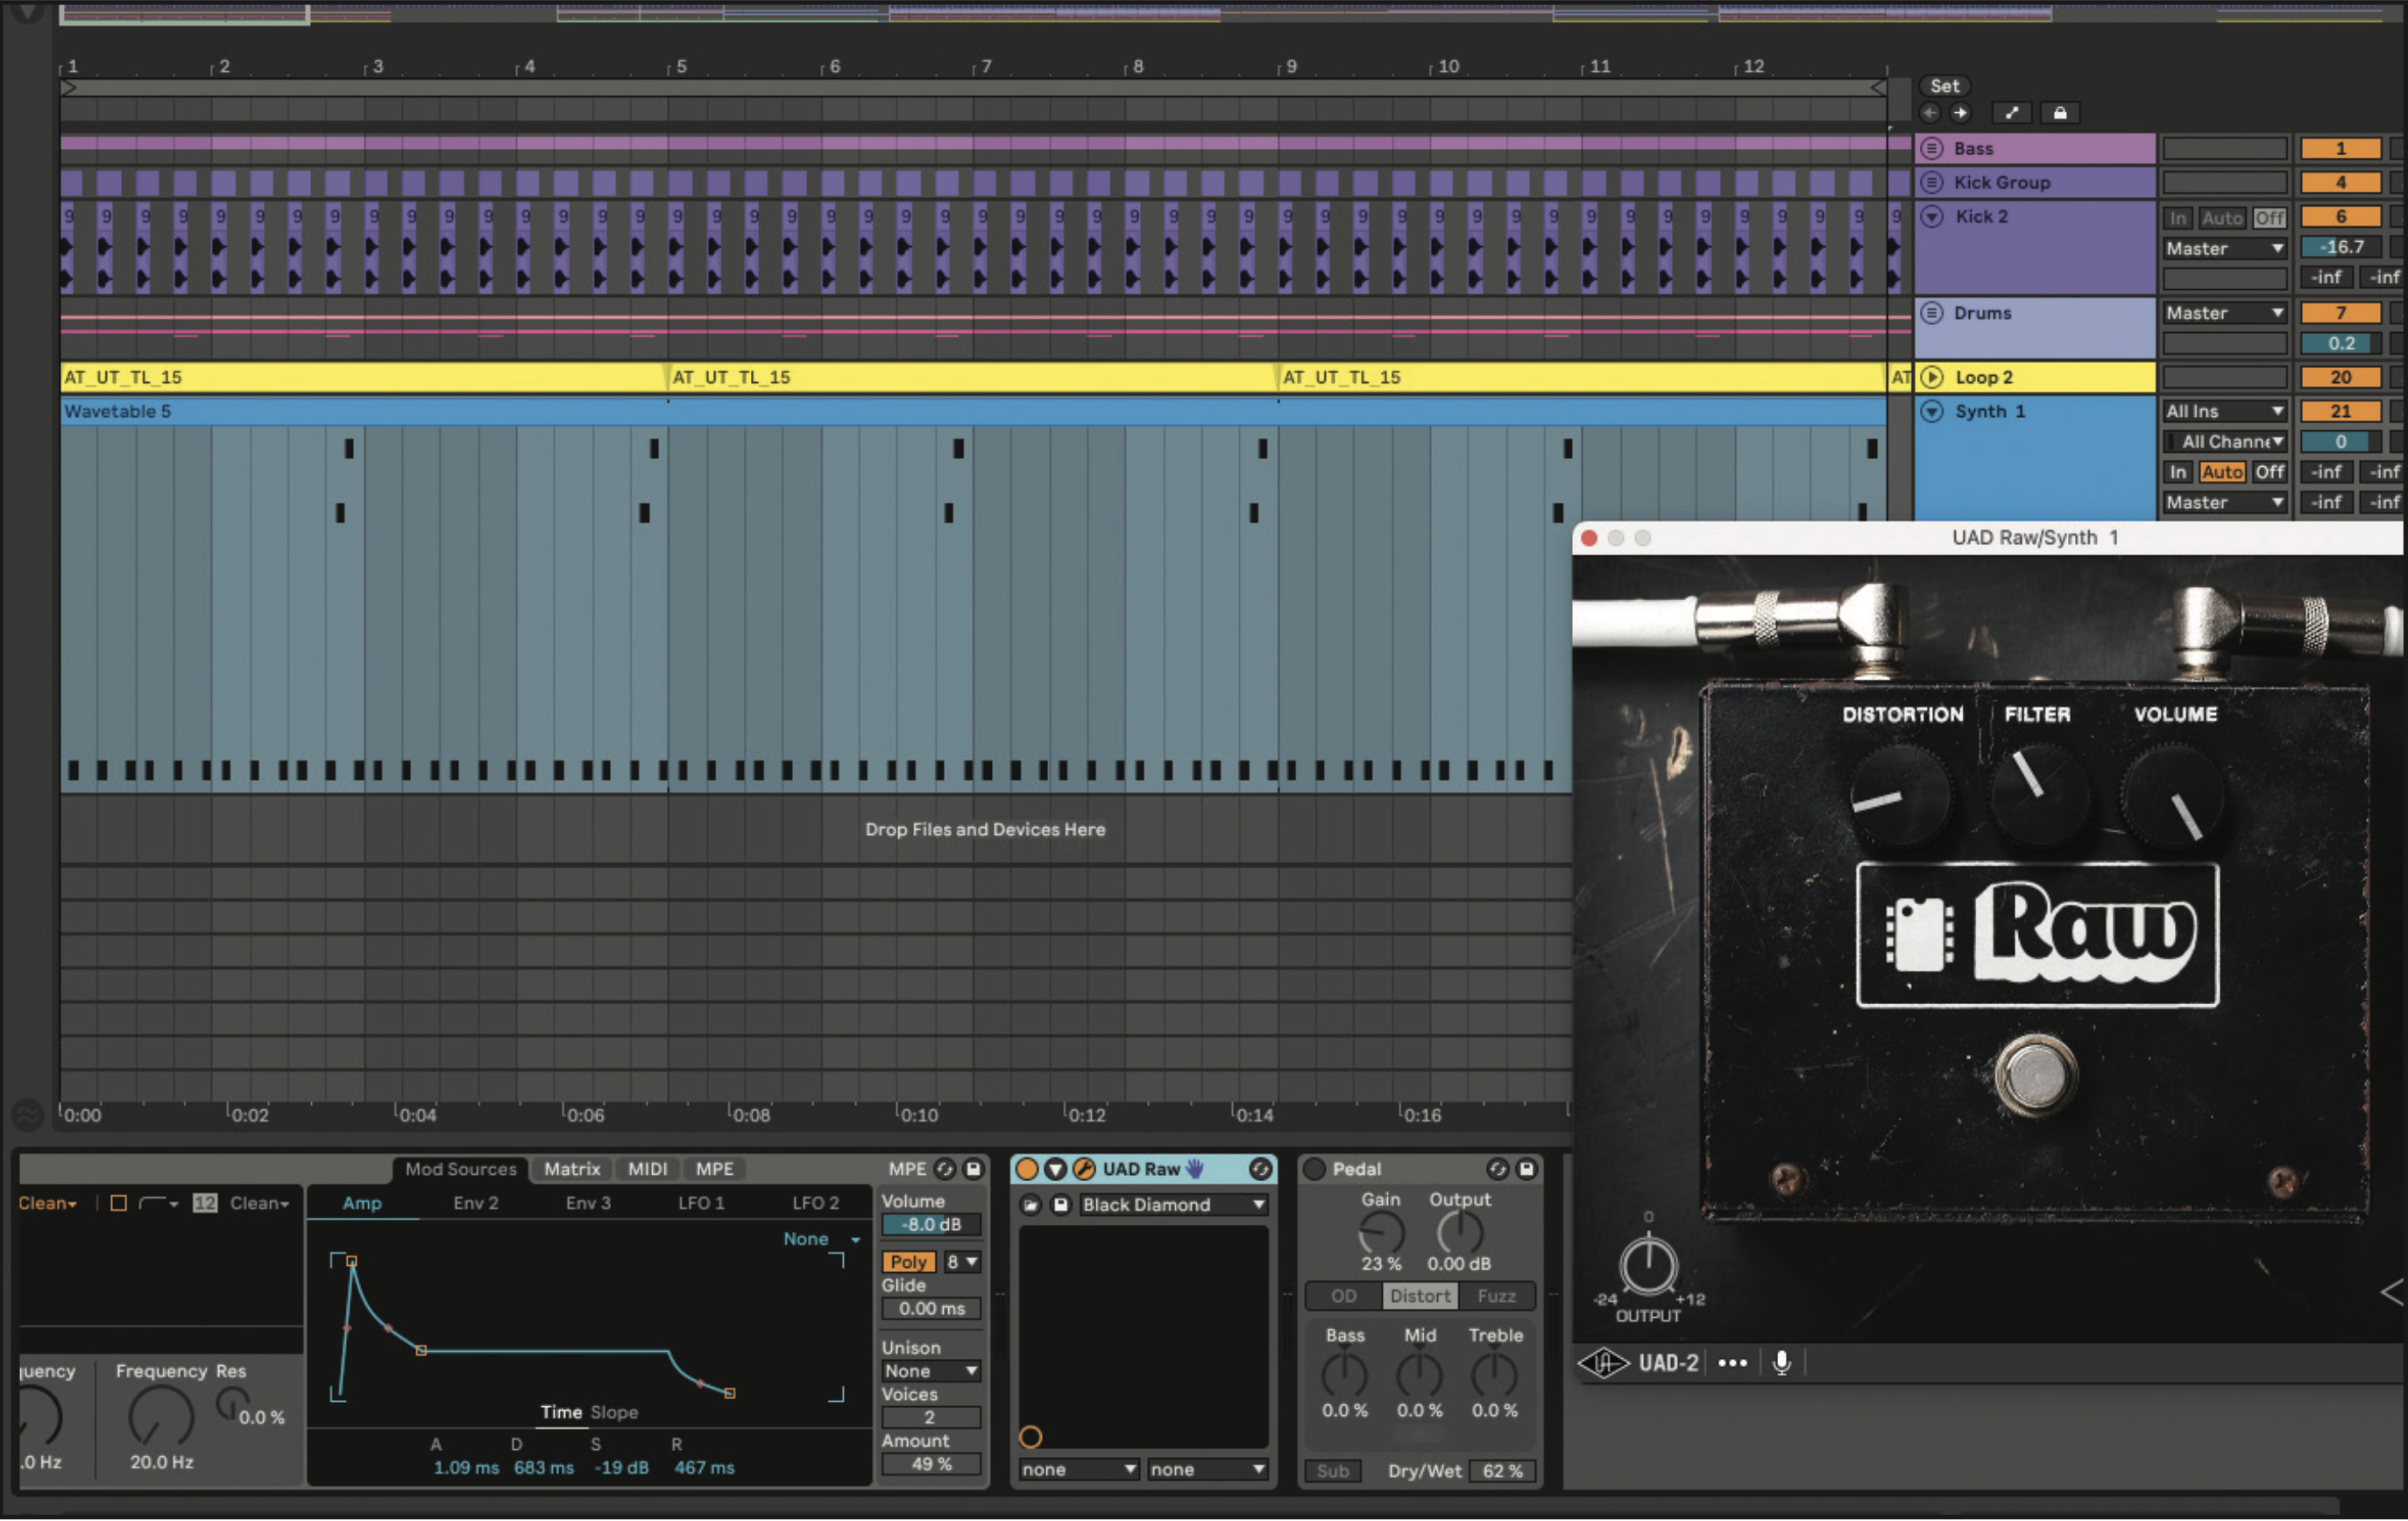
In the Mod Sources, set the Amp to 1.09ms, Decay to 683ms, Sustain to -19dB and Release to 467ms. Add in a simple melodic pattern, ideally one that repeats three times with a variation in the fourth bar. Add an aggressive distortion (We’re using Universal Audio’s Raw) with the filter around 11 o’clock, distortion low and volume high.
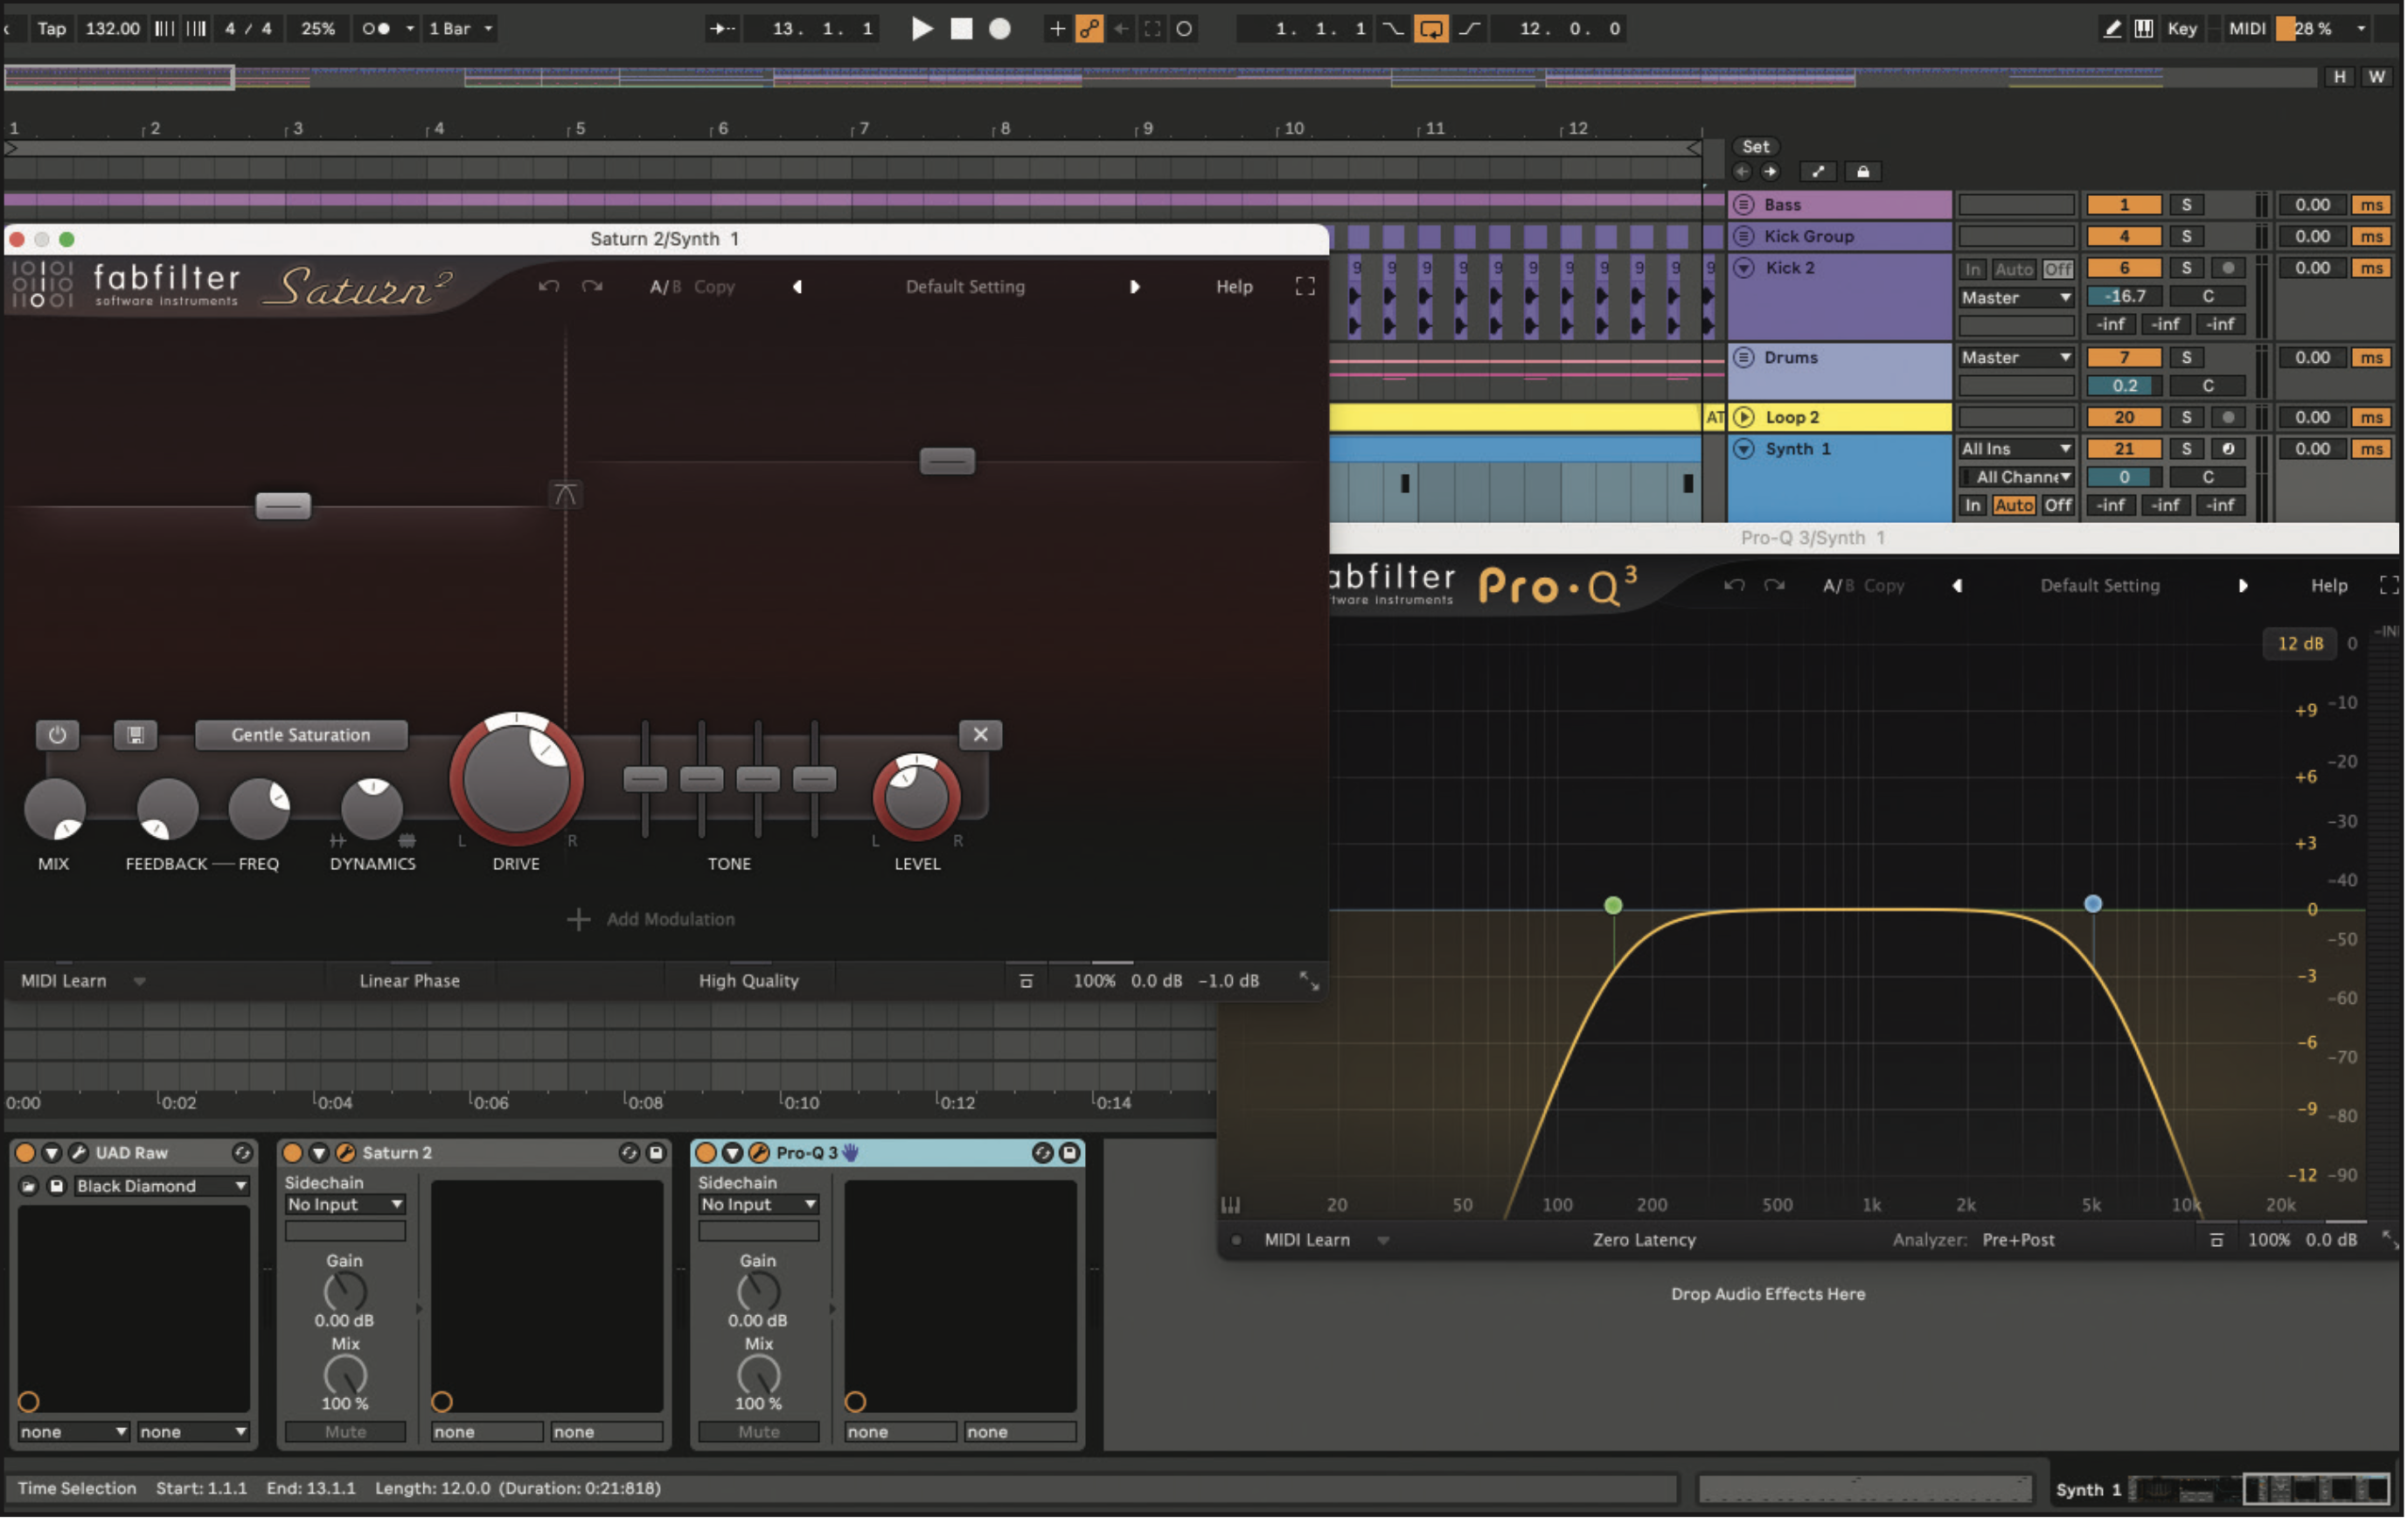
Next, we further dirty the sound with one of our favourite saturators, FabFilter’s Saturn 2. Setting the crossover point to 300Hz, and bring Band 1 to around -3dB. We set the Band 2 level to +8dB, and the Band 1 Drive to 65%. Set Band 1 Level to -2.73dB. Using an EQ, roll off the low end below 150dB and cut all above 5kHz.
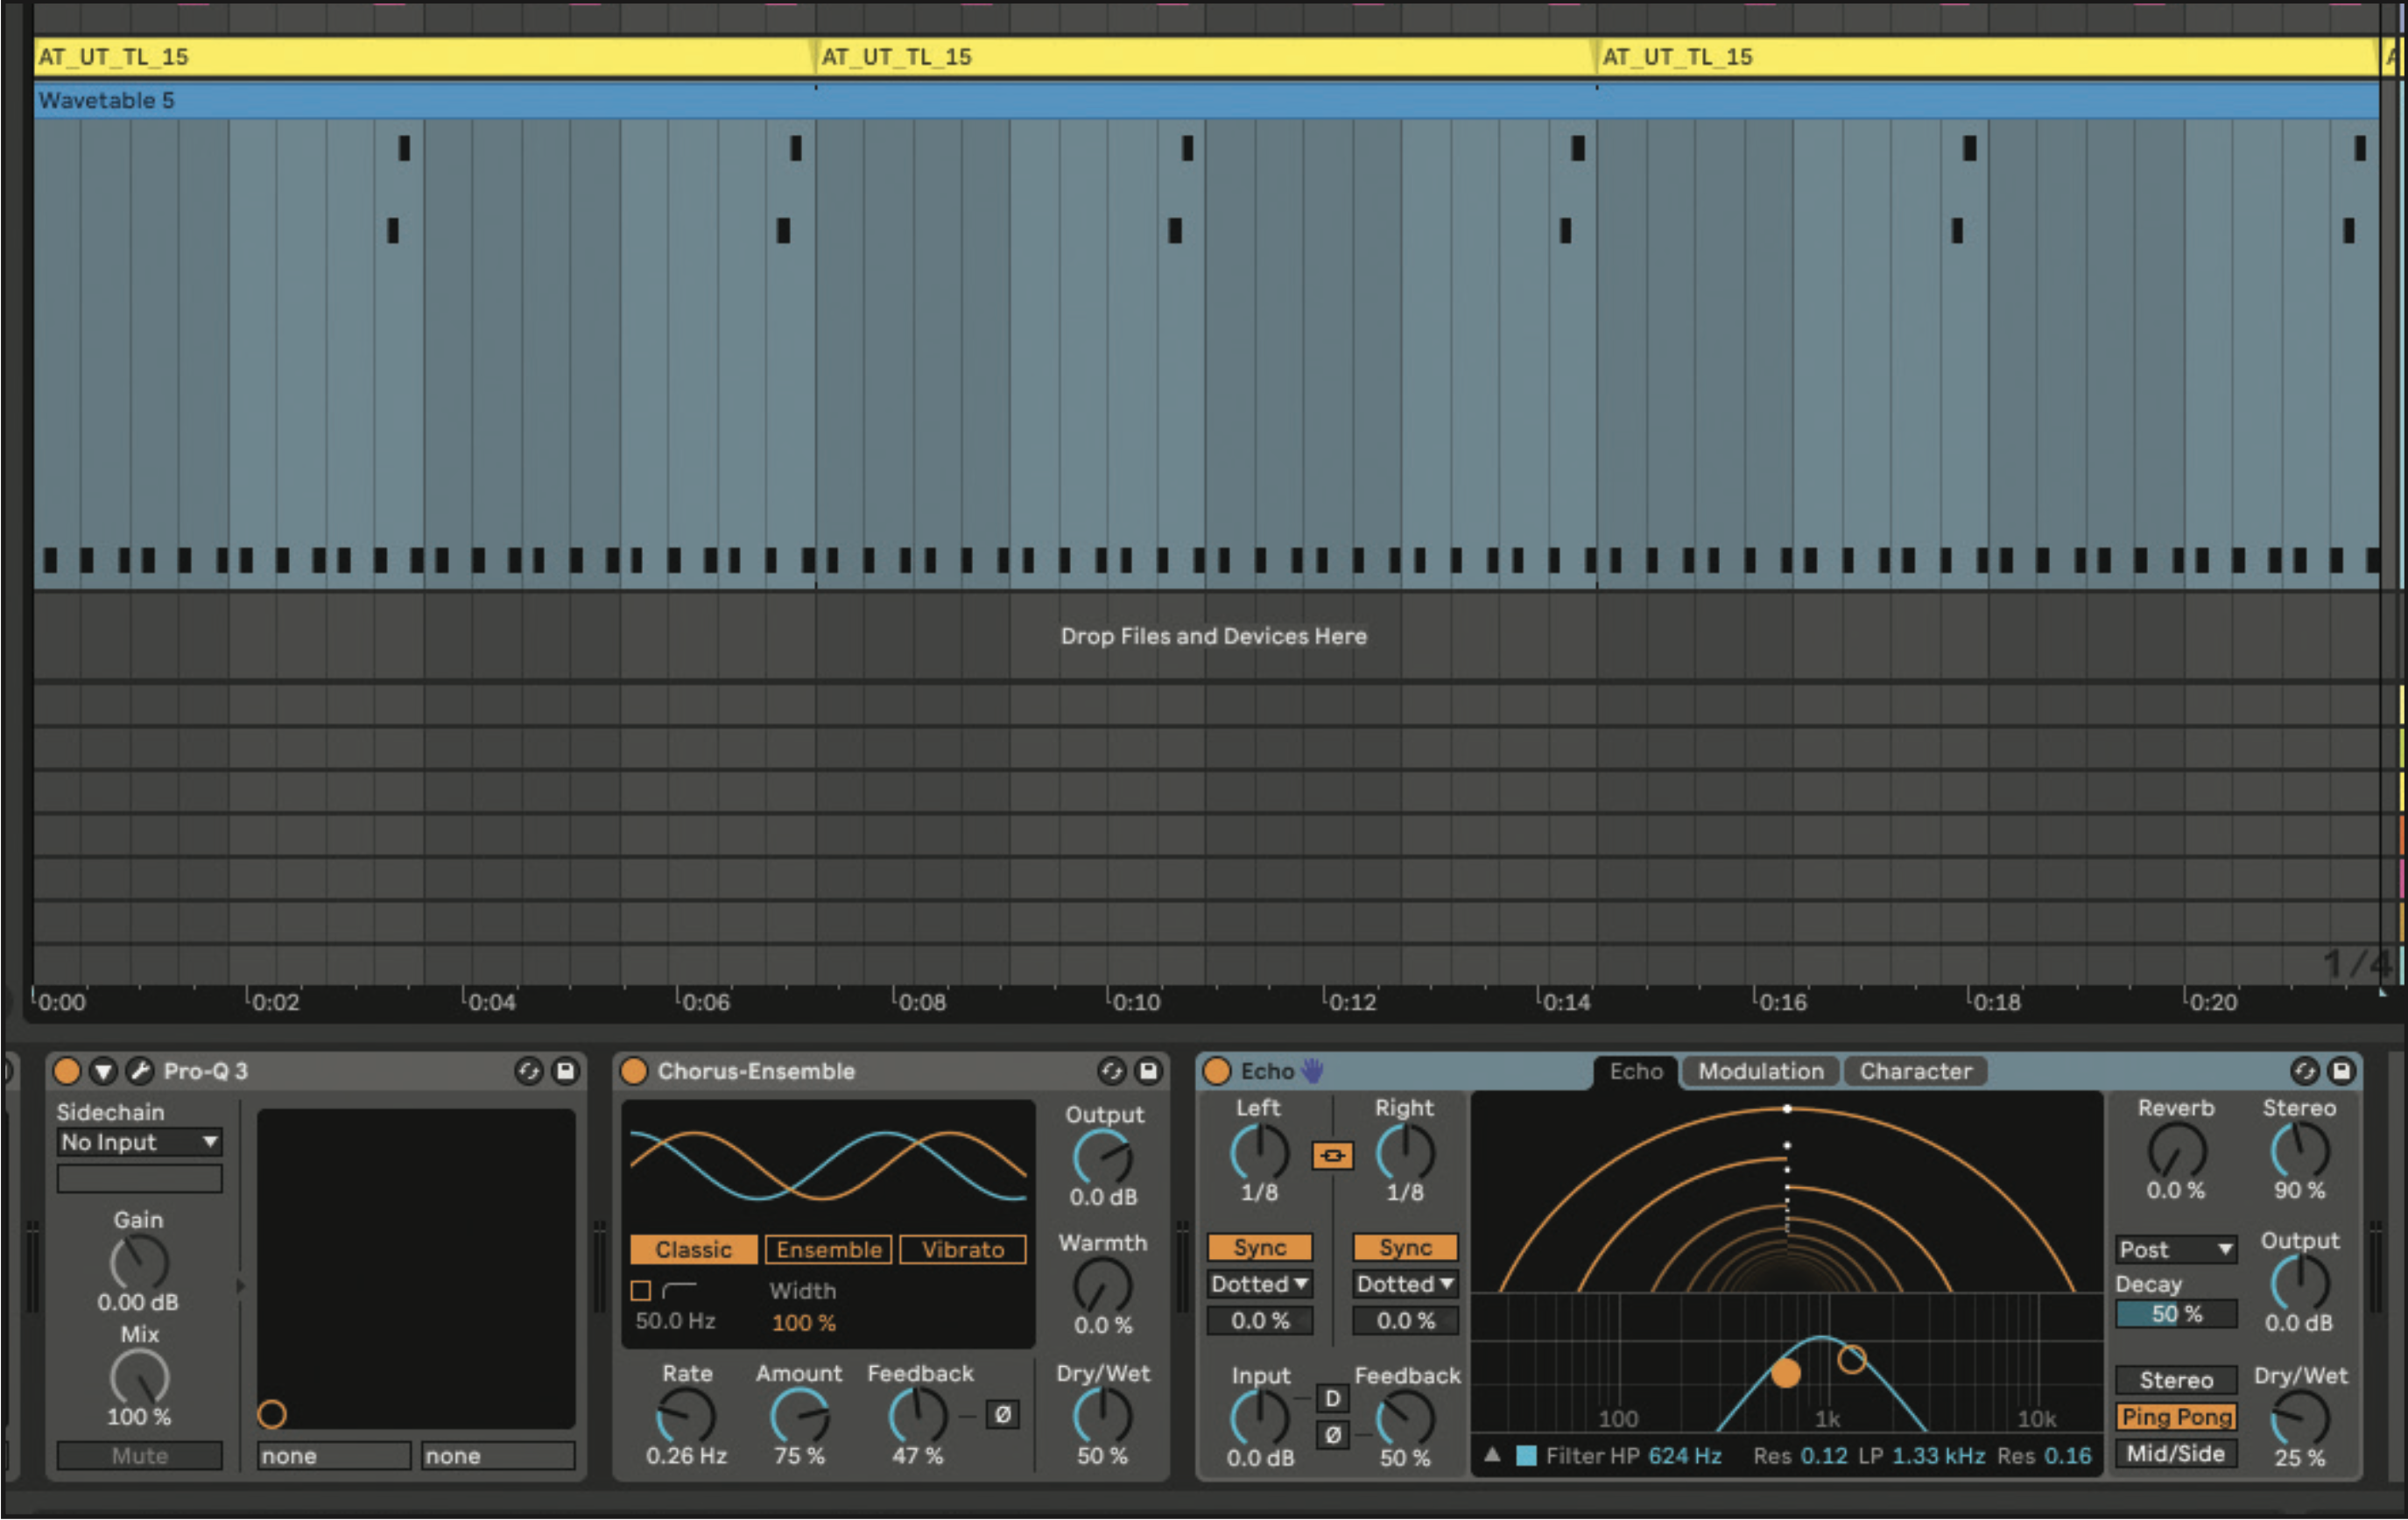
Add Ableton’s Chorus-Ensemble to give the sound movement. Set the Rate to 0.26Hz, Feedback to 47% and Dry/Wet to 50%. Add Ableton’s Echo with a Dotted ⅛ Echo, Feedback at 50%, and Bandpass Filter focused between 600 and 1.5kHz with a small amount of Resonance. Turn on Ping Pong Delay and set the Dry/Wet to 25%.
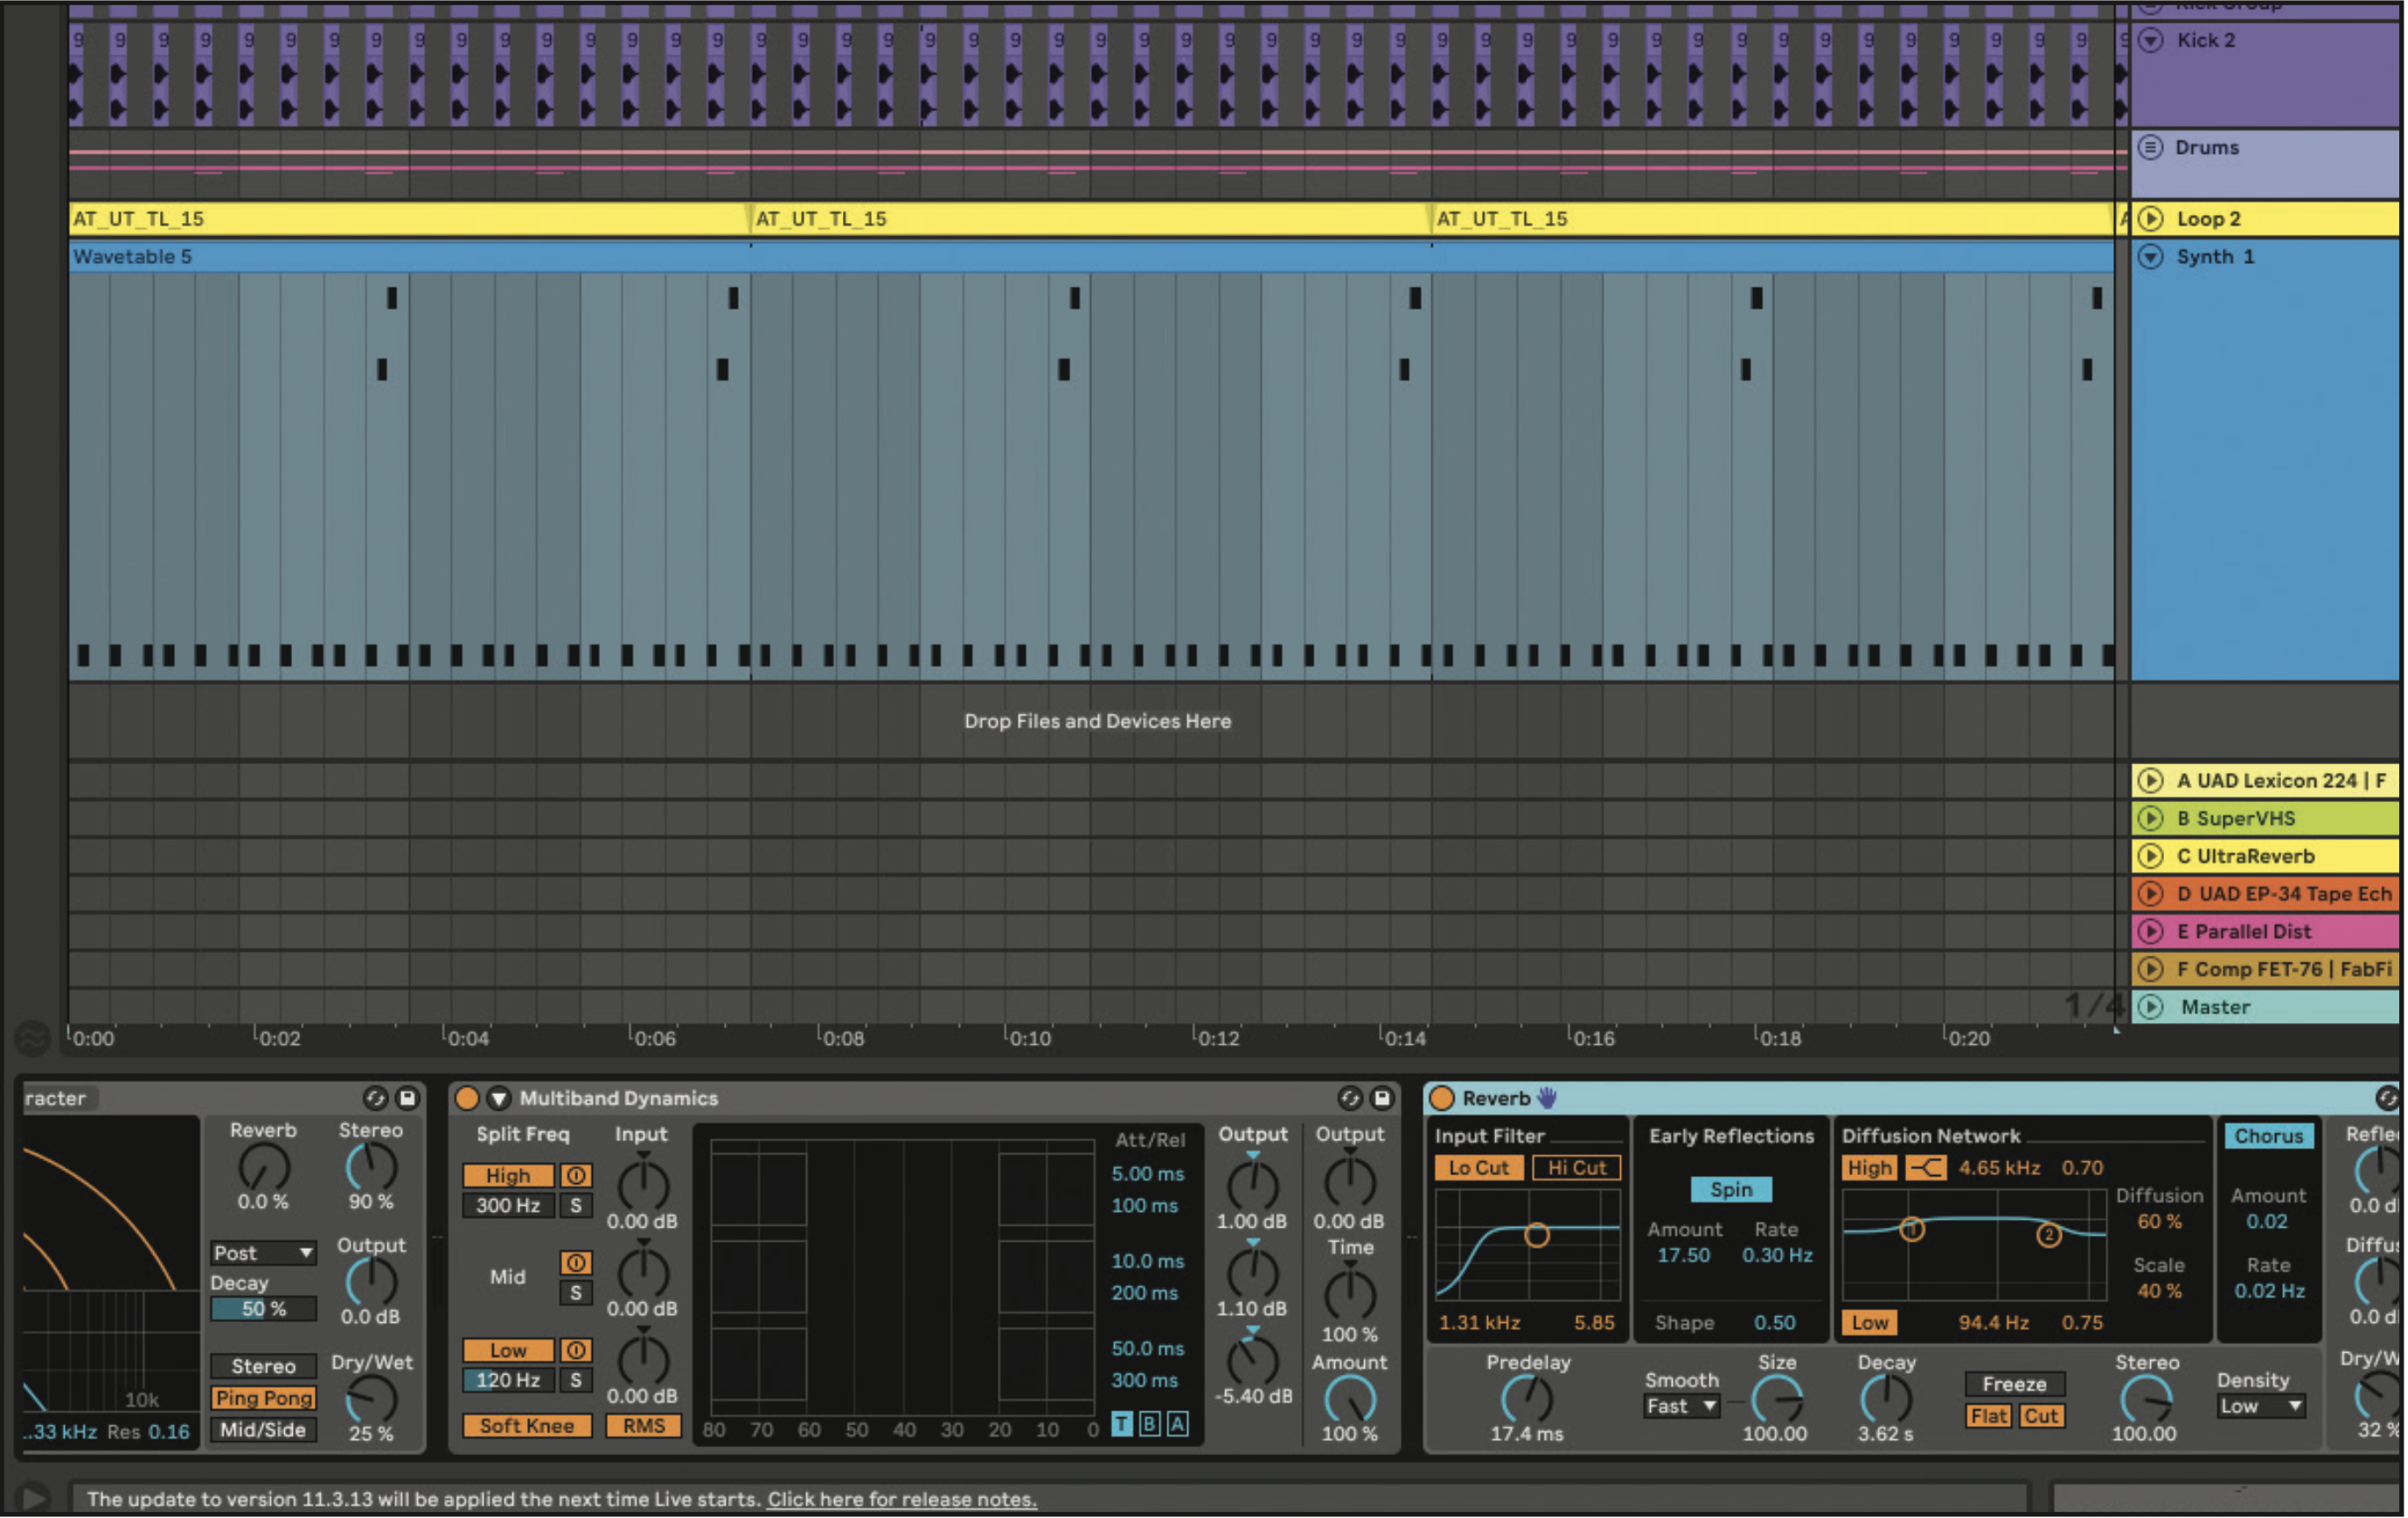
Add Ableton’s stock Multiband Dynamics to process the three frequency bands by applying compression. Set the Output of the High Band to 1dB, Output of the Mid to 1.1dB and Low to -5.4dB. Set the Amount to 100%. Add Ableton’s Reverb and set the Predelay to 17.4ms and Decay to 3.62s. Set the Dry/Wet to 32%.
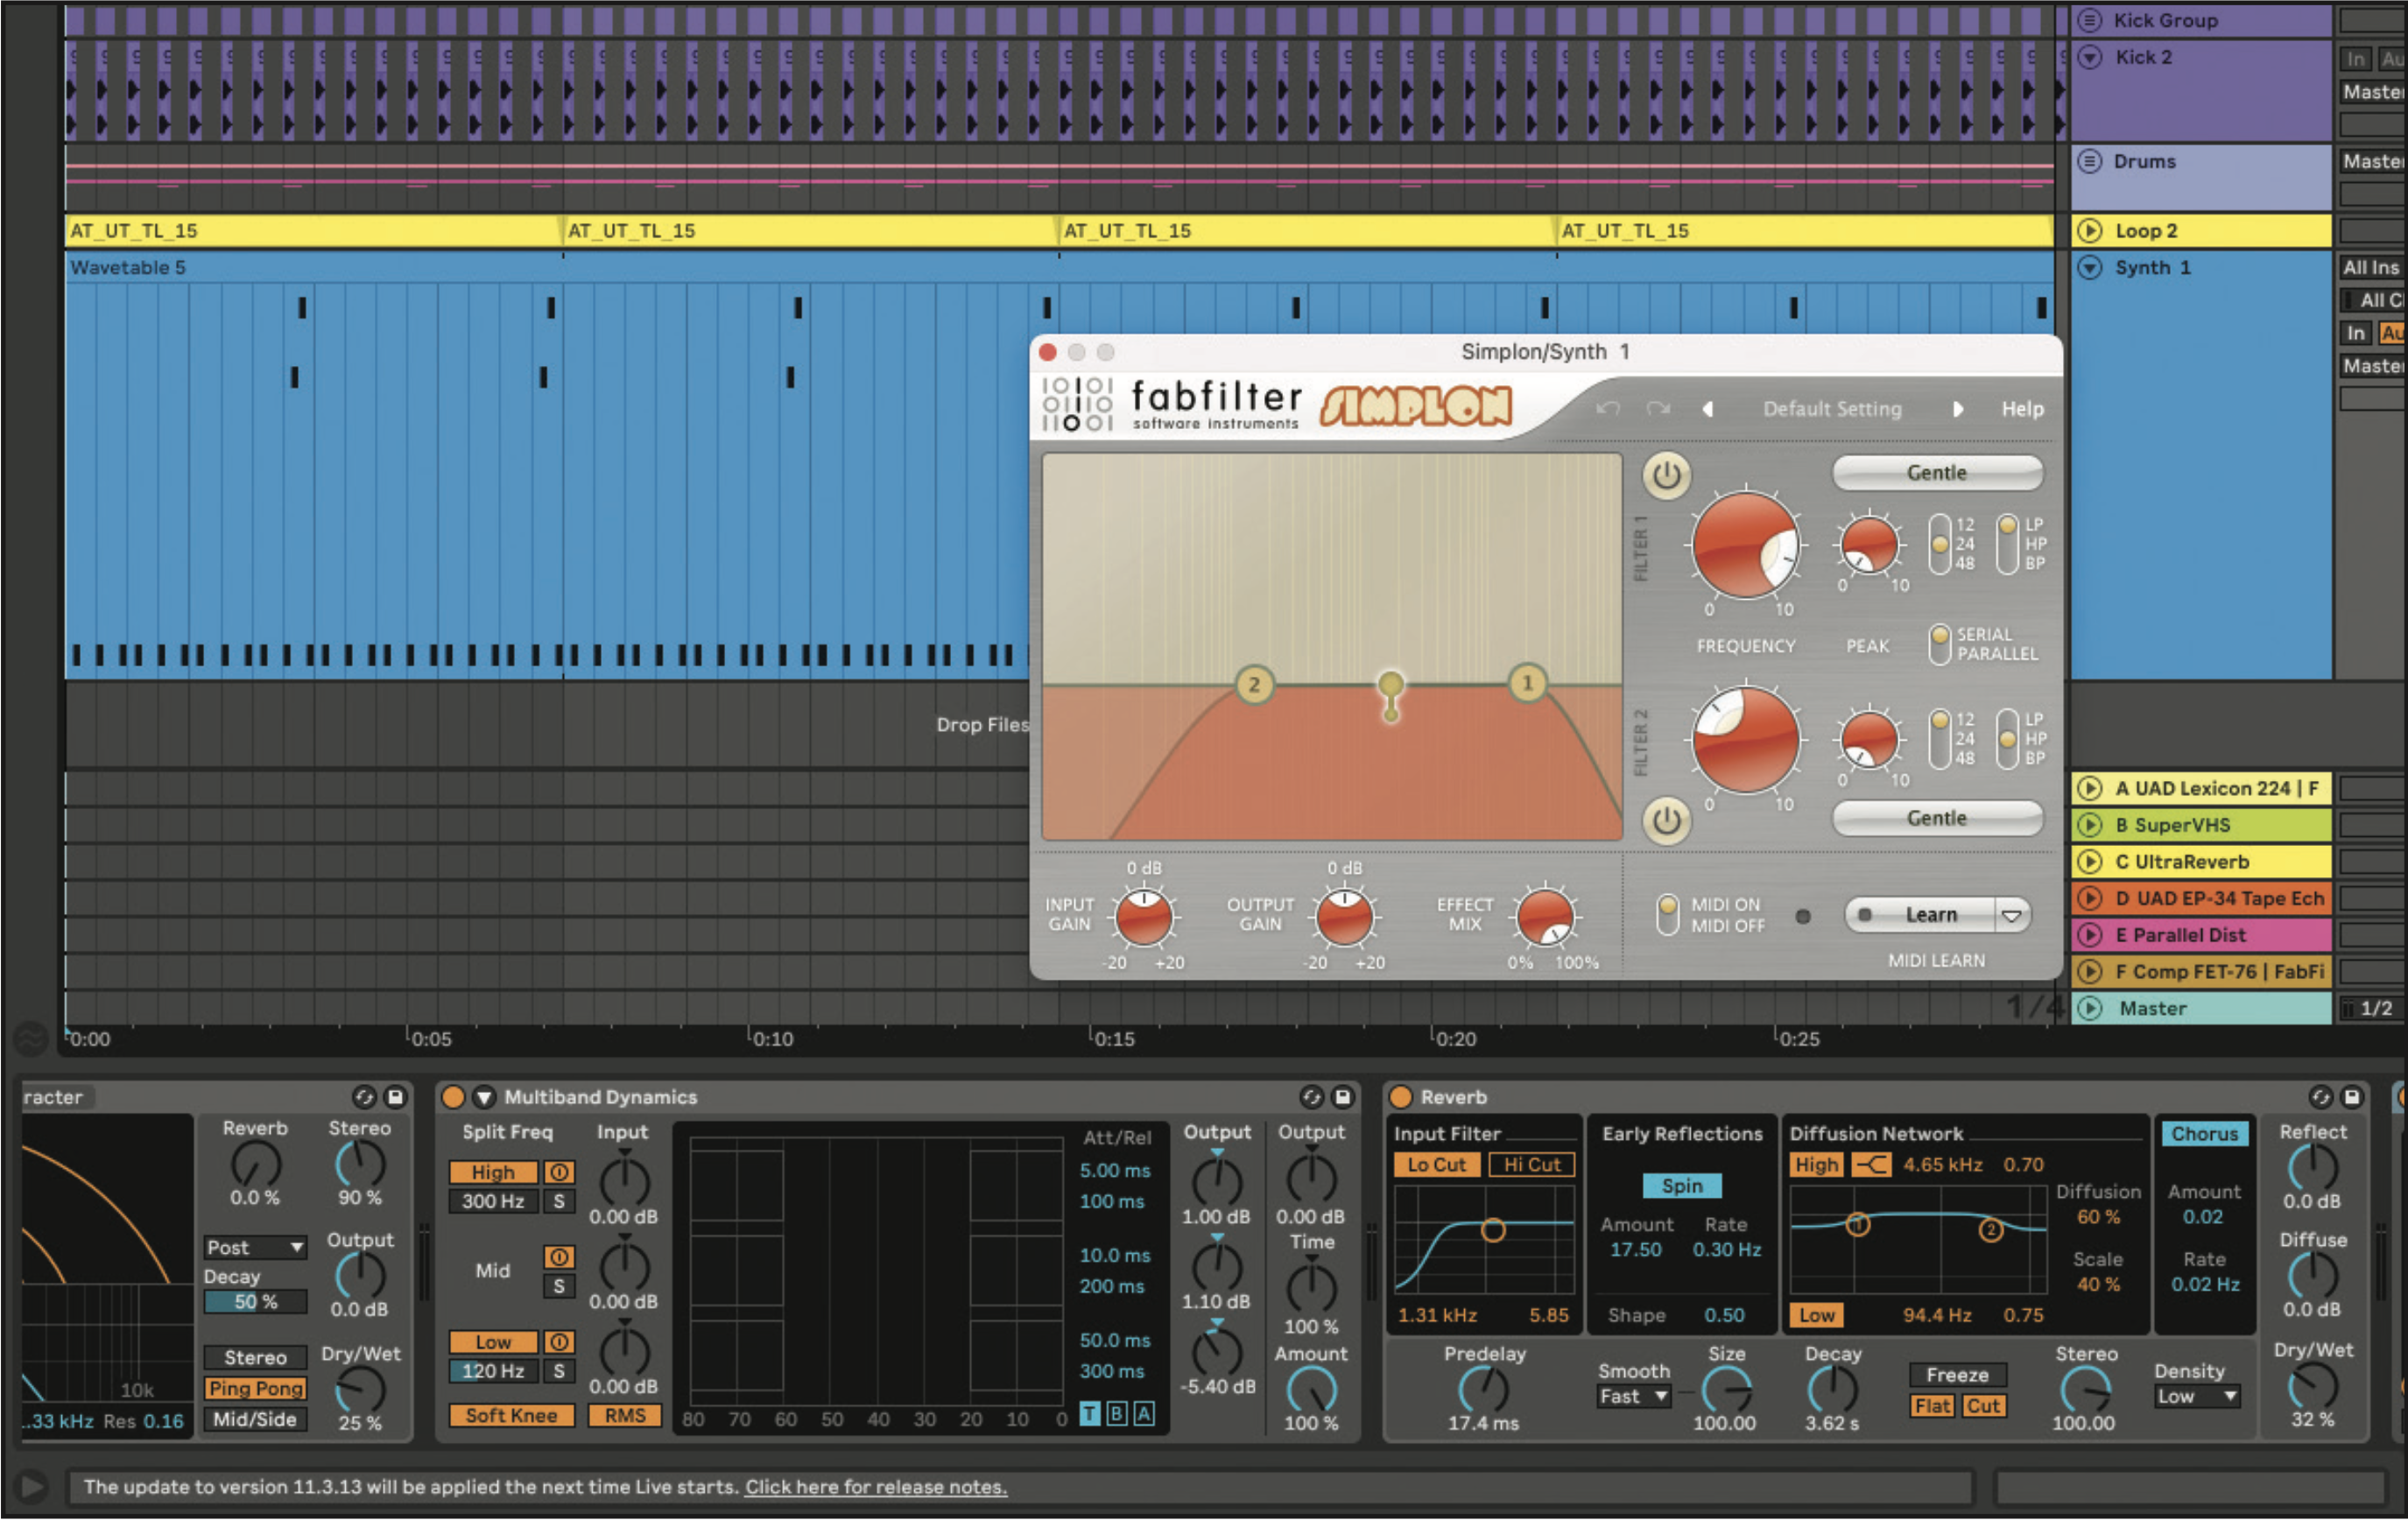
Lastly, add or Ableton’s Auto Filter (or a filter like FabFilter’s Simplon). Cut off the low frequencies below 150Hz, and cut high frequencies above 20kHz. Highlight each of the plugins and right click to save them in a Group. Save the chain in the User Library in Ableton by clicking the disk in the upper right hand, give it a unique name.
Trance synth
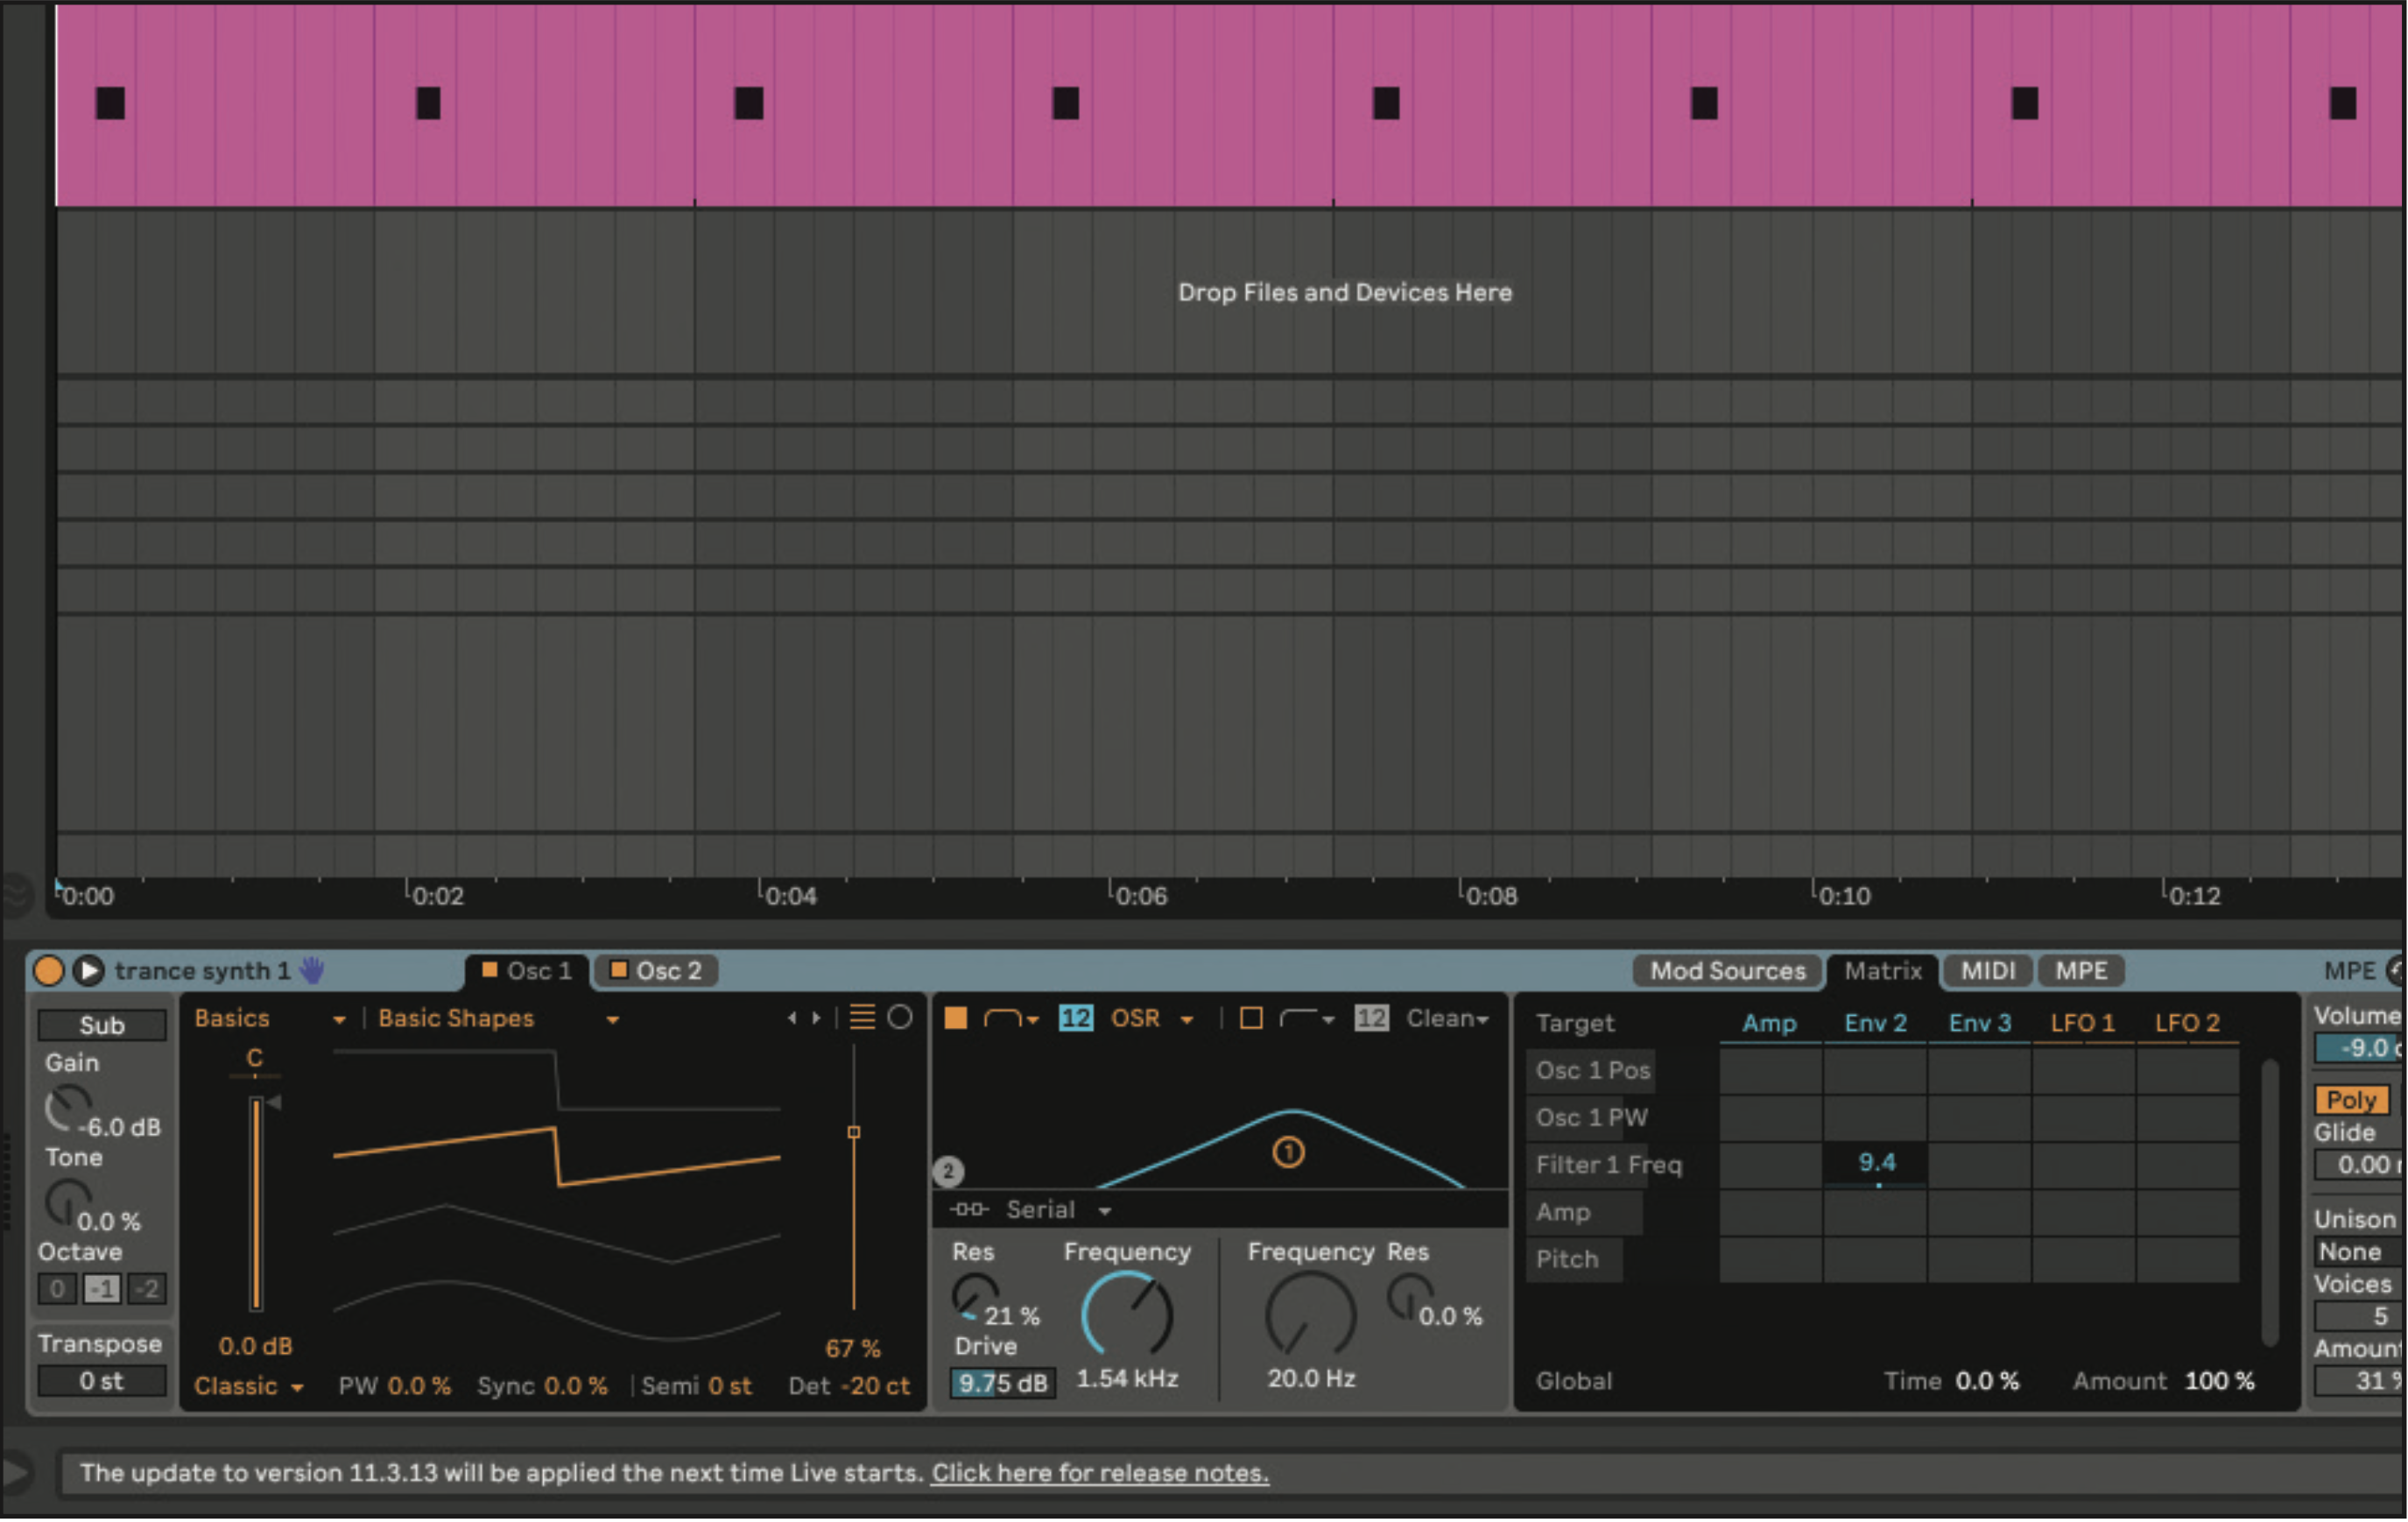
Create a MIDI track and add Operator. In Osc 1 and Osc 2, choose Basics Shapes and set the Osc position to 67%, then Detune to -20. In the Filter section, select the Bandpass filter and set Resonance to 21%, Frequency to 1.54kHz and Drive to 9.75. Click on the Frequency and drag it to the Matrix on Env 2 with a value of 9.4.
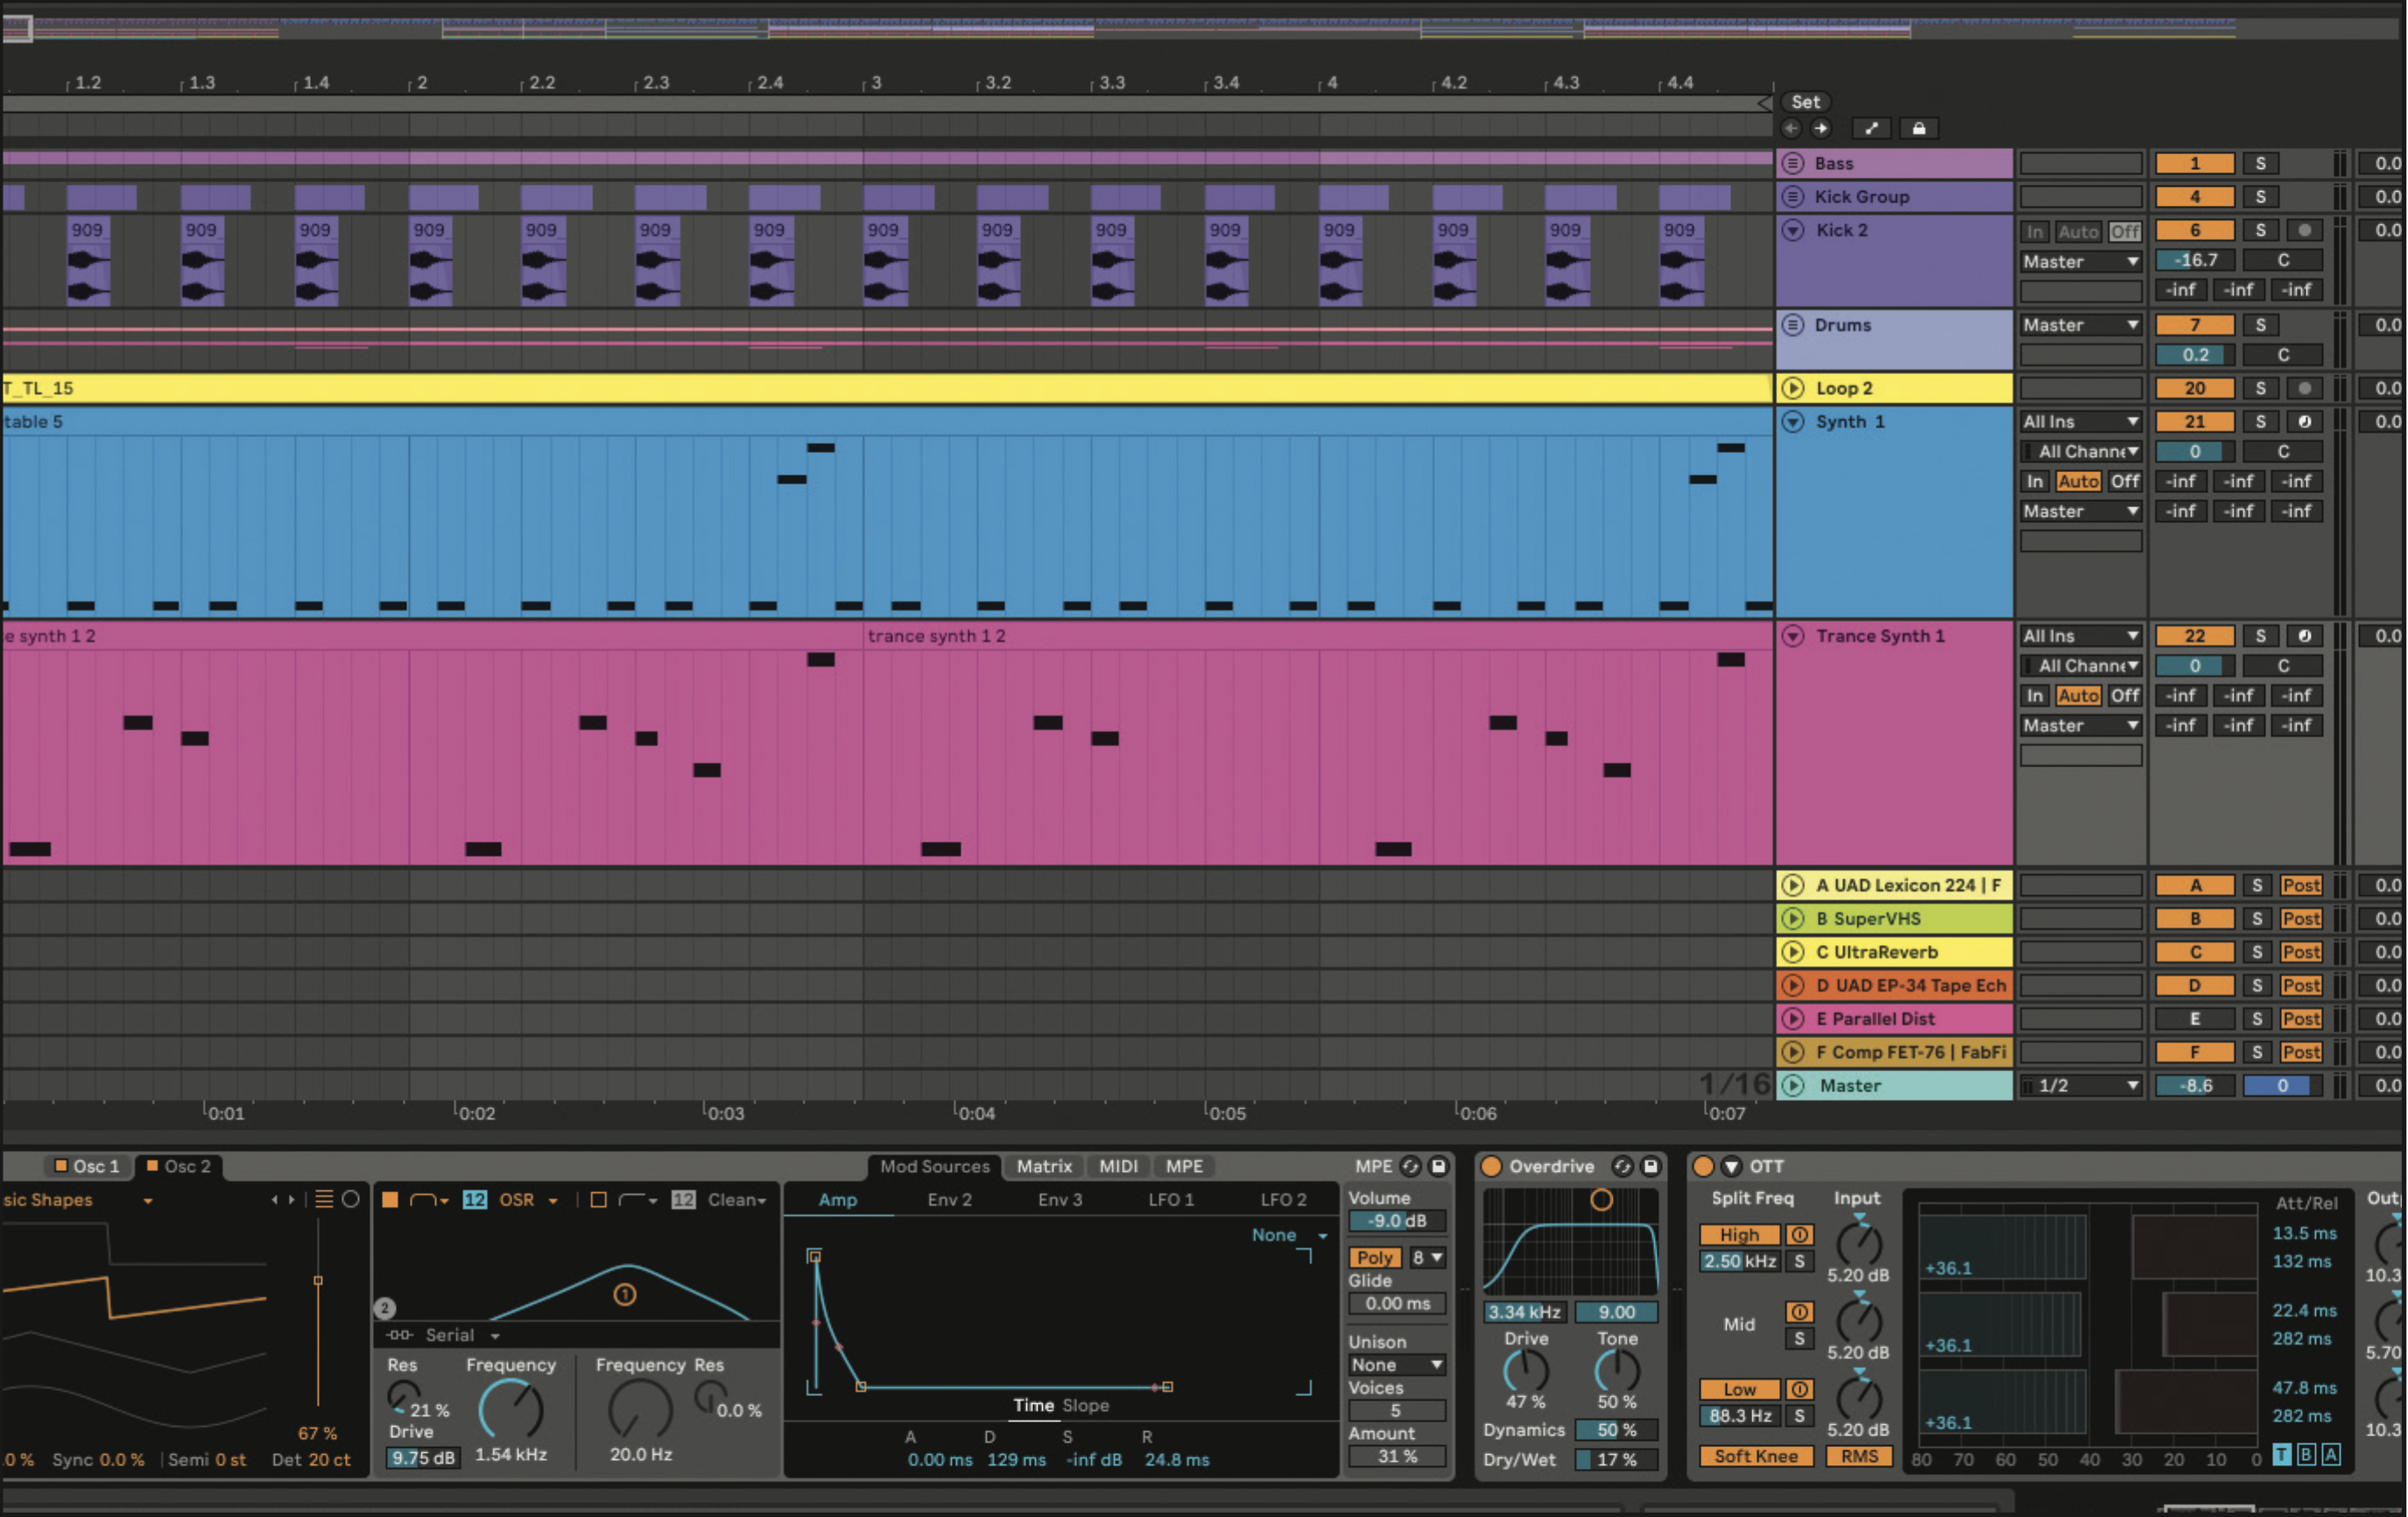
In the Mod Sources, set the Attack to 0, Decay to 129ms, Sustain to -inf dB and Release to 24.8ms. Create a catchy one-bar melody. Add aggression by adding Overdrive, focused around 3.33kHz. Set the Drive to 47%, and Dry/Wet to 17%. Add OTT, and adjust the output of each band to taste. Set the amount to 100%.
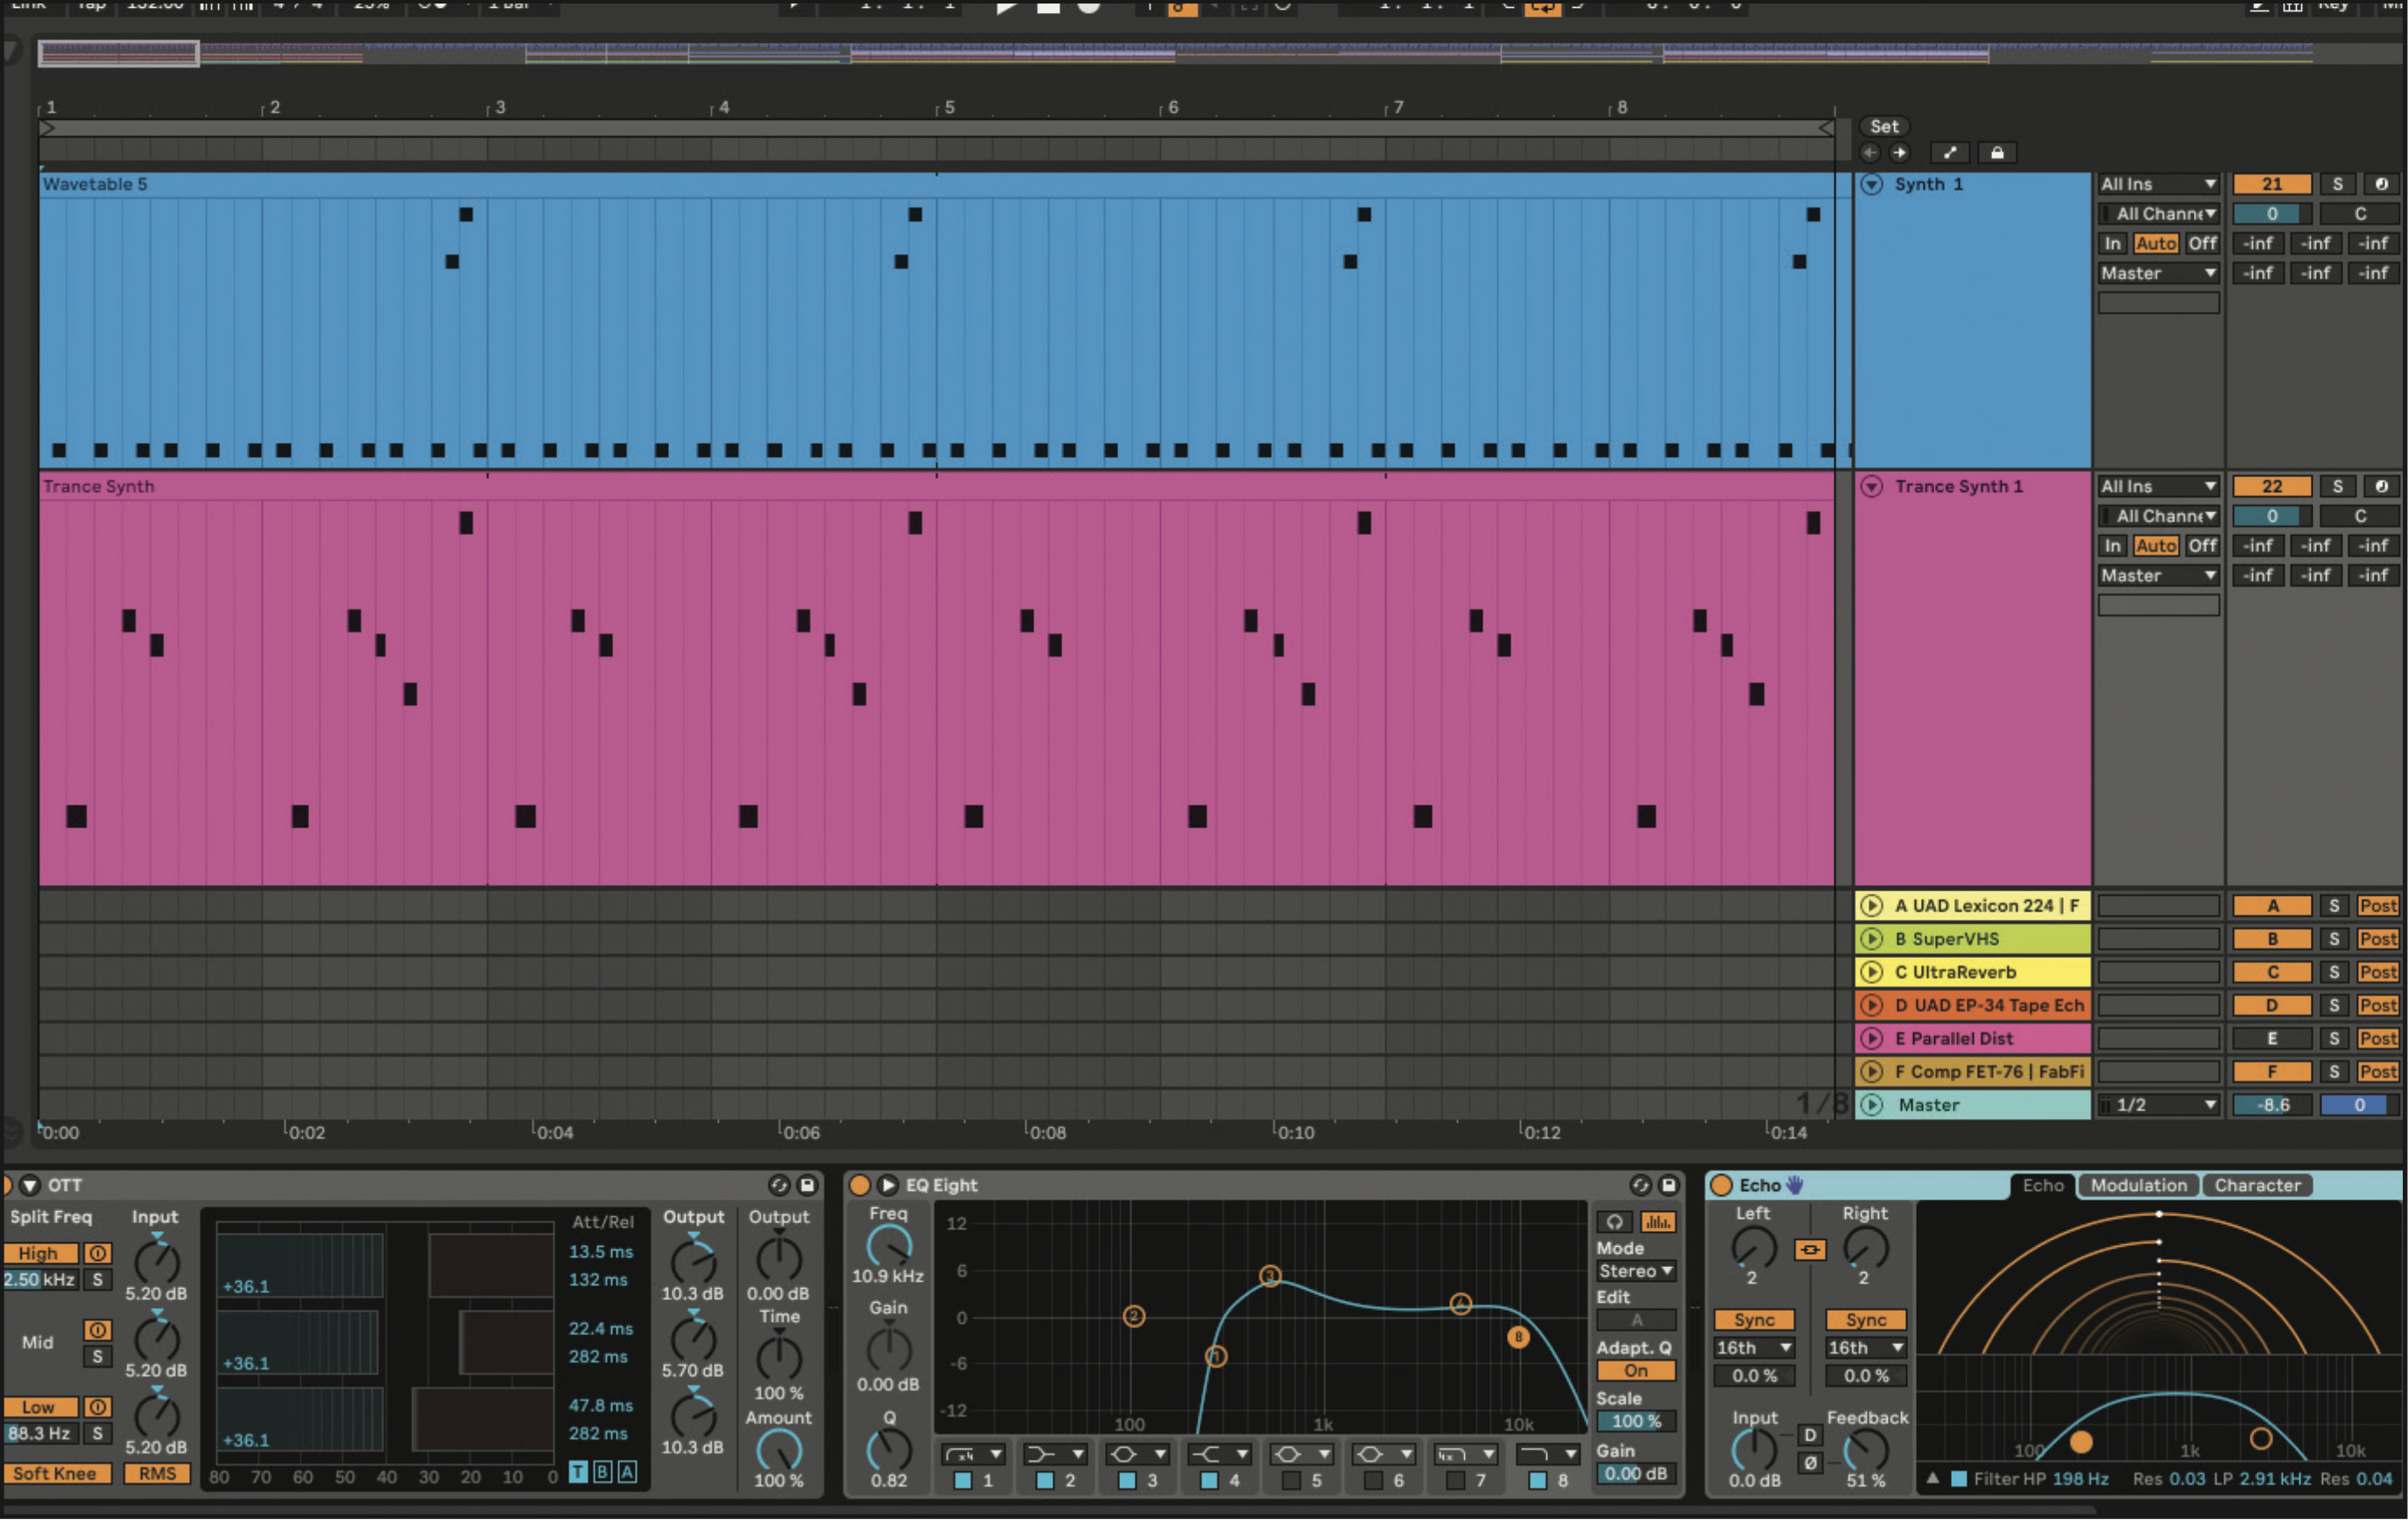
Add an EQ and cut the low end below 270Hz, boost the mids around 500Hz and roll off the top end above 10.9kHz. Add movement to sound by adding an echo and selecting a 1/16th note. Set the Feedback to 50%, Dry/Wet to 22% and turn on Ping Pong. Use a bandpass filter to focus the echo around the midrange.
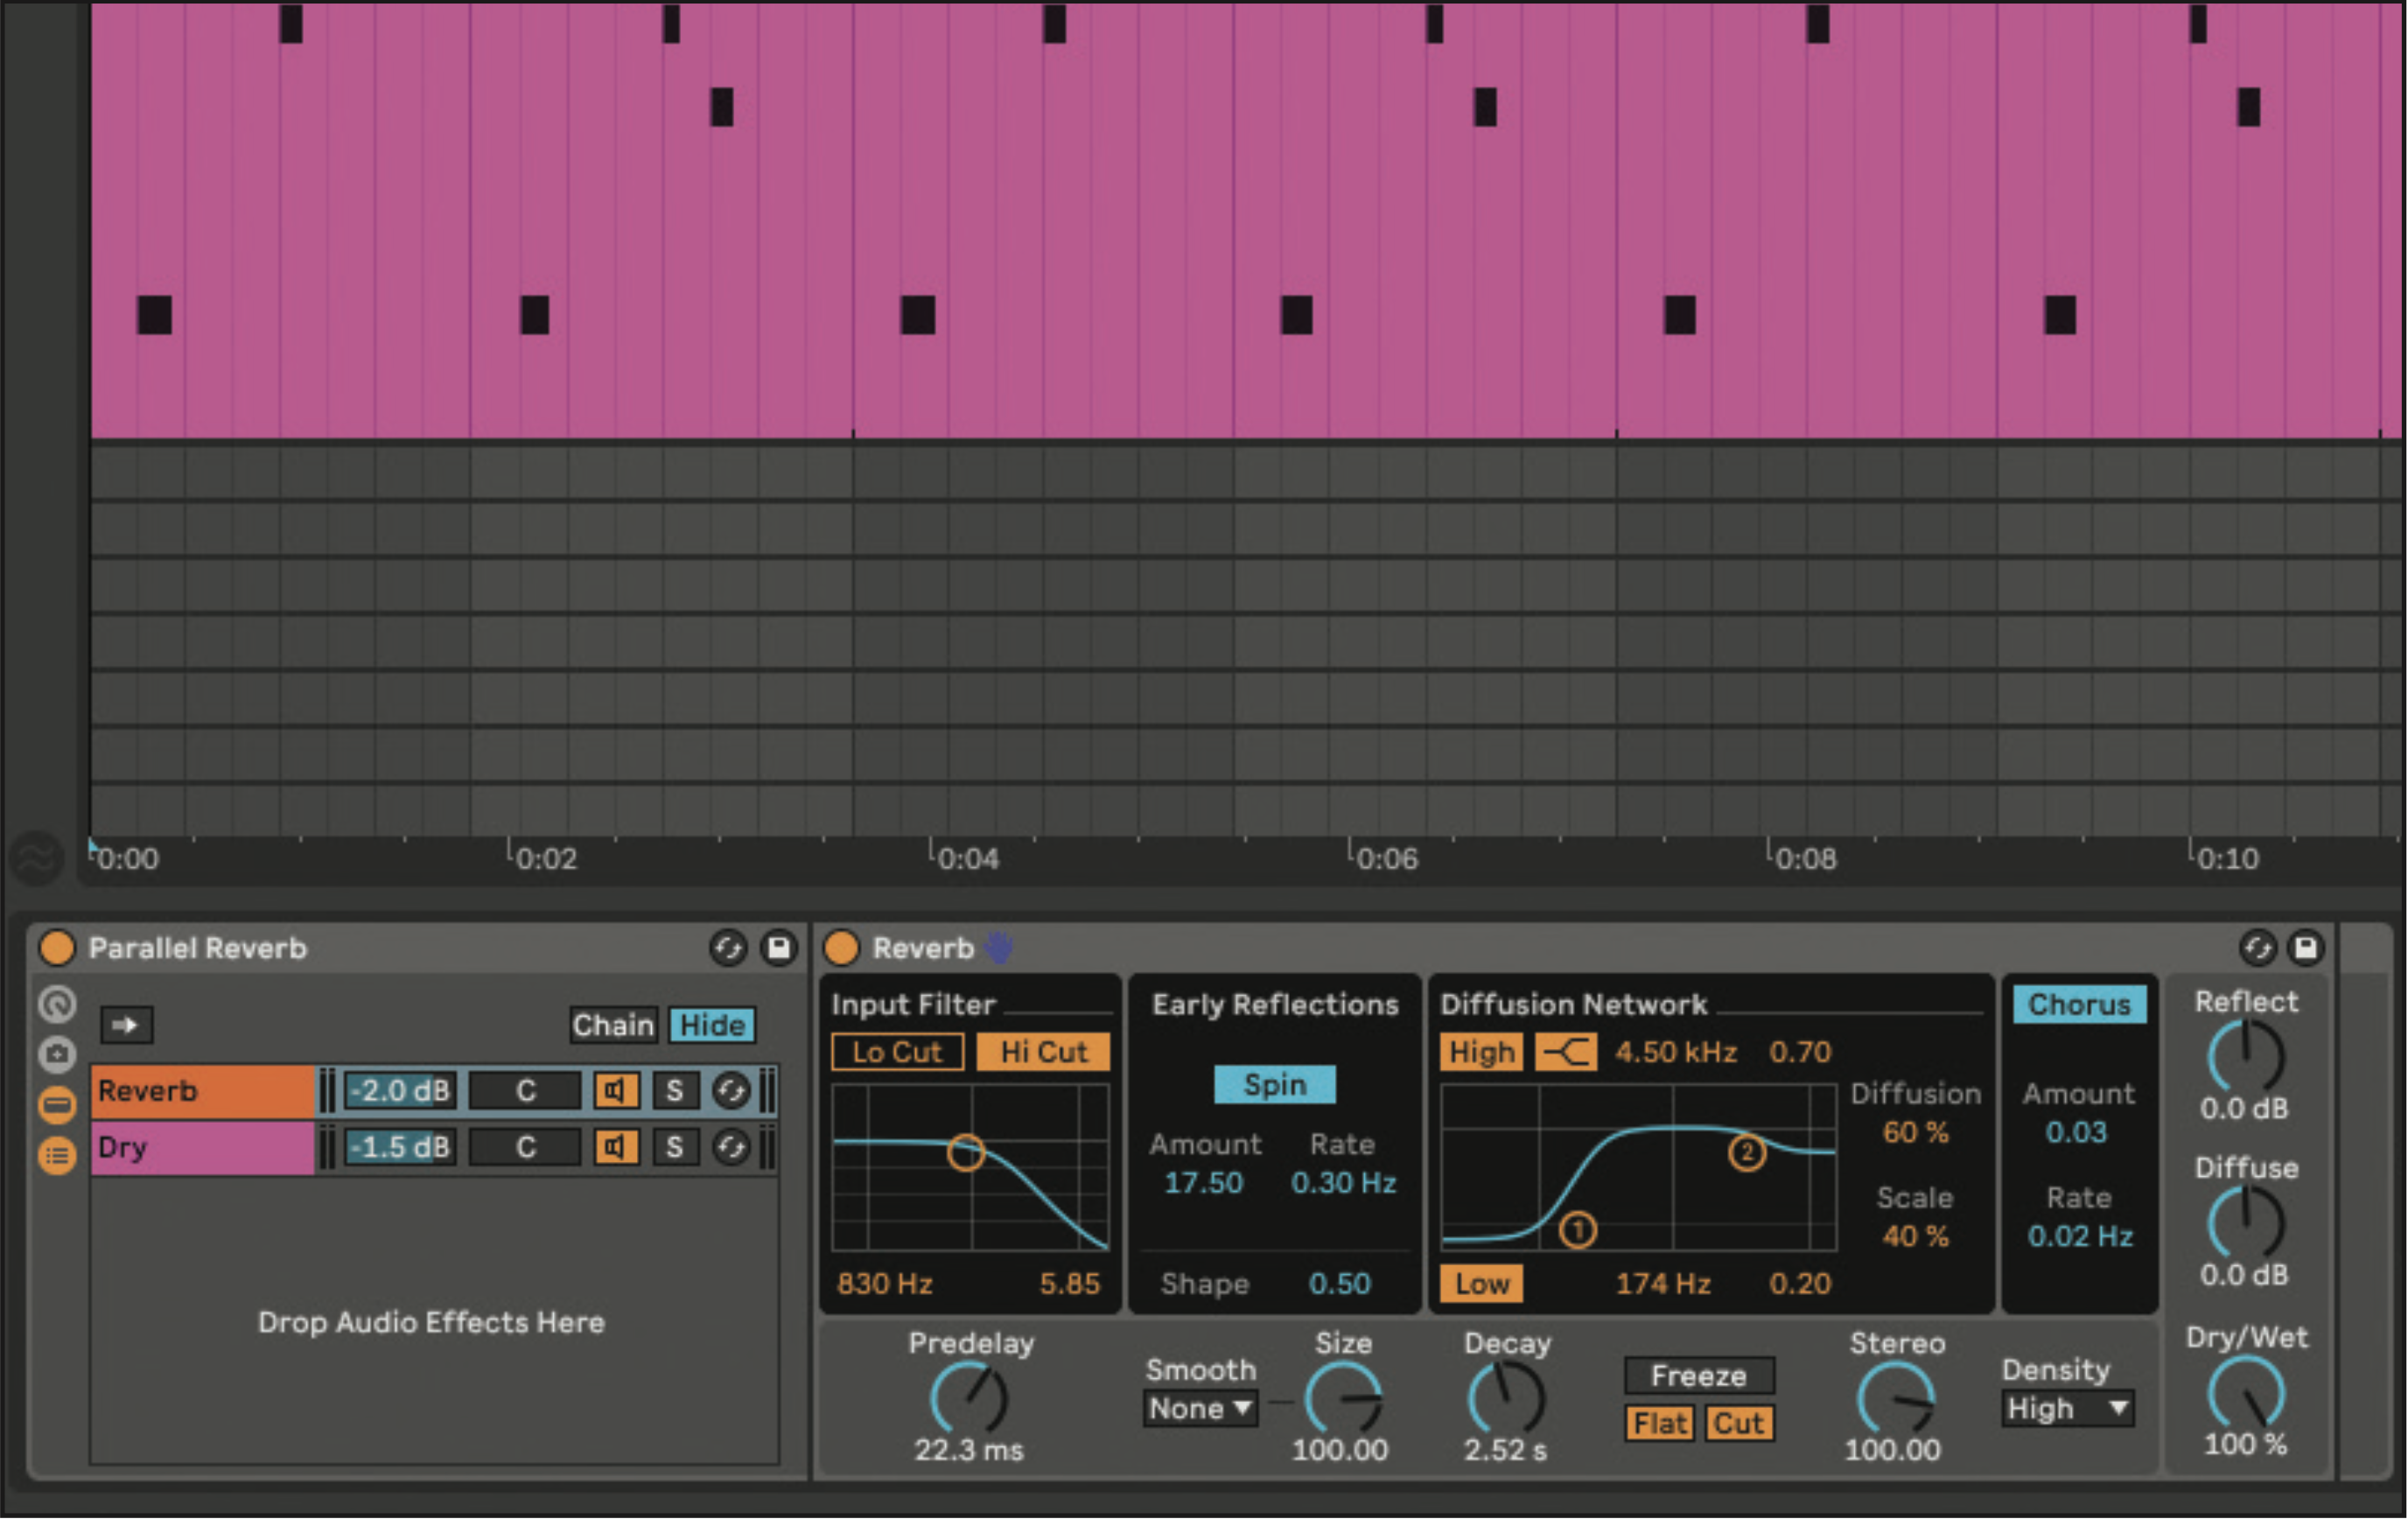
Create a parallel reverb chain that allows you to mix the processed signal with the dry signal. Add a reverb, highlight it and select Group. Turn on the Hi Cut and roll off frequencies above 800Hz. Set the Predelay to 22ms, Decay to 2.5s and Dry/Wet to 100%. Right click inside the Group to select ‘Create Chain’ to create a dry chain.
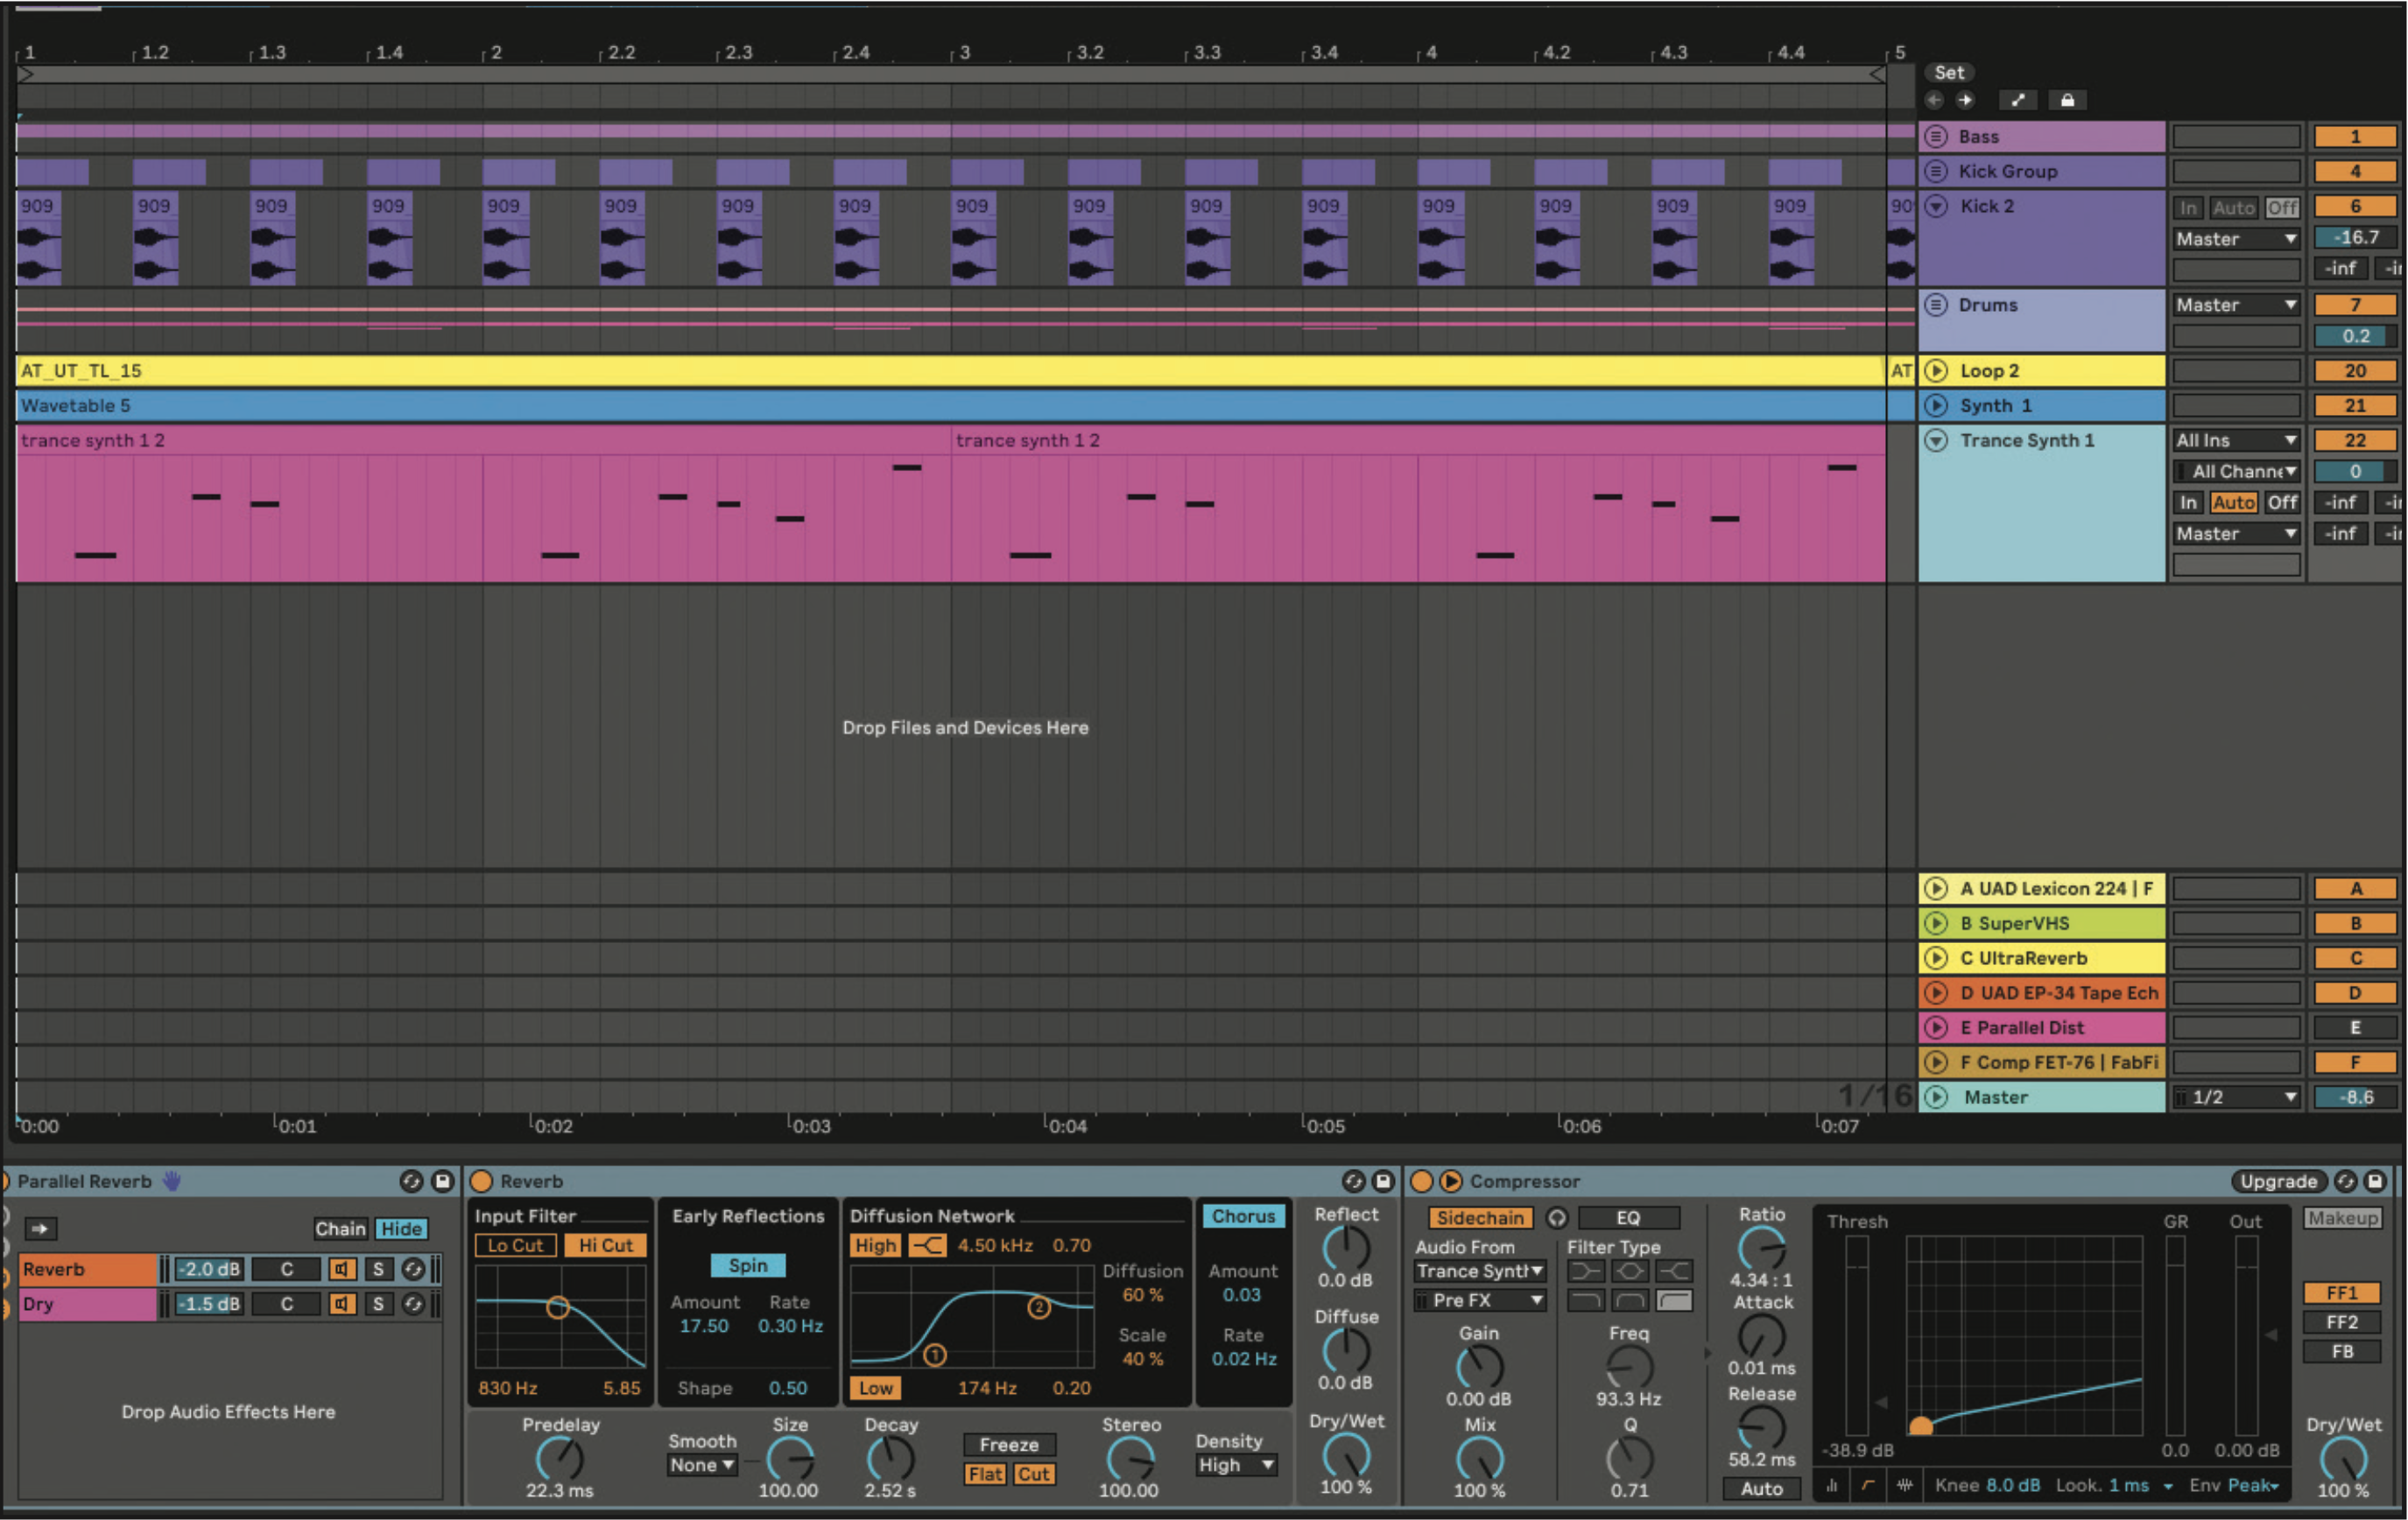
Add Ableton’s Compressor to the parallel reverb chain, and sidechain the audio from the Trance Synth, and select Pre FX. Set the ratio to 4.34, attack to 0.01ms, and fast Release around 60ms. Set the threshold to -40dB, and set the Dry/Wet at 100%. This compressor gives the synth a tighter sound, with less reverb tail.
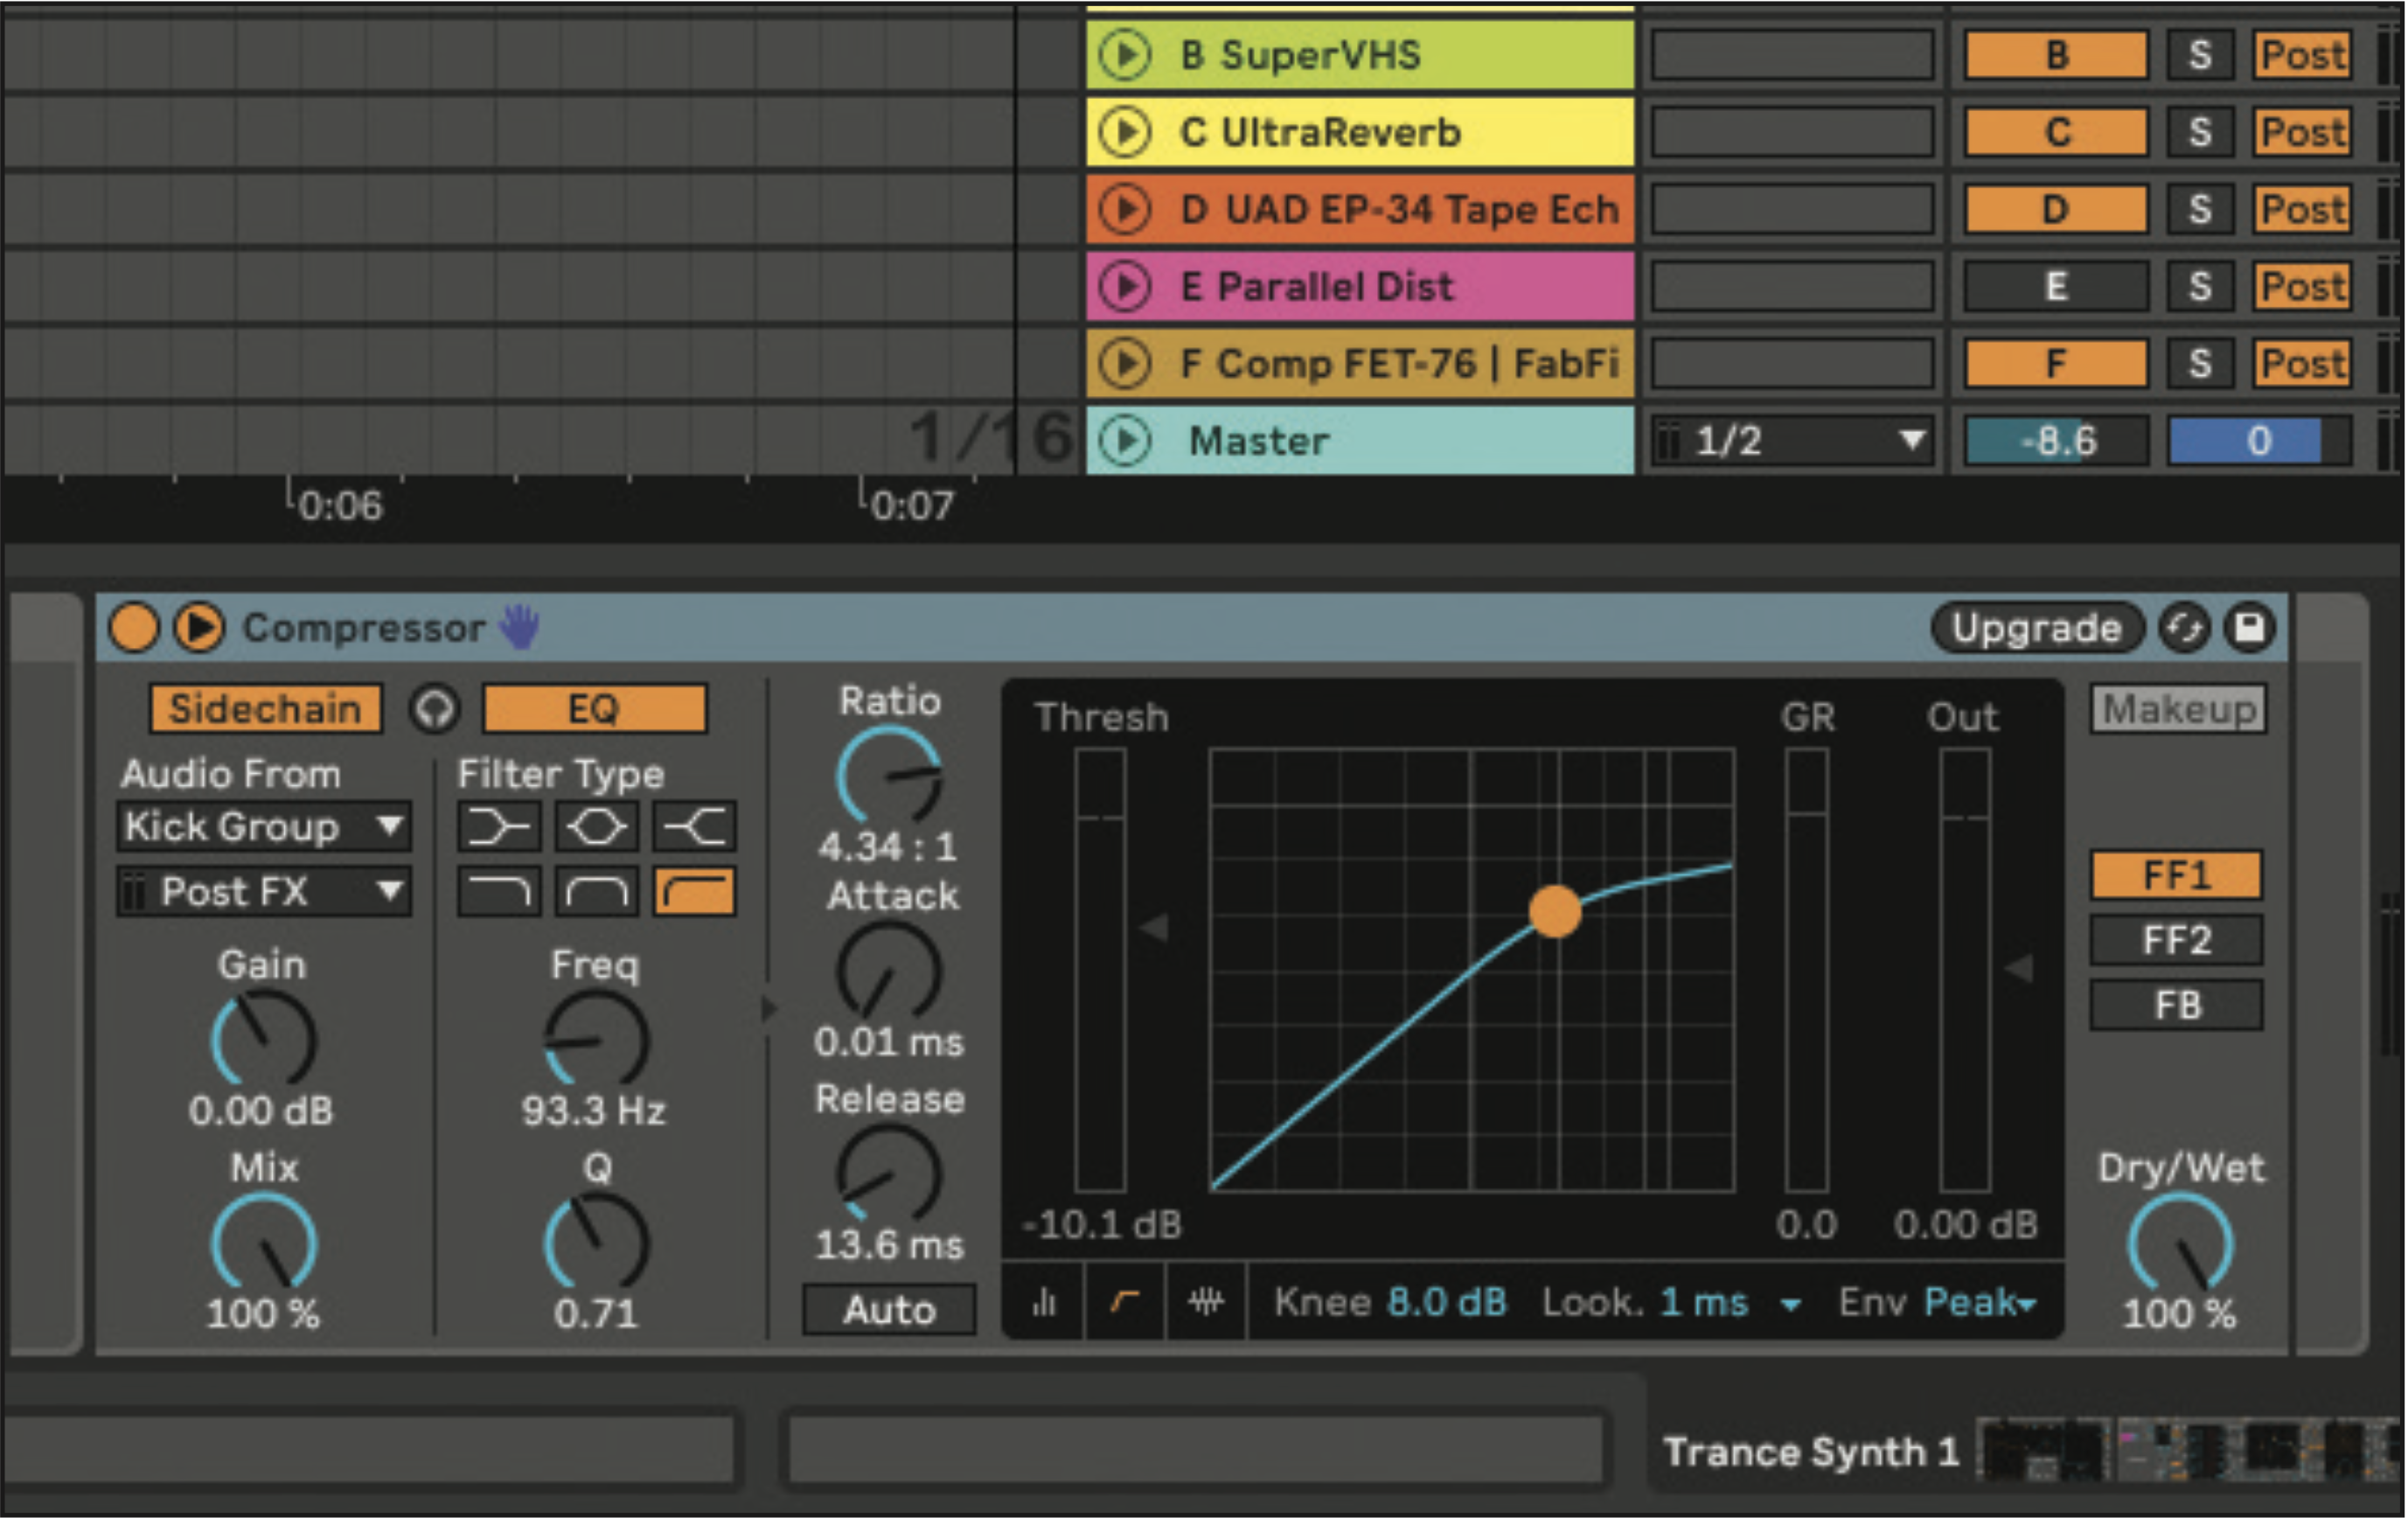
Add a second compressor after the parallel reverb chain and sidechain the compressor to the kick in your track. Set the Ratio to around 4:1, the Attack to 0.01 ms and Release to 13.6 ms. Set the threshold to taste, around -10dB and the Dry/Wet at 100%. You could also use a dedicated plugin like Cableguys Kickstart 2 for this.
Pro tip: synth stabs
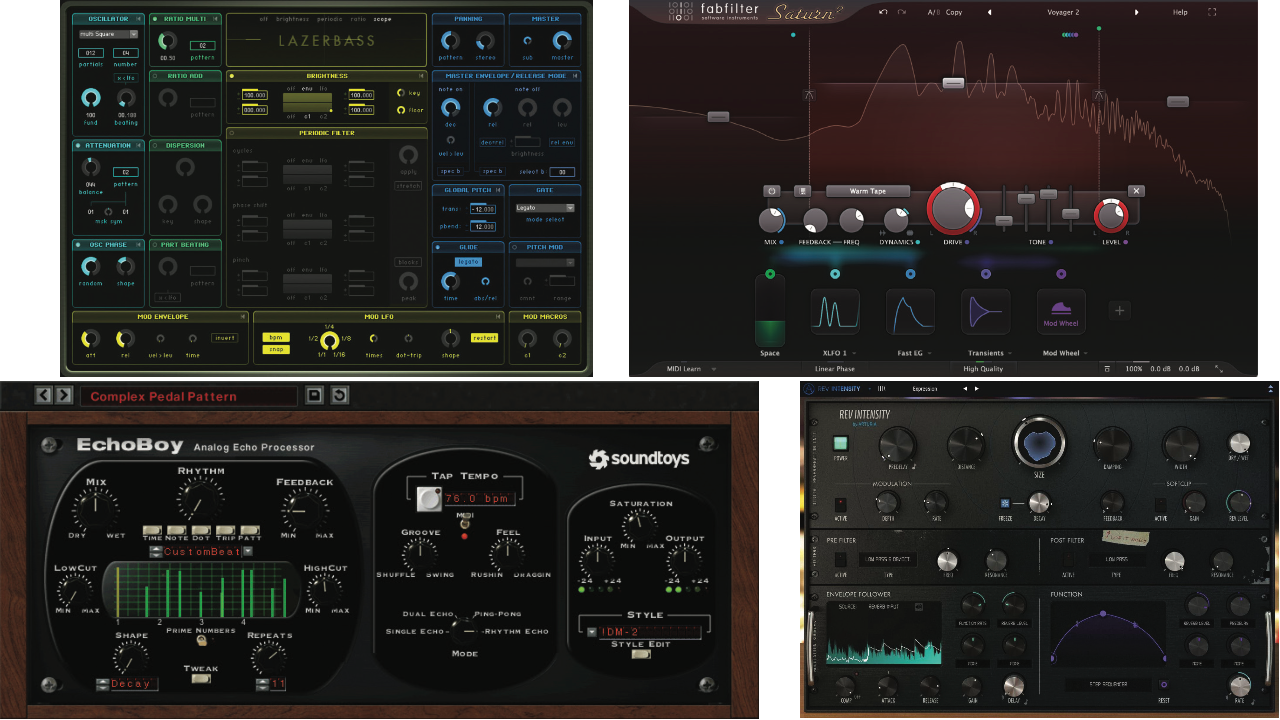
A synth stab adds character to a rave style techno track, and brings a modern edge to the production. A VST library like Native Instruments’ Reaktor or Spitfire LABS is a great place to look. For our example, we selected Reaktor’s Lazerbass, but scroll through what’s on offer and find an instrument you like to make it your own.
To get started with shaping your ‘stab’, create a MIDI pattern and place your sound where there’s some space. In order to start processing, add an EQ and roll off the low frequencies below 100Hz.
Add some saturation to the stab (we used FabFilter’s Saturn 2 but your DAW may have options). Try setting the drive at a low value, turning up any crunch or overdrive and setting dry/wet to 100%. Add a 1/16 note delay (try something like Soundtoys EchoBoy for this), and set the mix to a low value. For thickness, use a Neve preamp-style effect like Kush Audio’s Omega N. Shape the result using a vocoder, or even just a band-pass filter.
Lastly, add space using a reverb. Choose a preset with a predelay of about 15ms, a large room size, and set dry/wet to a low value.
