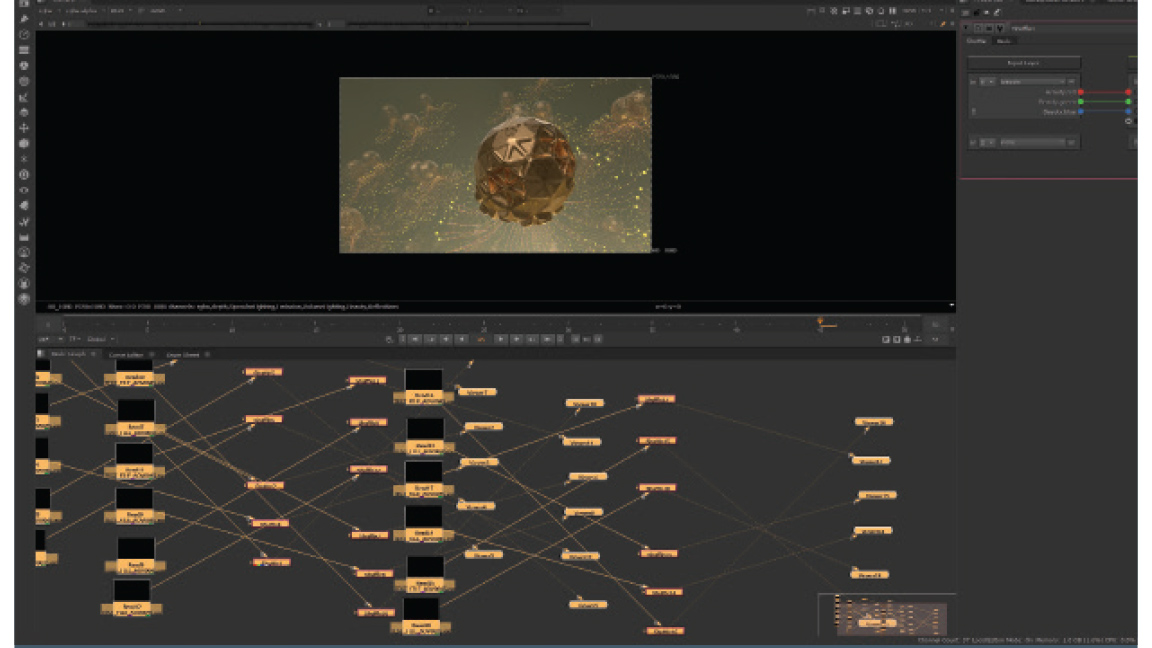
For many artists, having a node-based workflow such as the one in Foundry’s content creation application Nuke is a delight of bespoke workflows that lend themselves to the artist’s way of working, and speeds up their work exponentially. For many other artists, a node-based workflow is a nasty tangle of spaghetti only used by aliens. It continually gets in the way of them creating their work.
The Dot node is a junction node, making it easier to create logical paths of connection between nodes rather than a mess of criss-crossing lines. The easiest way to make a Dot node is to press the Ctrl key, which shows a yellow diamond that can then be clicked on to create the node.
The thing about these opposing views is that both are true, the only difference being that the artist who likes a nodal workflow has accepted that the initial set-up process can be slow. When it has been set up though, the node-based devotee saves and organises those tedious tasks in a way that creates a toolbox of custom nodes and workflows ready to go in just seconds when the need arises.
While there are many ways that individual artists can organise specific workflows within Nuke to suit them – for example, a compositor’s workflow that uses filmed footage would have a different set of requirements than a 3D artist working with rendered EXRs – the building blocks of organisation are the same no matter the task. In this tutorial, we’ll look at two of the most fundamental nodes to help artists organise themselves: the Backdrop node and the Group node, which support artists in multiple ways.
The Backdrop and Note nodes help to keep matters visually organised on the Node Graph, while the former can clearly denote the function of a set of nodes or a certain point in a node tree. What’s great about the Backdrop node is that the nodes within it move as well, making it easy to keep track of various stages of a Node Graph’s progression as it grows.
Meanwhile, the Group node is used to bundle together a set of nodes into a single node, with the advantage that that solitary node obviously makes the graph a lot less complex visually. Using these organisational nodes can help make sense of the Node Graph spaghetti, which will help any artist get the most from their time spent in Nuke.
Keeping your Node Graph organised in Nuke
Nuke can be views as one of the best After Effects alternatives but its node-base system is closer to Unreal Engine or Unity. If you're keen on read our feature on the '10 greatest VFX movies all time' to get inspired. Below I share my ideas of how to manage nodes in Nuke.
01. Adding a Backdrop node
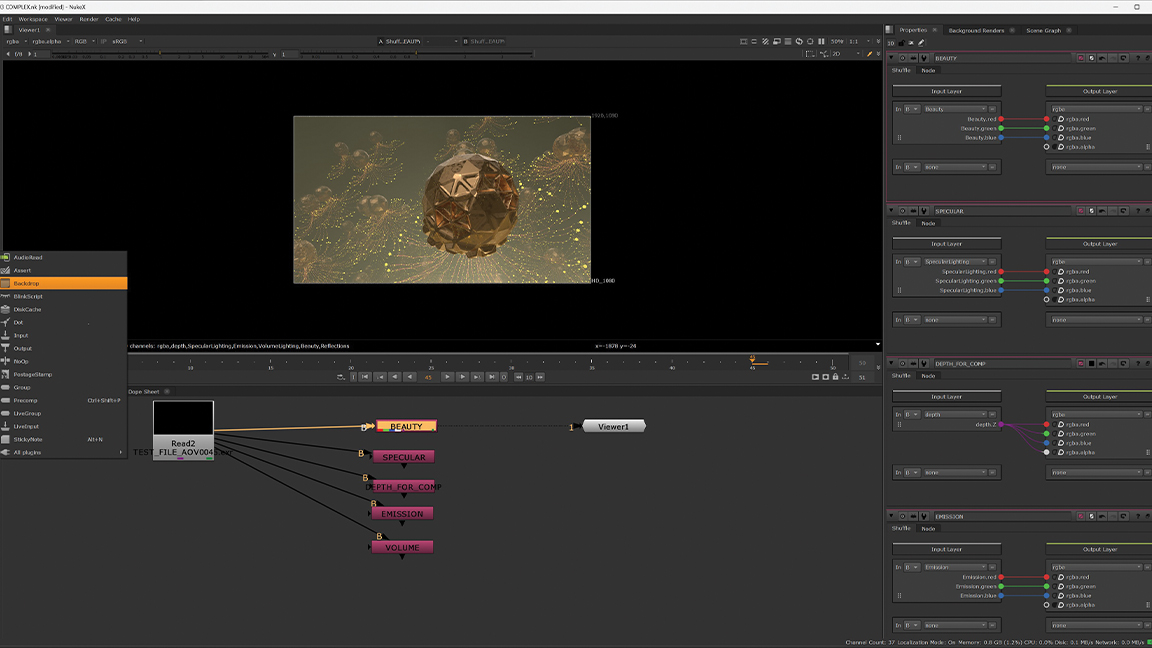
This tutorial was created in Nuke 14 and is aimed at new users. For this guide, a multi-part EXR Read node has been connected to multiple Shuffle nodes, each renamed to denote which respective pass they access. To insert a Backdrop node into your project, press the Tab key in the Node Graph and type “Backdrop” in the dialogue box. It’s also available in the box icon in the toolbar.
02. Using the Backdrop node
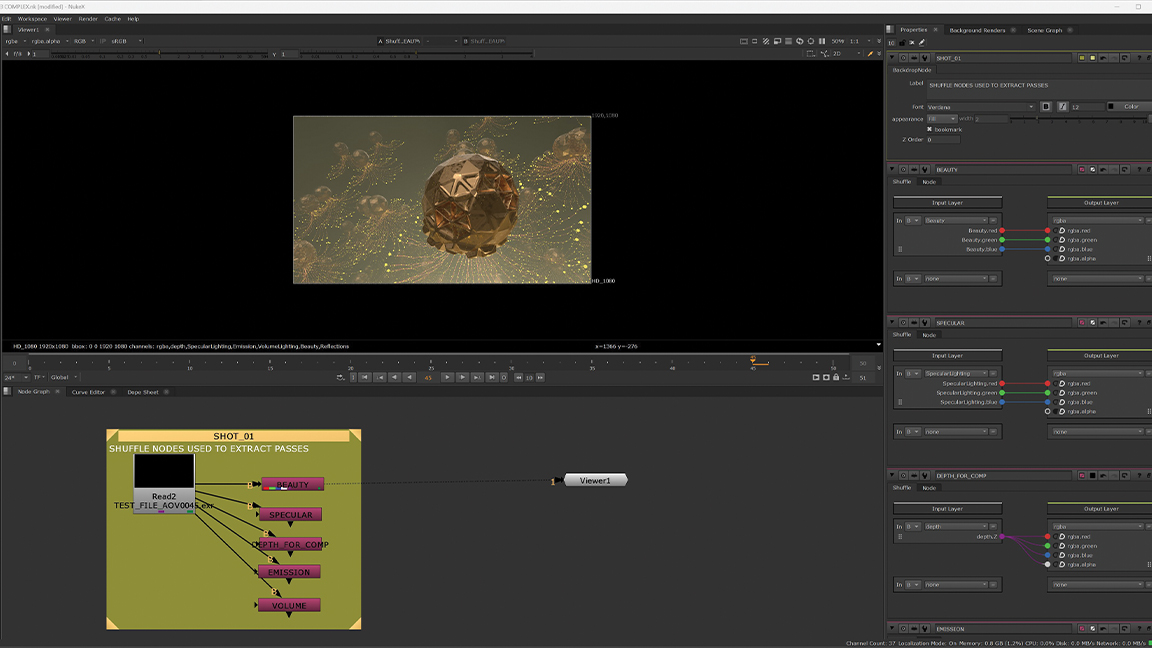
When the Backdrop node is added, click on one of its corner arrows to resize it around the nodes; in this case, the Read node and its child Shuffle nodes. The Backdrop node can both be renamed, the same as any Node, or have a label within it that can be used to define any parameter the artist wants. Moving the Shuffle nodes will move all the nodes within it.
03. Finding the Group node
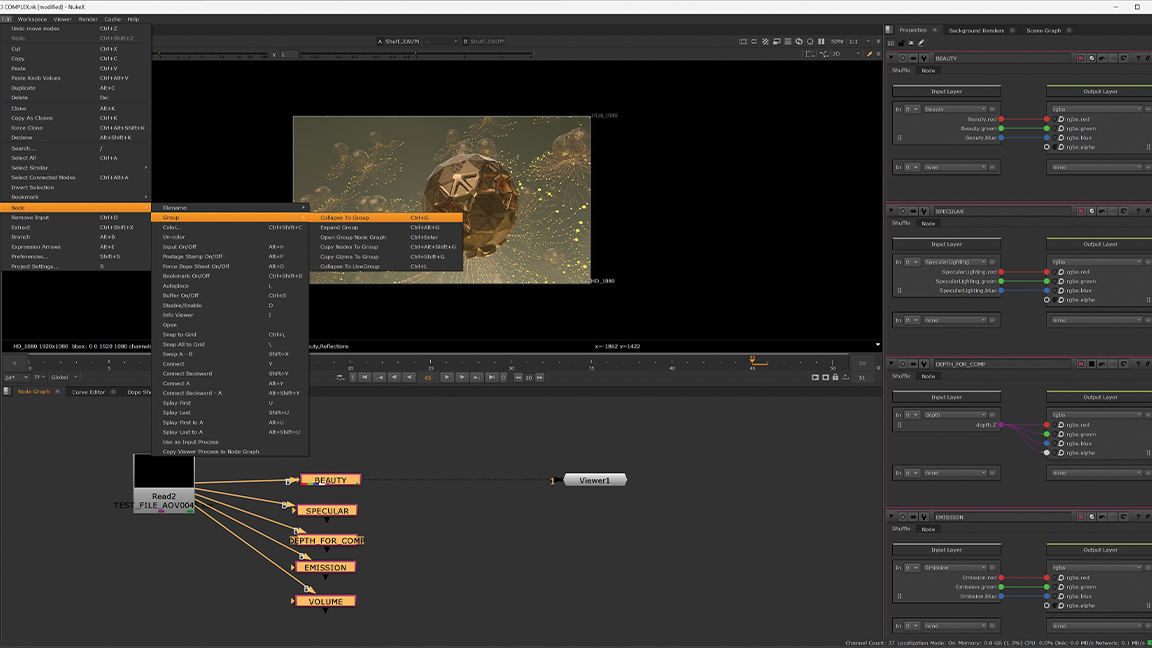
The Group node is accessed in the same way as a Backdrop node, or it can be created by selecting a desired group of nodes – the Shuffle nodes only for our purposes here – and then going to Edit>Node>Group>‘Collapse To Group’. Alternatively, you can also use the Ctrl+G shortcut to group your Shuffle nodes. A dialogue box will pop up asking which Shuffle output needs to be used for the Group node output.
04. Using the Group node
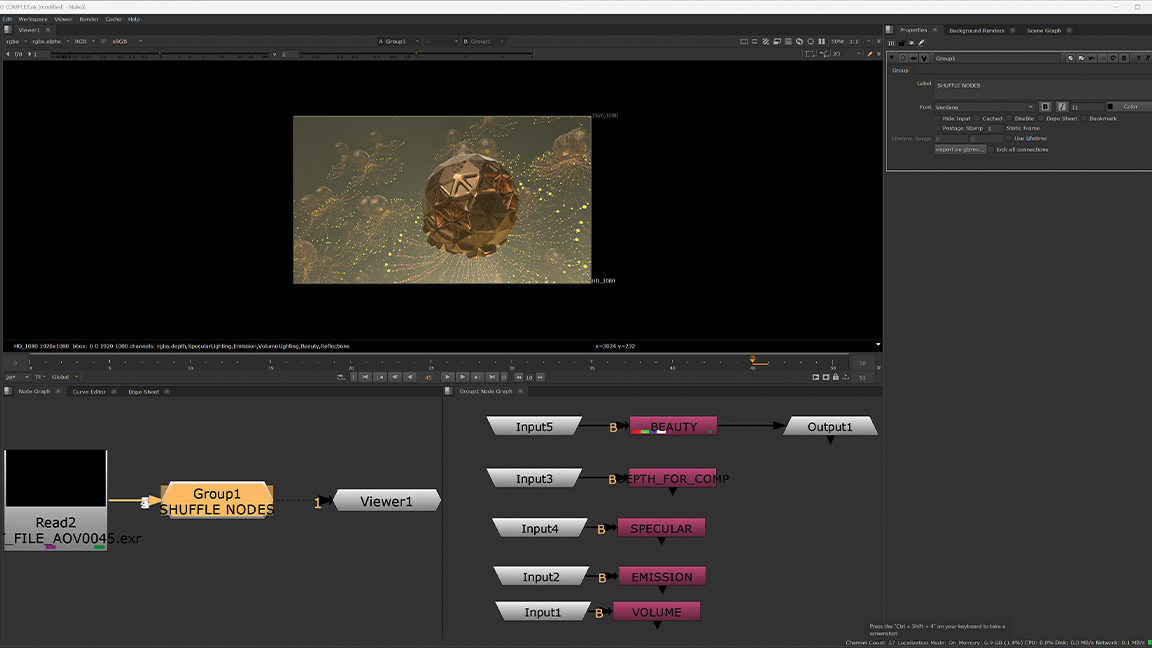
The Group node, in many ways, is similar to a Precomp in Adobe After Effects (Nuke has a Precomp node that performs a different function) in that it nests the nodes. The nested nodes in the group are available within their own Node Graph. If the Group node’s Node Graph is not visible, press the black ‘S’ symbol on its Properties palette to open it up.
This content originally appeared in 3D World magazine. Subscribe to 3D World at Magazines Direct.


