On Windows 11, the Taskbar is perhaps one of those features we use on a daily basis as it allows us to launch and manage running applications quickly. However, some users may feel it takes away part of the screen, so the operating system includes an option to hide it automatically, but it's not enabled by default.
In this how-to guide, I'll explain the easy steps to manage the option to show or hide the Taskbar.
How to enable Taskbar auto-hide on Windows 11
To allow Windows 11 to hide the Taskbar automatically, use these steps:
- Open Settings.
- Click on Personalization.
- Click the Taskbar page on the right side.
Quick note: You can always right-click the Taskbar and select the "Taskbar settings" option to access the settings page.

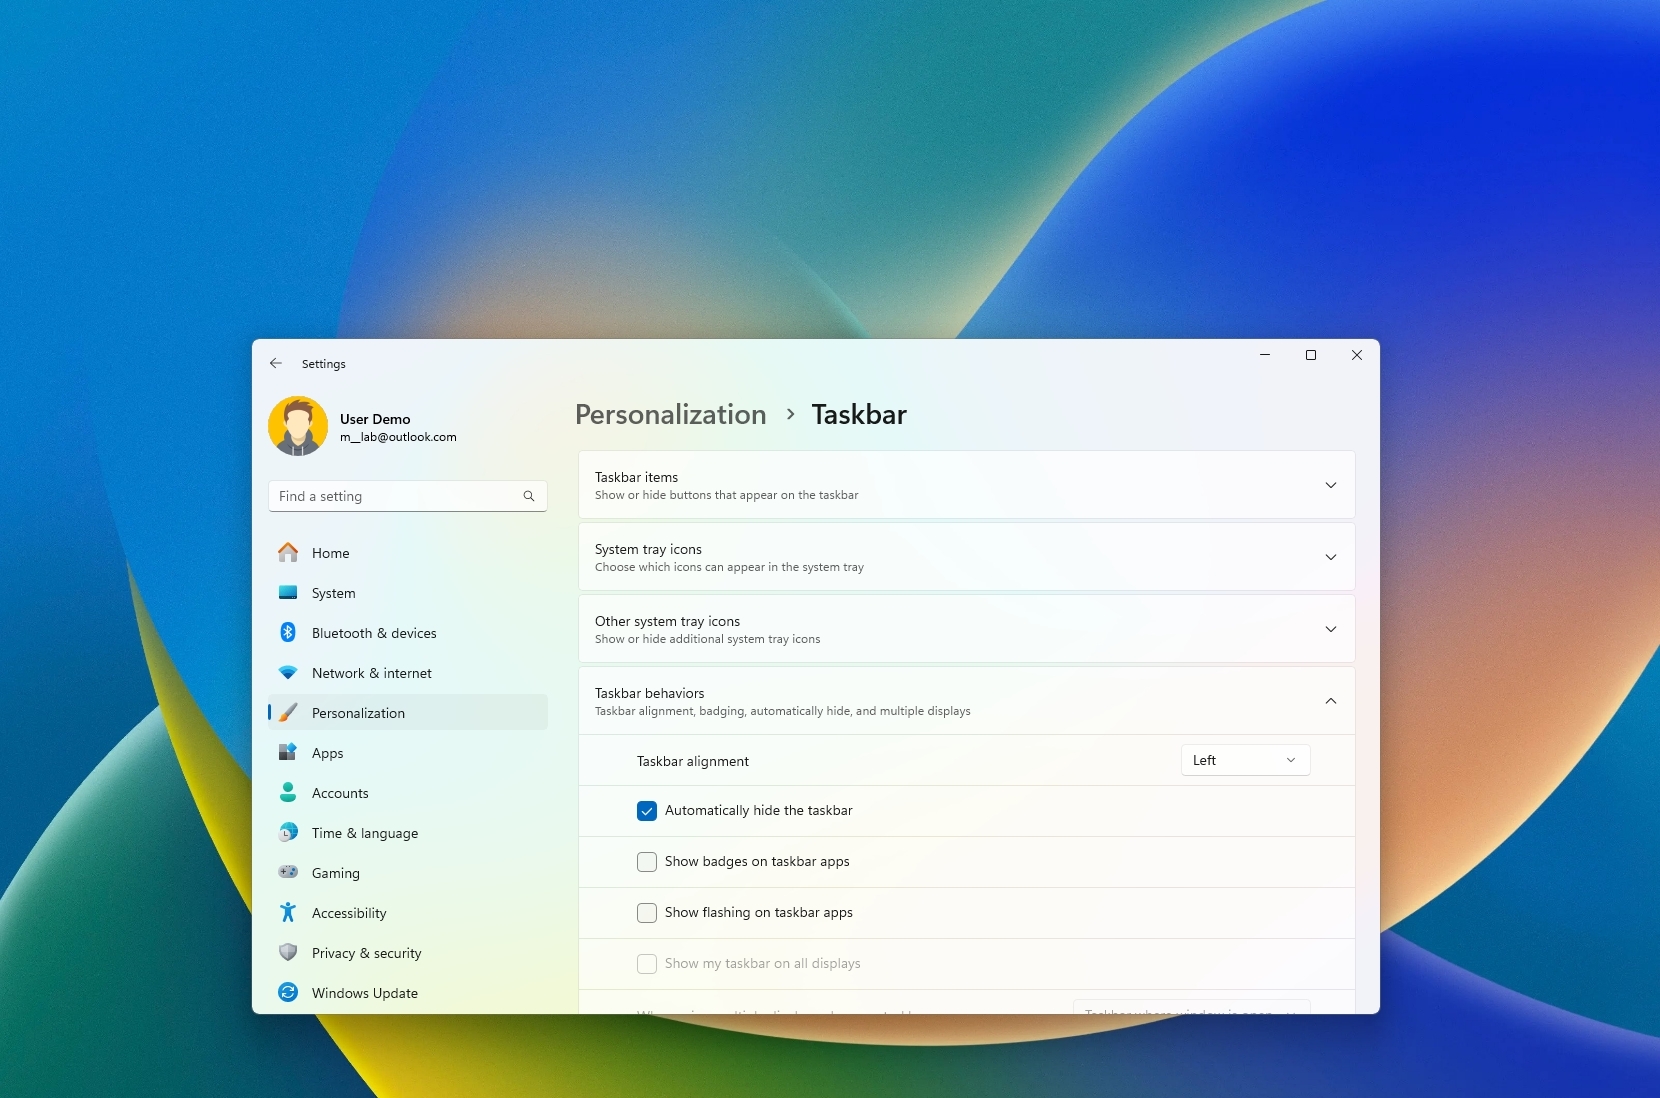
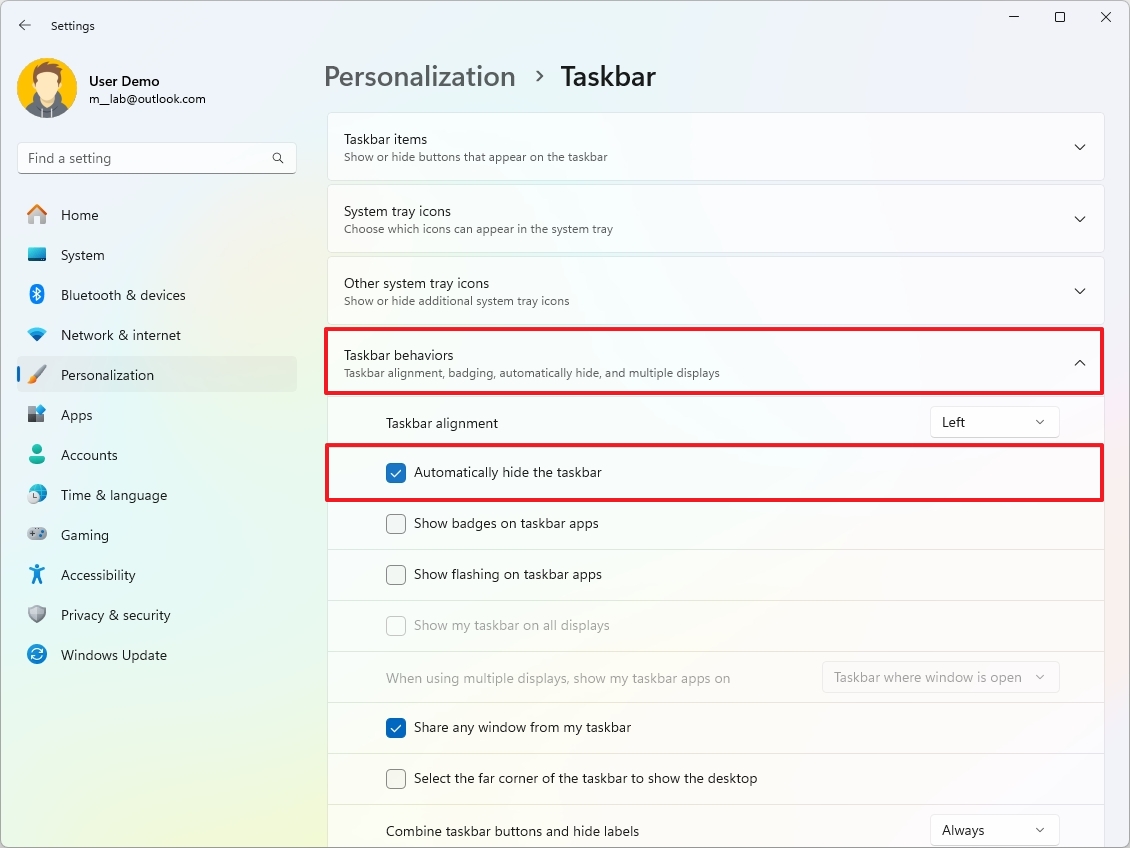
- Click the Taskbar behavior setting.
- Check the "Automatically hide the Taskbar" option.
Once you complete the steps, the Taskbar will hide automatically when you move the mouse away from the element, giving you a little more real state to work with other applications.
How to disable Taskbar auto-hide on Windows 11
To disable the option to automatically hide the Taskbar, use these steps:
- Open Settings.
- Click on Personalization.
- Click the Taskbar page on the right side.
- Click the Taskbar behavior setting.
- Clear the "Automatically hide the Taskbar" option.

After you complete the steps, the Taskbar will always show in the desktop as intended by default.
More resources
Find in-depth guides, troubleshooting tips, and the latest updates on Windows 11 and 10 here: