Of the many upgrades Meta included on the Quest 2, its display was probably one of the best. While it may look outdated now compared to the Quest 3 and Pro, the upgraded refresh rate provided a 25% improvement over the original Oculus Quest at launch, delivering a smoother, much more immersive VR experience.
Meta Quest 2 runs supported games at 90Hz and even some at 120Hz natively, but if you're connecting to a PC with Oculus Link you may still need to adjust some settings to get the best experience.
Quest games with 120Hz support
A few years ago, Meta updated the Quest 2 with an experimental 120Hz mode. The Quest 2 still automatically switches the display to 90Hz mode when a game supports it, but you'll need to go into your Quest 2's settings to enable a 120Hz refresh rate. Since there aren't a ton of games that have full 120Hz support, many games will still cap at 90Hz.
That said, players won't have to modify their Quest 2 in order to play their Oculus Quest games at higher frame rates anymore. The caveat here is that developers need to update their games in order to support 90 or 120Hz on the Quest 2, otherwise they'll run at 72Hz like the original Oculus Quest did.
How to enable 120Hz on Quest 2
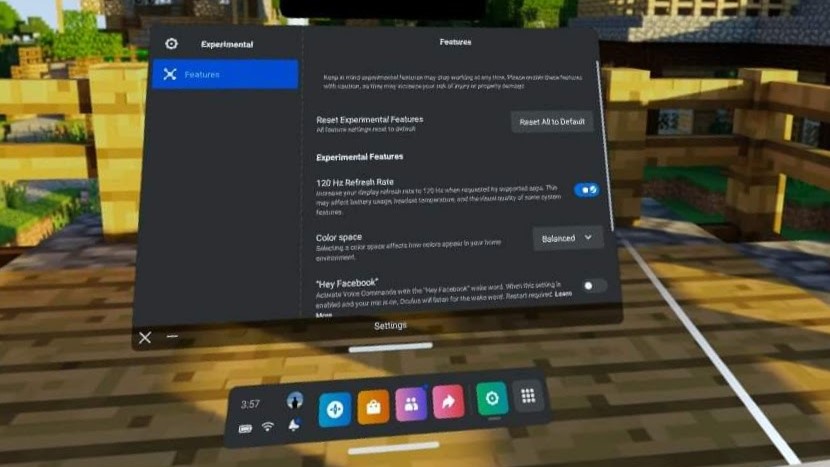
The Quest 2's offered support for 120Hz refresh rates for some time now, but for the time being, they're tucked away with other experimental features on the Quest 2. Before you enable 120Hz though, it's important to note that the 120Hz refresh rate on Quest 2 is still considered an experimental feature, so it can affect your Quest 2's battery life, temperature, and other performance-related specifications. To enable 120Hz on your Quest 2...
- Open your Quest 2's Settings App.
- At the bottom of the Settings App, you'll find a widget labeled "Experimental."
- Enable 120Hz will be the first setting you can toggle below he "Reset Experimental Features" option.

How to enable higher framerates with Oculus Link
When you connect your Meta Quest 2 to a gaming PC with a Link cable, you'll be able to play PC VR games using Rift software. The $80 Oculus cable is officially recommended by Meta to provide the highest-quality experience. You can save money by opting for one of the great Link cable alternatives, as well.
1. If you don't already have it, download the Link software here.
2. Sign in with your Oculus account.
3. Connect one side of the USB cable to a USB port on your PC and the other side to your Oculus Quest 2.
4. The Oculus app on your computer should recognize the Oculus Quest once it's plugged in. Click Continue on the screen that pops up to enable Oculus Link.
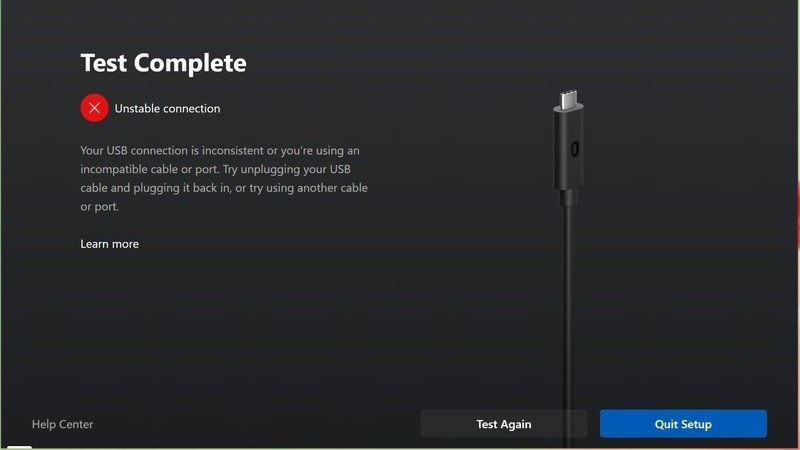
5. During the setup, you can test the cable to make sure it's fast enough to be used with Oculus Link by clicking the Test button at the bottom of the screen. If your cable fails the test, you should consider one of the cables we recommend above.

6. Click Continue and put the Meta Quest on your head.
7. If asked to Allow access to data, select Deny.
8. Select Enable Oculus Link on the next pop-up that appears.
Now that you've got your Quest 2 connected and set up, it's time to head to advanced options to make sure you're running at 90Hz.
9. With the Oculus software open on your PC, select Devices from the menu on the left.
10. In your list of devices, click on Quest 2 and Touch to open device options.
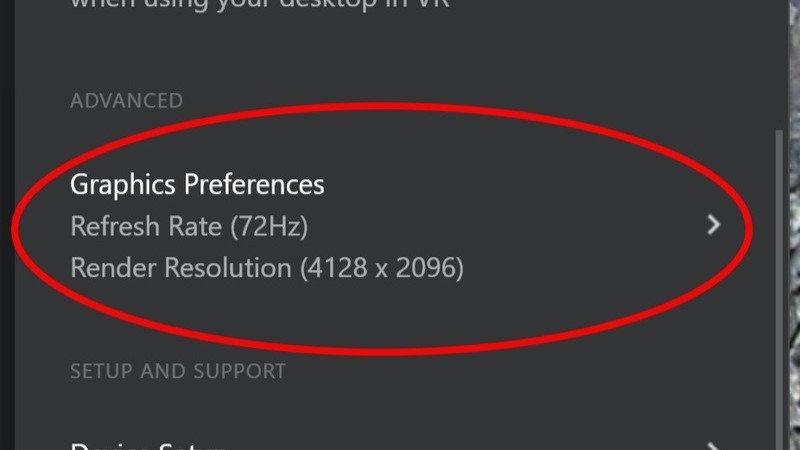
11. Scroll down to Graphics Preferences and click it.

12. Select your desired framerate from the range of refresh rate options.
13. Click Save & Restart to restart the Oculus software.
The difference in frame rates is a big upgrade
Frame rates like 120, or even 90Hz are a huge upgrade for loads of VR games, even if the number jump from 72Hz to 90Hz doesn't seem like a lot. Every increase in refresh rate with a VR headset means a more comfortable experience, less motion sickness, and a more realistic feeling.
An incredible experience
The Quest 2 can be used on its own or paired with a PC, making it the ultimate VR experience.


