Launching Premiere Pro for the first time can be quite daunting. How do you create a new project, how do you edit, add effects, insert titles, and perhaps most importantly, export your creation to share it with others?
We’ve created a tutorial to answer these questions.
Now, like all of the best non-linear video editors, the software’s capabilities are vast, so consider the following steps as a gentle introduction, easing you in at the shallow end, making you comfortable with the very basics, before delving deeper in future, more in-depth, tutorials which will focus on a specific tool, feature, or way of editing.
Video editing can be a lot of fun, especially when working on a dedicated laptop for video editing, or a powerful PC with a great monitor ideal for video editing. So double-click on that Adobe Premiere Pro icon, and let’s get started.
Try Premier Pro for free
1. Import footage
Adobe projects all launch in a similar way, by presenting you with the app’s Home Page. From there, you can check the software’s latest features, open a project not shown in your list of recent ones, or create a new one from scratch, among others.
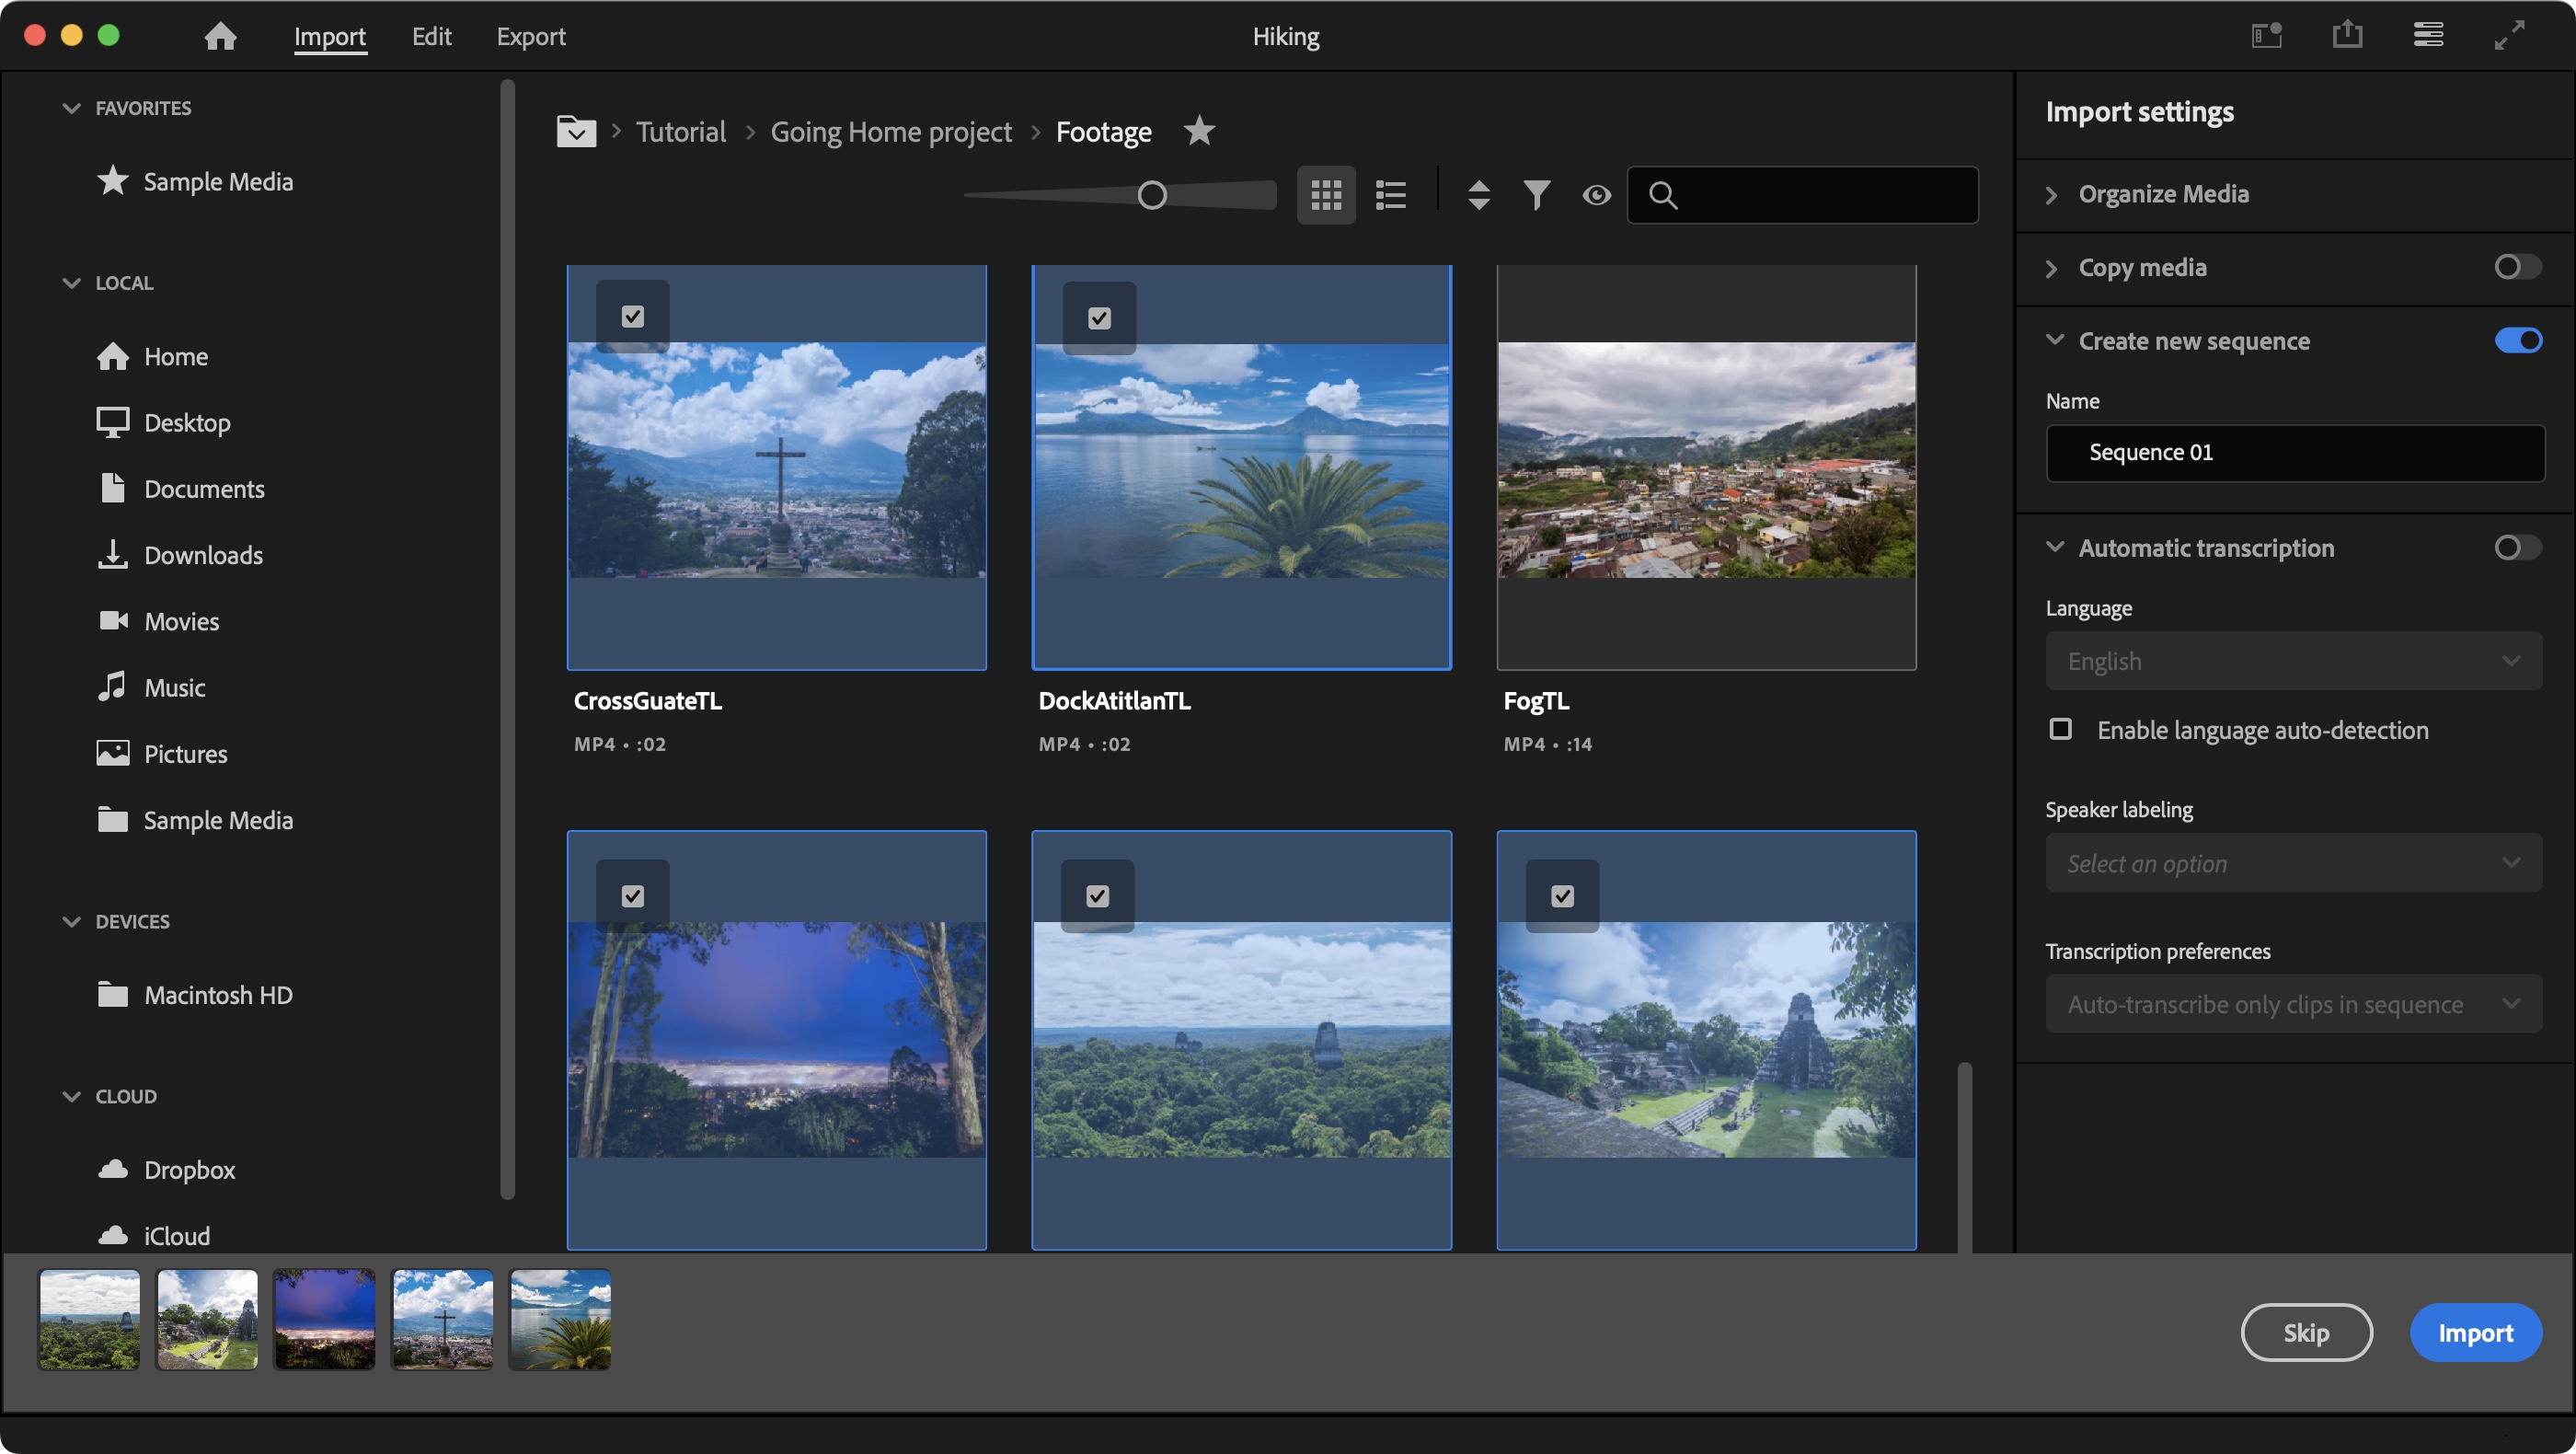
Clicking on ‘New Project’ reveals a smaller window through which you give your project a name, and choose where to save it. Once you’ve clicked on ‘Create’, you’re taken to the ‘Import’ space (you can’t edit without having imported clips first).
A sidebar to the left lets you navigate through your local and online devices. Should you not have some footage at hand, ‘Sample Media’ would be a good alternative. Locate the files you need, and click on them to select them. Once you’re happy with what you’ve got, click on ‘Import’ (lower right of the interface).
2. Add first clip
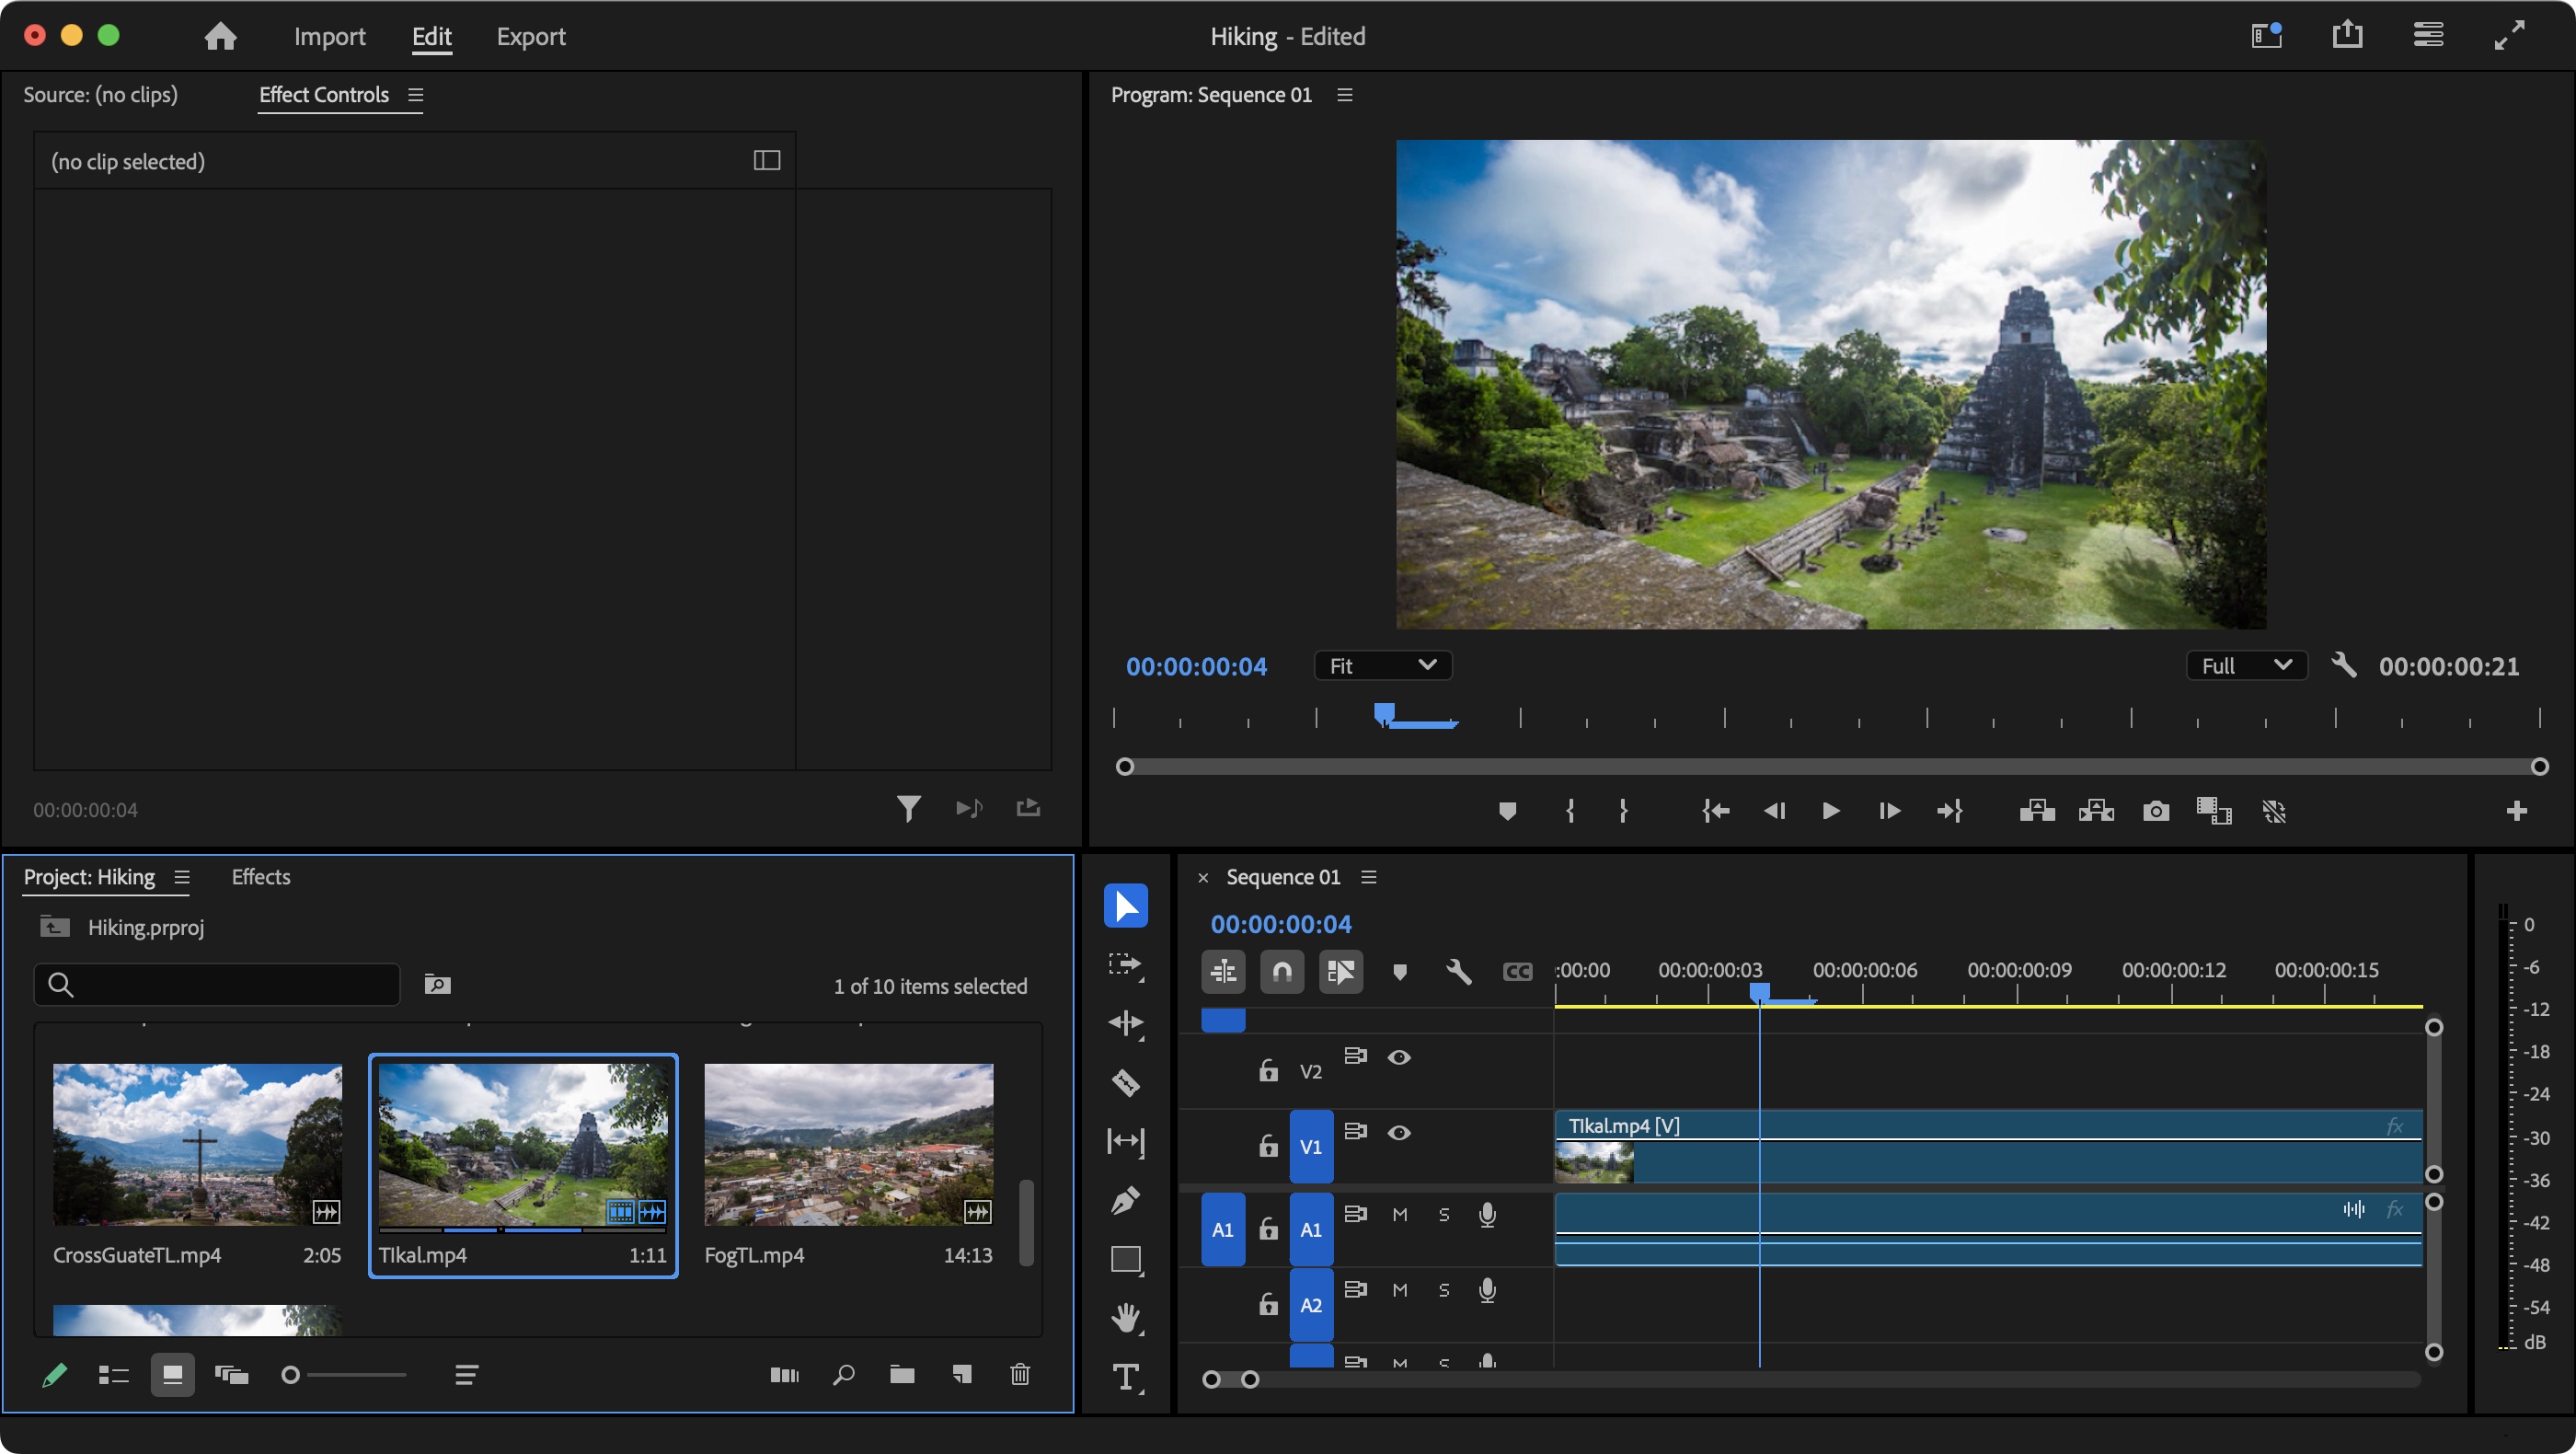
Now that your clips have been imported, you’re automatically taken into the ‘Edit’ space, with your imported clips lower left of the interface. You’ll notice that they’ve also all been automatically placed in your timeline (lower right).
For the purposes of this exercise, we don’t want clips in the timeline just yet, so click on one, go to Edit > Select All, and then Edit > Ripple Delete.
Mouse over one of your clips in your Library. As you do so, notice that you’re in fact scrolling through your footage. This is a great way to quickly preview your clip and make sure you’ve chosen the right one.
Most of the time, you only need part of a clip. To do this, as you mouse over, hit the ‘i’ key to set an ‘in point’, and the ‘o’ key, for the ‘out point', then drag that clip’s thumbnail onto your Timeline.
3. Working the timeline
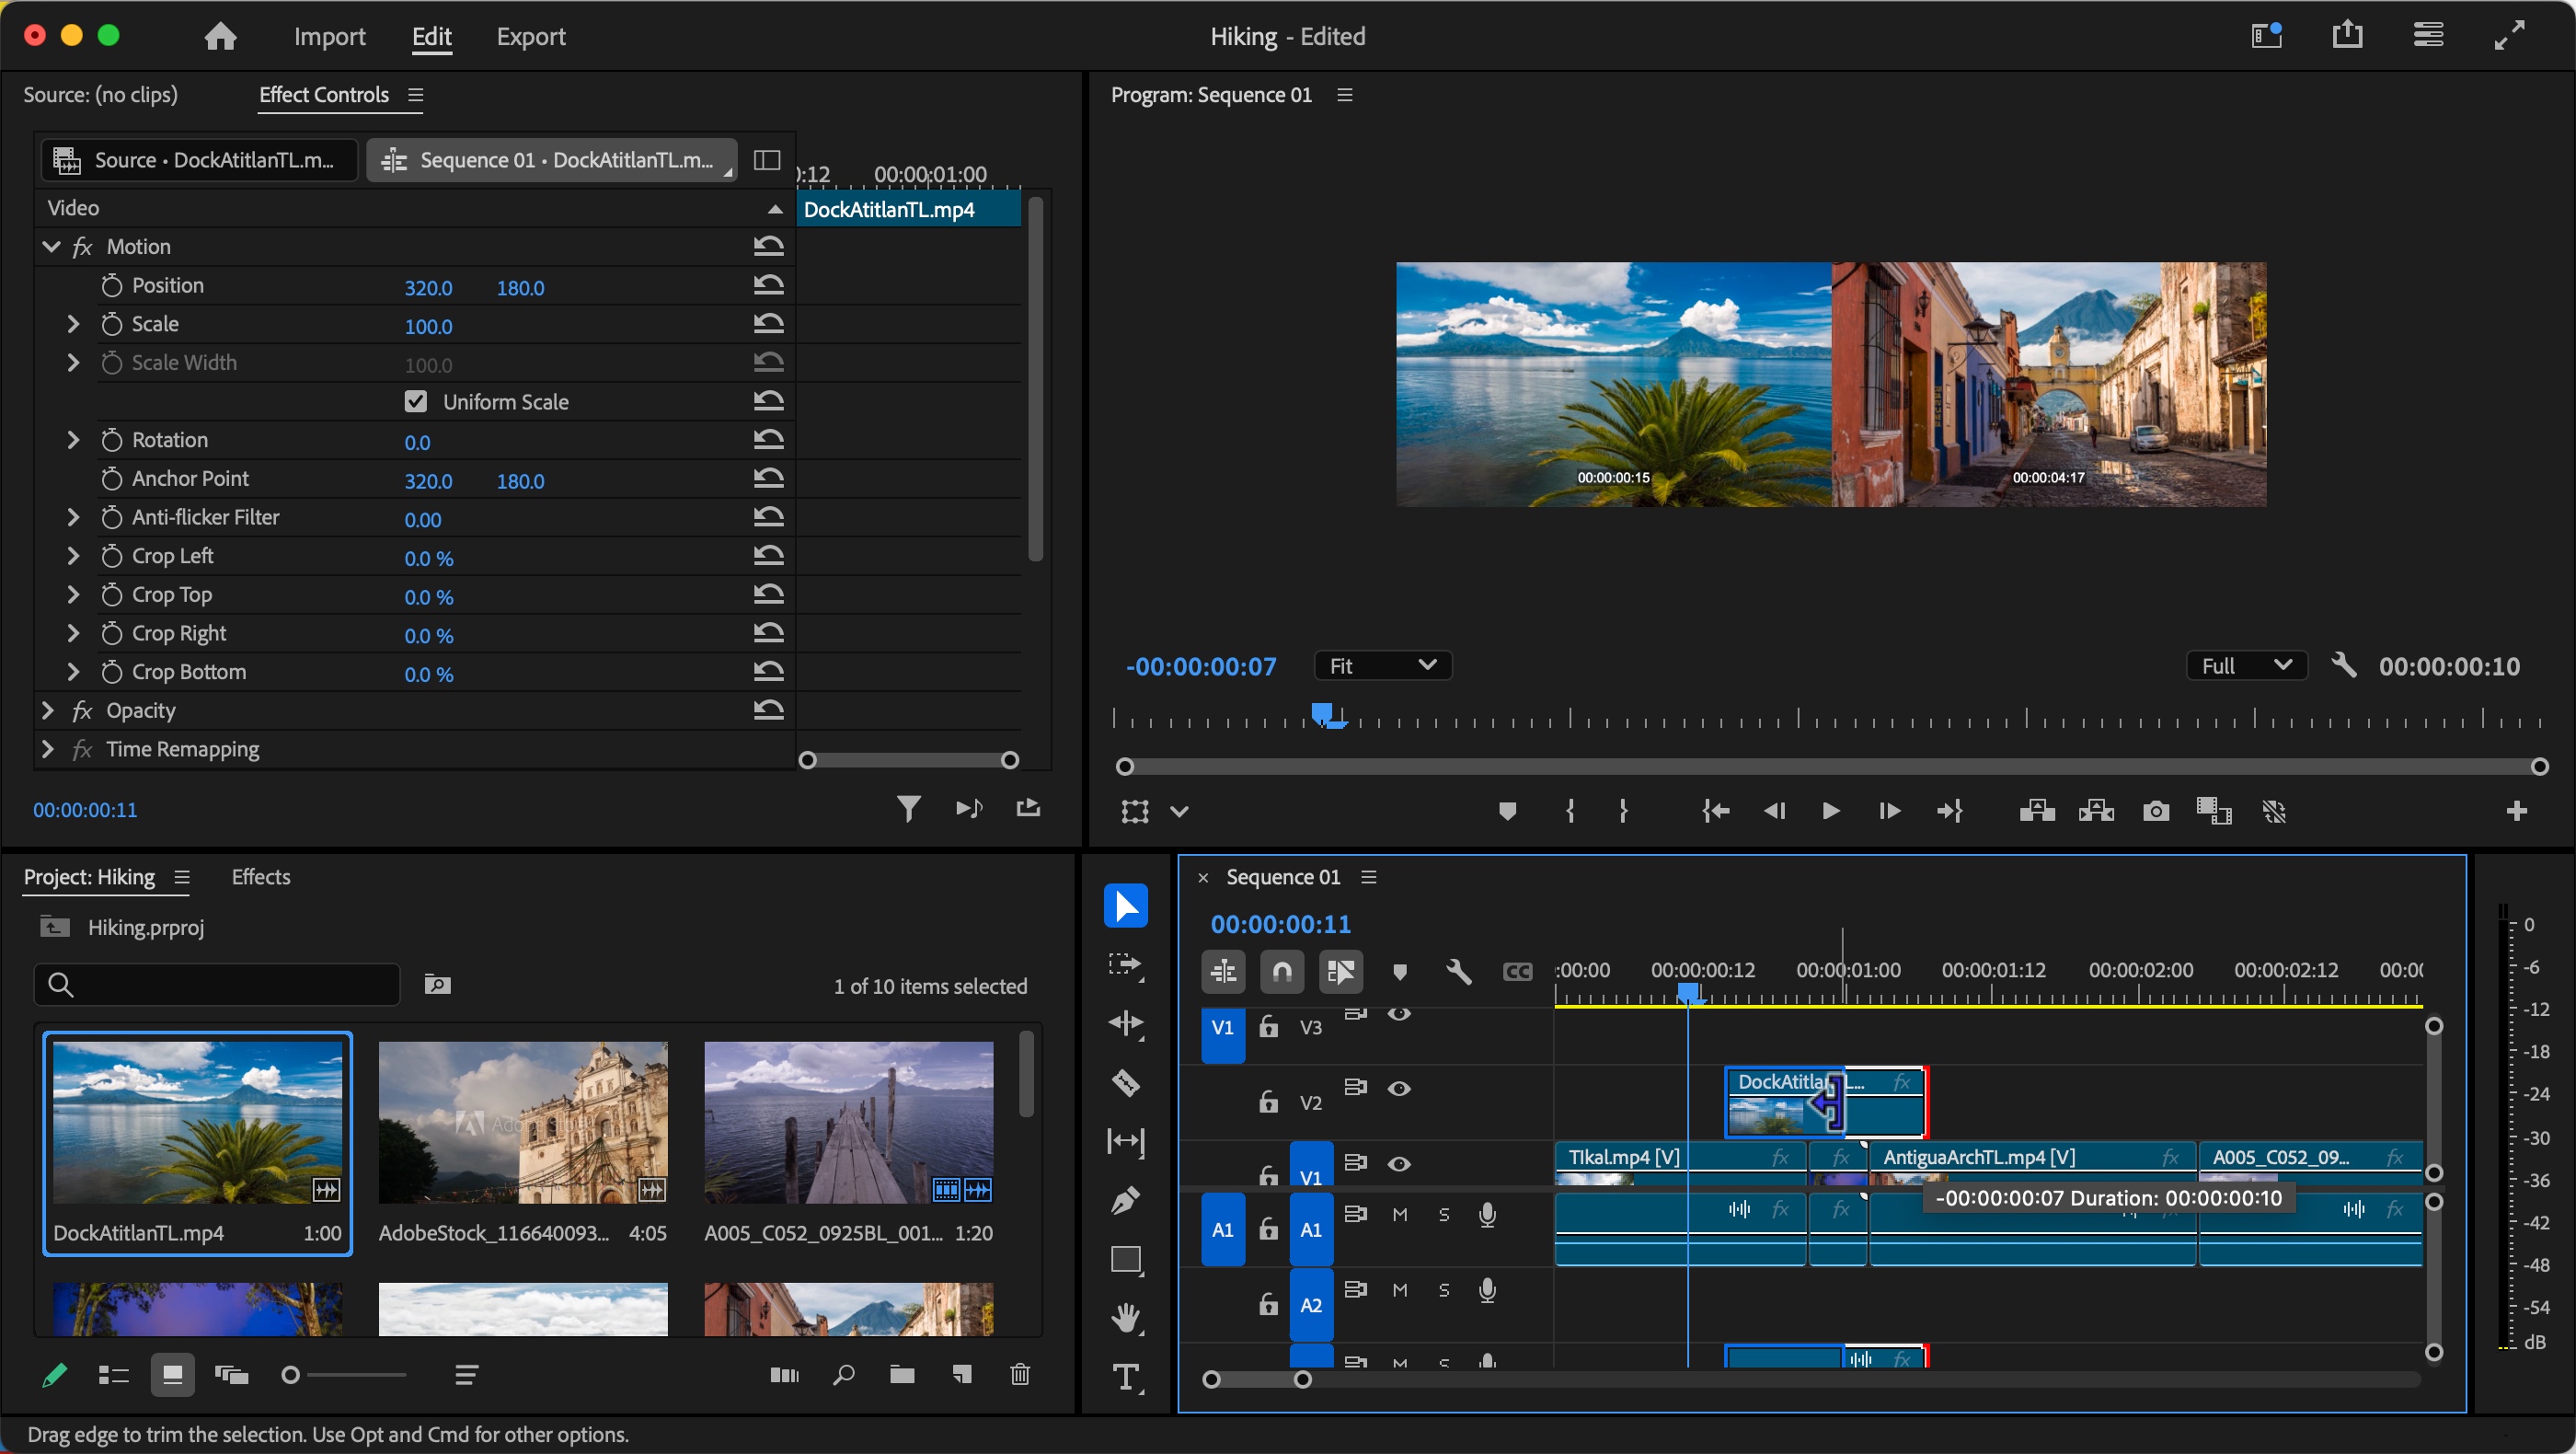
Add additional clips to your project, one after the other, as we described in Step 2. This creates a very basic edit, but you can add a degree of complexity to your project by placing clips on different layers. If you look to the left of the Timeline, all your video clips should be on the ‘V1’ layer.
So this time, add a clip anywhere on ‘V2’. Any clip under this new one will be obstructed by it.
You could use this technique for instance to keep hearing what’s going on in V1 while changing the visual to what you placed in V2.
Your clips’ in and out points are not set in stone: check the clip on V2 and mouse over one of its edges. The cursor changes shape and turns red. You can then drag its edge in either direction to alter its edit point.
4. Adding effects
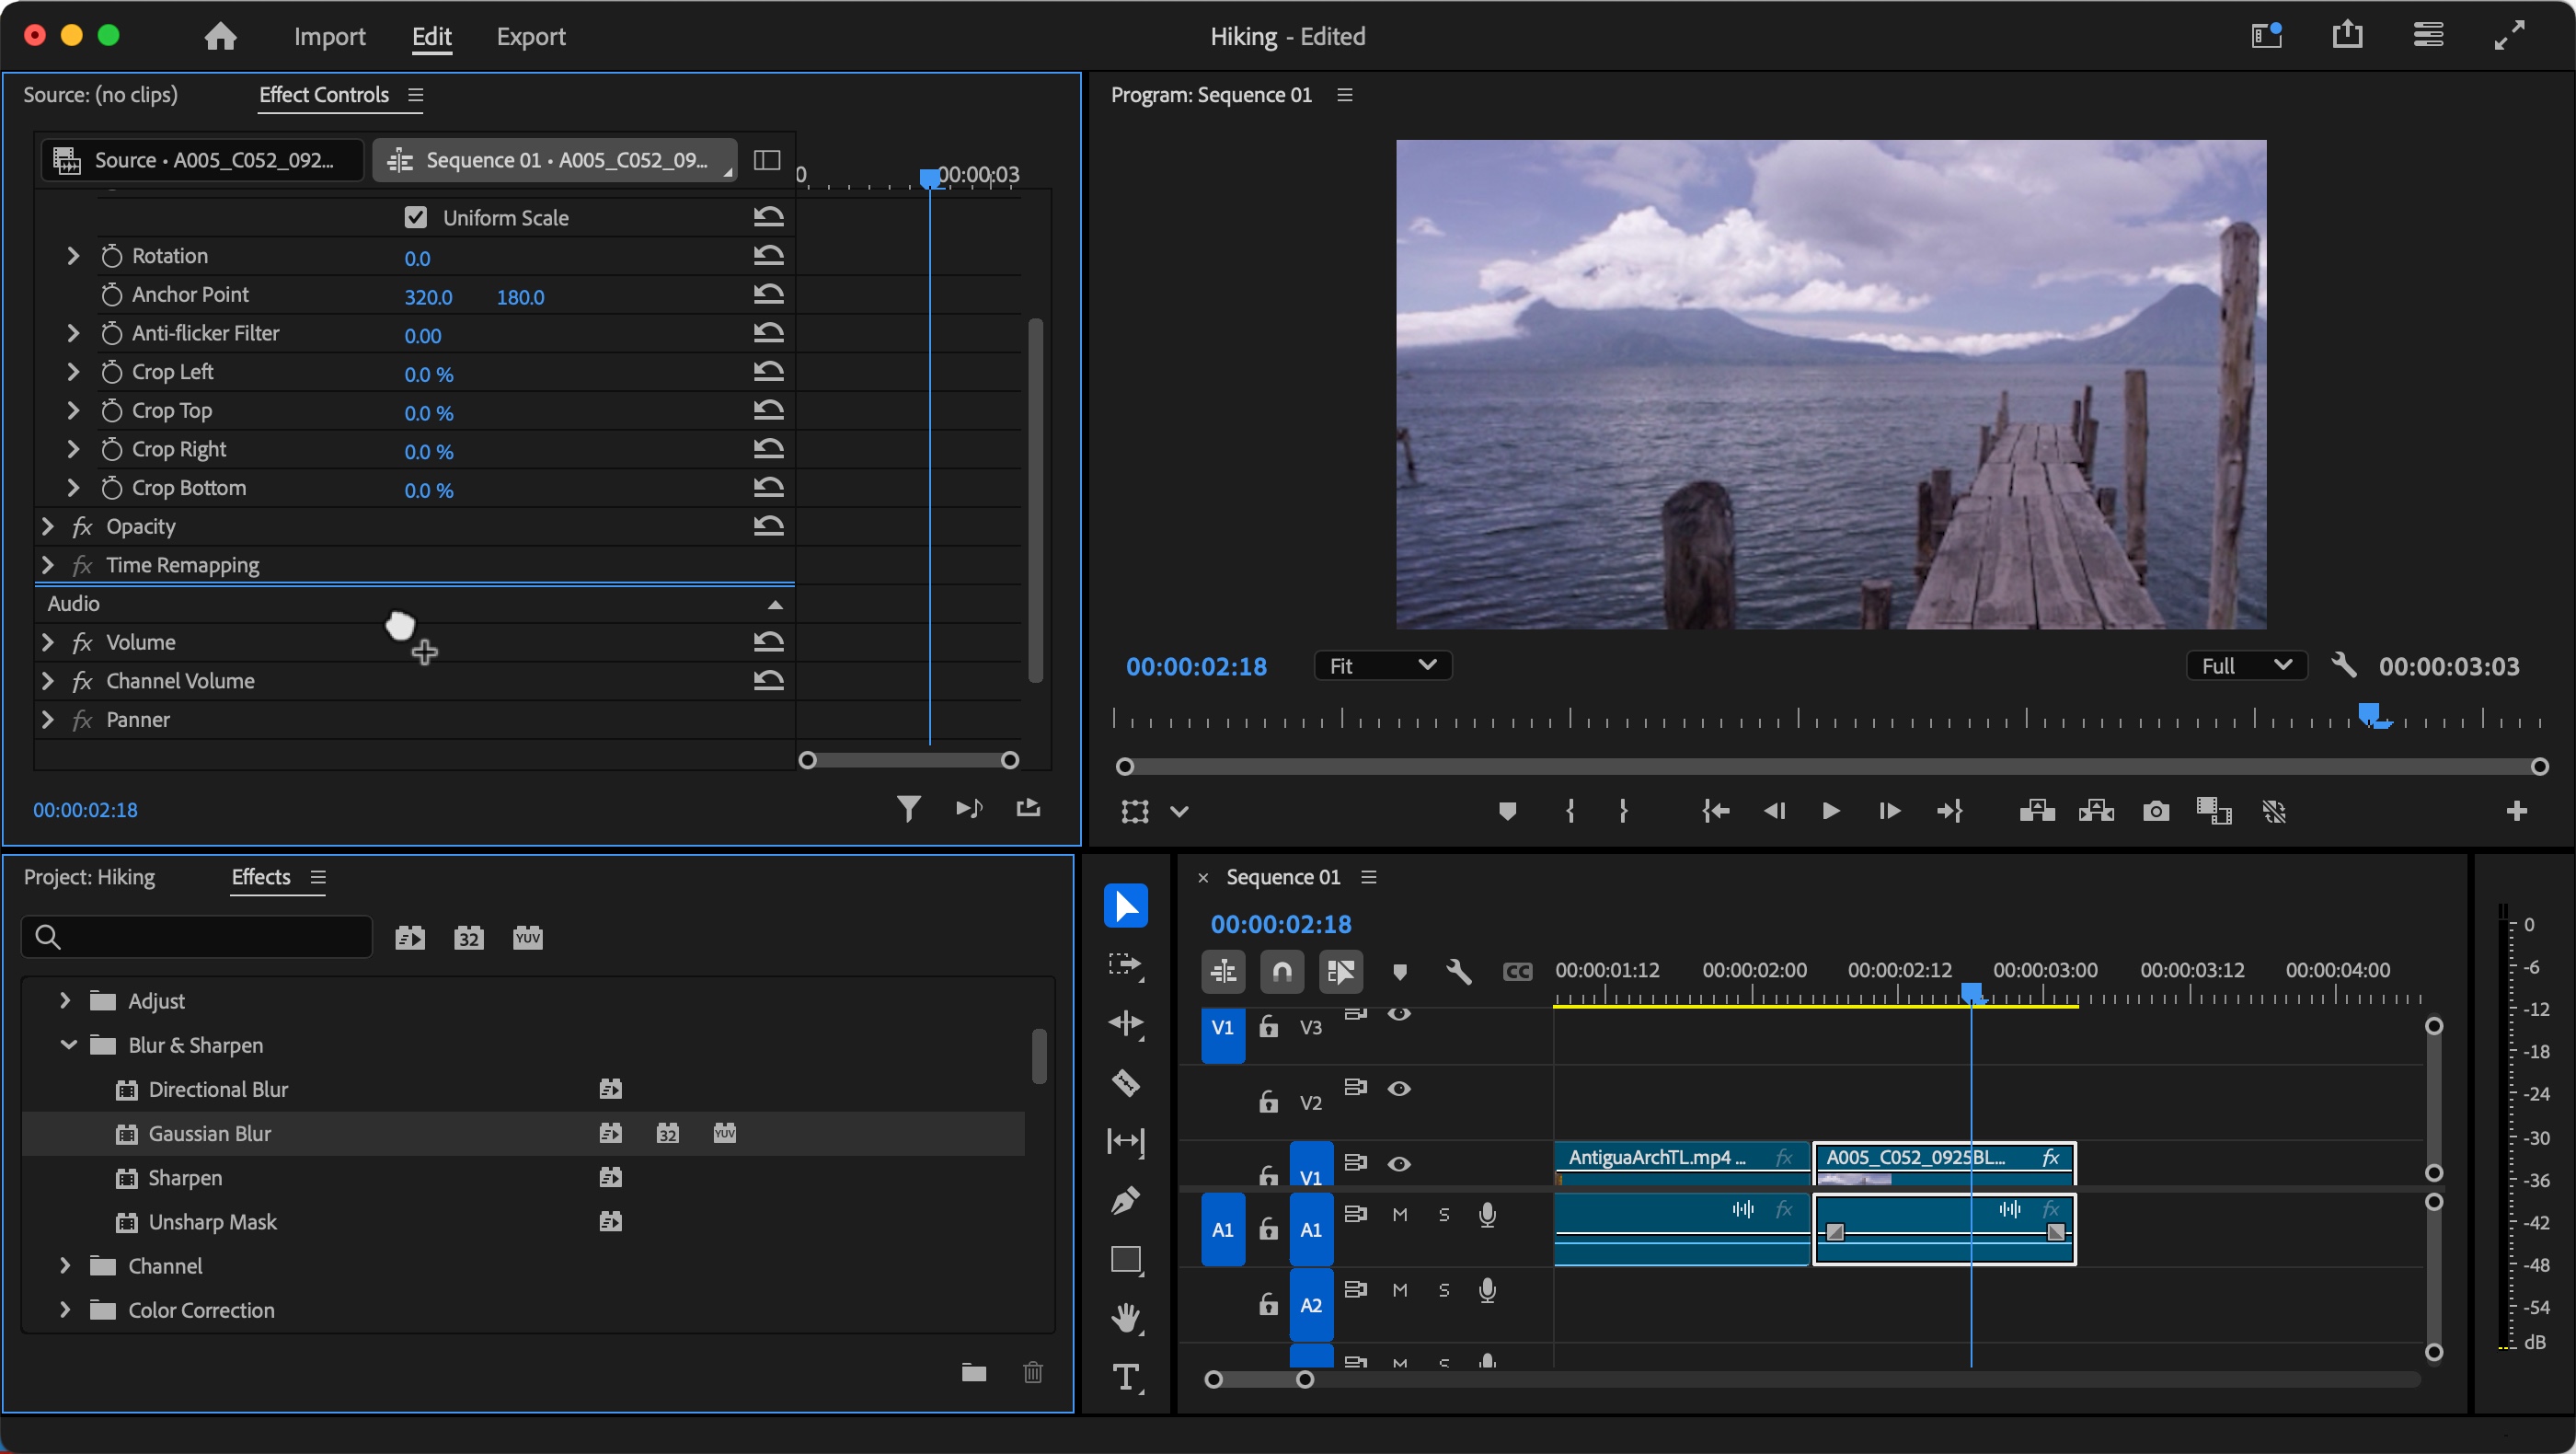
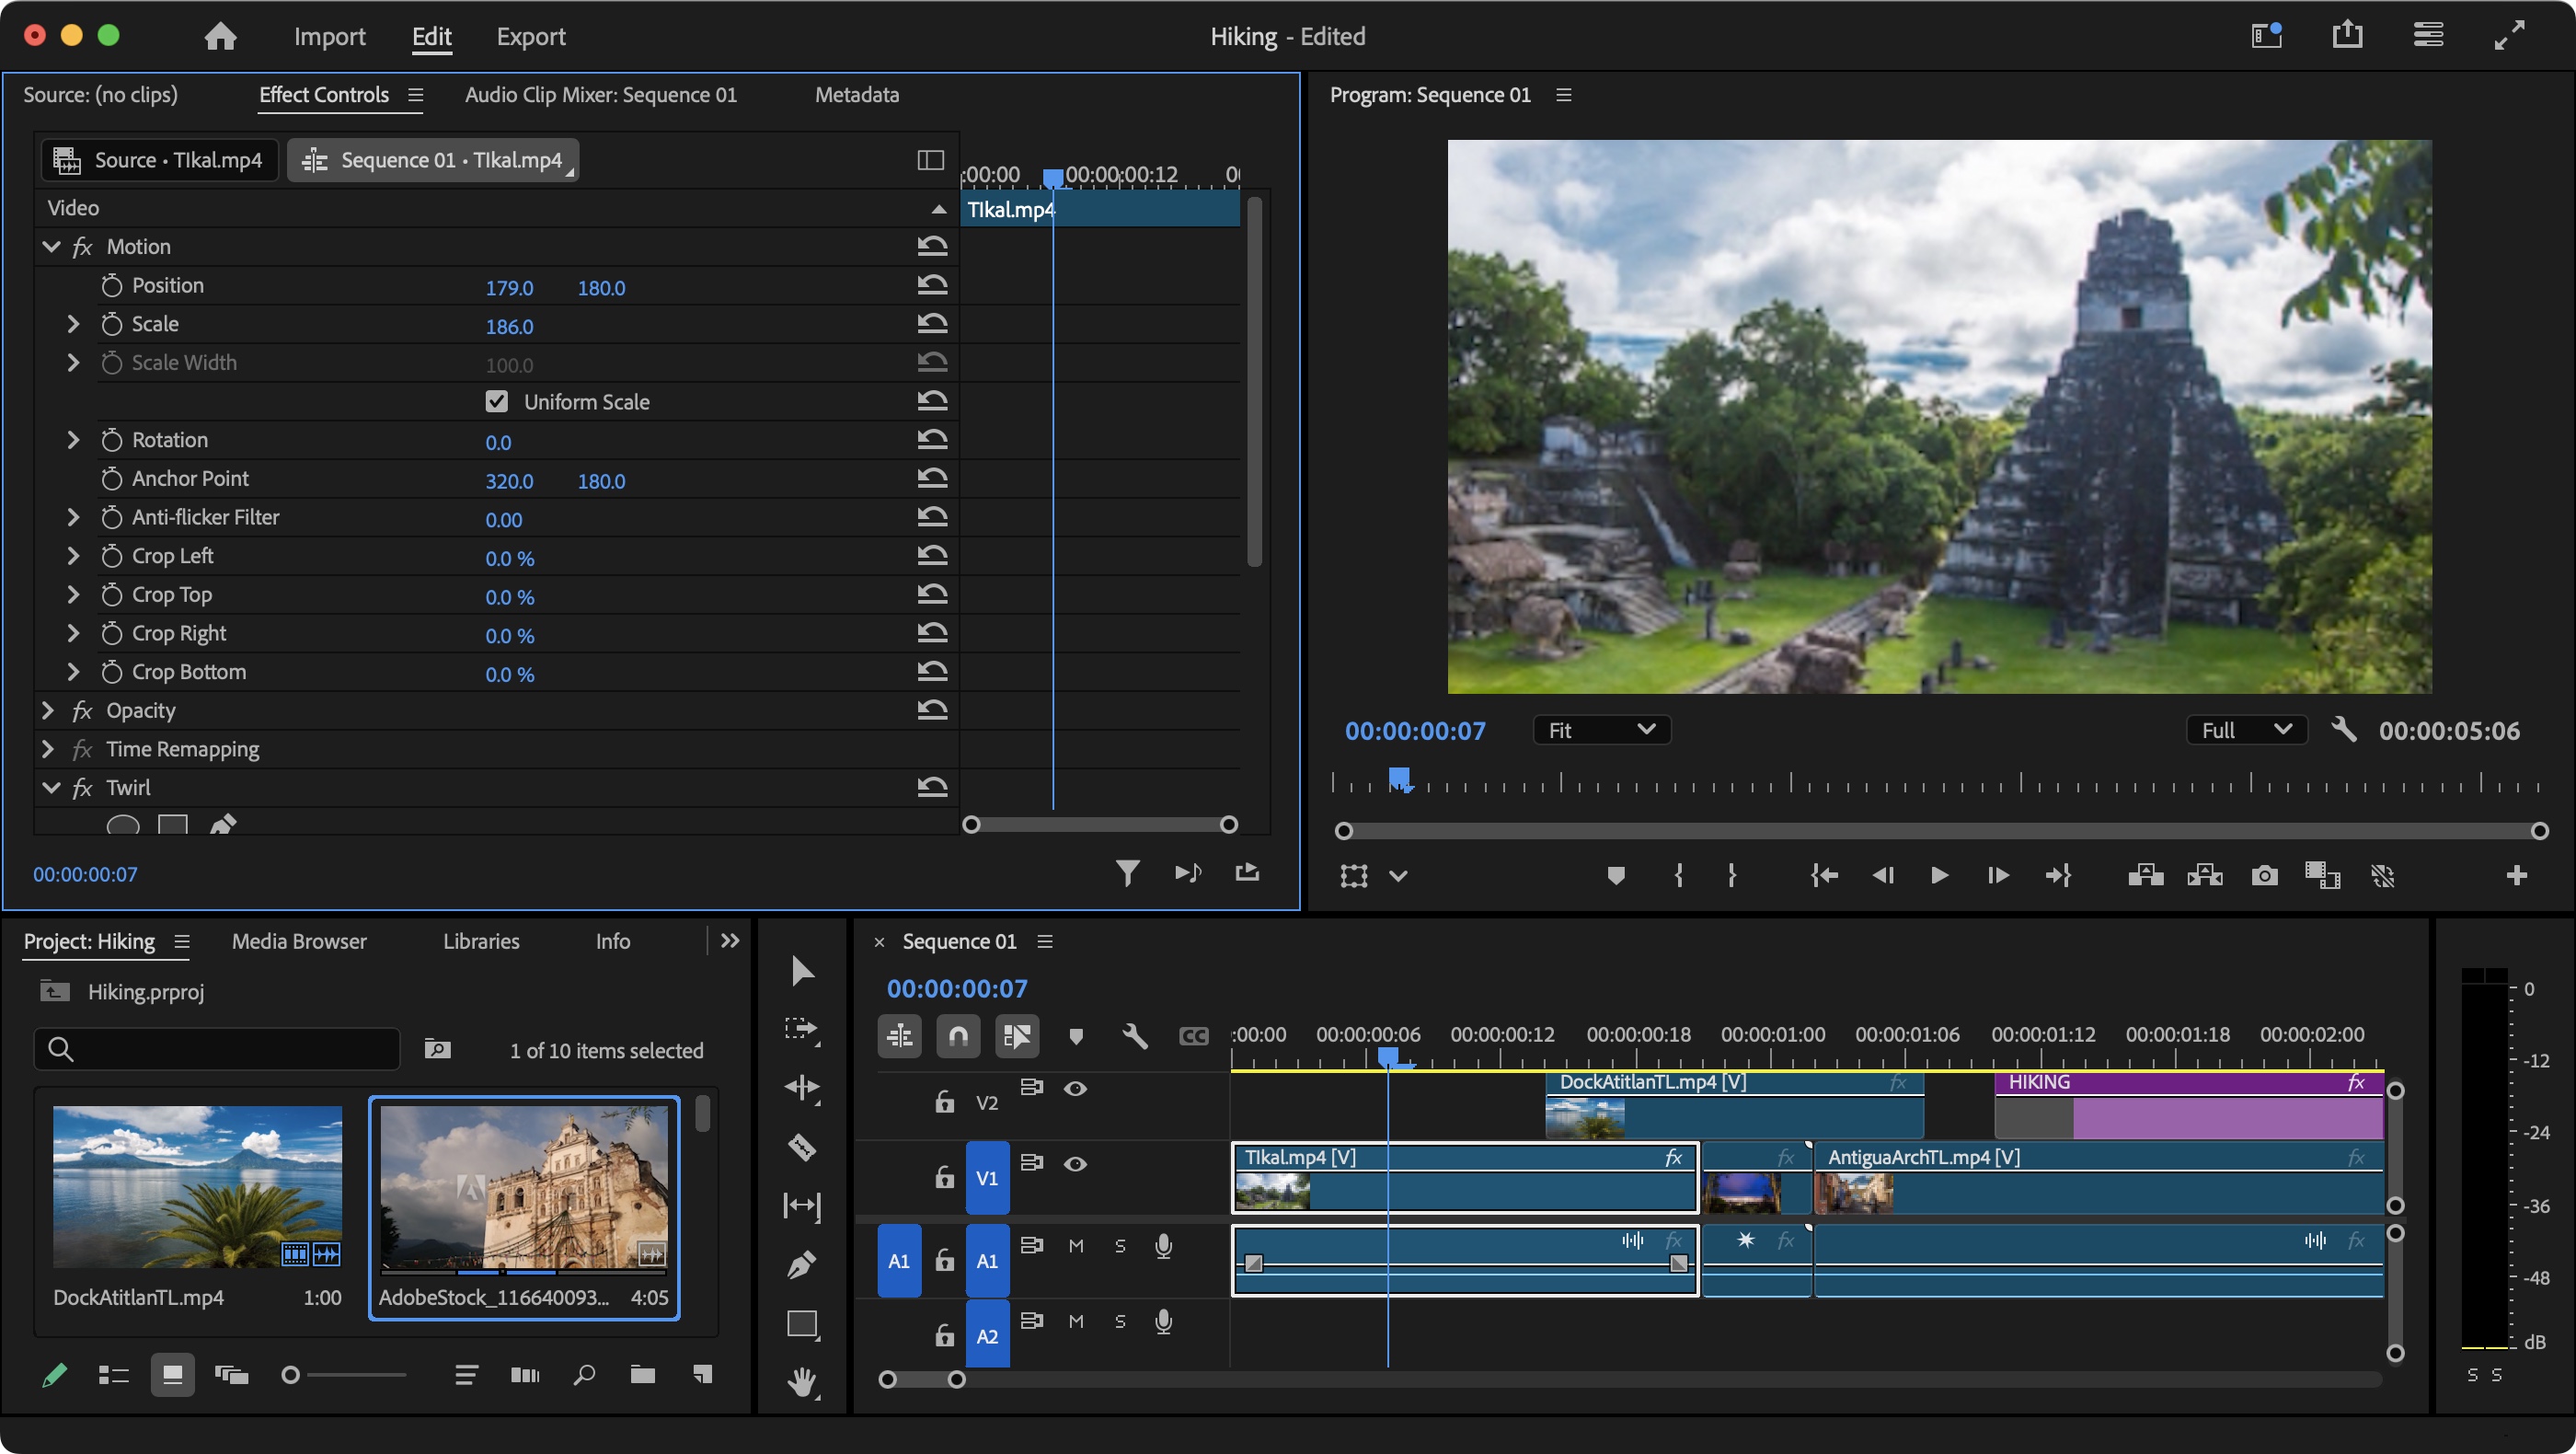
As you build your edit, you may wish to alter the clips you’re using. You might want to zoom into the footage for instance. To do this, select a clip you’re added in the timeline. This should reveal numerous parameters in the ‘Effects Control’ panel, top left of the interface. From there, locate ‘Scale’ which is currently set to ‘100’. You can either click on it to type in a new value, or click and drag left or right on the current value to gradually increase or decrease the clip’s size. You can do the same with ‘Position’ to change the part of the image you see in your timeline.
In the Lower Left panel, you’ll find an ‘Effects’ tab. Scroll through, find ‘Gaussian Blur’ for instance, and drag it to the ‘Effects Controls’ panel to add it to your selected clip (you can also drag it to the clip - or any other clip for that matter - in the Timeline), and manipulate it as above.
5. Adding title

Adding a title is a tad more complicated as it involves changing your workspace to gain access to all available title templates. To do this, go to the main menu bar and select Window > Workspaces > Graphics. The whole interface will change. Top right, you’ll find the ‘Graphics Templates’ panel. Select it, and scroll down until you find one you’re happy with, then drag it to your timeline, above your existing clips.
Now you need to customise your title. To change the wording, simply double-click on it in the main preview window (top right).
Should you need to make additional changes to your title, click on the ‘Effects Controls’ panel (top left) and scroll down until you see ‘Text’. To its left is a chevron. Click on it to reveal all its changeable parameters.
Don’t forget: should you make a mistake, you can Edit > Undo at any time to revert to your project’s previous state.
6. Sharing Your Work
You’ve created a project, dragged various clips onto it, applied some effects and even added a title. Sounds like you’re ready to export your work.
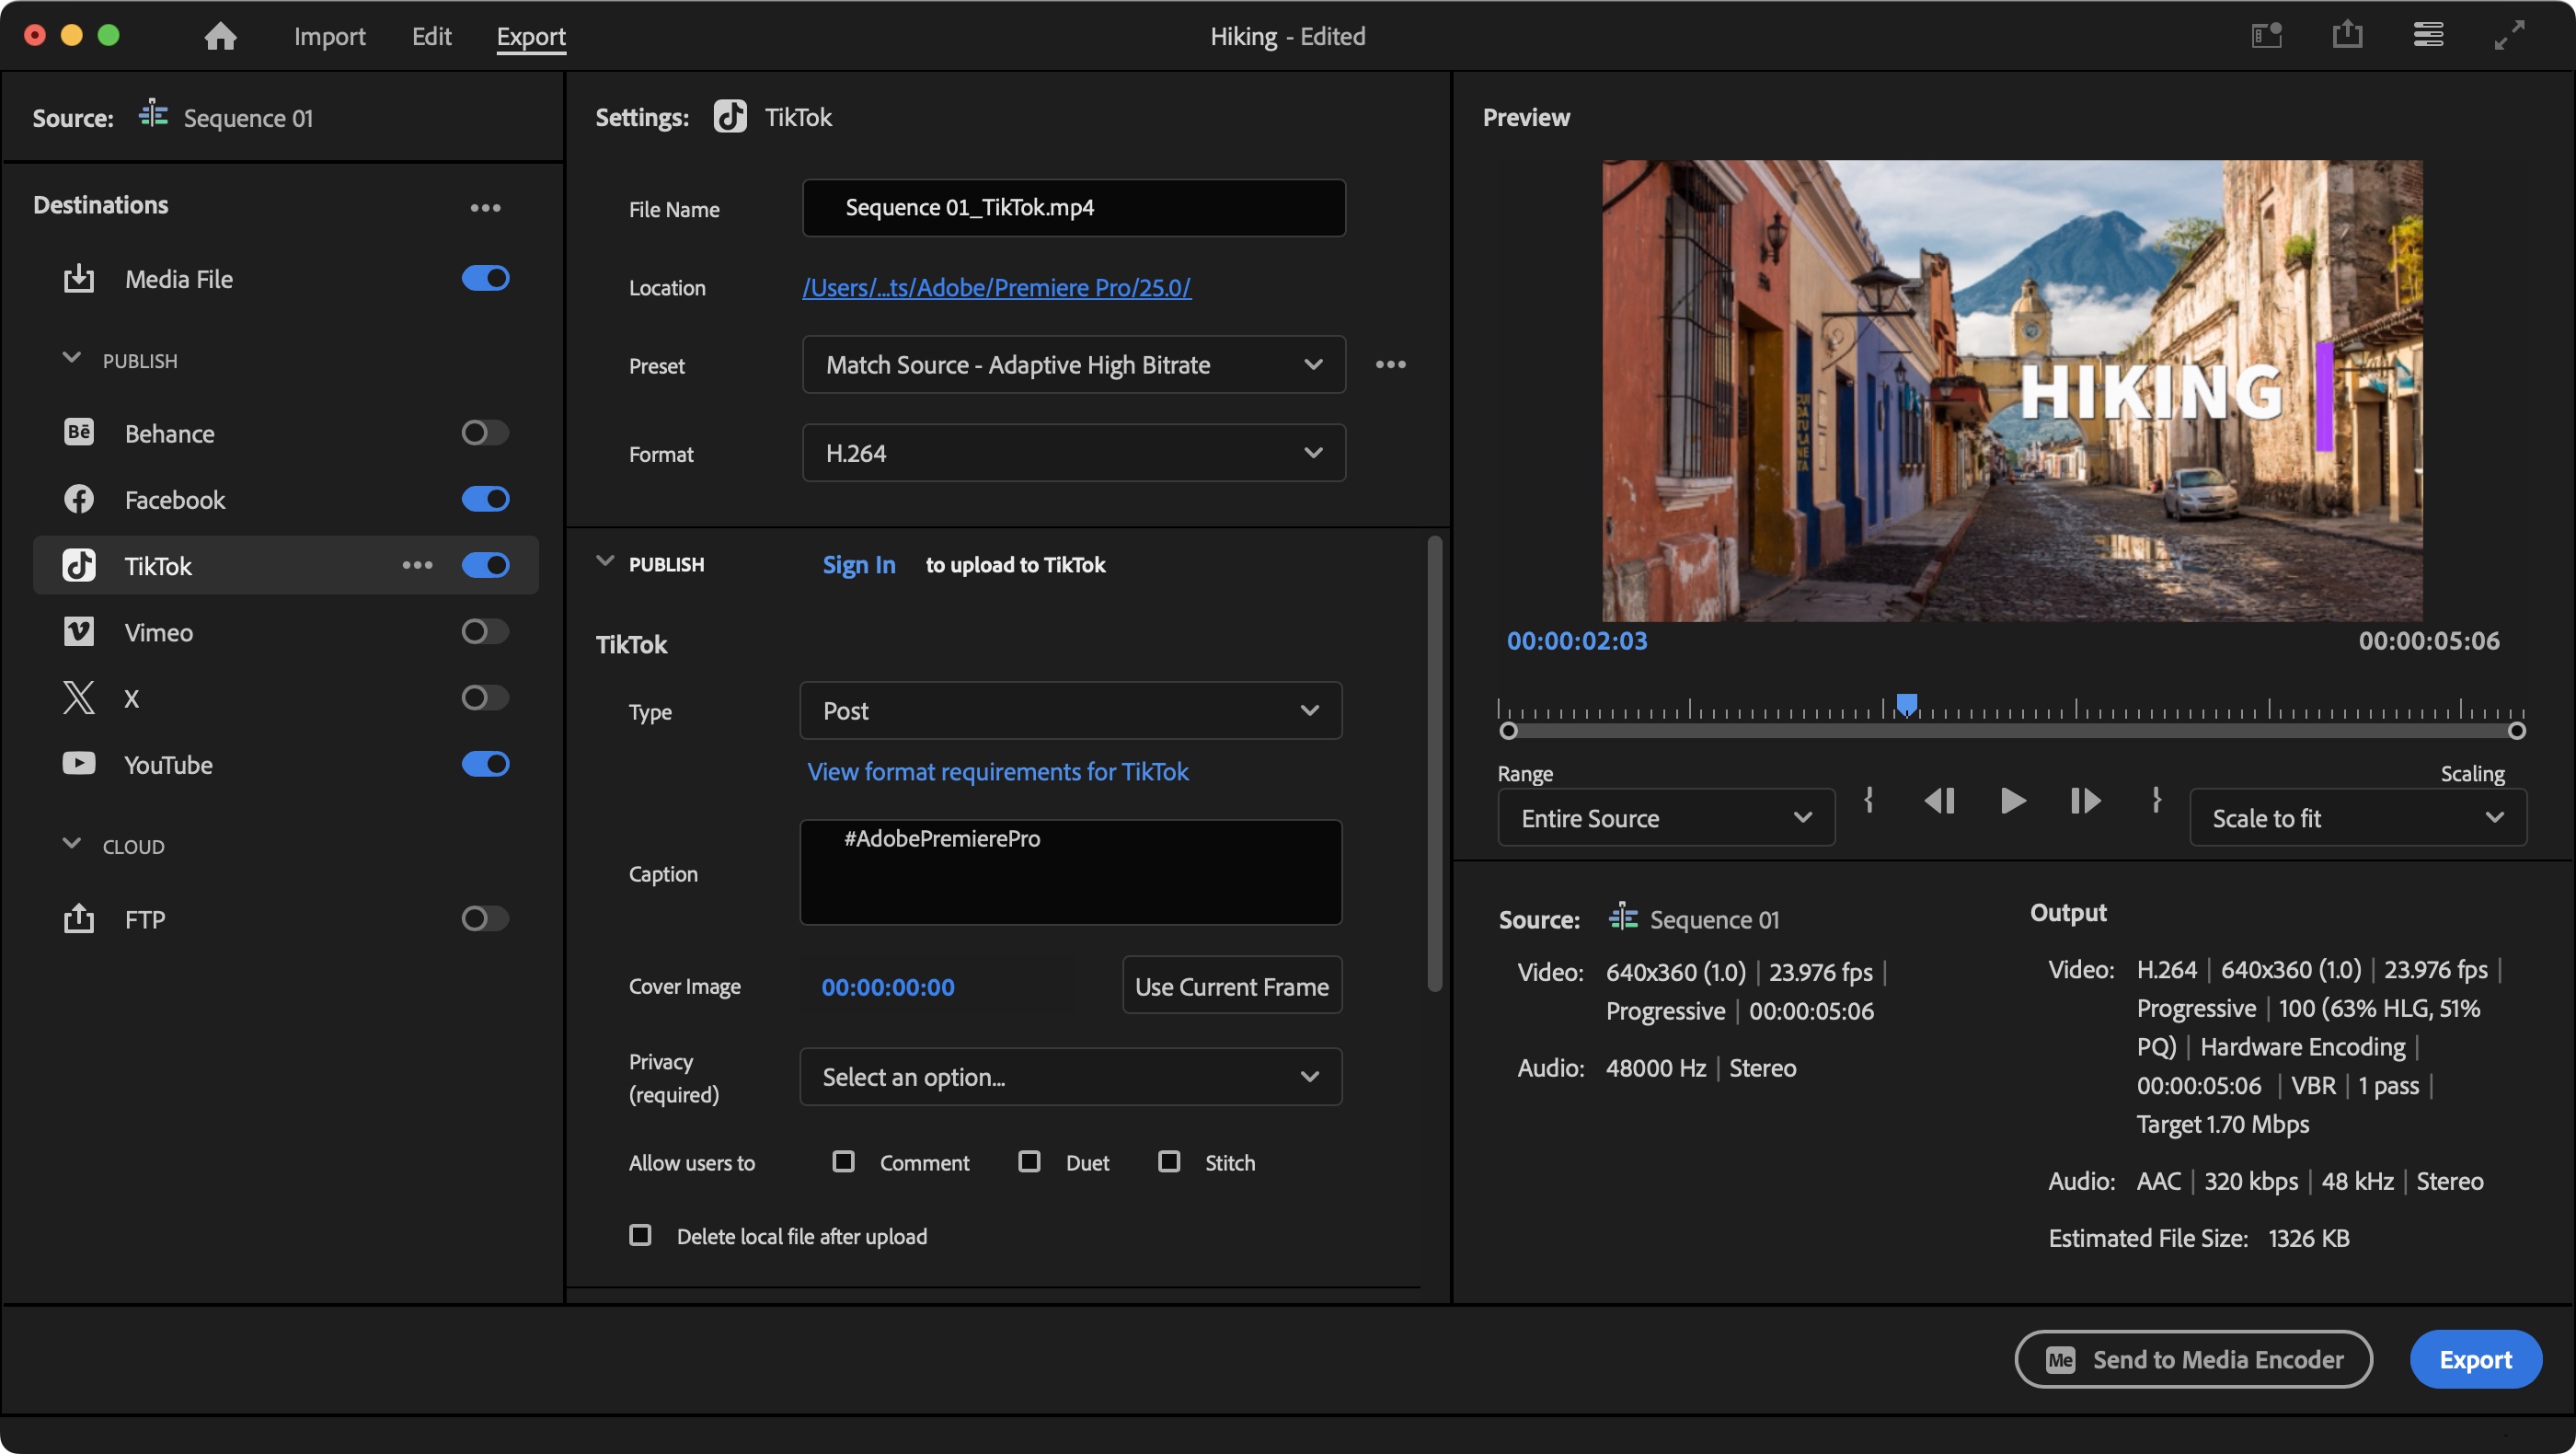
To do this, click on the Export menu, top left of the interface (it’s the menu with a home icon to its left). The interface changes again, this time giving you all the tools you need to perform the action at hand.
The default setting is ‘Media File’ which will export your project at the same resolution and quality as you’ve been working on. This is great for archival purposes, but more often than not would create files that are too large to share on social media.
Thankfully, Premiere Pro allows you to share your work directly to various sites, such as Facebook, YouTube and TikTok. All you need do it sign in to your accounts (you can export simultaneously to numerous platforms), trust the presets as they are, and click on ‘Export’ (lower right).