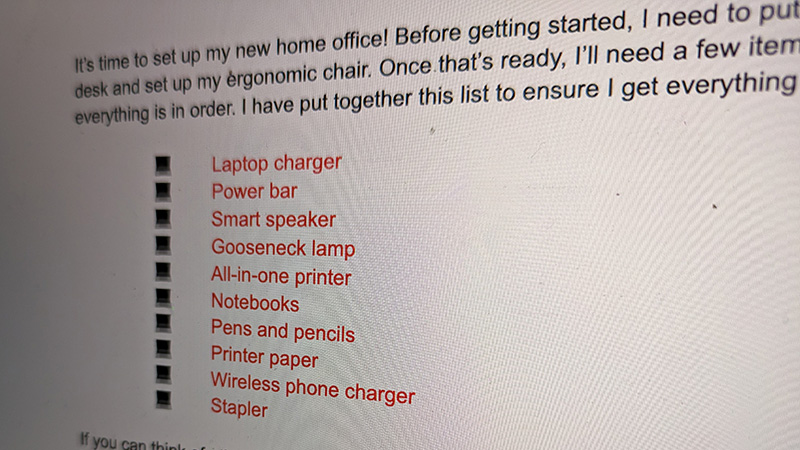
There’s so much you can do in Google Docs, creating documents that go well beyond just basic black-and-white text. You can add color, images, adjust the font size and type, and more. One exciting way to liven up a Google Doc and make it easier to read and the information simpler to digest, especially with lists, is to use bullet points. You can even customize bullet points in Google Docs, including adjusting the type, indents, prefixes, and suffixes.
How to customize bullet points in Google Docs
1. Open Google Docs and start composing your document.
2. When you’re ready to add a list, select Bulleted list from the toolbar.
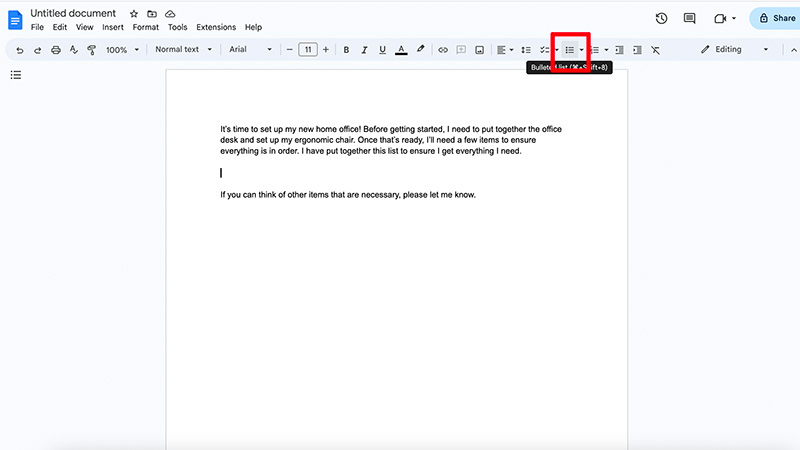
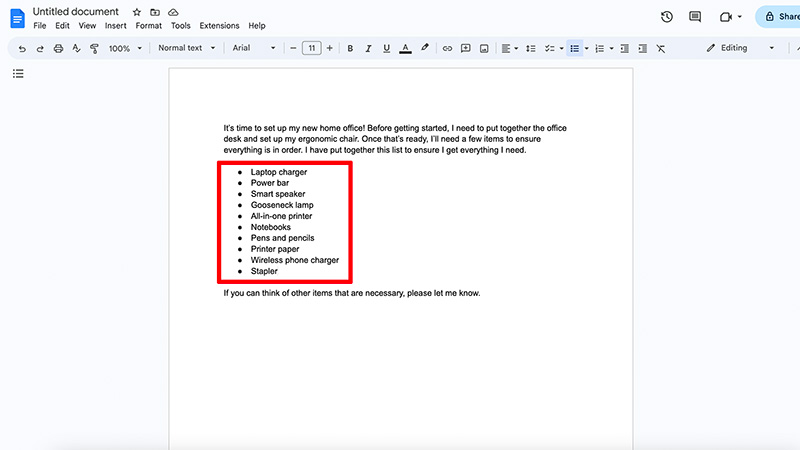
3. Add the contents of your list. The items will appear next to standard circular bullets.
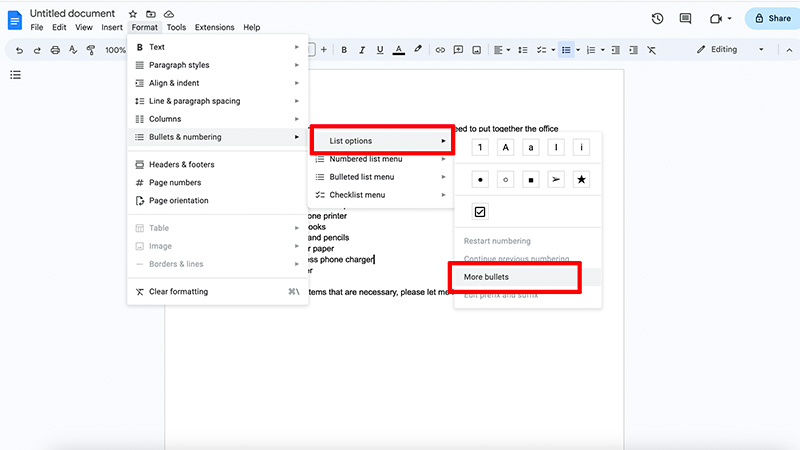
4. To customize, select a bullet and select Format from the top menu.
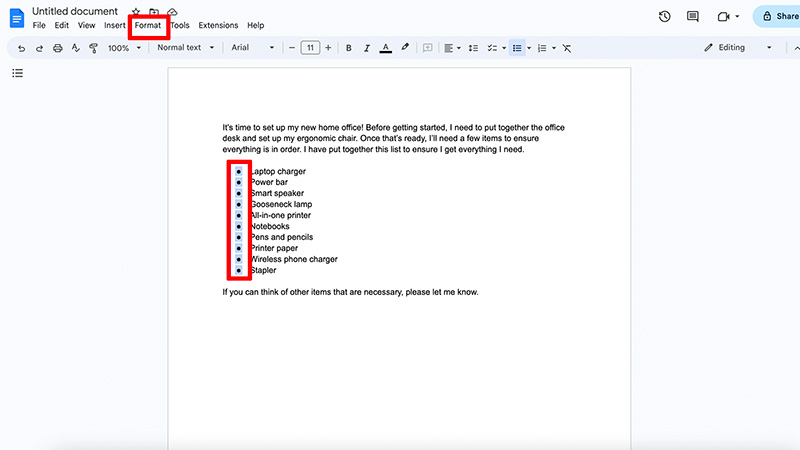
5. Select Bullets & numbering and choose the new bullet type. You can select Numbered list, Bulleted list, or Checklist.
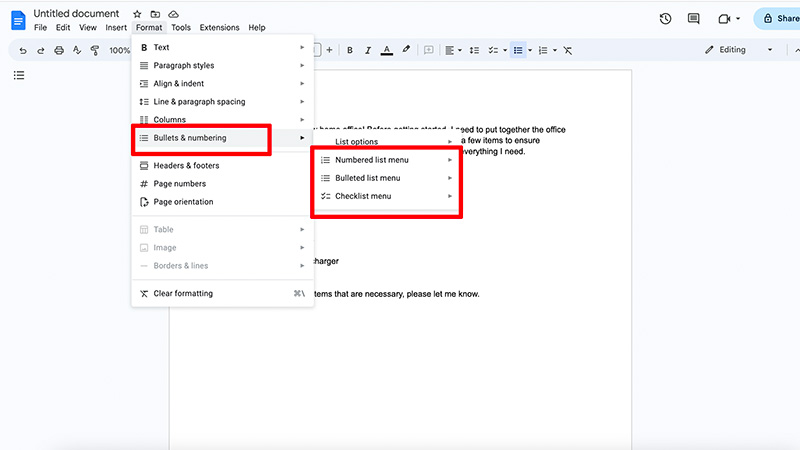
6. Here, I have selected Checklist.
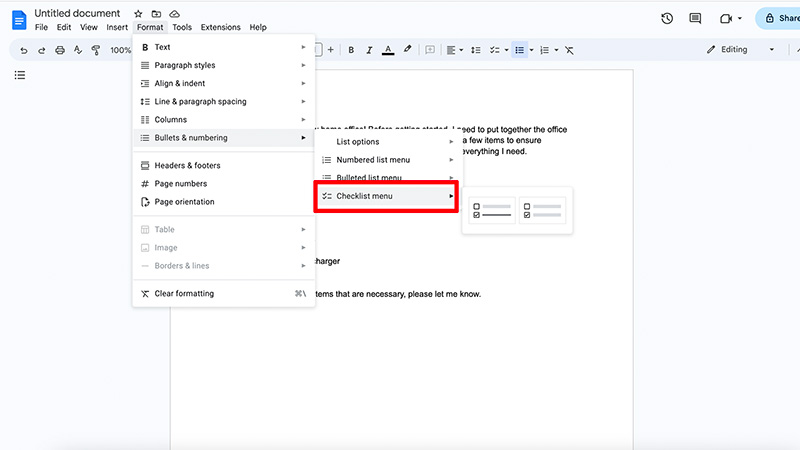
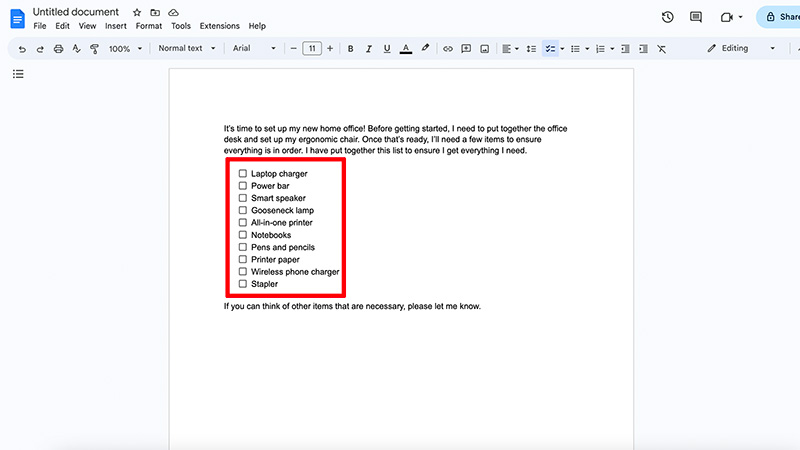
7. You can see the bullets have changed to empty squares in which I can add checkmarks.
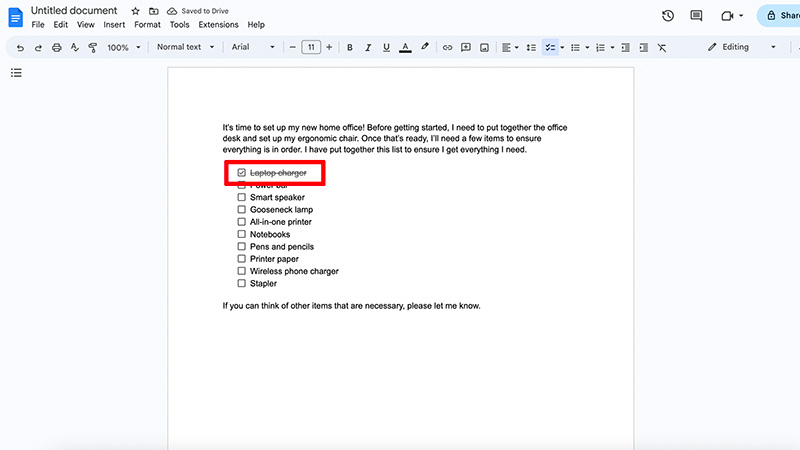
8. You’ll see that if I click one, it will add the checkmark and cross the item off the list.
9. To create a custom bullet instead, including special characters in place of the typical circle bullet or numbering, return to step 4 and choose List options, then More bullets.
10. The Insert special characters window will open. (You can also simply right click on the bullet point to which you want to add a custom bullet.) Choose the special character you want from the Categories, Symbols, or Arrows.
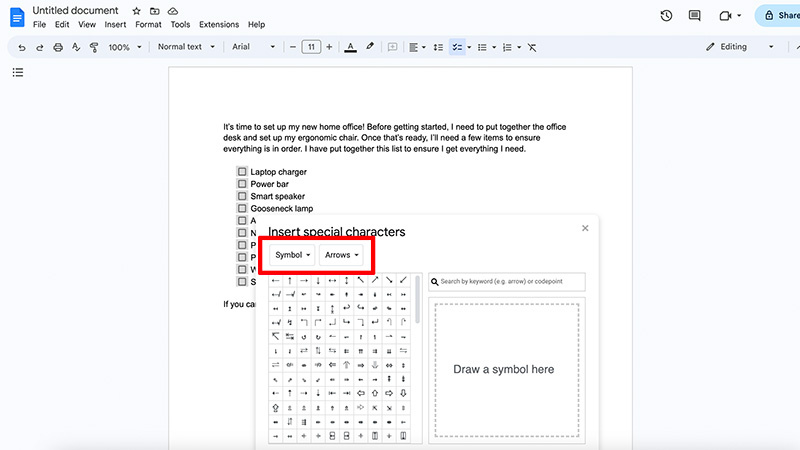
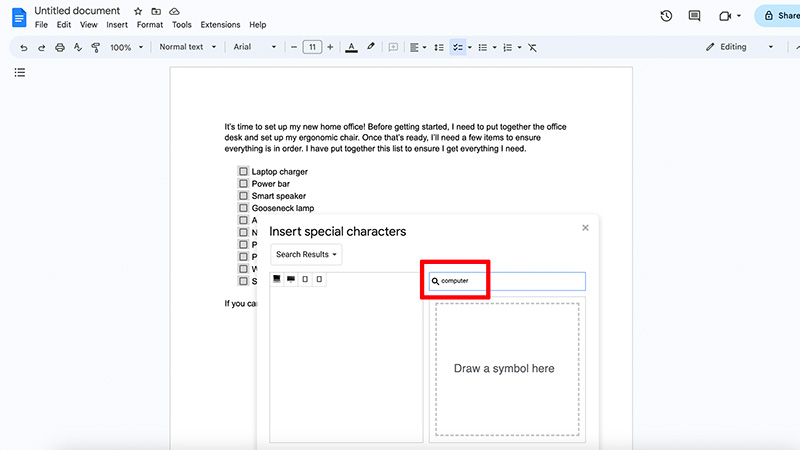
11. You can also use the search bar to find exactly what you want. You can even draw your own symbol!
12. Select the desired character and X out of the screen.
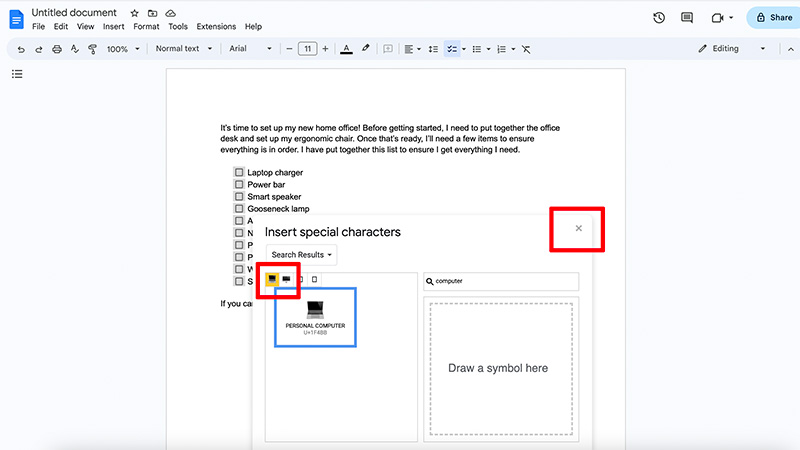
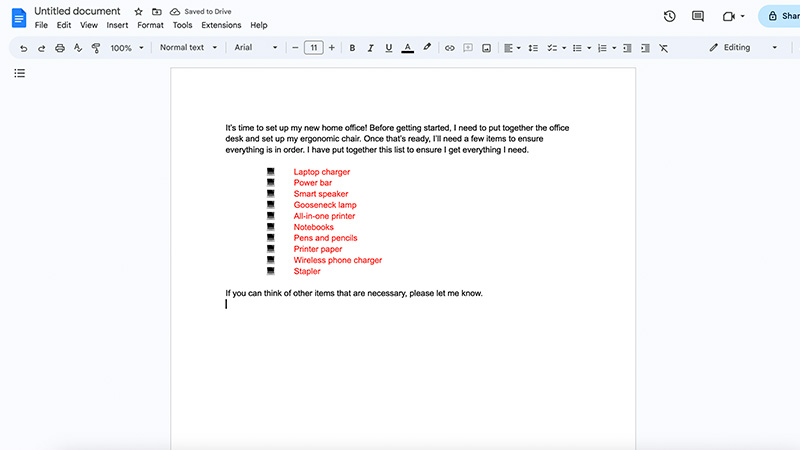
13. The new bullet format will appear for all bulleted items.
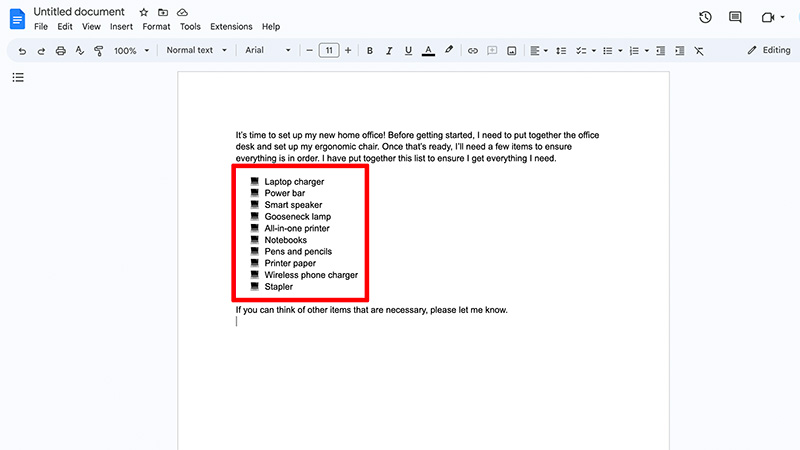
14. To change the color of your bullets, highlight them and select Text color in the toolbar.
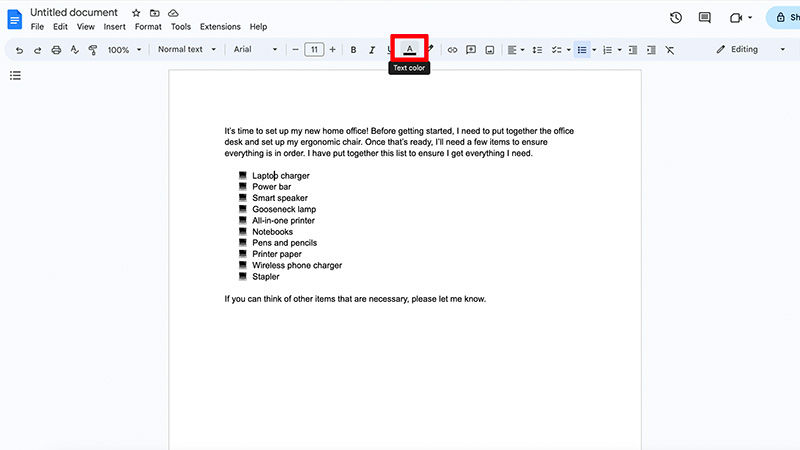
15. Select your preferred color.
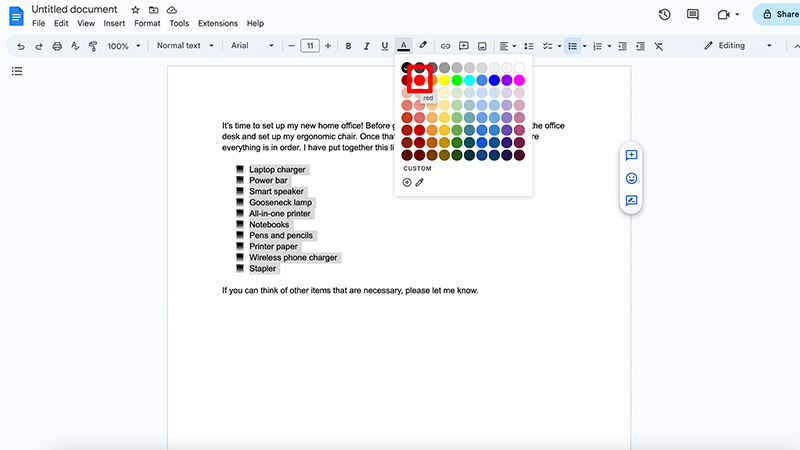
16. The bullets now show in your preferred color.
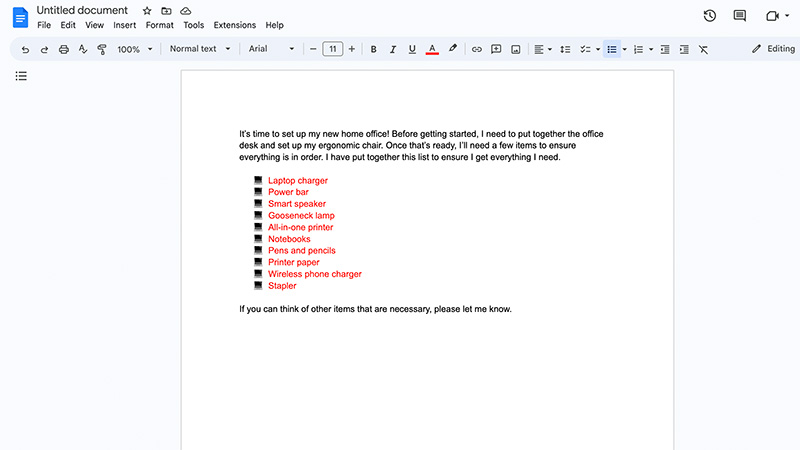
17. To indent, highlight the bullet text and in the top menu, select Format.
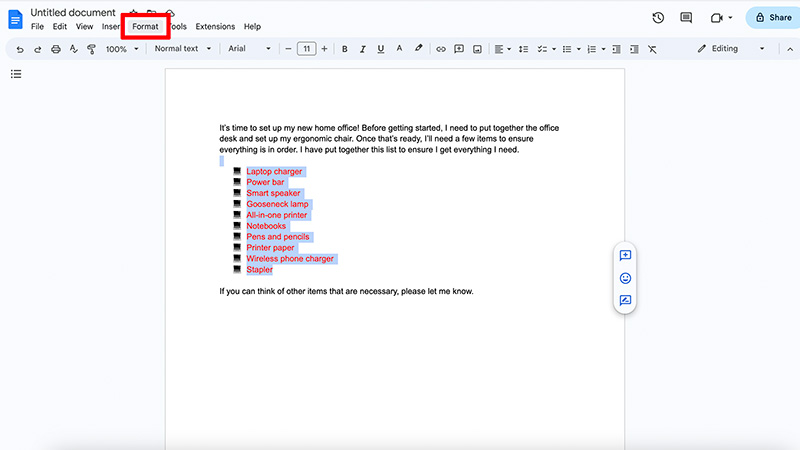
18. Select Align & indent, and choose Left, Right, or Center.
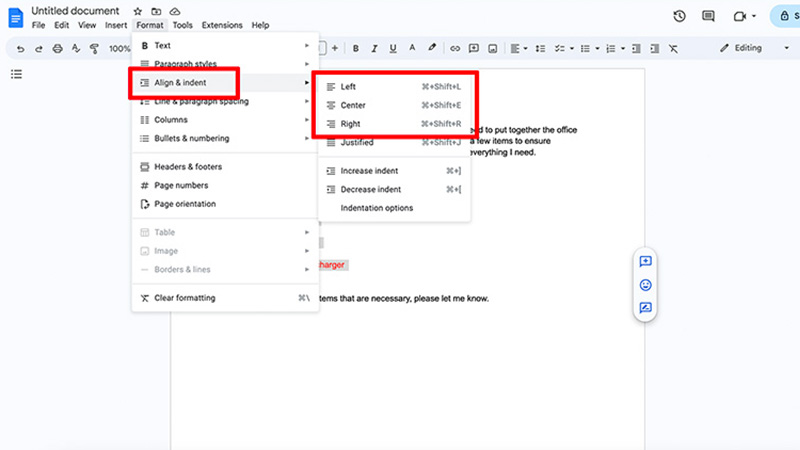
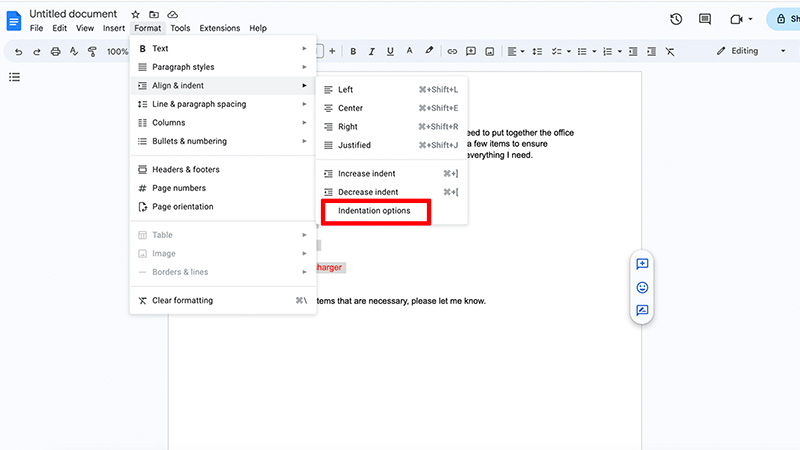
19. You can also select Indentation options.
20. Choose how many inches you want the text indented and select apply.
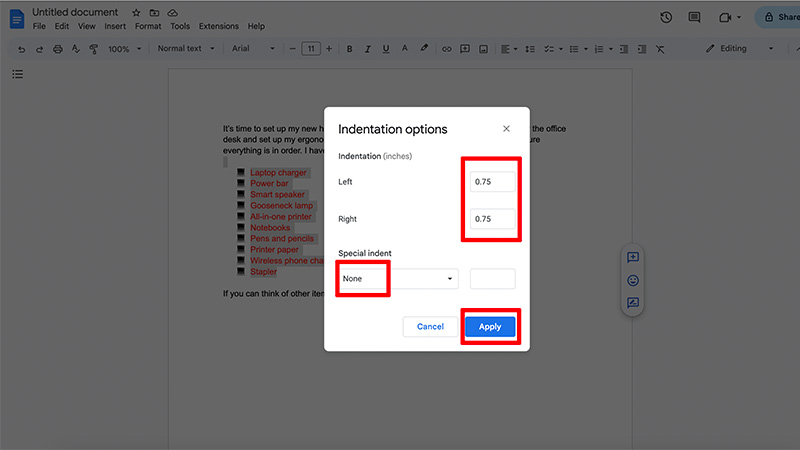
21. You can go back at any time and adjust if you think it’s indented too much.
Note that in addition to using these tools to customize bullet points in Google Docs, you can also do this in Google Slides. The instructions are similar, and it’s really easy to do. You can also make additional adjustments to bullet points in the same way you would other text. Highlight the entry or all entries and adjust things like font size and type using the handy top toolbar menu.
Making checklists in Google Docs is a great way to keep on top of tasks for work, or even lists for personal uses. This might include what you need to get for the summer barbecue, what chores the kids need to do, packing lists for your next travel adventure, and more. In addition to bullet points, you can even add images, tables, charts, and more to Google Docs.
Looking for more ways to manage lists? Check out the best Google Tasks tips and tricks.


