Watch video: Add Star Wars special effects to your shots
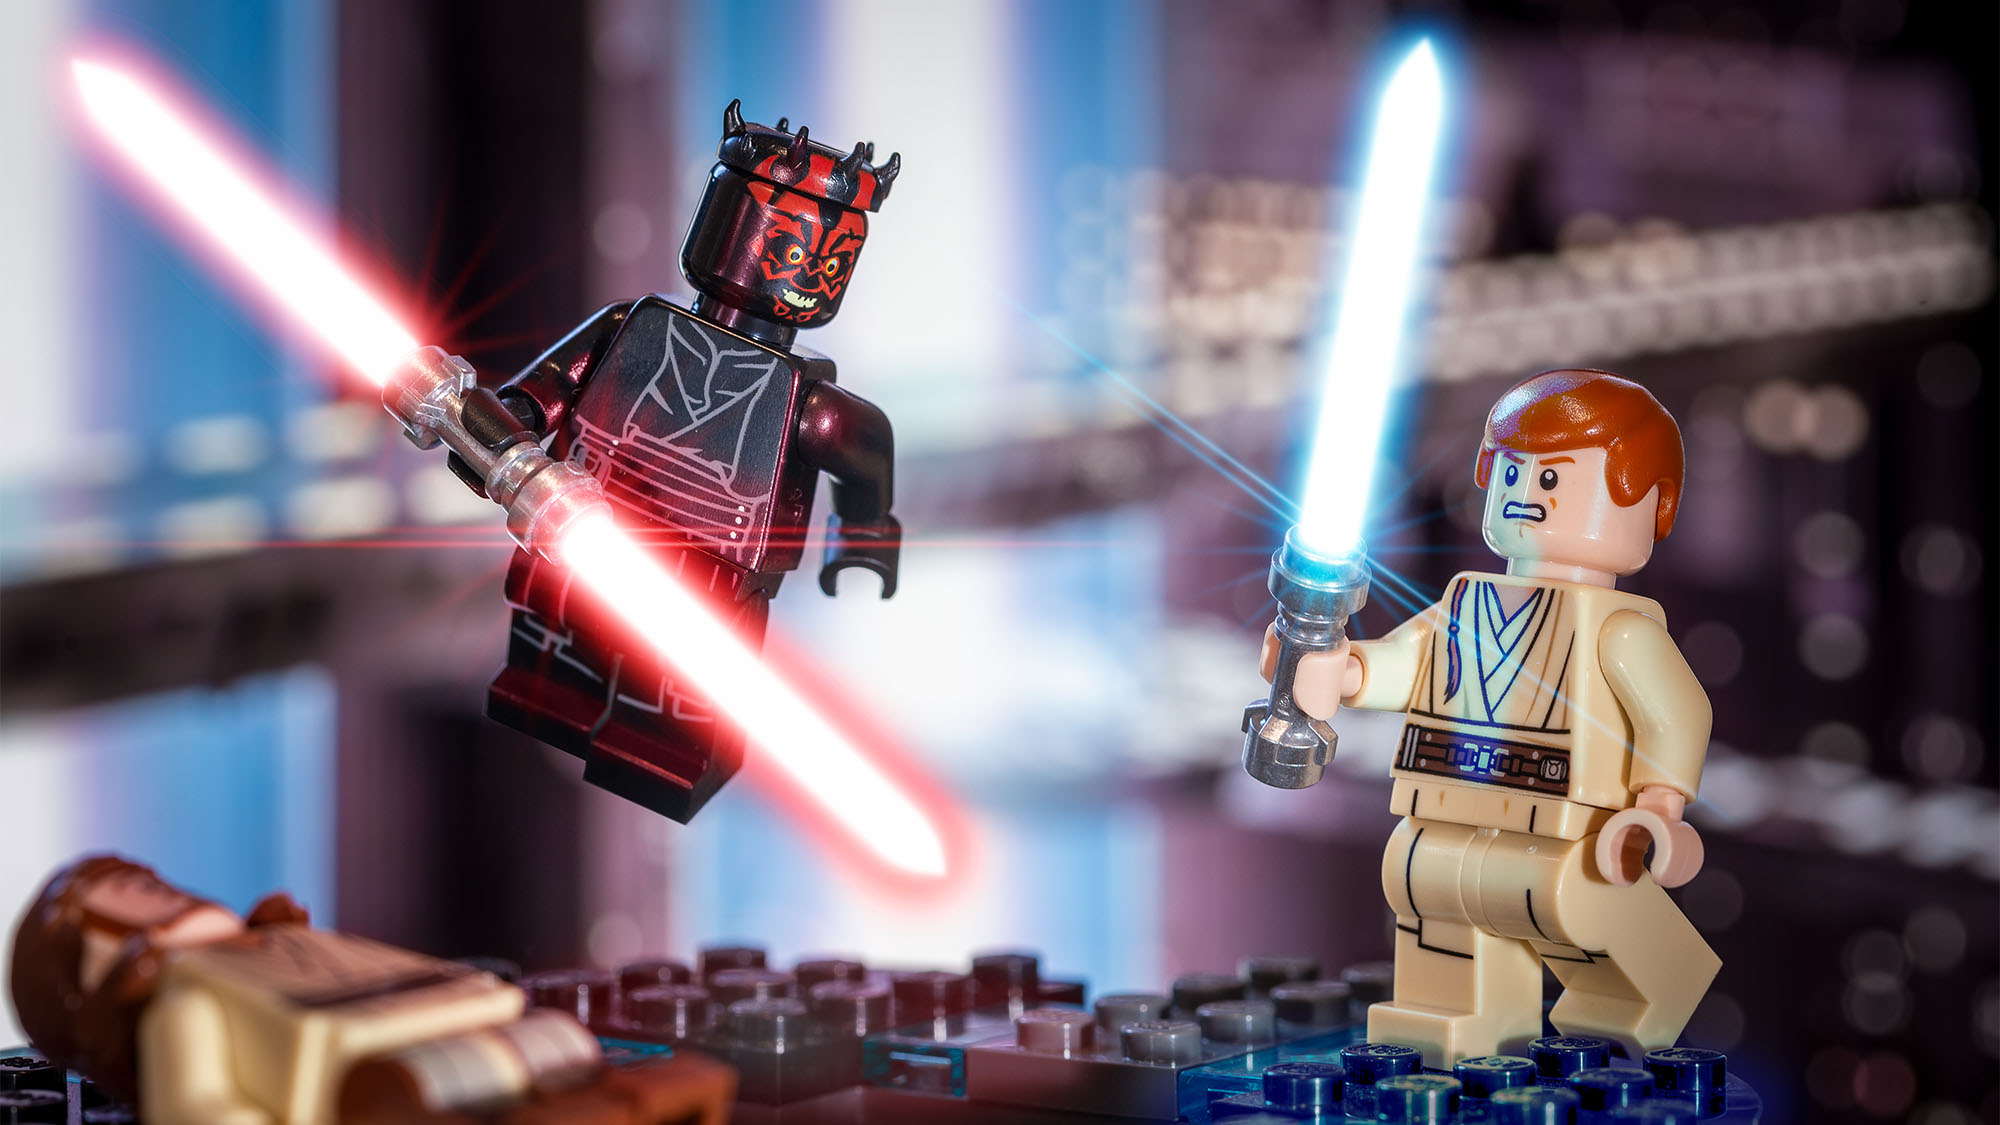
Toy photography enables you to let your imagination run wild! You can photograph subjects and scenes you would never normally be able to capture (without a big budget). In this tutorial, we’ve created a Star Wars-themed diorama and employed a few useful post-production tips to create authentic-looking special effects that wouldn’t look out of place on the silver screen.
You might assume that you’d need to set up a specialist home studio to capture a cinematic scene like ours, but we set it up on a kitchen table and used a pair of affordable Lume Cube continuous LED lightsto illuminate our tiny subjects – though any of the best LED light panels will do. And if you don’t want to invest in any lighting, you can still achieve fantastic results by using the torch on a smartphone, covered with a thin piece of white paper to act as a diffuser.
• Shoot a cinematic Star Wars scene at home!
If you don’t have one of the best macro lenses, there’s a budget-friendly fix for that too. Many kit lenses, such as the Nikon AF-P DX 18-55mm, have decent close-focusing properties. Once you’ve landed a cracking shot, post-production is where you can really bring your cinema still to life. We used a variety of Adobe Photoshop CC techniques to add glowing lightsabers, ambient lighting and lens flares. Even if you decide not to pursue toy photography after this project, you’ll learn plenty of transferable tips to add to your photo skill set.
(Download this project's start files: Access the N-Photo 138 virtual video disc)

CREATE A DARK SIDE DIORAMA
01 Set up a cinematic backdrop
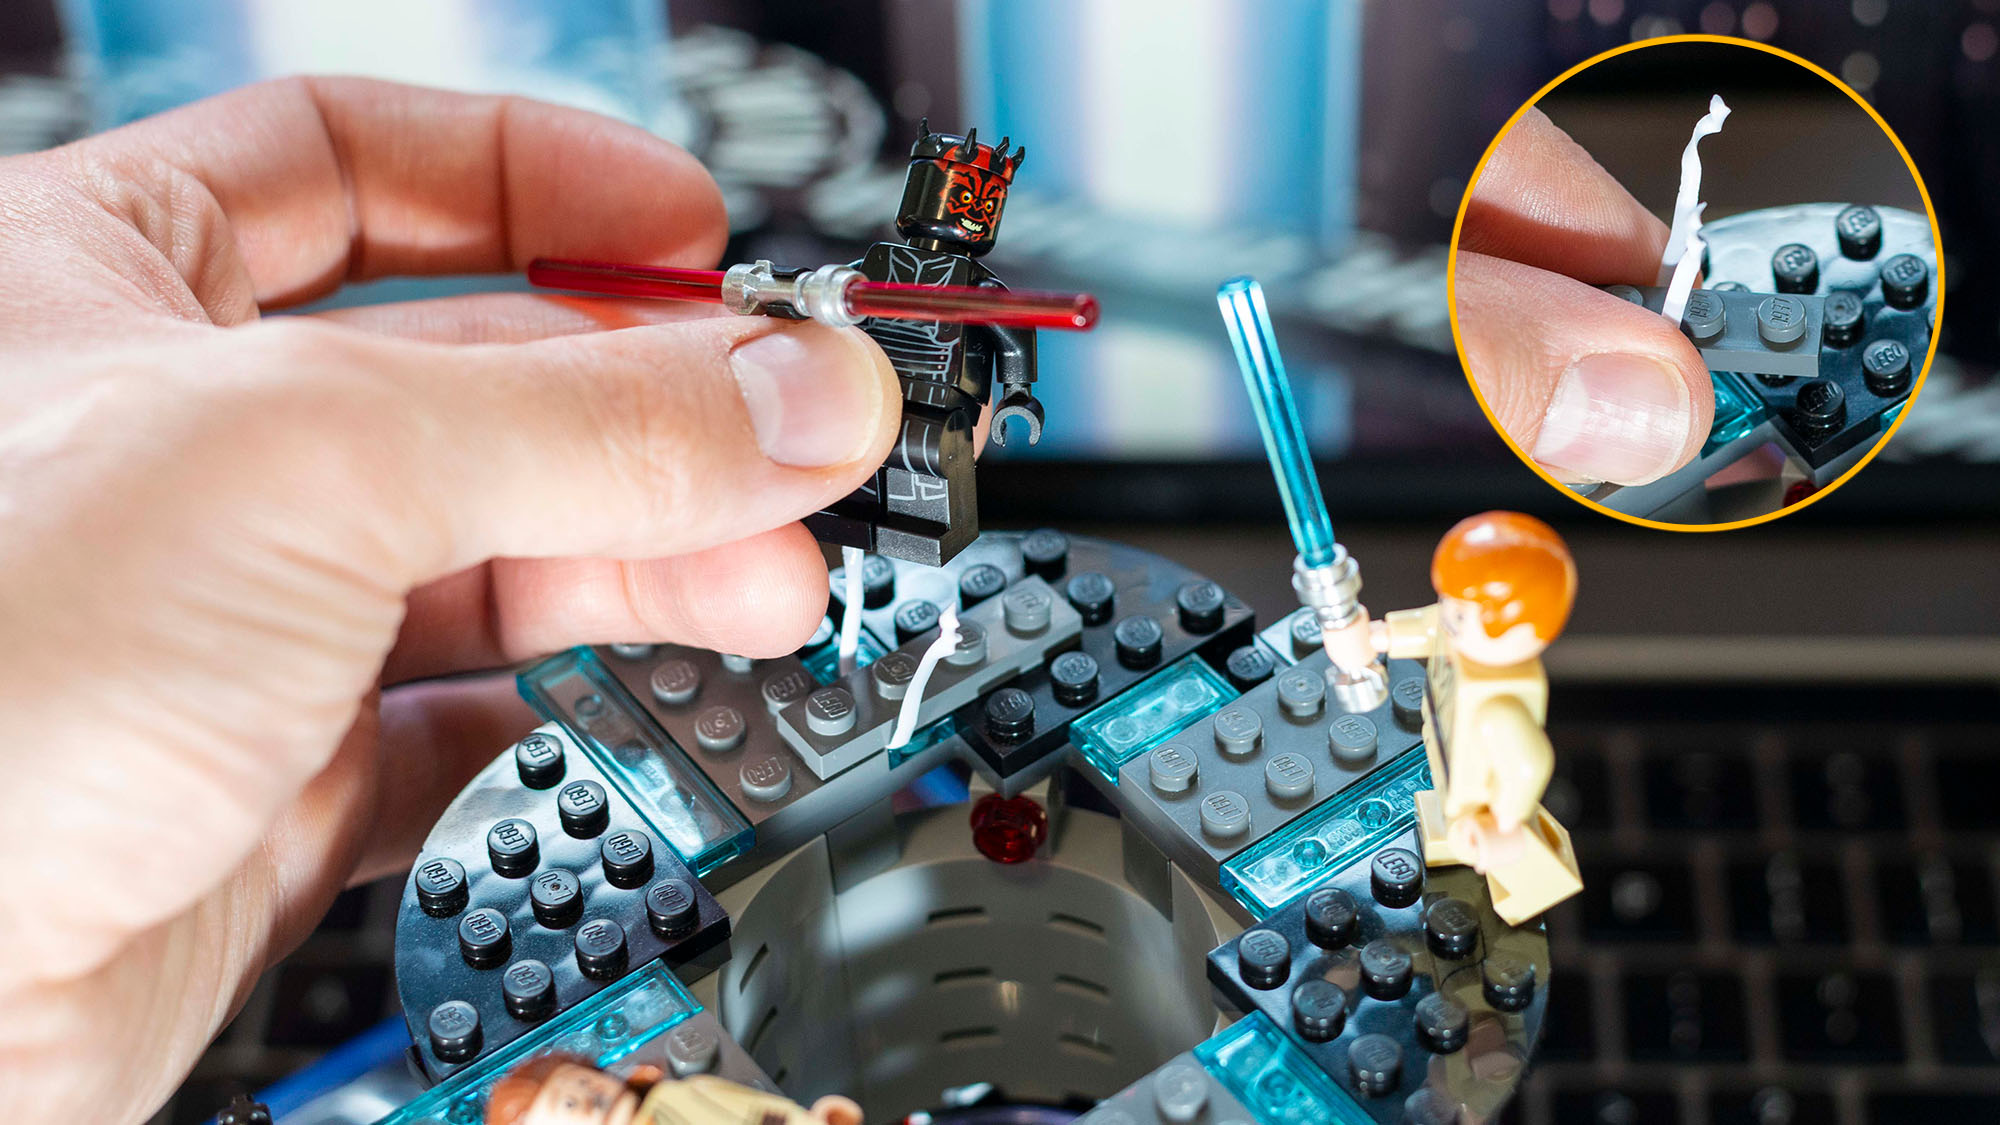
We used tying wire to elevate one of the figures. Once the wire is removed in post production via a double exposure (see step 06), the figure will appear to be jumping.
02 Sculpt the light
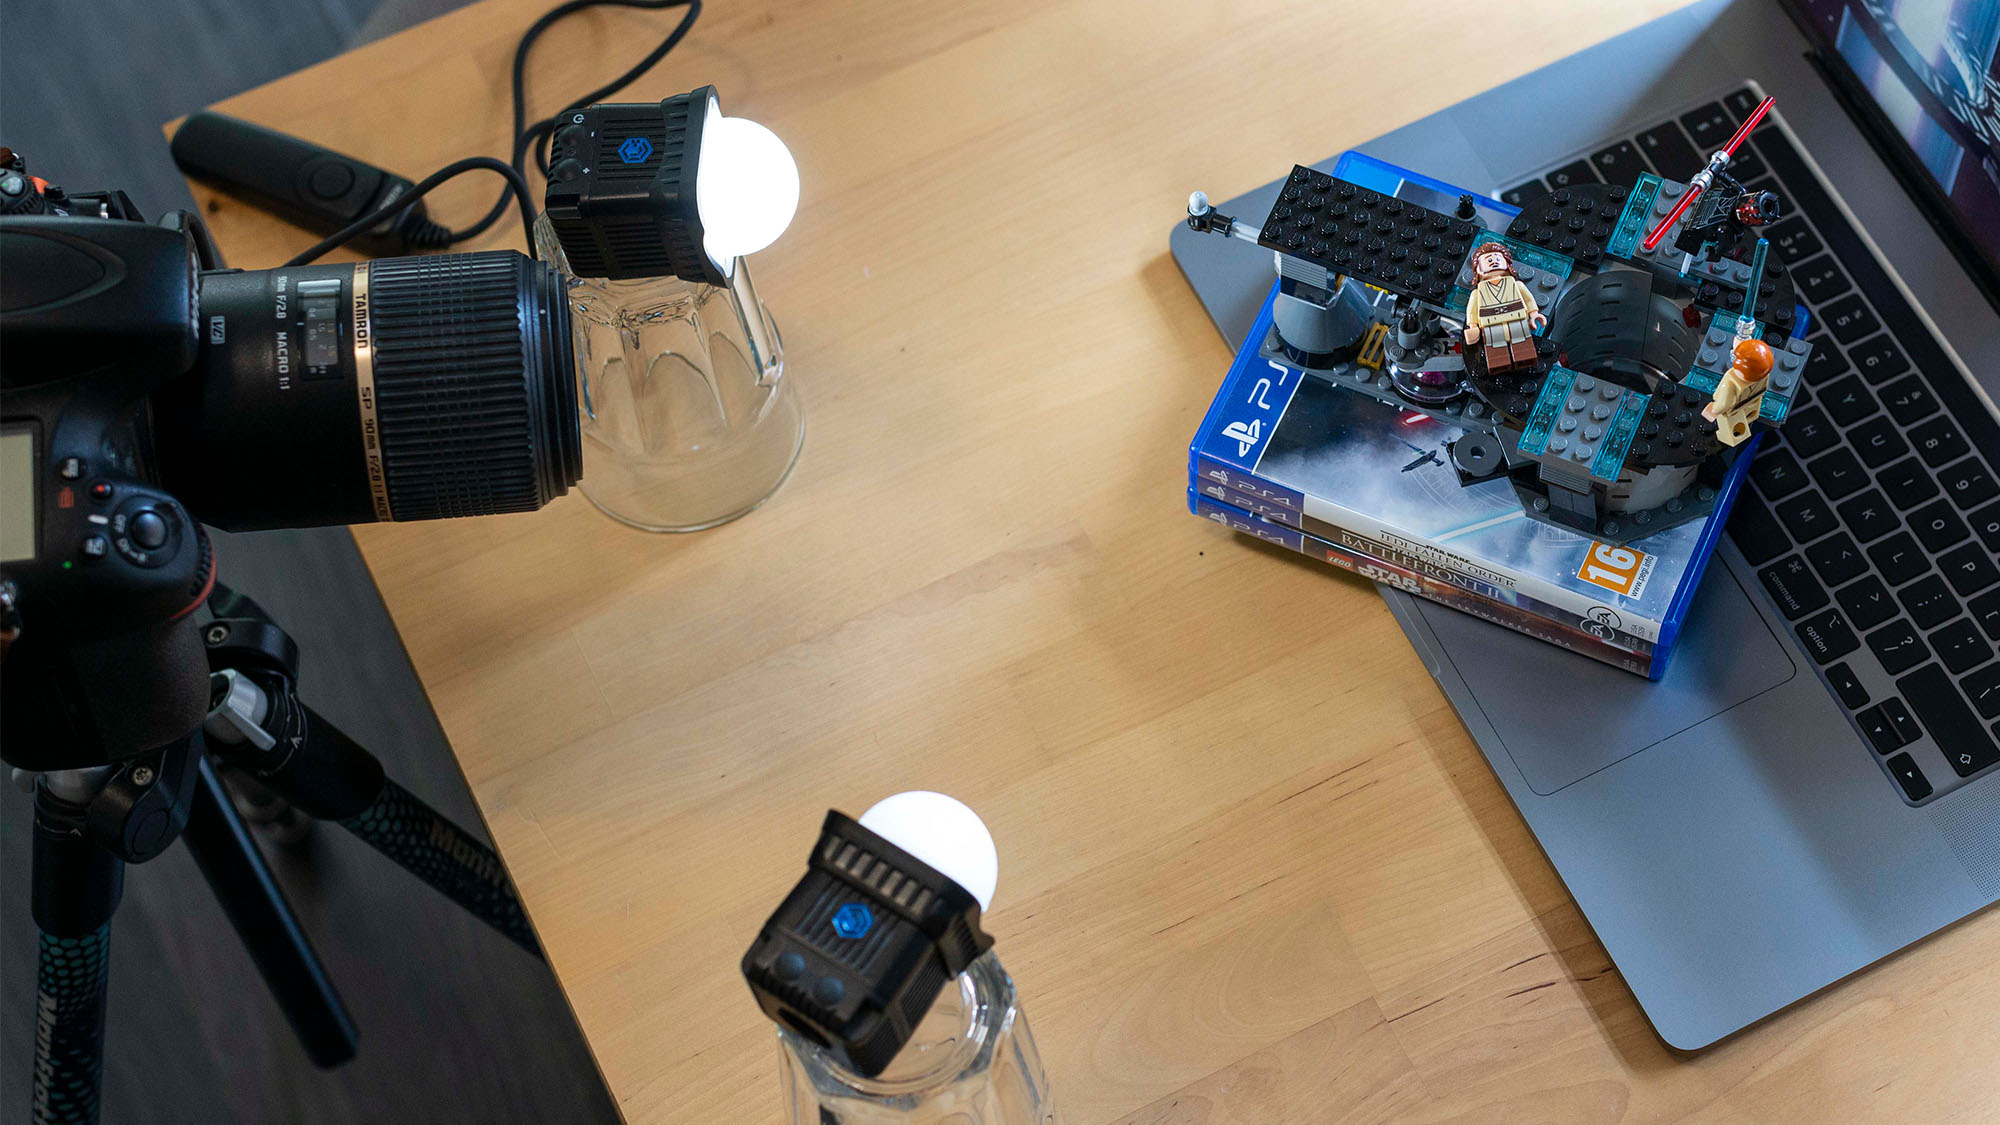
Flash can be overpowering when you shoot close-ups, so we opted to use a pair of Lume Cube LED continuous lights. The key light was placed to the left and on a slightly higher power setting to the fill light on the right. Hotspots add to the toy-like charm; just make sure they don’t obscure faces.
03 Set your exposure
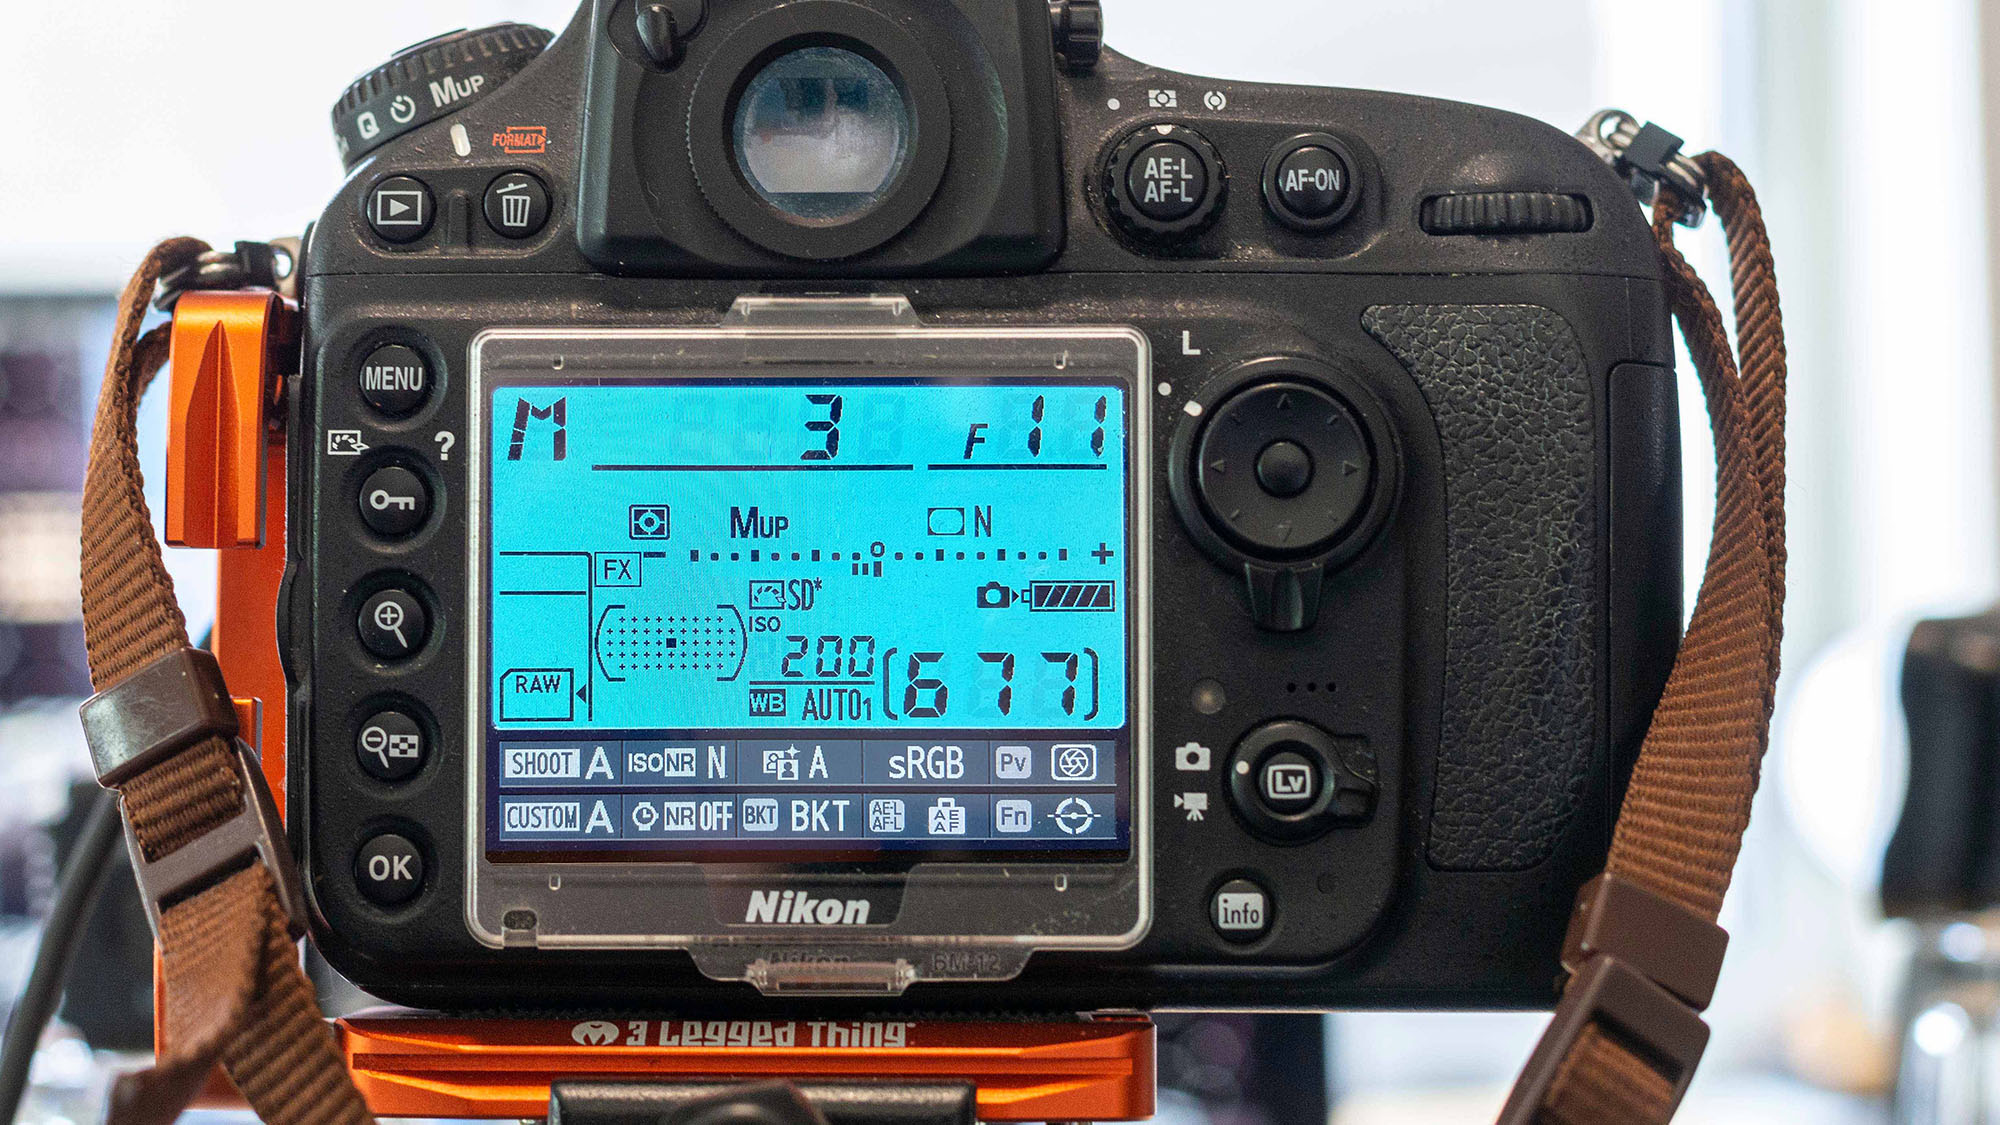
There’s no need to worry about shutter speed and ISO, because you’re shooting still subjects from a tripod. Macro lenses produce extremely shallow depths of field, so we used an aperture of f/11. This rendered both figures sharply, while not being narrow enough to risk diffraction.
04 Banish bad vibrations
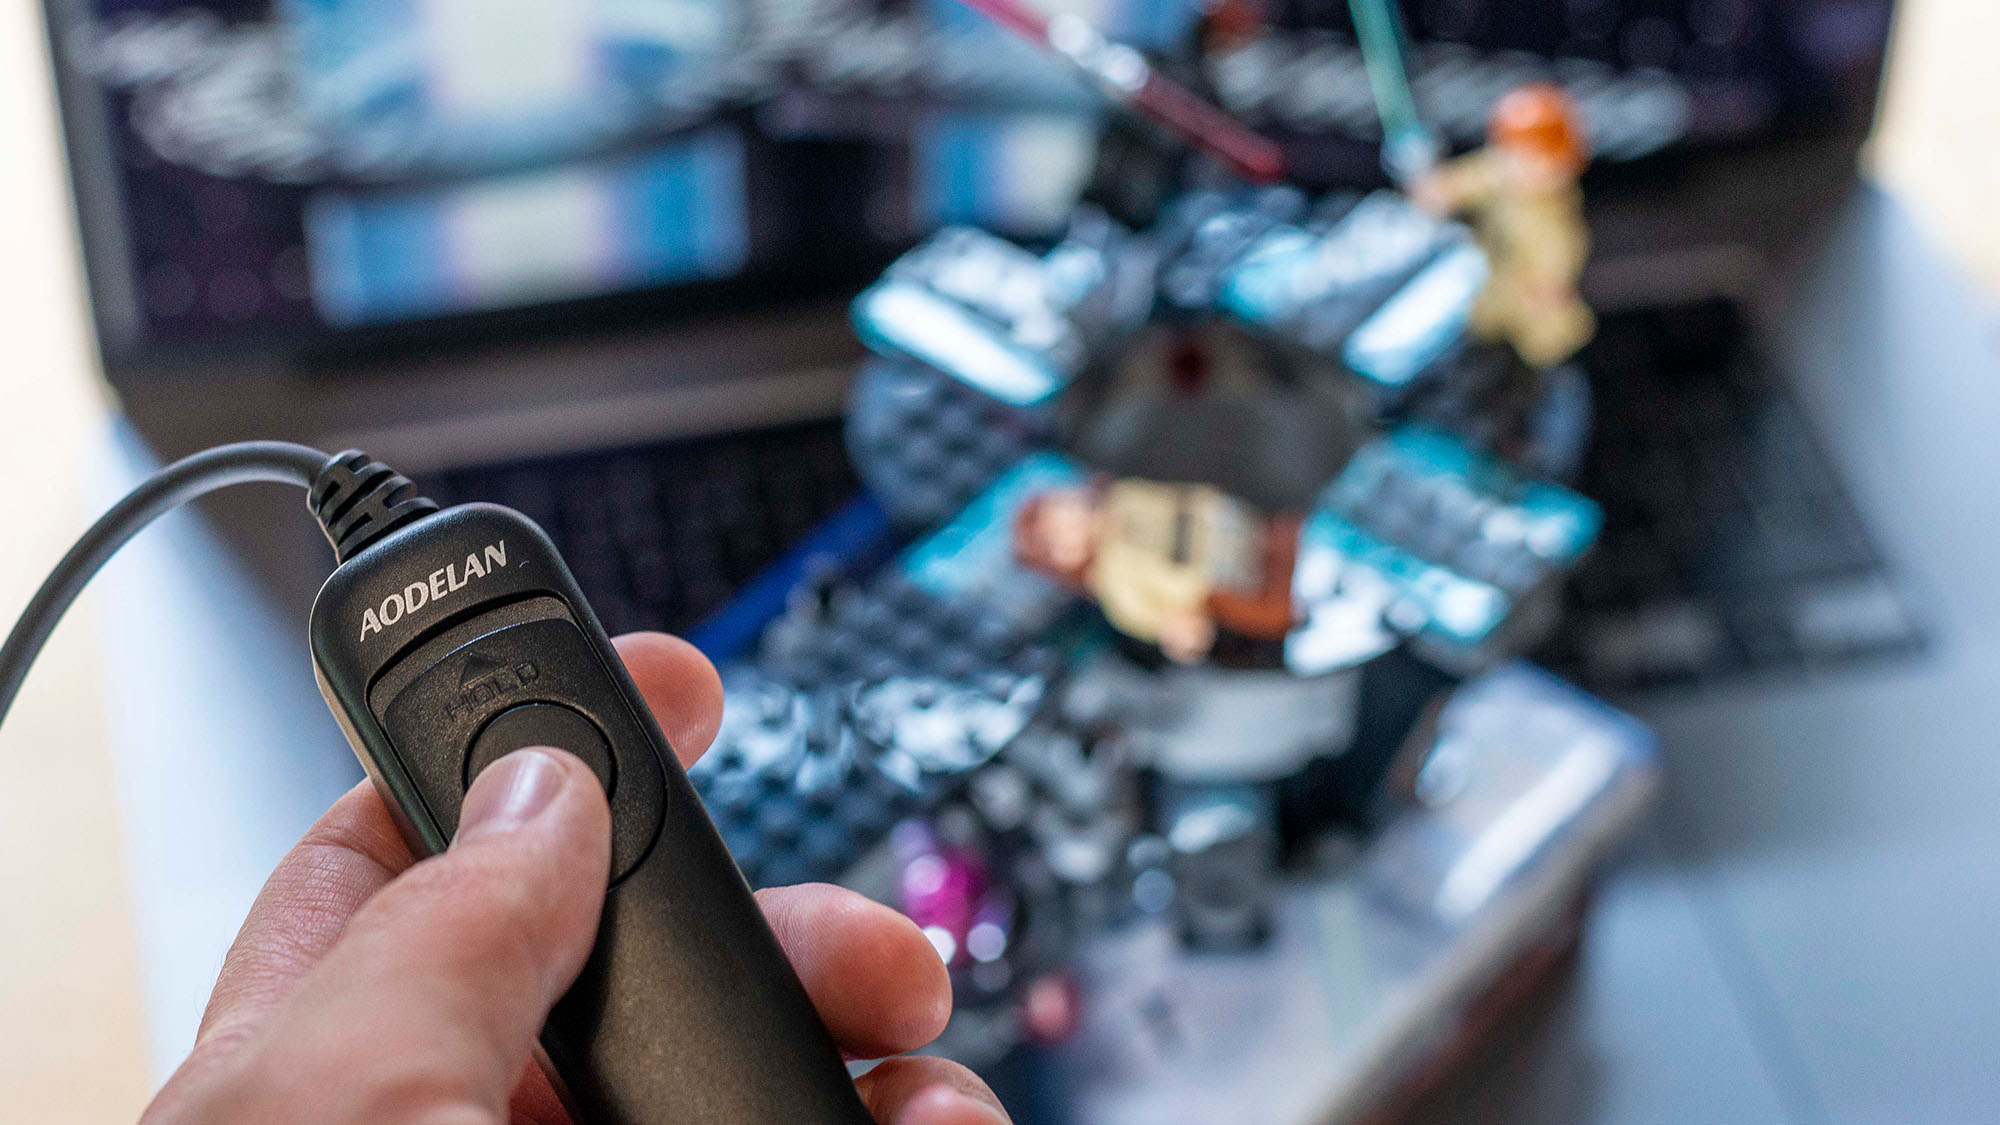
Movement caused by pressing the shutter button can soften images, so mitigate this by using a remote release. A DSLR’s flipping mirror can cause vibrations, too. Use Mirror-Up mode if you camera possesses it, as this enables you to flip the mirror on the first press, pause to quell vibrations, then activate the shutter on the second press.
05 Focus manually
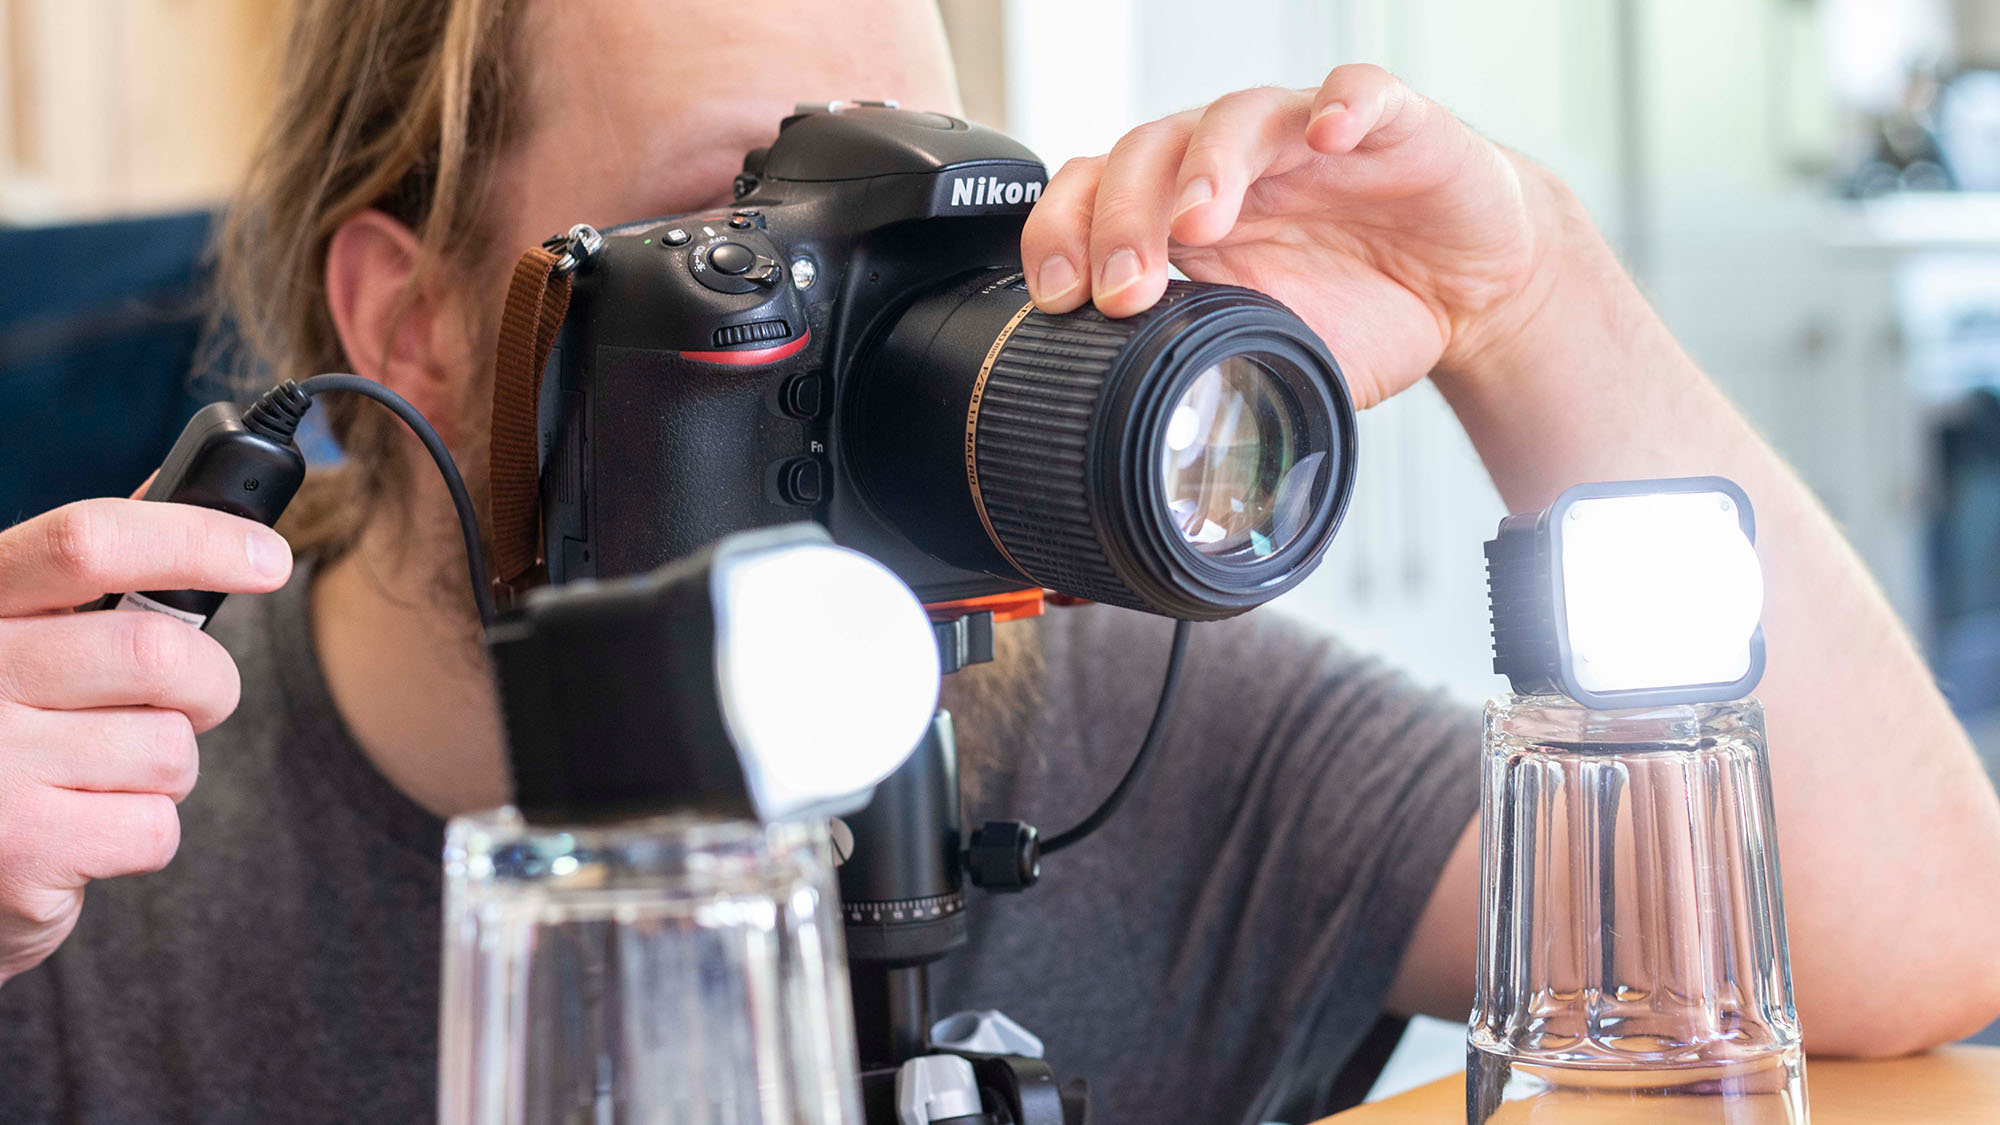
Autofocus systems can struggle to lock onto close-up subjects, so we recommend using manual focus. Zoom into Live View while focusing to ensure that the focus is tack-sharp. Some cameras feature focus peaking, which uses a colored overlay to indicate where an image is in focus.
06 Do a double exposure
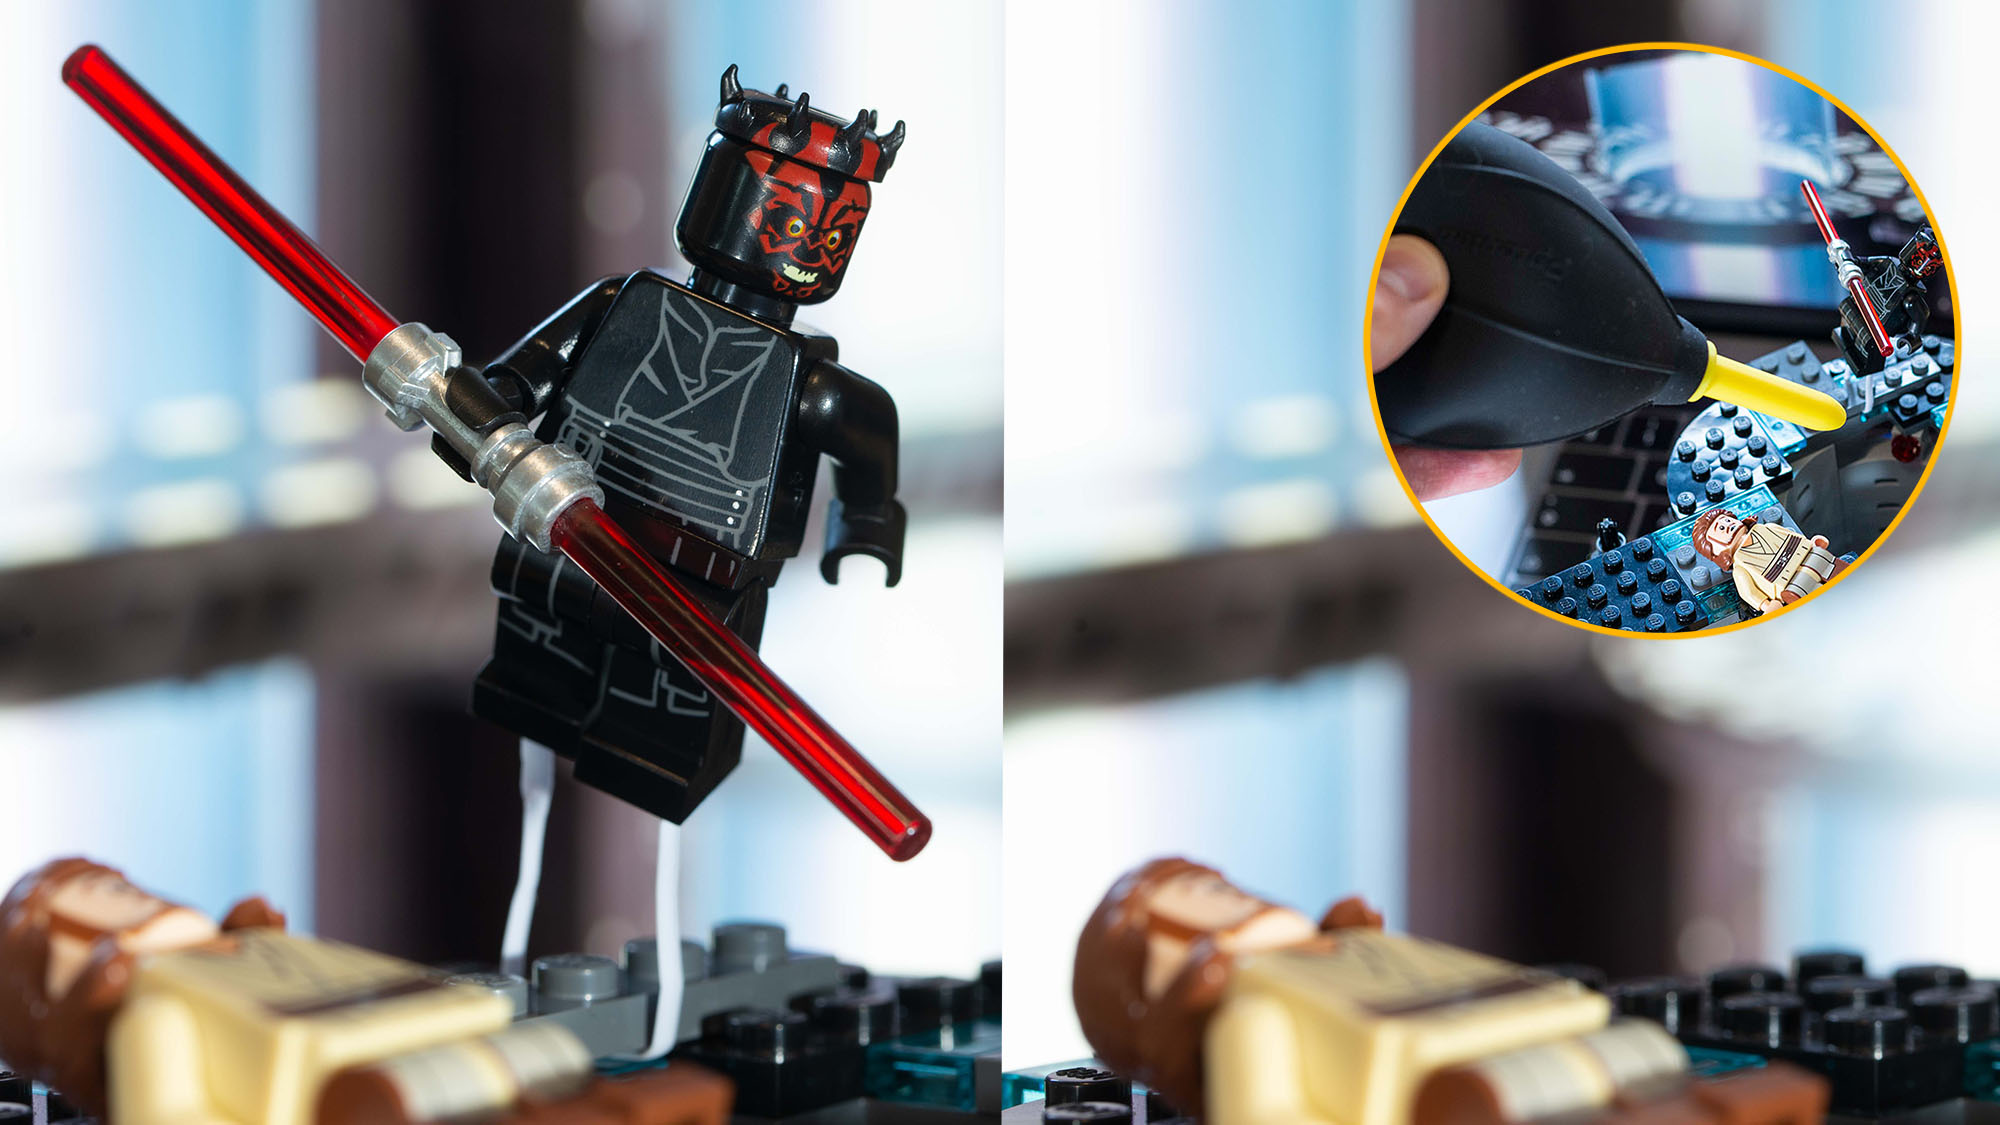
Use a dust blower to gently remove any loose particles, then take the shot. Carefully remove the elevated figure and wire – without moving anything else or changing your camera’s settings – and take a second photo. These two images will be combined in post so it looks like the figure is in mid-air.
SABER SPECIAL EFFECTS
01 Complete the initial edit
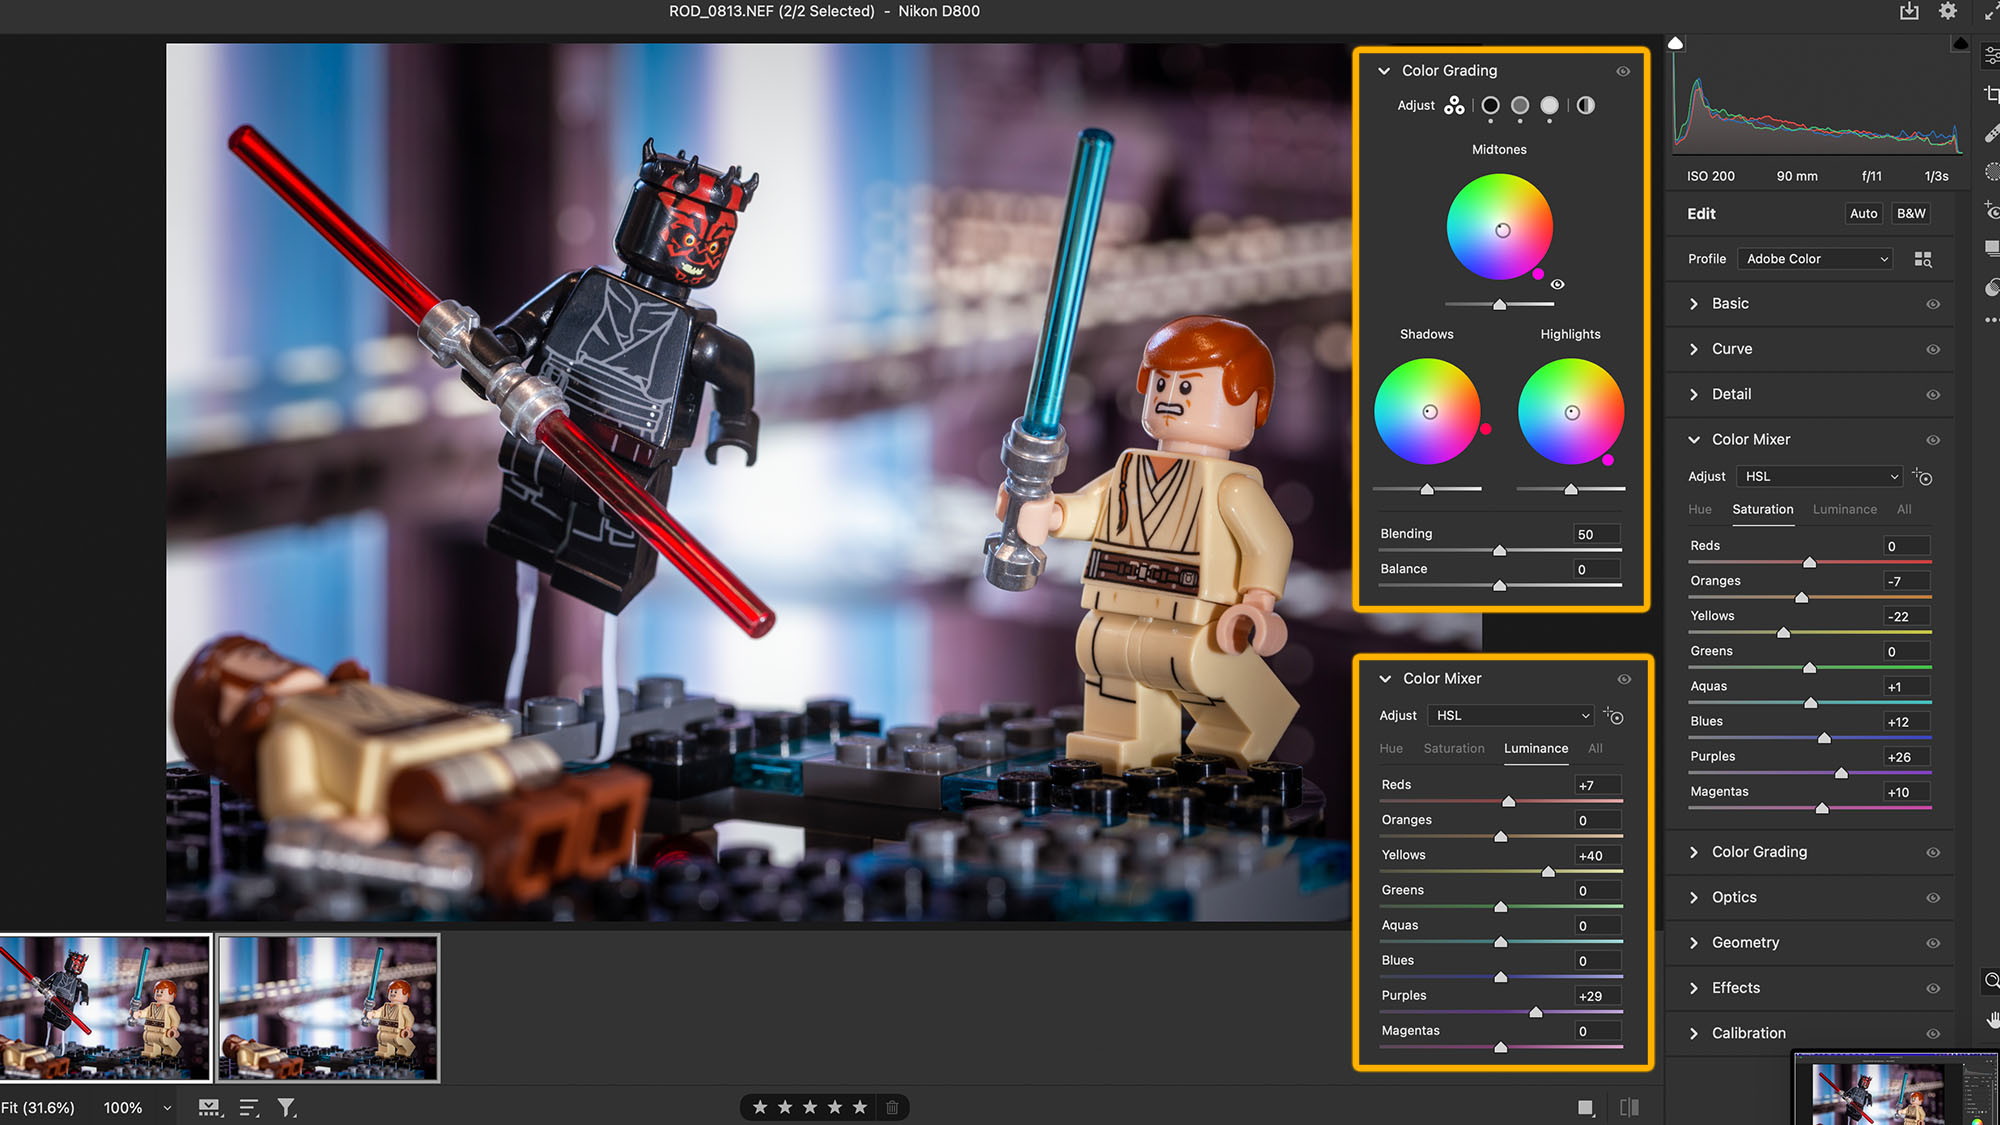
Open the two images in Camera Raw. Press Cmd/Ctrl + A to select both; while selected, edits will affect both images. Proceed with your preferred edit – we made use of the Color Mixer and Color Grading panels to boost the cool hues and create a cinematic look.
02 Create an illusion
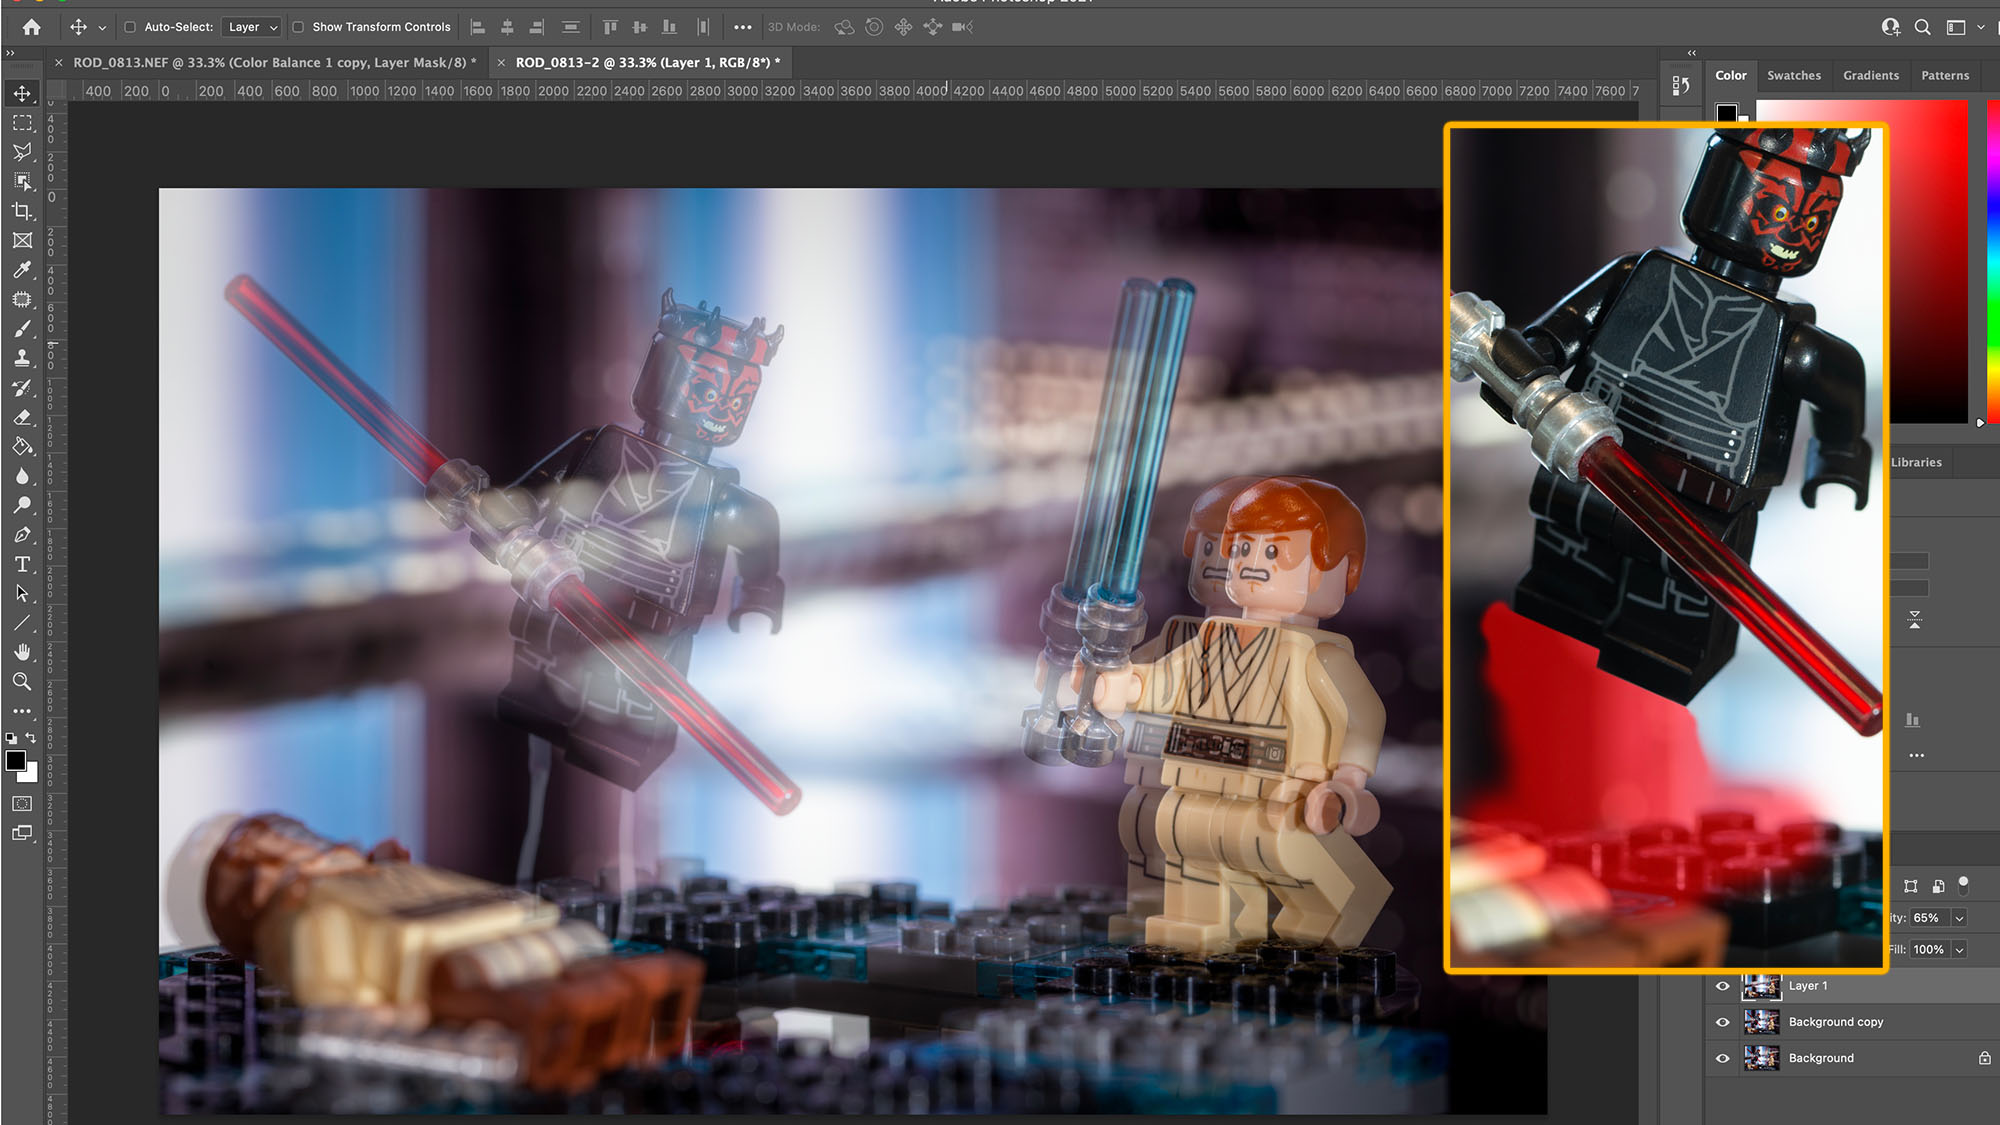
Open both images into a Photoshop document. Reduce the opacity of the top layer (with the jumping figure) and reposition with the Move tool so the shots are aligned. Add a layer mask to the top layer and use a soft, black brush to paint away the wire.
03 Make a selection and fill it
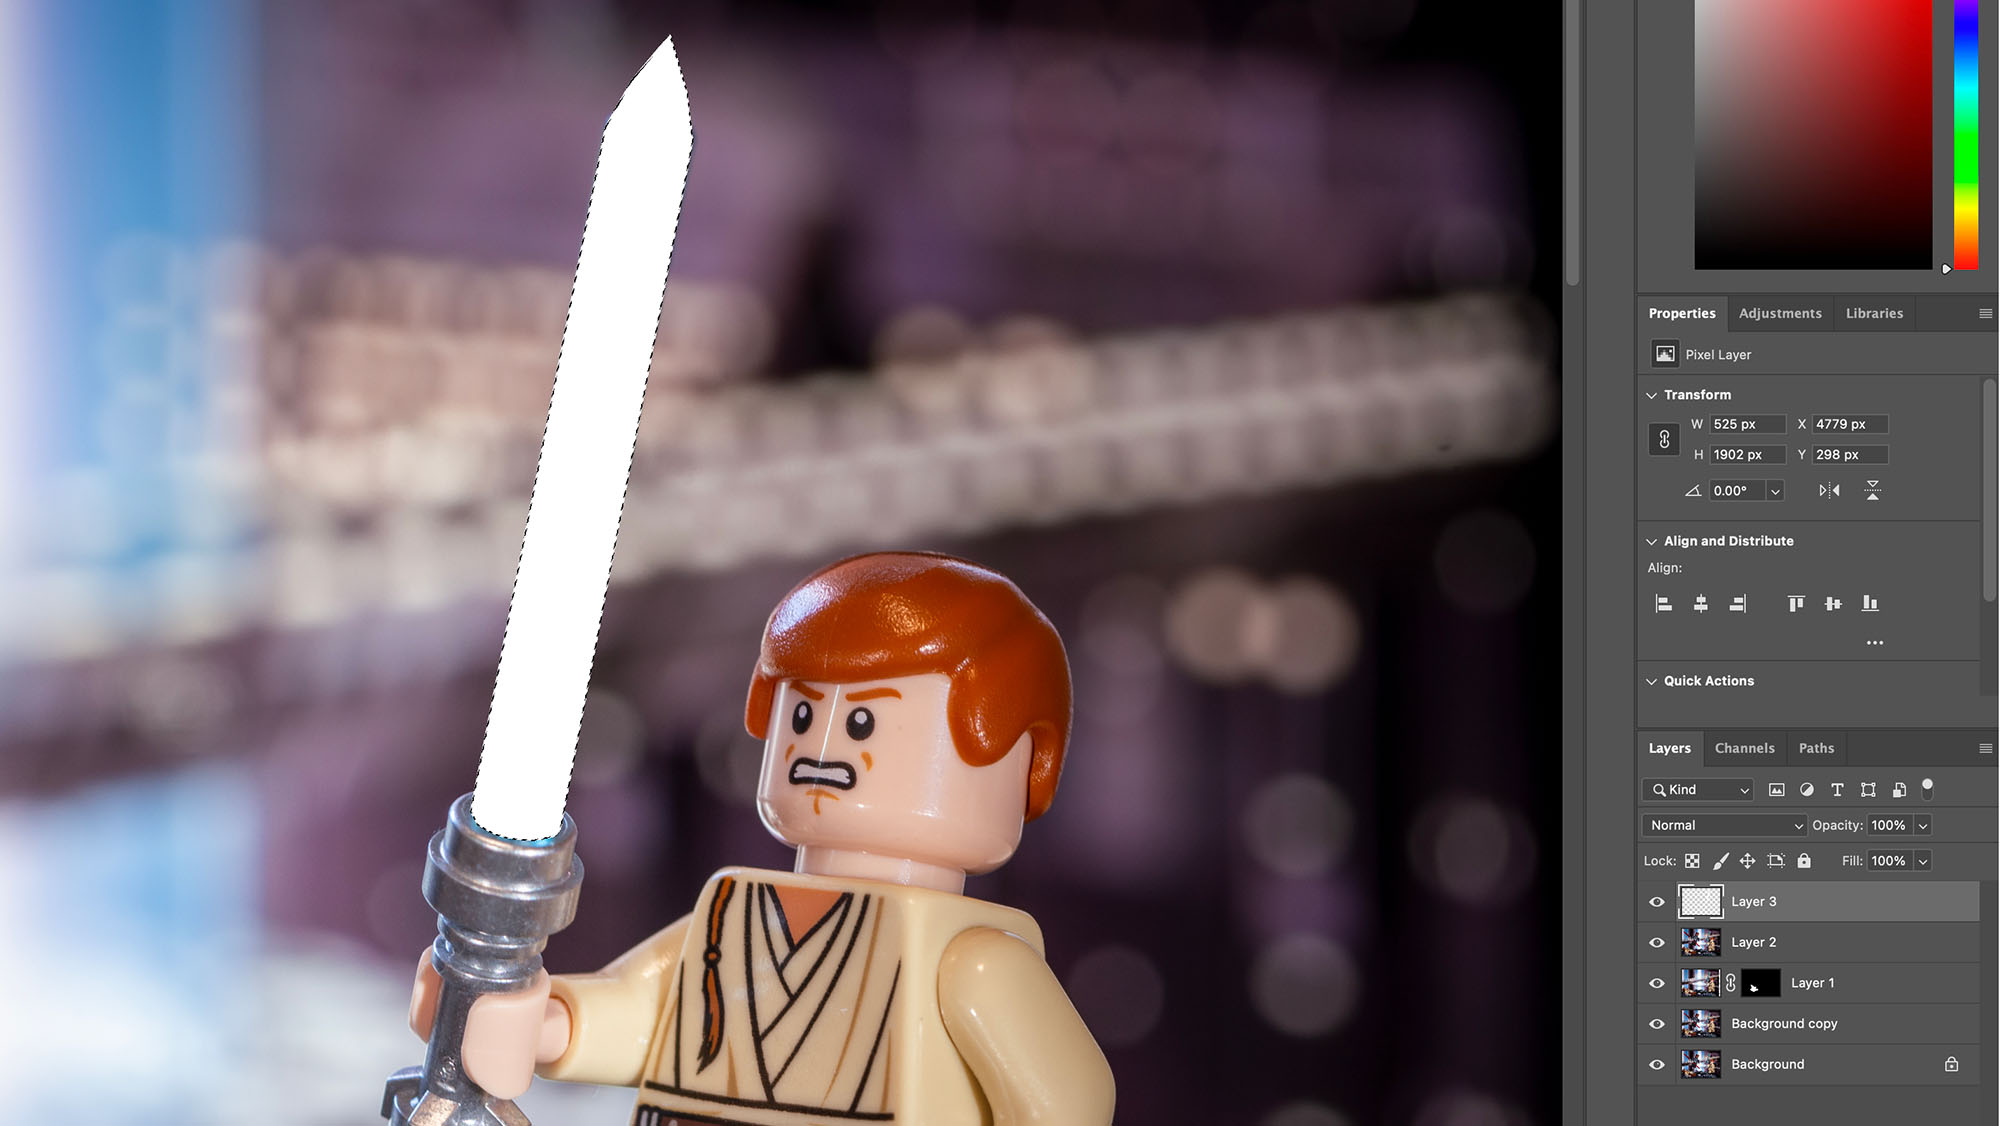
Create a merged copy of all visible layers by pressing Cmd/Ctrl + Shift + Alt + E, then create a new layer. Use the Polygonal Lasso tool to carefully trace around the blue sword’s blade, then use the Paint Bucket tool to fill the selection white.
04 Change the blending mode

Right-click the new layer in the Layers panel and select Convert to Smart Object. Press Cmd/Ctrl + D to deselect the selection, then use the Paint Bucket tool to make everything around the blade black. In the Blending Mode dropdown menu, select Screen.
05 Blur the blade
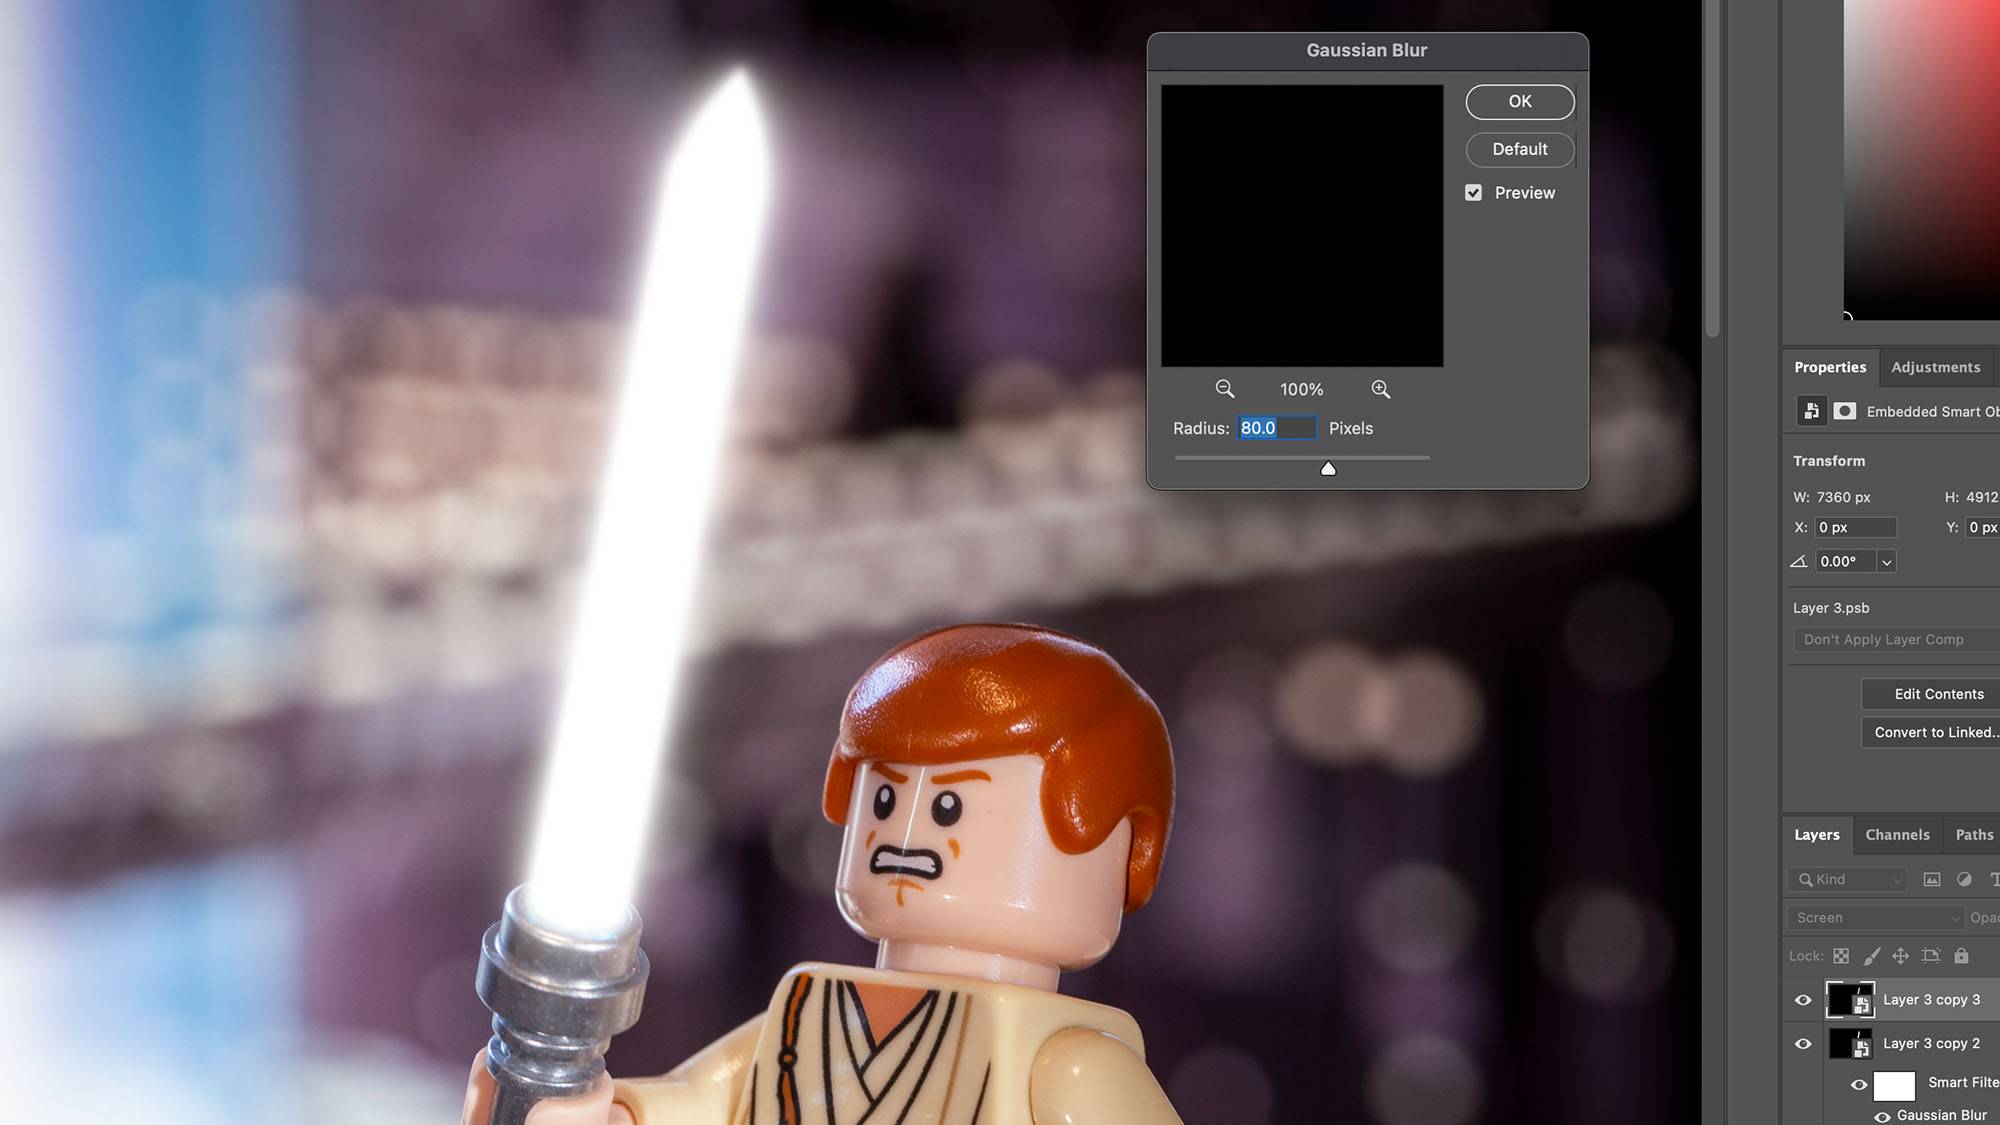
Duplicate the layer three times, then select the original layer. In the top toolbar, click Filter > Blur > Gaussian Blur. While in the Gaussian Blur window, set Radius to 10 pixels and click OK. Repeat this process with the three remaining layers, but double the Radius each time: 20px, 40px and 80px.
06 Make the blur blue
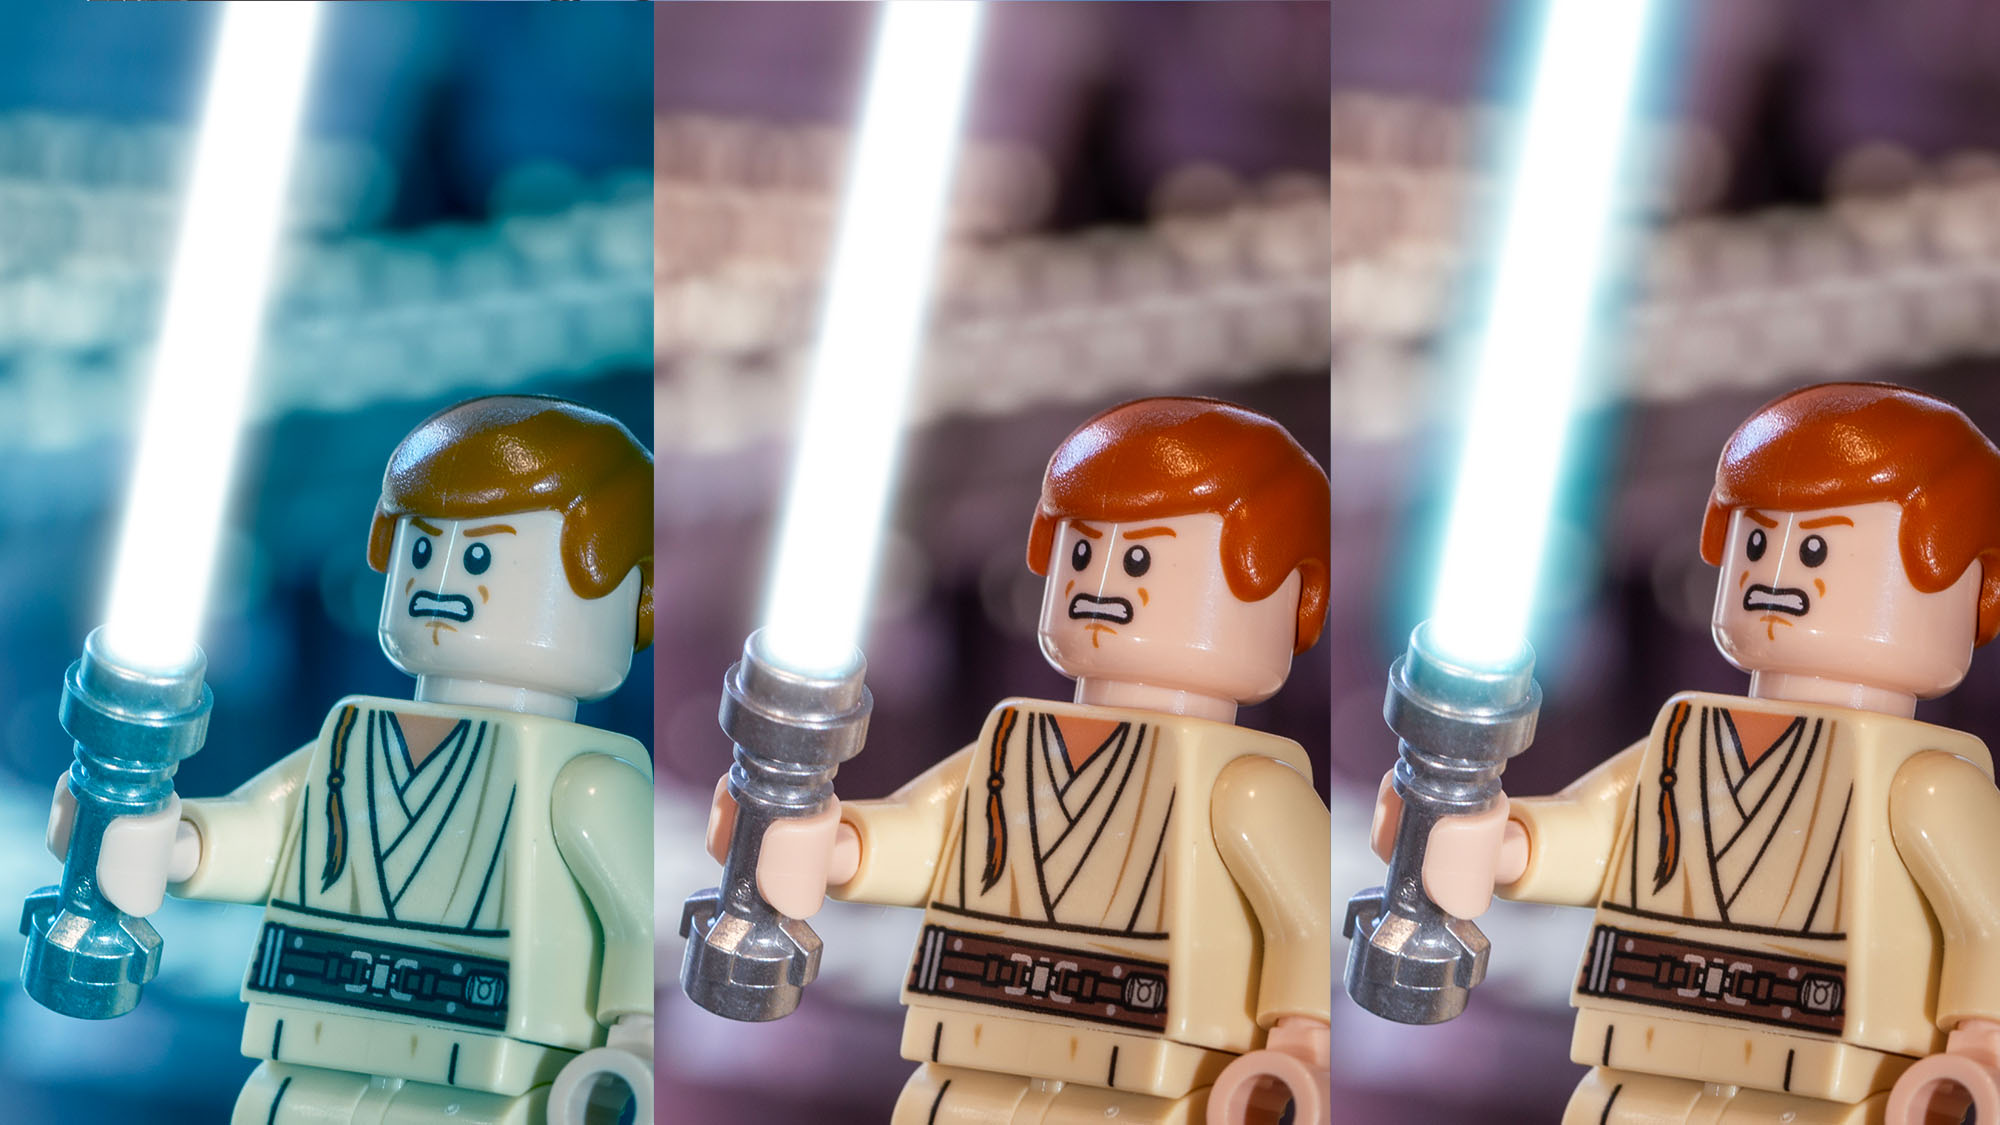
Place a Color Balance adjustment layer above the first sword layer. Push the sliders towards Cyan and Blue, right-click on the adjustment layer and select Create Clipping Mask. Duplicate the adjustment and clip it to the top sword layer. Duplicate the two new layers for a stronger effect.
07 Repeat it in red
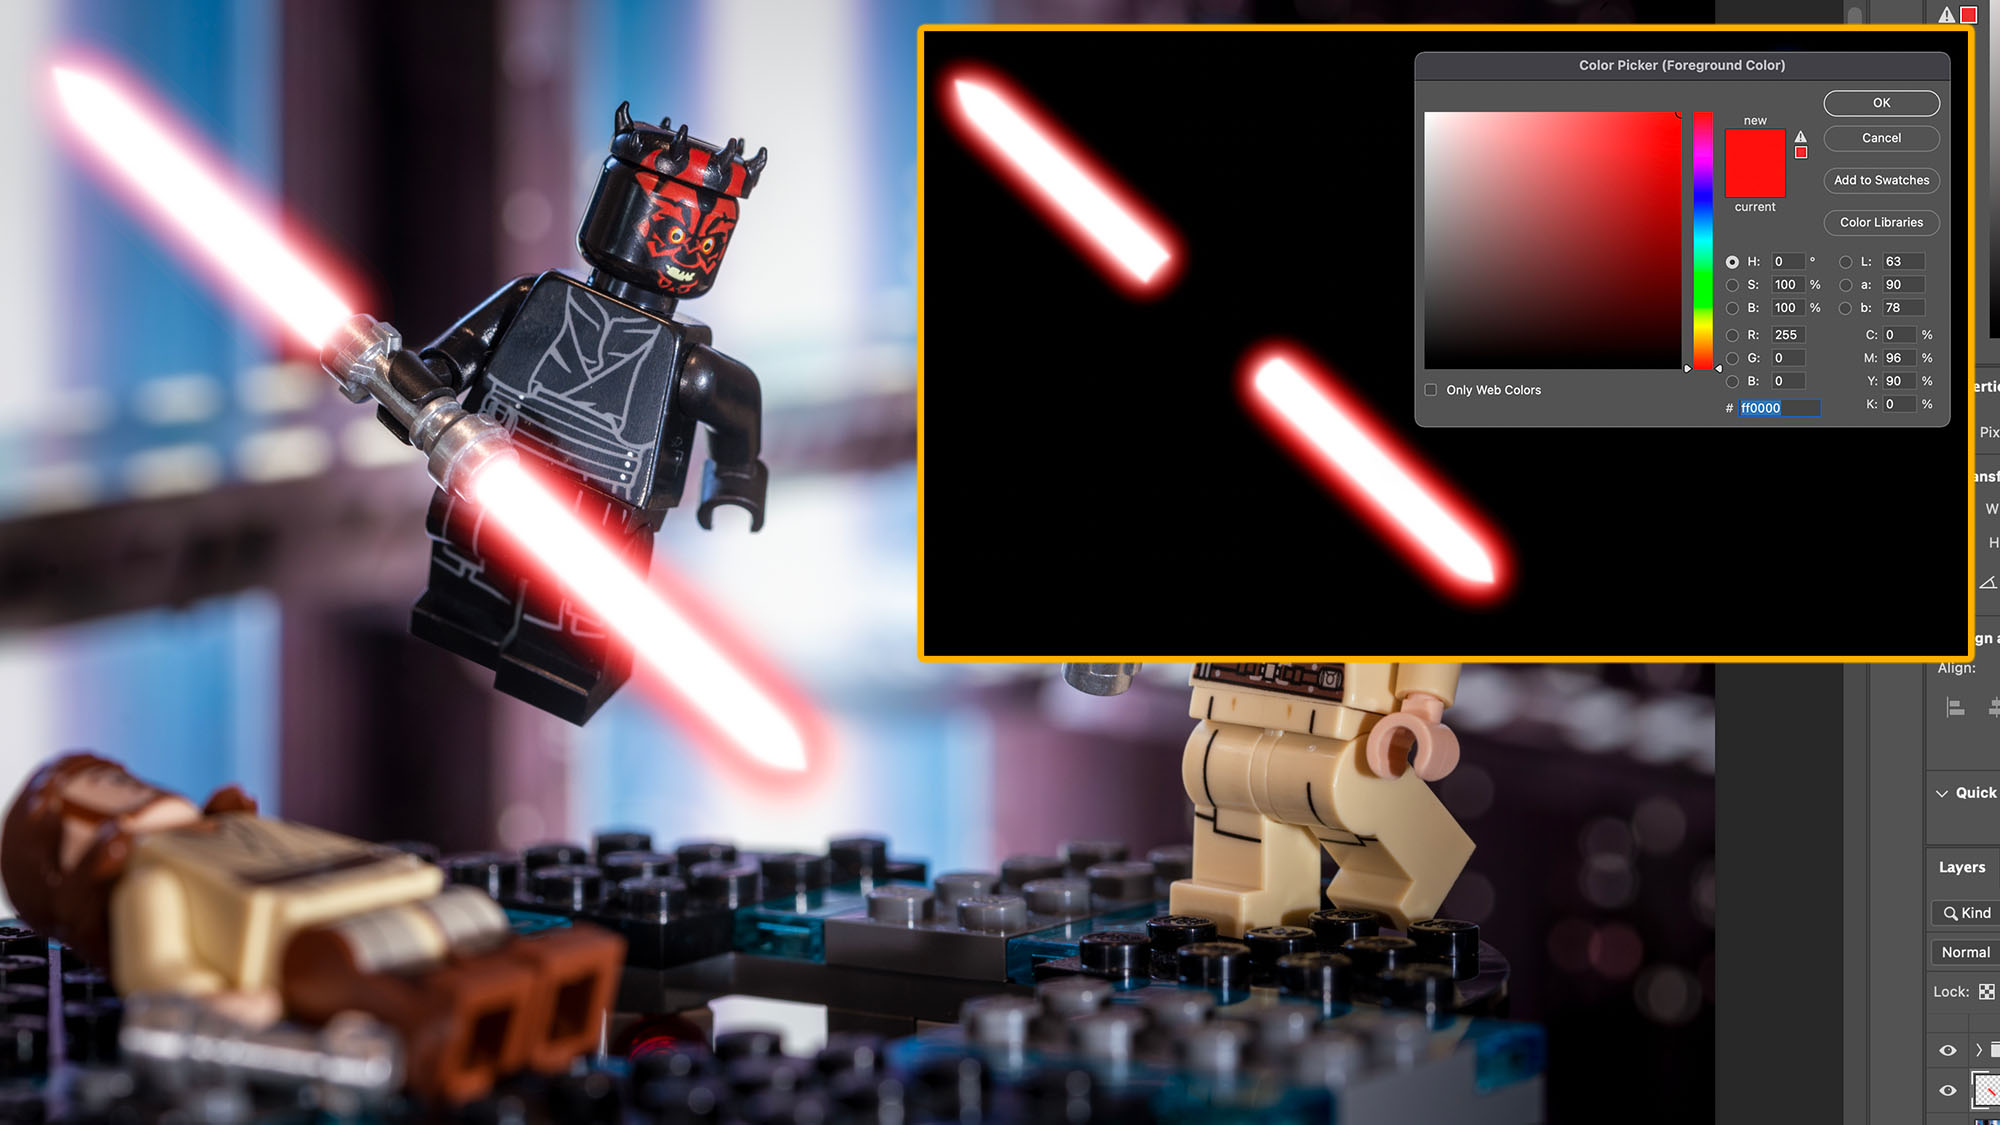
Select the other blades and repeat steps 03 to 06, but push the Color Balance slider towards red instead of cyan and blue. To make the front blade stand out against the bright backdrop, create a layer between the red sword and the main image, then paint along the blade with a soft red brush.
STEP INTO THE LIGHT SIDE
01 Find the correct blue hue
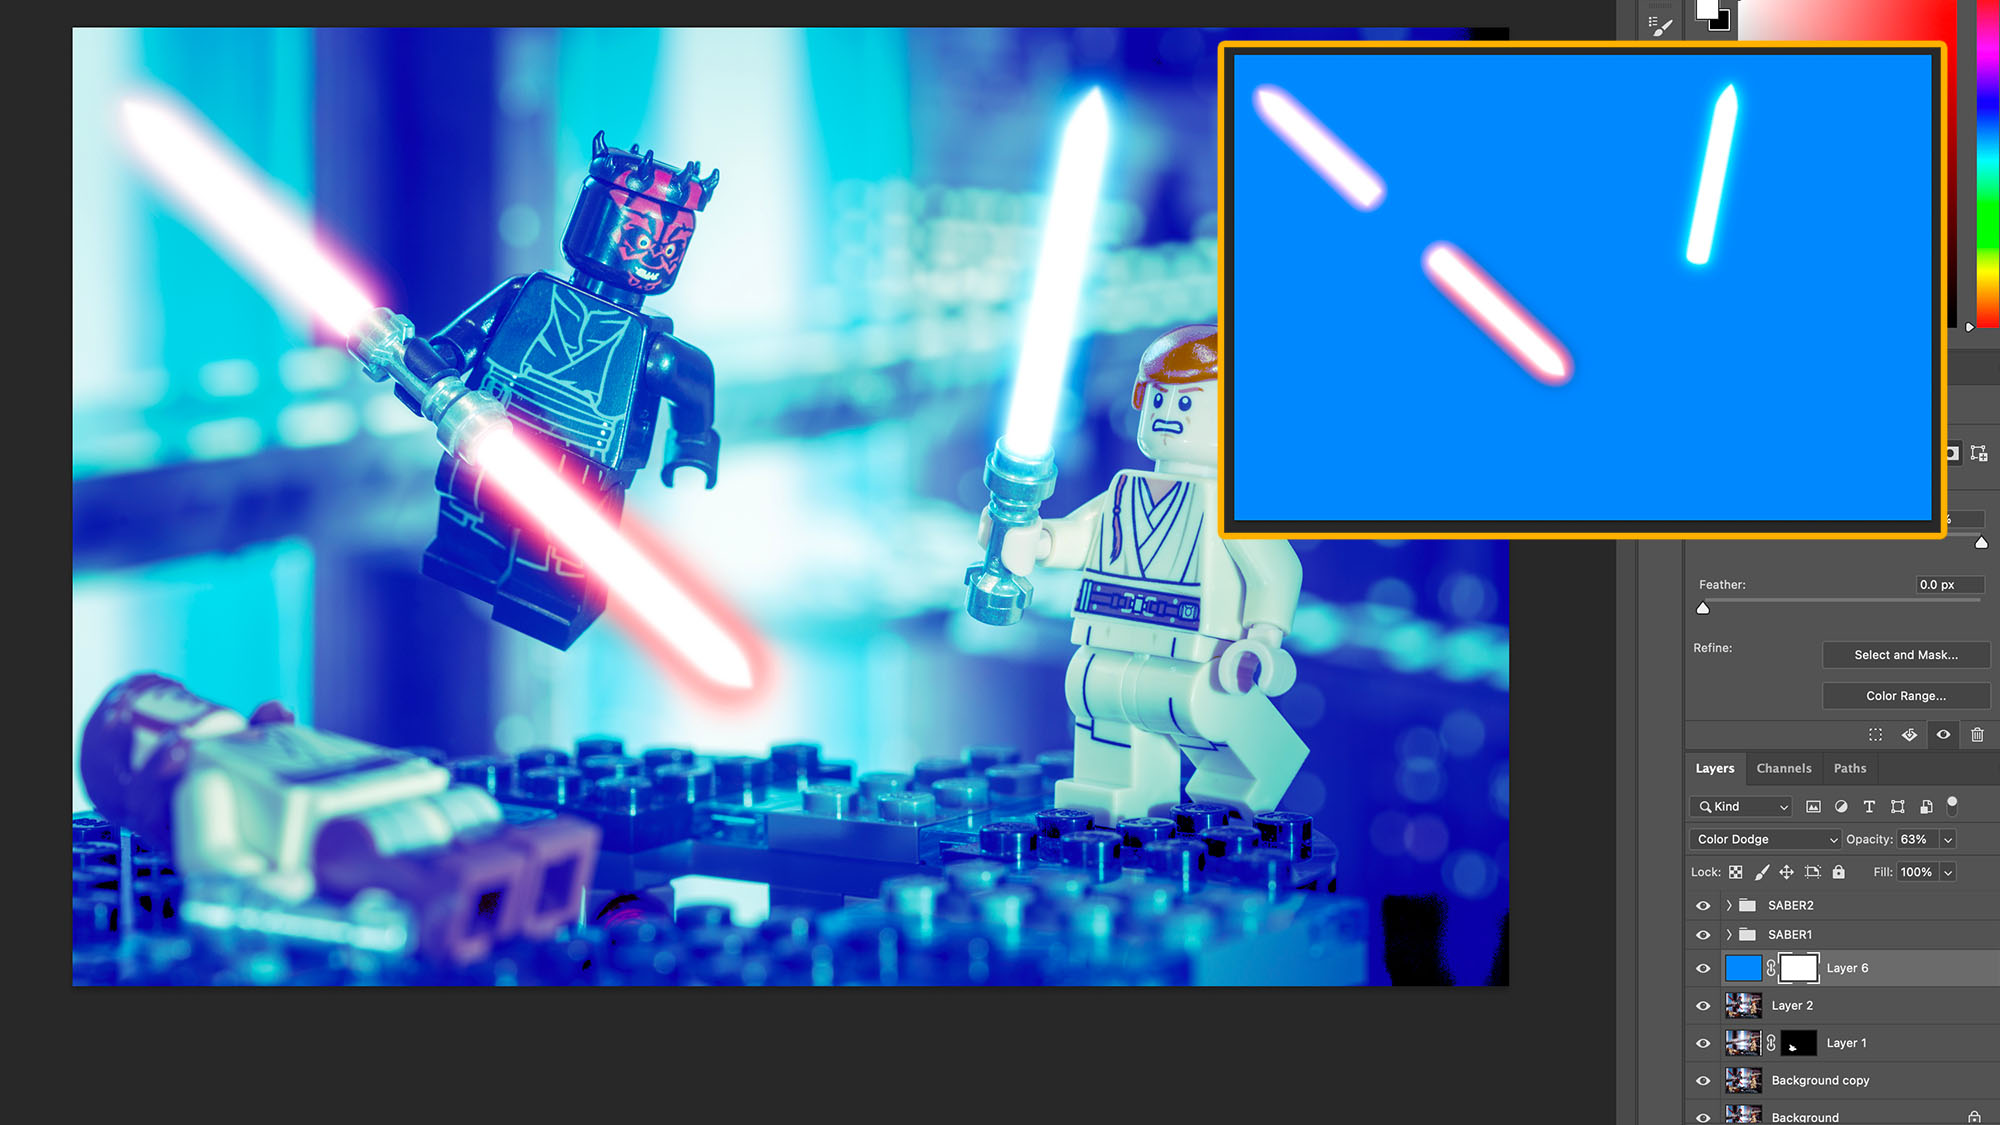
Create a new layer between the main image and laser sword layers. Use the Paint Bucket tool to fill the layer with a solid blue color that’s a similar hue to the blue blade. Then head to the Blending Mode dropdown menu and select Color Dodge.
02 Paint in ambient lighting
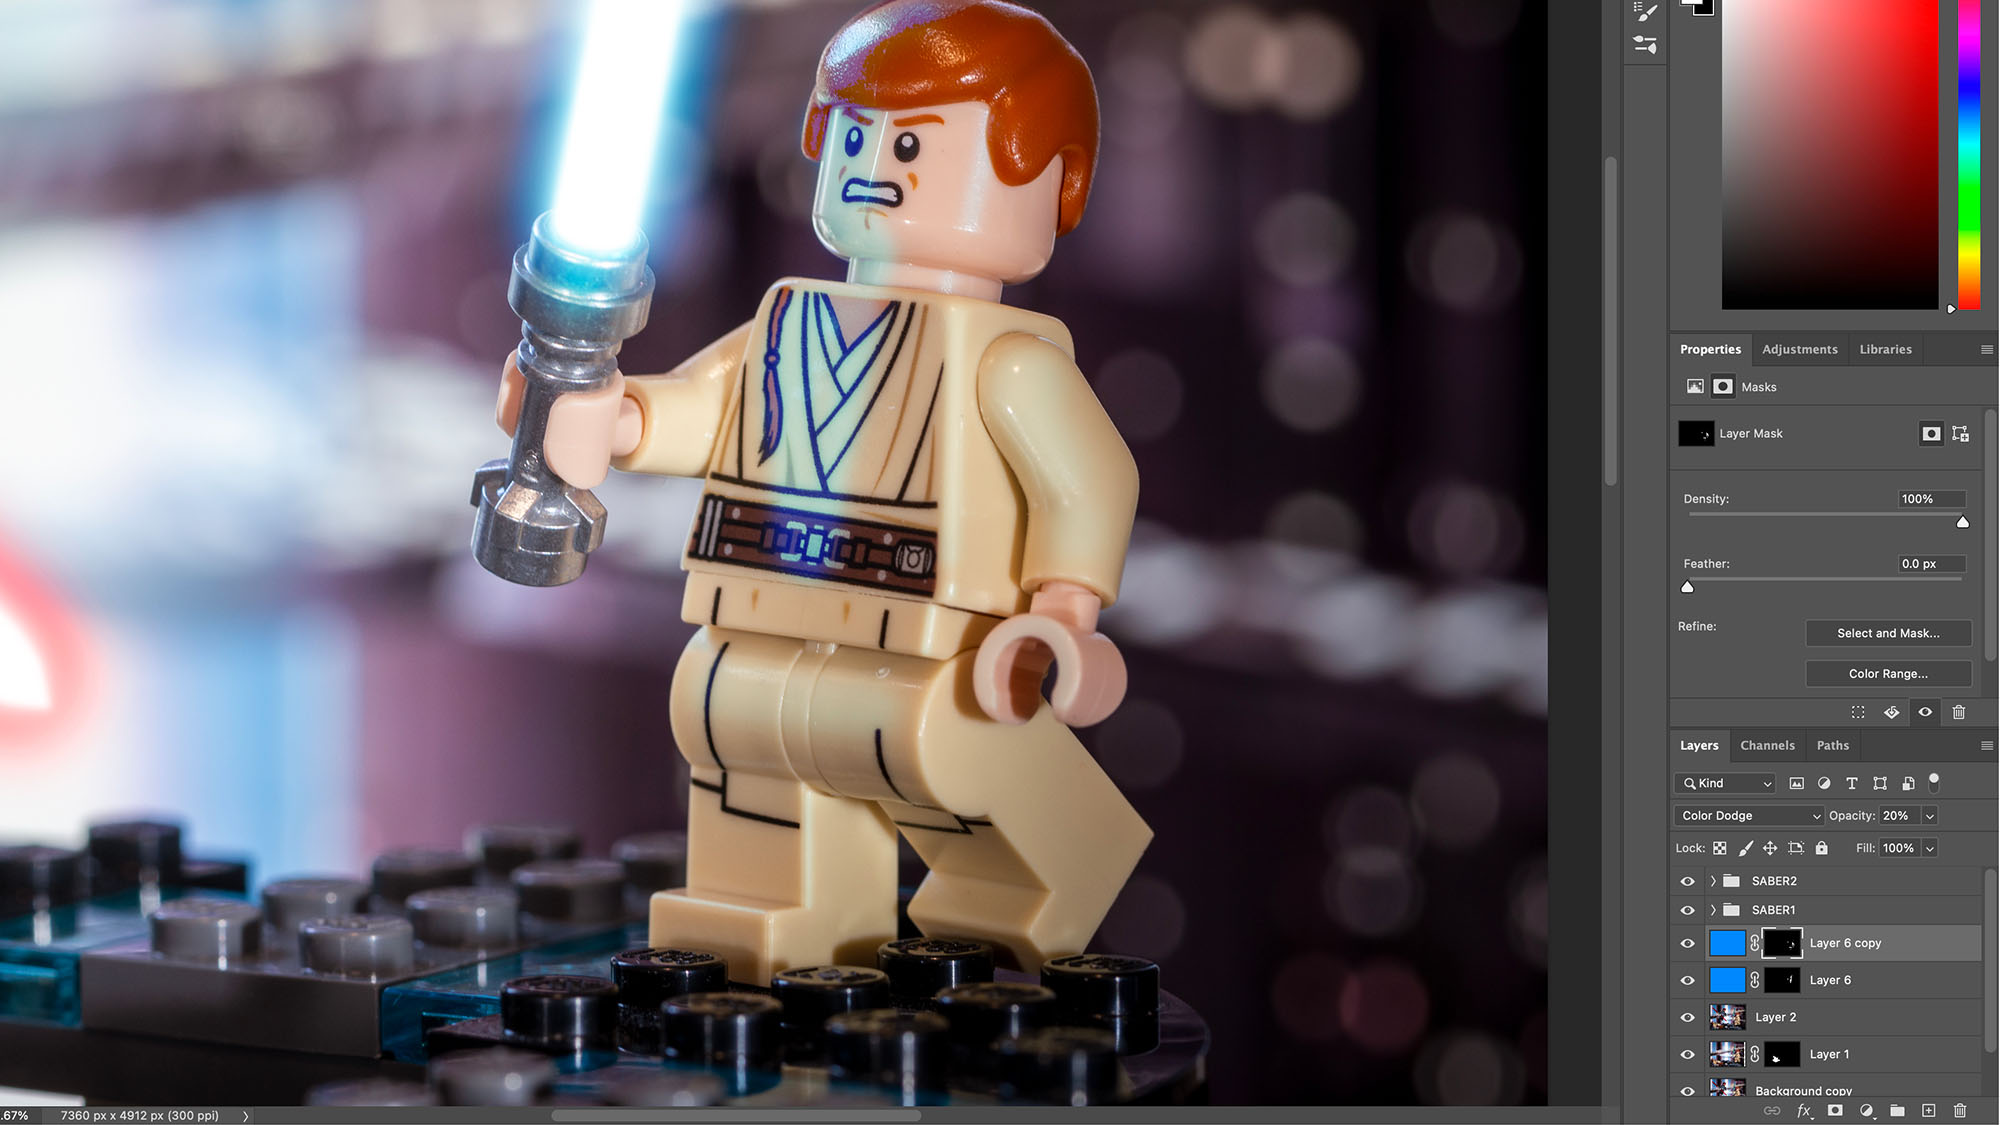
Click the Add Layer Mask icon and invert the mask (Cmd/Ctrl + I). Set the layer Opacity to 48%, then use a soft white brush to paint areas that the Lightsaber would illuminate. Repeat this step at 20% Opacity, and paint areas that are further away to represent drop-off.
03 Form a Gradient Map
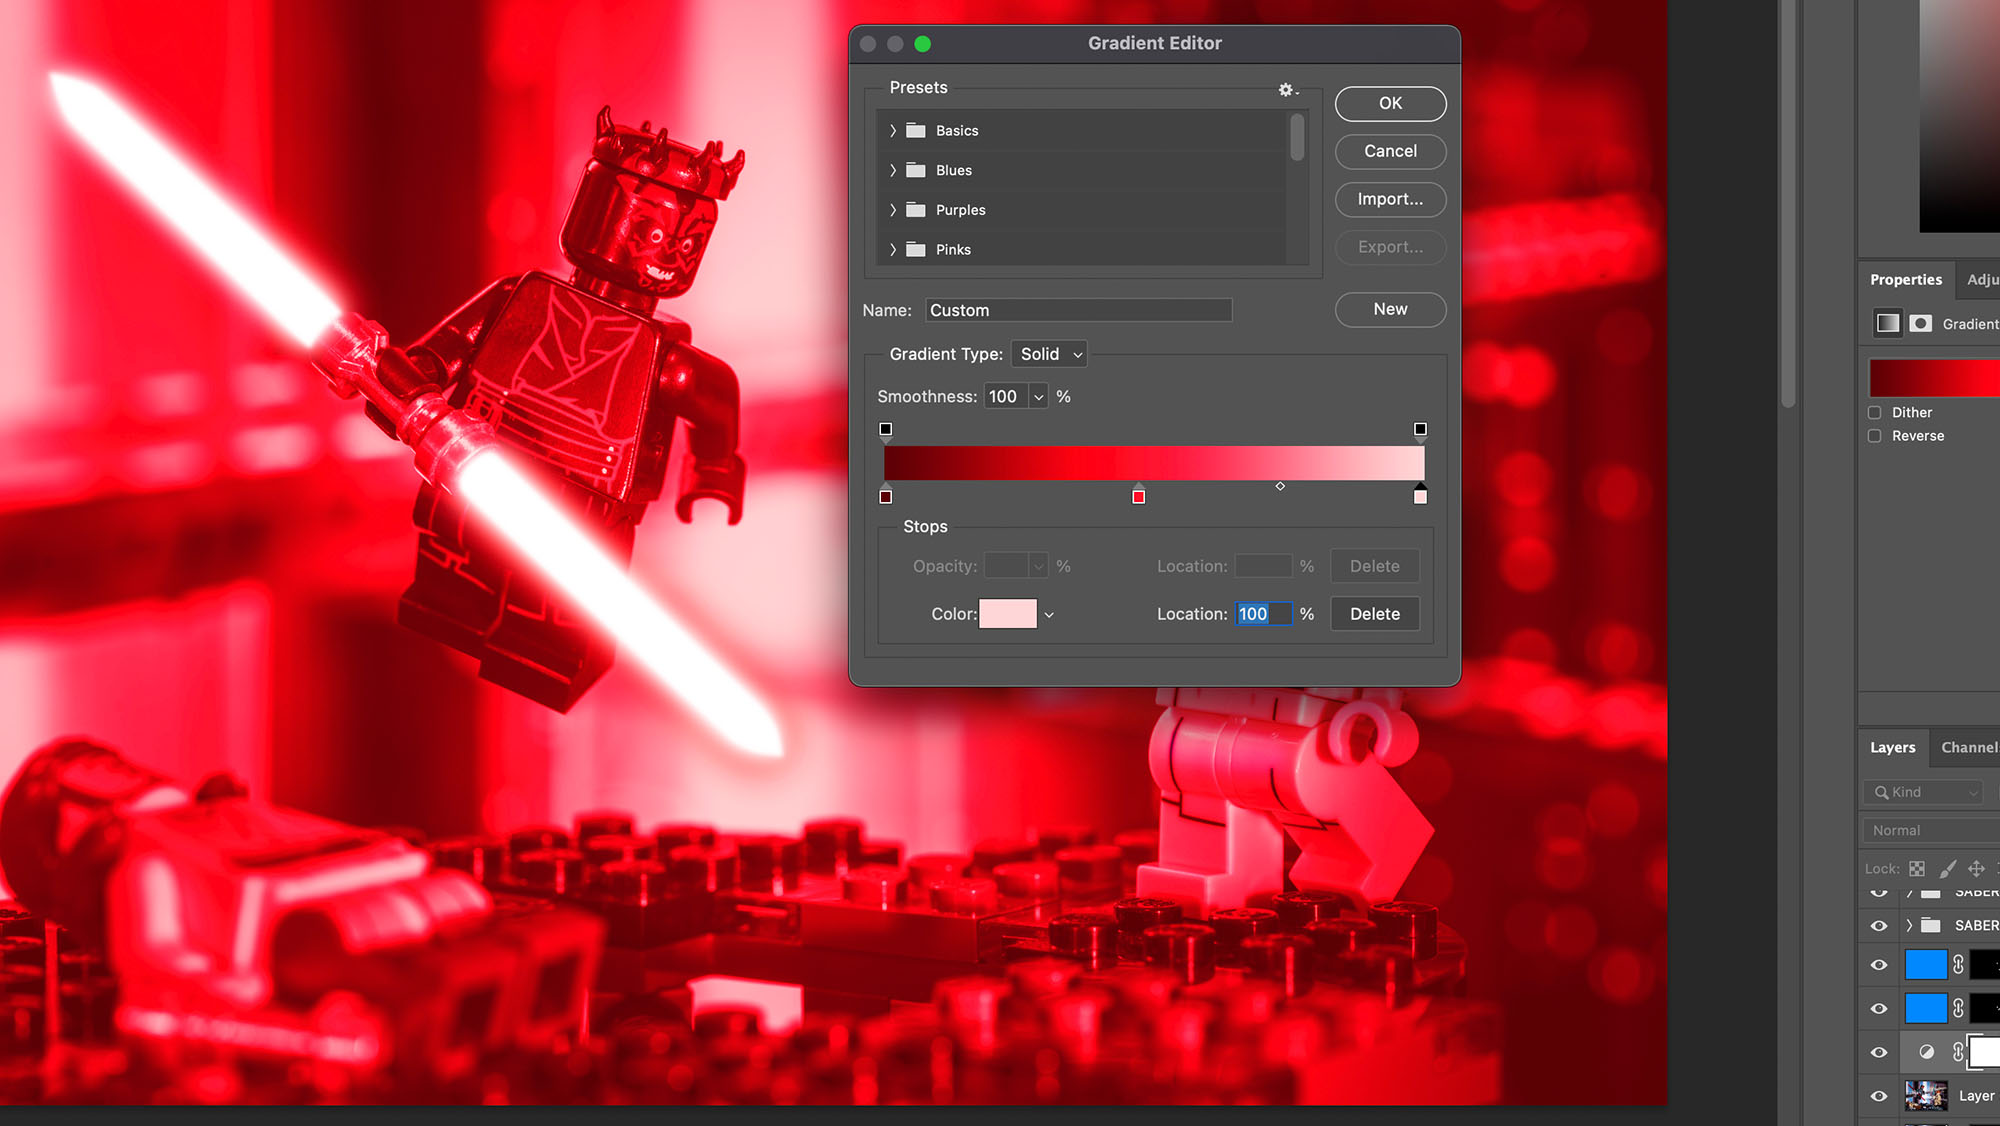
Add a Gradient Map adjustment layer under the blue layers. Click the gradient in the Properties panel; in the Gradient Editor, select dark, bright and pale reds. Create an inverted layer mask and paint in areas of red light. We used layers at 32%, 22% and 10% Opacity.
04 Make a thin red line
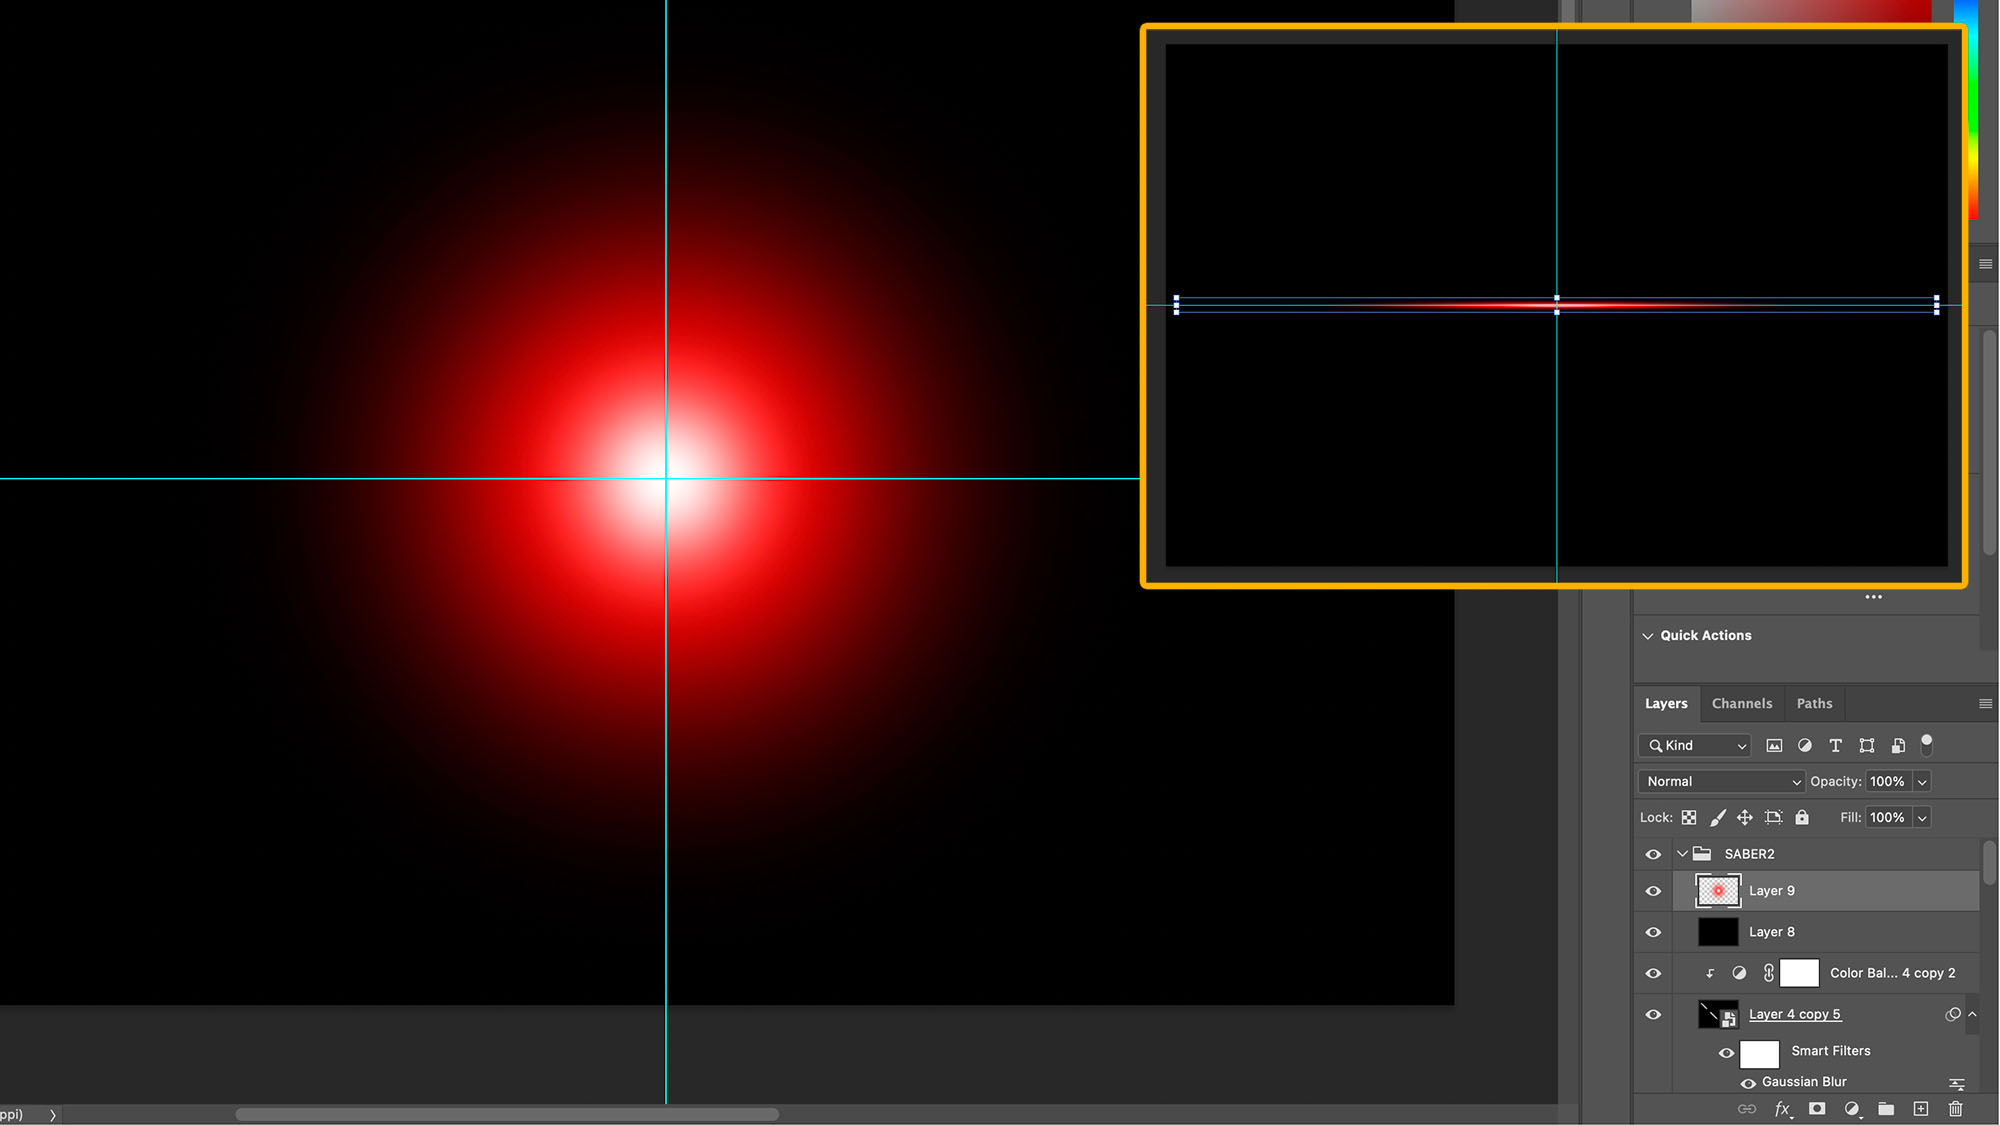
Create two top layers. Fill one with black, and use a large soft brush to paint a single red blob in the other. Paint a smaller and brighter blob in its center, followed by a smaller white blob. Merge the blobs and use the Free Transform tool to squash them into a thin line.
05 Aim for the stars
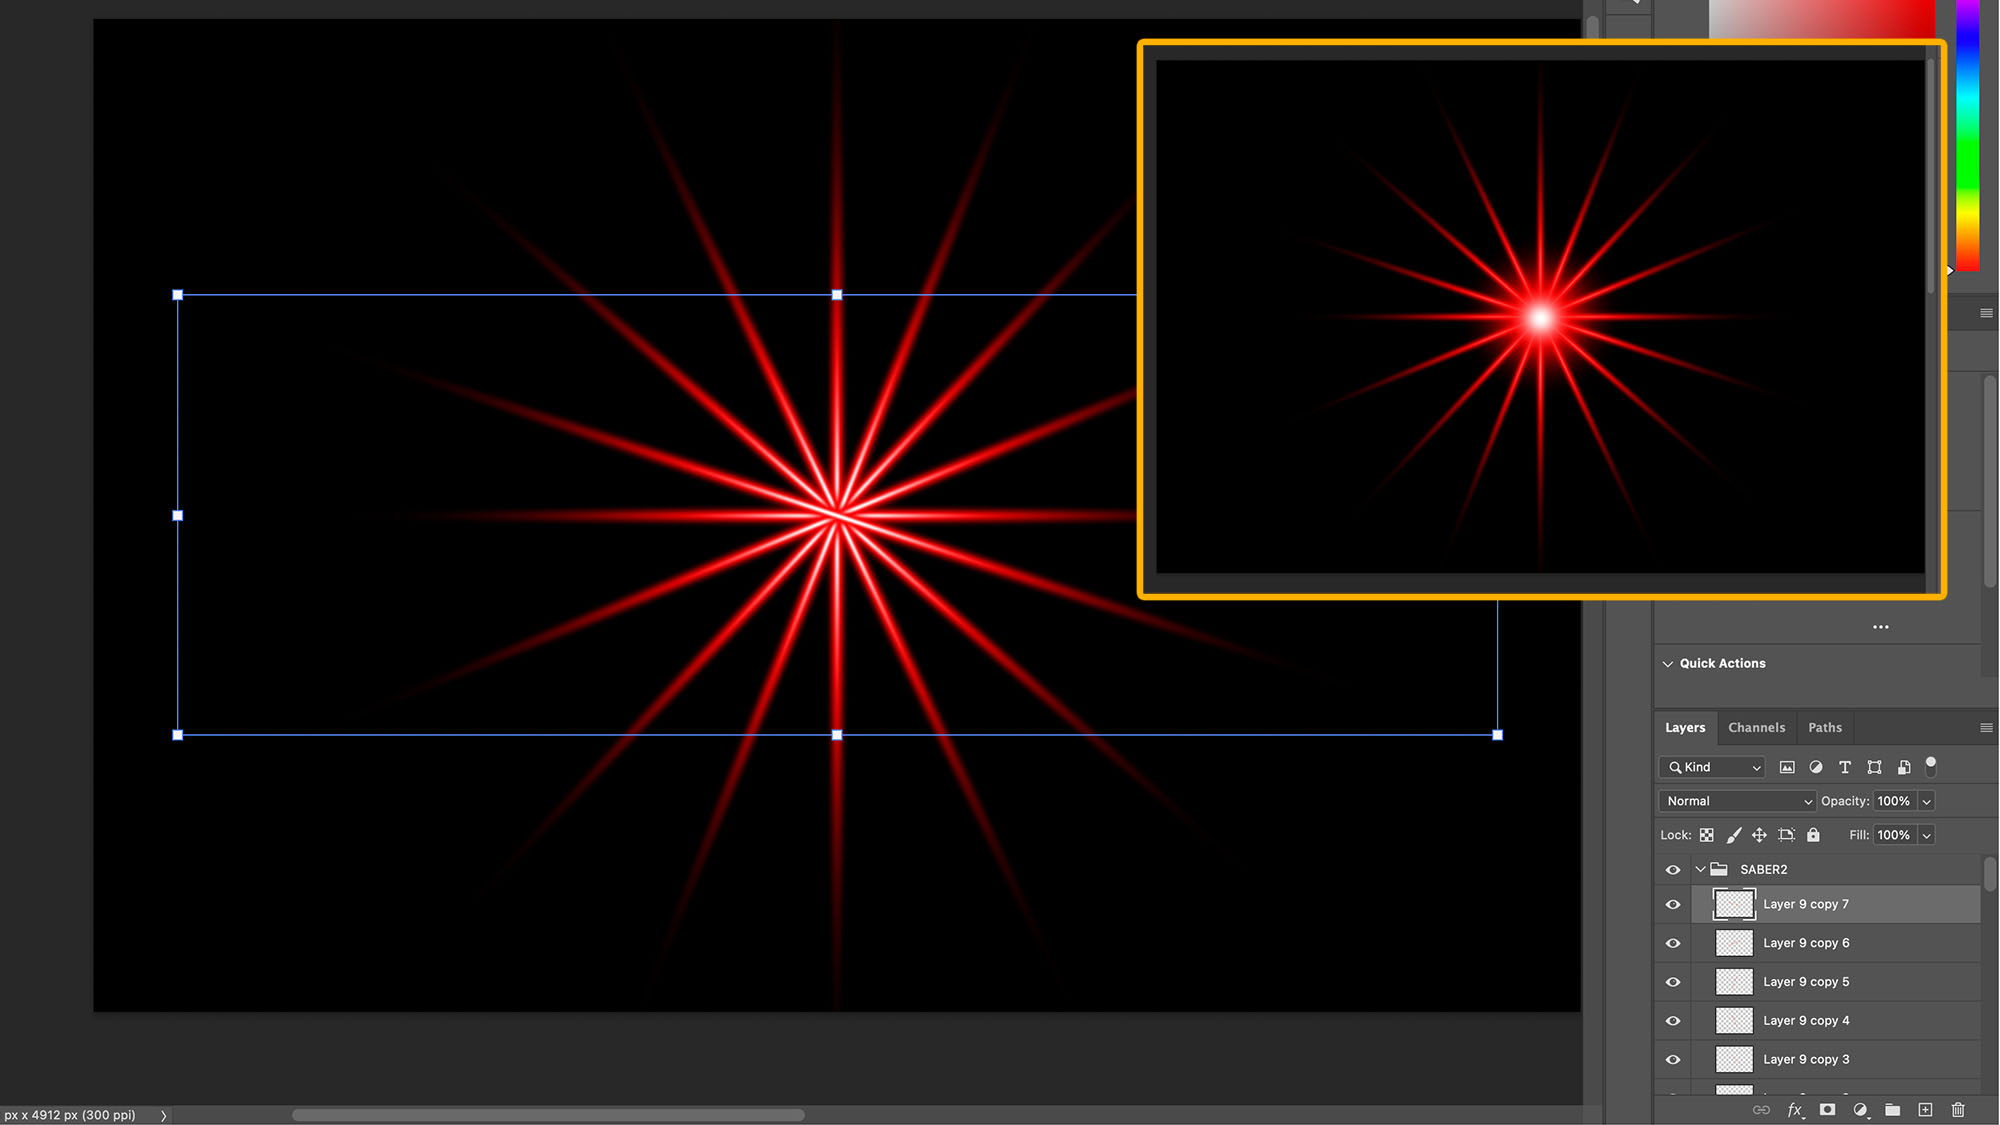
Duplicate the horizontal line and select Edit > Transform > Rotate 90° Clockwise. Keep duplicating the layer while using Edit > Transform > Rotate to create a 16-point star. Place a red / white blob in the center, hide the background and merge the star layers. Set the blending mode to Screen.
06 Position your flare
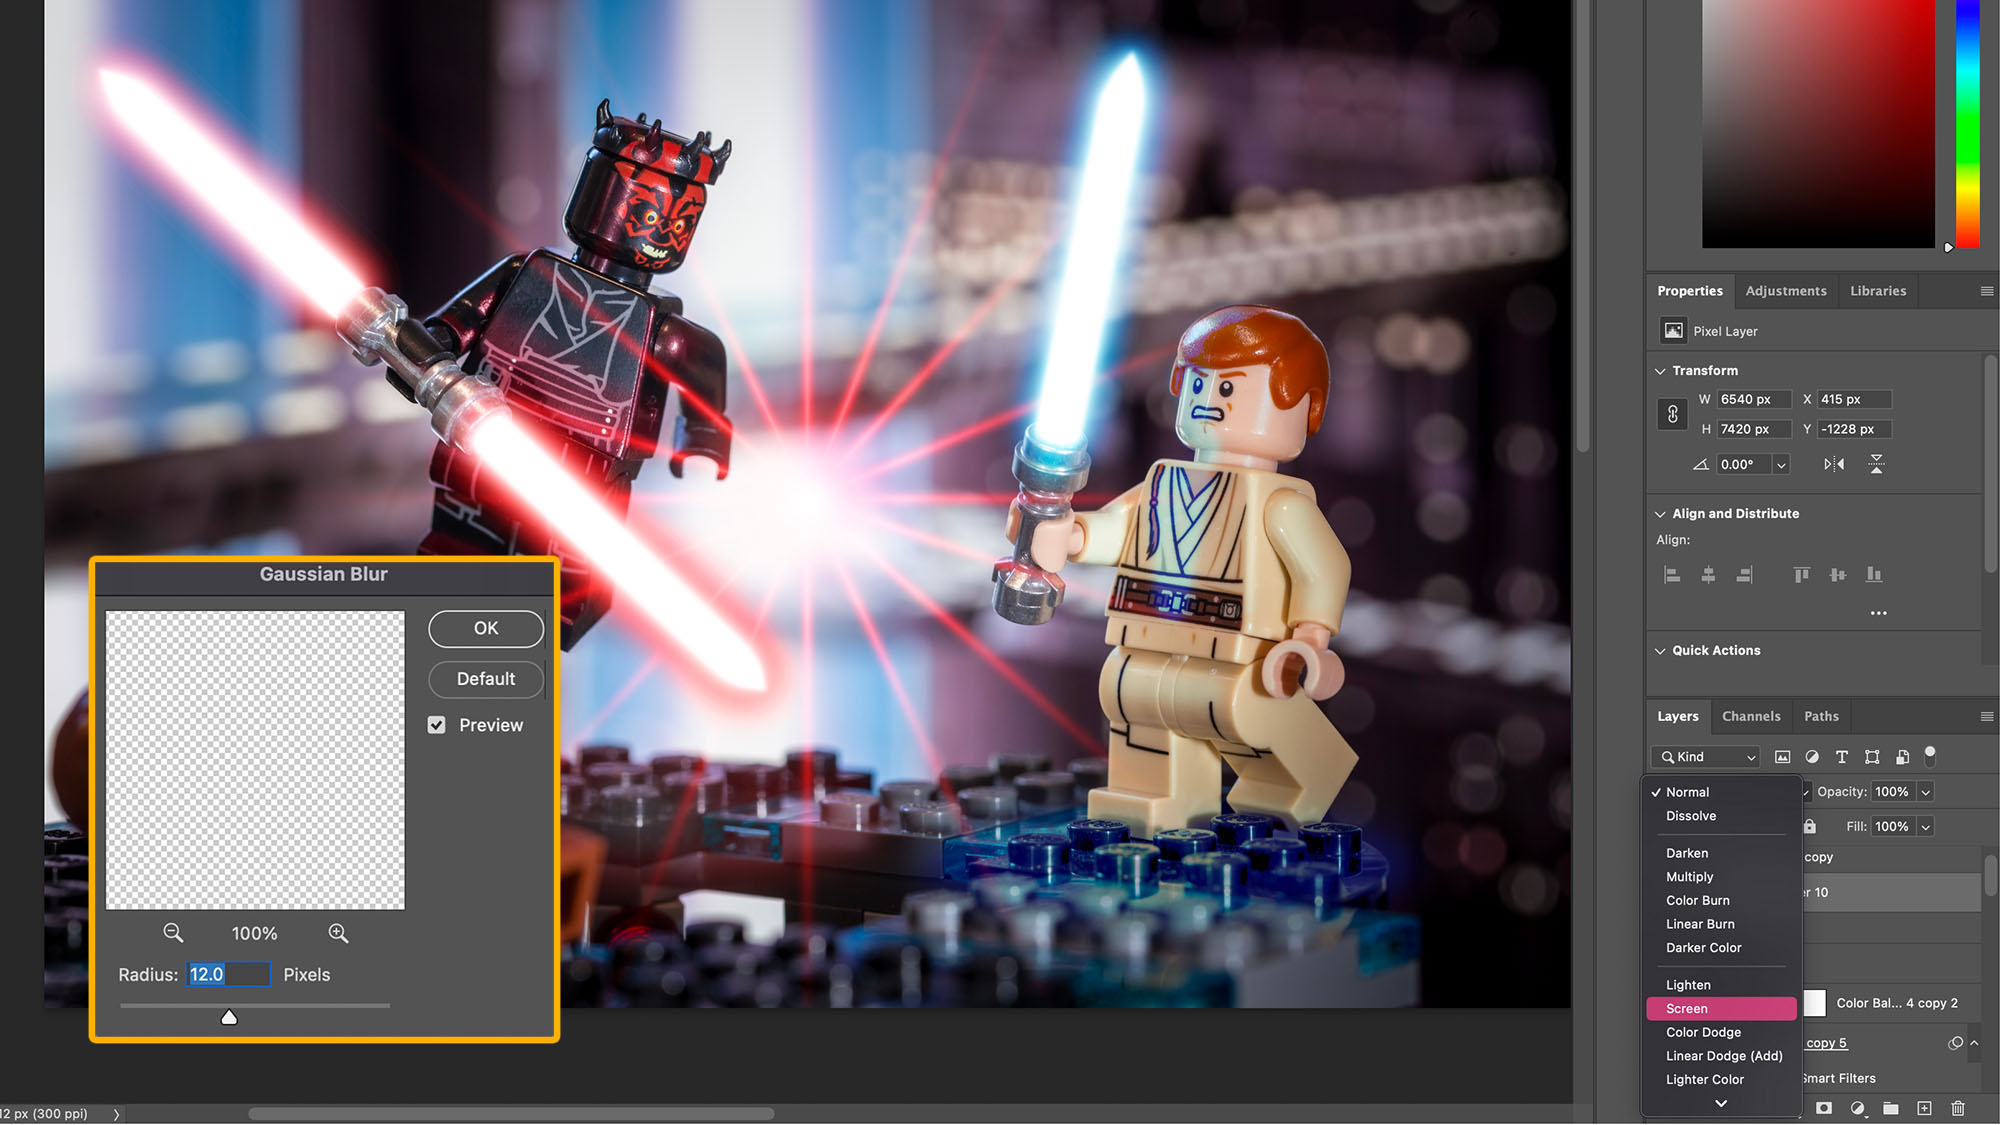
Blur the flare by 12 pixels. Resize the flare, place it at the bottom of the sword blade and reduce its Opacity (62%). Duplicate the layer for the second red blade. For the blue blade, duplicate the layer, create and clip a Hue / Saturation adjustment layer and change the hue to blue before placement.
How to get Adobe Photoshop CC
Adobe offers three subscription based Photography Plans, which you can click on below. We recommend either the regular Photography Plan, or the Photography Plan (1TB), which costs more but comes with 1TB of online storage.
For this tutorial and for anyone who likes to work on a single main computer, we recommend the regular Creative Cloud Photography Plan. This is the cheapest way to get started AND it comes with Lightroom and Lightroom Classic too.
Read more:
Make your own Lightsaber in Photoshop
Top techniques for photographing action figures
Bring your toys to life with forced perspective photography


