
When you’ve got a multitude of functions to use on Google Sheets, it can be exhausting to keep typing the same keystrokes for one function. Running a macro can make your work easier by programming a few keystrokes to serve a specific function. Combining multiple steps into one will help make your work easier, and reduce the amount of time doing the same task over and over.
Related: How to protect data in Google Sheets: Preventing accidental changes
What are macros on Google Sheets?
A macro duplicates a task based on a particular command or keystrokes on Google Sheets. It’s typically more complex than using keyboard shortcuts because a macro can perform multiple steps. Rather than go through the menu bar and go through the dropdowns and click on a particular function that opens to separate windows and additional functions, a macro can replicate those steps into a singular command or keyboard shortcut.
A macro is especially useful when doing repetitive tasks, and it can help to avoid errors because you’ve programmed it to record a specific order of commands or tasks. This automated functionality
How to create a macro
When you record a macro, Google Sheets automatically creates what is called an Apps Script function that replicates the macro steps. Apps Script is a cloud-based JavaScript platform that allows you to integrate with and automate tasks across Google products. Apps Script can be edited.
On your designated spreadsheet, go to the menu bar, and go to “Extensions.” Click on “Macros,” and then “Record macro.” A small window pops up at the bottom of the spreadsheet, and it shows a blinking red dot within a red circle that shows that recording the new macro is active. There are also two options on the type of macro: “Use absolute references” or “Use relative references.” Absolute references mean that if you make changes to the spreadsheet, the macro will continue to apply the function to those cells that were originally selected. Relative references will automatically apply changes in the macro to the cells, if you make changes in the spreadsheet.
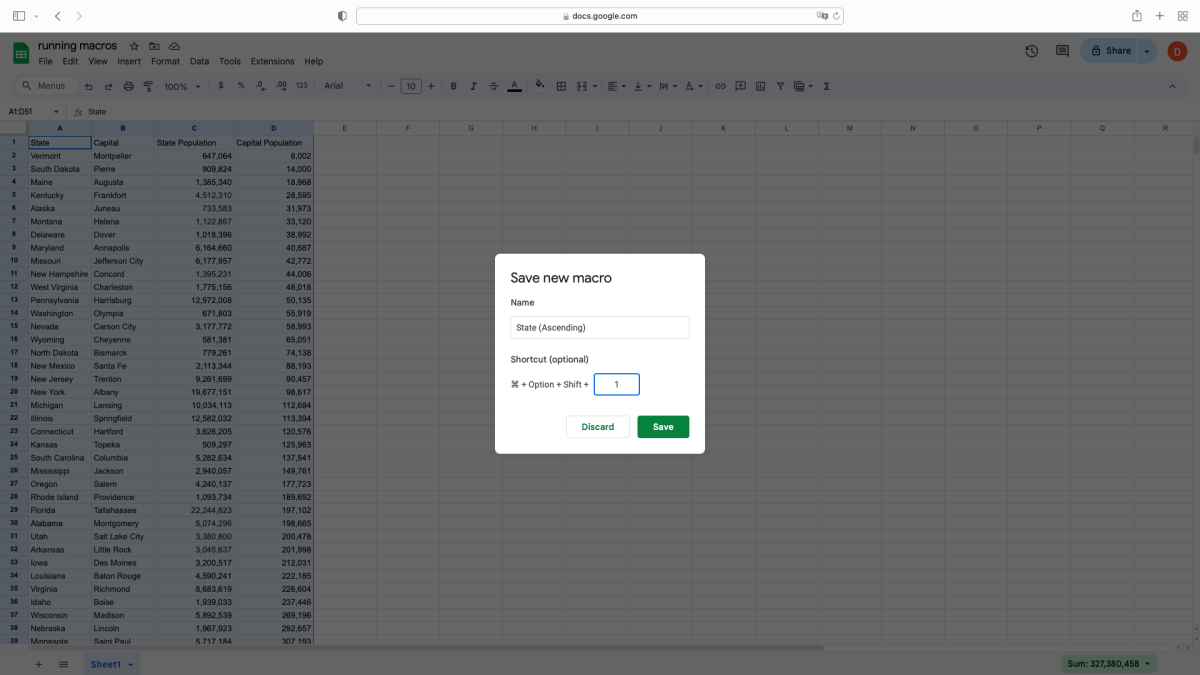
After creating the macro using the commands you’ve selected, click on “Save” for recording the macro in the small window. A window titled “Save new macro” then pops up in the middle of the screen, and it will allow you to name the macro. You can also assign the macro by number, from 1 to 9, and afterward the shortcut allows you to perform the macro function. On the Mac OS, these buttons would be Command (butterfly icon), Option, Shift and the selected number.
A small window will briefly appear saying Macro Saved and the clickable “EDIT MACRO,” which will allow you to edit the macro in Apps Script. The number of macros per spreadsheet, however, is limited to nine.
The spreadsheet version of this tutorial can be downloaded here. Make a copy of the worksheet by selecting "Make a copy" from the drop-down in the File menu.
Examples of macros
Let’s use the 50 states, their capitals and populations as an example of running macros. In a separate data sorting tutorial, the states, capitals, and their populations were sorted from highest to lowest and vice versa. In this example, we will automate that function.
Let’s start with Column A for State in programming the macro for sorting in ascending order. In the menu bar, go to “Extensions.” Click on “Macros,” and then to “Record macro.” The default is to “Use absolute references,” so proceed to record the macro to sort State in ascending order.
Highlight cell A1 to D51. Go to the menu bar to click on “Data.” Under “Sort range,” go to “Advance range sorting options,” and a small window titled “Sort range from A1 to D51” appears in the center. Click on “Data has header row,” which will exclude the headings in row 1 from the sort. Sort by “State” and select “A to Z” for ascending order. Click on “Sort” in the lower right corner of the window, and it will then sort column A in ascending order. At the small pop-up window at the bottom of the screen, click on “Save” in the same line as “Recording new macro…”
A small window titled “Save new macro” will appear, and the name for the macro will be “State (Ascending).” For the shortcut option, type number 1 in the box, so that the keyboard shortcut on the Mac OS will be “Command + Option + Shift + 1.” Click “Save,” and your first macro is now recorded.
Repeat the same steps for Capital, and both ascending and descending orders for State Population and Capital Population. Your list of six macros will read as such in the “Macros” tab of the menu bar.
Command + Option + Shift + 1 — State (Ascending)
Command + Option + Shift + 2 — Capital (Ascending)
Command + Option + Shift + 3 — State Population (Descending)
Command + Option + Shift + 4 — State Population (Ascending)
Command + Option + Shift + 5 — Capital Population (Descending)
Command + Option + Shift + 6 — Capital Population (Ascending)
You can also run a macro by selecting the macro in the “Macros” tab of “Extensions.”
To make changes in the names and assigned numbers in the macros, go to the “Manage macros” setting under “Macros” in “Extensions” on the menu bar. To delete a macro, click on the three vertical dots to the right of the keyboard shortcut in “Manage macros” and select “Remove.”
Note that any additional cells in the spreadsheet outside the A1 to D51 range will not be affected by running a macro. To include those new cells in a macro, you will need to edit the script by clicking on the three vertical dots to the right of the keyboard shortcut in “Manage macros” and picking “Edit script.” A new window tab will appear as Apps Script linked to that macro, and selecting “macros.gs” in the left side of the screen will bring up the code.
WATCH: A step-by-step guide to creating your own macros
Again, the spreadsheet version of this tutorial can be downloaded here. Make a copy of the worksheet by selecting "Make a copy" from the drop-down in the File menu.
This is just one of many articles about easy-to-use tools in Google Sheets. See more below from TheStreet.
Related: How to create a stock tracker with live data using Google Finance
Related: How to sort data in Google Sheets: Refining information further
Let us know what you'd like to see next. Email us here: tools@thearenagroup.net