One of the most frequently-asked questions we get here at MusicRadar is 'how do I connect my studio monitors to my audio interface?' In this step-by-step guide, we're going to guide you through the process, from connecting up your audio interface to your computer, to setting up your monitors for the best listening position.
What was quite a difficult process a few years ago is now relatively easy thanks to the fact that most audio interfaces and studio monitors now feature universal connectivity options. However, there are one or two additional factors you might come across along the way, depending on the interface and speakers you own or are intending to buy, and we'll cover all of these potential pitfalls in this tutorial.So let's get into our easy step-by-step guide on how to connect studio monitors to your audio interface.
Step 1 - Connect your interface to your computer
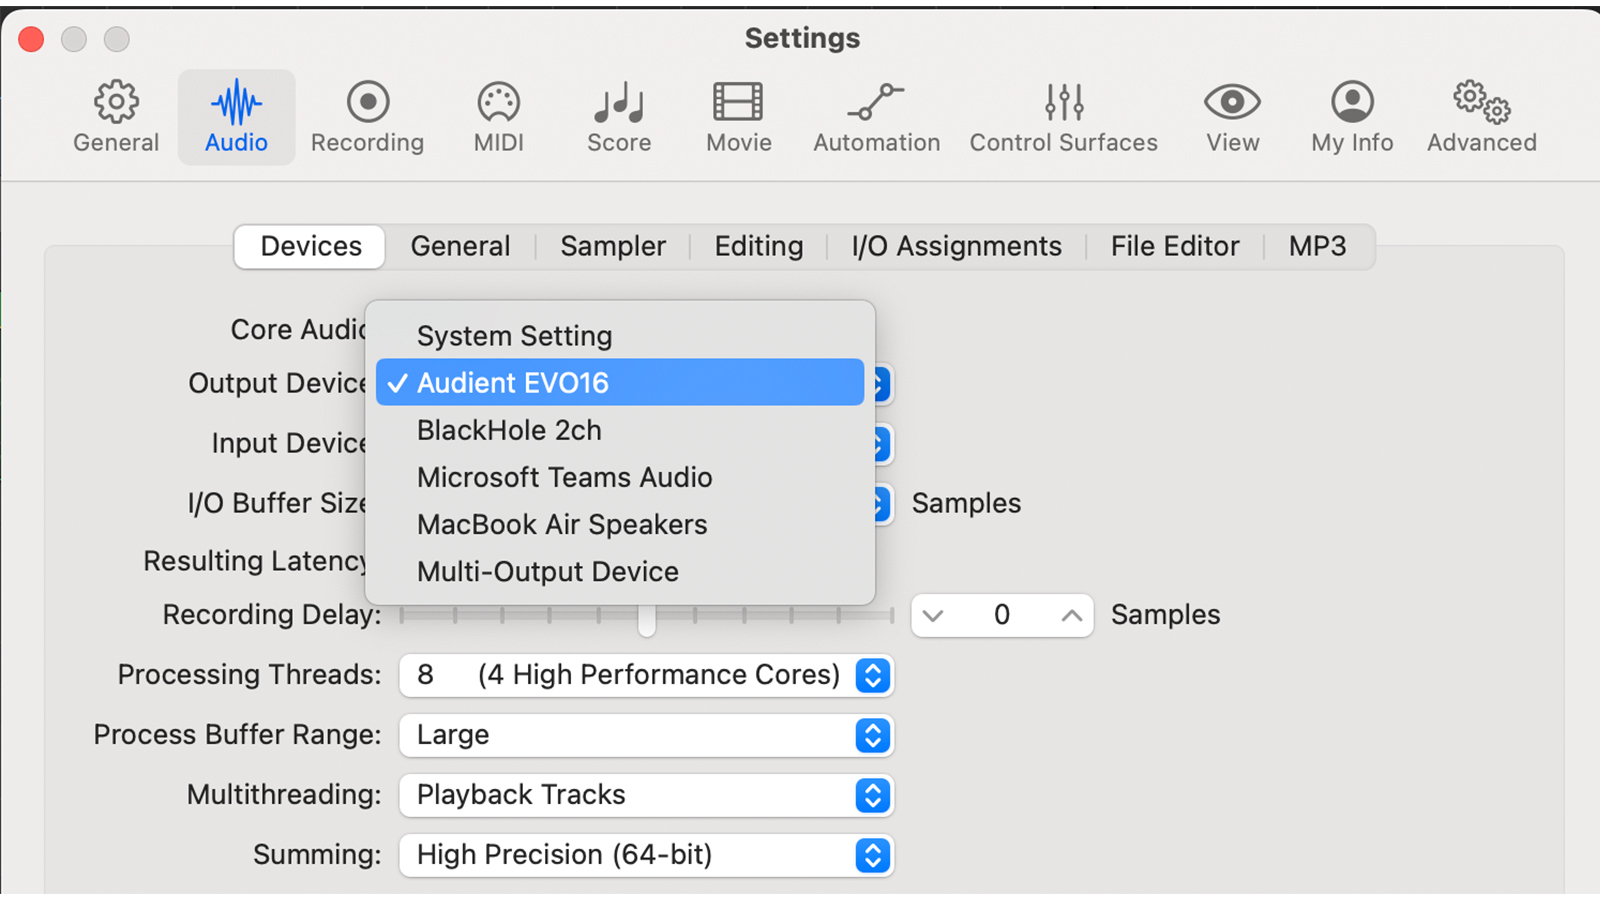
Connect up your USB or Thunderbolt audio interface to your computer using the cable supplied, plugging it into either the USB or USB-C computer port. Open your DAW (Digital Audio Workstation) and make sure that you select your interface under the audio preferences menu. You can now play music through your audio interface, but not hear it yet as it's time to connect up your studio monitors.
Step 2 - Turn down the volume
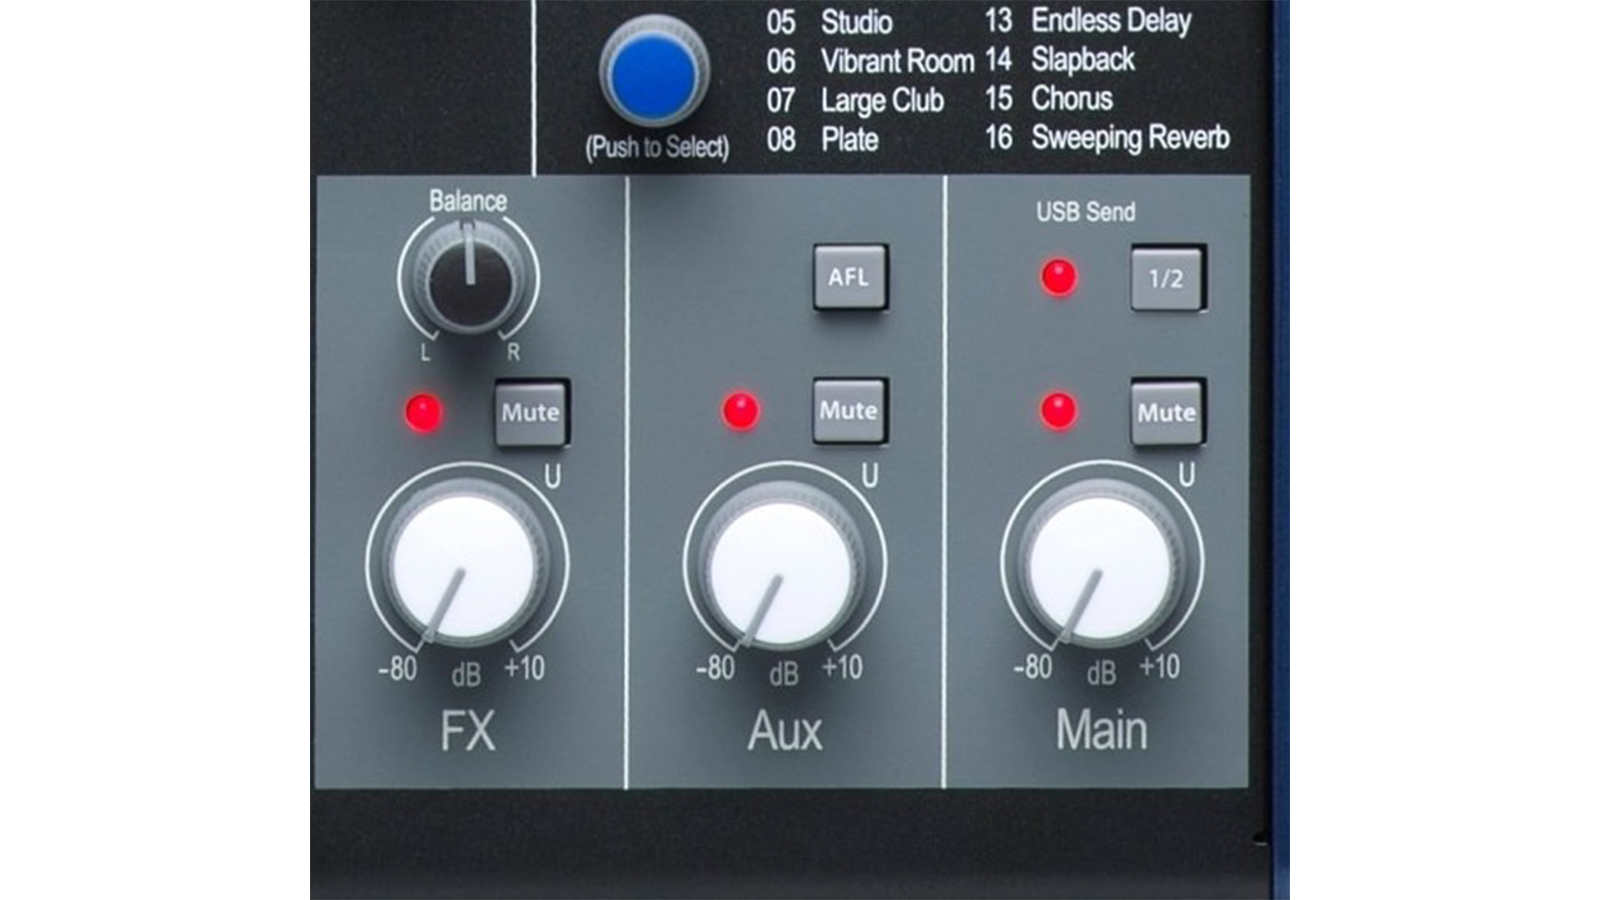
Before you do, make sure the output volume of your audio interface is set to zero. You'll want to avoid unexpected pops and crackles, or potentially overly loud music reaching your speakers, so keep this volume to a minimum. Similarly, turn your studio monitors' volume right down as well and don't power them up just yet.
Step 3 - Identity your cables
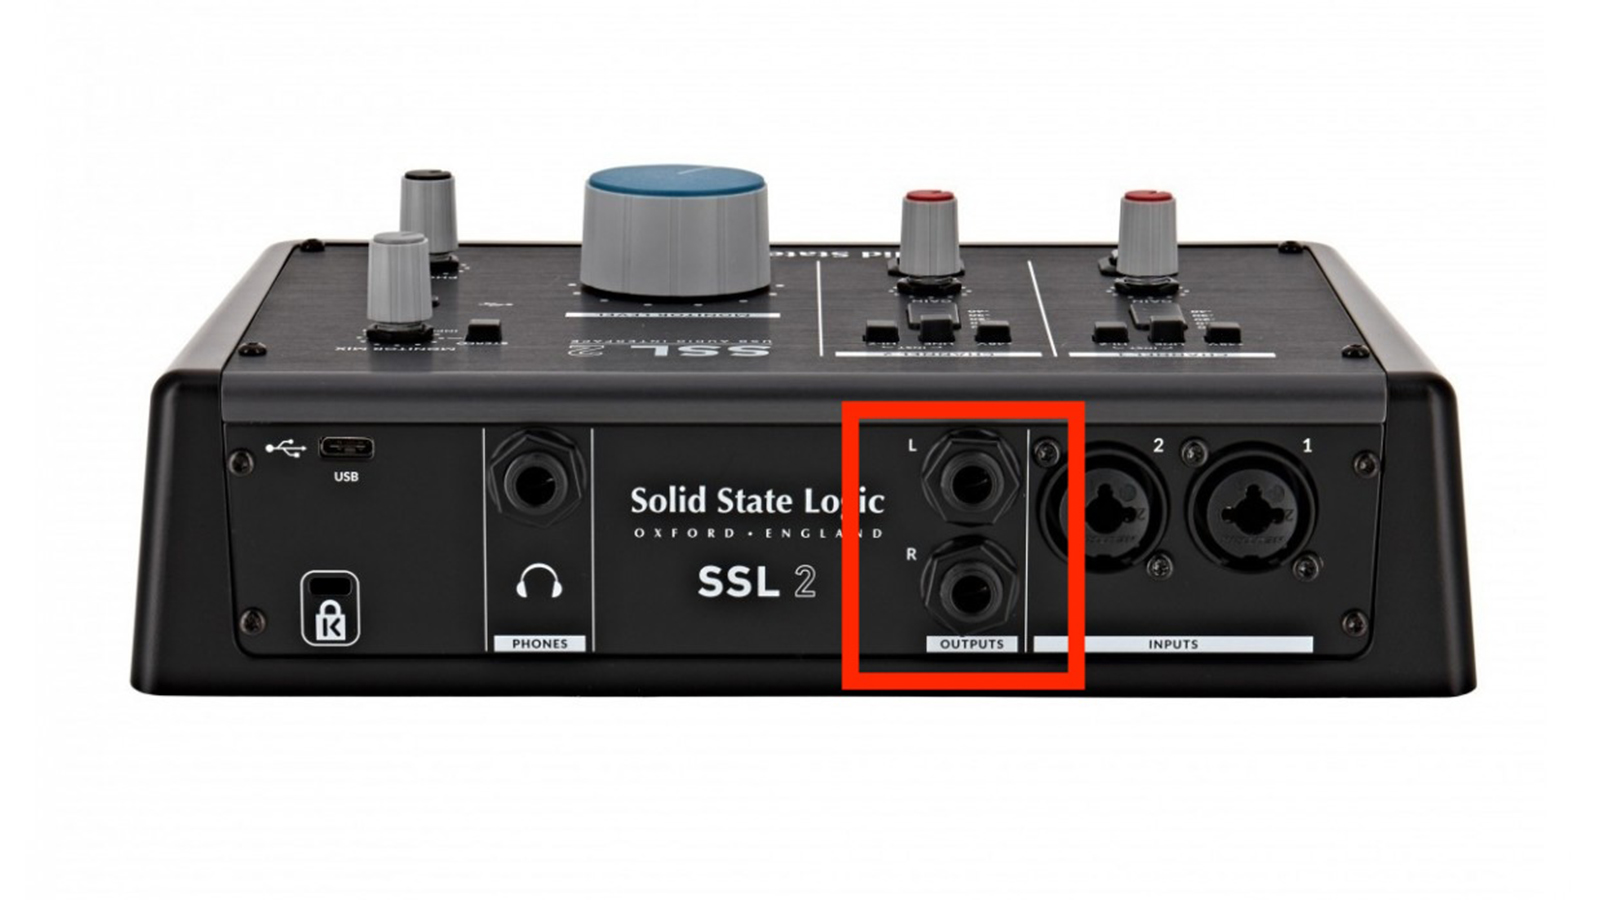
Now you need to identify which cables you need. First check which type of outputs your interface has, which will usually be found around the back of the unit. Typically these will be 6.35mm TRS jack sockets marked 'Main', 'Line', 'Monitor' or 'Outputs L R' (for left and right outputs), as on the SSL 2 interface shown here.
Step 4 - What about XLR?
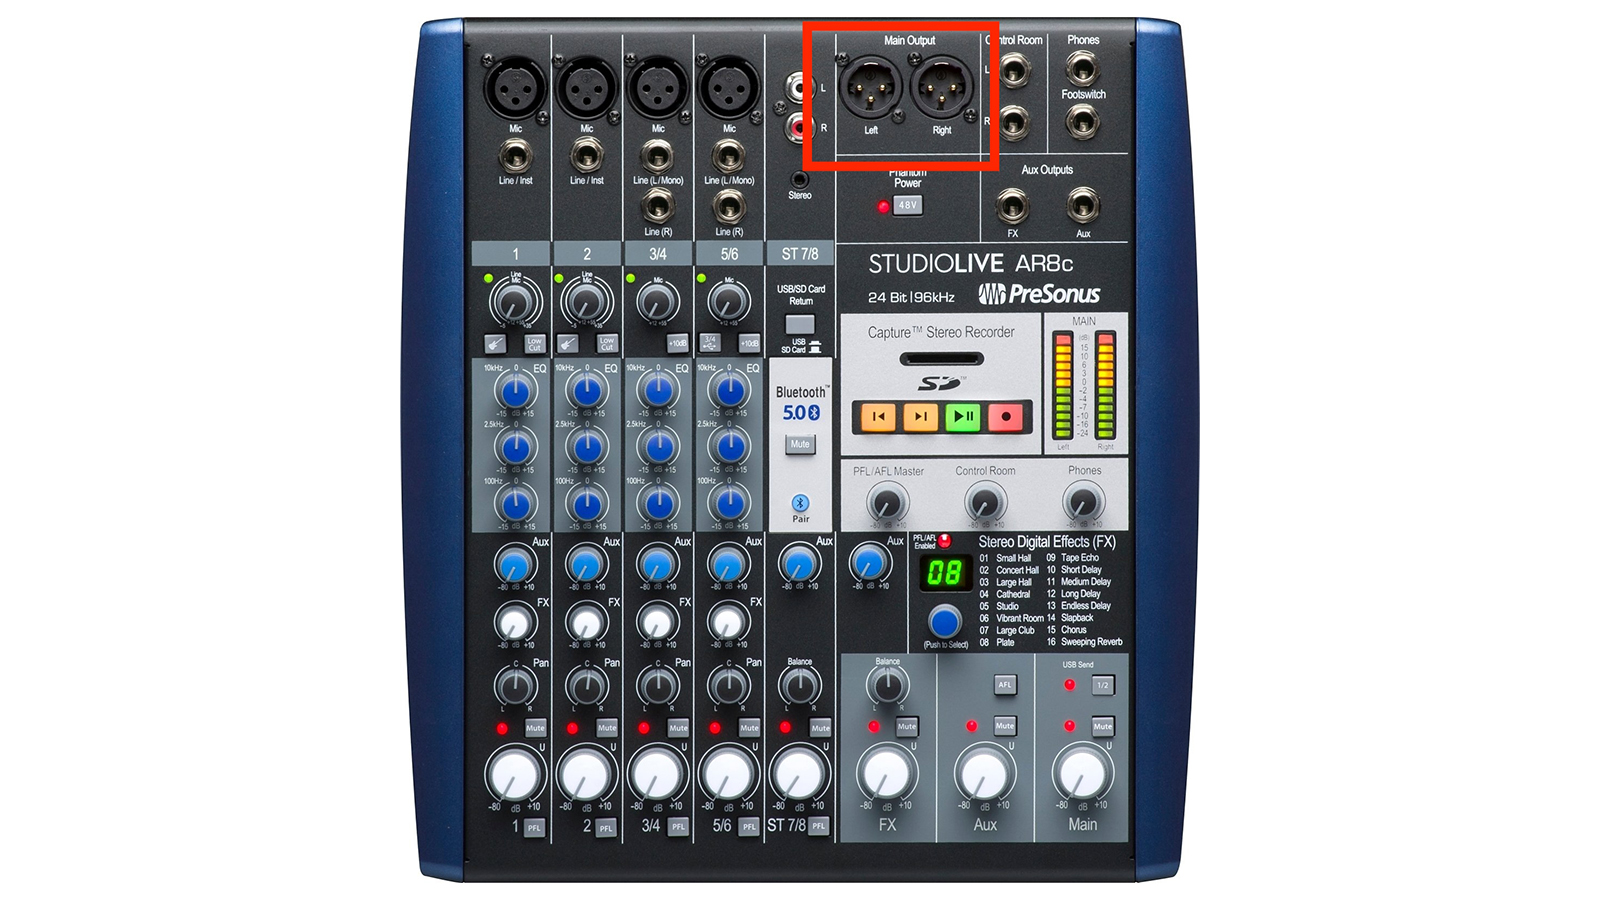
Rarely, some more expensive interfaces, or larger models designed to double as mixers with multiple channel recording, might also have a pair of XLR outputs – like the Presonus Studio Live AR8C. As we'll see, it doesn't really matter which type of output your interface has, as long as your studio monitors has the same input – and even if they don't match, it's an easy issue to deal with!
Step 5 - Check your monitor inputs
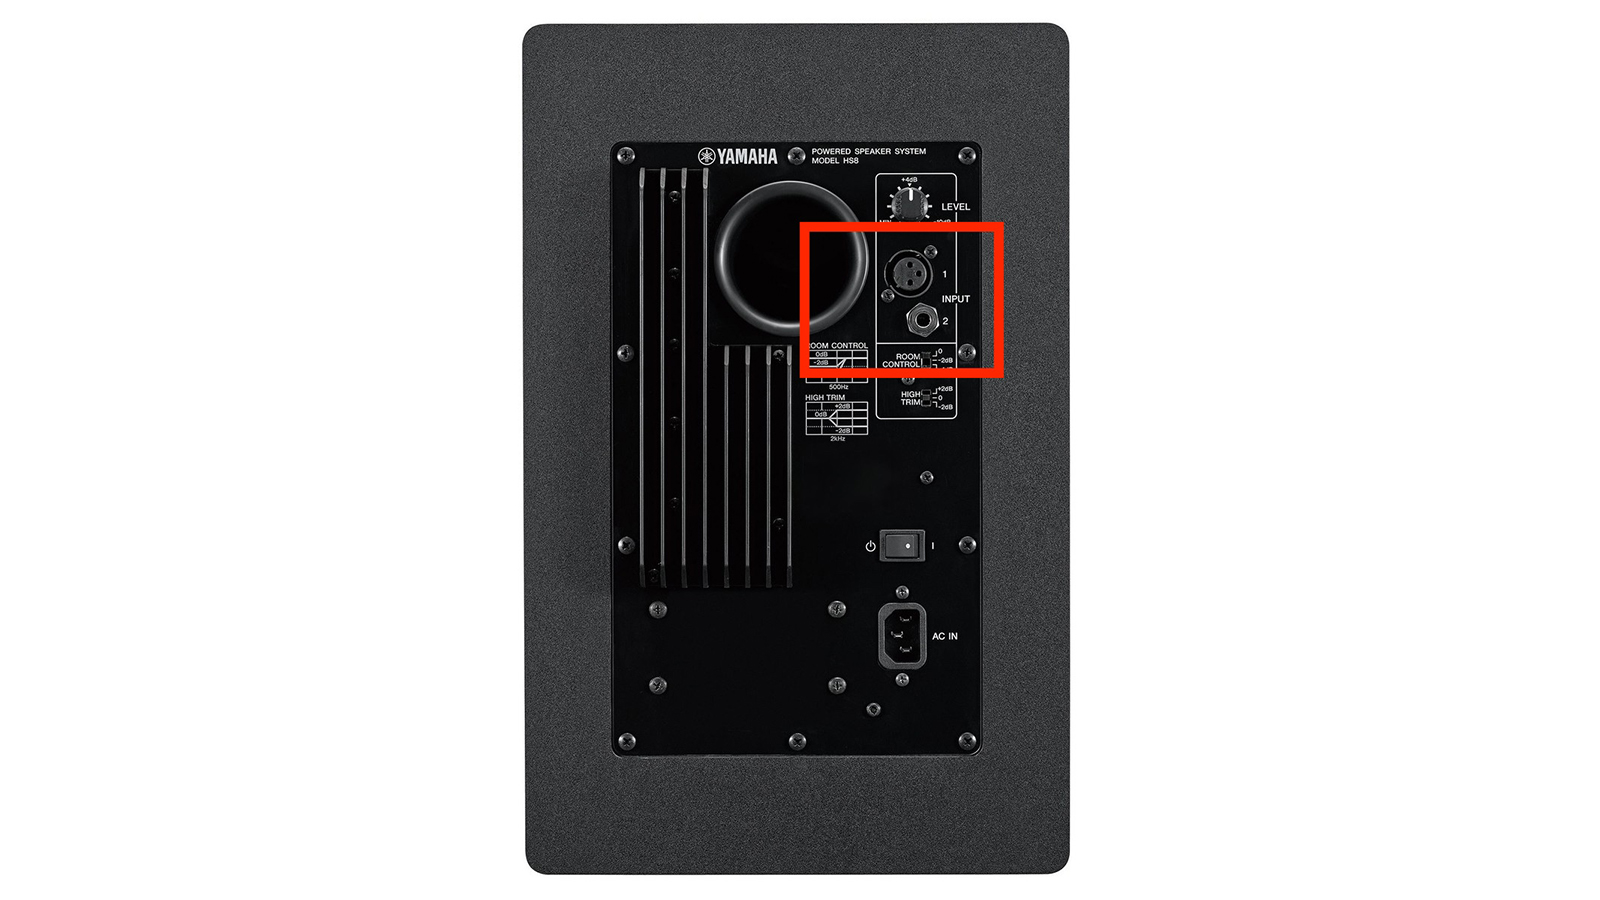
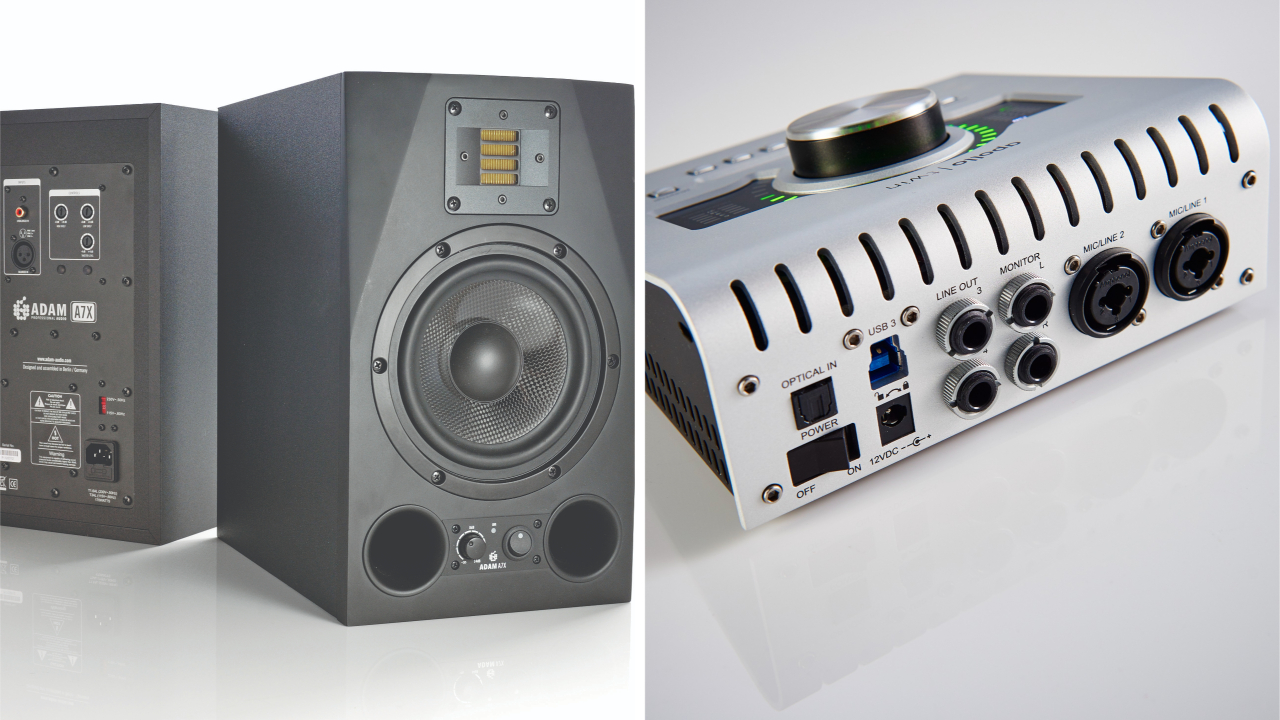
As your audio interface is taking the audio out of your computer and into your speakers, you now need to check which type of inputs these monitors have. With the volume still down and power off, check these monitor inputs, located at the back. Again this will typically be TRS jack or XLR in, or even both, as shown on the Yamaha HS8 here.
Step 6 - Connect the correct interface outputs with your speaker inputs
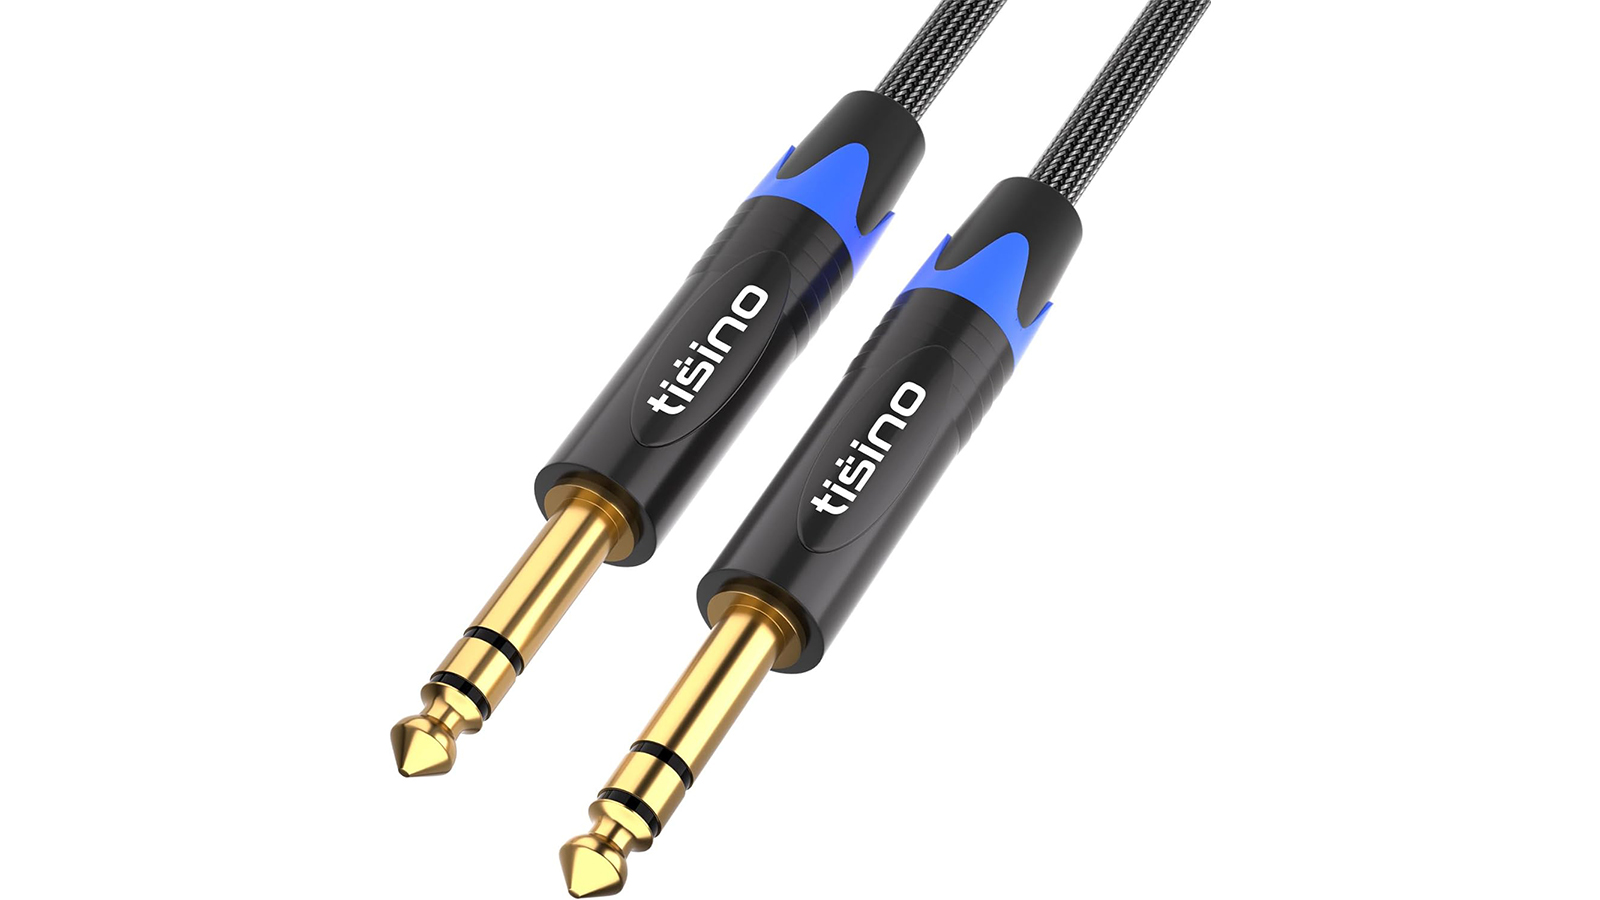
Now it's time to connect up both the audio interface outputs – left and right – with the corresponding left and right speaker inputs, using the input and output connections we've discussed above. So far we've been talking about 'balanced' outputs from the audio interface – the most common – so you will require two balanced TRS cables to connect to the audio interface outputs. You can recognise these as they feature two rings as shown here – marking out the tip, ring and sleeve areas, which makes up that TRS name.
Now, simply connect up one end to your interface, and the other end to your monitor inputs. It is possible that your monitors only feature an XLR input rather than a TRS, but don't worry. All you will require to connect these together is a balanced TRS to male XLR cable, that has one connector of each type on each end. If your speakers boast both XLR and TRS inputs then you have a choice to use either, but audio wise it shouldn't make too much difference. Some people prefer the XLR speaker inputs as they lock in place when connected, so can be more stable.
Step 7 - Do you have unbalanced outputs?
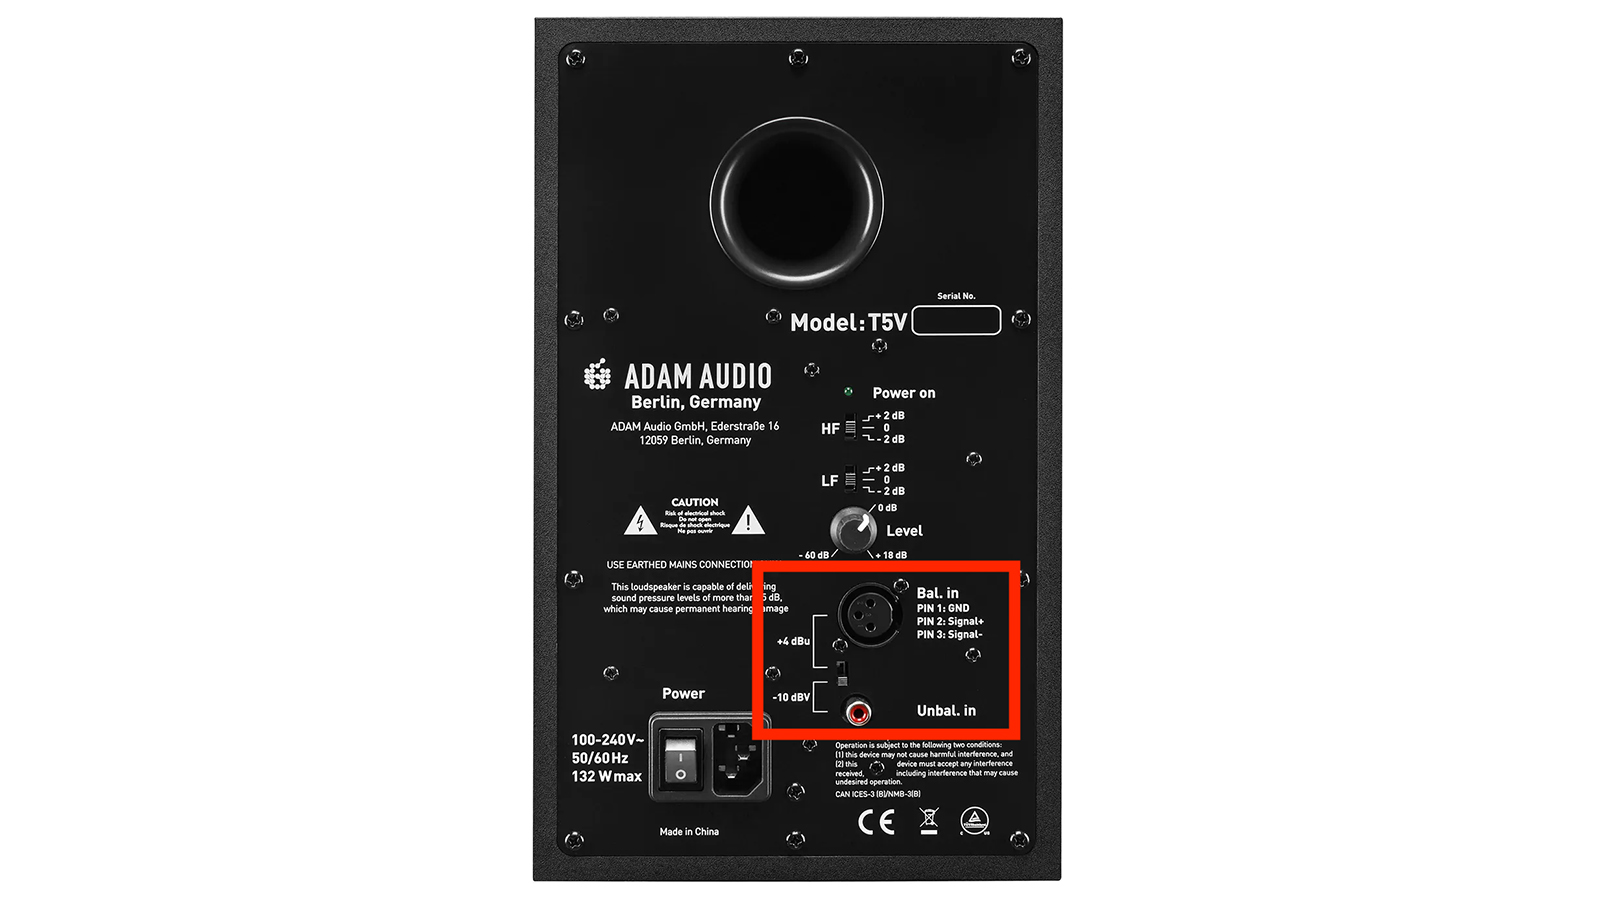
As we've only been dealing with much more common balanced audio interfaces, we should also mention the rarer interfaces that feature 'unbalanced' outputs, which require a slightly different connection. Here you would connect these outputs using phono connectors, and would require speakers with additional unbalanced RCA phono inputs like the Adam Audio T5 V.
Step 8 - Adjust speaker positioning
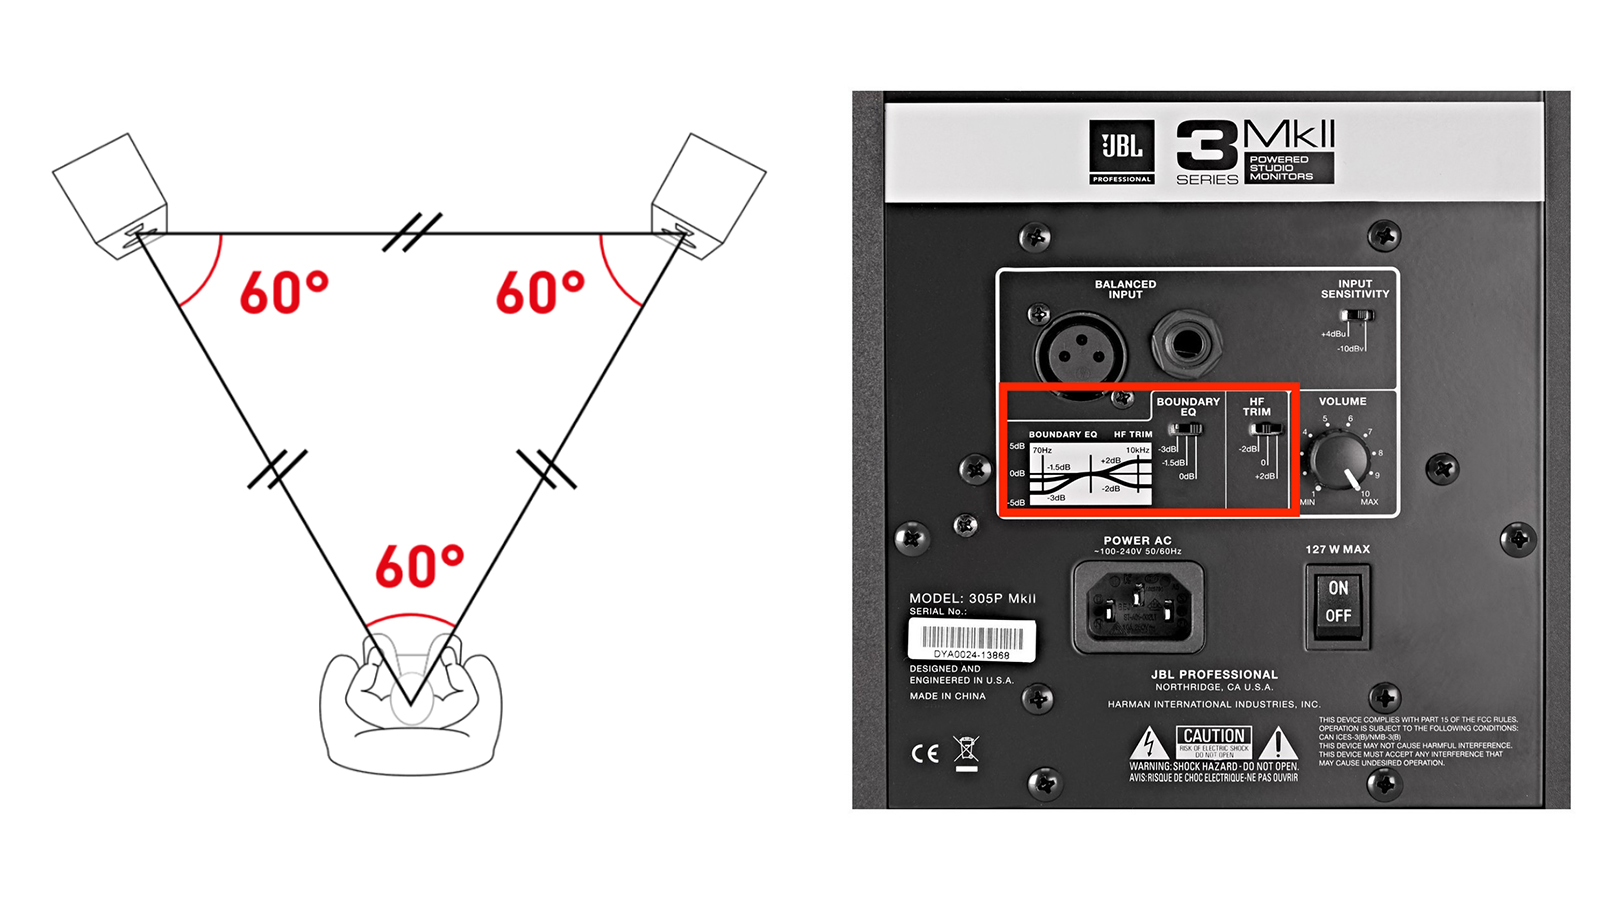
Once your audio interface and studio monitors are connected, power up the speakers, take their volume up to around half and gradually raise the output level of your interface from zero. Now that you can hear your music, it is time to set the speakers up. Make sure the tweeter (high frequency) driver is level with your head, and that you are sitting at the front point of an equilateral triangle with your speakers being at the other two points. That way you are at equal distance from each speaker so will get a balanced overview of your mix. This diagram from Adam Audio gives you the exact positioning.
You should also place the monitors at around 30cm away from any walls and corners as this can particularly affect the EQ response of your speakers. If your mixes sound too boomy or trebly, and you are limited with where you can place them, many monitors like the JBL 3 series offer the option of adjusting EQ to compensate for any positional impact on your sound. And that's it, you have connected and set up your studio monitors!